display BMW 745Li 2004 E66 Workshop Manual
[x] Cancel search | Manufacturer: BMW, Model Year: 2004, Model line: 745Li, Model: BMW 745Li 2004 E66Pages: 232, PDF Size: 5.27 MB
Page 98 of 232
Technology for comfort, convenience and safety
96
Flat tire
Indicator lamp
The symbol in the Info Display lights
up red and a message appears
simultaneously. In addition, an
acoustic signal sounds.
Please note any supplementary information
that appears on the Control Display. You
can find more information on the Check
Control starting at page 82.
1.Reduce speed and stop the vehicle
carefully. Avoid sudden braking and
steering maneuvers
2.Identify damaged tire
If identification is not possible,
contact your BMW center.<
3.Replace the damaged tire, refer to
Changing wheels on page 202.
Vehicles with run-flat tires:
1.Cautiously reduce the vehicle speed to
below 50 mph/80 km/h. Avoid sudden
braking and steering maneuvers. Do
not exceed a vehicle speed of 50 mph/
80 km/h
Due to the reinforcement on the
side walls of the run-flat tires,
inflation pressure loss can not usually
be recognized from the outside, refer to
Run-flat tires on page 205.<
2.To continue driving, comply with the
instructions for driving with damaged
tires on page 205.
System malfunctions
Indicator lamp
The symbol in the Info Display lights
up yellow and a message appears
simultaneously. Please contact
your BMW center for assistance.
Please note any supplementary information
that appears on the Control Display.
Self-leveling suspension*
In the event of malfunction
A Check Control message appear-
ing together with this symbol indi-
cates a malfunction in the self-lev-
eling suspension. Please take note of the
additional information on the Control Dis-
play.
Stop and inspect the vehicle. If the rear of
the vehicle is visibly lower than the front,
possibly accompanied by a tilt noticeable
when you compare the left rear with the
right rear, please respond by immediately
proceeding to the nearest BMW center.
Drive with appropriate caution in the mean-
time. The vehicle has reduced ground
clearance and driving comfort may be
noticeably reduced. Even if the attitude of
the vehicle is normal, you should consult
the nearest BMW center if the warning
lamp indicates a system fault.
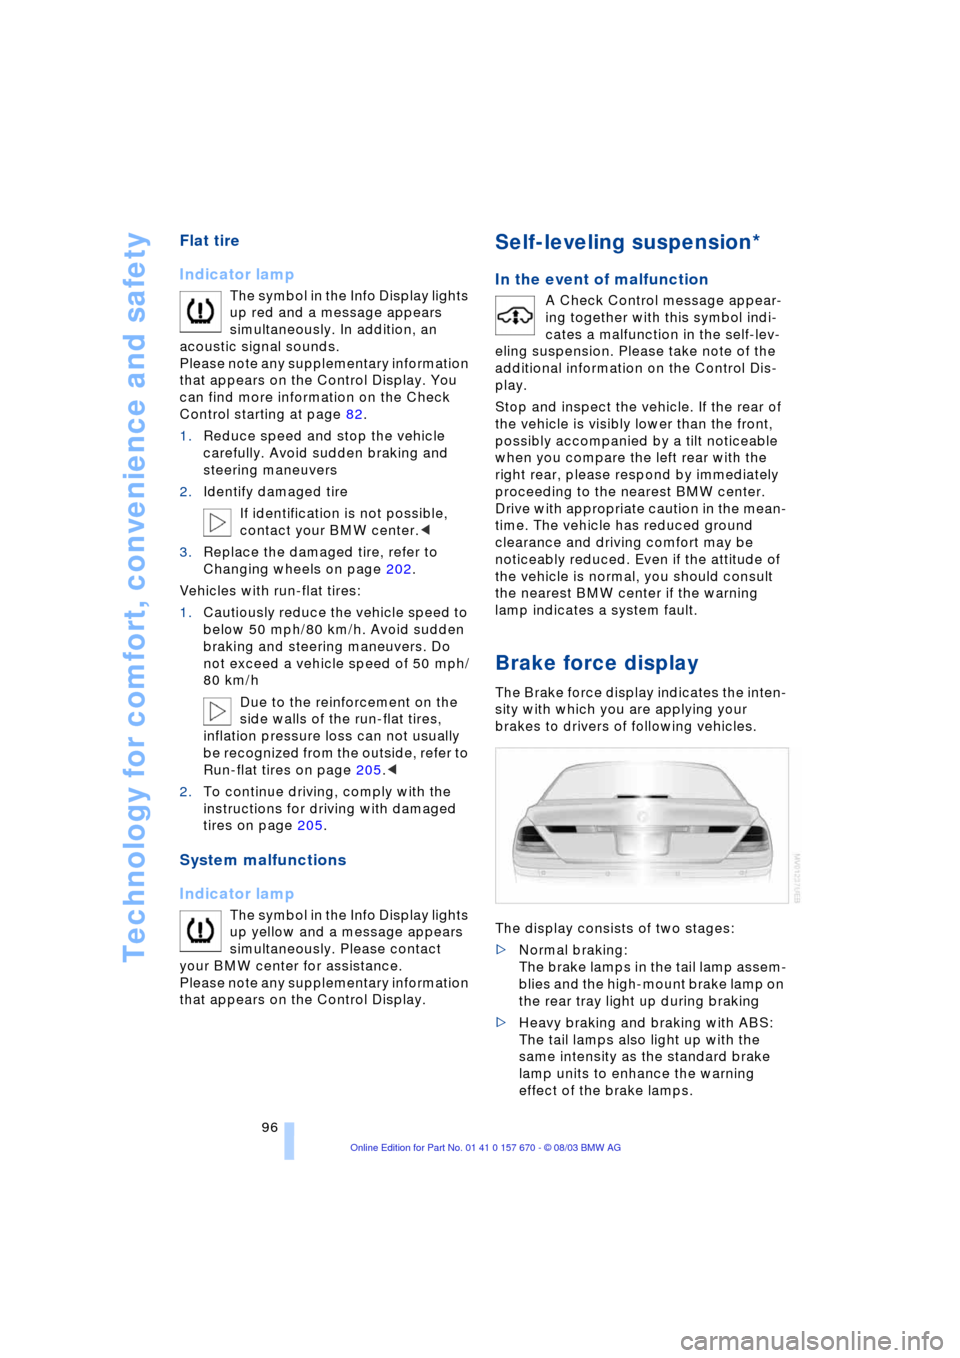
Brake force display
The Brake force display indicates the inten-
sity with which you are applying your
brakes to drivers of following vehicles.
The display consists of two stages:
>Normal braking:
The brake lamps in the tail lamp assem-
blies and the high-mount brake lamp on
the rear tray light up during braking
>Heavy braking and braking with ABS:
The tail lamps also light up with the
same intensity as the standard brake
lamp units to enhance the warning
effect of the brake lamps.
Page 100 of 232
Technology for comfort, convenience and safety
98
Indicator lamp
Operational readiness of airbag
system
The airbag warning lamp in the Info
Display indicates the operational
readiness of the entire airbag sys-
tem and the safety belt tensioners as of
ignition key radio position.
The indicator lamp goes out after a few
seconds.
Airbag system malfunction
A system malfunction could prevent
the system from responding in the
expected manner to an impact occurring
within its normal response range.
Have the airbag system inspected immedi-
ately at a BMW center.<
There is a fault in the airbag system
if the airbag warning lamp behaves
as follows:
>The indicator lamp fails to come on as
of ignition radio position
>The indicator lamp remains on
continuously
>Indicator lamp lights up while the
vehicle is being driven.
Page 102 of 232
Lamps
100
Activating the Adaptive Head Light
With the ignition on, refer to
page 60, turn the light switch to the
position Automatic headlamp con-
trol, refer to page 99.
When the vehicle is backing up, the
Adaptive Head Light is inactive; when
the vehicle is at a standstill, it is only active
in one direction.<
In case of malfunction
The LED above the symbol for automatic
headlamp control flashes, refer to page 99.
Please have the system inspected at your
BMW center.
Instrument lighting
Turn the serrated dial to adjust the illumina-
tion intensity.
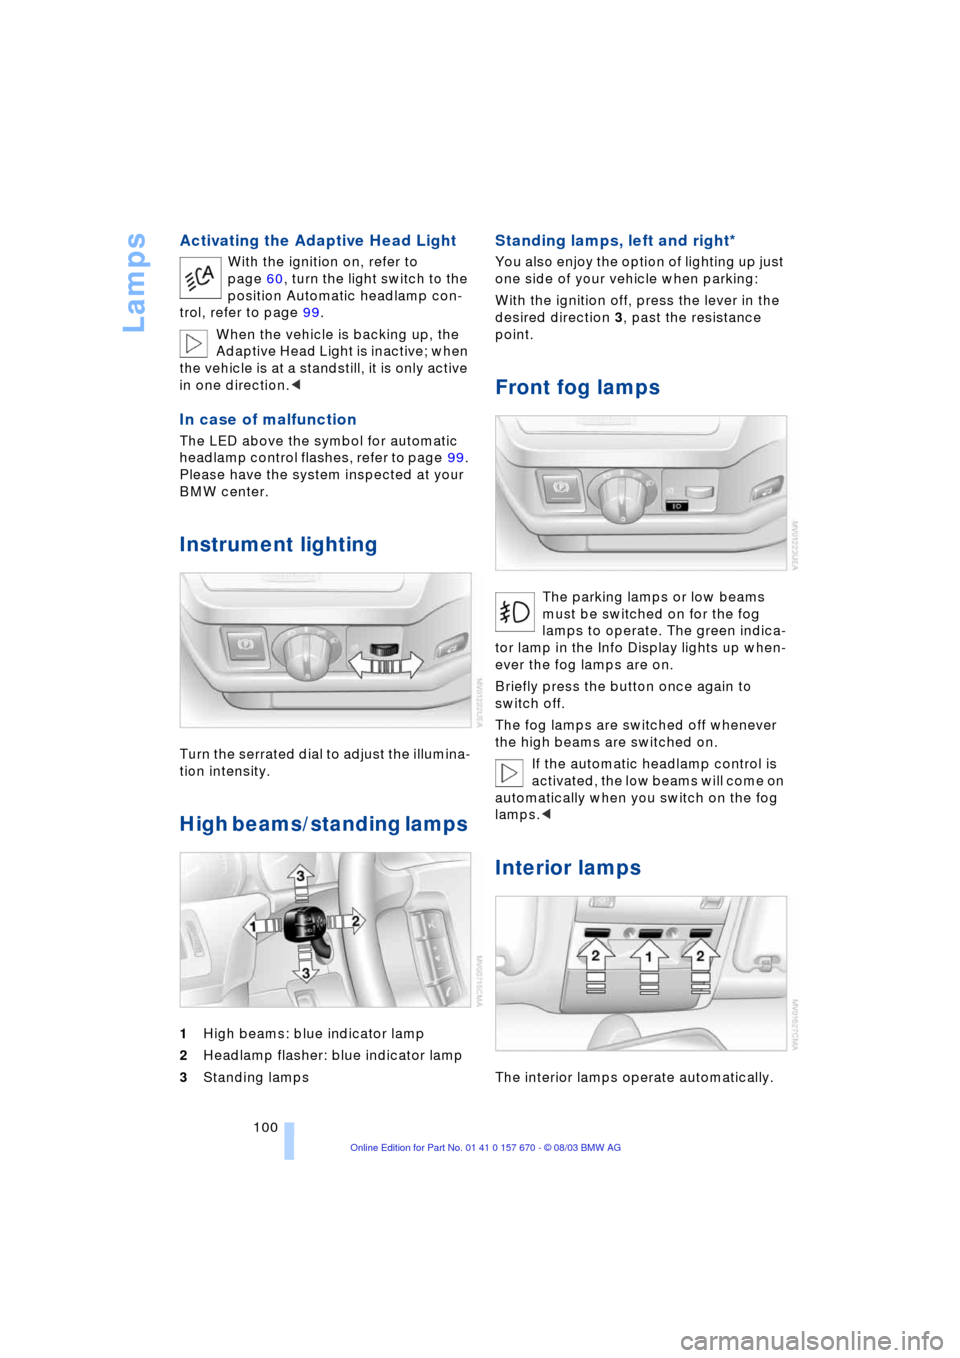
High beams/standing lamps
1High beams: blue indicator lamp
2Headlamp flasher: blue indicator lamp
3Standing lamps
Standing lamps, left and right*
You also enjoy the option of lighting up just
one side of your vehicle when parking:
With the ignition off, press the lever in the
desired direction 3, past the resistance
point.
Front fog lamps
The parking lamps or low beams
must be switched on for the fog
lamps to operate. The green indica-
tor lamp in the Info Display lights up when-
ever the fog lamps are on.
Briefly press the button once again to
switch off.
The fog lamps are switched off whenever
the high beams are switched on.
If the automatic headlamp control is
activated, the low beams will come on
automatically when you switch on the fog
lamps.<
Interior lamps
The interior lamps operate automatically.
Page 103 of 232
Controls
101Reference
At a glance
Driving tips
Communications
Navigation
Entertainment
Mobility
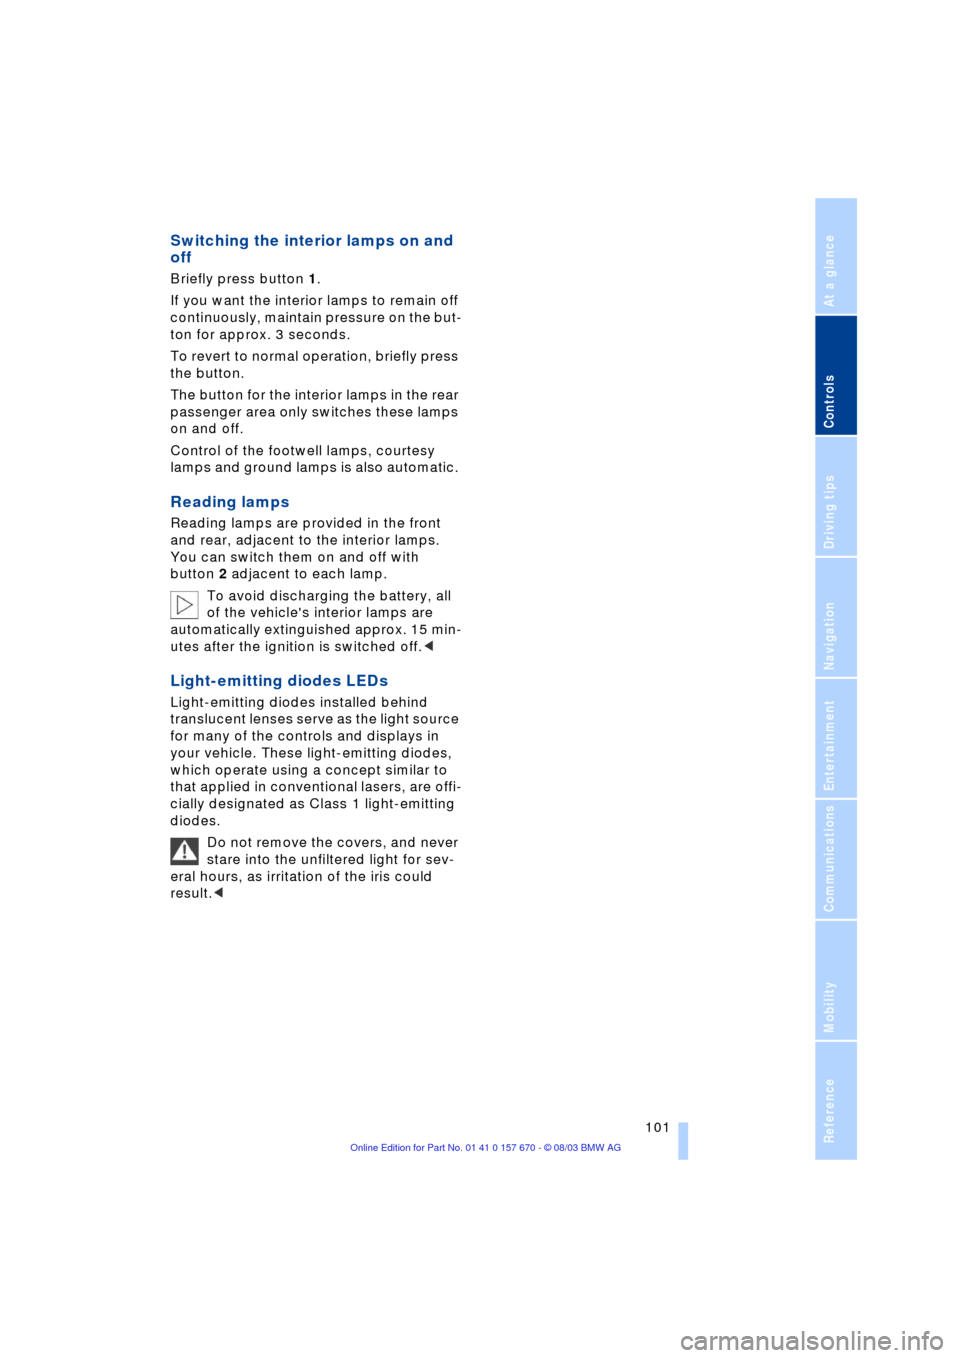
Switching the interior lamps on and
off
Briefly press button 1.
If you want the interior lamps to remain off
continuously, maintain pressure on the but-
ton for approx. 3 seconds.
To revert to normal operation, briefly press
the button.
The button for the interior lamps in the rear
passenger area only switches these lamps
on and off.
Control of the footwell lamps, courtesy
lamps and ground lamps is also automatic.
Reading lamps
Reading lamps are provided in the front
and rear, adjacent to the interior lamps.
You can switch them on and off with
button 2 adjacent to each lamp.
To avoid discharging the battery, all
of the vehicle's interior lamps are
automatically extinguished approx. 15 min-
utes after the ignition is switched off.<
Light-emitting diodes LEDs
Light-emitting diodes installed behind
translucent lenses serve as the light source
for many of the controls and displays in
your vehicle. These light-emitting diodes,
which operate using a concept similar to
that applied in conventional lasers, are offi-
cially designated as Class 1 light-emitting
diodes.
Do not remove the covers, and never
stare into the unfiltered light for sev-
eral hours, as irritation of the iris could
result.<
Page 105 of 232
Controls
103Reference
At a glance
Driving tips
Communications
Navigation
Entertainment
Mobility
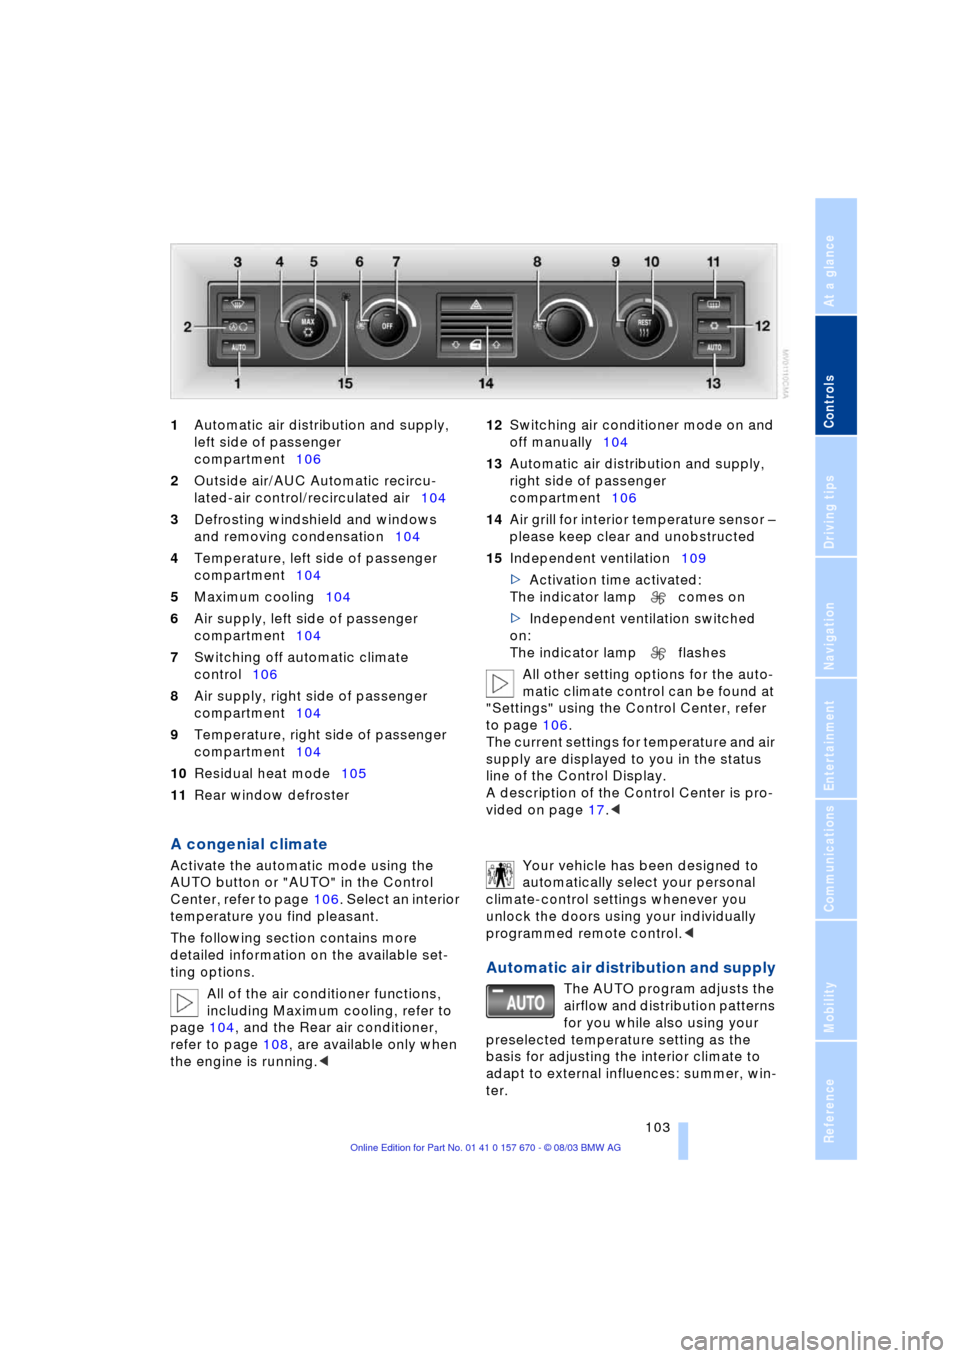
1Automatic air distribution and supply,
left side of passenger
compartment106
2Outside air/AUC Automatic recircu-
lated-air control/recirculated air104
3Defrosting windshield and windows
and removing condensation104
4Temperature, left side of passenger
compartment104
5Maximum cooling104
6Air supply, left side of passenger
compartment104
7Switching off automatic climate
control106
8Air supply, right side of passenger
compartment104
9Temperature, right side of passenger
compartment104
10Residual heat mode105
11Rear window defroster 12Switching air conditioner mode on and
off manually104
13Automatic air distribution and supply,
right side of passenger
compartment106
14Air grill for interior temperature sensor Ð
please keep clear and unobstructed
15Independent ventilation109
>Activation time activated:
The indicator lamp comes on
>Independent ventilation switched
on:
The indicator lamp flashes
All other setting options for the auto-
matic climate control can be found at
"Settings" using the Control Center, refer
to page 106.
The current settings for temperature and air
supply are displayed to you in the status
line of the Control Display.
A description of the Control Center is pro-
vided on page 17.<
A congenial climate
Activate the automatic mode using the
AUTO button or "AUTO" in the Control
Center, refer to page 106. Select an interior
temperature you find pleasant.
The following section contains more
detailed information on the available set-
ting options.
All of the air conditioner functions,
including Maximum cooling, refer to
page 104, and the Rear air conditioner,
refer to page 108, are available only when
the engine is running.< Your vehicle has been designed to
automatically select your personal
climate-control settings whenever you
unlock the doors using your individually
programmed remote control.<
Automatic air distribution and supply
The AUTO program adjusts the
airflow and distribution patterns
for you while also using your
preselected temperature setting as the
basis for adjusting the interior climate to
adapt to external influences: summer, win-
ter.
Page 106 of 232
A congenial climate
104 The air conditioner comes on automatically
when you select the AUTO program.
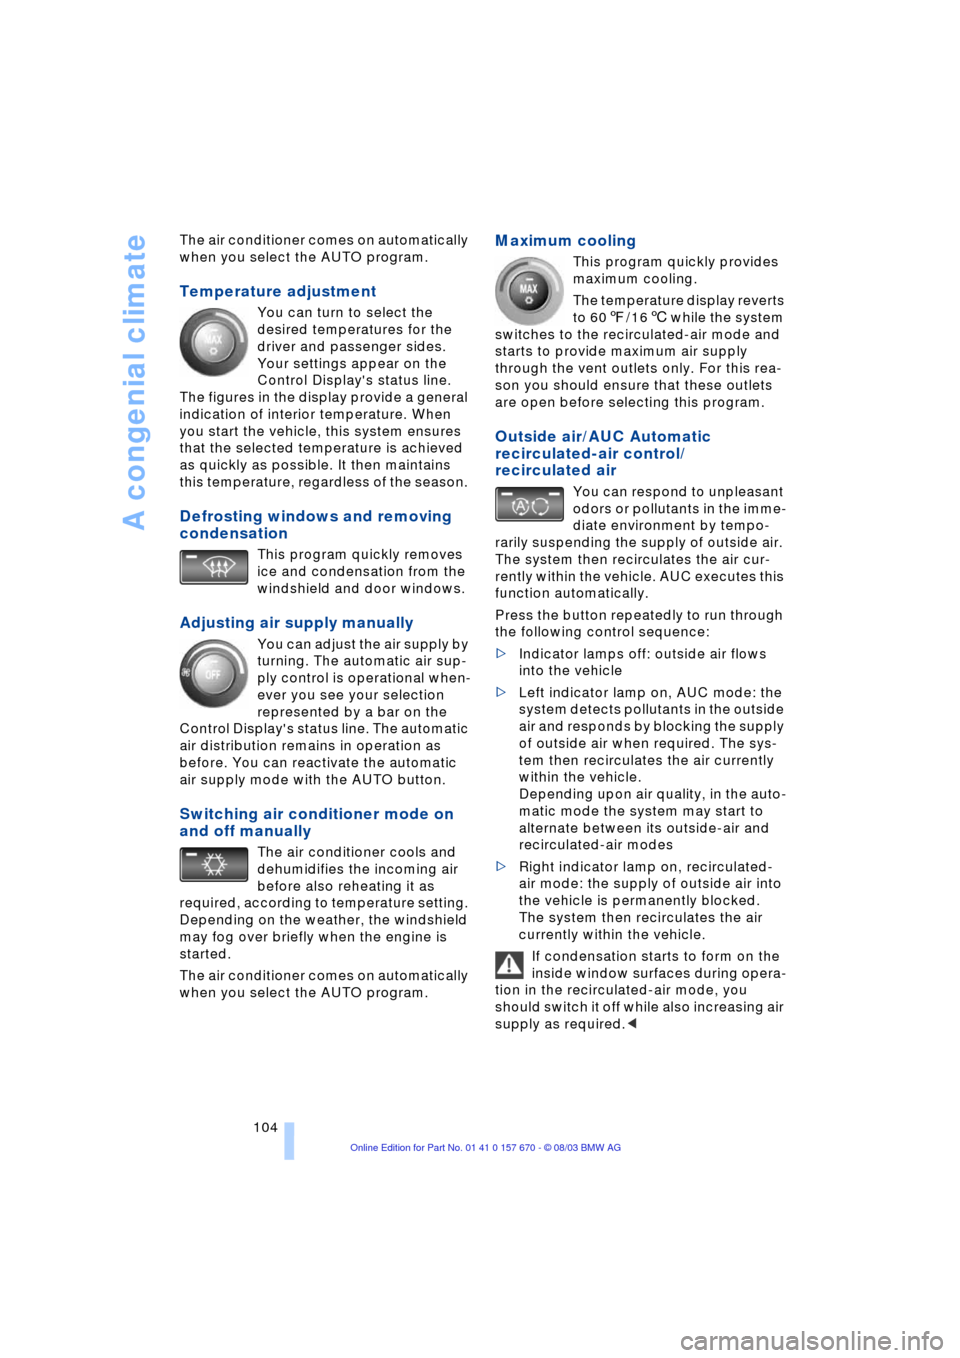
Temperature adjustment
You can turn to select the
desired temperatures for the
driver and passenger sides.
Your settings appear on the
Control Display's status line.
The figures in the display provide a general
indication of interior temperature. When
you start the vehicle, this system ensures
that the selected temperature is achieved
as quickly as possible. It then maintains
this temperature, regardless of the season.
Defrosting windows and removing
condensation
This program quickly removes
ice and condensation from the
windshield and door windows.
Adjusting air supply manually
You can adjust the air supply by
turning. The automatic air sup-
ply control is operational when-
ever you see your selection
represented by a bar on the
Control Display's status line. The automatic
air distribution remains in operation as
before. You can reactivate the automatic
air supply mode with the AUTO button.
Switching air conditioner mode on
and off manually
The air conditioner cools and
dehumidifies the incoming air
before also reheating it as
required, according to temperature setting.
Depending on the weather, the windshield
may fog over briefly when the engine is
started.
The air conditioner comes on automatically
when you select the AUTO program.
Maximum cooling
This program quickly provides
maximum cooling.
The temperature display reverts
to 607/166 while the system
switches to the recirculated-air mode and
starts to provide maximum air supply
through the vent outlets only. For this rea-
son you should ensure that these outlets
are open before selecting this program.
Outside air/AUC Automatic
recirculated-air control/
recirculated air
You can respond to unpleasant
odors or pollutants in the imme-
diate environment by tempo-
rarily suspending the supply of outside air.
The system then recirculates the air cur-
rently within the vehicle. AUC executes this
function automatically.
Press the button repeatedly to run through
the following control sequence:
>Indicator lamps off: outside air flows
into the vehicle
>Left indicator lamp on, AUC mode: the
system detects pollutants in the outside
air and responds by blocking the supply
of outside air when required. The sys-
tem then recirculates the air currently
within the vehicle.
Depending upon air quality, in the auto-
matic mode the system may start to
alternate between its outside-air and
recirculated-air modes
>Right indicator lamp on, recirculated-
air mode: the supply of outside air into
the vehicle is permanently blocked.
The system then recirculates the air
currently within the vehicle.
If condensation starts to form on the
inside window surfaces during opera-
tion in the recirculated-air mode, you
should switch it off while also increasing air
supply as required.<
Page 110 of 232
A congenial climate
108 Select "Individual" and confirm. The AUTO
program is deactivated.
Microfilter/activated-charcoal filter
The microfilter removes dust and pollen
from the incoming air. The activated-char-
coal filter provides additional protection by
filtering gaseous pollutants from the out-
side air. Your BMW center replaces this
combined filter as a standard part of your
scheduled maintenance.
You can select a display of more detailed
information in the Service Interval Display,
refer to page 81.
Rear air conditioner*
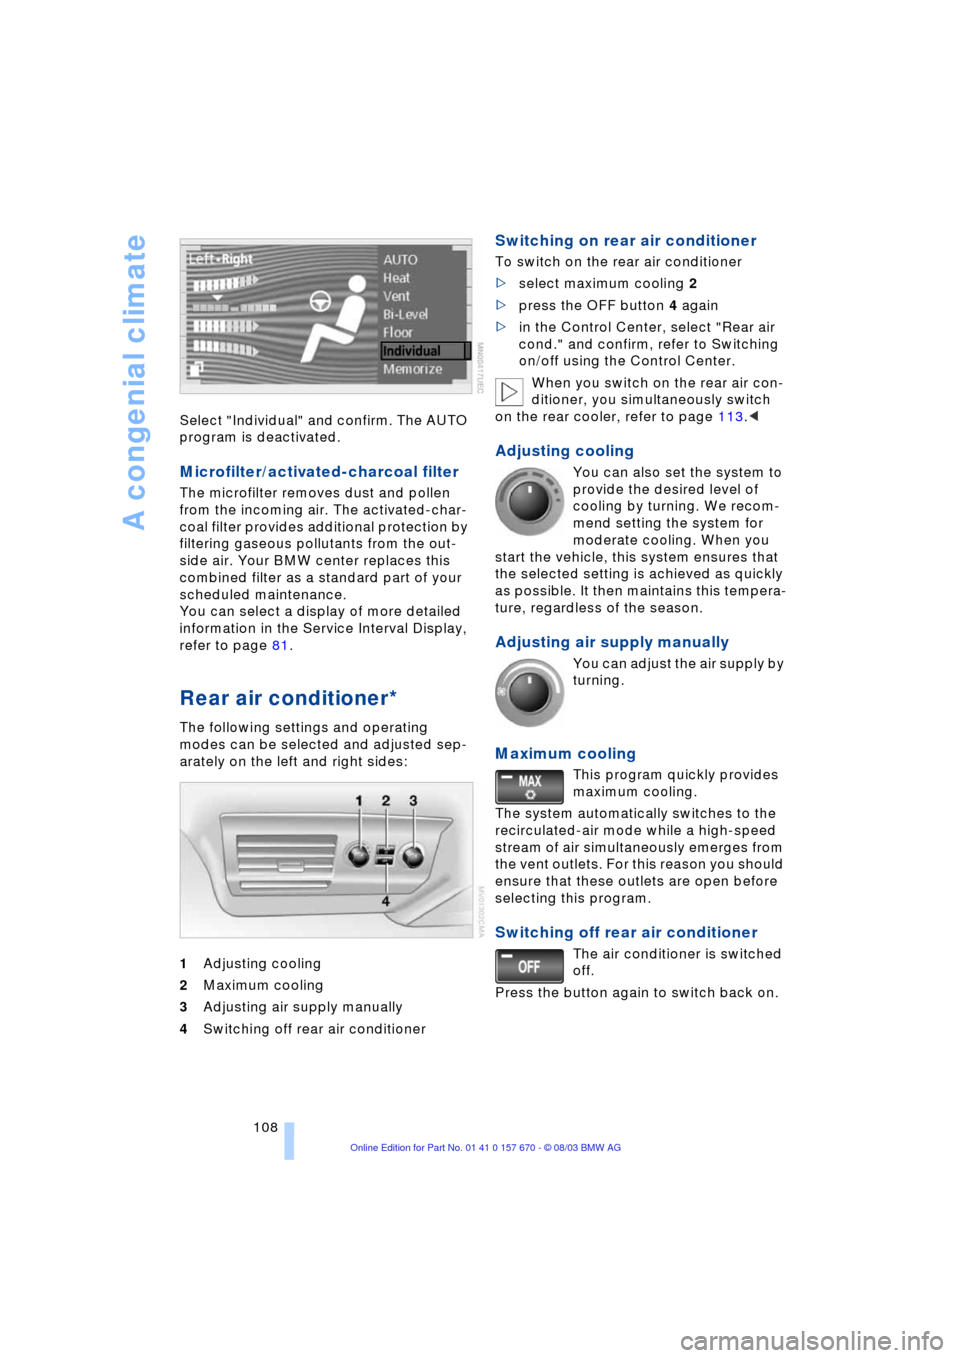
The following settings and operating
modes can be selected and adjusted sep-
arately on the left and right sides:
1Adjusting cooling
2Maximum cooling
3Adjusting air supply manually
4Switching off rear air conditioner
Switching on rear air conditioner
To switch on the rear air conditioner
>select maximum cooling 2
>press the OFF button 4 again
>in the Control Center, select "Rear air
cond." and confirm, refer to Switching
on/off using the Control Center.
When you switch on the rear air con-
ditioner, you simultaneously switch
on the rear cooler, refer to page 113.<
Adjusting cooling
You can also set the system to
provide the desired level of
cooling by turning. We recom-
mend setting the system for
moderate cooling. When you
start the vehicle, this system ensures that
the selected setting is achieved as quickly
as possible. It then maintains this tempera-
ture, regardless of the season.
Adjusting air supply manually
You can adjust the air supply by
turning.
Maximum cooling
This program quickly provides
maximum cooling.
The system automatically switches to the
recirculated-air mode while a high-speed
stream of air simultaneously emerges from
the vent outlets. For this reason you should
ensure that these outlets are open before
selecting this program.
Switching off rear air conditioner
The air conditioner is switched
off.
Press the button again to switch back on.
Page 125 of 232
Driving tips
123Reference
At a glance
Controls
Communications
Navigation
Entertainment
Mobility
to as hydroplaning, and is characterized
by a partial or complete loss of contact
between tires and road surface, ultimately
undermining your ability to steer and brake
the vehicle.<
Driving through water
Do not drive through water on the
road if it is deeper than 1 ft/30 cm,
and then only at walking speed at the most.
Otherwise, the vehicle's engine, the electri-
cal systems and the transmission may be
damaged.<
Brake system
Braking with ABS
The best way to achieve the best response
from the ABS is to apply maximum pres-
sure to the brake pedal Ð panic stop. Since
the vehicle maintains steering responsive-
ness, you can nevertheless avoid possible
obstacles with a minimum of steering
effort.
Pulsation at the brake pedal combines with
sounds from the hydraulic circuits to indi-
cate to the driver that ABS is in its active
mode.
Do not drive with your foot resting on
the brake pedal. Otherwise, even light
but consistent pedal pressure can lead to
high temperatures, brake wear and possi-
bly even brake failure.<
Disc brakes
Driving in wet conditions
While driving in wet conditions and in
heavy rain, it is a good idea to apply light
pressure to the brake pedal every few
miles. Monitor traffic conditions to ensure
that this maneuver does not endanger
other road users. The heat generated in this
process helps dry the pads and rotors to
ensure that full braking efficiency will then
be available when you need it.
Hills
You can retain full and unimpaired braking
efficiency by downshifting to a gear in
which only minimal brake applications are
needed when descending long or steep
downhill stretches.
You can further enhance the engine's
braking effect by selecting a lower gear
in the automatic transmission's manual
mode, downshifting as far as first gear
on extremely steep stretches, refer to
page 67. This strategy helps you avoid
placing excessive loads on the brake sys-
tem.
Never allow the vehicle to coast with
the transmission in Neutral Ð or with
the engine switched off Ð as there is no
engine braking when the transmission is in
Neutral, and no power-assist for brakes
and steering when the engine is not run-
ning.
Never allow floor mats, carpets or any other
objects to protrude into the area around the
accelerator and brake pedals and obstruct
their movement.<
Corrosion
When the vehicle is driven only occasion-
ally, during extended periods when the
vehicle is not used at all, and in operating
conditions where brake applications are
less frequent, there is an increased ten-
dency for corrosion to form on rotors, while
contaminants accumulate on the brake
pads. This occurs because the minimal
pressure which must be exerted by the
pads during brake applications to clean the
rotors is not reached.
Should corrosion form on the brake rotors,
the brakes will tend to respond with a pul-
sating effect that even extended applica-
tion will fail to cure.
Brake pads
If the brake pad wear warning lamp
appears in the Check Control,
accompanied by a text. Please take
careful note of the additional information on
the Control Display.
Page 133 of 232
Navigation
Driving tips
131Reference
At a glance
Controls
Communications
Entertainment
Mobility
The CD/DVD is ejected from the naviga-
tion computer
2.Remove the CD/DVD
3.Insert the new CD/DVD with the labeled
side up.
Allow approx. eight seconds for the
system to scan the data from the new
CD/DVD.
Opening the navigation
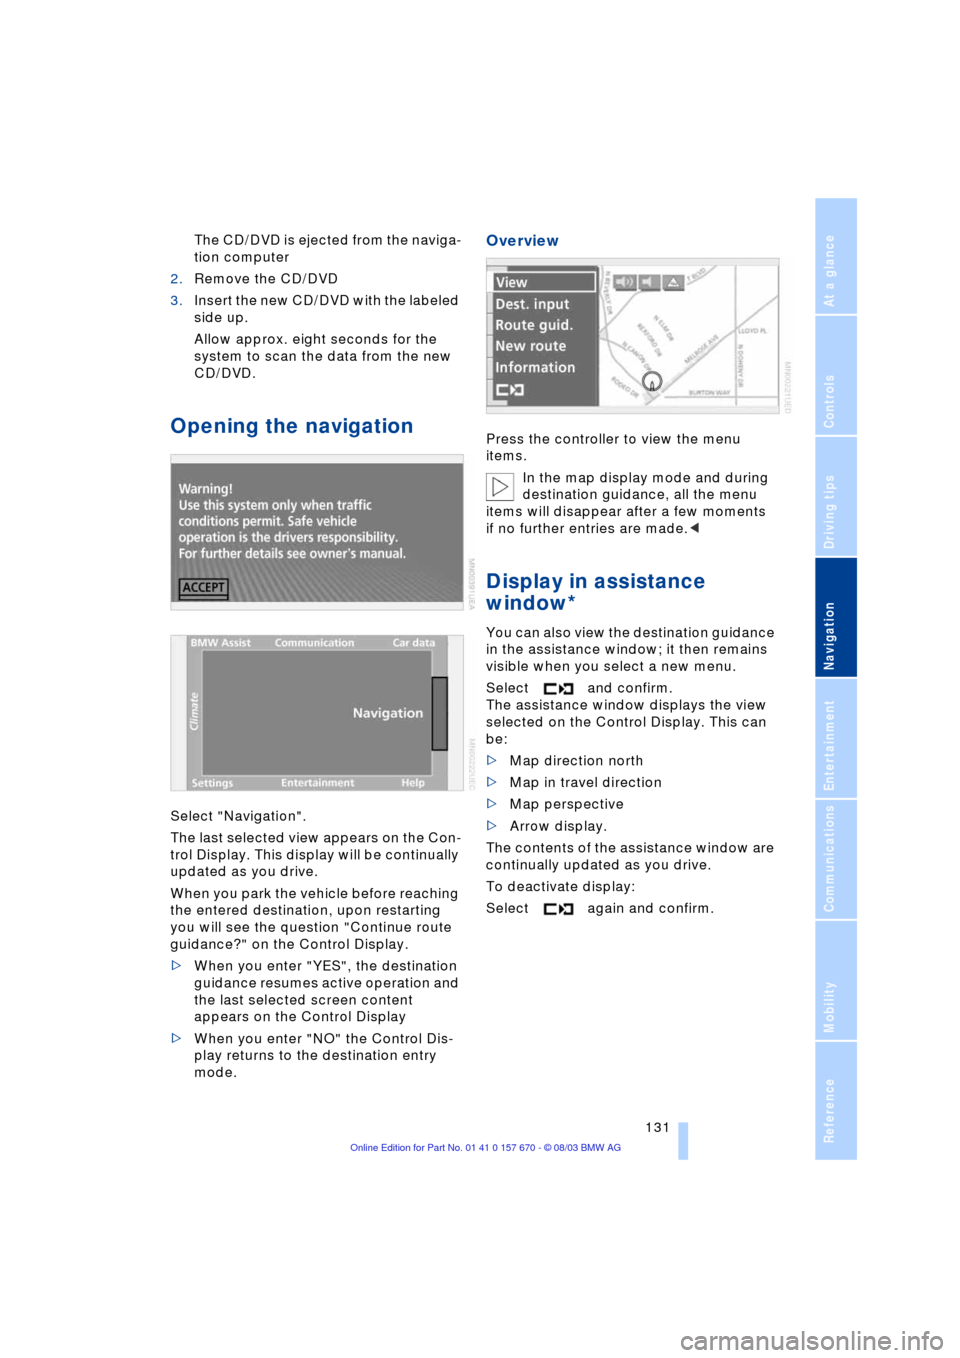
Select "Navigation".
The last selected view appears on the Con-
trol Display. This display will be continually
updated as you drive.
When you park the vehicle before reaching
the entered destination, upon restarting
you will see the question "Continue route
guidance?" on the Control Display.
>When you enter "YES", the destination
guidance resumes active operation and
the last selected screen content
appears on the Control Display
>When you enter "NO" the Control Dis-
play returns to the destination entry
mode.
Overview
Press the controller to view the menu
items.
In the map display mode and during
destination guidance, all the menu
items will disappear after a few moments
if no further entries are made.<
Display in assistance
window*
You can also view the destination guidance
in the assistance window; it then remains
visible when you select a new menu.
Select and confirm.
The assistance window displays the view
selected on the Control Display. This can
be:
>Map direction north
>Map in travel direction
>Map perspective
>Arrow display.
The contents of the assistance window are
continually updated as you drive.
To deactivate display:
Select again and confirm.
Page 135 of 232
Navigation
Driving tips
133Reference
At a glance
Controls
Communications
Entertainment
Mobility
>If you do not enter a street, the system
will guide you as far as the city limits
>Depending on the data stored on your
navigation CD/DVD, you can also enter
the house or building number on some
streets
>You can skip the entry of country and
locality if the current entries are being
retained for your new destination
>You can overwrite street names if you
would like to proceed to another street
within the same locality.
The example shows how to use the naviga-
tion system to find the following destina-
tion:
United States
Beverly Hills, Ca
455 N Rexford Drive
To enter the destination address:
Select "ABC..." and confirm.
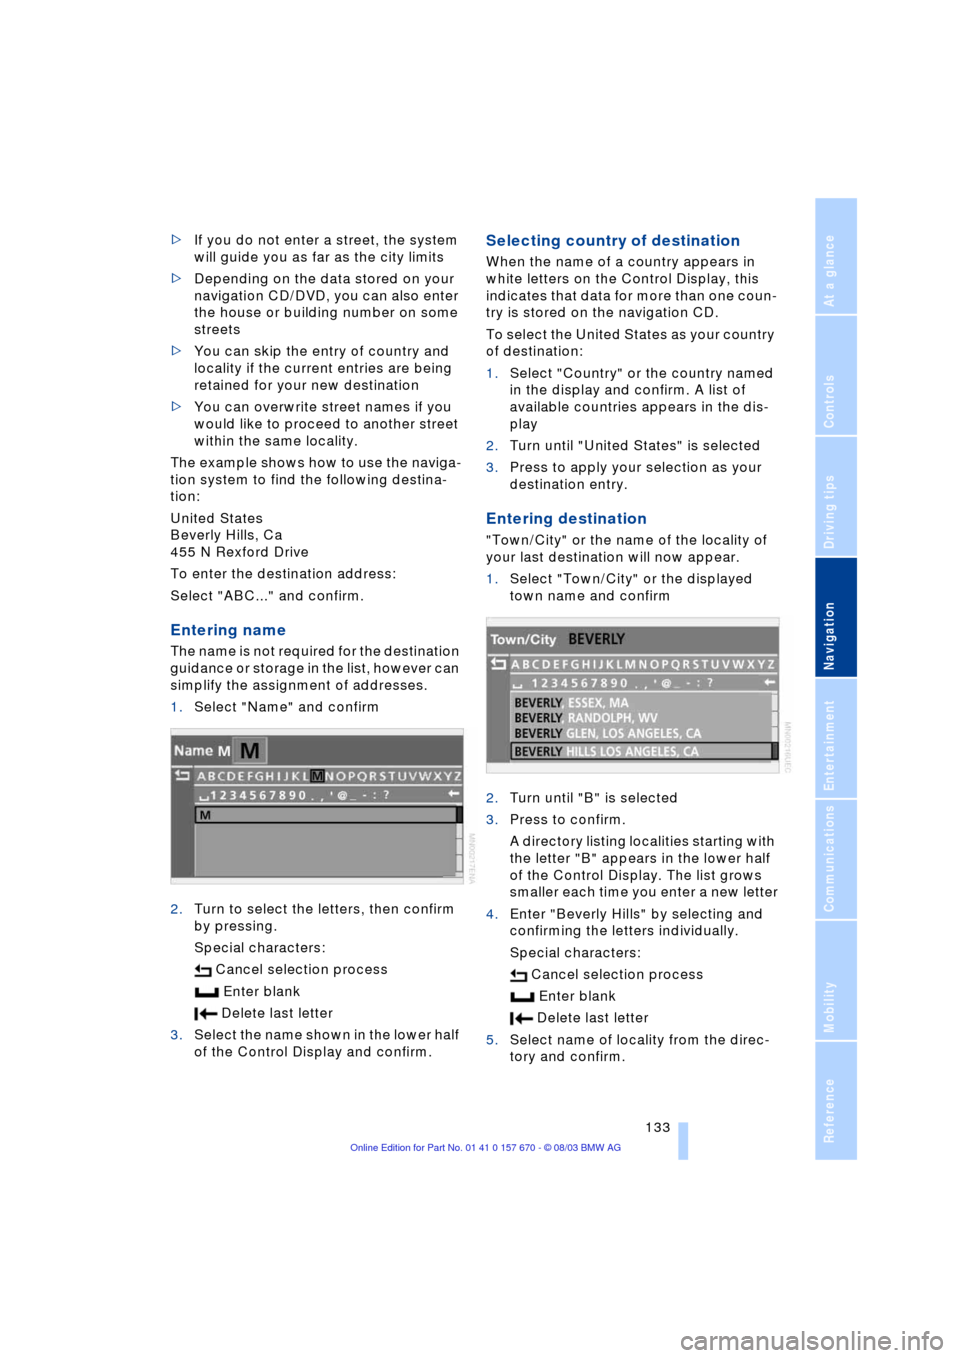
Entering name
The name is not required for the destination
guidance or storage in the list, however can
simplify the assignment of addresses.
1.Select "Name" and confirm
2.Turn to select the letters, then confirm
by pressing.
Special characters:
Cancel selection process
Enter blank
Delete last letter
3.Select the name shown in the lower half
of the Control Display and confirm.
Selecting country of destination
When the name of a country appears in
white letters on the Control Display, this
indicates that data for more than one coun-
try is stored on the navigation CD.
To select the United States as your country
of destination:
1.Select "Country" or the country named
in the display and confirm. A list of
available countries appears in the dis-
play
2.Turn until "United States" is selected
3.Press to apply your selection as your
destination entry.
Entering destination
"Town/City" or the name of the locality of
your last destination will now appear.
1.Select "Town/City" or the displayed
town name and confirm
2.Turn until "B" is selected
3.Press to confirm.
A directory listing localities starting with
the letter "B" appears in the lower half
of the Control Display. The list grows
smaller each time you enter a new letter
4.Enter "Beverly Hills" by selecting and
confirming the letters individually.
Special characters:
Cancel selection process
Enter blank
Delete last letter
5.Select name of locality from the direc-
tory and confirm.