key BMW 760Li 2005 E66 User Guide
[x] Cancel search | Manufacturer: BMW, Model Year: 2005, Model line: 760Li, Model: BMW 760Li 2005 E66Pages: 239, PDF Size: 8.03 MB
Page 57 of 239
Controls
55Reference
At a glance
Driving tips
Communications
Navigation
Entertainment
Mobility
Hold refer to Automatic Hold on
page65.
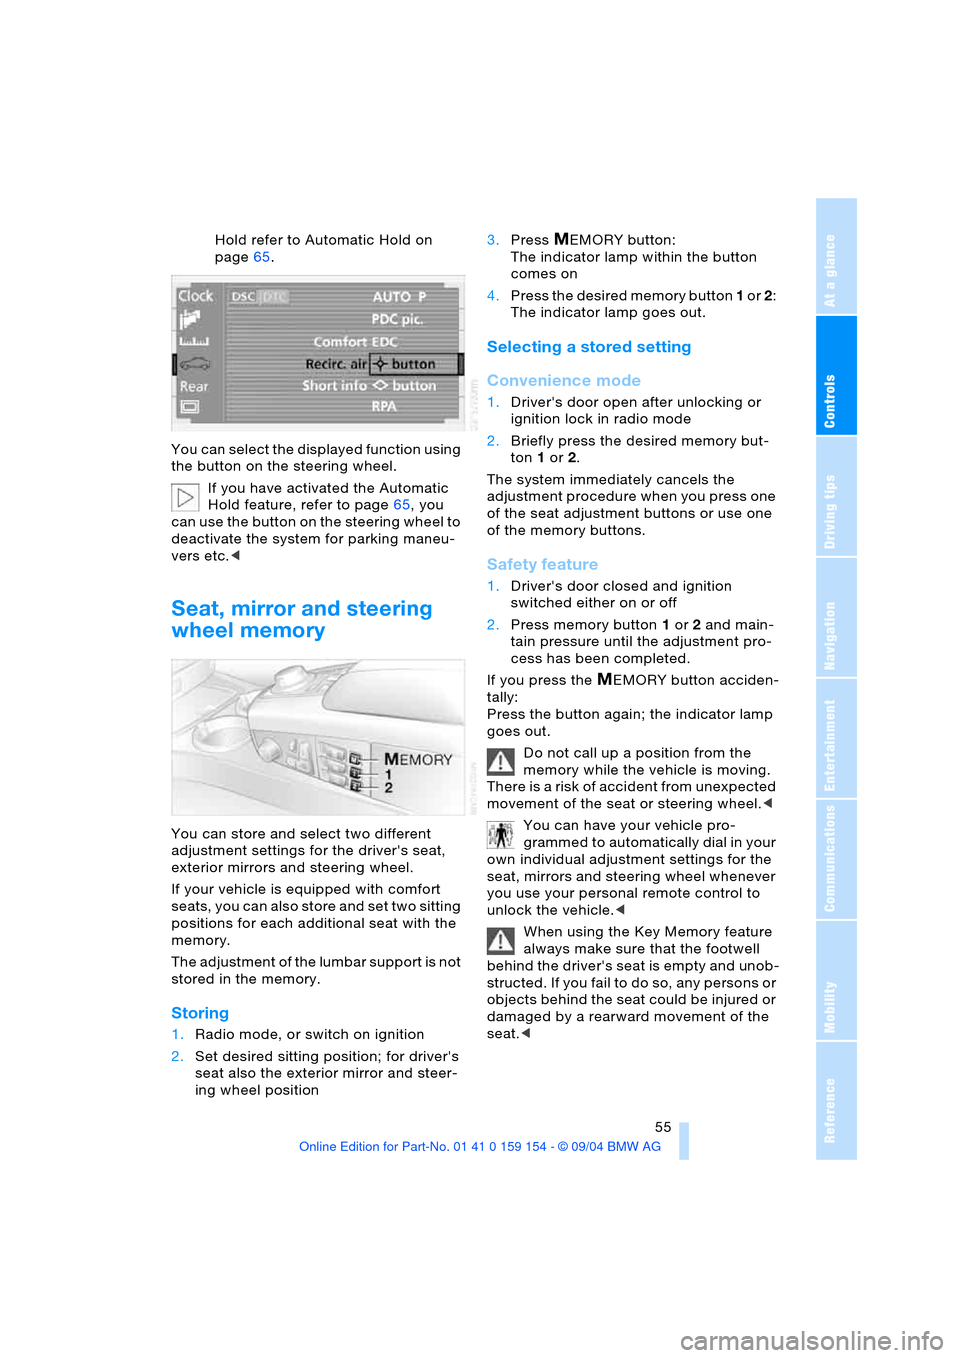
You can select the displayed function using
the button on the steering wheel.
If you have activated the Automatic
Hold feature, refer to page65, you
can use the button on the steering wheel to
deactivate the system for parking maneu-
vers etc.<
Seat, mirror and steering
wheel memory
You can store and select two different
adjustment settings for the driver's seat,
exterior mirrors and steering wheel.
If your vehicle is equipped with comfort
seats, you can also store and set two sitting
positions for each additional seat with the
memory.
The adjustment of the lumbar support is not
stored in the memory.
Storing
1.Radio mode, or switch on ignition
2.Set desired sitting position; for driver's
seat also the exterior mirror and steer-
ing wheel position 3.Press
MEMORY button:
The indicator lamp within the button
comes on
4.Press the desired memory button 1 or 2:
The indicator lamp goes out.
Selecting a stored setting
Convenience mode
1.Driver's door open after unlocking or
ignition lock in radio mode
2.Briefly press the desired memory but-
ton 1 or2.
The system immediately cancels the
adjustment procedure when you press one
of the seat adjustment buttons or use one
of the memory buttons.
Safety feature
1.Driver's door closed and ignition
switched either on or off
2.Press memory button 1 or2 and main-
tain pressure until the adjustment pro-
cess has been completed.
If you press the
MEMORY button acciden-
tally:
Press the button again; the indicator lamp
goes out.
Do not call up a position from the
memory while the vehicle is moving.
There is a risk of accident from unexpected
movement of the seat or steering wheel.<
You can have your vehicle pro-
grammed to automatically dial in your
own individual adjustment settings for the
seat, mirrors and steering wheel whenever
you use your personal remote control to
unlock the vehicle.<
When using the Key Memory feature
always make sure that the footwell
behind the driver's seat is empty and unob-
structed. If you fail to do so, any persons or
objects behind the seat could be injured or
damaged by a rearward movement of the
seat.<
Page 58 of 239
Adjustments
56
Tilt function, passenger-side mirror
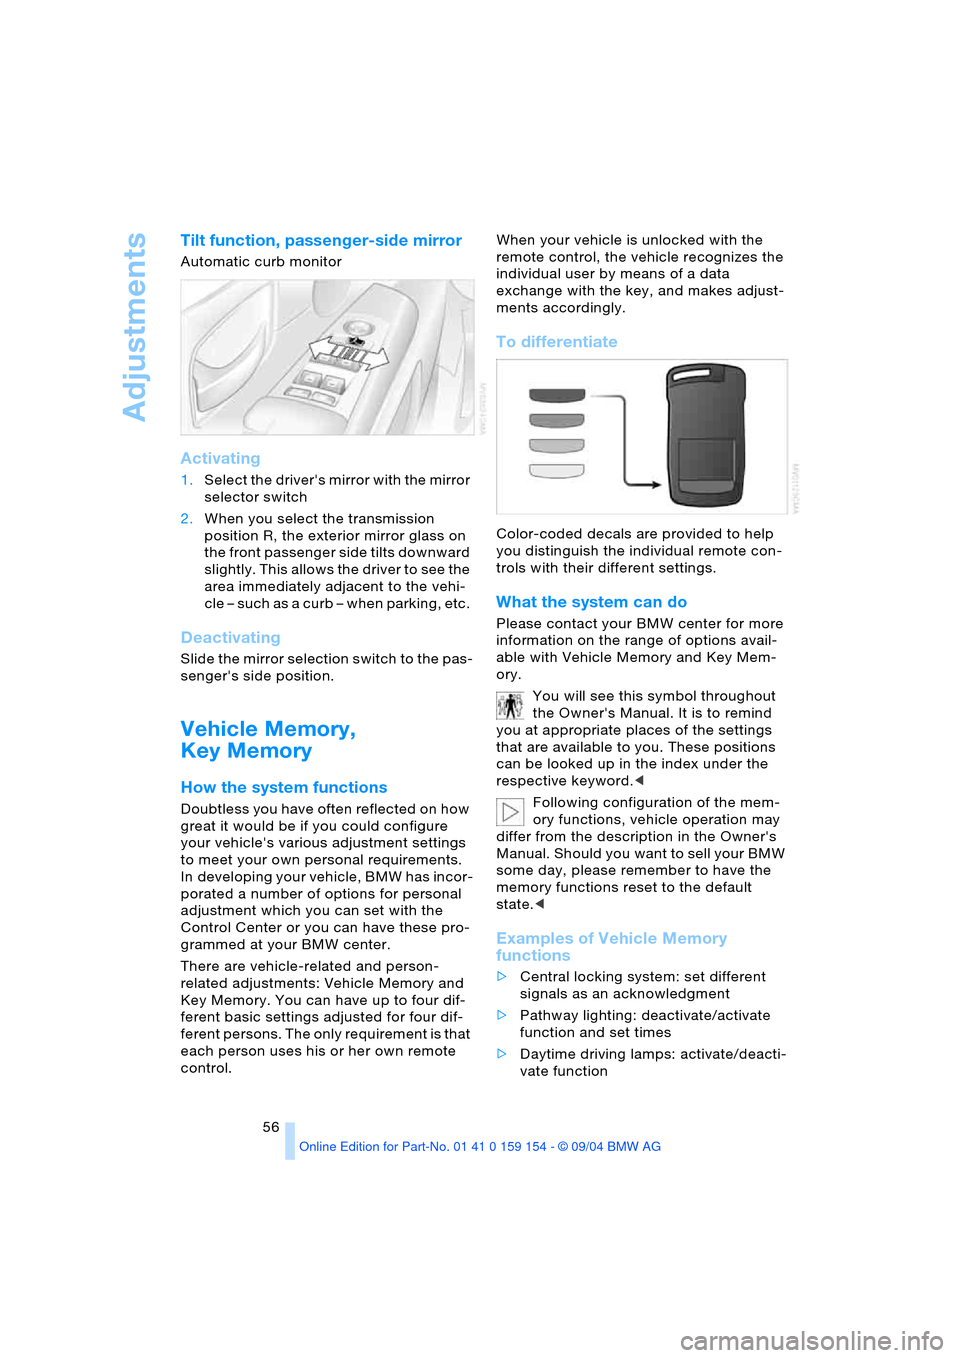
Automatic curb monitor
Activating
1.Select the driver's mirror with the mirror
selector switch
2.When you select the transmission
position R, the exterior mirror glass on
the front passenger side tilts downward
slightly. This allows the driver to see the
area immediately adjacent to the vehi-
cle – such as a curb – when parking, etc.
Deactivating
Slide the mirror selection switch to the pas-
senger's side position.
Vehicle Memory,
Key Memory
How the system functions
Doubtless you have often reflected on how
great it would be if you could configure
your vehicle's various adjustment settings
to meet your own personal requirements.
In developing your vehicle, BMW has incor-
porated a number of options for personal
adjustment which you can set with the
Control Center or you can have these pro-
grammed at your BMW center.
There are vehicle-related and person-
related adjustments: Vehicle Memory and
Key Memory. You can have up to four dif-
ferent basic settings adjusted for four dif-
ferent persons. The only requirement is that
each person uses his or her own remote
control. When your vehicle is unlocked with the
remote control, the vehicle recognizes the
individual user by means of a data
exchange with the key, and makes adjust-
ments accordingly.
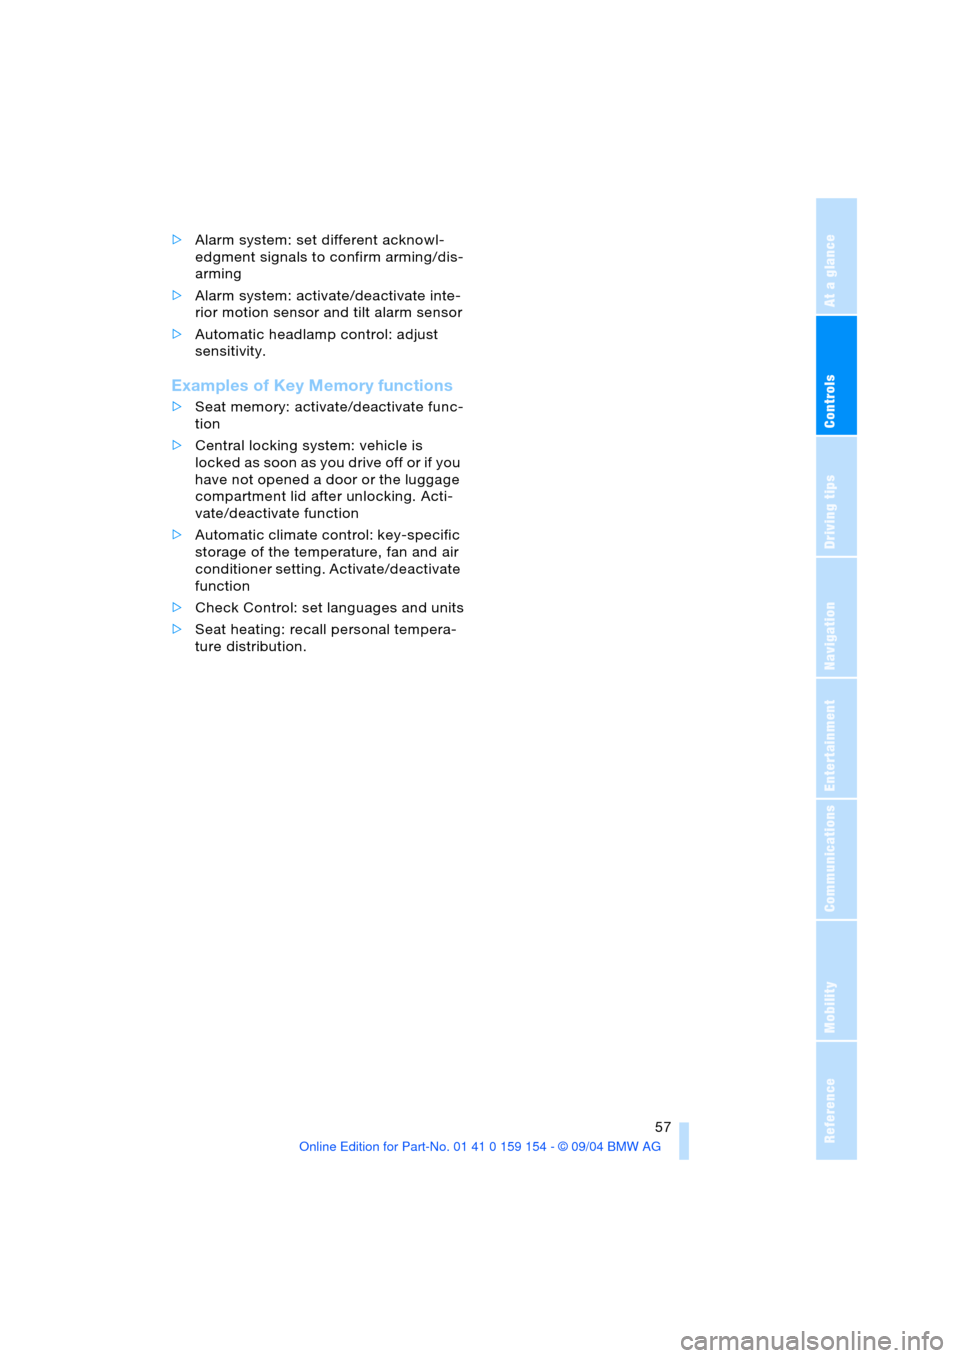
To differentiate
Color-coded decals are provided to help
you distinguish the individual remote con-
trols with their different settings.
What the system can do
Please contact your BMW center for more
information on the range of options avail-
able with Vehicle Memory and Key Mem-
ory.
You will see this symbol throughout
the Owner's Manual. It is to remind
you at appropriate places of the settings
that are available to you. These positions
can be looked up in the index under the
respective keyword.<
Following configuration of the mem-
ory functions, vehicle operation may
differ from the description in the Owner's
Manual. Should you want to sell your BMW
some day, please remember to have the
memory functions reset to the default
state.<
Examples of Vehicle Memory
functions
>Central locking system: set different
signals as an acknowledgment
>Pathway lighting: deactivate/activate
function and set times
>Daytime driving lamps: activate/deacti-
vate function
Page 59 of 239
Controls
57Reference
At a glance
Driving tips
Communications
Navigation
Entertainment
Mobility
>Alarm system: set different acknowl-
edgment signals to confirm arming/dis-
arming
>Alarm system: activate/deactivate inte-
rior motion sensor and tilt alarm sensor
>Automatic headlamp control: adjust
sensitivity.
Examples of Key Memory functions
>Seat memory: activate/deactivate func-
tion
>Central locking system: vehicle is
locked as soon as you drive off or if you
have not opened a door or the luggage
compartment lid after unlocking. Acti-
vate/deactivate function
>Automatic climate control: key-specific
storage of the temperature, fan and air
conditioner setting. Activate/deactivate
function
>Check Control: set languages and units
>Seat heating: recall personal tempera-
ture distribution.
Page 73 of 239
Controls
71Reference
At a glance
Driving tips
Communications
Navigation
Entertainment
Mobility
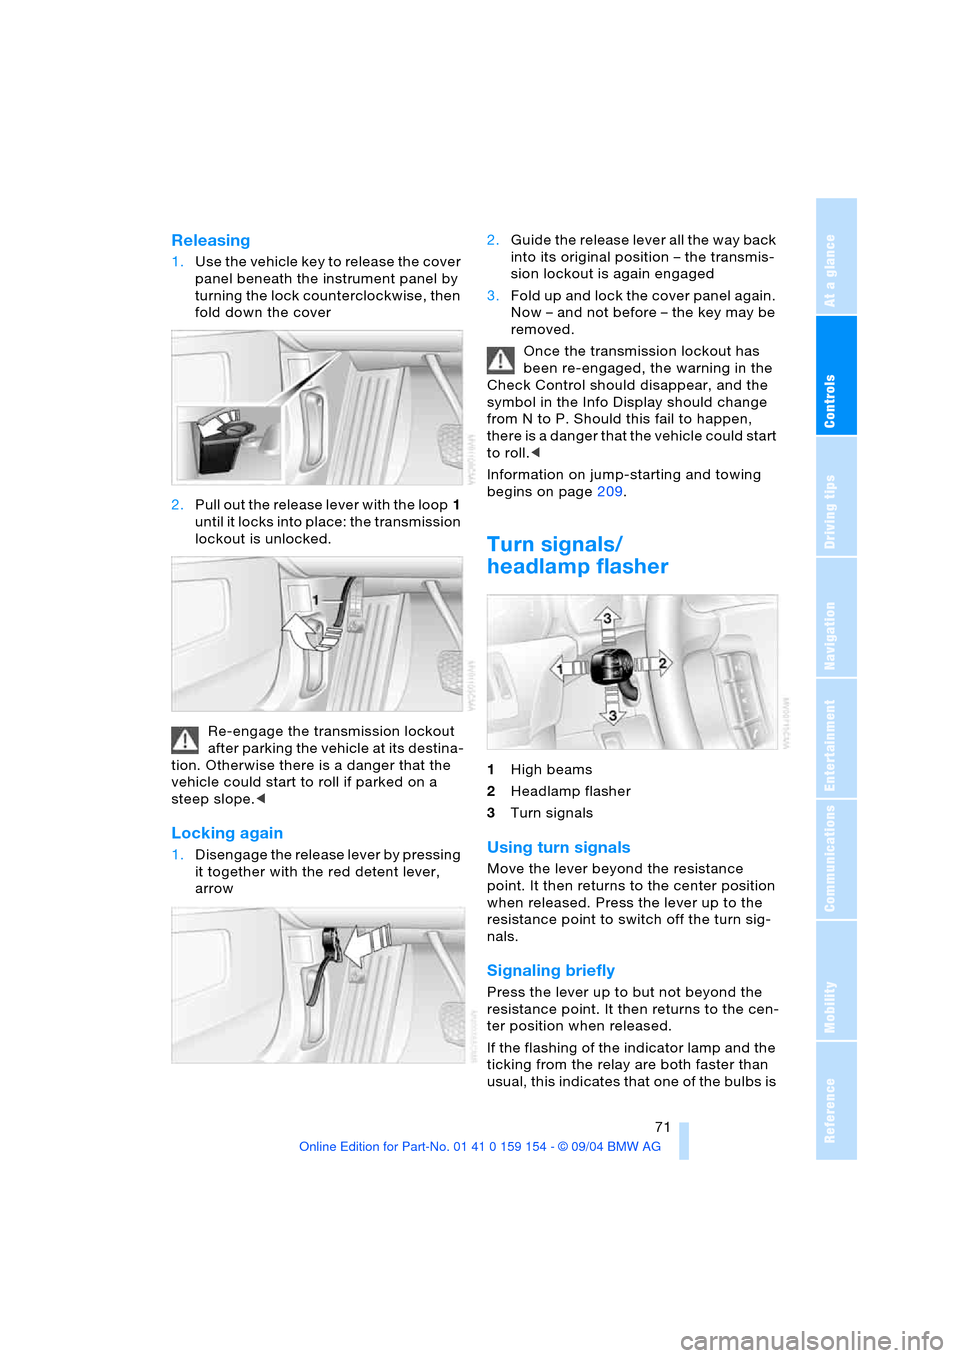
Releasing
1.Use the vehicle key to release the cover
panel beneath the instrument panel by
turning the lock counterclockwise, then
fold down the cover
2.Pull out the release lever with the loop1
until it locks into place: the transmission
lockout is unlocked.
Re-engage the transmission lockout
after parking the vehicle at its destina-
tion. Otherwise there is a danger that the
vehicle could start to roll if parked on a
steep slope.<
Locking again
1.Disengage the release lever by pressing
it together with the red detent lever,
arrow 2.Guide the release lever all the way back
into its original position – the transmis-
sion lockout is again engaged
3.Fold up and lock the cover panel again.
Now – and not before – the key may be
removed.
Once the transmission lockout has
been re-engaged, the warning in the
Check Control should disappear, and the
symbol in the Info Display should change
from N to P. Should this fail to happen,
there is a danger that the vehicle could start
to roll.<
Information on jump-starting and towing
begins on page209.
Turn signals/
headlamp flasher
1High beams
2Headlamp flasher
3Turn signals
Using turn signals
Move the lever beyond the resistance
point. It then returns to the center position
when released. Press the lever up to the
resistance point to switch off the turn sig-
nals.
Signaling briefly
Press the lever up to but not beyond the
resistance point. It then returns to the cen-
ter position when released.
If the flashing of the indicator lamp and the
ticking from the relay are both faster than
usual, this indicates that one of the bulbs is
Page 85 of 239
Controls
83Reference
At a glance
Driving tips
Communications
Navigation
Entertainment
Mobility
or the battery switch OFF.
Please remember that brake fluid should be
changed every two years at the latest, even
if the display does not yet indicate that ser-
vice is required, refer to page197.
This same precaution applies to all of the
other service and maintenance operations
scheduled according to periodic inter-
vals.<
Displaying and entering dates for
legally-mandated emission and
vehicle inspections
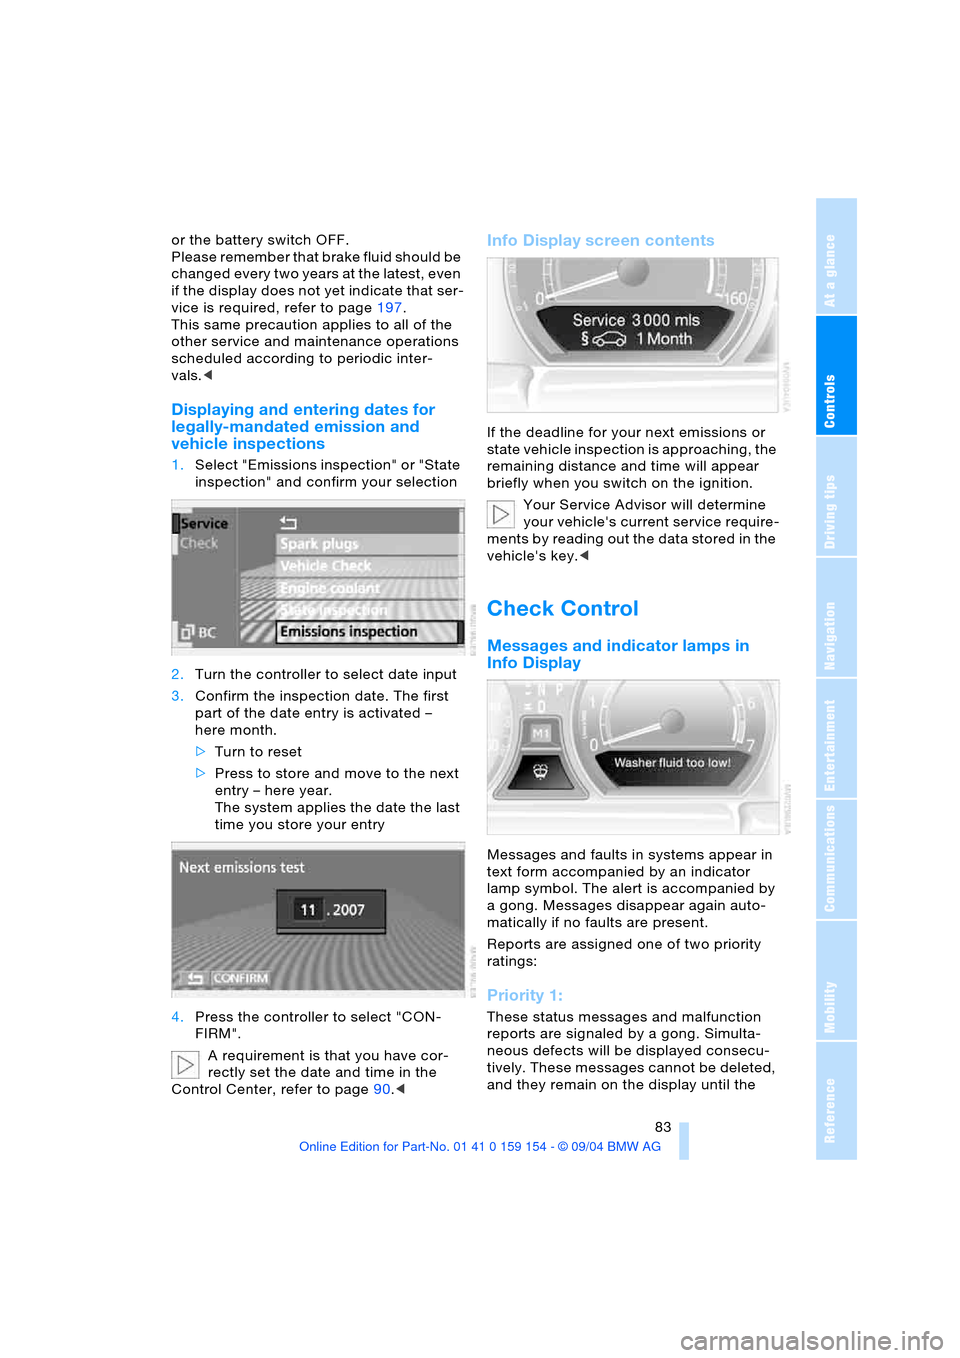
1.Select "Emissions inspection" or "State
inspection" and confirm your selection
2.Turn the controller to select date input
3.Confirm the inspection date. The first
part of the date entry is activated –
here month.
>Turn to reset
>Press to store and move to the next
entry – here year.
The system applies the date the last
time you store your entry
4.Press the controller to select "CON-
FIRM".
A requirement is that you have cor-
rectly set the date and time in the
Control Center, refer to page90.<
Info Display screen contents
If the deadline for your next emissions or
state vehicle inspection is approaching, the
remaining distance and time will appear
briefly when you switch on the ignition.
Your Service Advisor will determine
your vehicle's current service require-
ments by reading out the data stored in the
vehicle's key.<
Check Control
Messages and indicator lamps in
Info Display
Messages and faults in systems appear in
text form accompanied by an indicator
lamp symbol. The alert is accompanied by
a gong. Messages disappear again auto-
matically if no faults are present.
Reports are assigned one of two priority
ratings:
Priority 1:
These status messages and malfunction
reports are signaled by a gong. Simulta-
neous defects will be displayed consecu-
tively. These messages cannot be deleted,
and they remain on the display until the
Page 101 of 239
Controls
99Reference
At a glance
Driving tips
Communications
Navigation
Entertainment
Mobility
whether or not the seat is occupied by a
child in the child-restraint system or an
adult.
>When a child is seated in the child-
restraint system or with an empty seat,
the front and side airbags are automat-
ically deactivated on the passenger's
side
>When an adult is traveling in the front
seat, the front and side airbags remain
active on the passenger side.
Although not desired, it can occur in
the case of heavier children that the
front passenger airbags remain active or in
the case of very light adults or young per-
sons that the front passenger airbags are
deactivated.
The state of the front passenger airbags is
shown with the indicator lamp, refer to Indi-
cator lamps in the following. In this case
transport the corresponding persons on the
rear seat.
Except when persons to be transported, do
not increase the load on the front passen-
ger seat with additional items. Do not fit
seat covers, seat cushion padding, ball
mats or other items to the front passenger
seat unless they are specifically recom-
mended by BMW. Do not place any items
under the seat. Otherwise, the function of
the seat occupation detection could be
impaired.<
Indicator lamps
Airbag system ready for use
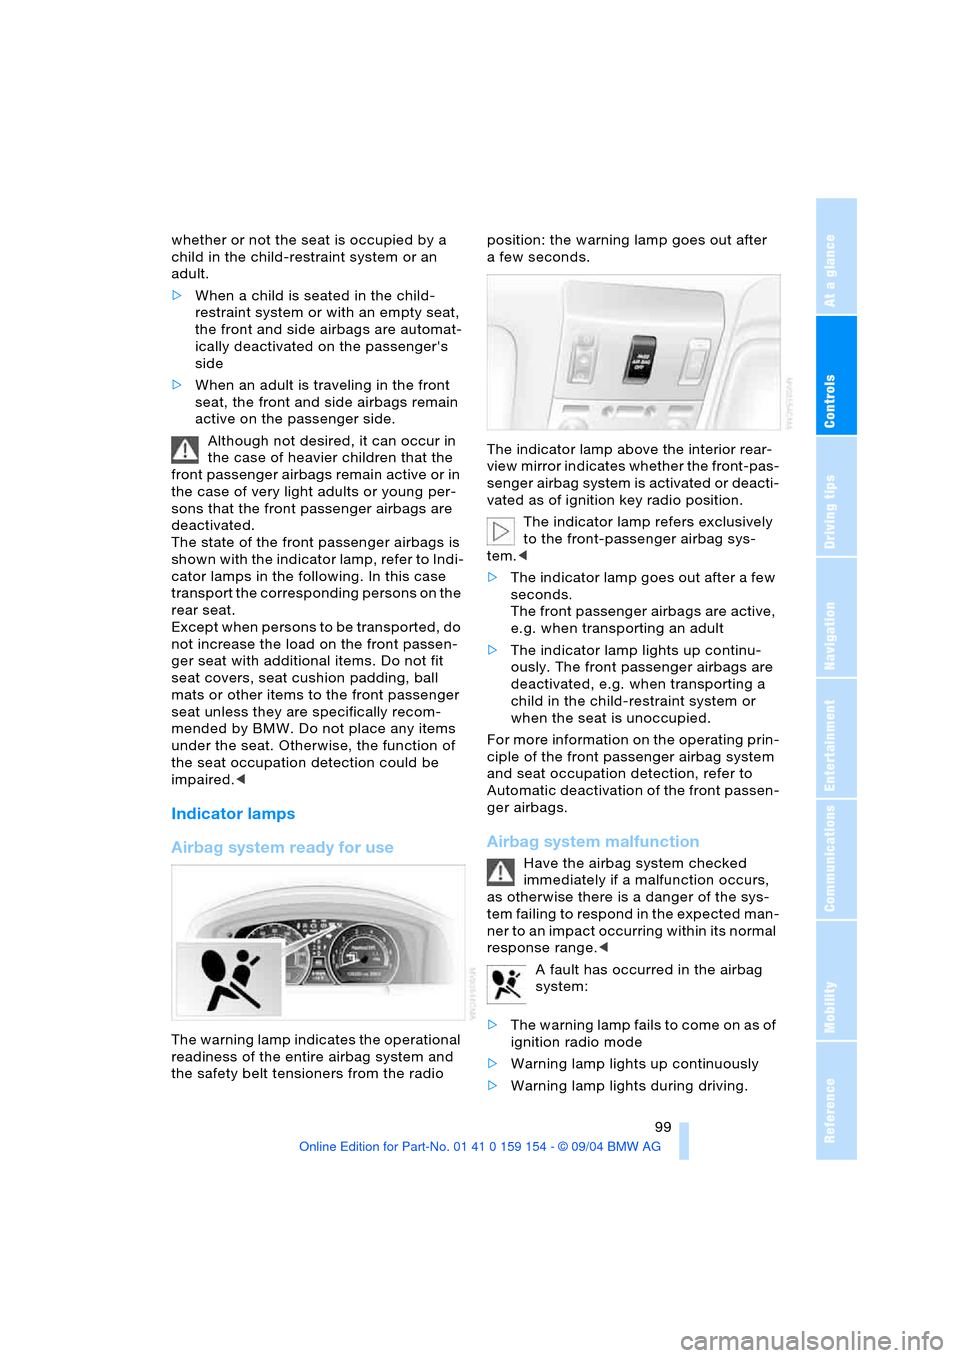
The warning lamp indicates the operational
readiness of the entire airbag system and
the safety belt tensioners from the radio position: the warning lamp goes out after
afew seconds.
The indicator lamp above the interior rear-
view mirror indicates whether the front-pas-
senger airbag system is activated or deacti-
vated as of ignition key radio position.
The indicator lamp refers exclusively
to the front-passenger airbag sys-
tem.<
>The indicator lamp goes out after a few
seconds.
The front passenger airbags are active,
e.g. when transporting an adult
>The indicator lamp lights up continu-
ously. The front passenger airbags are
deactivated, e.g. when transporting a
child in the child-restraint system or
when the seat is unoccupied.
For more information on the operating prin-
ciple of the front passenger airbag system
and seat occupation detection, refer to
Automatic deactivation of the front passen-
ger airbags.
Airbag system malfunction
Have the airbag system checked
immediately if a malfunction occurs,
as otherwise there is a danger of the sys-
tem failing to respond in the expected man-
ner to an impact occurring within its normal
response range.<
A fault has occurred in the airbag
system:
>The warning lamp fails to come on as of
ignition radio mode
>Warning lamp lights up continuously
>Warning lamp lights during driving.
Page 114 of 239
Practical interior accessories
112
Practical interior accessories
Integrated universal remote
control*
The concept
The integrated universal remote control can
replace as many as three hand-held trans-
mitters for various remote-controlled
accessories, such as door openers and
house alarm systems. The integrated uni-
versal remote control registers and stores
signals from the original hand-held trans-
mitters.
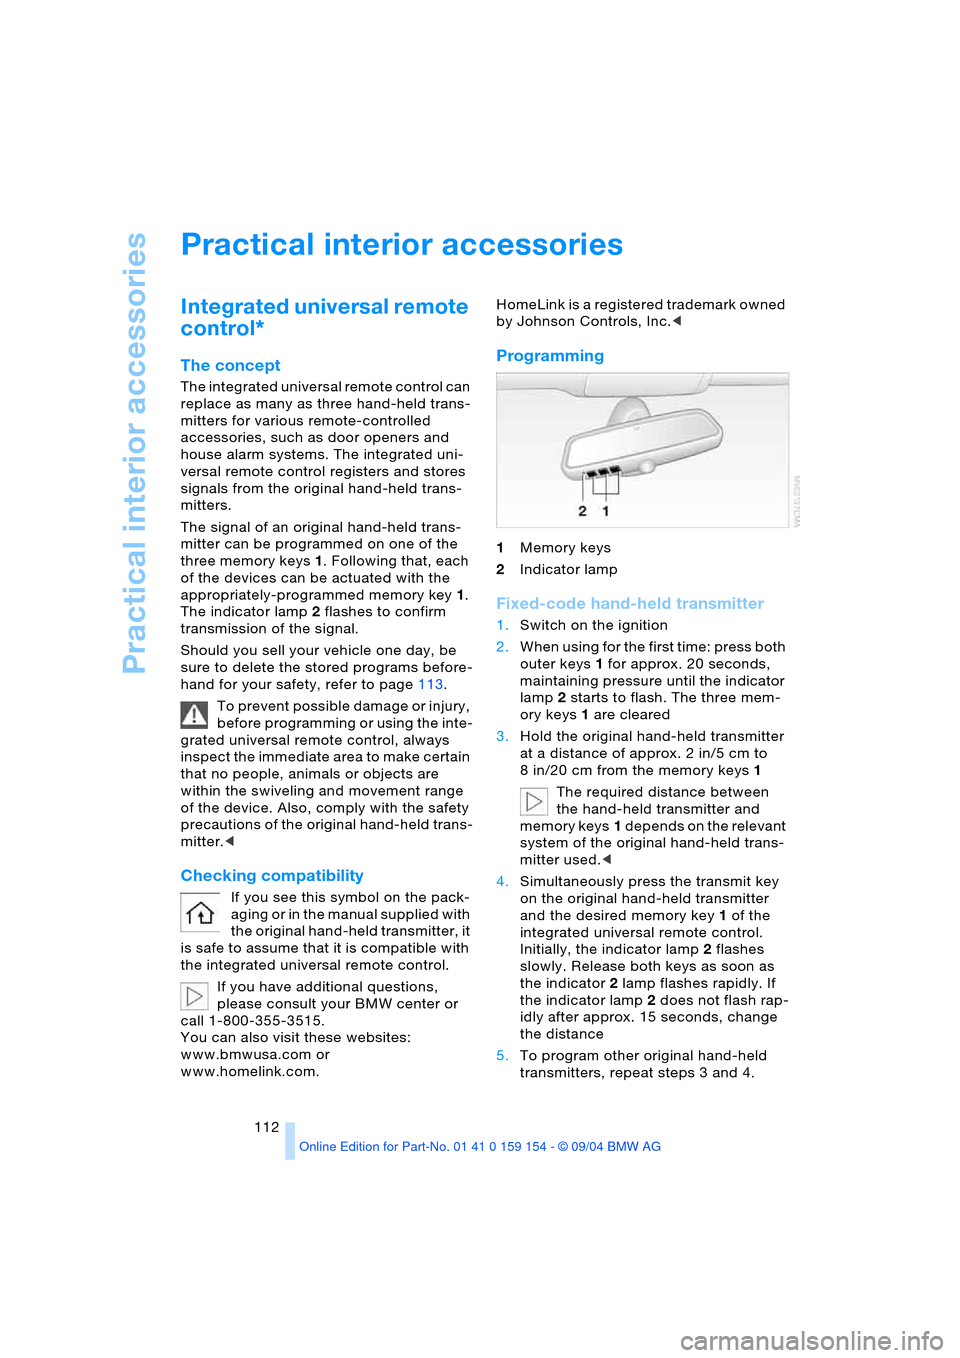
The signal of an original hand-held trans-
mitter can be programmed on one of the
three memory keys1. Following that, each
of the devices can be actuated with the
appropriately-programmed memory key1.
The indicator lamp 2 flashes to confirm
transmission of the signal.
Should you sell your vehicle one day, be
sure to delete the stored programs before-
hand for your safety, refer to page113.
To prevent possible damage or injury,
before programming or using the inte-
grated universal remote control, always
inspect the immediate area to make certain
that no people, animals or objects are
within the swiveling and movement range
of the device. Also, comply with the safety
precautions of the original hand-held trans-
mitter.<
Checking compatibility
If you see this symbol on the pack-
aging or in the manual supplied with
the original hand-held transmitter, it
is safe to assume that it is compatible with
the integrated universal remote control.
If you have additional questions,
please consult your BMW center or
call 1-800-355-3515.
You can also visit these websites:
www.bmwusa.com or
www.homelink.com. HomeLink is a registered trademark owned
by Johnson Controls, Inc.<
Programming
1Memory keys
2Indicator lamp
Fixed-code hand-held transmitter
1.Switch on the ignition
2.When using for the first time: press both
outer keys1 for approx. 20 seconds,
maintaining pressure until the indicator
lamp2 starts to flash. The three mem-
ory keys1 are cleared
3.Hold the original hand-held transmitter
at a distance of approx. 2 in/5 cm to
8 in/20 cm from the memory keys1
The required distance between
the hand-held transmitter and
memory keys1 depends on the relevant
system of the original hand-held trans-
mitter used.<
4.Simultaneously press the transmit key
on the original hand-held transmitter
and the desired memory key1 of the
integrated universal remote control.
Initially, the indicator lamp2 flashes
slowly. Release both keys as soon as
the indicator 2 lamp flashes rapidly. If
the indicator lamp2 does not flash rap-
idly after approx. 15 seconds, change
the distance
5.To program other original hand-held
transmitters, repeat steps 3 and 4.
Page 115 of 239
Controls
113Reference
At a glance
Driving tips
Communications
Navigation
Entertainment
Mobility
The corresponding memory key1 is now
programmed with the signal of the original
hand-held transmitter.
The device can be operated as of ignition
on.
If the device can not be operated
after repeated programming, check
whether the original hand-held transmitter
uses an alternating-code system. To do so,
either read the instructions of the original
hand-held transmitter or press and hold
down the programmed memory key1 of
the integrated universal remote control.
If the indicator lamp2 on the integrated
universal remote control flashes quickly
for a brief period and then remains lit up
for approx. two seconds, this indicates
that the original hand-held transmitter is
equipped with an alternating-code system.
In the case of an alternating-code system,
program the memory keys1 as described
at the section on alternating-code transmit-
ters.<
Alternating-code transmitters
Consult the operating instructions of the
unit you wish to set when programming the
universal remote control. You will find infor-
mation there on the possibilities for syn-
chronization.
When programming hand-held transmitters
that employ an alternating code, please
observe the following supplementary
instructions:
Programming will be easier with the
aid of a second person.<
1.Park your vehicle within the range of the
remote-controlled device
2.Program the integrated universal
remote control as described at the sec-
tion on fixed-code hand-held transmit-
ters
3.Localize the key on the receiver of the
device you want to set up, e.g. on the
upper section of the motor
4.Press the key on the receiver of the
device you want to set up. After step 4,
you have approx. 30 seconds for step 55.Press the programmed memory key1
on the integrated universal remote con-
trol three times.
The corresponding memory key1 is now
programmed with the signal of the original
hand-held transmitter.
If you have any additional questions,
please contact your BMW center.<
Clearing memory keys
Individual memory keys1 can not be
cleared. However, you clear all three mem-
ory keys1 together as follows:
Press both outer keys1 of the integrated
universal remote control for approx.
20 seconds, maintaining pressure until the
indicator lamp2 starts to flash.
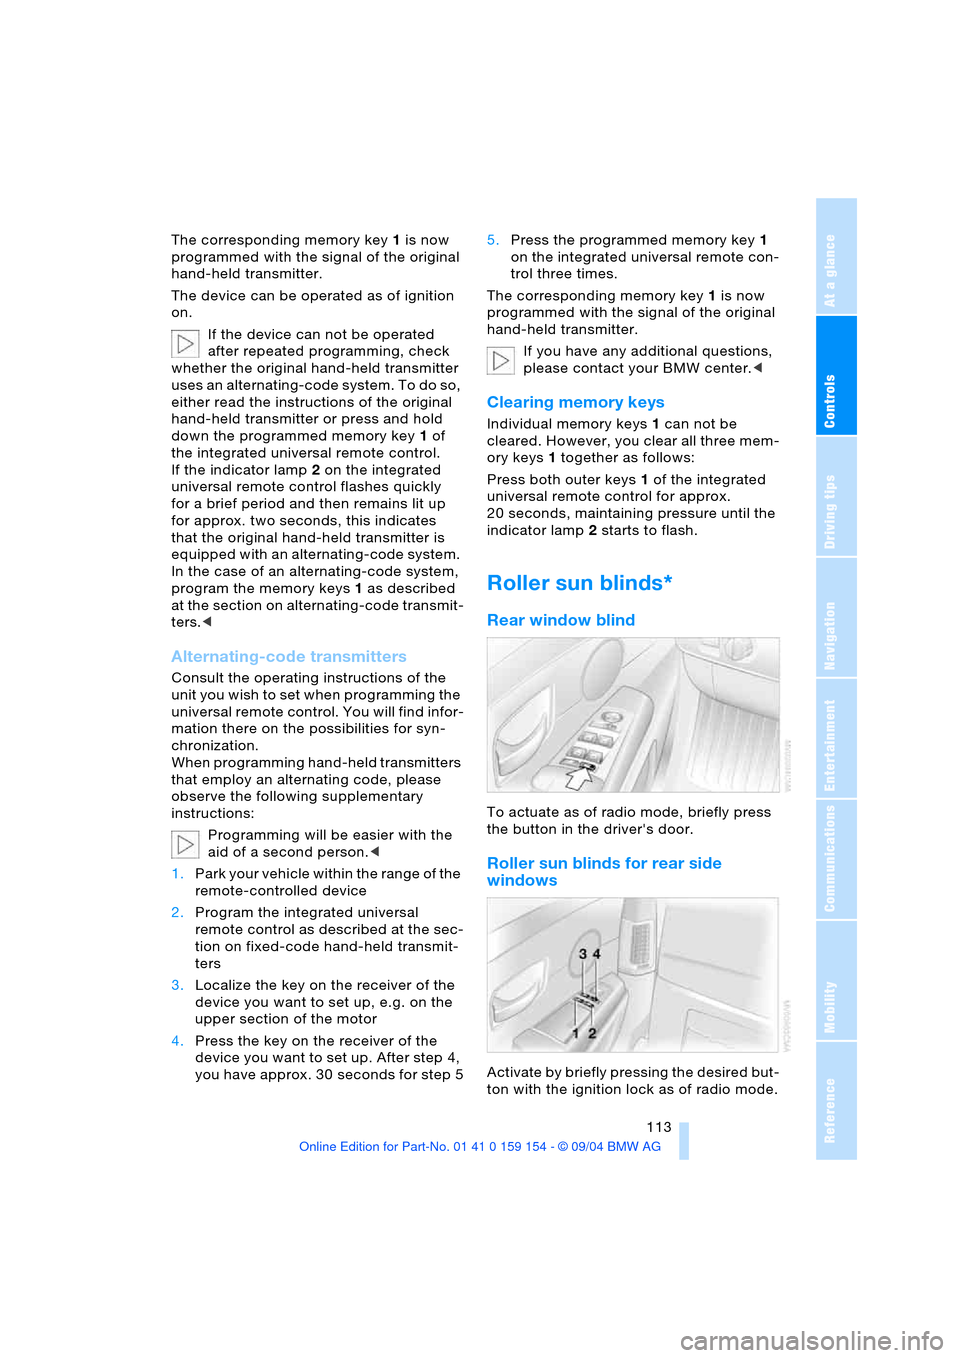
Roller sun blinds*
Rear window blind
To actuate as of radio mode, briefly press
the button in the driver's door.
Roller sun blinds for rear side
windows
Activate by briefly pressing the desired but-
ton with the ignition lock as of radio mode.
Page 117 of 239
Controls
115Reference
At a glance
Driving tips
Communications
Navigation
Entertainment
Mobility
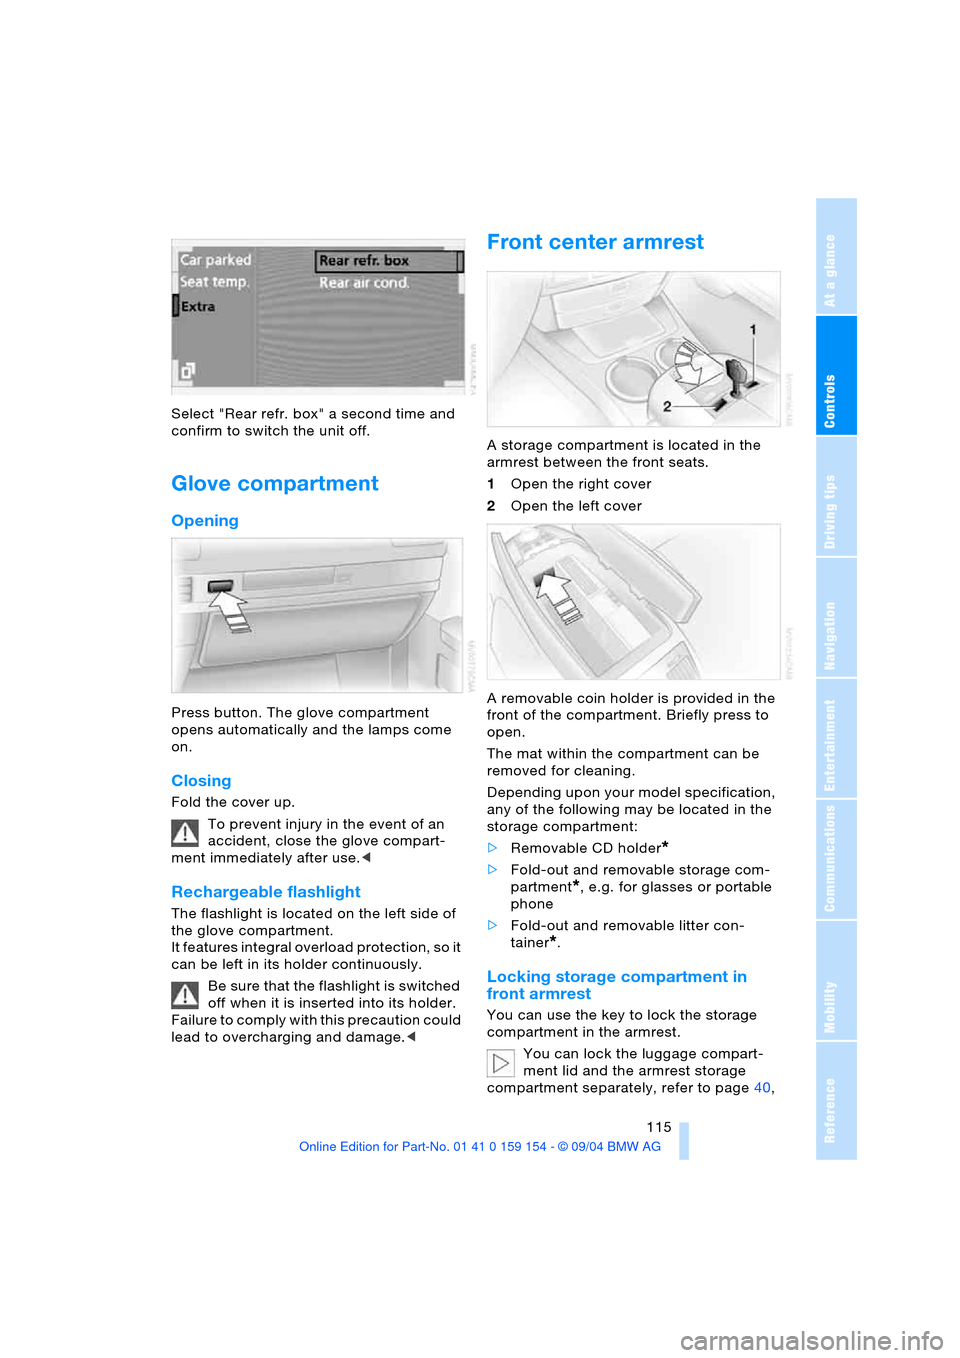
Select "Rear refr. box" a second time and
confirm to switch the unit off.
Glove compartment
Opening
Press button. The glove compartment
opens automatically and the lamps come
on.
Closing
Fold the cover up.
To prevent injury in the event of an
accident, close the glove compart-
ment immediately after use.<
Rechargeable flashlight
The flashlight is located on the left side of
the glove compartment.
It features integral overload protection, so it
can be left in its holder continuously.
Be sure that the flashlight is switched
off when it is inserted into its holder.
Failure to comply with this precaution could
lead to overcharging and damage.<
Front center armrest
A storage compartment is located in the
armrest between the front seats.
1Open the right cover
2Open the left cover
A removable coin holder is provided in the
front of the compartment. Briefly press to
open.
The mat within the compartment can be
removed for cleaning.
Depending upon your model specification,
any of the following may be located in the
storage compartment:
>Removable CD holder
*
>Fold-out and removable storage com-
partment
*, e.g. for glasses or portable
phone
>Fold-out and removable litter con-
tainer
*.
Locking storage compartment in
front armrest
You can use the key to lock the storage
compartment in the armrest.
You can lock the luggage compart-
ment lid and the armrest storage
compartment separately, refer to page40,
Page 118 of 239
Practical interior accessories
116 and then retain the key in your possession
while handing over only the remote control
when leaving the vehicle for valet parking
etc., refer to page34; this prevents unau-
thorized access to the luggage and front
storage compartments.<
Ventilating storage compartment in
front armrest
You can use the serrated dial in the storage
compartment to open and close the vent.
Depending on the automatic climate
control setting, the temperature
within the storage compartment may be
higher than in the rest of the interior.
Close the vent as required.<
Storage compartments
Glasses compartment
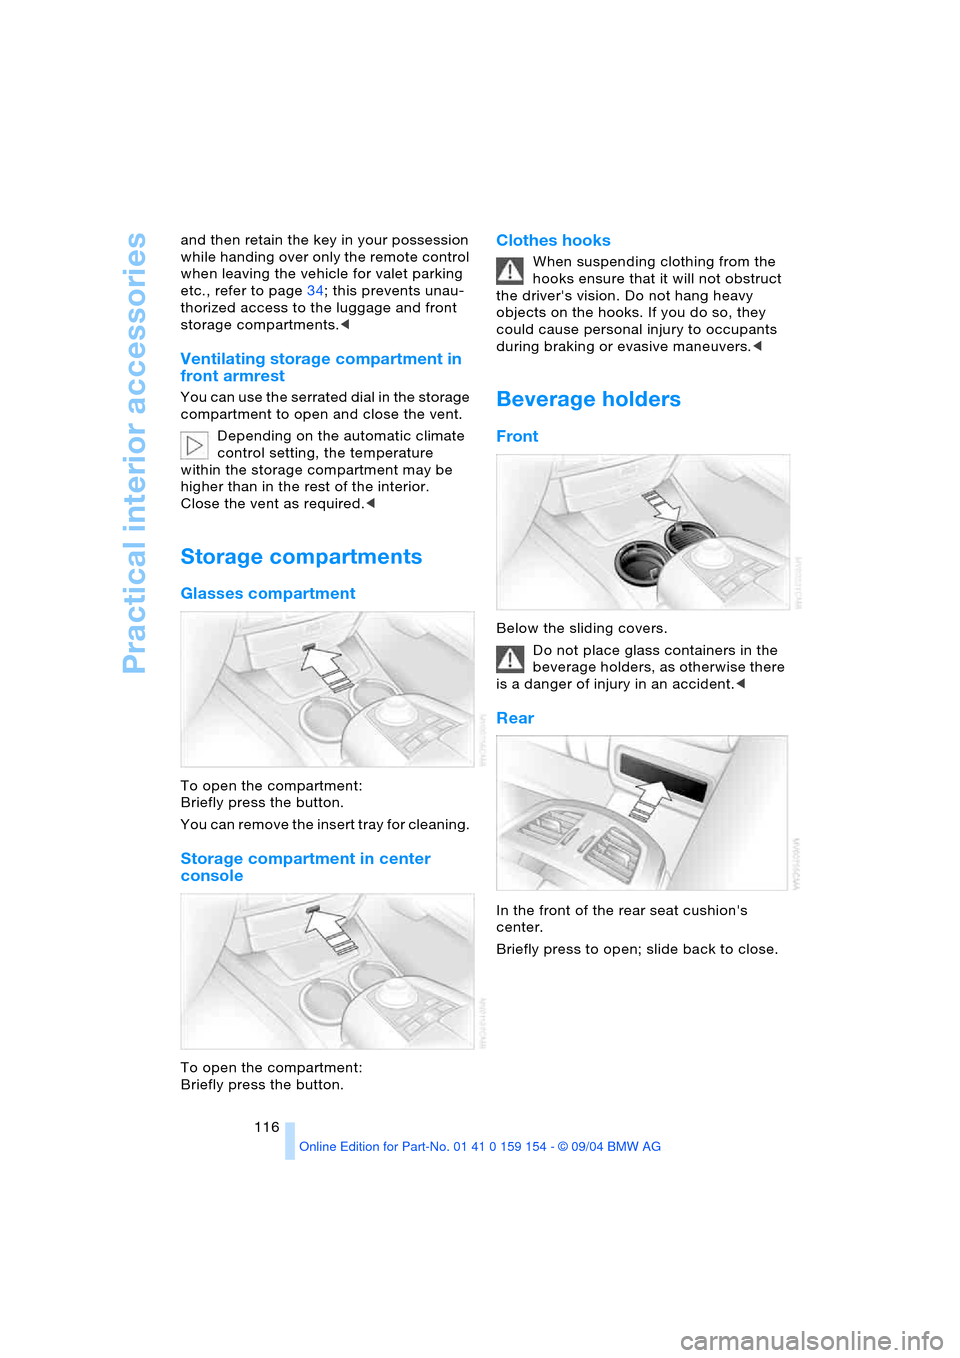
To open the compartment:
Briefly press the button.
You can remove the insert tray for cleaning.
Storage compartment in center
console
To open the compartment:
Briefly press the button.
Clothes hooks
When suspending clothing from the
hooks ensure that it will not obstruct
the driver's vision. Do not hang heavy
objects on the hooks. If you do so, they
could cause personal injury to occupants
during braking or evasive maneuvers.<
Beverage holders
Front
Below the sliding covers.
Do not place glass containers in the
beverage holders, as otherwise there
is a danger of injury in an accident.<
Rear
In the front of the rear seat cushion's
center.
Briefly press to open; slide back to close.