ESP BMW I3 2014 I01 User Guide
[x] Cancel search | Manufacturer: BMW, Model Year: 2014, Model line: I3, Model: BMW I3 2014 I01Pages: 230, PDF Size: 29.93 MB
Page 57 of 230
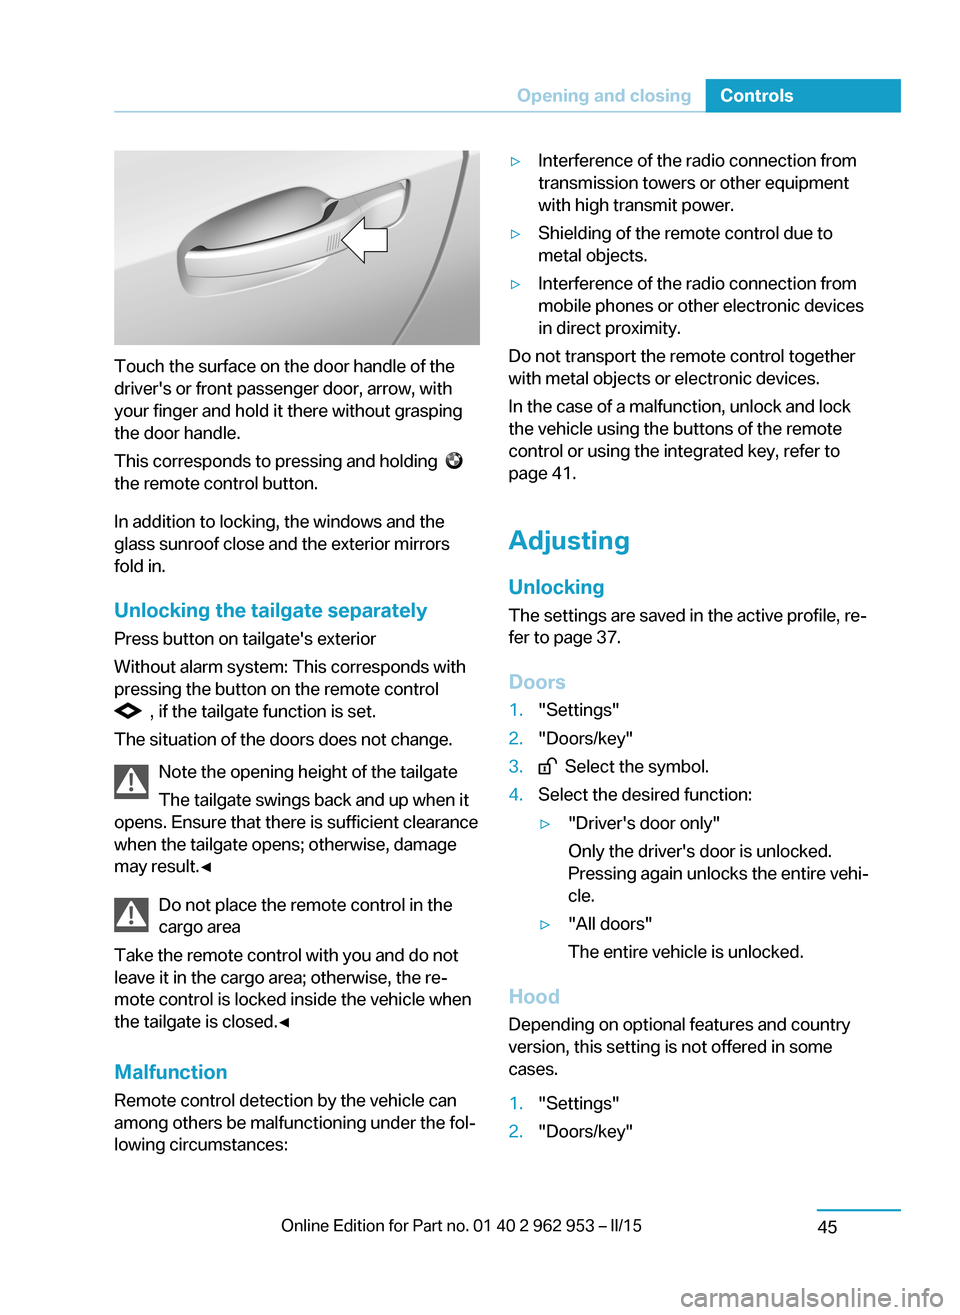
Touch the surface on the door handle of the
driver's or front passenger door, arrow, with
your finger and hold it there without grasping
the door handle.
This corresponds to pressing and holding
the remote control button.
In addition to locking, the windows and the
glass sunroof close and the exterior mirrors
fold in.
Unlocking the tailgate separately
Press button on tailgate's exterior
Without alarm system: This corresponds with
pressing the button on the remote control
, if the tailgate function is set.
The situation of the doors does not change.
Note the opening height of the tailgate
The tailgate swings back and up when it
opens. Ensure that there is sufficient clearance
when the tailgate opens; otherwise, damage
may result.◀
Do not place the remote control in the
cargo area
Take the remote control with you and do not
leave it in the cargo area; otherwise, the re‐
mote control is locked inside the vehicle when
the tailgate is closed.◀
Malfunction
Remote control detection by the vehicle can
among others be malfunctioning under the fol‐
lowing circumstances:
▷Interference of the radio connection from
transmission towers or other equipment
with high transmit power.▷Shielding of the remote control due to
metal objects.▷Interference of the radio connection from
mobile phones or other electronic devices
in direct proximity.
Do not transport the remote control together
with metal objects or electronic devices.
In the case of a malfunction, unlock and lock
the vehicle using the buttons of the remote
control or using the integrated key, refer to
page 41.
Adjusting
Unlocking The settings are saved in the active profile, re‐
fer to page 37.
Doors
1."Settings"2."Doors/key"3. Select the symbol.4.Select the desired function:▷"Driver's door only"
Only the driver's door is unlocked.
Pressing again unlocks the entire vehi‐
cle.▷"All doors"
The entire vehicle is unlocked.
Hood Depending on optional features and country
version, this setting is not offered in some cases.
1."Settings"2."Doors/key"Seite 43Opening and closingControls45
Page 58 of 230
3. Select the symbol.4.Select the desired function:▷"Front compartment lid"
The hood is unlocked.▷"Front lid and door(s)"
The hood and the doors are unlocked.
Without alarm system: tailgate Depending on optional features and country
version, this setting is not offered in some cases.
1."Settings"2."Doors/key"3. Select the symbol.4.Select the desired function:▷"Tailgate"
The tailgate is unlocked.▷"Tailgate + door(s)"
The tailgate and the doors are un‐
locked.
Confirmation signals from the vehicle
The settings are saved in the active profile, re‐
fer to page 37.
1."Settings"2."Doors/key"3.Deactivate or activate the desired confir‐
mation signals.▷"Acoustic sig. lock/unlock"▷"Flash when lock/unlock"
Automatic locking
The settings are saved in the active profile, re‐fer to page 37.
1."Settings"2."Doors/key"3.Select the desired function:▷"Lock if no door is opened"The vehicle locks automatically after a
short period of time if no door is
opened.
Without alarm system: headlamp
courtesy delay feature/standing
climate control
The settings are saved in the active profile, re‐
fer to page 37.
1."Settings"2."Doors/key"3. Select the symbol.4.Select the desired function:▷"Pathway lighting"
Headlight courtesy delay feature▷"Comfort climate control"
Stationary climate control
Alarm system
The conceptWhen the vehicle is locked, the vehicle alarm
system responds to:
▷Opening a door, the hood or the tailgate.▷Movements in the interior.▷Changes in the vehicle tilt, e. g., during at‐
tempts at stealing a wheel.▷Disconnected battery voltage.
The alarm system briefly signals tampering:
▷By sounding an acoustic alarm.▷By switching on the hazard warning sys‐
tem.▷By flashing the daytime running lights.
Arming and disarming the alarm
system
When you unlock or lock the vehicle, either
with the remote control or via the Comfort Ac‐
cess, the alarm system is disarmed or armed at
the same time.
Seite 44ControlsOpening and closing46
Page 59 of 230
Door lock and armed alarm systemThe alarm system is triggered when the door is
opened, when the vehicle is unlocked via the
door lock.
Tailgate and armed alarm system
The tailgate can be opened even when the alarm system is armed.
After the tailgate is closed, it is locked and
monitored again when the doors are locked.
The hazard warning system flashes once.
Panic mode
You can trigger the alarm system if you find
yourself in a dangerous situation.
Press button on the remote control for
at least 3 seconds.
To reel off the alarm: press any button.
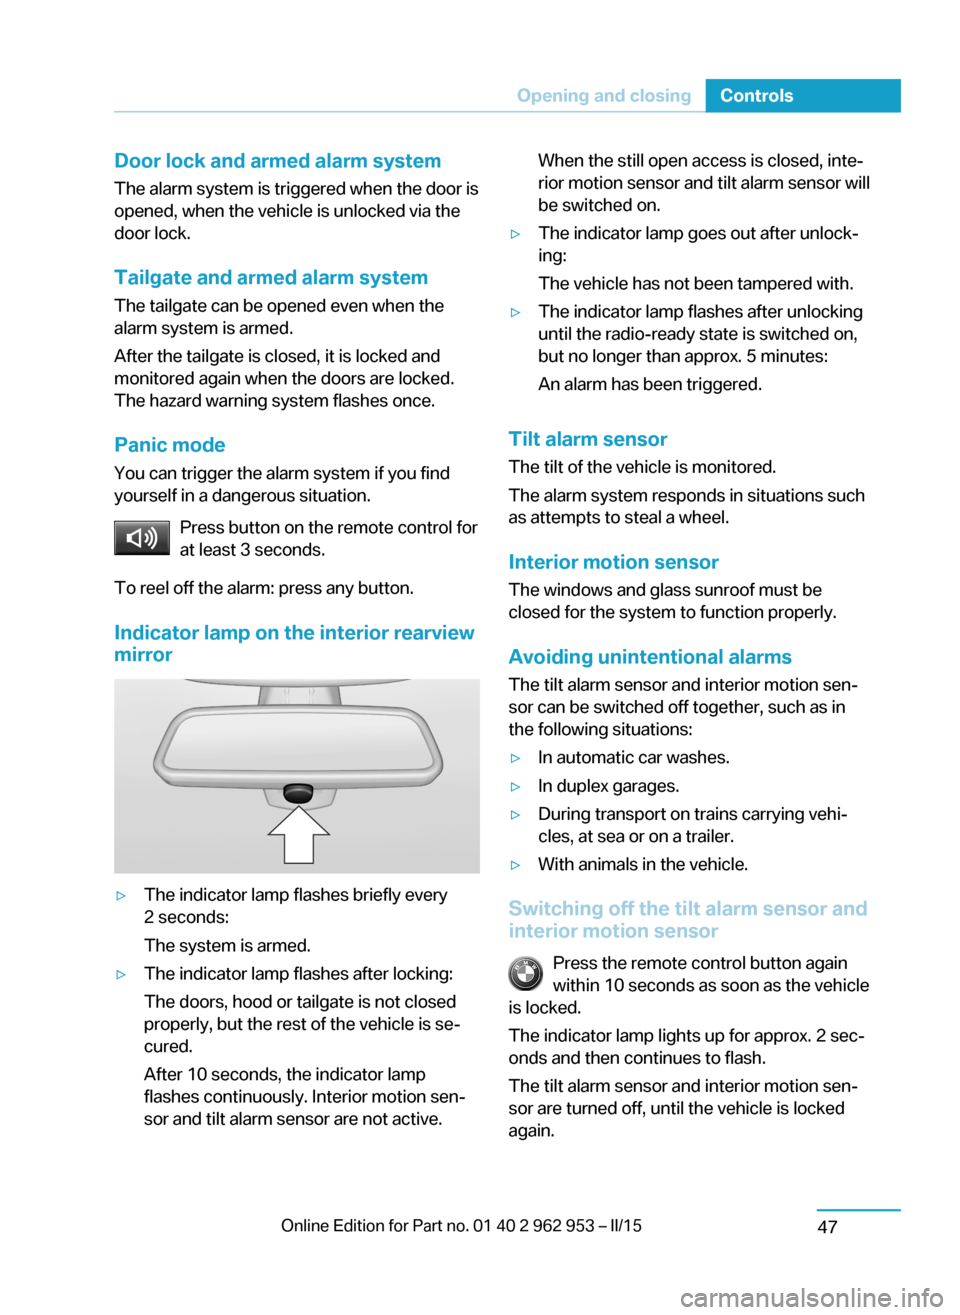
Indicator lamp on the interior rearview
mirror▷The indicator lamp flashes briefly every
2 seconds:
The system is armed.▷The indicator lamp flashes after locking:
The doors, hood or tailgate is not closed
properly, but the rest of the vehicle is se‐
cured.
After 10 seconds, the indicator lamp
flashes continuously. Interior motion sen‐
sor and tilt alarm sensor are not active.When the still open access is closed, inte‐
rior motion sensor and tilt alarm sensor will
be switched on.▷The indicator lamp goes out after unlock‐
ing:
The vehicle has not been tampered with.▷The indicator lamp flashes after unlocking
until the radio-ready state is switched on,
but no longer than approx. 5 minutes:
An alarm has been triggered.
Tilt alarm sensor The tilt of the vehicle is monitored.
The alarm system responds in situations such
as attempts to steal a wheel.
Interior motion sensor The windows and glass sunroof must be
closed for the system to function properly.
Avoiding unintentional alarms The tilt alarm sensor and interior motion sen‐
sor can be switched off together, such as in
the following situations:
▷In automatic car washes.▷In duplex garages.▷During transport on trains carrying vehi‐
cles, at sea or on a trailer.▷With animals in the vehicle.
Switching off the tilt alarm sensor and
interior motion sensor
Press the remote control button again
within 10 seconds as soon as the vehicle
is locked.
The indicator lamp lights up for approx. 2 sec‐
onds and then continues to flash.
The tilt alarm sensor and interior motion sen‐
sor are turned off, until the vehicle is locked again.
Seite 45Opening and closingControls47
Page 62 of 230
The glass sunroof reopens slightly.Danger of jamming even with pinch pro‐
tection
Despite the pinch protection system, check
that the glass sunroof's closing path is clear;
otherwise, the closing action may not be inter‐
rupted in certain extreme situations, such as
when thin objects are present.◀
Closing from the open position
without pinch protection
E. g. if there is an external danger, proceed as
follows:1.Press the reel forward beyond the resist‐
ance point and hold.
The pinch protection is limited and the
glass sunroof reopens slightly if the closing
force exceeds a certain margin.2.Press the reel forward again beyond the re‐
sistance point and hold until the glass sun‐
roof closes without jam protection. Make
sure that the closing area is clear.
Closing from the raised position
without pinch protection
If there is an external danger, push the reel for‐
ward past the resistance point and hold it.
The glass sunroof closes without jam protec‐
tion.
Initializing after a power failure After a power failure during the opening or
closing process, the glass sunroof can only be
operated to a limited extent.
Initializing the system
The system can be initialized when the vehicle
is stationary and drive readiness is established.
During the initialization, the glass sunroof
closes without jam protection.
Keep the closing path clear
Monitor closing and make sure that the
closing path of the glass sunroof is clear; oth‐
erwise, injuries may result.◀
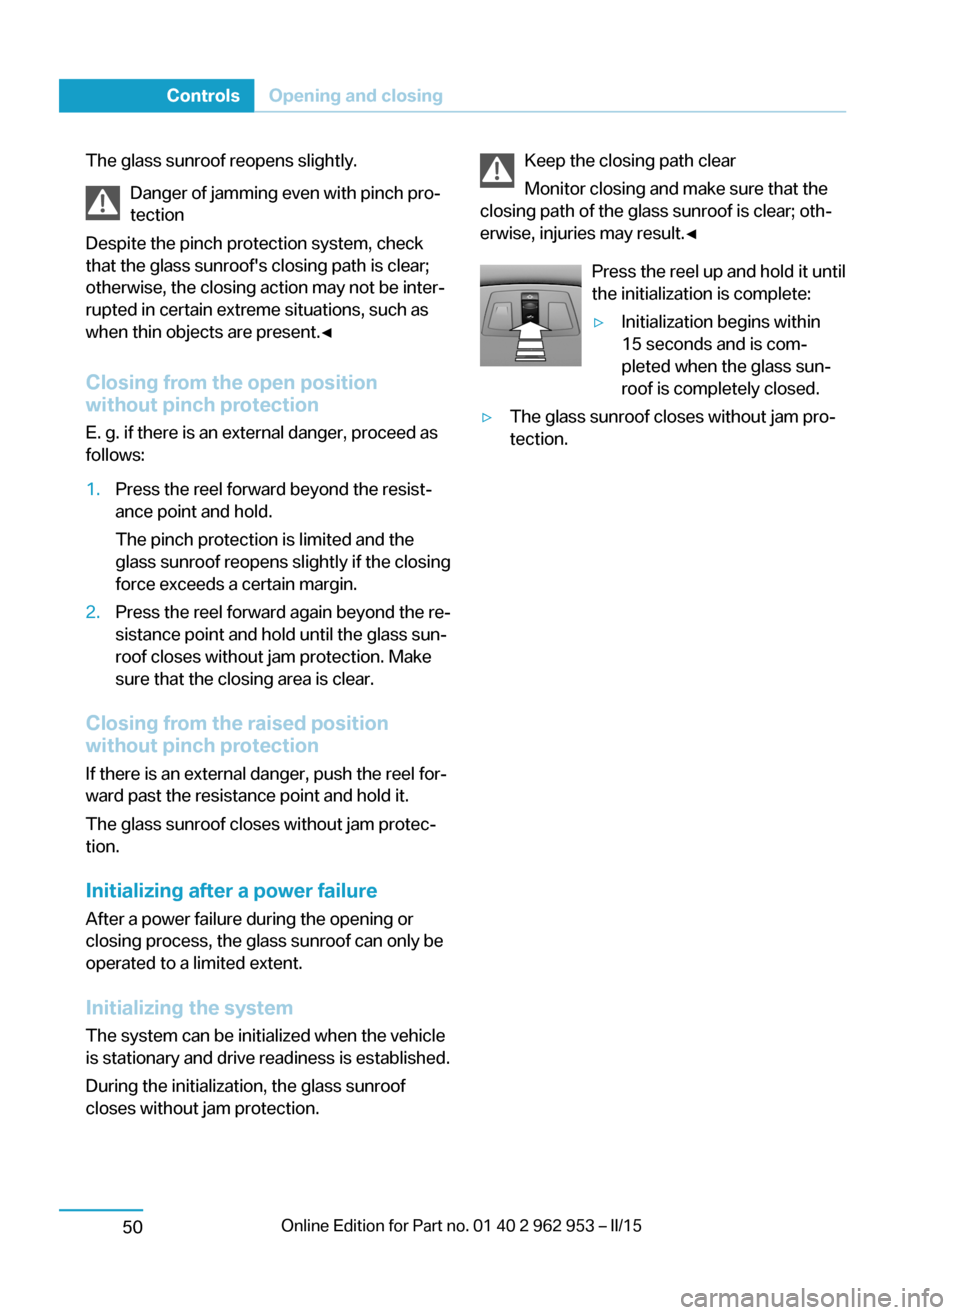
Press the reel up and hold it until
the initialization is complete:▷Initialization begins within
15 seconds and is com‐
pleted when the glass sun‐
roof is completely closed.▷The glass sunroof closes without jam pro‐
tection.Seite 48ControlsOpening and closing50
Page 63 of 230
AdjustingVehicle features and options
This chapter describes all standard, country-
specific and optional features offered with the
series. It also describes features that are not
necessarily available in your car, e. g., due to
the selected options or country versions. This
also applies to safety-related functions and
systems.
Sitting safely
The ideal seating position can make a vital
contribution to relaxed, fatigue-free driving.
The seating position plays an important role in
an accident in combination with:▷Safety belts, refer to page 53.▷Head restraints, refer to page 54.▷Airbags, refer to page 92.
Seats
Hints Do not adjust the seat while driving
Do not adjust the driver's seat while driv‐
ing, or the seat could respond with unexpected
movement and the ensuing loss of vehicle
control could lead to an accident.◀
Do not incline the backrest too far to the
rear
Also on the front passenger side, do not incline
the backrest on the front passenger side too far to the rear while driving, or there is a risk of
slipping under the safety belt in the event of an
accident. This would eliminate the protection
normally provided by the belt.◀
Keep the movement area unobstructed
When changing the seat position, keep
the seat's area of movement unobstructed;
otherwise, people might get injured or objects
damaged.◀
Adjusting seats
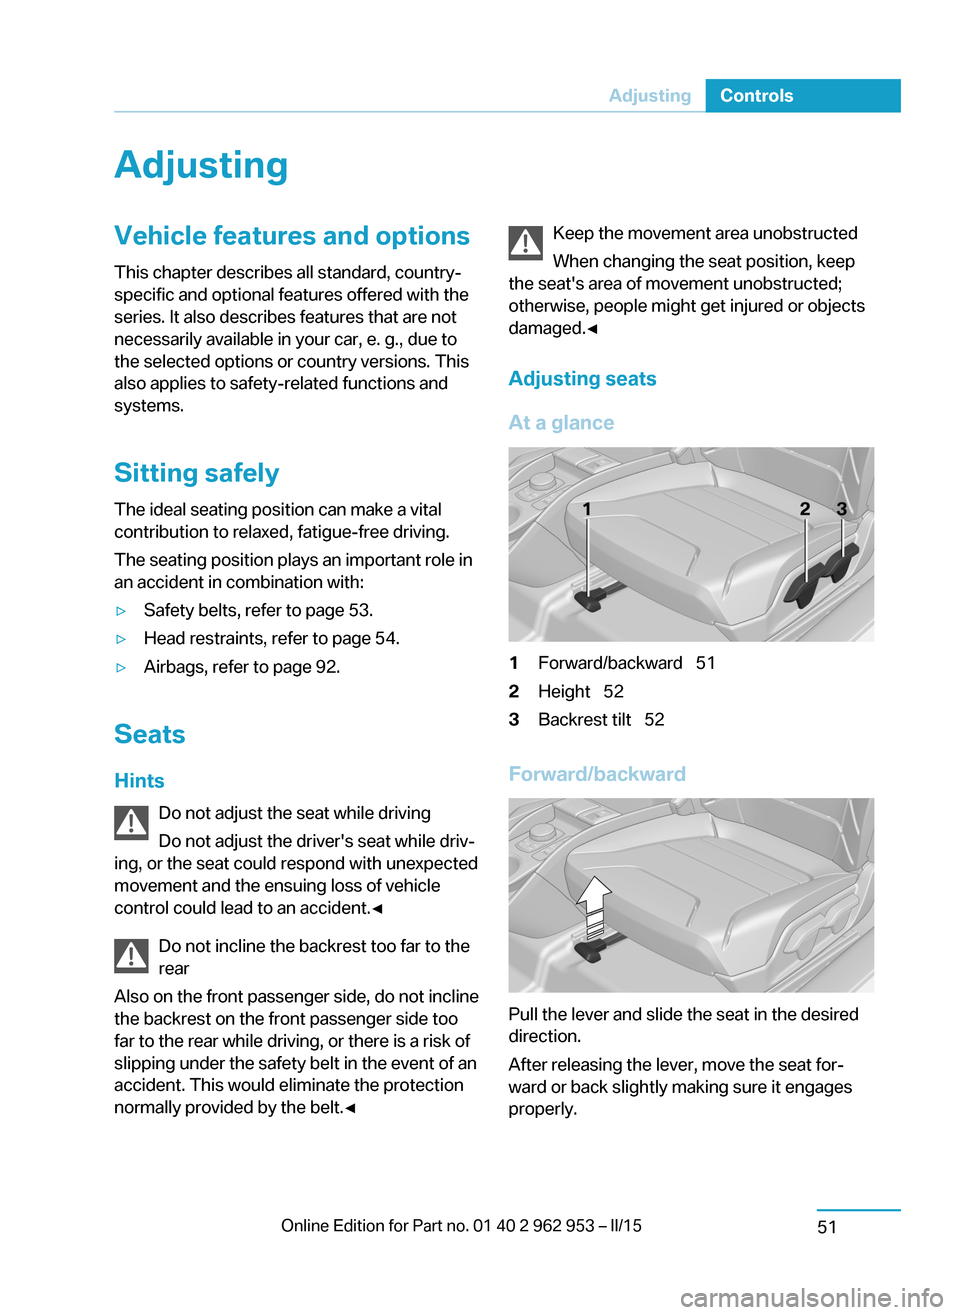
At a glance1Forward/backward 512Height 523Backrest tilt 52
Forward/backward
Pull the lever and slide the seat in the desired
direction.
After releasing the lever, move the seat for‐
ward or back slightly making sure it engages
properly.
Seite 49AdjustingControls51
Page 67 of 230
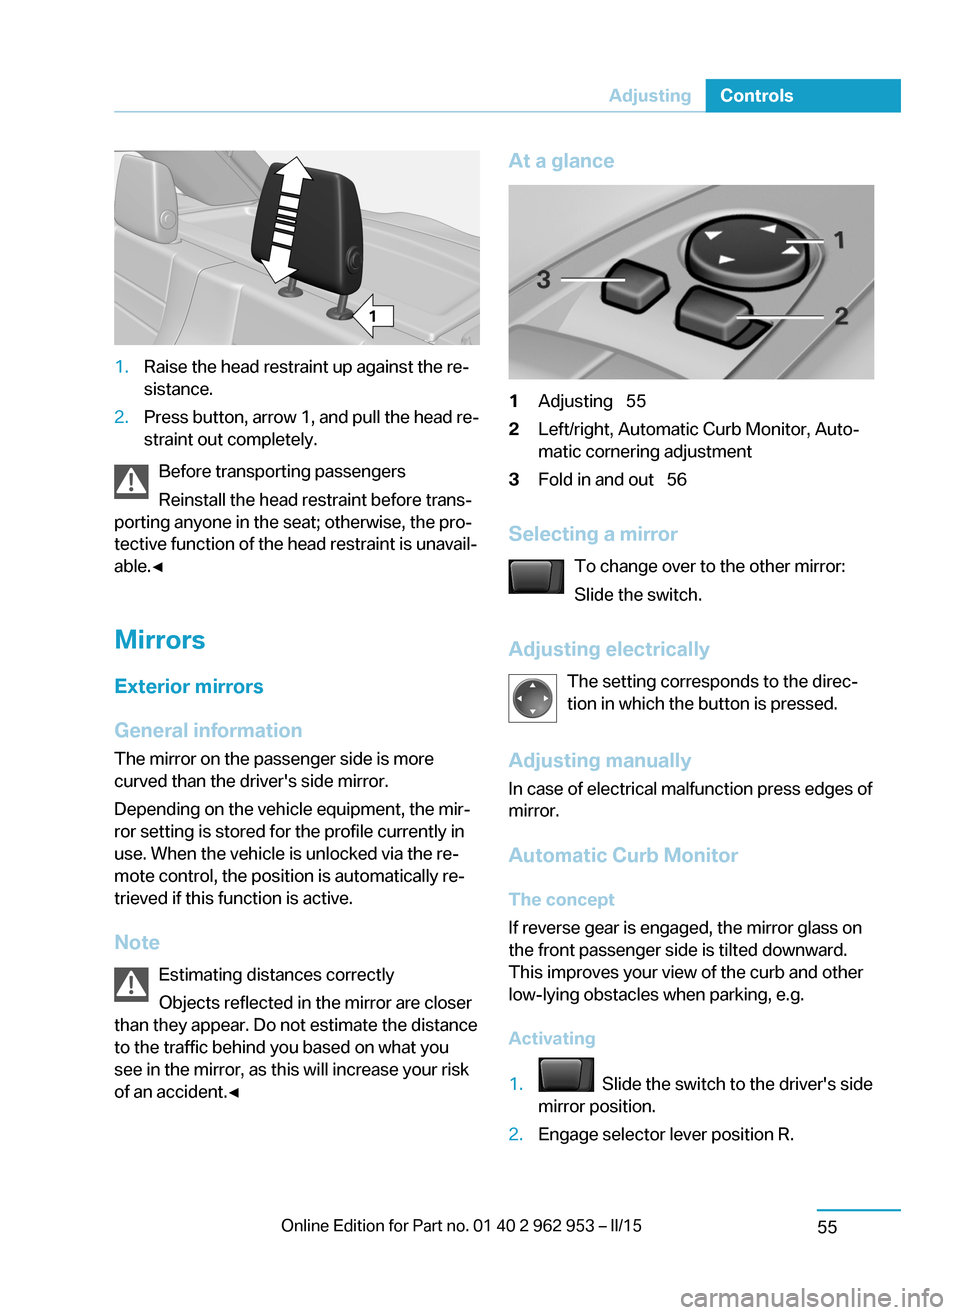
1.Raise the head restraint up against the re‐
sistance.2.Press button, arrow 1, and pull the head re‐
straint out completely.
Before transporting passengers
Reinstall the head restraint before trans‐
porting anyone in the seat; otherwise, the pro‐
tective function of the head restraint is unavail‐
able.◀
Mirrors
Exterior mirrors
General information The mirror on the passenger side is more
curved than the driver's side mirror.
Depending on the vehicle equipment, the mir‐
ror setting is stored for the profile currently in
use. When the vehicle is unlocked via the re‐
mote control, the position is automatically re‐
trieved if this function is active.
Note Estimating distances correctly
Objects reflected in the mirror are closer
than they appear. Do not estimate the distance
to the traffic behind you based on what you
see in the mirror, as this will increase your risk of an accident.◀
At a glance1Adjusting 552Left/right, Automatic Curb Monitor, Auto‐
matic cornering adjustment3Fold in and out 56
Selecting a mirror
To change over to the other mirror:
Slide the switch.
Adjusting electrically The setting corresponds to the direc‐
tion in which the button is pressed.
Adjusting manually
In case of electrical malfunction press edges of
mirror.
Automatic Curb MonitorThe concept
If reverse gear is engaged, the mirror glass on
the front passenger side is tilted downward.
This improves your view of the curb and other
low-lying obstacles when parking, e.g.
Activating
1. Slide the switch to the driver's side
mirror position.2.Engage selector lever position R.Seite 53AdjustingControls55
Page 68 of 230
Deactivating
Slide the switch to the passenger side mirror
position.
Automatic cornering adjustment The concept
During right-hand turns, the mirror glass is
turned. Provides a better view of the vehicle
sideways.
Note Personal responsibility
The system does not serve as a substi‐
tute for the driver's personal judgment of the
traffic situation.
Be aware of the traffic situation and the vehi‐
cle's surroundings at all times, otherwise acci‐
dents are still possible depending on the situa‐
tion.◀
Requirements▷Vehicle moving.▷Speed less than 12 mph/20 km/h.▷Turn signal is set.
Activating
Slide the switch to the driver's side
mirror position.
Deactivating
Slide the switch to the passenger side mirror
position.
Fold in and out Press button.
Possible at speeds up to approx.
15 mph/20 km/h.
E. g. this is advantageous
▷In car washes.▷In narrow streets.▷For folding mirrors back out that were
folded away manually.
Mirrors that were folded in are folded out auto‐
matically at a speed of approx.
25 mph/40 km/h.
Fold in the mirror in a car wash
Before washing the car in an automatic
car wash, fold in the exterior mirrors by hand or
with the button; otherwise, the mirrors could
be damaged, depending on the width of the
vehicle.◀
Automatic heating
Both exterior mirrors are automatically heated
whenever drive readiness is switched on.
Automatic dimming featureBoth exterior mirrors are automatically dim‐
med. Photocells are used to control the Interior
rearview mirror, refer to page 57.
Interior rearview mirror, manually
dimmable
Flip lever
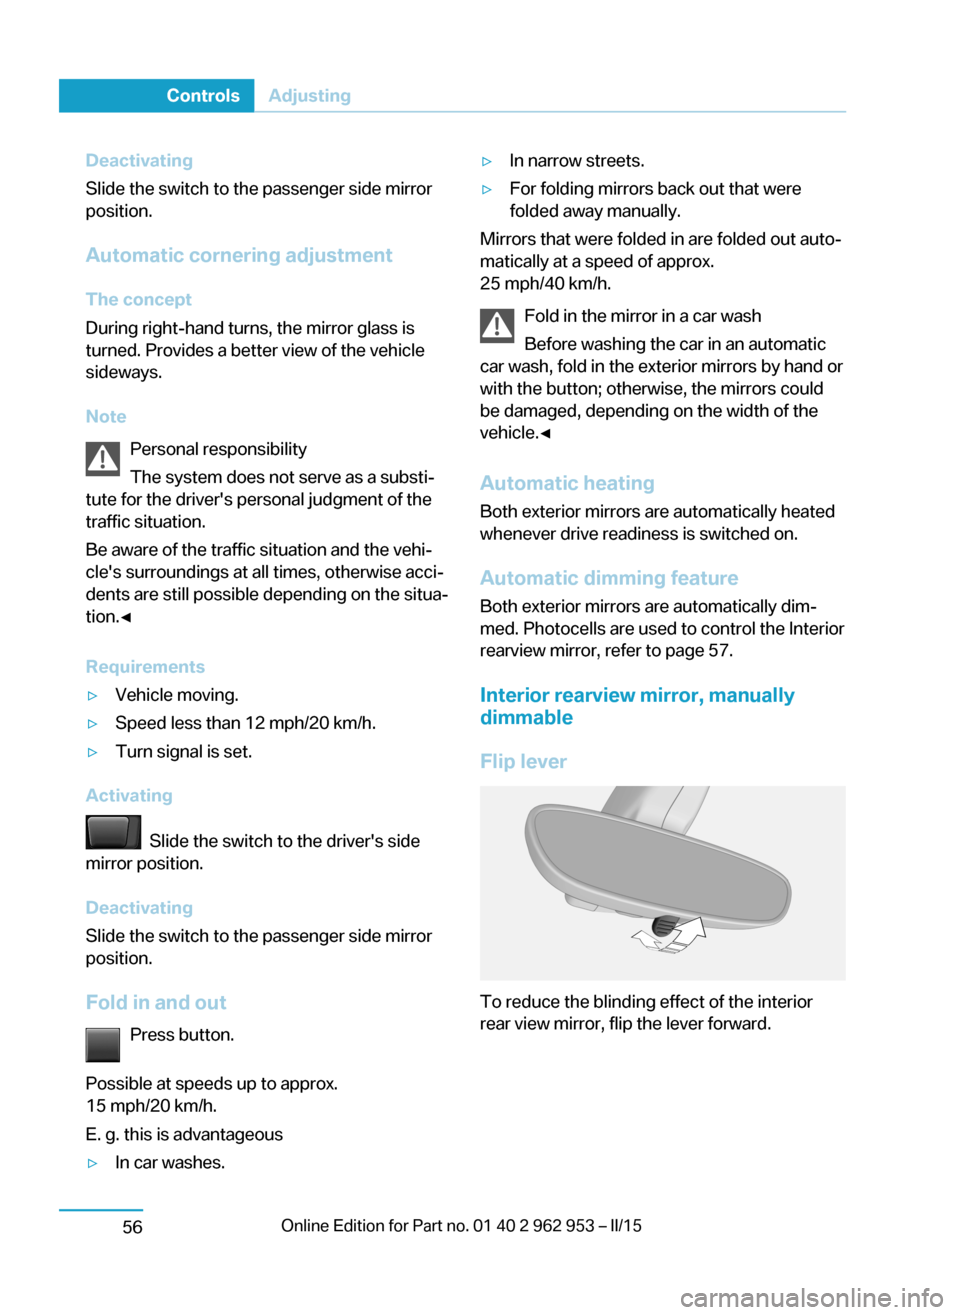
To reduce the blinding effect of the interior
rear view mirror, flip the lever forward.
Seite 54ControlsAdjusting56
Page 72 of 230
Properly engage the lower LATCH an‐
chors
Make sure that the lower LATCH anchors have
properly engaged and that the child restraint
system is resting snugly against the backrest;
otherwise, the degree of protection may be re‐
duced.◀
Before mounting the LATCH child restraint
system, pull the belt away from the child re‐
straint system.
The corresponding symbol shows the
mounts for the lower LATCH anchors.
Position
Attach to the lower LATCH anchors located
behind the indicated covers.
Assembly of LATCH child restraint
systems
1.Mount the child restraint system; refer to
the user's manual of the system.2.Ensure that both LATCH anchors are prop‐
erly connected.Child restraint fixing system with a
tether strap
Mounting points
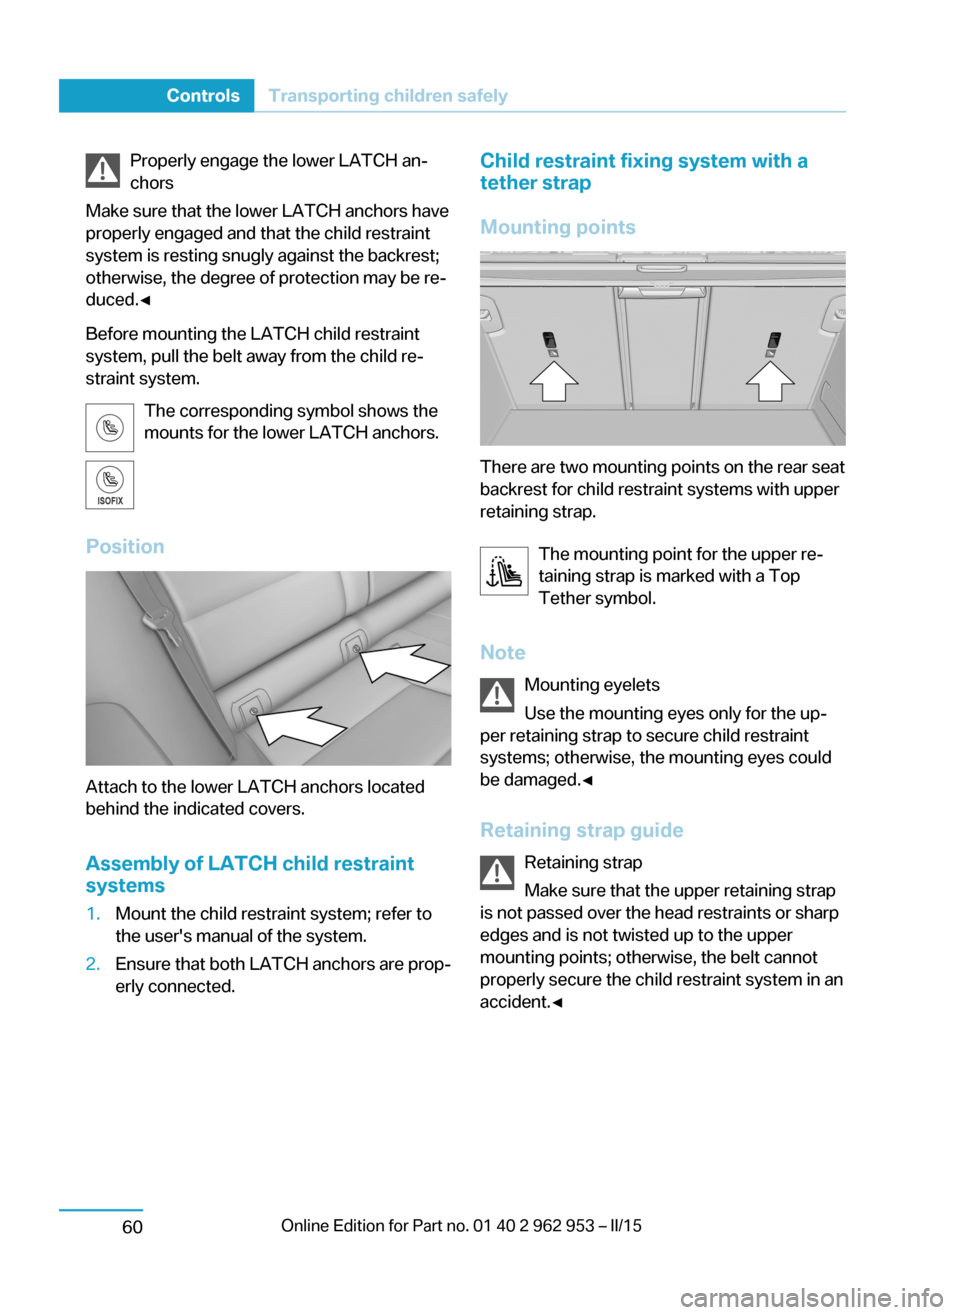
There are two mounting points on the rear seat
backrest for child restraint systems with upper
retaining strap.
The mounting point for the upper re‐
taining strap is marked with a Top
Tether symbol.
Note Mounting eyelets
Use the mounting eyes only for the up‐
per retaining strap to secure child restraint
systems; otherwise, the mounting eyes could
be damaged.◀
Retaining strap guide Retaining strap
Make sure that the upper retaining strap
is not passed over the head restraints or sharp
edges and is not twisted up to the upper
mounting points; otherwise, the belt cannot
properly secure the child restraint system in an
accident.◀
Seite 58ControlsTransporting children safely60
Page 77 of 230
Engaging selector lever positions
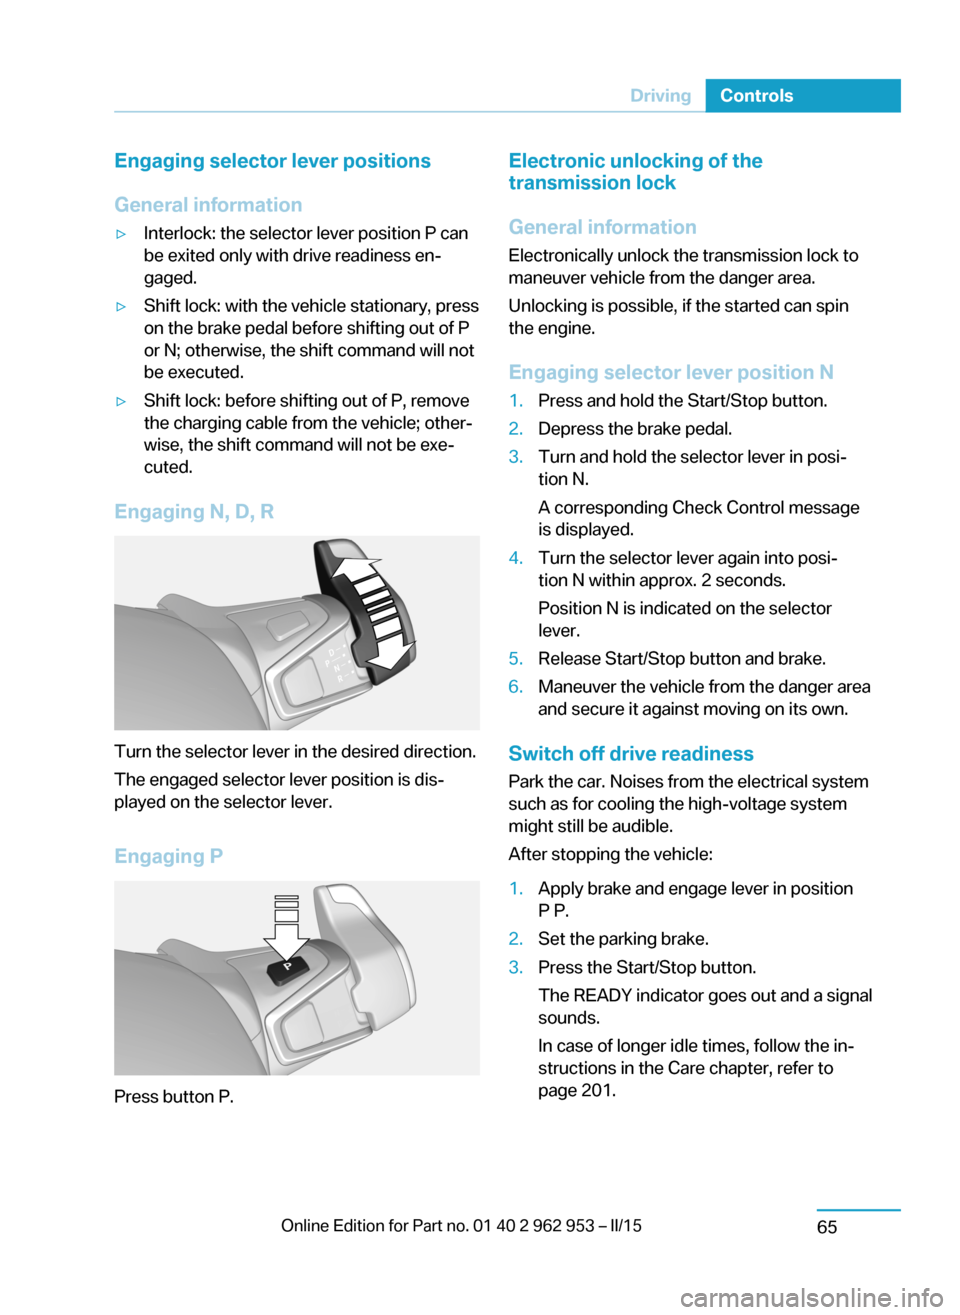
General information▷Interlock: the selector lever position P can
be exited only with drive readiness en‐
gaged.▷Shift lock: with the vehicle stationary, press
on the brake pedal before shifting out of P
or N; otherwise, the shift command will not
be executed.▷Shift lock: before shifting out of P, remove
the charging cable from the vehicle; other‐
wise, the shift command will not be exe‐
cuted.
Engaging N, D, R
Turn the selector lever in the desired direction.
The engaged selector lever position is dis‐
played on the selector lever.
Engaging P
Press button P.
Electronic unlocking of the
transmission lock
General information
Electronically unlock the transmission lock to
maneuver vehicle from the danger area.
Unlocking is possible, if the started can spin
the engine.
Engaging selector lever position N1.Press and hold the Start/Stop button.2.Depress the brake pedal.3.Turn and hold the selector lever in posi‐
tion N.
A corresponding Check Control message
is displayed.4.Turn the selector lever again into posi‐
tion N within approx. 2 seconds.
Position N is indicated on the selector
lever.5.Release Start/Stop button and brake.6.Maneuver the vehicle from the danger area
and secure it against moving on its own.
Switch off drive readiness
Park the car. Noises from the electrical system
such as for cooling the high-voltage system might still be audible.
After stopping the vehicle:
1.Apply brake and engage lever in position
P P.2.Set the parking brake.3.Press the Start/Stop button.
The READY indicator goes out and a signal
sounds.
In case of longer idle times, follow the in‐
structions in the Care chapter, refer to
page 201.Seite 63DrivingControls65
Page 79 of 230
Exemplary traffic situations
If a deceleration operation is foreseeable while
driving, this can be used for energy recovery.
The following exemplary driving situations may
show that:▷Decelerating downhill.▷Deceleration before a red light.
Avoid late or abrupt braking. Instead, deceler‐
ate the vehicle using energy recovery.
Coasting
The electric drive makes it possible to roll with‐
out consuming energy. This driving condition
is referred to as coasting.
Proactive driving reduces energy consumption
and increases the range.
With vehicle rolling, READY is displayed in the
instrument cluster. With vehicle rolling, no en‐
ergy is recovered.
Exemplary traffic situations
If a route can be traveled without anticipated
need for braking, it is advantageous to roll.
The following exemplary driving situations may
show that:
▷Rolling on a straight downhill route without
obstacles.▷Coasting on a route without obstacles.
Avoid late or abrupt braking.
Range Extender
Increase range
If the charging state of the high-voltage battery
drops during travel to a minimum value, the
Range Extender starts and supplies the re‐
quired electrical energy for driving on.
The symbol on the charging state indicator
designates a Range Extender reel-on time.
The Range Extender controls its output auto‐
matically, turns itself off and restarts according
to the driving situation.
The high-voltage battery will not be charged
by the Range Extender.
Automatic maintenance run
To ensure that the Range Extender functions
properly even during longer periods of non- use, the Range Extender is automatically acti‐
vated for a few minutes at certain intervals dur‐
ing the trip. Respective Check Control
messages indicate the dry run. Should that oc‐
cur at an unfavorable time you may cancel the
dry run by pressing the Start/Stop button. It
postpones the dry run.
Should the high-voltage battery be fully
charged or if there is not enough gas in the
tank then a dry run will not be executed.
Heavily discharged high-voltage
battery
If the high-voltage battery is heavily dis‐
charged during the trip, the performance and
some comfort features are reduced step-by-
step to extend the range.
Heated high-voltage batteryWith a stationary dirt In exceptional cases, it is possible that the
high-voltage battery heats up sharply when the
vehicle is stationary. E. g. with extreme exter‐
nal temperatures and direct solar radiation.
With a overheated high-voltage battery, drive
readiness cannot be switched on.
A Check Control message is displayed.
Another message will indicate when drive readiness is available again.
While driving
If the high-voltage battery overheats during the
trip, the performance is reduced step-by-step
in order to cool down the battery. The ePO‐
WER performance display in the instrument
cluster returns in the process. When tempera‐
ture increases further, park the vehicle until theSeite 65DrivingControls67