BMW M3 CONVERTIBLE 2001 E46 Repair Manual
Manufacturer: BMW, Model Year: 2001, Model line: M3 CONVERTIBLE, Model: BMW M3 CONVERTIBLE 2001 E46Pages: 195, PDF Size: 1.96 MB
Page 61 of 195
61n
IndexDataTechnologyRepairsCar careControlsOverview
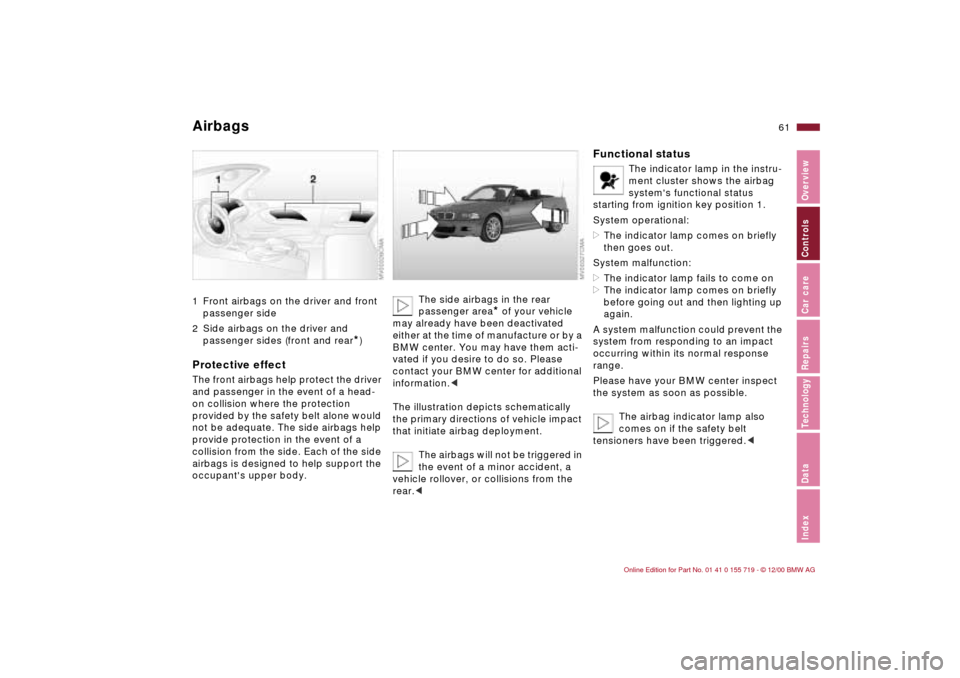
Airbags 1 Front airbags on the driver and front
passenger side
2 Side airbags on the driver and
passenger sides (front and rear
*)
Protective effectThe front airbags help protect the driver
and passenger in the event of a head-
on collision where the protection
provided by the safety belt alone would
not be adequate. The side airbags help
provide protection in the event of a
collision from the side. Each of the side
airbags is designed to help support the
occupant's upper body.
The side airbags in the rear
passenger area
* of your vehicle
may already have been deactivated
either at the time of manufacture or by a
BMW center. You may have them acti-
vated if you desire to do so. Please
contact your BMW center for additional
information.<
The illustration depicts schematically
the primary directions of vehicle impact
that initiate airbag deployment.
The airbags will not be triggered in
the event of a minor accident, a
vehicle rollover, or collisions from the
rear.<
Functional status
The indicator lamp in the instru-
ment cluster shows the airbag
system's functional status
starting from ignition key position 1.
System operational:
>The indicator lamp comes on briefly
then goes out.
System malfunction:
>The indicator lamp fails to come on
>The indicator lamp comes on briefly
before going out and then lighting up
again.
A system malfunction could prevent the
system from responding to an impact
occurring within its normal response
range.
Please have your BMW center inspect
the system as soon as possible.
The airbag indicator lamp also
comes on if the safety belt
tensioners have been triggered.<
Page 62 of 195

62n
AirbagsSitting correctly with airbags
For your safety, comply with the
following instructions for the
airbags. If you do not, the airbags may
not be able to provide their maximum
protection. All passengers in the vehicle
should be aware of and comply with
this information:
The airbags are supplemental restraint
devices designed to provide extra
protection; they are not a substitute for
safety belts. Wear your safety belt at all
times. The airbags will not be triggered
in the event of a minor accident, a
vehicle rollover, or collisions from the
rear. In these instances, the safety belt
provides optimal protection.
Airbags are located under cover panels
in the steering wheel, in the instrument
panel and in the side trim panels in the
front and rear
*.
Adjust your seat to a position that
provides maximum distance between
you and the steering wheel, the instru-
ment panel and the door while still
allowing comfortable and safe access
to all vehicle controls.
To avoid sustaining hand and arm inju-
ries, always grasp the steering wheel
on the rim with the hands at the 9 and
3 o'clock positions. Do not place your
hands on the center pad.
Never allow any objects to obstruct the
area between the airbag and an occu-
pant.
Do not use the cover panel above the
passenger side airbag as a storage
area.
Do not apply adhesive materials to the
cover panels of the airbags, cover them
or modify them in any other way.
Do not install a rear-facing child
restraint system in the front passenger
seat of this vehicle.
Children under 13 years of age and
children less than 5 feet (150 cm) tall
should ride only in the rear seat.
Infants or small children should never
be held on the lap of a passenger.
If your vehicle is equipped with side
airbags in the rear passenger area
*, be
sure that child restraints are mounted
correctly and provided with the
greatest-possible distance between the
airbags in the side trim panels. Do not
allow children to lean out of the child's
seat in the direction of the side trim
panels. If they do so, serious injuries
can occur if the airbag is triggered.
(infants and small children in appro-
priate child restraint systems; larger
children and adults using the safety
belts). Never let an occupant's head
rest near or on a side airbag because
the inflating airbag could cause a
serious or fatal injury. Please note that
the word "Airbag" imprinted on the door
trim panel indicates the airbag's loca-
tion.
Accident research shows that the
safest place for children in an automo-
bile is in the rear seat. However, a child
sitting in the rear seat and not properly
restrained may place his or her head on
or near the airbag, if so equipped. For
example, a child — even though belted
— may fall asleep with his or her head
against the side airbag. It may be diffi-
cult for a driver to ensure that children
in the rear seat will remain properly
positioned at all times and not place
their heads on or near the side airbag.
Therefore, we recommend that the rear
seat side airbags, if so equipped, be
deactivated if children will travel in the
rear seat.
The rear seat side airbags may already
have been deactivated, either at the
time of manufacture or by a BMW
Page 63 of 195
63n
IndexDataTechnologyRepairsCar careControlsOverview
Airbagscenter. Labels in the door opening
should indicate the status of your rear
seat side airbags. If you are uncertain of
their status, or wish to have the airbags
activated or deactivated, please
contact your BMW center.<
Even when all these guidelines are
observed, there is still a small residual
risk of injuries to the face, hands and
arms occurring in isolated instances.
The ignition and inflation noise may
induce a mild temporary hearing loss in
sensitive individuals.
For additional information concerning
the airbag system, refer to pages 139
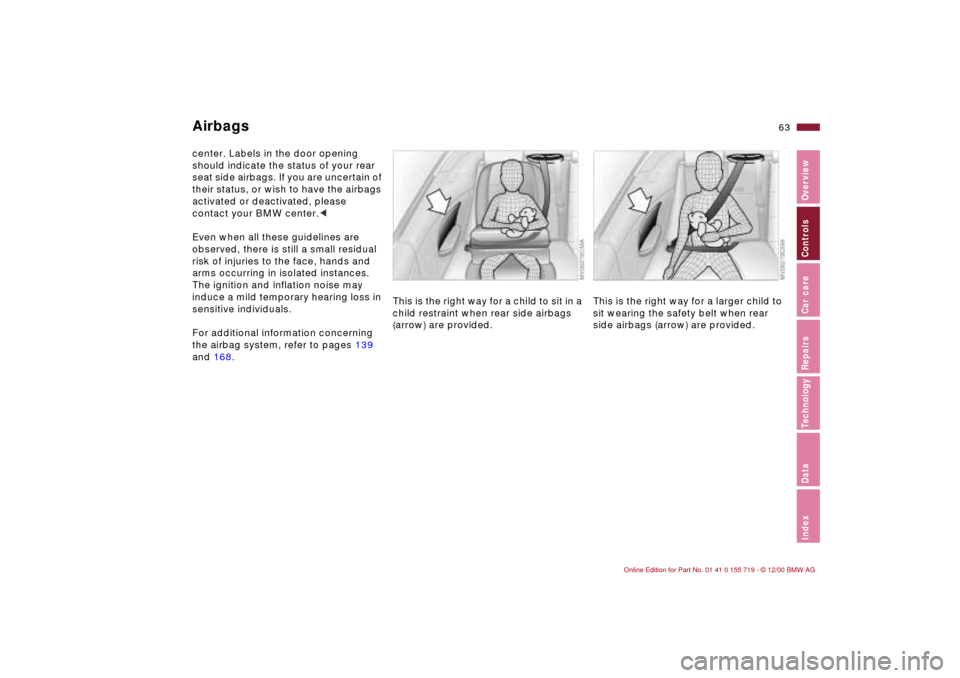
and 168.This is the right way for a child to sit in a
child restraint when rear side airbags
(arrow) are provided.
This is the right way for a larger child to
sit wearing the safety belt when rear
side airbags (arrow) are provided.
Page 64 of 195
64n
Rollover protection system In the event of an accident or some
other critical driving situation (extreme
tilting in the longitudinal or transverse
axis, loss of contact with the ground),
the rollover protection system will be
automatically activated. The protective
bars located in the rear head restraints
extend upward within fractions of a
second.
In addition to the integrated rollover bar
in the windshield frame, the rollover
protection system can help provide all
the vehicle occupants with necessary
headroom in certain rollover accidents.
Always keep the travel path clear
for the rollover protection system.
Never attach any type of protective
coverings to the head restraints.
In the event of less serious accidents,
the safety belt will protect you and,
depending on the nature and severity of
the accident, the safety belt tensioner
and the multi-stage airbag restraint
system will as well.<
If, after being automatically triggered,
the protective function is not needed,
then the rollover protection system can
be lowered back into place. No special
tool is needed for this.
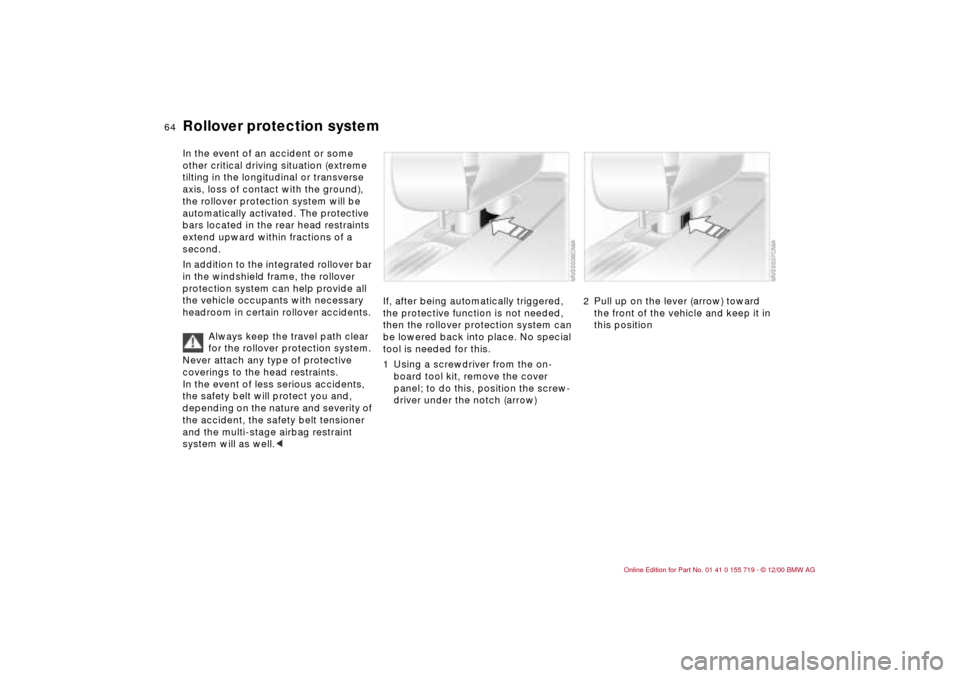
1 Using a screwdriver from the on-
board tool kit, remove the cover
panel; to do this, position the screw-
driver under the notch (arrow)
2 Pull up on the lever (arrow) toward
the front of the vehicle and keep it in
this position
Page 65 of 195
65n
IndexDataTechnologyRepairsCar careControlsOverview
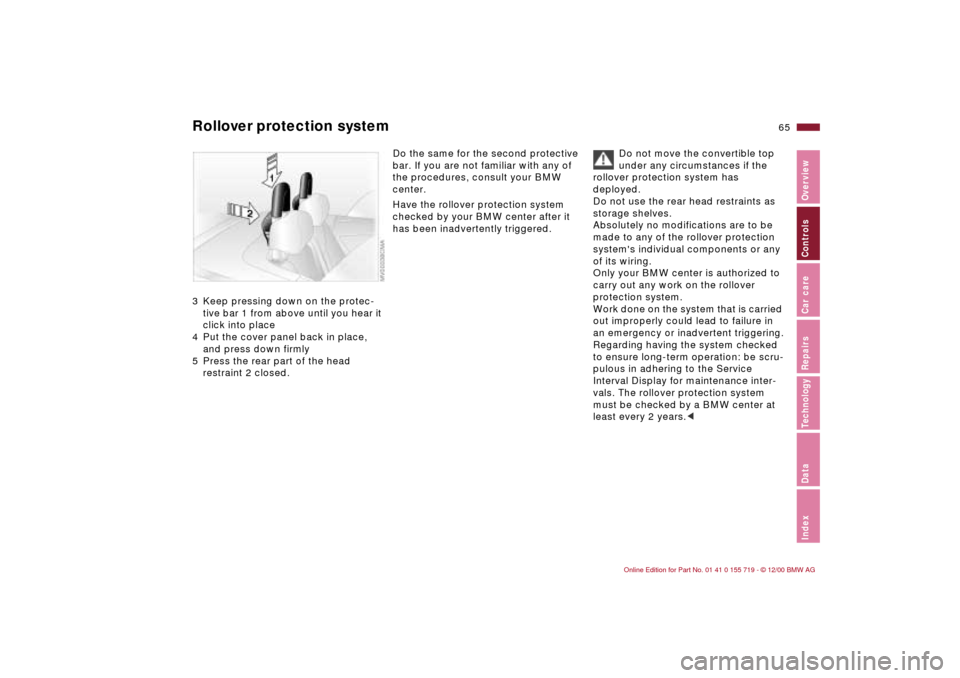
Rollover protection system3 Keep pressing down on the protec-
tive bar 1 from above until you hear it
click into place
4 Put the cover panel back in place,
and press down firmly
5 Press the rear part of the head
restraint 2 closed.
Do the same for the second protective
bar. If you are not familiar with any of
the procedures, consult your BMW
center.
Have the rollover protection system
checked by your BMW center after it
has been inadvertently triggered.Do not move the convertible top
under any circumstances if the
rollover protection system has
deployed.
Do not use the rear head restraints as
storage shelves.
Absolutely no modifications are to be
made to any of the rollover protection
system's individual components or any
of its wiring.
Only your BMW center is authorized to
carry out any work on the rollover
protection system.
Work done on the system that is carried
out improperly could lead to failure in
an emergency or inadvertent triggering.
Regarding having the system checked
to ensure long-term operation: be scru-
pulous in adhering to the Service
Interval Display for maintenance inter-
vals. The rollover protection system
must be checked by a BMW center at
least every 2 years.<
Page 66 of 195
66n
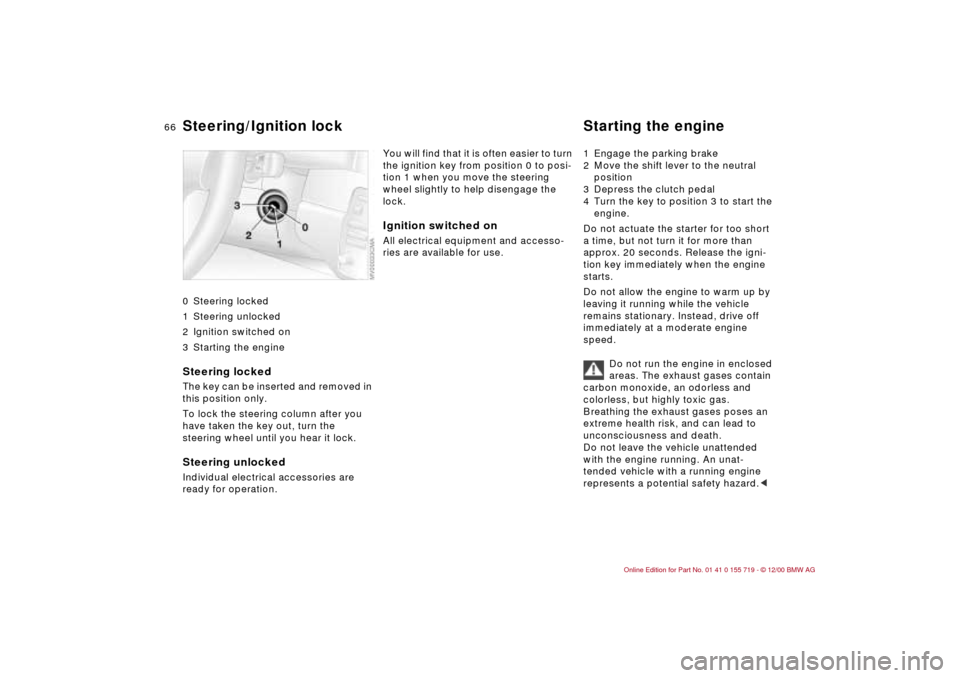
0 Steering locked
1 Steering unlocked
2 Ignition switched on
3 Starting the engine
Steering locked The key can be inserted and removed in
this position only.
To lock the steering column after you
have taken the key out, turn the
steering wheel until you hear it lock.Steering unlocked Individual electrical accessories are
ready for operation.
You will find that it is often easier to turn
the ignition key from position 0 to posi-
tion 1 when you move the steering
wheel slightly to help disengage the
lock. Ignition switched onAll electrical equipment and accesso-
ries are available for use. 1 Engage the parking brake
2 Move the shift lever to the neutral
position
3 Depress the clutch pedal
4 Turn the key to position 3 to start the
engine.
Do not actuate the starter for too short
a time, but not turn it for more than
approx. 20 seconds. Release the igni-
tion key immediately when the engine
starts.
Do not allow the engine to warm up by
leaving it running while the vehicle
remains stationary. Instead, drive off
immediately at a moderate engine
speed.
Do not run the engine in enclosed
areas. The exhaust gases contain
carbon monoxide, an odorless and
colorless, but highly toxic gas.
Breathing the exhaust gases poses an
extreme health risk, and can lead to
unconsciousness and death.
Do not leave the vehicle unattended
with the engine running. An unat-
tended vehicle with a running engine
represents a potential safety hazard.<
Steering/Ignition lock Starting the engine
Page 67 of 195
67n
IndexDataTechnologyRepairsCar careControlsOverview
Starting the engine Switching off the engine Parking brake If the engine does not start on the first
attempt (if it is very hot or cold, for
instance):
>Press the accelerator pedal halfway
down while engaging the starter.
Cold starts at very low temperatures,
starting at approx. 5 7 (–15 6) and at
high altitudes (over 1,000 meters):
>On the first start attempt, engage the
starter for a longer period (approx.
10 seconds)
>Press the accelerator pedal halfway
down while engaging the starter.
Engine idle speed is controlled by the
engine computer system. Increased
speeds at startup are normal and
should decrease as the engine warms
up. If engine speed does not decrease,
service is required.
To prevent the battery from
discharging, always deactivate elec-
trical devices that are not in use. Switch
the ignition off when the vehicle is not
being driven.Turn the ignition key to position 1 or 0.
Do not remove the ignition key
while the vehicle is still moving.
If you did so, the steering lock would
engage when the steering wheel is
turned.
When you leave the vehicle, always
remove the ignition key and engage the
steering lock.
Set the parking brake when parking on
steep hills, because under certain
conditions, putting the vehicle into first
or reverse gear may not be enough to
prevent it from rolling away.
The power assist is not available when
the engine is not on. This means that
more effort is required for braking.<
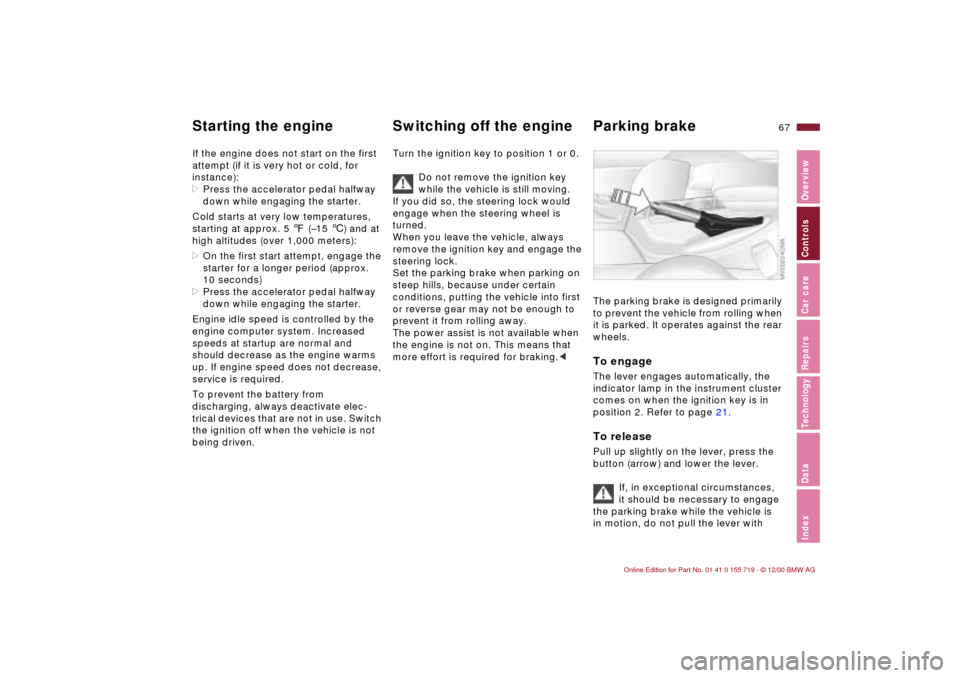
The parking brake is designed primarily
to prevent the vehicle from rolling when
it is parked. It operates against the rear
wheels. To engageThe lever engages automatically, the
indicator lamp in the instrument cluster
comes on when the ignition key is in
position 2. Refer to page 21.To releasePull up slightly on the lever, press the
button (arrow) and lower the lever.
If, in exceptional circumstances,
it should be necessary to engage
the parking brake while the vehicle is
in motion, do not pull the lever with
Page 68 of 195
68n
Parking brake Manual transmission excessive pressure. Keep your thumb
pressed against the release button
while carefully pulling up the lever to
apply moderate pressure.
Excessive pressure can lead to over-
braking and loss of traction (fishtailing)
at the rear axle.
The brake lamps do not come on when
the parking brake is engaged.
Set the parking brake when parking on
steep hills, because under certain
conditions, putting the vehicle into first
or reverse gear may not be enough to
prevent it from rolling away.<
To avoid corrosion and one-sided
braking, apply the parking brake lightly
from time to time when coasting to a
standstill (at a traffic signal, for
instance), provided that it is safe to do
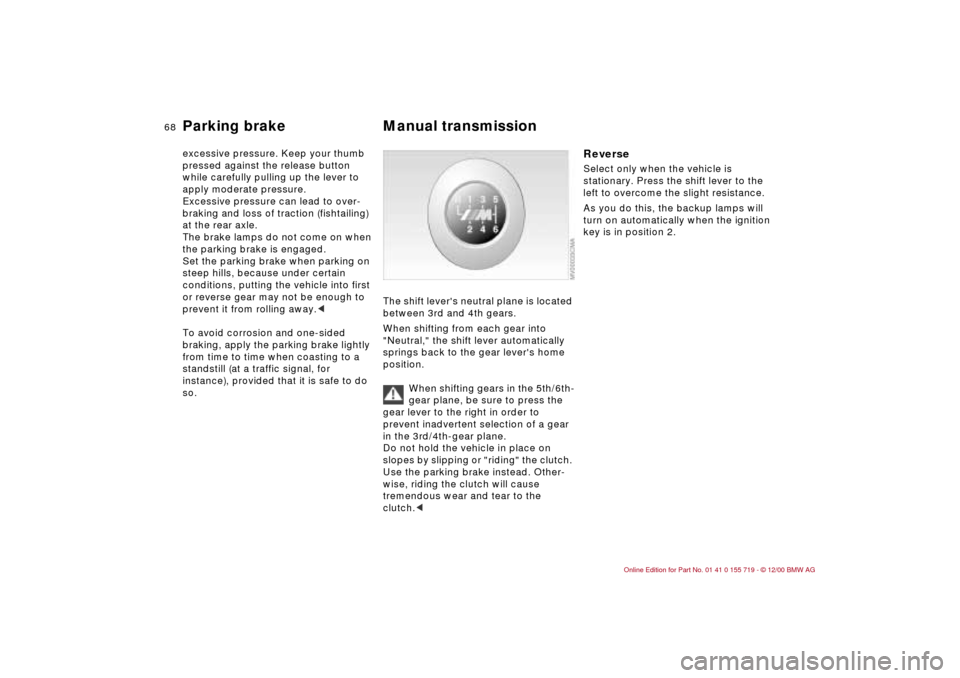
so. The shift lever's neutral plane is located
between 3rd and 4th gears.
When shifting from each gear into
"Neutral," the shift lever automatically
springs back to the gear lever's home
position.
When shifting gears in the 5th/6th-
gear plane, be sure to press the
gear lever to the right in order to
prevent inadvertent selection of a gear
in the 3rd/4th-gear plane.
Do not hold the vehicle in place on
slopes by slipping or "riding" the clutch.
Use the parking brake instead. Other-
wise, riding the clutch will cause
tremendous wear and tear to the
clutch.<
Reverse Select only when the vehicle is
stationary. Press the shift lever to the
left to overcome the slight resistance.
As you do this, the backup lamps will
turn on automatically when the ignition
key is in position 2.
Page 69 of 195
69n
IndexDataTechnologyRepairsCar careControlsOverview
Turn signal indicator/Headlamp flasher Washer/Wiper system 1 High beams (blue indicator lamp)
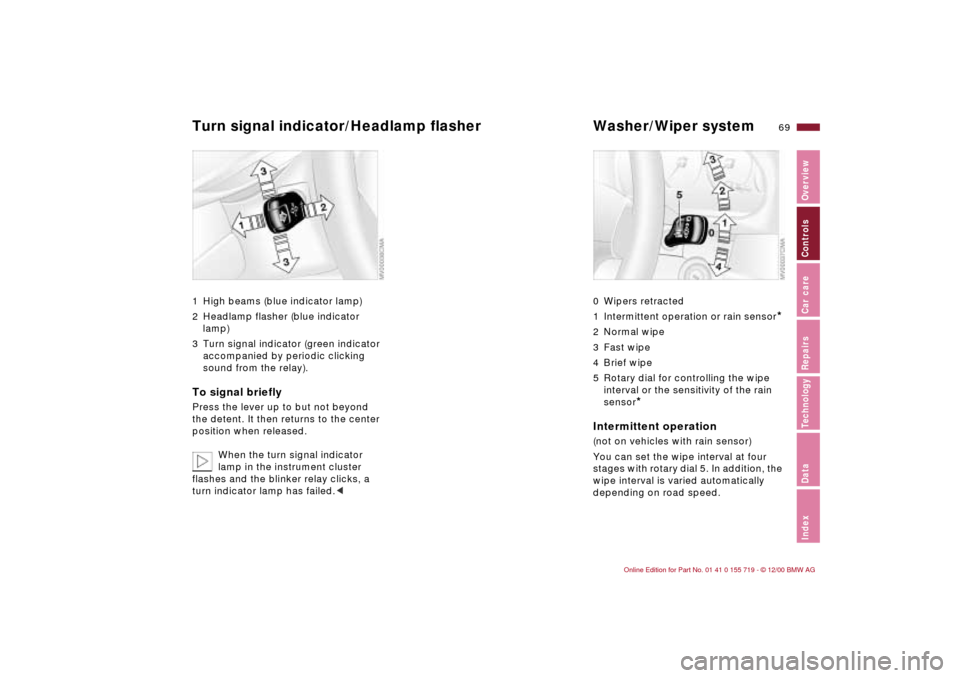
2 Headlamp flasher (blue indicator
lamp)
3 Turn signal indicator (green indicator
accompanied by periodic clicking
sound from the relay).To signal brieflyPress the lever up to but not beyond
the detent. It then returns to the center
position when released.
When the turn signal indicator
lamp in the instrument cluster
flashes and the blinker relay clicks, a
turn indicator lamp has failed.<
0 Wipers retracted
1 Intermittent operation or rain sensor
*
2 Normal wipe
3 Fast wipe
4 Brief wipe
5 Rotary dial for controlling the wipe
interval or the sensitivity of the rain
sensor
*
Intermittent operation(not on vehicles with rain sensor)
You can set the wipe interval at four
stages with rotary dial 5. In addition, the
wipe interval is varied automatically
depending on road speed.
Page 70 of 195
70n
Washer/Wiper systemRain sensor
*
When the rain sensor is activated, the
windshield wiper is controlled automati-
cally, depending on the degree of
wetness of the windshield (in both snow
and rain). You do not have to be
concerned with switching the wind-
shield wiper on or off or adjusting the
wipe interval between intermittent and
full wipe. Instead, you can concentrate
fully on the traffic conditions. This is
especially important under adverse
weather conditions.
The rain sensor is positioned on the
windshield, directly ahead of the inte-
rior rearview mirror.
To activate the rain sensor:
>From ignition key position 1 and up,
move the lever to position 1. The
wipers travel once across the wind-
shield, regardless of the weather
>You can leave the lever permanently
in position 1. It is then only necessary
to activate the rain sensor from igni-
tion key position 1 and up. To do this
give rotary dial 5 a quick turn.
To adjust the sensitivity of the rain
sensor: turn rotary dial 5.
Deactivating the rain sensor: put lever
in position 0.Deactivate the rain sensor when
passing through an automatic car
wash. Failure to do so could result in
damage caused by undesired wiper
activation.<
Normal wiper speedWhen the vehicle is stationary, the
wipers switch automatically to intermit-
tent wipe (not on vehicles with rain
sensor).Fast wiper speedWhen the vehicle is stationary, the
wipers operate at normal speed (not on
vehicles with rain sensor).
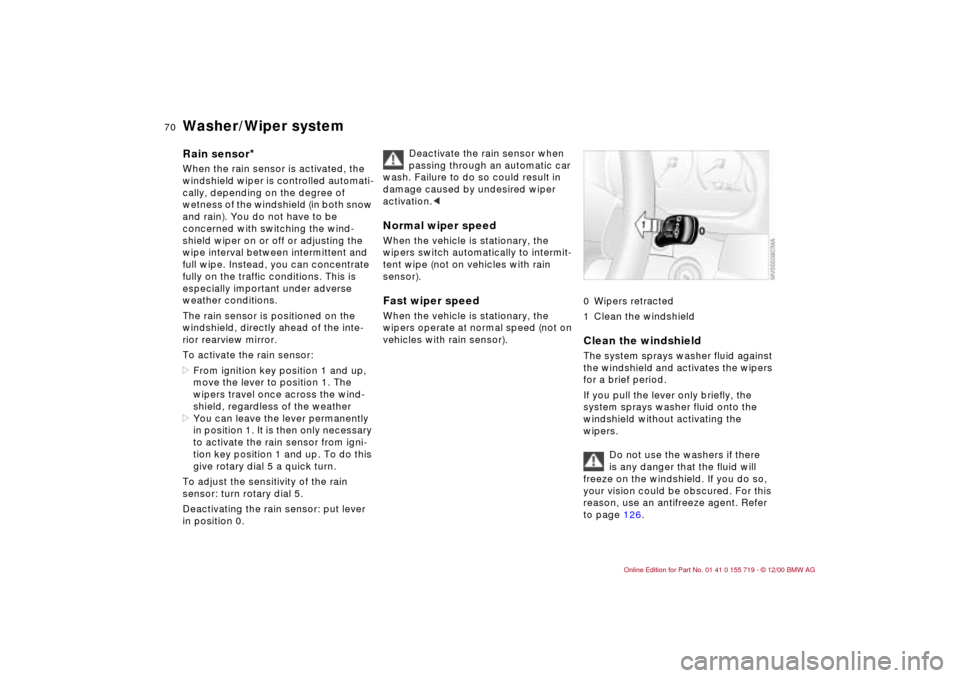
0 Wipers retracted
1 Clean the windshieldClean the windshieldThe system sprays washer fluid against
the windshield and activates the wipers
for a brief period.
If you pull the lever only briefly, the
system sprays washer fluid onto the
windshield without activating the
wipers.
Do not use the washers if there
is any danger that the fluid will
freeze on the windshield. If you do so,
your vision could be obscured. For this
reason, use an antifreeze agent. Refer
to page 126.