maintenance BMW M3 COUPE 2004 E46 User Guide
[x] Cancel search | Manufacturer: BMW, Model Year: 2004, Model line: M3 COUPE, Model: BMW M3 COUPE 2004 E46Pages: 170, PDF Size: 2.62 MB
Page 25 of 170
25
Close the gas cap carefully after
refueling until a click is heard.
While closing, be sure not to squeeze
the strap which is fastened to the cap.
A loose or missing cap will activate the
CHECK GAS CAP* lamp.<
Fuel tank capacity>Approx. 16.6 gal./63 liters, of which
>approx. 2.1 gal./8 liters are reserve
capacity.
Do not drive to the last drop of
fuel. This can prevent the engine
from operating properly and result in
damage.<
Fuel specificationsUse unleaded gasolineThe engine uses lead-free gasoline
only.
Required fuel:
>Premium Unleaded Gasoline,
min. 91 AKI
AKI = Anti Knock Index
Never use leaded fuel, as it would
cause permanent and irreversible
damage to the oxygen sensor and the
catalytic converter.<
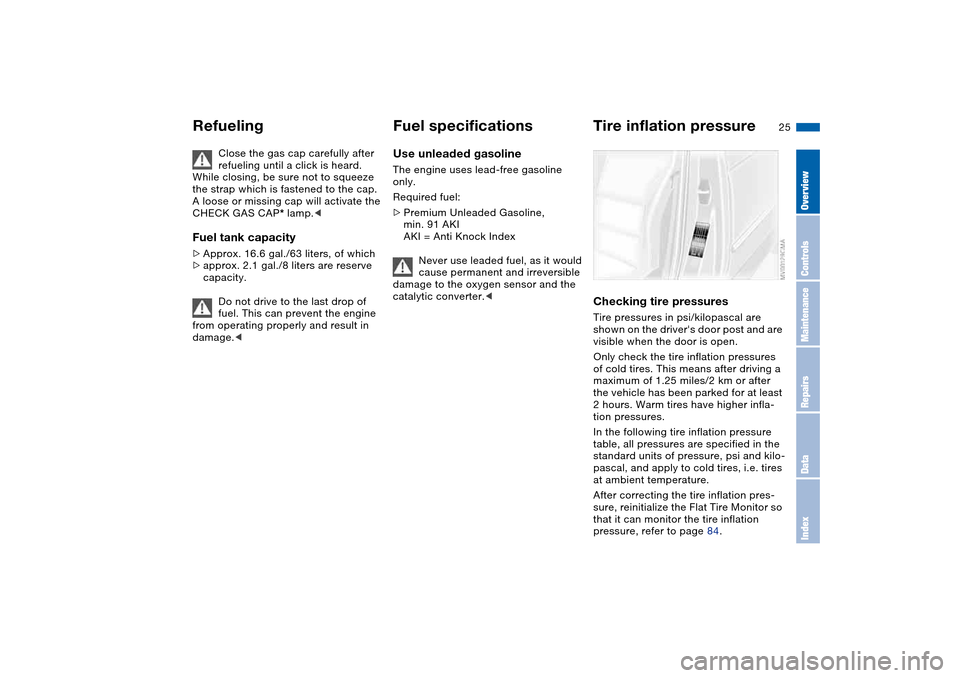
Tire inflation pressureChecking tire pressuresTire pressures in psi/kilopascal are
shown on the driver's door post and are
visible when the door is open.
Only check the tire inflation pressures
of cold tires. This means after driving a
maximum of 1.25 miles/2 km or after
the vehicle has been parked for at least
2 hours. Warm tires have higher infla-
tion pressures.
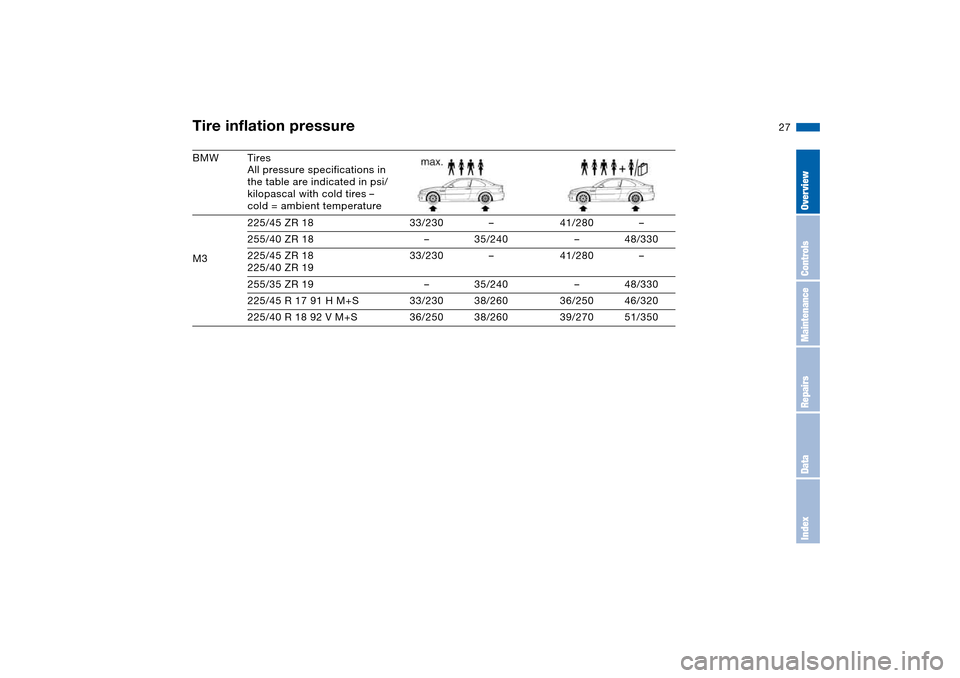
In the following tire inflation pressure
table, all pressures are specified in the
standard units of pressure, psi and kilo-
pascal, and apply to cold tires, i.e. tires
at ambient temperature.
After correcting the tire inflation pres-
sure, reinitialize the Flat Tire Monitor so
that it can monitor the tire inflation
pressure, refer to page 84.
Refueling
OverviewControlsMaintenanceRepairsDataIndex
Page 27 of 170
27
BMW Tires
All pressure specifications in
the table are indicated in psi/
kilopascal with cold tires –
cold = ambient temperature
M3 225/45 ZR 18 33/230 – 41/280 –
255/40 ZR 18 – 35/240 – 48/330
225/45 ZR 18
225/40 ZR 1933/230 – 41/280 –
255/35 ZR 19 – 35/240 – 48/330
225/45 R 17 91 H M+S 33/230 38/260 36/250 46/320
225/40 R 18 92 V M+S 36/250 38/260 39/270 51/350Tire inflation pressure
OverviewControlsMaintenanceRepairsDataIndex
Page 29 of 170
29
Overview
Controls and features
Operation, maintenance
Owner service procedures
Technical data
Index
OverviewControlsMaintenanceRepairsDataIndex
Page 31 of 170
31
Opening and closing – via the remote controlThe conceptThe remote control also provides two
additional functions beyond the central
locking feature:
>Switch on the interior lamps, refer to
page 32.
With this function you can also
search for your vehicle – when
parked in an underground garage, for
instance
>Open the luggage compartment lid,
refer to page 32.
The luggage compartment lid will
open slightly, regardless of whether it
was locked or unlocked.
Whenever you unlock or lock the vehi-
cle, you simultaneously deactivate/acti-
vate the anti-theft system, disarm/arm
the alarm system and switch the interior
lamps on/off.
You can have a signal set to con-
firm that the vehicle's locks have
engaged securely.<
Master keys with remote control
Since passengers or animals
remaining in the vehicle might be
able to lock the doors from the inside,
always take the vehicle's keys with you
so that the vehicle can be opened again
from the outside at any time.<
If it is no longer possible to lock
the vehicle via the remote control,
the battery is discharged. Use this key
while driving for an extended period in
order to recharge the battery. To pre-
vent unauthorized use of the remote
control, surrender only the spare key
when leaving the vehicle for valet park-
ing, for example.
In the event of a system malfunction,
please contact your BMW center. You
can also obtain replacement keys
there.<
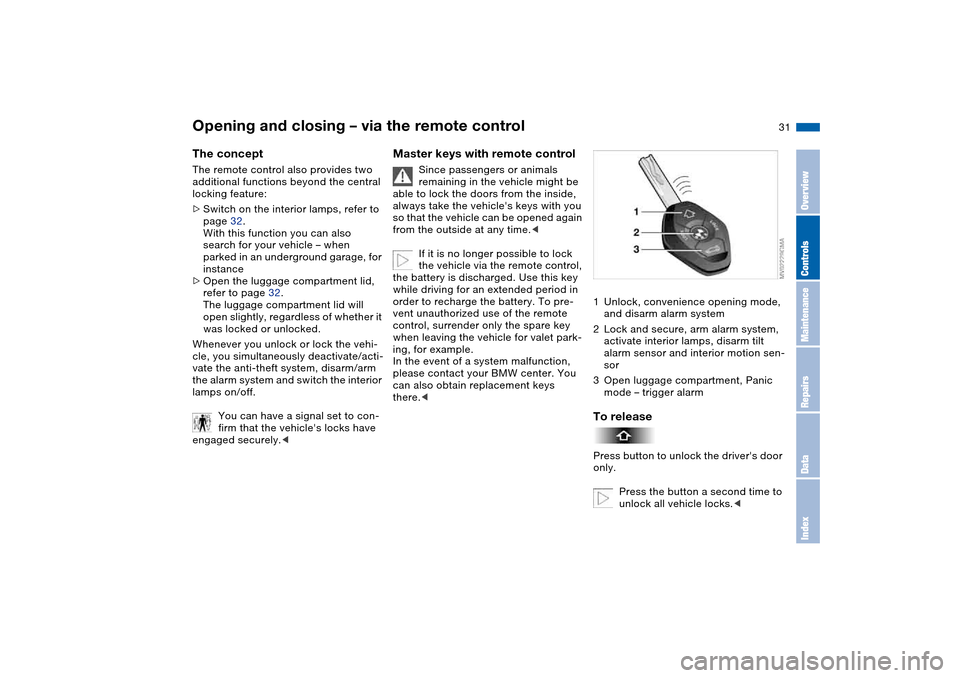
1Unlock, convenience opening mode,
and disarm alarm system
2Lock and secure, arm alarm system,
activate interior lamps, disarm tilt
alarm sensor and interior motion sen-
sor
3Open luggage compartment, Panic
mode – trigger alarmTo releasePress button to unlock the driver's door
only.
Press the button a second time to
unlock all vehicle locks.<
OverviewControlsMaintenanceRepairsDataIndex
Page 33 of 170
33
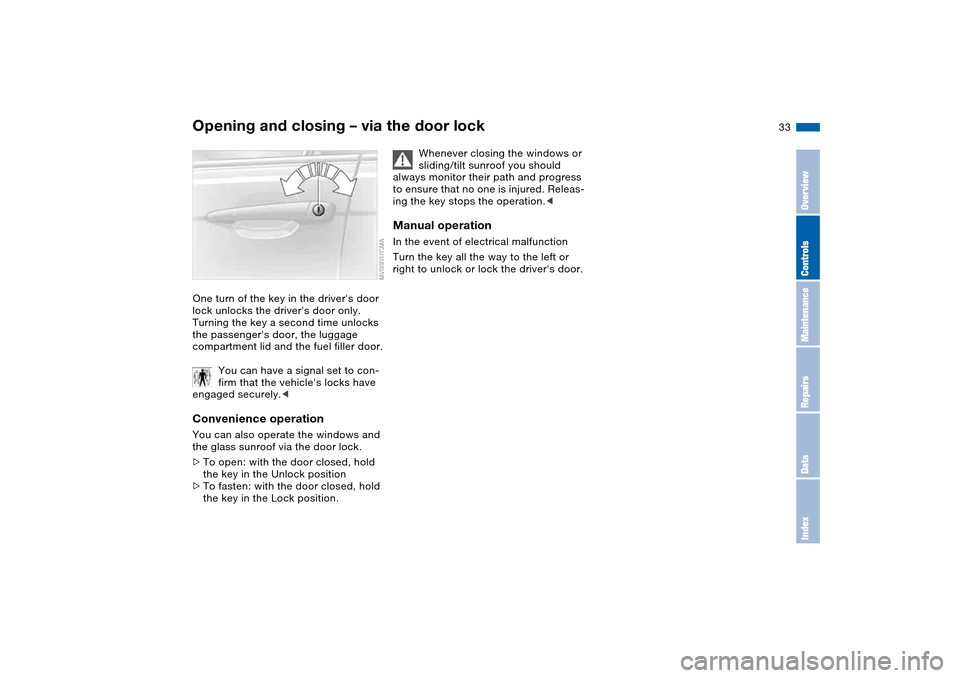
Opening and closing – via the door lockOne turn of the key in the driver's door
lock unlocks the driver's door only.
Turning the key a second time unlocks
the passenger's door, the luggage
compartment lid and the fuel filler door.
You can have a signal set to con-
firm that the vehicle's locks have
engaged securely.
>To open: with the door closed, hold
the key in the Unlock position
>To fasten: with the door closed, hold
the key in the Lock position.
Whenever closing the windows or
sliding/tilt sunroof you should
always monitor their path and progress
to ensure that no one is injured. Releas-
ing the key stops the operation.<
Manual operationIn the event of electrical malfunction
Turn the key all the way to the left or
right to unlock or lock the driver's door.
OverviewControlsMaintenanceRepairsDataIndex
Page 35 of 170
35
Luggage compartment lidThe lockOnly the master keys fit in the lock for
the luggage compartment lid, refer to
page 30.
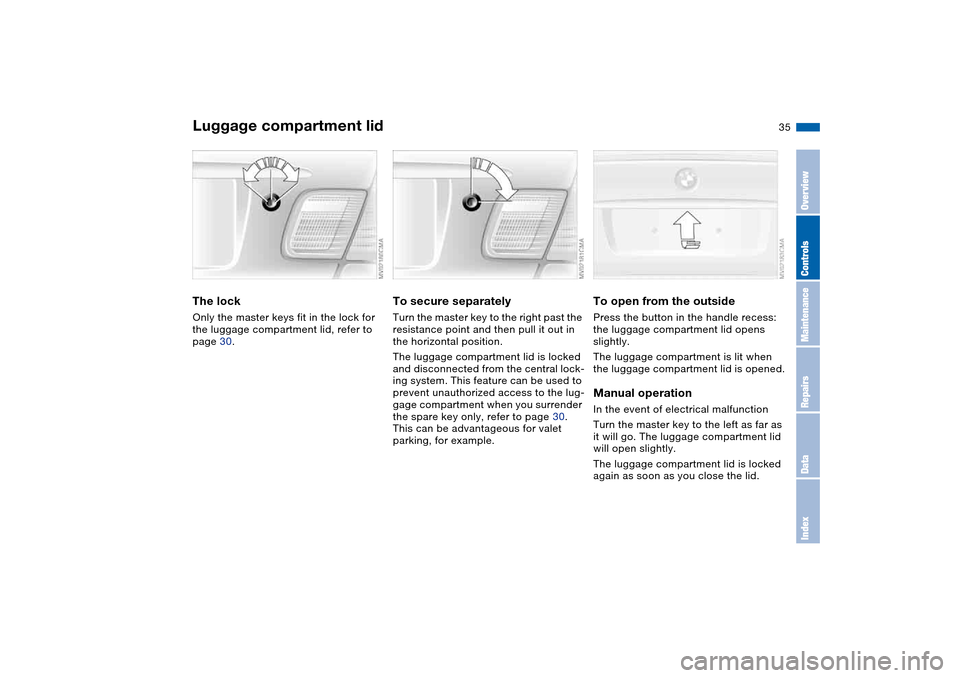
To secure separatelyTurn the master key to the right past the
resistance point and then pull it out in
the horizontal position.
The luggage compartment lid is locked
and disconnected from the central lock-
ing system. This feature can be used to
prevent unauthorized access to the lug-
gage compartment when you surrender
the spare key only, refer to page 30.
This can be advantageous for valet
parking, for example.
To open from the outsidePress the button in the handle recess:
the luggage compartment lid opens
slightly.
The luggage compartment is lit when
the luggage compartment lid is opened.Manual operationIn the event of electrical malfunction
Turn the master key to the left as far as
it will go. The luggage compartment lid
will open slightly.
The luggage compartment lid is locked
again as soon as you close the lid.
OverviewControlsMaintenanceRepairsDataIndex
Page 37 of 170
37
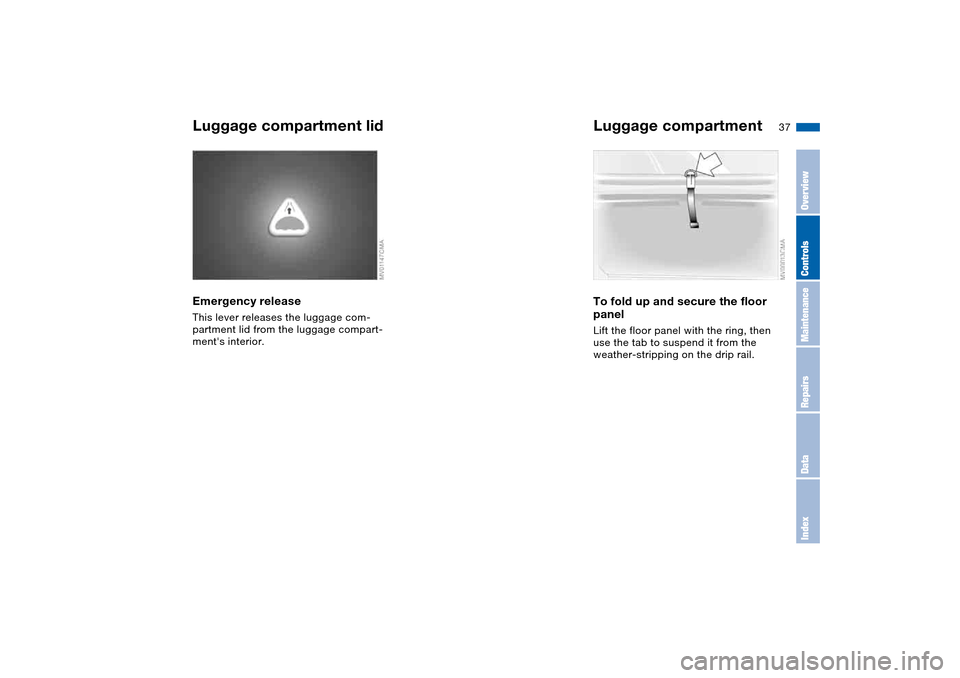
Emergency releaseThis lever releases the luggage com-
partment lid from the luggage compart-
ment's interior.
Luggage compartmentTo fold up and secure the floor
panelLift the floor panel with the ring, then
use the tab to suspend it from the
weather-stripping on the drip rail.
Luggage compartment lid
OverviewControlsMaintenanceRepairsDataIndex
Page 39 of 170
39
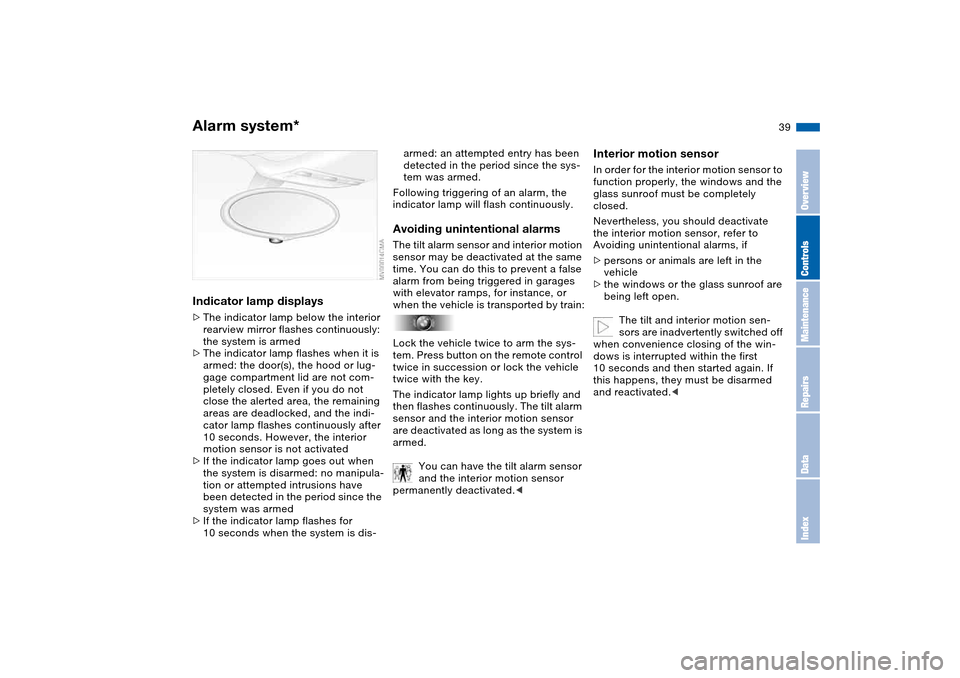
Indicator lamp displays>The indicator lamp below the interior
rearview mirror flashes continuously:
the system is armed
>The indicator lamp flashes when it is
armed: the door(s), the hood or lug-
gage compartment lid are not com-
pletely closed. Even if you do not
close the alerted area, the remaining
areas are deadlocked, and the indi-
cator lamp flashes continuously after
10 seconds. However, the interior
motion sensor is not activated
>If the indicator lamp goes out when
the system is disarmed: no manipula-
tion or attempted intrusions have
been detected in the period since the
system was armed
>If the indicator lamp flashes for
10 seconds when the system is dis-
armed: an attempted entry has been
detected in the period since the sys-
tem was armed.
Following triggering of an alarm, the
indicator lamp will flash continuously.Avoiding unintentional alarmsThe tilt alarm sensor and interior motion
sensor may be deactivated at the same
time. You can do this to prevent a false
alarm from being triggered in garages
with elevator ramps, for instance, or
when the vehicle is transported by train:
Lock the vehicle twice to arm the sys-
tem. Press button on the remote control
twice in succession or lock the vehicle
twice with the key.
The indicator lamp lights up briefly and
then flashes continuously. The tilt alarm
sensor and the interior motion sensor
are deactivated as long as the system is
armed.
You can have the tilt alarm sensor
and the interior motion sensor
permanently deactivated.<
Interior motion sensorIn order for the interior motion sensor to
function properly, the windows and the
glass sunroof must be completely
closed.
Nevertheless, you should deactivate
the interior motion sensor, refer to
Avoiding unintentional alarms, if
>persons or animals are left in the
vehicle
>the windows or the glass sunroof are
being left open.
The tilt and interior motion sen-
sors are inadvertently switched off
when convenience closing of the win-
dows is interrupted within the first
10 seconds and then started again. If
this happens, they must be disarmed
and reactivated.<
Alarm system*
OverviewControlsMaintenanceRepairsDataIndex
Page 41 of 170
41
Glass sunroof, electric*
To prevent injuries, exercise care
when closing the glass sunroof
and keep it in your field of vision until it
is shut.
When leaving the vehicle, always
remove the ignition key from the lock
and remember to close the doors to
prevent children from operating the
sunroof and injuring themselves, etc.<
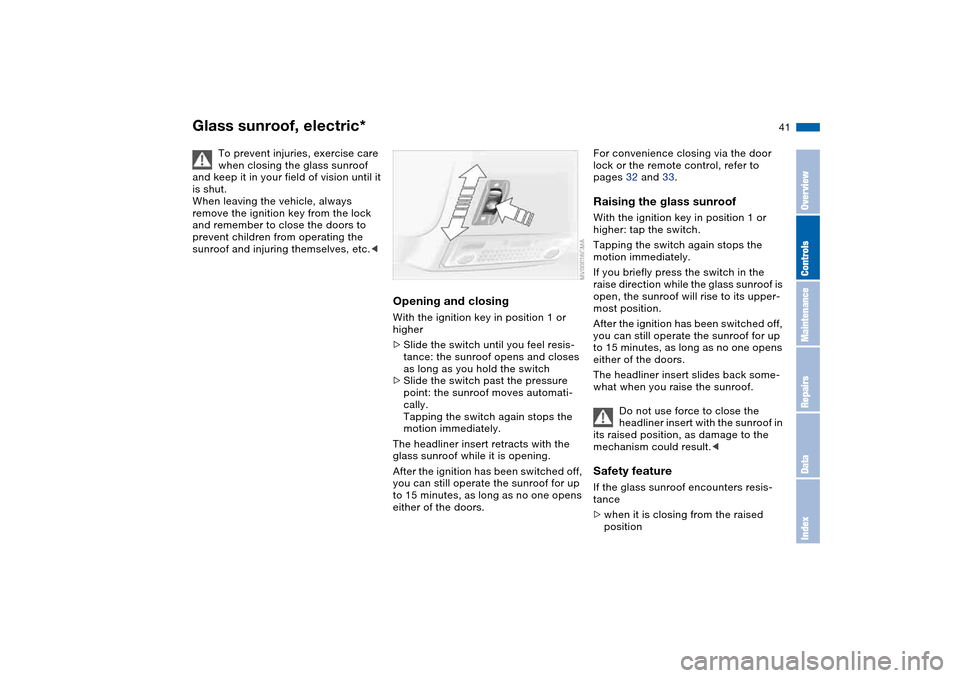
Opening and closingWith the ignition key in position 1 or
higher
>Slide the switch until you feel resis-
tance: the sunroof opens and closes
as long as you hold the switch
>Slide the switch past the pressure
point: the sunroof moves automati-
cally.
Tapping the switch again stops the
motion immediately.
The headliner insert retracts with the
glass sunroof while it is opening.
After the ignition has been switched off,
you can still operate the sunroof for up
to 15 minutes, as long as no one opens
either of the doors.
For convenience closing via the door
lock or the remote control, refer to
pages 32 and 33.Raising the glass sunroofWith the ignition key in position 1 or
higher: tap the switch.
Tapping the switch again stops the
motion immediately.
If you briefly press the switch in the
raise direction while the glass sunroof is
open, the sunroof will rise to its upper-
most position.
After the ignition has been switched off,
you can still operate the sunroof for up
to 15 minutes, as long as no one opens
either of the doors.
The headliner insert slides back some-
what when you raise the sunroof.
Do not use force to close the
headliner insert with the sunroof in
its raised position, as damage to the
mechanism could result.
>when it is closing from the raised
position
OverviewControlsMaintenanceRepairsDataIndex
Page 43 of 170
43 To adjust
Safe seating positionFor driving that is relaxed and less likely
to cause fatigue, you should select a
sitting position that reflects your per-
sonal requirements. In combination
with the safety belts and airbags, the
correct seating position also plays an
important role in enhancing occupant
safety in the event of an accident. To
ensure that the vehicle's safety systems
provide you with optimal protection, we
request that you direct your careful
attention to the following section.
For supplementary information on
transporting children, refer to page 56.Sitting safely with airbags
Always maintain an adequate dis-
tance between yourself and the
airbags. Always hold the steering wheel
by the rim to keep any chance of injury
to hands or arms to an absolute mini-
mum should the airbag be deployed.
Never allow any objects, individuals or
animals to obstruct the areas between
passengers and airbags. Never use the
front airbag's cover as a storage tray or
support for objects of any kind. Never
allow front passengers to rest their feet
or legs on the airbag cover.<
For airbag locations and additional
information on airbags, refer to
page 53.Sitting safely with safety beltsYour vehicle offers five sitting positions,
each of which is provided with a safety
belt.Never allow more than one person
to wear a single safety belt. Never
allow infants or small children to ride in
a passenger's lap. Avoid twisting the
belt while routing it firmly across the
pelvis and shoulder, wear it as snugly
against your body as possible. Do not
allow the belt to rest against hard or
fragile objects in your pockets. Do not
route the belt across your neck, or run it
across sharp edges. Be sure that the
belt does not become caught or
jammed. Avoid wearing bulky clothing
and pull on the lap belt periodically to
retension it over your shoulders. In the
event of a frontal impact, a loose lap
belt could slide over the hips, leading to
abdominal injury. In addition, the safety
belt's restraint effectiveness is reduced
if the belt is worn loosely. Expectant
mothers should always wear their
safety belts, taking care to position the
lap belt against the lower hips, where it
will not exert pressure against the
abdominal area. Leave the rear safety
belts in the holders, if they are not
needed, to avoid unwanted movement
from the safety belts at high speeds.<
For information on using the safety
belts, refer to page 47.
OverviewControlsMaintenanceRepairsDataIndex