BMW M6 CONVERTIBLE 2010 E64 Repair Manual
Manufacturer: BMW, Model Year: 2010, Model line: M6 CONVERTIBLE, Model: BMW M6 CONVERTIBLE 2010 E64Pages: 250, PDF Size: 8.4 MB
Page 61 of 250
Controls
59Reference
At a glance
Driving tips
Communications
Navigation
Entertainment
Mobility
D Drive mode
In the Drive mode, all forward gears are shifted
automatically.
Shifting from Sequential mode to Drive mode:
shift using the shift paddles or the selector
lever, or press the selector level to the right in
the D/S direction.
Shifting back to Drive mode: press the selector
lever to the right in the D/S direction again.
Kickdown: for rapid acceleration, e. g. when
passing, press the accelerator pedal as far
down as it will go. You achieve maximum accel-
eration.
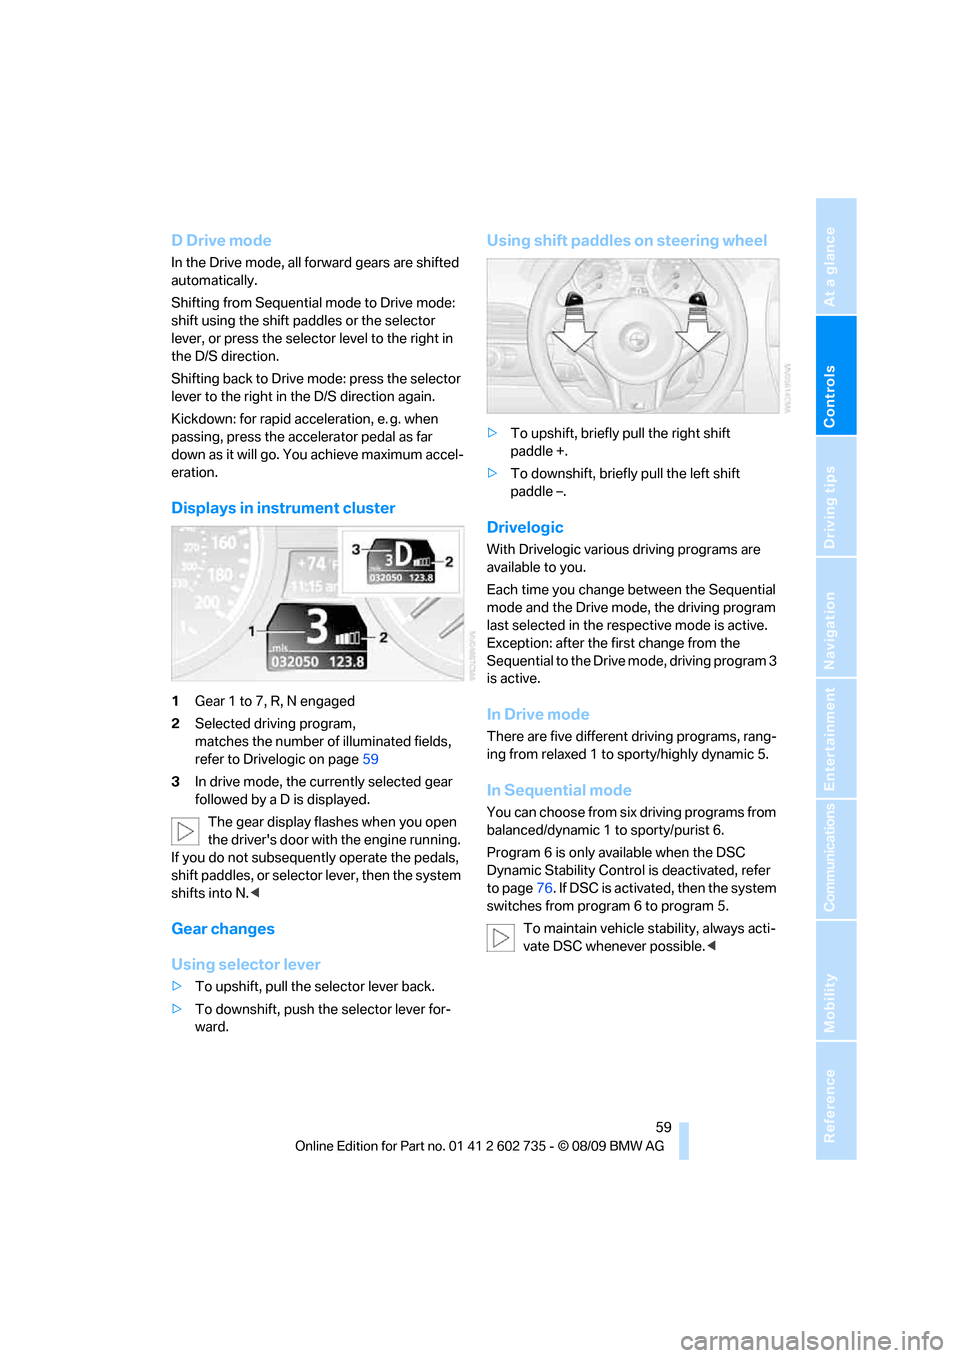
Displays in instrument cluster
1Gear 1 to 7, R, N engaged
2Selected driving program,
matches the number of illuminated fields,
refer to Drivelogic on page59
3In drive mode, the currently selected gear
followed by a D is displayed.
The gear display flashes when you open
the driver's door with the engine running.
If you do not subsequently operate the pedals,
shift paddles, or selector lever, then the system
shifts into N.<
Gear changes
Using selector lever
>To upshift, pull the selector lever back.
>To downshift, push the selector lever for-
ward.
Using shift paddles on steering wheel
>To upshift, briefly pull the right shift
paddle +.
>To downshift, briefly pull the left shift
paddle –.
Drivelogic
With Drivelogic various driving programs are
available to you.
Each time you change between the Sequential
mode and the Drive mode, the driving program
last selected in the respective mode is active.
Exception: after the first change from the
Sequential to the Drive mode, driving program 3
is active.
In Drive mode
There are five different driving programs, rang-
ing from relaxed 1 to sporty/highly dynamic 5.
In Sequential mode
You can choose from six driving programs from
balanced/dynamic 1 to sporty/purist 6.
Program 6 is only available when the DSC
Dynamic Stability Control is deactivated, refer
to page76. If DSC is activated, then the system
switches from program 6 to program 5.
To maintain vehicle stability, always acti-
vate DSC whenever possible.<
Page 62 of 250
Driving
60
Selecting driving program with button
in center console
Press the button repeatedly until the desired
driving program is displayed in the instrument
cluster, refer to page59.
Selecting driving program via button
on steering wheel
You can also activate your preferred driving pro-
gram with the button on the steering wheel,
refer to MDrive on page50.
With the ignition switched on you can change
the settings of MDrive on the Control Display.
iDrive, for operating principle refer to page16.
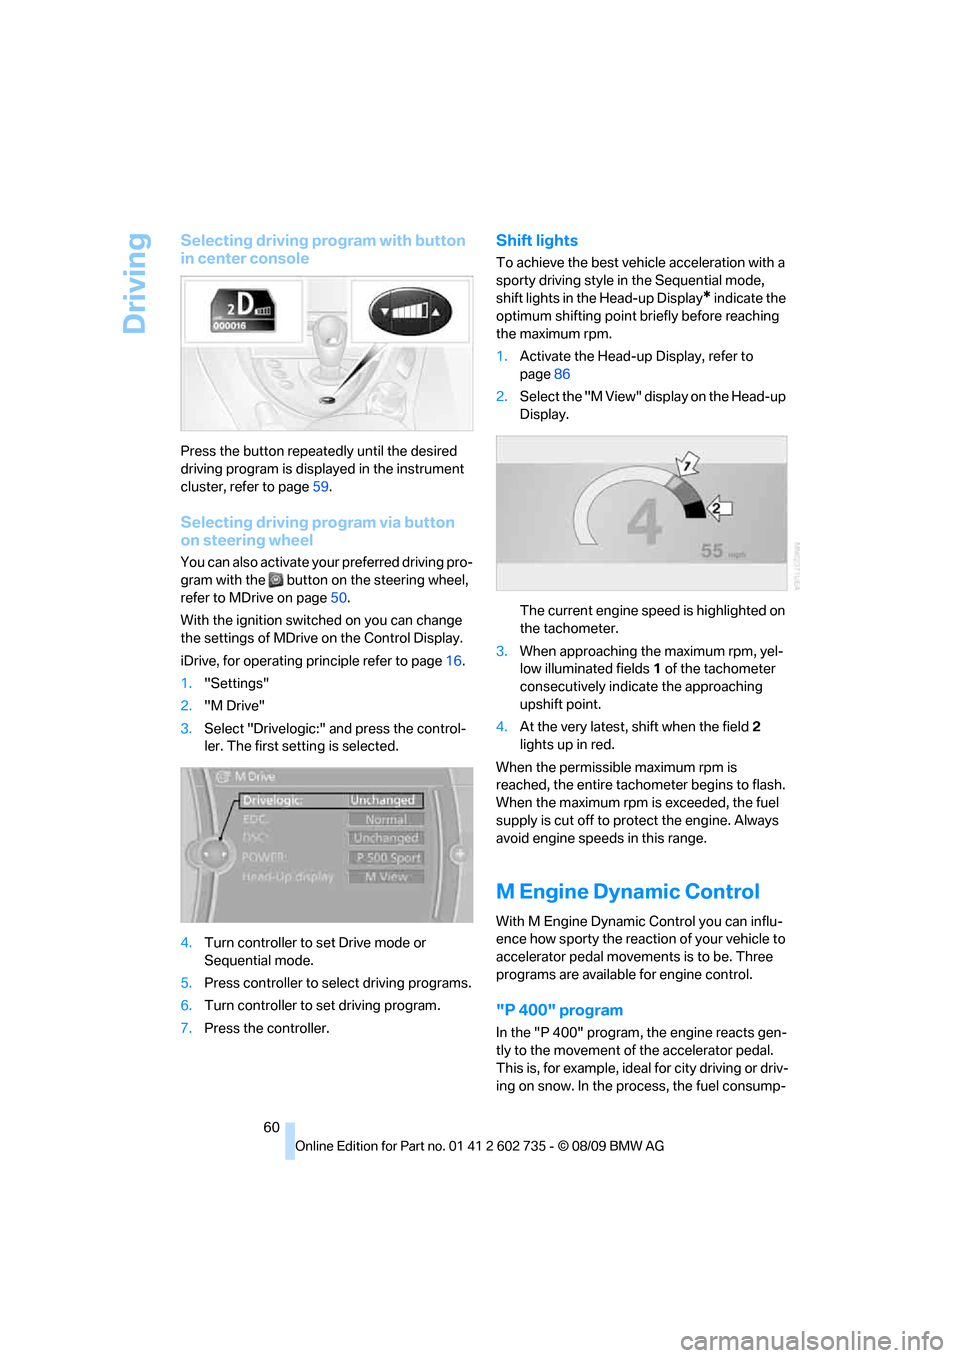
1."Settings"
2."M Drive"
3.Select "Drivelogic:" and press the control-
ler. The first setting is selected.
4.Turn controller to set Drive mode or
Sequential mode.
5.Press controller to select driving programs.
6.Turn controller to set driving program.
7.Press the controller.
Shift lights
To achieve the best vehicle acceleration with a
sporty driving style in the Sequential mode,
shift lights in the Head-up Display
* indicate the
optimum shifting point briefly before reaching
the maximum rpm.
1.Activate the Head-up Display, refer to
page86
2.Select the "M View" display on the Head-up
Display.
The current engine speed is highlighted on
the tachometer.
3.When approaching the maximum rpm, yel-
low illuminated fields1 of the tachometer
consecutively indicate the approaching
upshift point.
4.At the very latest, shift when the field2
lights up in red.
When the permissible maximum rpm is
reached, the entire tachometer begins to flash.
When the maximum rpm is exceeded, the fuel
supply is cut off to protect the engine. Always
avoid engine speeds in this range.
M Engine Dynamic Control
With M Engine Dynamic Control you can influ-
ence how sporty the reaction of your vehicle to
accelerator pedal movements is to be. Three
programs are available for engine control.
"P 400" program
In the "P 400" program, the engine reacts gen-
tly to the movement of the accelerator pedal.
This is, for example, ideal for city driving or driv-
ing on snow. In the process, the fuel consump-
Page 63 of 250
Controls
61Reference
At a glance
Driving tips
Communications
Navigation
Entertainment
Mobility
tion is minimal and the engine output is
reduced.
"P 500" program
The "P 500" program provides maximum per-
formance and more spontaneous reaction of
the engine to accelerator pedal movements.
"P 500 Sport" program
In the "P 500 Sport" program, the engine
responds to accelerator pedal movements with
a high degree of spontaneity and uncompro-
mising sportiness while exhibiting maximum
performance.
Selecting program
The "P 400" program is activated after each
engine start.
Press the POWER button to activate the
"P 500" program. Pressing the POWER button
repeatedly switches between the programs
"P 400" and "P 500".
You can also activate your preferred program
with the button on the steering wheel, refer
to MDrive on page50. You can activate the
"P 500 Sport" program only with MDrive.
For the programs "P 500" and "P 500 Sport",
the LED in the POWER button lights up.
Turn signals/
headlamp flasher
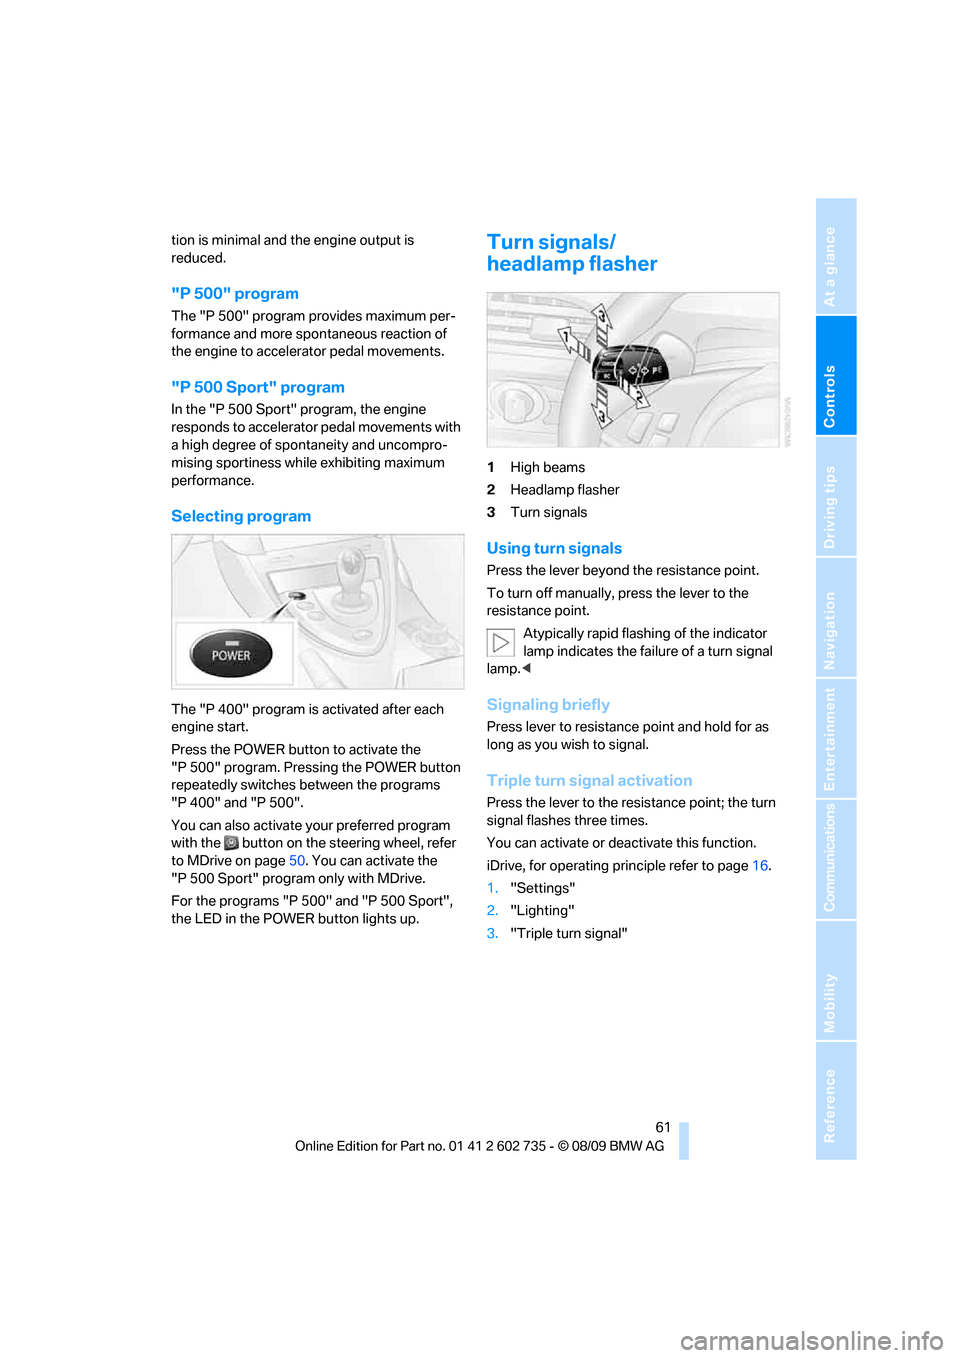
1High beams
2Headlamp flasher
3Turn signals
Using turn signals
Press the lever beyond the resistance point.
To turn off manually, press the lever to the
resistance point.
Atypically rapid flashing of the indicator
lamp indicates the failure of a turn signal
lamp.<
Signaling briefly
Press lever to resistance point and hold for as
long as you wish to signal.
Triple turn signal activation
Press the lever to the resistance point; the turn
signal flashes three times.
You can activate or deactivate this function.
iDrive, for operating principle refer to page16.
1."Settings"
2."Lighting"
3."Triple turn signal"
Page 64 of 250
Driving
62 4. Triple turn signal activation is activated
and is stored for the remote control cur-
rently in use.
Wiper system
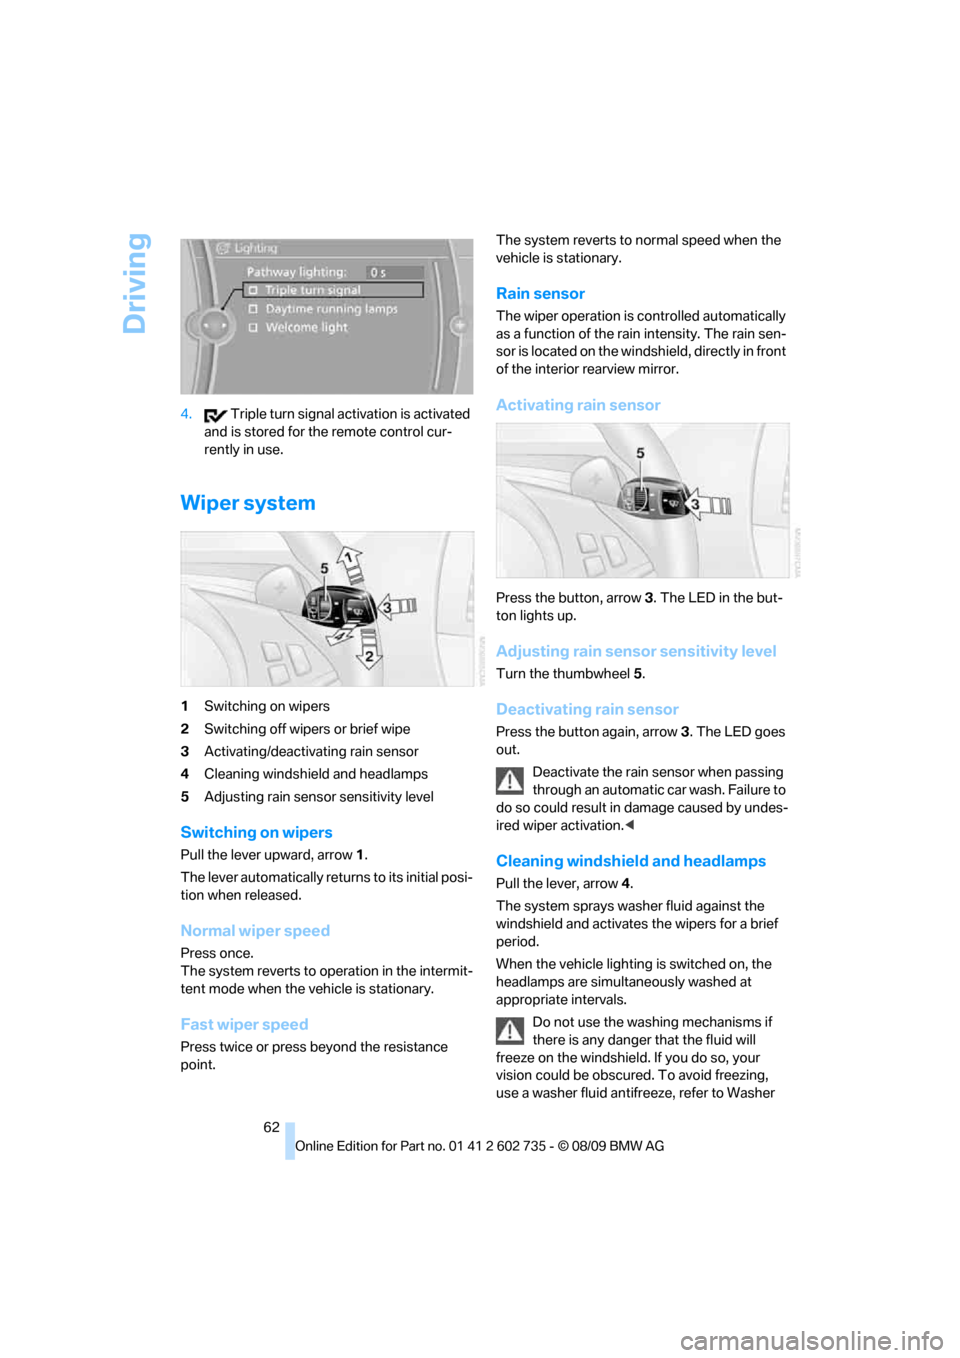
1Switching on wipers
2Switching off wipers or brief wipe
3Activating/deactivating rain sensor
4Cleaning windshield and headlamps
5Adjusting rain sensor sensitivity level
Switching on wipers
Pull the lever upward, arrow1.
The lever automatically returns to its initial posi-
tion when released.
Normal wiper speed
Press once.
The system reverts to operation in the intermit-
tent mode when the vehicle is stationary.
Fast wiper speed
Press twice or press beyond the resistance
point. The system reverts to normal speed when the
vehicle is stationary.
Rain sensor
The wiper operation is controlled automatically
as a function of the rain intensity. The rain sen-
sor is located on the windshield, directly in front
of the interior rearview mirror.
Activating rain sensor
Press the button, arrow3. The LED in the but-
ton lights up.
Adjusting rain sensor sensitivity level
Turn the thumbwheel5.
Deactivating rain sensor
Press the button again, arrow3. The LED goes
out.
Deactivate the rain sensor when passing
through an automatic car wash. Failure to
do so could result in damage caused by undes-
ired wiper activation.<
Cleaning windshield and headlamps
Pull the lever, arrow4.
The system sprays washer fluid against the
windshield and activates the wipers for a brief
period.
When the vehicle lighting is switched on, the
headlamps are simultaneously washed at
appropriate intervals.
Do not use the washing mechanisms if
there is any danger that the fluid will
freeze on the windshield. If you do so, your
vision could be obscured. To avoid freezing,
use a washer fluid antifreeze, refer to Washer
Page 65 of 250
Controls
63Reference
At a glance
Driving tips
Communications
Navigation
Entertainment
Mobility
fluid. Do not use washing mechanisms when
the washer fluid reservoir is empty, otherwise
you will damage the washer pump.<
Windshield washer nozzles
The windshield washer nozzles are heated
when the engine is running or the ignition is
switched on.
Washer fluid
Washer fluid antifreeze is flammable. For
this reason, keep it away from ignition
sources and store only in the closed original
container out of reach of children. Otherwise,
there is the danger of bodily injury. Always
observe the instructions for use provided on the
containers.<
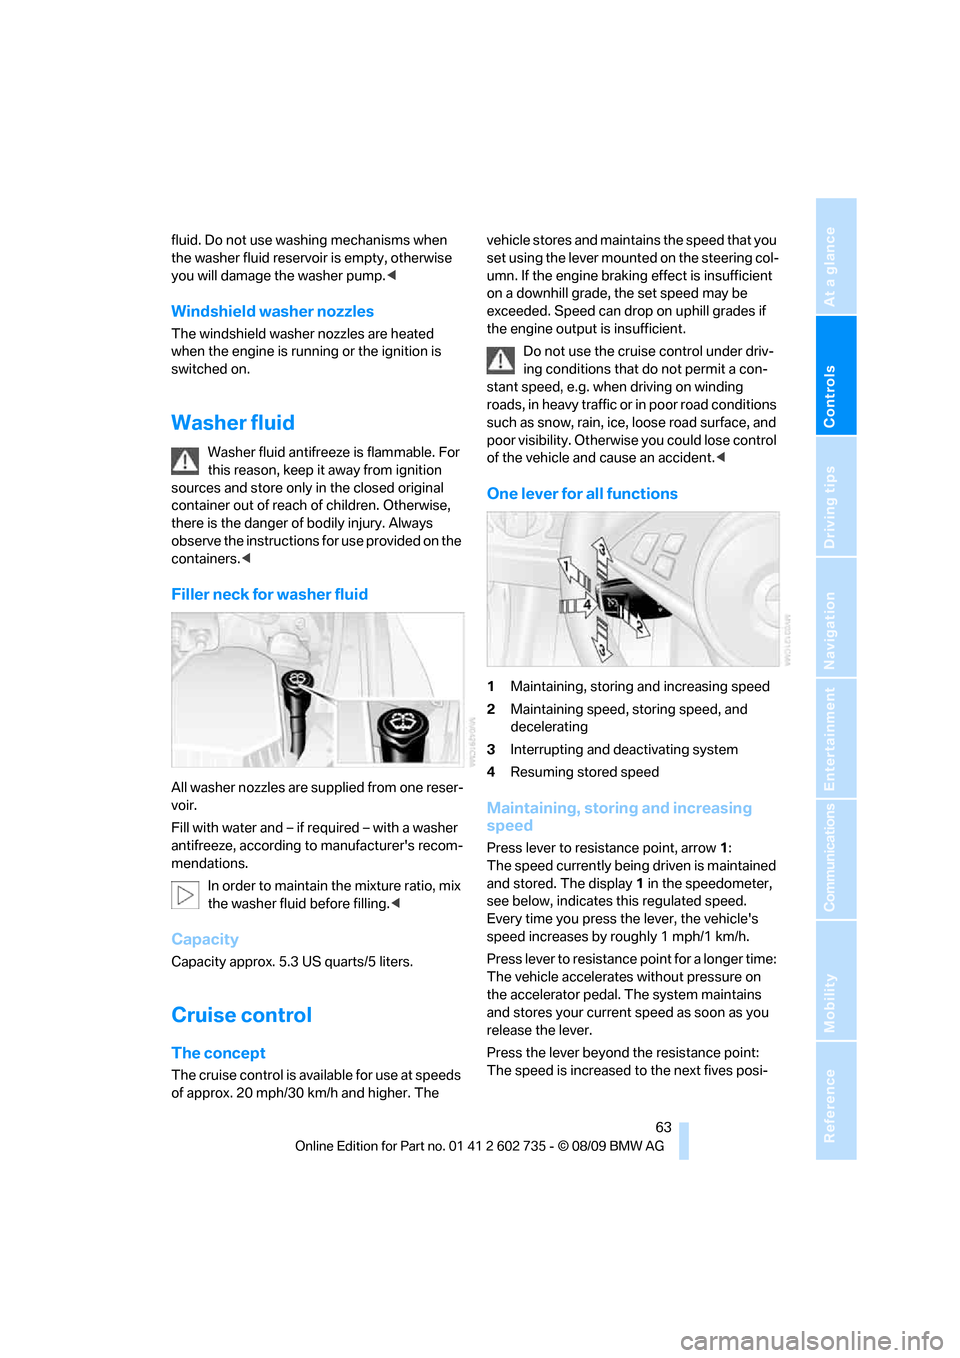
Filler neck for washer fluid
All washer nozzles are supplied from one reser-
voir.
Fill with water and – if required – with a washer
antifreeze, according to manufacturer's recom-
mendations.
In order to maintain the mixture ratio, mix
the washer fluid before filling.<
Capacity
Capacity approx. 5.3 US quarts/5 liters.
Cruise control
The concept
The cruise control is available for use at speeds
of approx. 20 mph/30 km/h and higher. The vehicle stores and maintains the speed that you
set using the lever mounted on the steering col-
umn. If the engine braking effect is insufficient
on a downhill grade, the set speed may be
exceeded. Speed can drop on uphill grades if
the engine output is insufficient.
Do not use the cruise control under driv-
ing conditions that do not permit a con-
stant speed, e.g. when driving on winding
roads, in heavy traffic or in poor road conditions
such as snow, rain, ice, loose road surface, and
poor visibility. Otherwise you could lose control
of the vehicle and cause an accident.<
One lever for all functions
1Maintaining, storing and increasing speed
2Maintaining speed, storing speed, and
decelerating
3Interrupting and deactivating system
4Resuming stored speed
Maintaining, storing and increasing
speed
Press lever to resistance point, arrow 1:
The speed currently being driven is maintained
and stored. The display1 in the speedometer,
see below, indicates this regulated speed.
Every time you press the lever, the vehicle's
speed increases by roughly 1 mph/1 km/h.
Press lever to resistance point for a longer time:
The vehicle accelerates without pressure on
the accelerator pedal. The system maintains
and stores your current speed as soon as you
release the lever.
Press the lever beyond the resistance point:
The speed is increased to the next fives posi-
Page 66 of 250
Driving
64 tion in the mph display or the next tens position
in the km/h display.
Press and hold the lever beyond the resistance
point:
The vehicle accelerates more quickly.
Maintaining speed, storing speed, and
decelerating
Pull the lever, arrow2:
Functions are the same as1; the speed is
reduced.
Interrupting system
Press the lever up or down, arrow3.
The display1 in the speedometer changes
color.
In addition, the system is interrupted:
>when you apply the brakes, even with the
parking brake
>when you clutch
>when you shift using the shift paddles or the
selector lever
>when the DSC comes on
Resuming stored speed
Press button4:
The stored speed is resumed and maintained.
Deactivating system
>Press the lever up or down twice, arrow3
>Switch off the ignition
The speed stored in the memory is deleted.
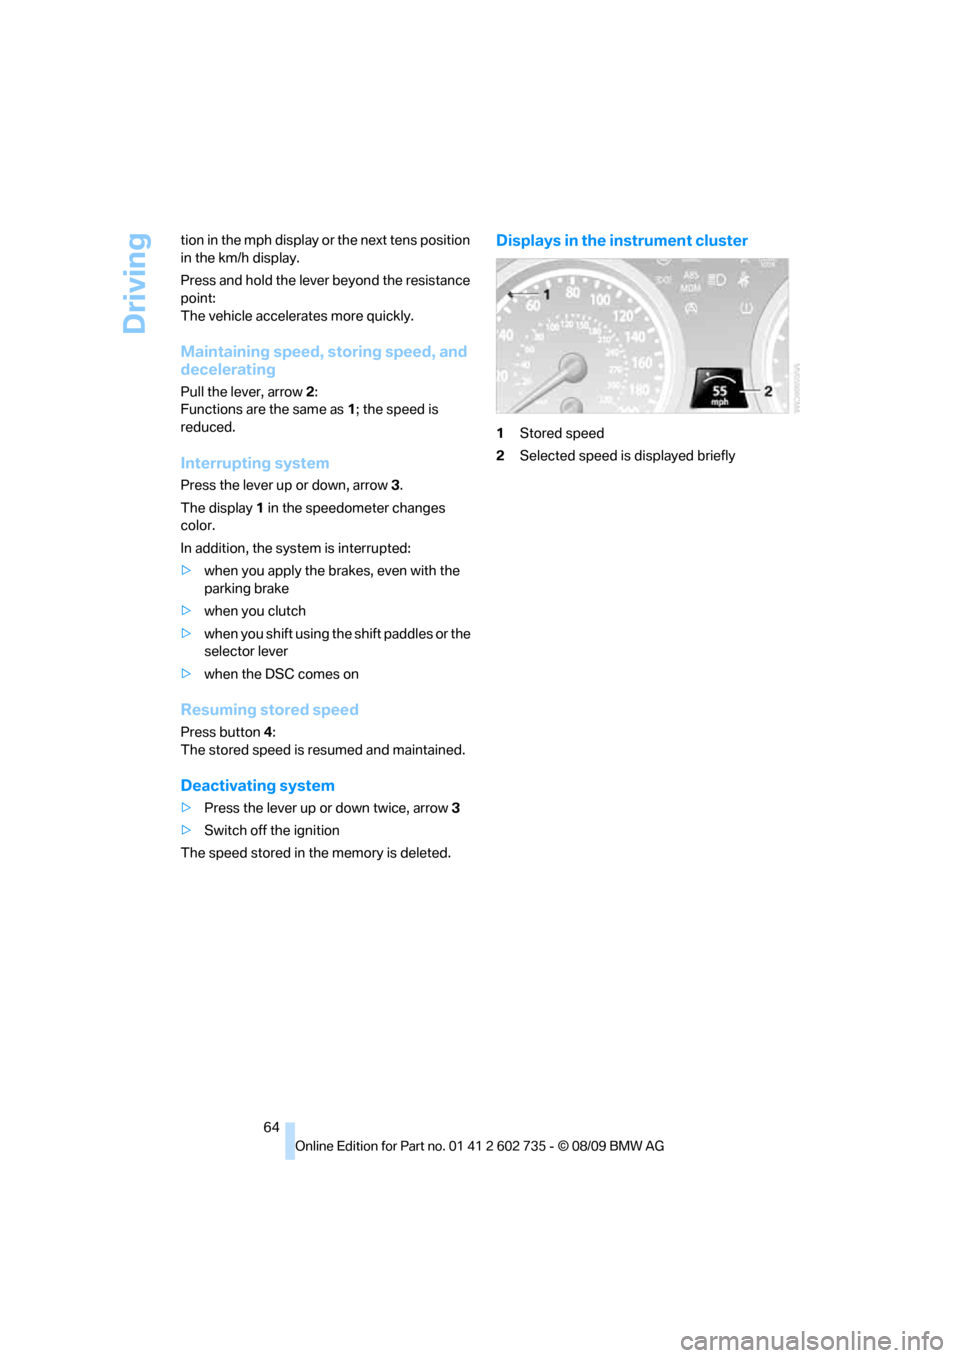
Displays in the instrument cluster
1Stored speed
2Selected speed is displayed briefly
Page 67 of 250
Controls
65Reference
At a glance
Driving tips
Communications
Navigation
Entertainment
Mobility
Controls Overview
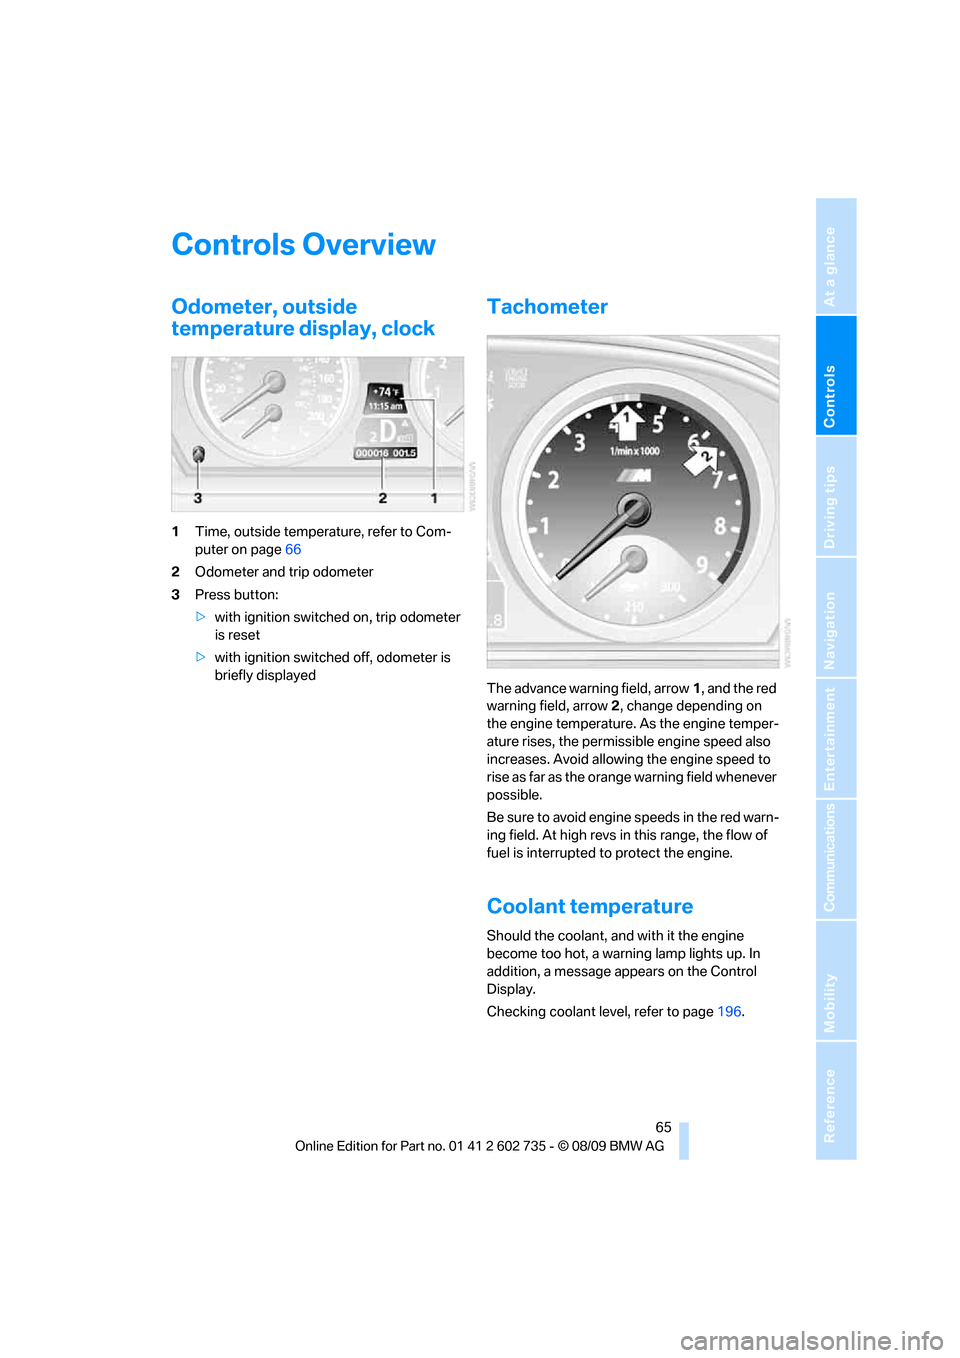
Odometer, outside
temperature display, clock
1Time, outside temperature, refer to Com-
puter on page66
2Odometer and trip odometer
3Press button:
>with ignition switched on, trip odometer
is reset
>with ignition switched off, odometer is
briefly displayed
Tachometer
The advance warning field, arrow1, and the red
warning field, arrow2, change depending on
the engine temperature. As the engine temper-
ature rises, the permissible engine speed also
increases. Avoid allowing the engine speed to
rise as far as the orange warning field whenever
possible.
Be sure to avoid engine speeds in the red warn-
ing field. At high revs in this range, the flow of
fuel is interrupted to protect the engine.
Coolant temperature
Should the coolant, and with it the engine
become too hot, a warning lamp lights up. In
addition, a message appears on the Control
Display.
Checking coolant level, refer to page196.
Page 68 of 250
Controls Overview
66
Engine oil temperature*
The general operating temperature lies
between 1757/806 and 2507/1206. Do
not exceed a value of approx. 2657/1306.
If the engine oil temperature is too high, the per-
missible engine speed, and with it the available
engine output is reduced.
Fuel gauge
Fuel tank capacity: approx. 18.5 US gal/
70 liters. You will find information on refueling
on page184.
If the tilt of the vehicle varies for a longer period,
when you are driving in mountainous areas, for
example, the indicator may fluctuate slightly.
Reserve
After the reserve quantity has been reached, a
message briefly appears on the Control Display;
the remaining range is shown in the computer.
Below a range of approx. 30 miles/50 km, the
message remains on the Control Display.
Refuel as soon as possible once your
cruising range falls below 30 miles/
50 km, otherwise engine functions are not
ensured and damage can occur.<
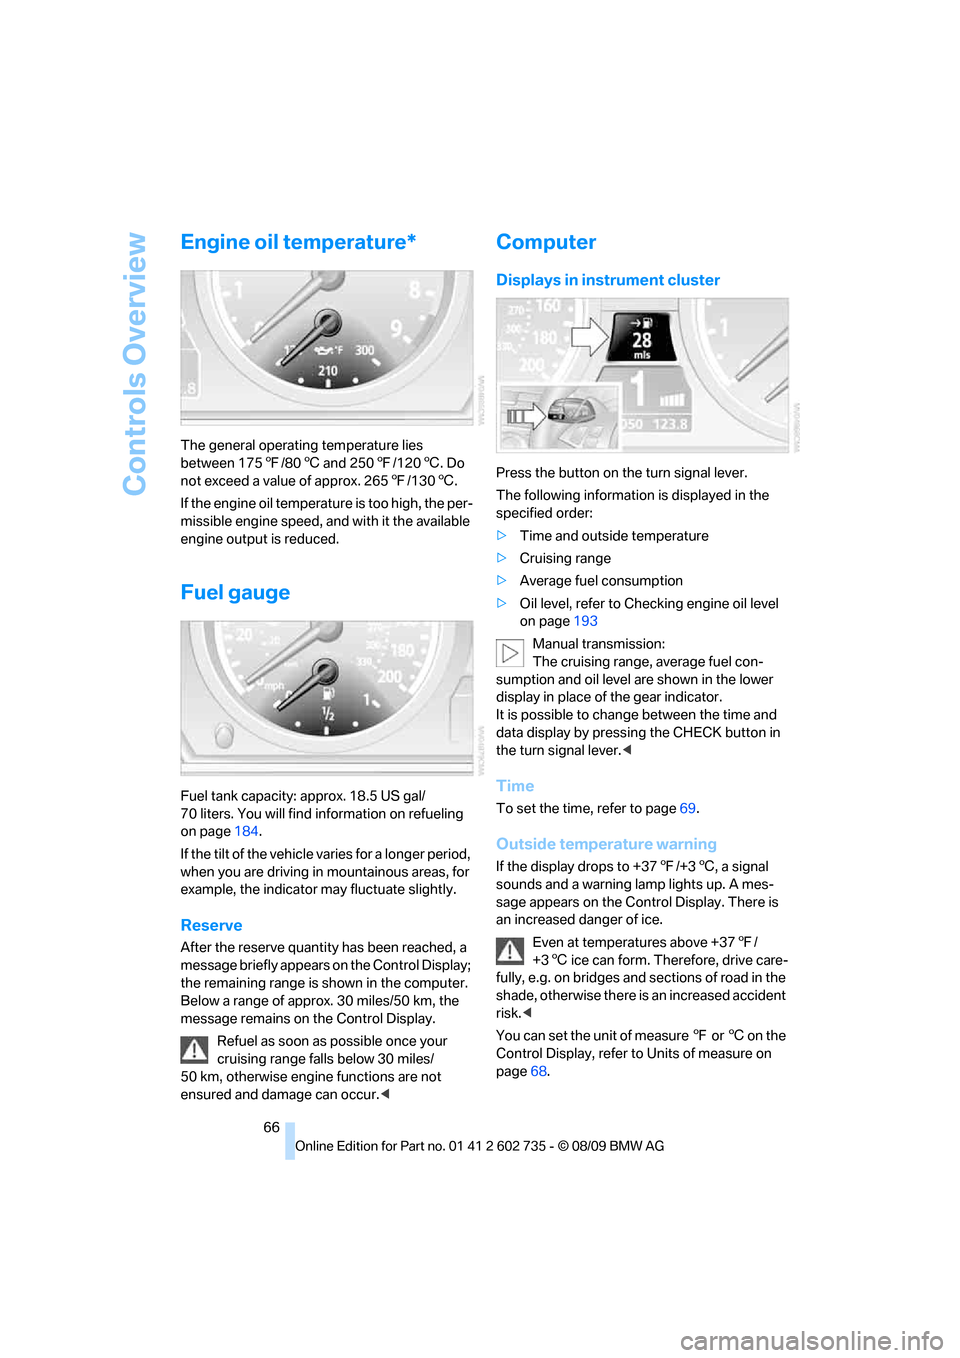
Computer
Displays in instrument cluster
Press the button on the turn signal lever.
The following information is displayed in the
specified order:
>Time and outside temperature
>Cruising range
>Average fuel consumption
>Oil level, refer to Checking engine oil level
on page193
Manual transmission:
The cruising range, average fuel con-
sumption and oil level are shown in the lower
display in place of the gear indicator.
It is possible to change between the time and
data display by pressing the CHECK button in
the turn signal lever.<
Time
To set the time, refer to page69.
Outside temperature warning
If the display drops to +377/+36, a signal
sounds and a warning lamp lights up. A mes-
sage appears on the Control Display. There is
an increased danger of ice.
Even at temperatures above +377/
+36 ice can form. Therefore, drive care-
fully, e.g. on bridges and sections of road in the
shade, otherwise there is an increased accident
risk.<
You can set the unit of measure 7 or 6 on the
Control Display, refer to Units of measure on
page68.
Page 69 of 250
Controls
67Reference
At a glance
Driving tips
Communications
Navigation
Entertainment
Mobility
Cruising range
Displays the estimated cruising range available
with the remaining fuel. The range is projected
based on the driving style over the last 20 miles/
30 km.
Refuel as soon as possible once your
cruising range falls below 30 miles/
50 km, otherwise engine functions are not
ensured and damage can occur.<
Average fuel consumption
The average fuel consumption is calculated for
the time during which the engine is running.
To reset average fuel consumption: press BC
button on turn signal lever for approx. 2 sec-
onds.
For different routes
You can display the average speed and average
fuel consumption for two different routes on the
Control Display, refer to the following and to
Trip computer.
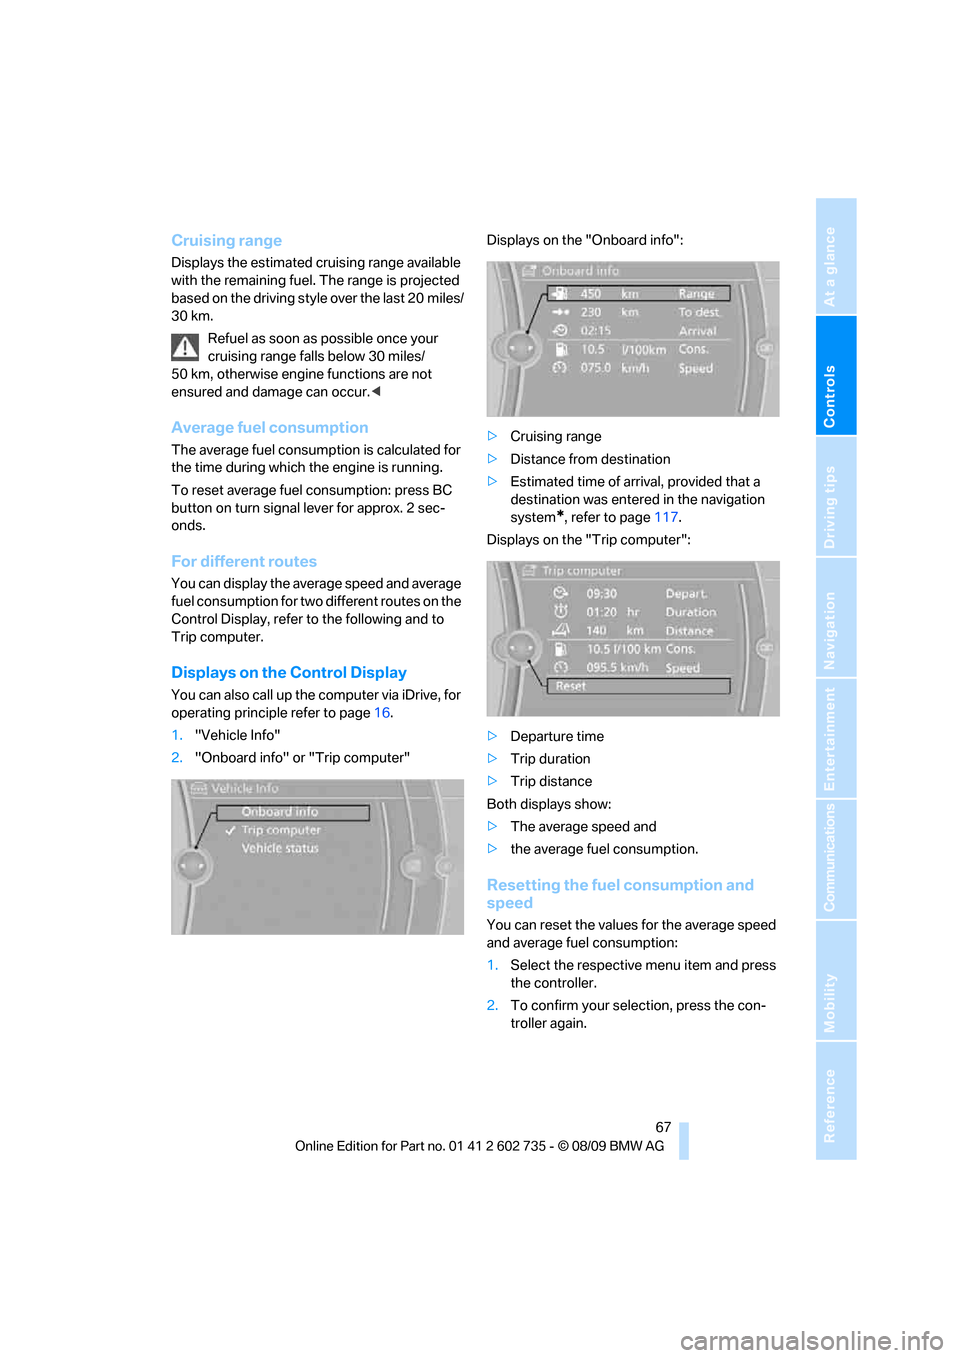
Displays on the Control Display
You can also call up the computer via iDrive, for
operating principle refer to page16.
1."Vehicle Info"
2."Onboard info" or "Trip computer"Displays on the "Onboard info":
>Cruising range
>Distance from destination
>Estimated time of arrival, provided that a
destination was entered in the navigation
system
*, refer to page117.
Displays on the "Trip computer":
>Departure time
>Trip duration
>Trip distance
Both displays show:
>The average speed and
>the average fuel consumption.
Resetting the fuel consumption and
speed
You can reset the values for the average speed
and average fuel consumption:
1.Select the respective menu item and press
the controller.
2.To confirm your selection, press the con-
troller again.
Page 70 of 250
Controls Overview
68
Resetting the Trip computer
1."Vehicle Info"
2."Trip computer"
3."Reset"
All values are reset.
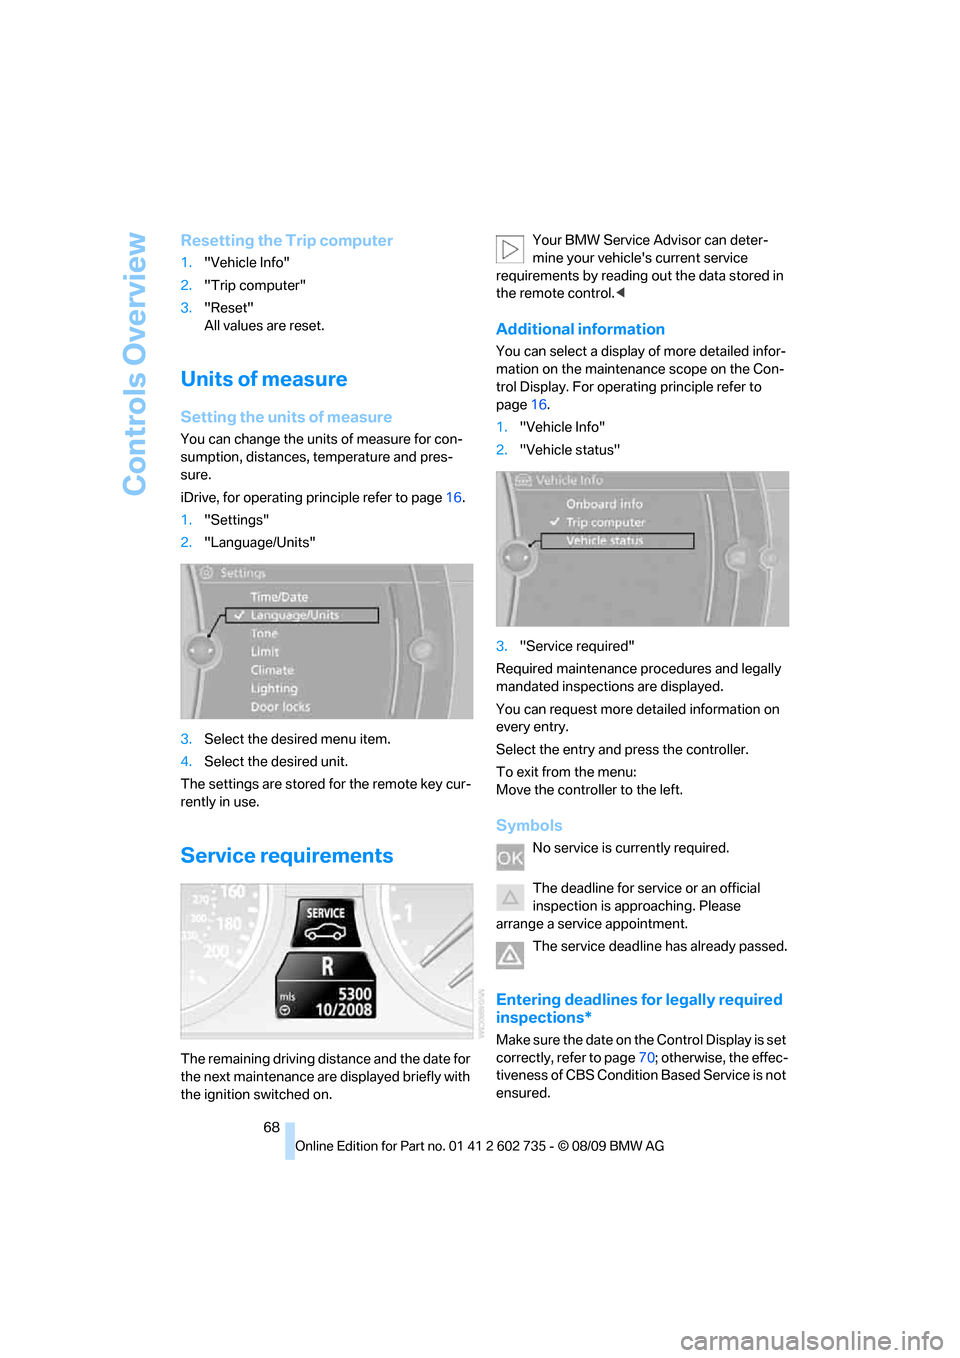
Units of measure
Setting the units of measure
You can change the units of measure for con-
sumption, distances, temperature and pres-
sure.
iDrive, for operating principle refer to page16.
1."Settings"
2."Language/Units"
3.Select the desired menu item.
4.Select the desired unit.
The settings are stored for the remote key cur-
rently in use.
Service requirements
The remaining driving distance and the date for
the next maintenance are displayed briefly with
the ignition switched on.Your BMW Service Advisor can deter-
mine your vehicle's current service
requirements by reading out the data stored in
the remote control.<
Additional information
You can select a display of more detailed infor-
mation on the maintenance scope on the Con-
trol Display. For operating principle refer to
page16.
1."Vehicle Info"
2."Vehicle status"
3."Service required"
Required maintenance procedures and legally
mandated inspections are displayed.
You can request more detailed information on
every entry.
Select the entry and press the controller.
To exit from the menu:
Move the controller to the left.
Symbols
No service is currently required.
The deadline for service or an official
inspection is approaching. Please
arrange a service appointment.
The service deadline has already passed.
Entering deadlines for legally required
inspections*
Make sure the date on the Control Display is set
correctly, refer to page70; otherwise, the effec-
tiveness of CBS Condition Based Service is not
ensured.