jump start BMW MOTORRAD G650 XMOTO 2007 Rider's Manual (in English)
[x] Cancel search | Manufacturer: BMW MOTORRAD, Model Year: 2007, Model line: G650 XMOTO, Model: BMW MOTORRAD G650 XMOTO 2007Pages: 132, PDF Size: 2.83 MB
Page 5 of 132
BMW Motorrad front-wheel
stand ......................... 79
Fuses ........................ 81
Bulbs . ........................ 82
Jump starting . . . ............. 90
Battery . . . . . . ................. 91
Number-plate carrier . . . ...... 95
9 Care . . . . . . ................ 97
Care products . . . ............. 98
Washing motorcycle . . . . ...... 98
Cleaning easily damaged
components . ................. 98
Paint care . . . ................. 99
Protective wax coating . .... 100
Laying up motorcycle . . .... 100
Restoring motorcycle to
use......................... 100
10 Technical data . . . . . . . 101
Troubleshooting chart . . .... 102
Threaded fasteners . . . . .... 103
Engine . . . . . . ............... 105
Fuel . . ...................... 106
Engine oil . . . ............... 106
Clutch ...................... 107
Transmission ............... 107 Rear-wheel drive
........... 108
Running gear ............... 108
Brakes . . . . . . ............... 109
Wheels and tyres ........... 109
Electrics . . . . . ............... 110
Frame ...................... 112
Dimensions . ............... 112
Weights . . . . . ............... 113
Riding specifications . . . .... 113
11 Service . . . . . . . . . . . . . . . . 115
BMW Motorrad service . .... 116
BMW Motorrad service
quality ...................... 116
BMW Motorrad Service
Card: on-the-spot break-
down assistance ........... 116
BMW Motorrad service net-
work . . ...................... 117
Maintenance work . . . . . . .... 117
Confirmation of mainten-
ance work . . . ............... 118
Confirmation of service . .... 123
Page 47 of 132
with OE BMW Motorrad ABS:Switch on the ignition.
Pre-ride check is performed.
( 45)
ABS self-diagnosis is
performed. ( 46)
Wait until the warning light for
the coolant temperature stops
flashing.
The idle actuator is posi-
tioned after you switch on
the ignition. The coolant-tem-
perature warning light flashes
if the idle actuator has not cor-
rectly positioned before the pre-
ride check completes. In order
to avoid subsequent problems,
wait for this process to complete
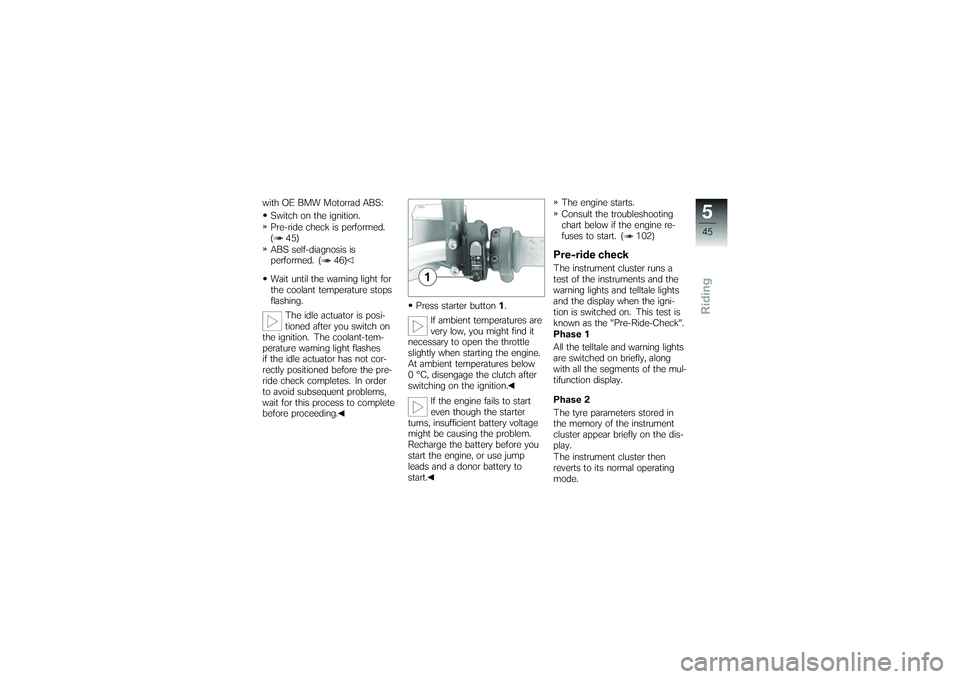
before proceeding. Press starter button
1.
If ambient temperatures are
very low, you might find it
necessary to open the throttle
slightly when starting the engine.
At ambient temperatures below
0 °C, disengage the clutch after
switching on the ignition.
If the engine fails to start
even though the starter
turns, insufficient battery voltage
might be causing the problem.
Recharge the battery before you
start the engine, or use jump
leads and a donor battery to
start. The engine starts.
Consult the troubleshooting
chart below if the engine re-
fuses to start. ( 102)
Pre-ride checkThe instrument cluster runs a
test of the instruments and the
warning lights and telltale lights
and the display when the igni-
tion is switched on. This test is
known as the "Pre-Ride-Check".
Phase 1
All the telltale and warning lights
are switched on briefly, along
with all the segments of the mul-
tifunction display.
Phase 2
The tyre parameters stored in
the memory of the instrument
cluster appear briefly on the dis-
play.
The instrument cluster then
reverts to its normal operating
mode.
545zRiding
Page 61 of 132
Maintenance
Maintenance
Notes................................ 60
Toolkit . . . ............................ 60
Engine oil ............................ 61
Brake system . ....................... 63
Brake pads . . . ....................... 64
Brake fluid ........................... 65
Coolant . . ............................ 67
Clutch . . . ............................ 68
Tyres ................................ 69
Rims ................................. 69
Chain ................................ 69
Wheels . . ............................ 71
BMW Motorrad auxiliary stand ....... 78
BMW Motorrad front-wheel
stand ................................ 79 Fuses . . .
............................. 81
Bulbs . . . ............................. 82
Jump starting . ....................... 90
Battery . . ............................. 91
Number-plate carrier ................. 95
859zMaintenance
Page 83 of 132
FusesRemoving fuse
Risk of fire if an attempt is
made to jumper defective
fuse.
Always replace defective fuses
with new fuses of the correct
amperage rating.
Switch off the ignition.
Remove the seat ( 38)
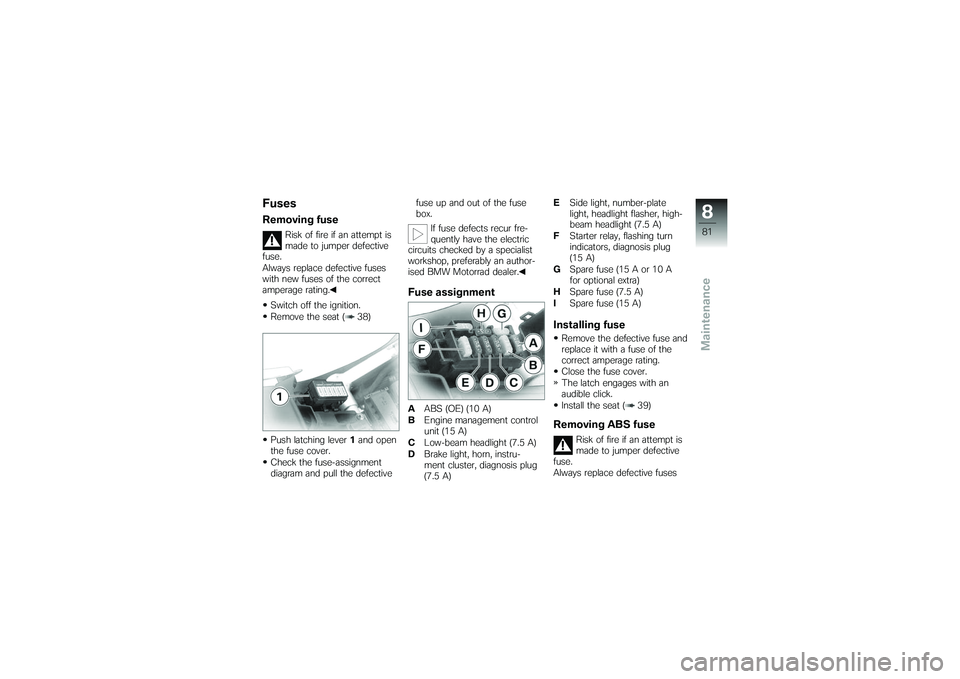
Push latching lever 1and open
the fuse cover.
Check the fuse-assignment
diagram and pull the defective fuse up and out of the fuse
box.
If fuse defects recur fre-
quently have the electric
circuits checked by a specialist
workshop, preferably an author-
ised BMW Motorrad dealer.
Fuse assignmentA ABS (OE) (10 A)
B Engine management control
unit (15 A)
C Low-beam headlight (7.5 A)
D Brake light, horn, instru-
ment cluster, diagnosis plug
(7.5 A) E
Side light, number-plate
light, headlight flasher, high-
beam headlight (7.5 A)
F Starter relay, flashing turn
indicators, diagnosis plug
(15 A)
G Spare fuse (15 A or 10 A
for optional extra)
H Spare fuse (7.5 A)
I Spare fuse (15 A)
Installing fuseRemove the defective fuse and
replace it with a fuse of the
correct amperage rating.
Close the fuse cover.
The latch engages with an
audible click.
Install the seat ( 39)Removing ABS fuse
Risk of fire if an attempt is
made to jumper defective
fuse.
Always replace defective fuses
881zMaintenance
Page 92 of 132
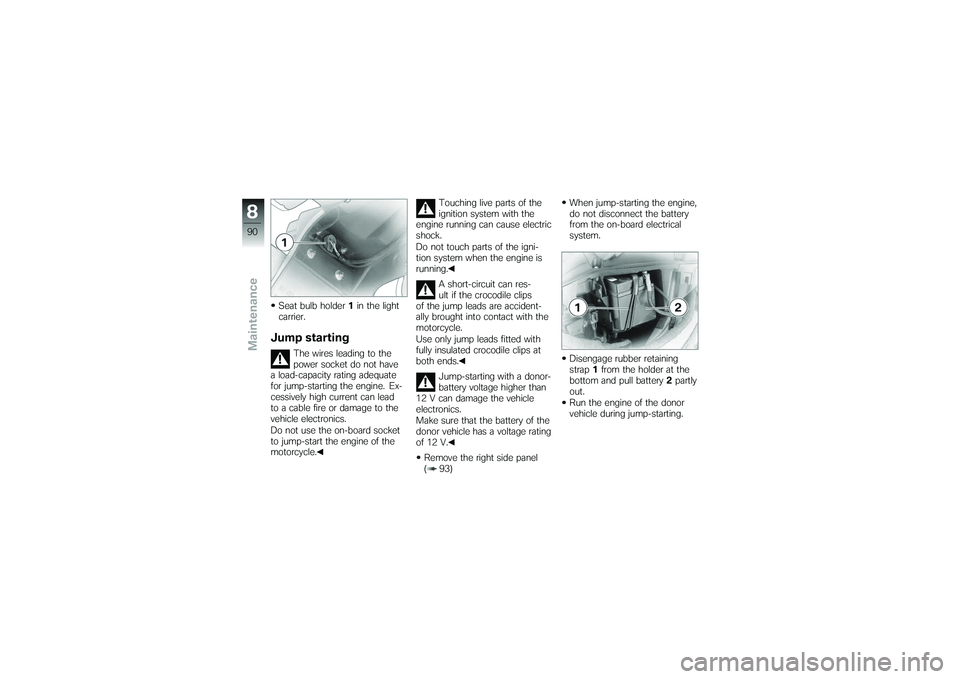
Seat bulb holder1in the light
carrier.Jump starting
The wires leading to the
power socket do not have
a load-capacity rating adequate
for jump-starting the engine. Ex-
cessively high current can lead
to a cable fire or damage to the
vehicle electronics.
Do not use the on-board socket
to jump-start the engine of the
motorcycle. Touching live parts of the
ignition system with the
engine running can cause electric
shock.
Do not touch parts of the igni-
tion system when the engine is
running.
A short-circuit can res-
ult if the crocodile clips
of the jump leads are accident-
ally brought into contact with the
motorcycle.
Use only jump leads fitted with
fully insulated crocodile clips at
both ends.
Jump-starting with a donor-
battery voltage higher than
12 V can damage the vehicle
electronics.
Make sure that the battery of the
donor vehicle has a voltage rating
of 12 V.
Remove the right side panel
( 93) When jump-starting the engine,
do not disconnect the battery
from the on-board electrical
system.
Disengage rubber retaining
strap
1from the holder at the
bottom and pull battery 2partly
out.
Run the engine of the donor
vehicle during jump-starting.
890zMaintenance
Page 93 of 132
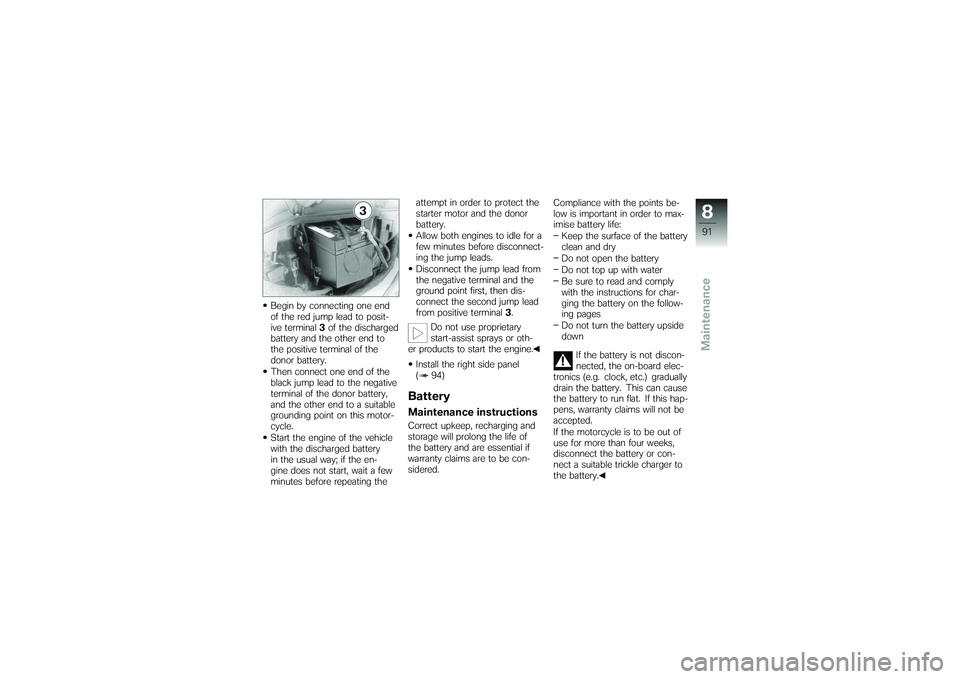
Begin by connecting one end
of the red jump lead to posit-
ive terminal3of the discharged
battery and the other end to
the positive terminal of the
donor battery.
Then connect one end of the
black jump lead to the negative
terminal of the donor battery,
and the other end to a suitable
grounding point on this motor-
cycle.
Start the engine of the vehicle
with the discharged battery
in the usual way; if the en-
gine does not start, wait a few
minutes before repeating the attempt in order to protect the
starter motor and the donor
battery.
Allow both engines to idle for a
few minutes before disconnect-
ing the jump leads.
Disconnect the jump lead from
the negative terminal and the
ground point first, then dis-
connect the second jump lead
from positive terminal
3.
Do not use proprietary
start-assist sprays or oth-
er products to start the engine.
Install the right side panel
( 94)
BatteryMaintenance instructionsCorrect upkeep, recharging and
storage will prolong the life of
the battery and are essential if
warranty claims are to be con-
sidered. Compliance with the points be-
low is important in order to max-
imise battery life:
Keep the surface of the battery
clean and dry
Do not open the battery
Do not top up with water
Be sure to read and comply
with the instructions for char-
ging the battery on the follow-
ing pages
Do not turn the battery upside
down
If the battery is not discon-
nected, the on-board elec-
tronics (e.g. clock, etc.) gradually
drain the battery. This can cause
the battery to run flat. If this hap-
pens, warranty claims will not be
accepted.
If the motorcycle is to be out of
use for more than four weeks,
disconnect the battery or con-
nect a suitable trickle charger to
the battery.
891zMaintenance
Page 129 of 132
J
Jump starting, 90
K
Keys, 28
L
Laying up, 100
LightsHigh-beam headlight, 31
Low-beam headlight, 31
Side light, 31
Low-beam headlight, 18
Luggage Correct loading, 57
M
Maintenance, 117 Notes, 60
Mirrors Adjusting, 33 Motorcycle
Care, 97
Laying up, 100
Overview, 11, 13
Parking, 49
Restoring to use, 100
Multifunction display See display, 17
N
Number-plate carrier Removing and installing, 95
O
Odometer and tripmeters, 20 Resetting, 17, 29
P
Power socket, 11, 56
Pre-ride check, 45
R
Rear-wheel drive Technical data, 108
Refuelling, 50
Restoring to use, 100 Rider's Manual
Stowage, 14
Running gear Technical data, 108
Running in, 46
S
Safety instructions, 42
Seat Lock, 13
Service, 116
Service Card, 116
Side light, 18
Spark plugs Technical data, 111
Speedometer, 20
Spring preload Adjusting, 11, 34
Standards, 7
Starter, 16
Starting, 44
Status indicators Overview, 20
Steering lock, 28 Locking, 28
12127zIndex