light BMW MOTORRAD K 1200 R 2004 Rider's Manual (in English)
[x] Cancel search | Manufacturer: BMW MOTORRAD, Model Year: 2004, Model line: K 1200 R, Model: BMW MOTORRAD K 1200 R 2004Pages: 168, PDF Size: 2.02 MB
Page 60 of 168
Riding458
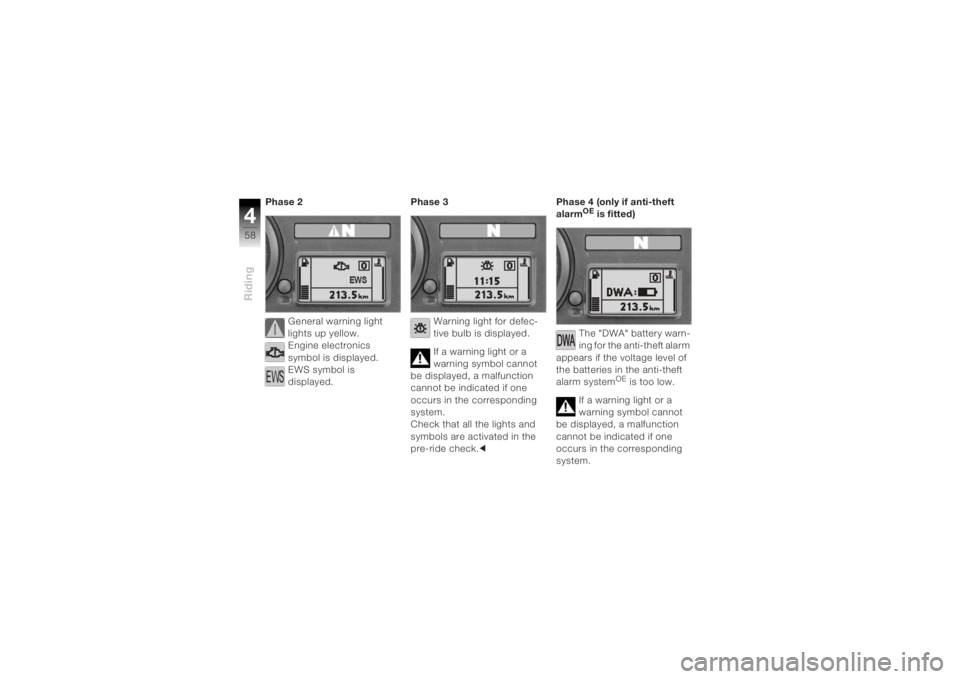
Phase 2General warning light
lights up yellow.
Engine electronics
symbol is displayed.
EWS symbol is
displayed. Phase 3
Warning light for defec-
tive bulb is displayed.
If a warning light or a
warning symbol cannot
be displayed, a malfunction
cannot be indicated if one
occurs in the corresponding
system.
Check that all the lights and
symbols are activated in the
pre-ride check. c Phase 4 (only if anti-theft
alarm
OE is fitted)
The "DWA" battery warn-
ing for the anti-theft alarm
appears if the voltage level of
the batteries in the anti-theft
alarm system
OE is too low.
If a warning light or a
warning symbol cannot
be displayed, a malfunction
cannot be indicated if one
occurs in the corresponding
system.
Page 61 of 168
459Riding
Check that all the lights and
symbols are activated in the
pre-ride check.c
If a light or symbol is not
displayed:
Have the fault rectified as quickly as possible by a spe-
cialist workshop, preferably
an authorised BMW motor-
cycle dealer.
Once the pre-ride check com-
pletes, the various gauges and
indicators show their current
values.
The pre-ride check is
aborted if you start the
engine before it completes. c
If the motorcycle is equipped
with BMW Integral ABS, the
ABS self-diagnosis routine is
performed as well.
ABS
OE
self-diagnosis
The BMW Integral ABS per-
forms self-diagnosis and a
pull-away test to ensure its
operability (
b
63). Self-diag-
nosis is performed automati-
cally when you switch on the
ignition.
Self-diagnosis is not per-
formed unless both brake
levers are in their fully released
positions. Only the residual
braking function (
b
77) is
available until self-diagnosis
completes. Release the brake levers.
Switch on the ignition.
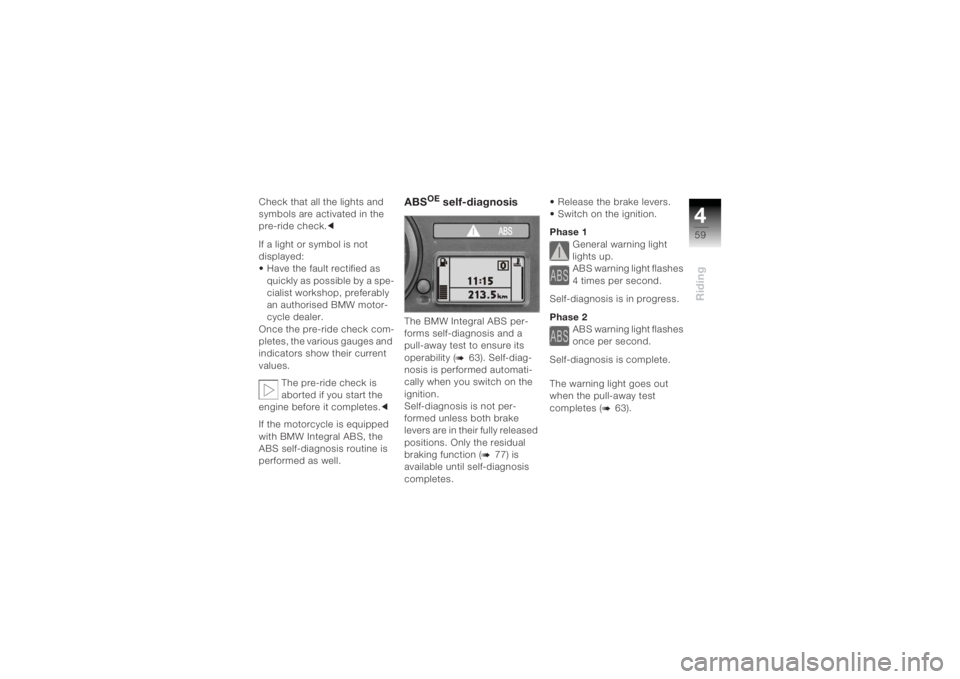
Phase 1
General warning light
lights up.
ABS warning light flashes
4 times per second.
Self-diagnosis is in progress.
Phase 2 ABS warning light flashes
once per second.
Self-diagnosis is complete.
The warning light goes out
when the pull-away test
completes (
b
63).
Page 62 of 168
Riding460
If you switch on the igni-
tion while the brakes are
applied, then start the engine
and ride off immediately, the
BMW Integral ABS remains in
its residual braking function
mode (b
77). Self-diagnosis is
performed as soon as the
brake levers are in their fully
released positions for the first
time. Until this completes the
ABS function is not available;
the same applies to power as-
sistance for the brakes.
Wait for ABS self-diagnosis to
complete before you start the
engine. c Starting on gradients:
Switch on the ignition
with gear engaged, clutch
lever released and both brake
levers released. When self-
diagnosis completes, apply
the brakes, disengage the
clutch, and start the engine. c
Side standYou cannot start the motorcy-
cle with the side stand
extended and a gear engaged.
The engine will switch itself off
if you start it with the gearbox
in neutral and then engage a
gear before retracting the side
stand.
GearboxYou can start the engine when
the gearbox is in neutral or if
you pull the clutch with a gear
engaged. Switch on the igni-
tion before you pull the clutch.
When the gearbox is in neutral,
the green neutral telltale light
is on and the gear indicator in
the multifunction display
shows 0.Starting
Do not turn the throttle
twistgrip when starting
the engine. At ambient tem-
peratures below 0 °C, disen-
gage the clutch after switching
on the ignition.c
Page 65 of 168
463Riding
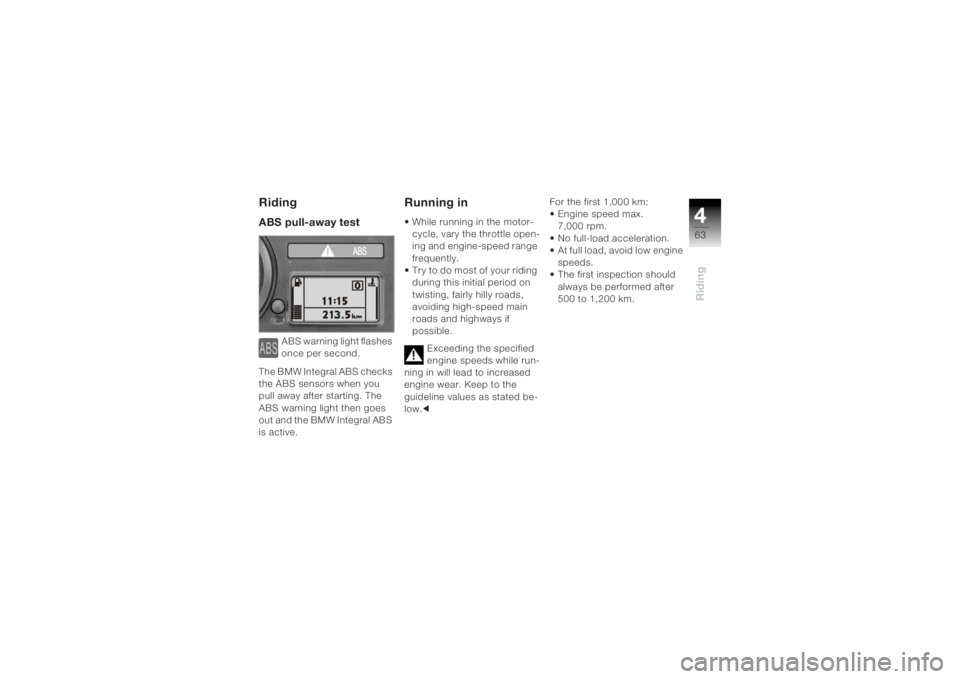
RidingABS pull-away test
ABS warning light flashes
once per second.
The BMW Integral ABS checks
the ABS sensors when you
pull away after starting. The
ABS warning light then goes
out and the BMW Integral ABS
is active.
Running in• While running in the motor- cycle, vary the throttle open-
ing and engine-speed range
frequently.
• Try to do most of your riding during this initial period on
twisting, fairly hilly roads,
avoiding high-speed main
roads and highways if
possible.
Exceeding the specified
engine speeds while run-
ning in will lead to increased
engine wear. Keep to the
guideline values as stated be-
low. c For the first 1
,000 km:
• Engine speed max.
7,000 rpm.
• No full-load acceleration.
• At full load, avoid low engine speeds.
• The first inspection should
always be performed after
500 to 1 ,200 km.
Page 75 of 168
473Riding
Pushing motorcycle off
centre stand
OE
Brake servo assistance is
not available when the ig-
nition is off; the motorcycle
can start to roll.
Particularly when the motorcy-
cle is parked on a gradient,
switch on the ignition and wait
for the ABS to complete its
self-diagnosis (b
59). c
• Unlock the ignition lock, switch on the ignition.
• Wait for ABS self-diagnosis
to complete.
• Place your left hand on the
left handlebar grip.
• Grip the rear grab handle with your right hand.
• Push the motorcycle forward off the centre stand. • Check that the centre stand
has fully retracted.
Fuel
Fuel is flammable and
explosive.
Do not smoke. Never bring a
naked flame near the fuel
tank. c
Fuel expands under the
influence of high temper-
atures and exposure to
sunlight.
Do not fill the tank past the
bottom edge of the filler
neck. c
Fuel can damage plastic
parts.
Do not permit fuel to come into
contact with body panels. c
Fuel grade
Leaded fuel will destroy
the catalytic converter.
Use only unleaded fuel. c
The engine is designed to run
on:
– Super Plus (premium) unleaded (98 RON)
Use fuel of this grade by pref-
erence, in order to achieve
rated performance and fuel
consumption.
You can also run the engine on
fuel of the following grade:
– Super unleaded (95 RON)
Page 101 of 168
699Maintenance
Removing front wheel
The types of threaded
fastener used are listed
on (b
128 ).c
There is a risk of damag-
ing parts of the front
brakes, particularly the
BMW Integral ABS, in the
course of the procedure de-
scribed below.
Take care not to damage the
brake system, in particular the
ABS sensor with cable and the
ABS sensor ring. c Place the motorcycle on the
centre stand
OE or a suitable
auxiliary stand.
It is advisable to use the
BMW rear wheel stand
for this purpose. c
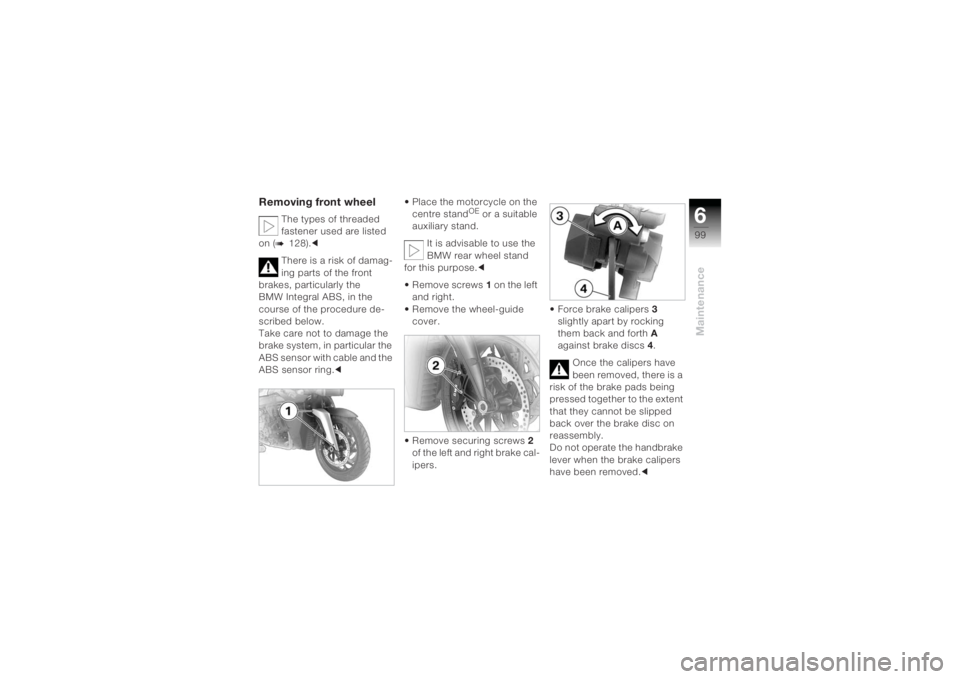
Remove screws 1 on the left
and right.
Remove the wheel-guide cover.
Remove securing screws 2
of the left and right brake cal-
ipers. Force brake calipers
3
slightly apart by rocking
them back and forth A
against brake discs 4.
Once the calipers have
been removed, there is a
risk of the brake pads being
pressed together to the extent
that they cannot be slipped
back over the brake disc on
reassembly.
Do not operate the handbrake
lever when the brake calipers
have been removed. c
Page 111 of 168
6109
Maintenance
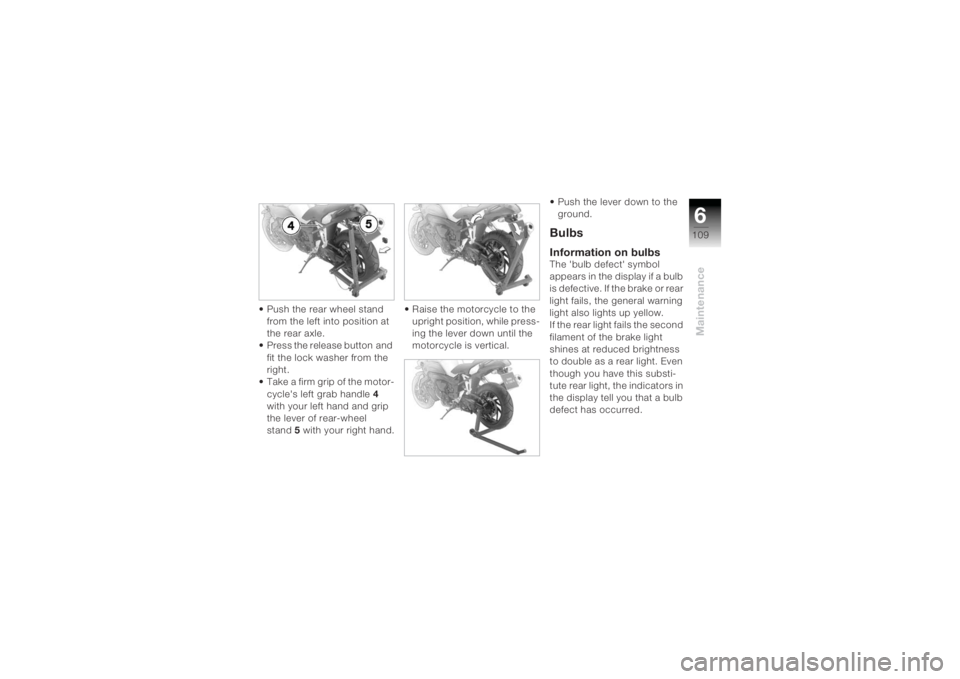
• Push the rear wheel stand from the left into position at
the rear axle.
• Press the release button and
fit the lock washer from the
right.
• Take a firm grip of the motor- cycle's left grab handle 4
with your left hand and grip
the lever of rear-wheel
stand 5 with your right hand. • Raise the motorcycle to the
upright position, while press-
ing the lever down until the
motorcycle is vertical. • Push the lever down to the
ground.
BulbsInformation on bulbsThe 'bulb defect' symbol
appears in the display if a bulb
is defective. If the brake or rear
light fails, the general warning
light also lights up yellow.
If the rear light fails the second
filament of the brake light
shines at reduced brightness
to double as a rear light. Even
though you have this substi-
tute rear light, the indicators in
the display tell you that a bulb
defect has occurred.
Page 112 of 168
Maintenance6110
A defective bulb places
your safety at risk be-
cause it is easier for other road
users to oversee you and your
motorcycle.
Replace defective bulbs as
soon as possible; always carry
a complete set of spare bulbs
if possible. c
The types of bulb used
are listed on (
b
139). c
Do not touch the glass of
new bulbs with your fin-
gers. Use a clean, dry cloth to
hold the bulbs when handling
them. Dirt deposits, in particu-
lar oil and grease, interfere
with heat radiation from the
bulb. This leads to overheating
and shortens the bulb’s oper-
ating life. c The types of threaded
fastener used are listed
on (
b
128). c
Replacing low-beam
headlight bulb
If it is not standing firmly,
the motorcycle could
topple in the course of the
operations described below.
Make sure that the motorcycle
is steady on its stand. c
The bulb is pressurised
and can cause injury if
damaged.
Wear protective goggles and
gloves when changing
bulbs. c
Turn the handlebars to
the right to facilitate
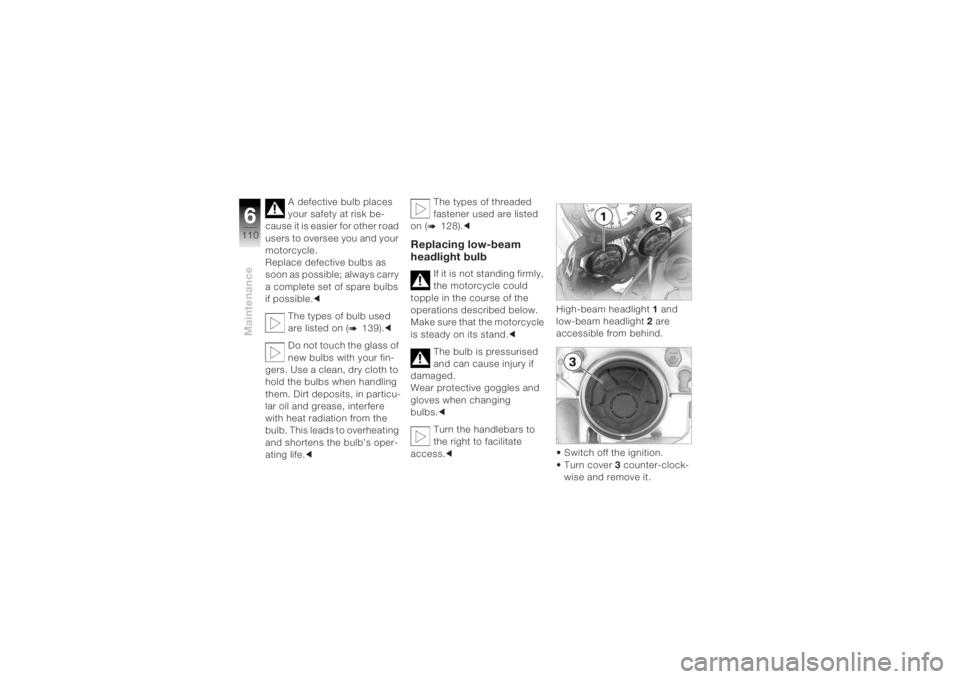
access. c High-beam headlight
1 and
low-beam headlight 2 are
accessible from behind.
• Switch off the ignition.
•Turn cover 3 counter-clock-
wise and remove it.
Page 113 of 168
6111
Maintenance
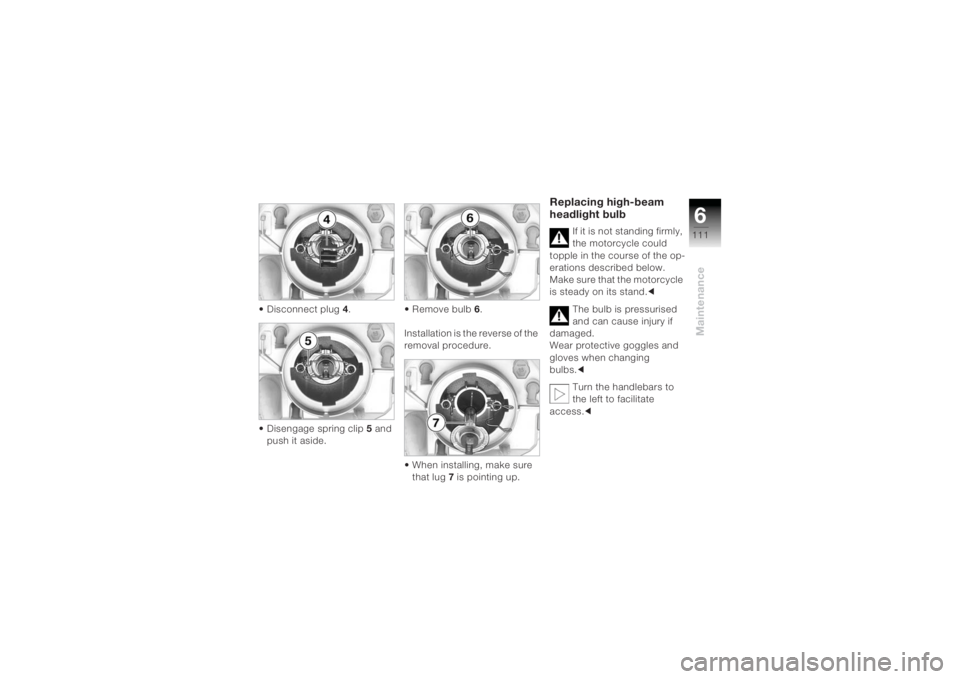
• Disconnect plug 4.
• Disengage spring clip 5 and
push it aside. • Remove bulb
6.
Installation is the reverse of the
removal procedure.
• When installing, make sure that lug 7 is pointing up.
Replacing high-beam
headlight bulb
If it is not standing firmly,
the motorcycle could
topple in the course of the op-
erations described below.
Make sure that the motorcycle
is steady on its stand. c
The bulb is pressurised
and can cause injury if
damaged.
Wear protective goggles and
gloves when changing
bulbs.c
Turn the handlebars to
the left to facilitate
access. c
Page 114 of 168
Maintenance6112
• The procedure for changing the high-beam headlight
bulb is the same as that for
the low-beam bulb. Note,
however, that the high-beam
headlight bulb is held in
place by a single-leg, vertical
spring clip.Replacing parking light
If it is not standing firmly,
the motorcycle could
topple in the course of the
operations described below.
Make sure that the motorcycle
is steady on its stand. c• Switch off the ignition.
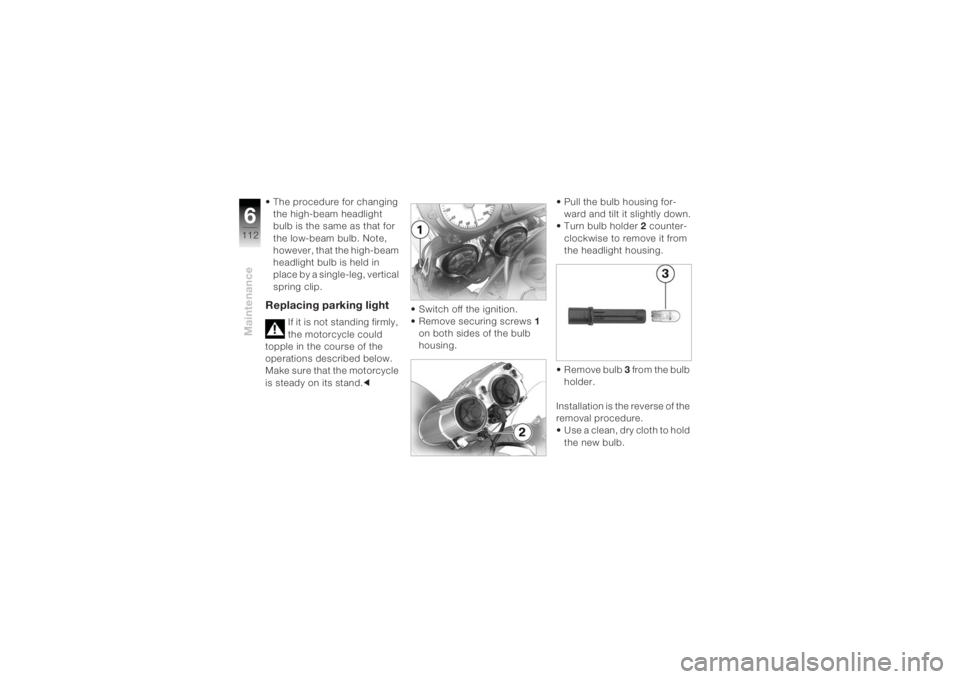
• Remove securing screws
1
on both sides of the bulb
housing. • Pull the bulb housing for-
ward and tilt it slightly down.
• Turn bulb holder 2 counter-
clockwise to remove it from
the headlight housing.
• Remove bulb 3 from the bulb
holder.
Installation is the reverse of the
removal procedure.
• Use a clean, dry cloth to hold the new bulb.