BMW MOTORRAD K 1200 R 2007 Rider's Manual (in English)
Manufacturer: BMW MOTORRAD, Model Year: 2007, Model line: K 1200 R, Model: BMW MOTORRAD K 1200 R 2007Pages: 168, PDF Size: 2.85 MB
Page 91 of 168

Accessories
Accessories
General instructions.................. 90
Power socket . ....................... 90
Luggage ............................. 91
Case
OA
.............................. 92
789zAccessories
Page 92 of 168
General instructionsBMW Motorrad recommends
the use of parts and accessories
for your motorcycle that are ap-
proved by BMW for this purpose.
Genuine BMW parts and ac-
cessories and other products
which BMW has approved can
be obtained from your authorised
BMW Motorrad dealer, together
with expert advice on their install-
ation and use.
These parts and products have
been tested by BMW for safety,
function and suitability. BMW
accepts product liability for them.
Conversely, BMW is unable to
accept any liability whatsoever
for parts and accessories which it
has not approved.BMW Motorrad cannot
assess each non-BMW
product to determine wheth-
er it can be used on or in con-
nection with BMW motorcycles without constituting a safety haz-
ard. Country-specific official au-
thorisation does not suffice as
assurance. Tests conducted by
these instances cannot make
provision for all operating con-
ditions experienced by BMW mo-
torcycles and, consequently, they
are not sufficient in some circum-
stances.
Use only parts and accessor-
ies approved by BMW for your
motorcycle.
Whenever you are planning
modifications, comply with all
the legal requirements. Make
sure that the motorcycle does
not infringe national road-vehicle
construction and use regulations.
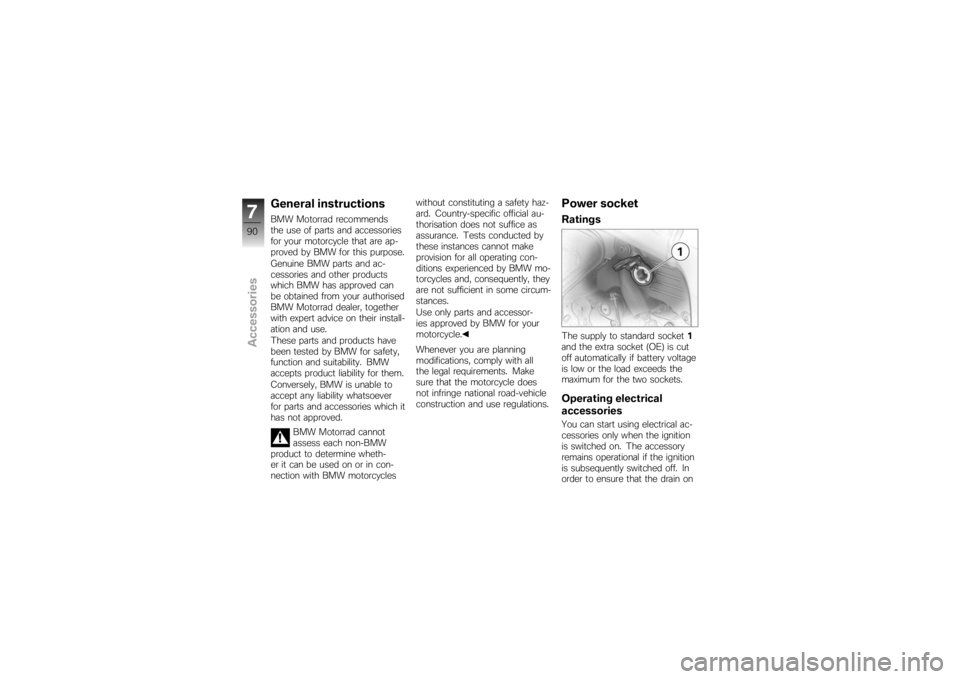
Power socketRatingsThe supply to standard socket
1
and the extra socket (OE) is cut
off automatically if battery voltage
is low or the load exceeds the
maximum for the two sockets.Operating electrical
accessoriesYou can start using electrical ac-
cessories only when the ignition
is switched on. The accessory
remains operational if the ignition
is subsequently switched off. In
order to ensure that the drain on
790zAccessories
Page 93 of 168
the on-board power supply sys-
tem is minimised, the supply to
the power socket is cut off ap-
proximately 15 minutes after the
ignition is switched off, and it is
also temporarily interrupted dur-
ing the start procedure.Cable routingThe cables from the power sock-
et to the auxiliary device must be
routed in such a way that they:Do not impede the rider
Do not restrict or obstruct the
steering angle and handling
characteristics
Cannot be trapped
Incorrectly routed cables
can impede the rider.
Route the cables as described
above.
LuggageCorrect loading
Overloading and imbal-
anced loads can adversely
affect the motorcycle's handling.
Do not exceed the permissible
gross weight and be sure to
comply with the instructions on
loading.
Set spring preload, damping
characteristic and tyre pres-
sures to suit total weight.
Adjust the spring preload for
rear wheel ( 61)
Check the tyre pressure
( 65)
Adjust the damping for rear
wheel ( 62)
Ensure that the case volumes
on the left and right are equal.
Make sure that the weight is
uniformly distributed between
right and left. Pack heavy items at the bot-
tom and toward the inboard
side.
Note the maximum permissible
payload of the cases and the
speed limit for riding with cases
on the motorcycle.
Payload of cases
max 8 kg Maximum permissible
speed for riding with
cases fitted to the motorcycle
max 180 km/h
Note the maximum permissible
payload of the tank rucksack.
Payload of tank rucksack
max 5 kg
Note the maximum permissible
payload of the tankbag.
791zAccessories
Page 94 of 168
Payload of tankbag
max 5 kg
Note the maximum permissible
payload of the luggage carrier.
Payload of luggage carri-
er
max 5 kg
Case
OA
Release leversEach case has two levers, one on
each side of the lock.
The grey lever marked OPEN is
for opening and closing the case.
The black lever marked
RELEASE is for removing and
attaching the case.
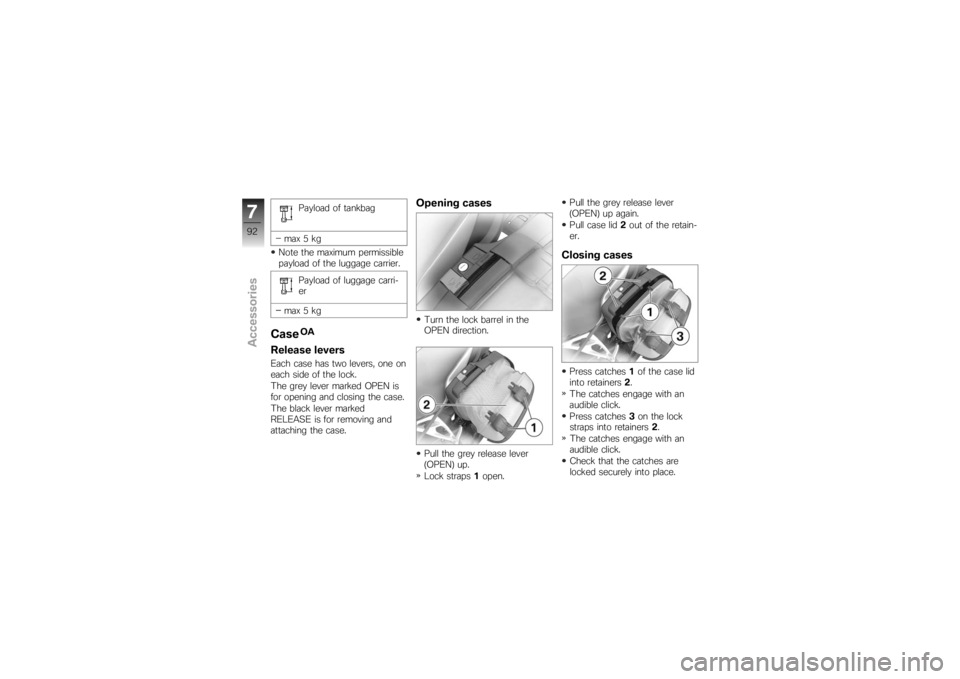
Opening casesTurn the lock barrel in the
OPEN direction.
Pull the grey release lever
(OPEN) up.
Lock straps 1open. Pull the grey release lever
(OPEN) up again.
Pull case lid
2out of the retain-
er.
Closing casesPress catches 1of the case lid
into retainers 2.
The catches engage with an
audible click.
Press catches 3on the lock
straps into retainers 2.
The catches engage with an
audible click.
Check that the catches are
locked securely into place.
792zAccessories
Page 95 of 168
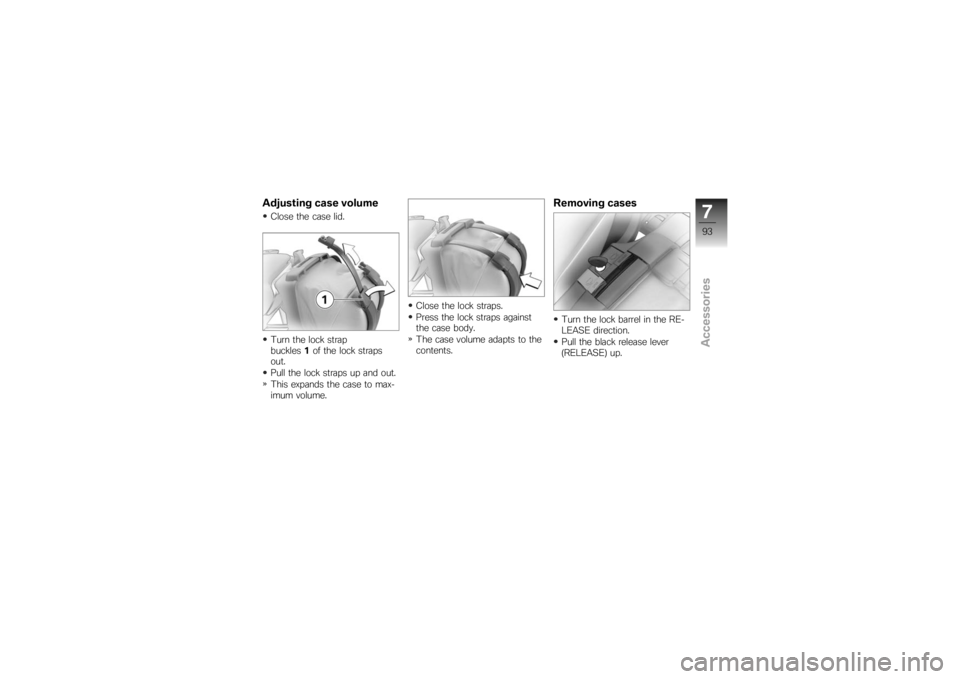
Adjusting case volumeClose the case lid.
Turn the lock strap
buckles1of the lock straps
out.
Pull the lock straps up and out.
This expands the case to max-
imum volume. Close the lock straps.
Press the lock straps against
the case body.
The case volume adapts to the
contents.
Removing casesTurn the lock barrel in the RE-
LEASE direction.
Pull the black release lever
(RELEASE) up.
793zAccessories
Page 96 of 168
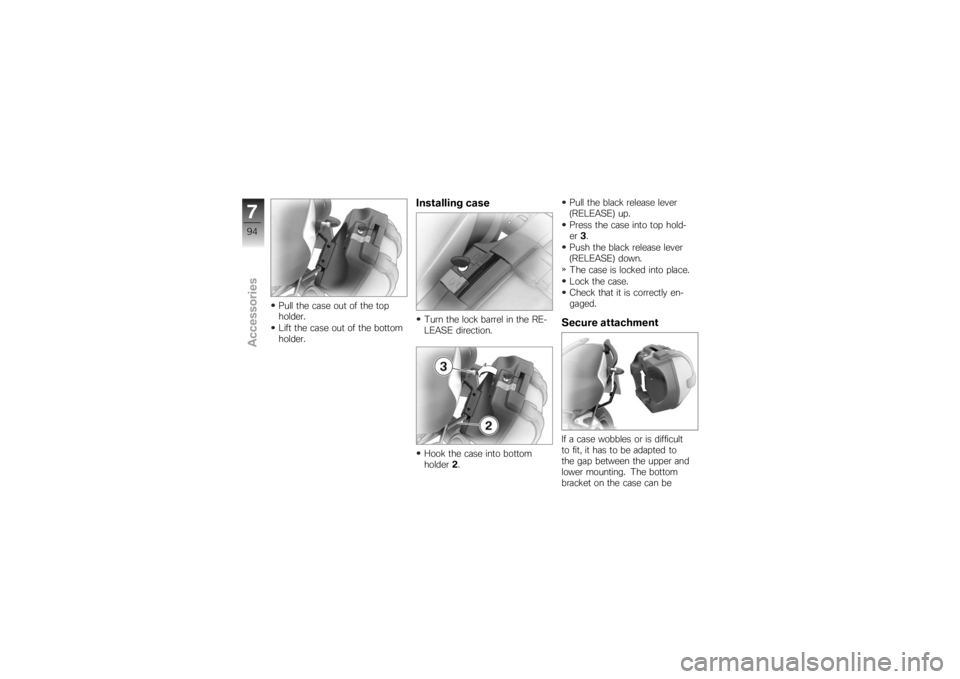
Pull the case out of the top
holder.
Lift the case out of the bottom
holder.
Installing caseTurn the lock barrel in the RE-
LEASE direction.
Hook the case into bottom
holder2. Pull the black release lever
(RELEASE) up.
Press the case into top hold-
er
3.
Push the black release lever
(RELEASE) down.
The case is locked into place.
Lock the case.
Check that it is correctly en-
gaged.
Secure attachmentIf a case wobbles or is difficult
to fit, it has to be adapted to
the gap between the upper and
lower mounting. The bottom
bracket on the case can be
794zAccessories
Page 97 of 168
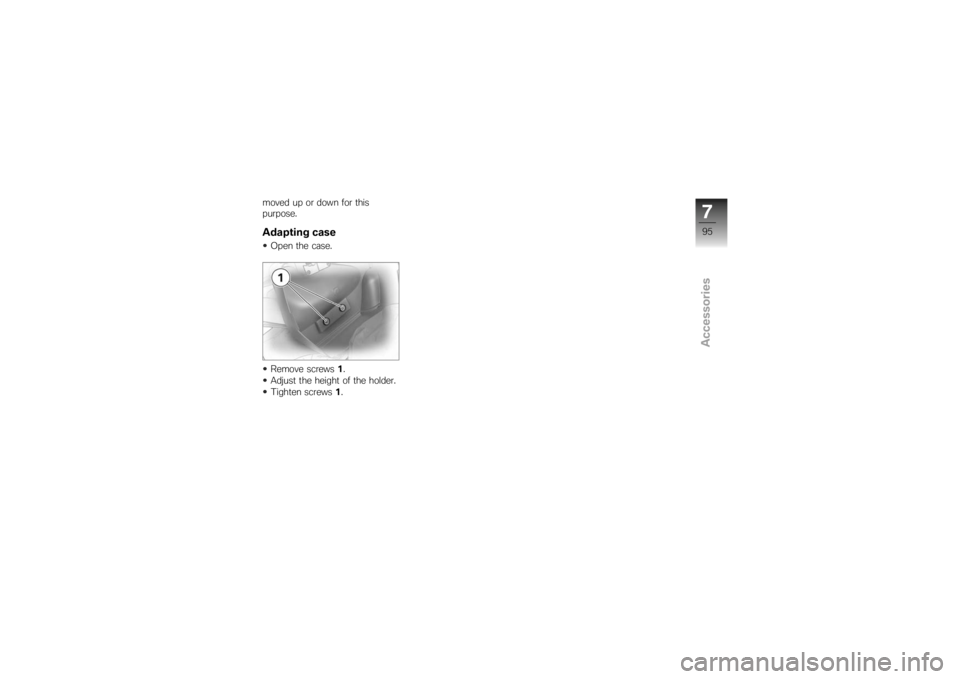
moved up or down for this
purpose.Adapting caseOpen the case.
Remove screws1.
Adjust the height of the holder.
Tighten screws 1.
795zAccessories
Page 98 of 168

796zAccessories
Page 99 of 168

Maintenance
Maintenance
General instructions.................. 98
Toolkit ............................... 98
Engine oil ............................ 99
Brake system, general . . . .......... 101
Brake pads . . . ..................... 102
Brake fluid ......................... 103
Clutch ............................. 105
Tyres .............................. 106
Rims ............................... 107
Wheels ............................ 107
Front-wheel stand ................. 115
Rear-wheel stand .................. 116
Bulbs .............................. 118
Jump starting . ..................... 125
Battery ............................. 126
897zMaintenance
Page 100 of 168
General instructionsThe Maintenance chapter de-
scribes straightforward proced-
ures for checking and replacing
certain wear parts.
Special tightening torques are lis-
ted as applicable. The tightening
torques for the threaded fasten-
ers on your motorcycle are listed
in the section entitled "Technical
data".
You will find information on more
extensive maintenance and re-
pair work in the Repair Manual
on DVD/CD-ROM (RepROM) for
your motorcycle, which is avail-
able from your authorised BMW
Motorrad dealer.
Some of the work calls for spe-
cial tools and a thorough know-
ledge of motorcycles. If you
are in doubt consult a specialist
workshop, preferably your author-
ised BMW Motorrad dealer.
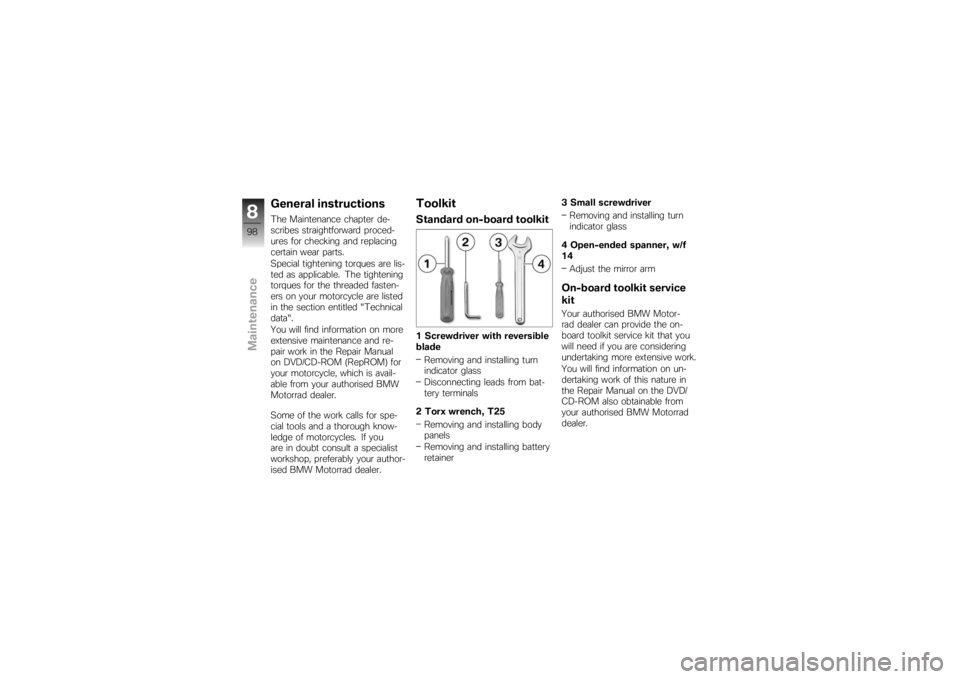
ToolkitStandard on-board toolkit1 Screwdriver with reversible
bladeRemoving and installing turn
indicator glass
Disconnecting leads from bat-
tery terminals
2 Torx wrench, T25 Removing and installing body
panels
Removing and installing battery
retainer 3 Small screwdriver
Removing and installing turn
indicator glass
4 Open-ended spanner, w/f
14 Adjust the mirror arm
On-board toolkit service
kitYour authorised BMW Motor-
rad dealer can provide the on-
board toolkit service kit that you
will need if you are considering
undertaking more extensive work.
You will find information on un-
dertaking work of this nature in
the Repair Manual on the DVD/
CD-ROM also obtainable from
your authorised BMW Motorrad
dealer.
898zMaintenance