BMW MOTORRAD K 1200 S 2004 Rider's Manual (in English)
Manufacturer: BMW MOTORRAD, Model Year: 2004, Model line: K 1200 S, Model: BMW MOTORRAD K 1200 S 2004Pages: 162, PDF Size: 2.99 MB
Page 101 of 162
699Maintenance
Without BMW Integral ABS:
• Press the handbrake lever
firmly a number of times until
the resistance point is
noticeable.
With BMW Integral ABS:
• Switch on the ignition.
• Wait for the self-diagnosis
(b 54)
.
• Press the handbrake lever
firmly a number of times until
the resistance point is
noticeable.
B rake pads that are not fully
applied to the brake discs
lead to delays in the braking ef-
fect. Before beginning a journey,
check that the braking effect
kicks in without any delay.c
Removing the rear wheel
You will find an overview
of the types of screw
used on (
b 124).c
Motorcycle without centre
stand
OA
:
To ensure a secure stance of
the motorcycle during the
following work:
• Place the motorcycle on the
BMW Motorrad rear wheel
stand (b 104).
• The rest of the procedure is
the same as for motorcycles
with centre stands.Motorcycles with centre
stands
OA
:
• Place the motorcycle on the
centre stand
OA.
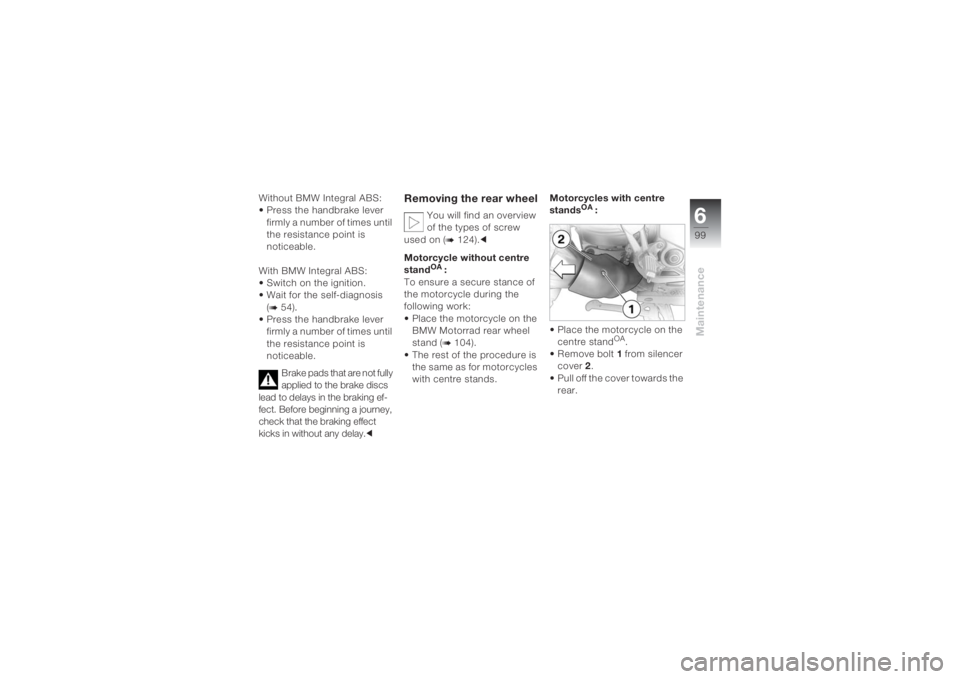
• Remove bolt1 from silencer
cover 2.
• Pull off the cover towards the
rear.
Page 102 of 162
Maintenance6100
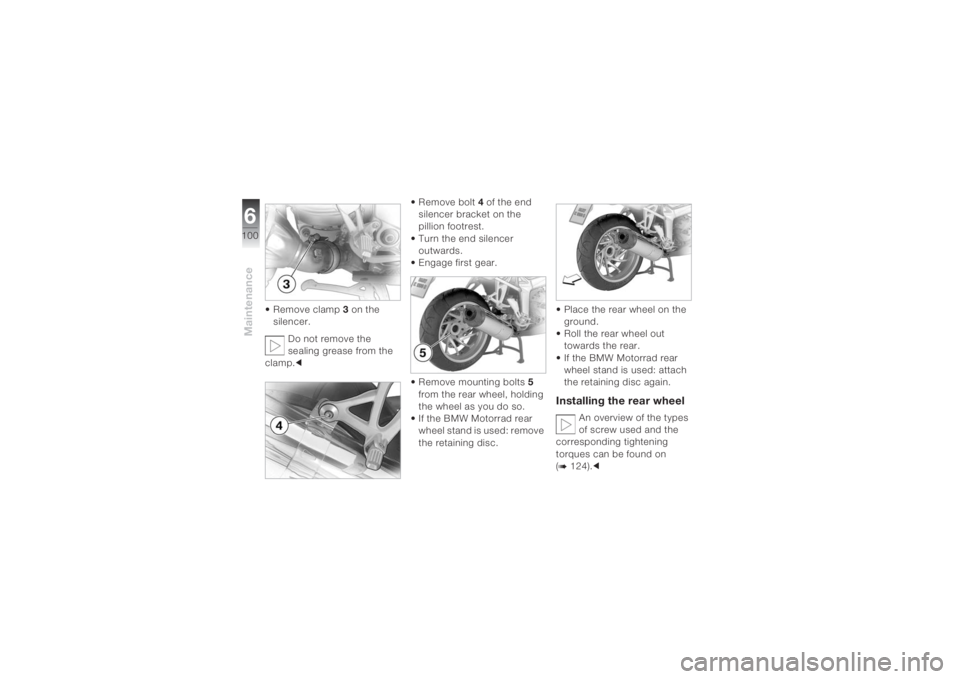
• Remove clamp3 on the
silencer.
Do not remove the
sealing grease from the
clamp.c• Remove bolt4 of the end
silencer bracket on the
pillion footrest.
• Turn the end silencer
outwards.
• Engage first gear.
• Remove mounting bolts5
from the rear wheel, holding
the wheel as you do so.
• If the BMW Motorrad rear
wheel stand is used: remove
the retaining disc.• Place the rear wheel on the
ground.
• Roll the rear wheel out
towards the rear.
• If the BMW Motorrad rear
wheel stand is used: attach
the retaining disc again.
Installing the rear wheel
An overview of the types
of screw used and the
corresponding tightening
torques can be found on
(
b 124).c
Page 103 of 162
6101
Maintenance
Screw connections tight-
ened to the incorrect
torque can come loose or
damage the screw connection
itself.
Make sure that you have the
tightening torques checked,
preferably by an authorised
BMW motorcycle dealer.c
• If the BMW Motorrad rear
wheel stand is used: remove
the retaining disc.• Roll the rear wheel onto the
rear wheel support.
• Place the rear wheel on the
rear wheel support.
• If the BMW Motorrad rear
wheel stand is used: attach
the retaining disc again.
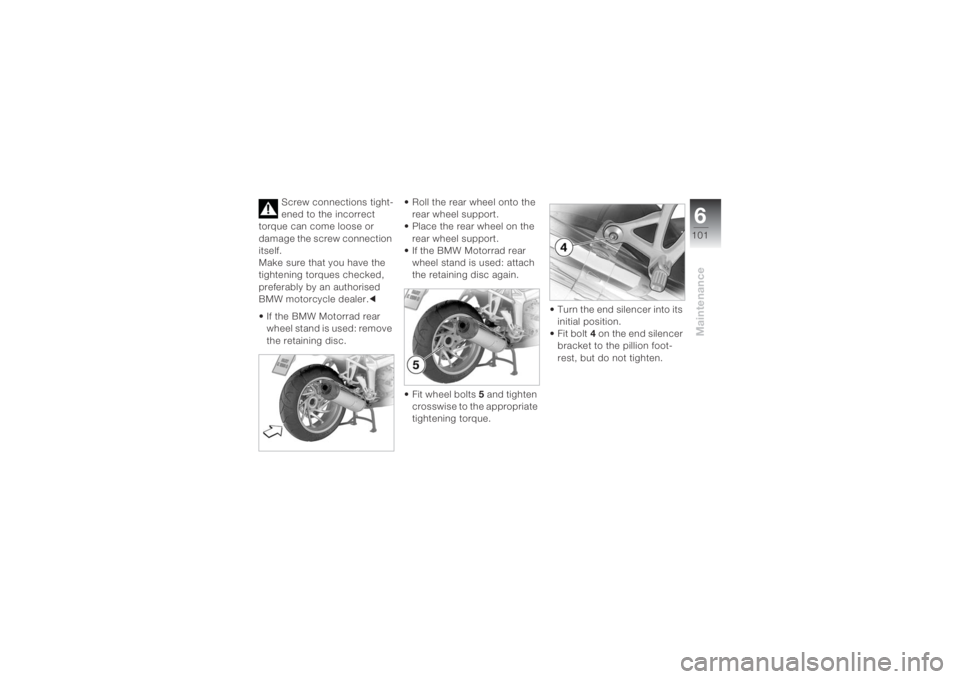
• Fit wheel bolts 5 and tighten
crosswise to the appropriate
tightening torque.• Turn the end silencer into its
initial position.
• Fit bolt4 on the end silencer
bracket to the pillion foot-
rest, but do not tighten.
Page 104 of 162
Maintenance6102
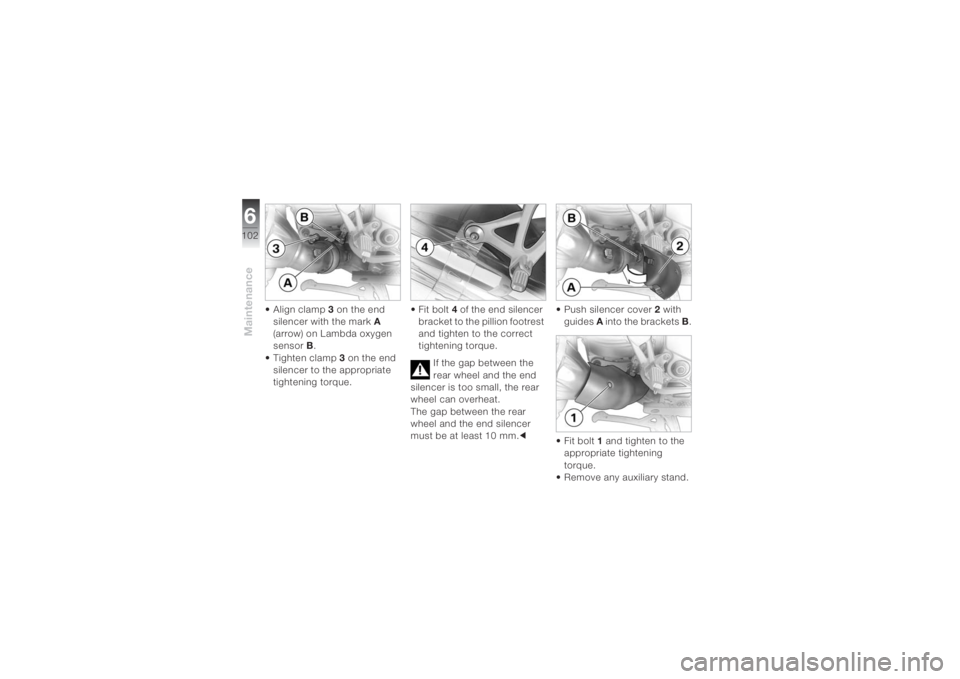
• Align clamp3 on the end
silencer with the markA
(arrow) on Lambda oxygen
sensor B.
• Tighten clamp3 on the end
silencer to the appropriate
tightening torque.• Fit bolt 4 of the end silencer
bracket to the pillion footrest
and tighten to the correct
tightening torque.
If the gap between the
rear wheel and the end
silencer is too small, the rear
wheel can overheat.
The gap between the rear
wheel and the end silencer
must be at least 10 mm.c• Push silencer cover 2 with
guides A into the brackets B.
• Fit bolt1 and tighten to the
appropriate tightening
torque.
• Remove any auxiliary stand.
Page 105 of 162
6103
Maintenance
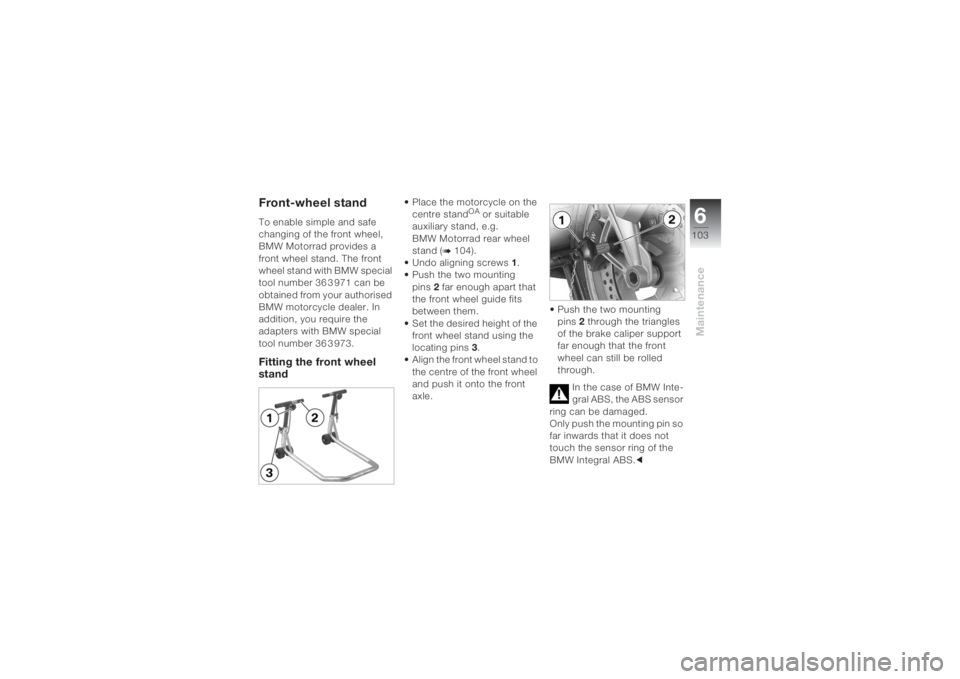
Front-wheel standTo enable simple and safe
changing of the front wheel,
BMW Motorrad provides a
front wheel stand. The front
wheel stand with BMW special
tool number 36 3 971 can be
obtained from your authorised
BMW motorcycle dealer. In
addition, you require the
adapters with BMW special
tool number 36 3 973.Fitting the front wheel
stand
• Place the motorcycle on the
centre stand
OA or suitable
auxiliary stand, e.g.
BMW Motorrad rear wheel
stand (
b 104).
• Undo aligning screws1.
• Push the two mounting
pins 2 far enough apart that
the front wheel guide fits
between them.
• Set the desired height of the
front wheel stand using the
locating pins3.
• Align the front wheel stand to
the centre of the front wheel
and push it onto the front
axle.• Push the two mounting
pins 2 through the triangles
of the brake caliper support
far enough that the front
wheel can still be rolled
through.
In the case of BMW Inte-
gral ABS, the ABS sensor
ring can be damaged.
Only push the mounting pin so
far inwards that it does not
touch the sensor ring of the
BMW Integral ABS.c
Page 106 of 162
Maintenance6104
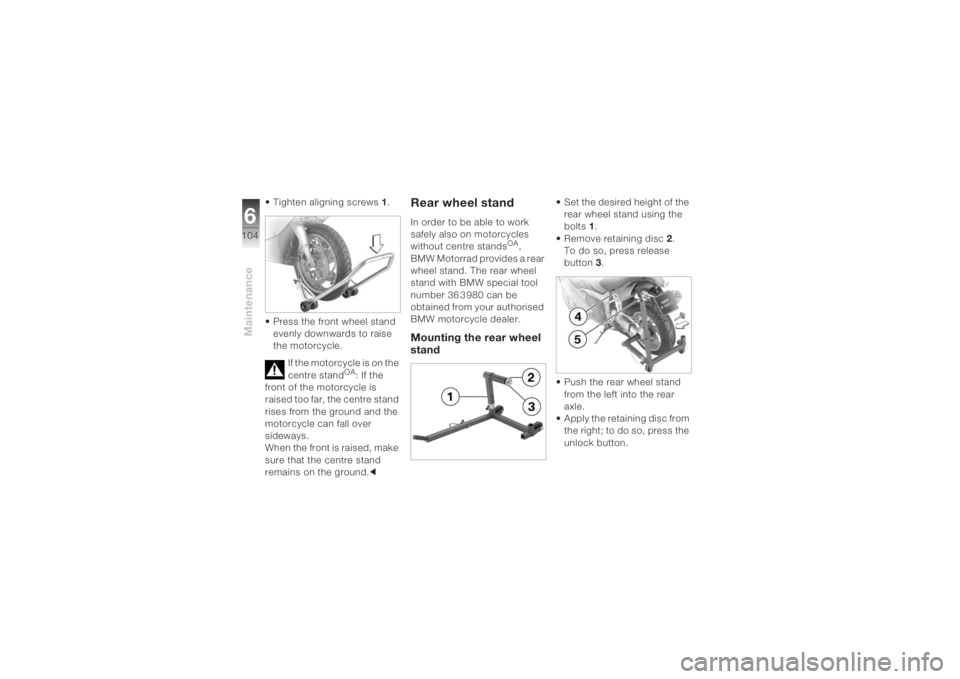
• Tighten aligning screws1.
• Press the front wheel stand
evenly downwards to raise
the motorcycle.
If the motorcycle is on the
centre stand
OA: If the
front of the motorcycle is
raised too far, the centre stand
rises from the ground and the
motorcycle can fall over
sideways.
When the front is raised, make
sure that the centre stand
remains on the ground.c
Rear wheel standIn order to be able to work
safely also on motorcycles
without centre stands
OA,
BMW Motorrad provides a rear
wheel stand. The rear wheel
stand with BMW special tool
number 36 3 980 can be
obtained from your authorised
BMW motorcycle dealer.
Mounting the rear wheel
stand
• Set the desired height of the
rear wheel stand using the
bolts 1.
• Remove retaining disc2.
To do so, press release
button3.
• Push the rear wheel stand
from the left into the rear
axle.
• Apply the retaining disc from
the right; to do so, press the
unlock button.
Page 107 of 162
6105
Maintenance
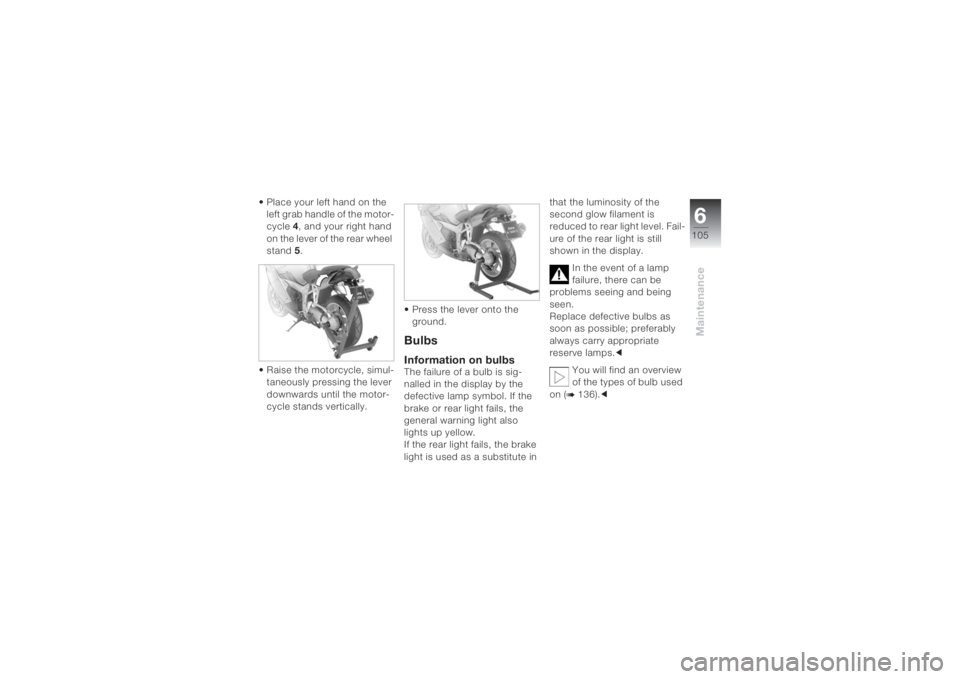
• Place your left hand on the
left grab handle of the motor-
cycle 4, and your right hand
on the lever of the rear wheel
stand 5.
• Raise the motorcycle, simul-
taneously pressing the lever
downwards until the motor-
cycle stands vertically.• Press the lever onto the
ground.
BulbsInformation on bulbsThe failure of a bulb is sig-
nalled in the display by the
defective lamp symbol. If the
brake or rear light fails, the
general warning light also
lights up yellow.
If the rear light fails, the brake
light is used as a substitute in that the luminosity of the
second glow filament is
reduced to rear light level. Fail-
ure of the rear light is still
shown in the display.
In the event of a lamp
failure, there can be
problems seeing and being
seen.
Replace defective bulbs as
soon as possible; preferably
always carry appropriate
reserve lamps.c
You will find an overview
of the types of bulb used
on (
b 136).c
Page 108 of 162
Maintenance6106
Do not touch the glass of
new bulbs with your
fingers. Use a clean, dry cloth
when fitting. Dirt deposits, in
particular oil and grease,
interfere with heat radiation
from the bulb. This will result in
overheating and therefore
shorten the service life of the
bulbs.c
You will find an overview
of the types of screw
used on (
b 124).c
Replacing the low-beam
headlight bulb
During the work
described below, a
motorcycle that has been
parked unsafely can fall over.
Make sure that the motorcycle
is parked securely.cThe bulb is pressurised,
injuries may result if the
bulb is damaged.
Wear protective goggles and
gloves when changing
bulbs.c
To achieve better acces-
sibility, turn the handle-
bars to the right.c
• If necessary, switch off the
ignition.
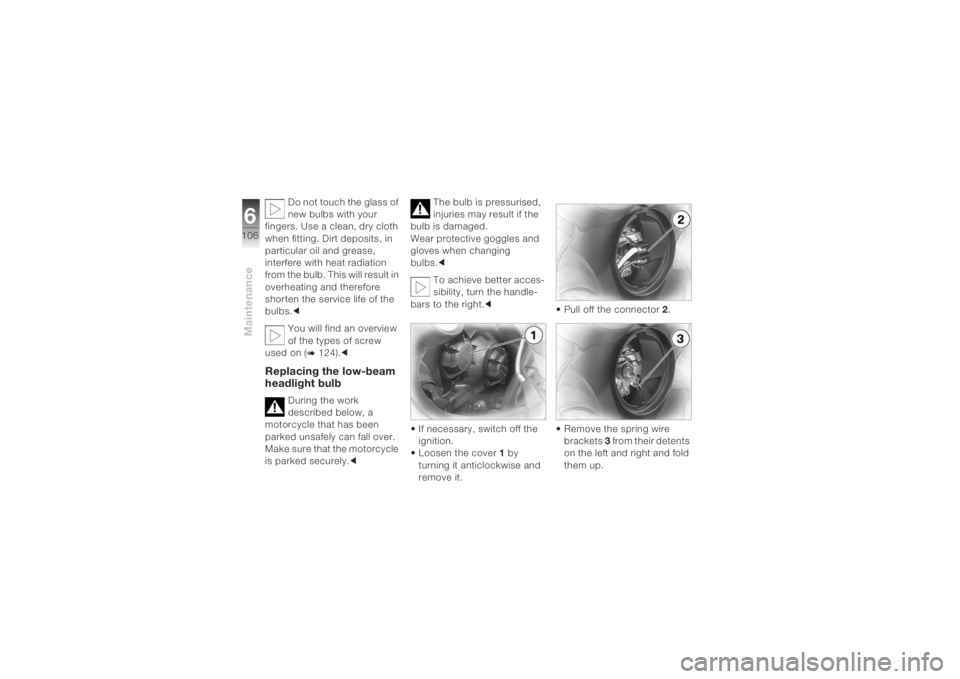
• Loosen the cover 1 by
turning it anticlockwise and
remove it.• Pull off the connector 2.
• Remove the spring wire
brackets 3 from their detents
on the left and right and fold
them up.
Page 109 of 162
6107
Maintenance
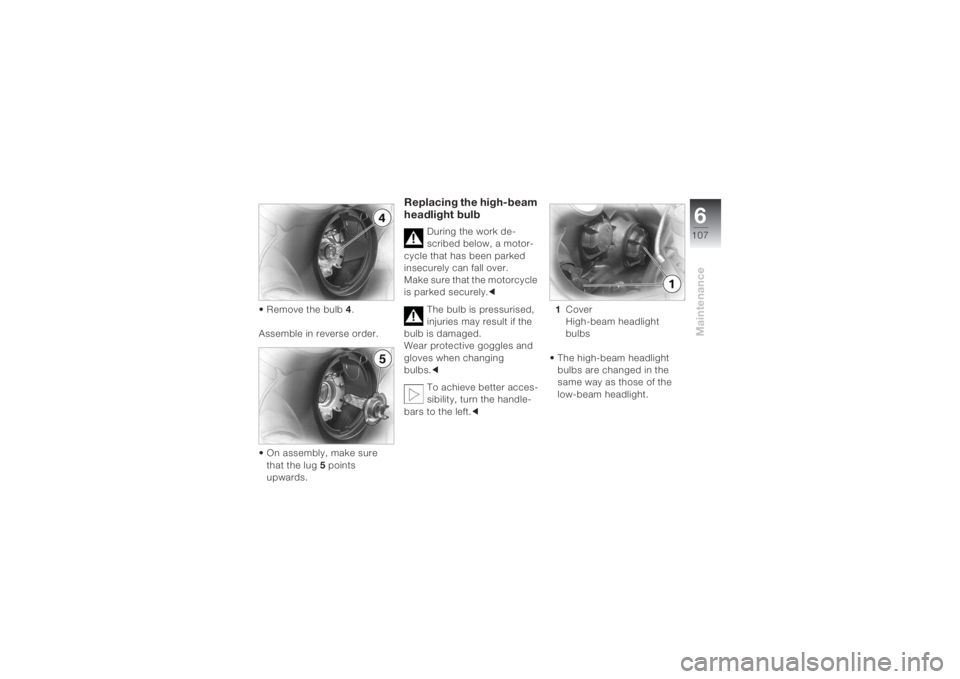
• Remove the bulb 4.
Assemble in reverse order.
• On assembly, make sure
that the lug 5 points
upwards.
Replacing the high-beam
headlight bulb
During the work de-
scribed below, a motor-
cycle that has been parked
insecurely can fall over.
Make sure that the motorcycle
is parked securely.c
The bulb is pressurised,
injuries may result if the
bulb is damaged.
Wear protective goggles and
gloves when changing
bulbs.c
To achieve better acces-
sibility, turn the handle-
bars to the left.c1Cover
High-beam headlight
bulbs
• The high-beam headlight
bulbs are changed in the
same way as those of the
low-beam headlight.
Page 110 of 162
Maintenance6108
Replacing the parking
light
During the work de-
scribed below, a motor-
cycle that has been parked
insecurely can fall over.
Make sure that the motorcycle
is parked securely.c
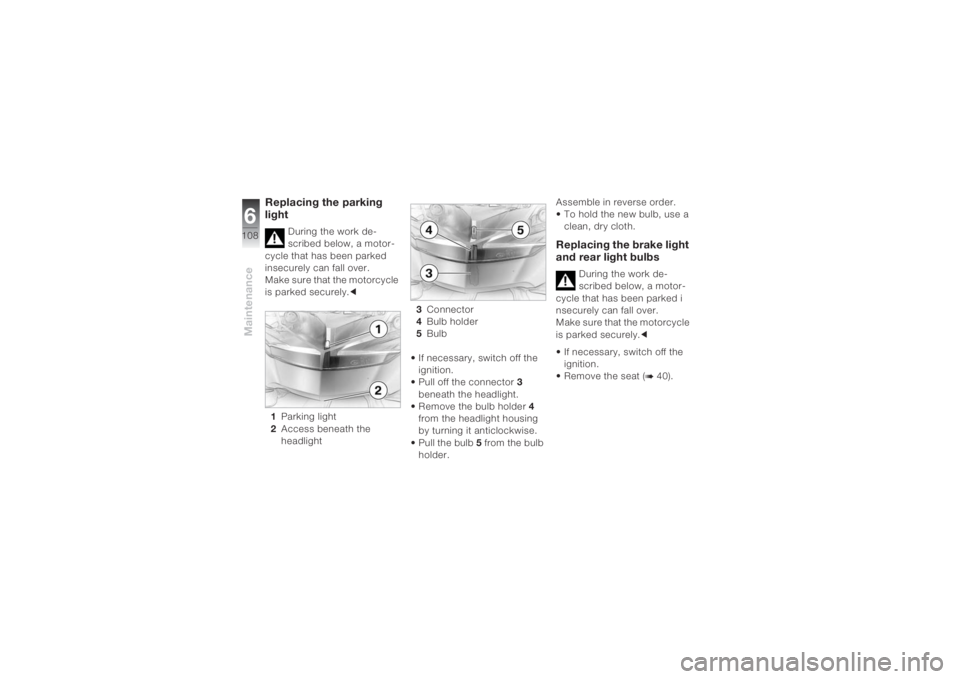
1Parking light
2Access beneath the
headlight3Connector
4Bulb holder
5Bulb
• If necessary, switch off the
ignition.
• Pull off the connector 3
beneath the headlight.
• Remove the bulb holder 4
from the headlight housing
by turning it anticlockwise.
• Pull the bulb 5 from the bulb
holder.Assemble in reverse order.
• To hold the new bulb, use a
clean, dry cloth.
Replacing the brake light
and rear light bulbs
During the work de-
scribed below, a motor-
cycle that has been parked i
nsecurely can fall over.
Make sure that the motorcycle
is parked securely.c
• If necessary, switch off the
ignition.
• Remove the seat (
b 40).