BMW MOTORRAD K 1200 S 2004 Rider's Manual (in English)
Manufacturer: BMW MOTORRAD, Model Year: 2004, Model line: K 1200 S, Model: BMW MOTORRAD K 1200 S 2004Pages: 162, PDF Size: 2.99 MB
Page 111 of 162
6109
Maintenance
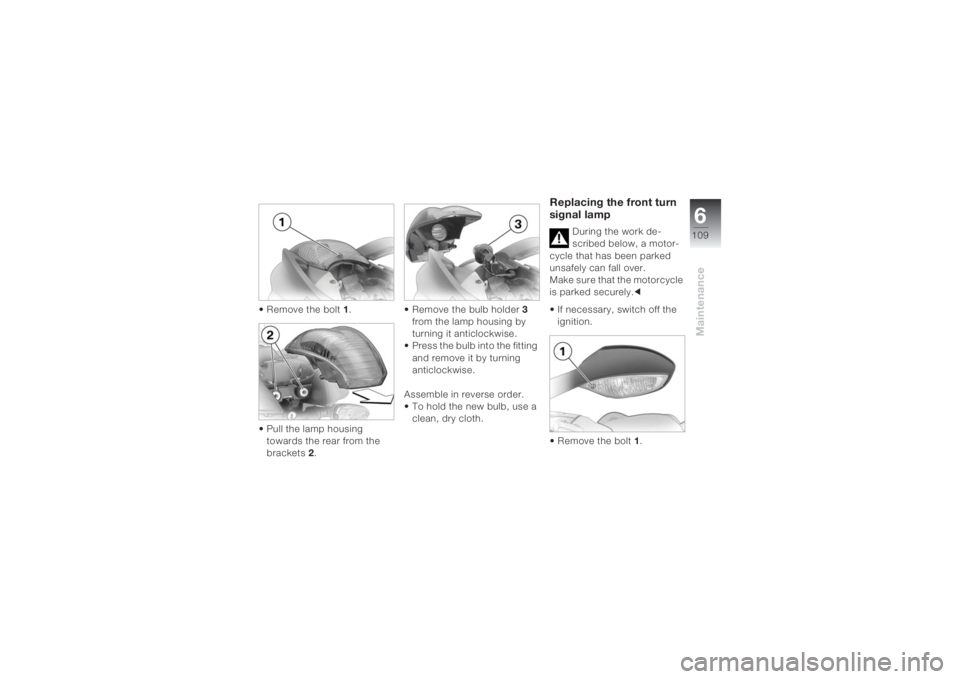
• Remove the bolt 1.
• Pull the lamp housing
towards the rear from the
brackets 2.• Remove the bulb holder 3
from the lamp housing by
turning it anticlockwise.
• Press the bulb into the fitting
and remove it by turning
anticlockwise.
Assemble in reverse order.
• To hold the new bulb, use a
clean, dry cloth.
Replacing the front turn
signal lamp
During the work de-
scribed below, a motor-
cycle that has been parked
unsafely can fall over.
Make sure that the motorcycle
is parked securely.c
• If necessary, switch off the
ignition.
• Remove the bolt 1.
Page 112 of 162
Maintenance6110
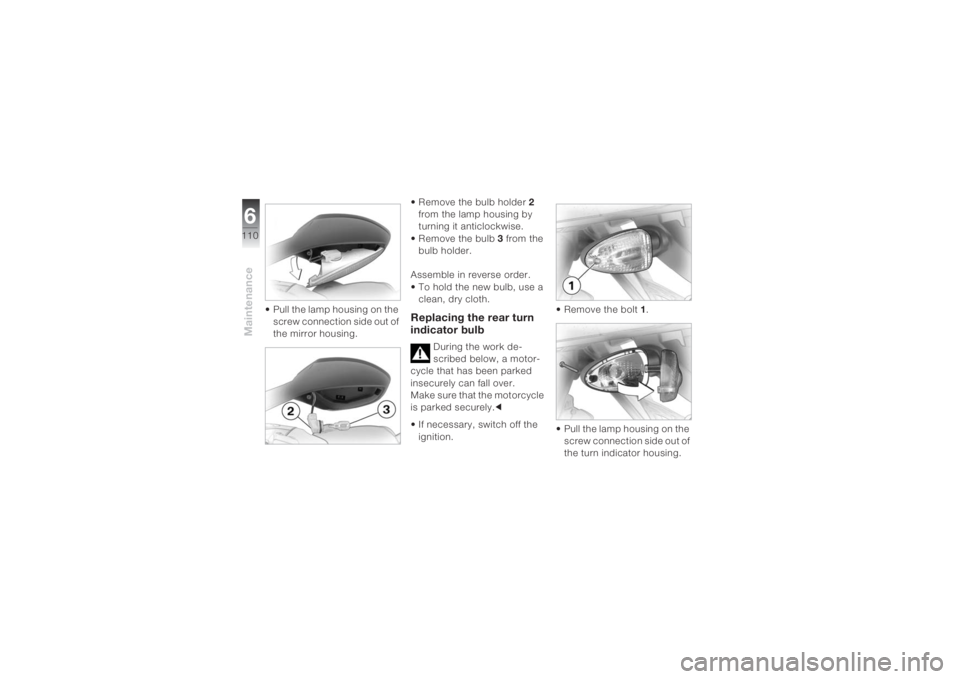
• Pull the lamp housing on the
screw connection side out of
the mirror housing.• Remove the bulb holder 2
from the lamp housing by
turning it anticlockwise.
• Remove the bulb 3 from the
bulb holder.
Assemble in reverse order.
• To hold the new bulb, use a
clean, dry cloth.
Replacing the rear turn
indicator bulb
During the work de-
scribed below, a motor-
cycle that has been parked
insecurely can fall over.
Make sure that the motorcycle
is parked securely.c
• If necessary, switch off the
ignition.• Remove the bolt 1.
• Pull the lamp housing on the
screw connection side out of
the turn indicator housing.
Page 113 of 162
6111
Maintenance
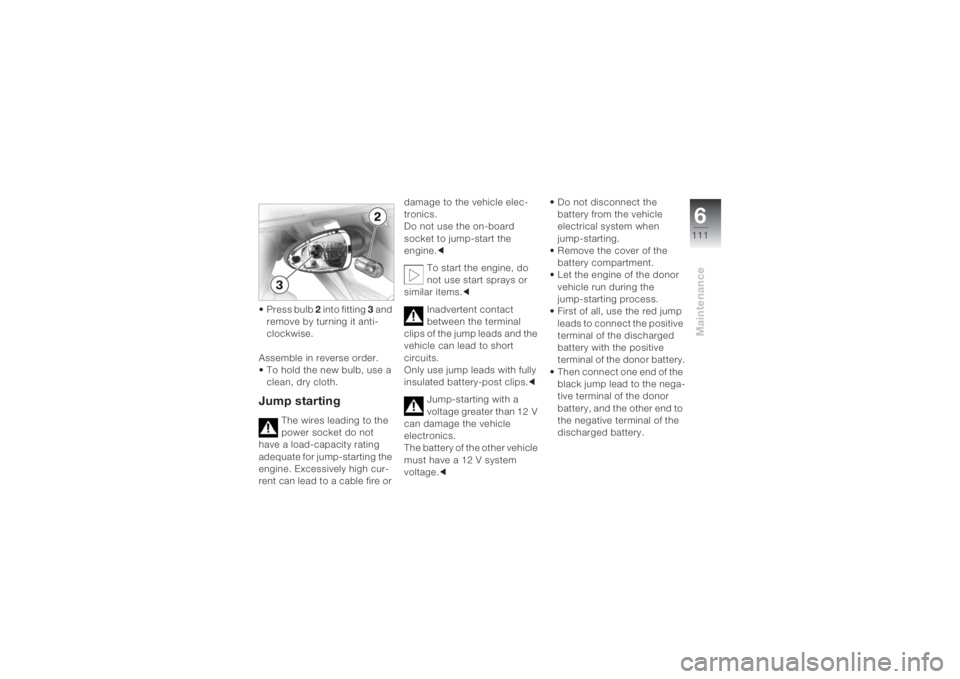
• Press bulb 2 into fitting 3 and
remove by turning it anti-
clockwise.
Assemble in reverse order.
• To hold the new bulb, use a
clean, dry cloth.Jump starting
The wires leading to the
power socket do not
have a load-capacity rating
adequate for jump-starting the
engine. Excessively high cur-
rent can lead to a cable fire or damage to the vehicle elec-
tronics.
Do not use the on-board
socket to jump-start the
engine.c
To start the engine, do
not use start sprays or
similar items.c
Inadvertent contact
between the terminal
clips of the jump leads and the
vehicle can lead to short
circuits.
Only use jump leads with fully
insulated battery-post clips.c
Jump-starting with a
voltage greater than 12 V
can damage the vehicle
electronics.
The battery of the other vehicle
must have a 12 V system
voltage.c• Do not disconnect the
battery from the vehicle
electrical system when
jump-starting.
• Remove the cover of the
battery compartment.
• Let the engine of the donor
vehicle run during the
jump-starting process.
• First of all, use the red jump
leads to connect the positive
terminal of the discharged
battery with the positive
terminal of the donor battery.
• Then connect one end of the
black jump lead to the nega-
tive terminal of the donor
battery, and the other end to
the negative terminal of the
discharged battery.
Page 114 of 162
Maintenance6112
• Start the engine of the
vehicle with the discharged
battery in the usual way; if
the engine does not start,
wait a few minutes before
repeating the attempt in
order to protect the starter
and the donor battery.
• Allow both engines to idle for
a few minutes before discon-
necting the jump leads.
• Disconnect the jump lead
from the negative terminals
first, then disconnect the
second lead from the
positive terminals.
• Screw down the cover of the
battery compartment.Touching live parts of the
ignition system with the
engine running can lead to
electric shocks.
Do not touch any parts of the
ignition system when the
engine is running.c
BatteryMaintenance informationYour motorcycle is supplied
with a maintenance-free
battery.
Correct upkeep, recharging
and storage will prolong the
life of the battery and are
essential if warranty claims are
to be considered.
Compliance with the points
below is important in order to
maximise battery life:– Keep the surface of the
battery clean and dry.
– Do not open the battery.
– Do not top up with water.
– Be sure to read and comply
with the instructions for
charging the battery on the
following pages.
– Do not turn the battery
upside down.
If the battery is not dis-
connected, the on-board
electronics (clock, etc.) will
drain the battery. This can
cause the battery to run flat.
If this happens, warranty
claims will not be accepted.
During immobilisation periods
of more than four weeks,
disconnect the battery from
the motorcycle or connect a
trickle charger to the battery.c
Page 115 of 162
6113
Maintenance
BMW Motorrad has de-
veloped a trickle-charger
specially designed for com-
patibility with the electronics of
your motorcycle. Using this
charger, you can keep the bat-
tery charged during long im-
mobilisation periods without
having to disconnect the
battery from the motorcycle’s
on-board systems. You can
obtain additional information
from your authorised BMW
motorcycle dealer.c
Charging the battery
when connected If you switch on the ignition
and the multifunction display
and telltale lights fail to light
up, the battery is completely
flat. • Charge the disconnected
battery via the power socket.
• Comply with the operating
instructions of the charger.
Charging a completely
discharged battery via
the on-board socket can result
in damage to the motorcycle
electronics.
A battery which is completely
discharged must always be
charged directly at the termi-
nals of the disconnected
battery.c
Charging the connected
battery directly at the bat-
tery terminals can damage the
vehicle electronics.
To charge the battery via the
battery terminals, disconnect
the battery first.cThe motorcycle's on-
board electronics know
when the battery is fully
charged. In this case, the
power socket is switched off.c
The BMW chargers with
item numbers
71 60 7 676 472 and
72 60 7 679 040 are not suita-
ble for charging this motorcy-
cle via the power socket.
In unfavourable cases, the
devices can be destroyed.
We recommend that you
obtain information on suitable
chargers from your authorised
BMW motorcycle dealer.c
Page 116 of 162
Maintenance6114
If you are unable to
charge the battery via the
power socket, you may be
using a charger that is not
compatible with your motorcy-
cle’s electronics. In this case,
please charge the battery
directly at the terminals of the
disconnected battery.c
Charging the discon-
nected battery
In the case of longer
immobilisation periods,
the battery must be recharged
regularly.
In this connection, comply
with the instructions for the
battery. Always fully recharge
the battery before restoring it
to use.c• Charge the battery using a
suitable charger.
• Comply with the operating
instructions of the charger.
• Once the battery is fully
charged, disconnect the
charger terminal clips from
the battery terminals.
Removing the battery
You will find an overview
of the types of screw
used on (
b 125).c
During the work
described below, a
motorcycle that has been
parked unsafely can fall over.
Make sure that the motorcycle
is parked securely.c
• If necessary, switch off the
ignition.• Remove screws 1.
The battery compartment
lid is locked at
positions 2.c
• Release the battery com-
partment lid from catches 2
one by one.
• Take out the battery com-
partment lid in a forward and
upward direction.
Page 117 of 162
6115
Maintenance
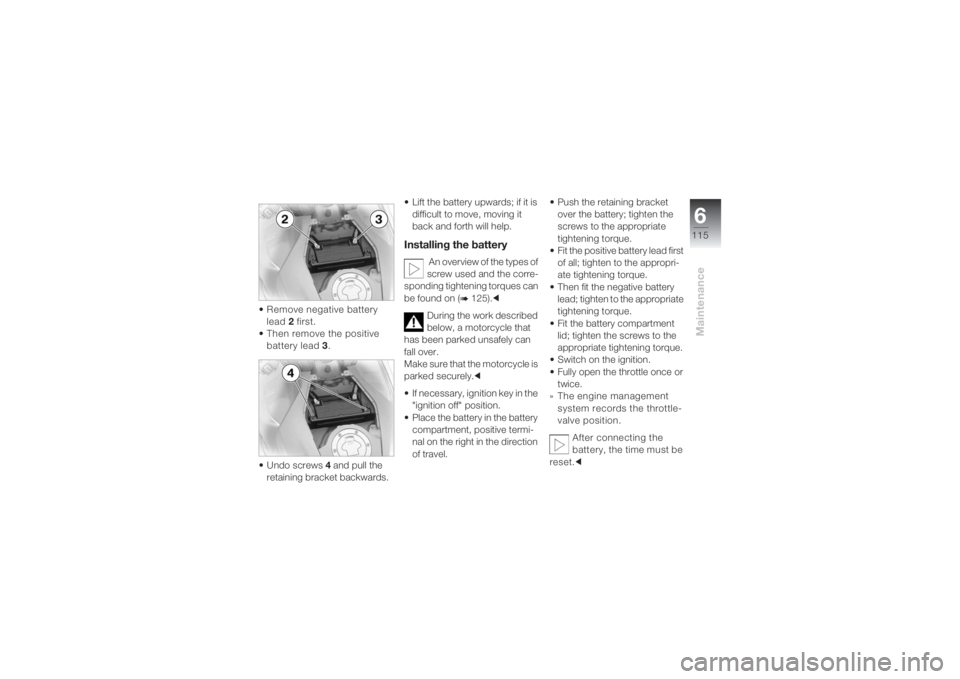
• Remove negative battery
lead 2 first.
•Then remove the positive
battery lead 3.
•Undo screws 4 and pull the
retaining bracket backwards.• Lift the battery upwards; if it is
difficult to move, moving it
back and forth will help.
Installing the battery
An overview of the types of
screw used and the corre-
sponding tightening torques can
be found on (
b 125).c
During the work described
below, a motorcycle that
has been parked unsafely can
fall over.
Make sure that the motorcycle is
parked securely.c
• If necessary, ignition key in the
"ignition off" position.
• Place the battery in the battery
compartment, positive termi-
nal on the right in the direction
of travel.• Push the retaining bracket
over the battery; tighten the
screws to the appropriate
tightening torque.
• Fit the positive battery lead first
of all; tighten to the appropri-
ate tightening torque.
• Then fit the negative battery
lead; tighten to the appropriate
tightening torque.
• Fit the battery compartment
lid; tighten the screws to the
appropriate tightening torque.
• Switch on the ignition.
• Fully open the throttle once or
twice.
» The engine management
system records the throttle-
valve position.
After connecting the
battery, the time must be
reset.c
Page 118 of 162
Maintenance6116
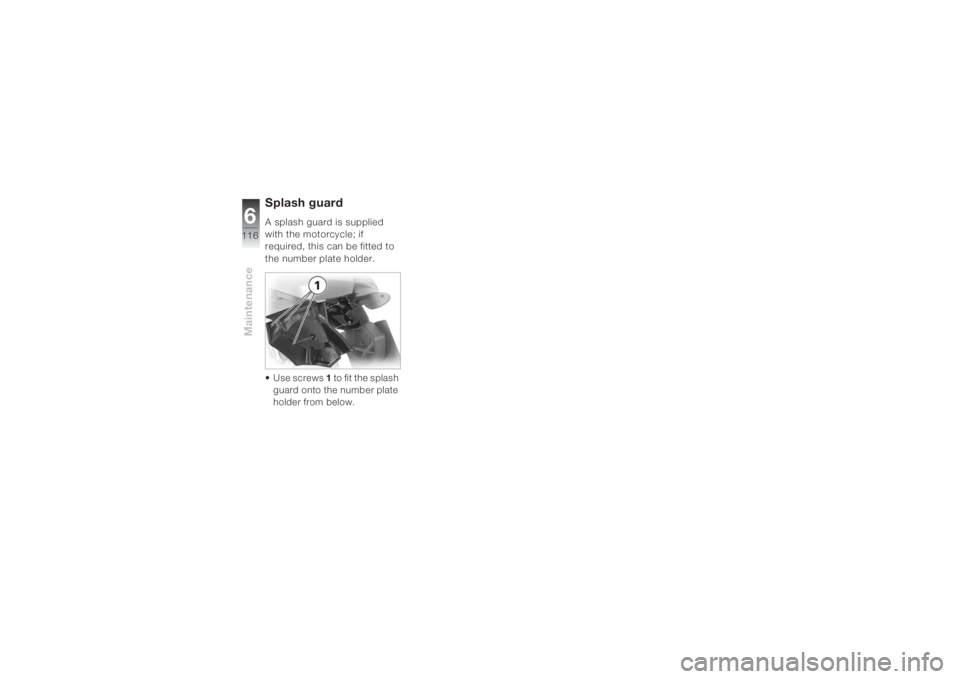
Splash guardA splash guard is supplied
with the motorcycle; if
required, this can be fitted to
the number plate holder. • Use screws
1 to fit the splash
guard onto the number plate
holder from below.
Page 119 of 162
7117
Care
Cleaning and care ..................... 118
Laying up...................................... 120
Restoring to use .......................... 121
Page 120 of 162
Care7118
Cleaning and care Regular cleaning, using the
correct methods, is an impor-
tant factor in maintaining the
value of your motorcycle.
It also ensures that safety-
relevant parts remain in full
working order.Care productsWe recommend that you use
the cleaning and care prod-
ucts you can obtain from your
authorised BMW motorcycle
dealer. The materials in BMW
Care Products have been
tested in laboratories and in
practice; they provide opti-
mised care and protection for
the materials used in your
vehicle. The use of unsuitable
cleaning and care prod-
ucts can damage vehicle
components.
For cleaning, do not use any
solvents such as nitro-thin-
ners, cold cleaning agents,
fuel or similar, and do not use
cleaning agents that contain
alcohol.c
Washing the motorcycleWe recommend that you use
BMW insect remover to soften
and wash off insects and resil-
ient dirt on painted parts prior
to washing the motorcycle. To
prevent stains, do not wash
the motorcycle immediately
after it has been exposed to
strong sunlight and do not
wash it in the sun.Make sure that the motorcycle
is washed frequently, espe-
cially during the winter
months.
To remove road salt, clean the
motorcycle with cold water
immediately after every trip.
Warm water reinforces
the effects of the salt.
Only use cold water to remove
road salt.c
Wet brake discs reduce
the braking effect.
After washing the motorcycle,
dry the brakes by braking.c
The high water pressure
of steam jet cleaners can
damage gaskets, the hydraulic
brake system and the electri-
cal equipment.