display BMW MOTORRAD K 1200 S 2007 Rider's Manual (in English)
[x] Cancel search | Manufacturer: BMW MOTORRAD, Model Year: 2007, Model line: K 1200 S, Model: BMW MOTORRAD K 1200 S 2007Pages: 166, PDF Size: 2.8 MB
Page 62 of 166
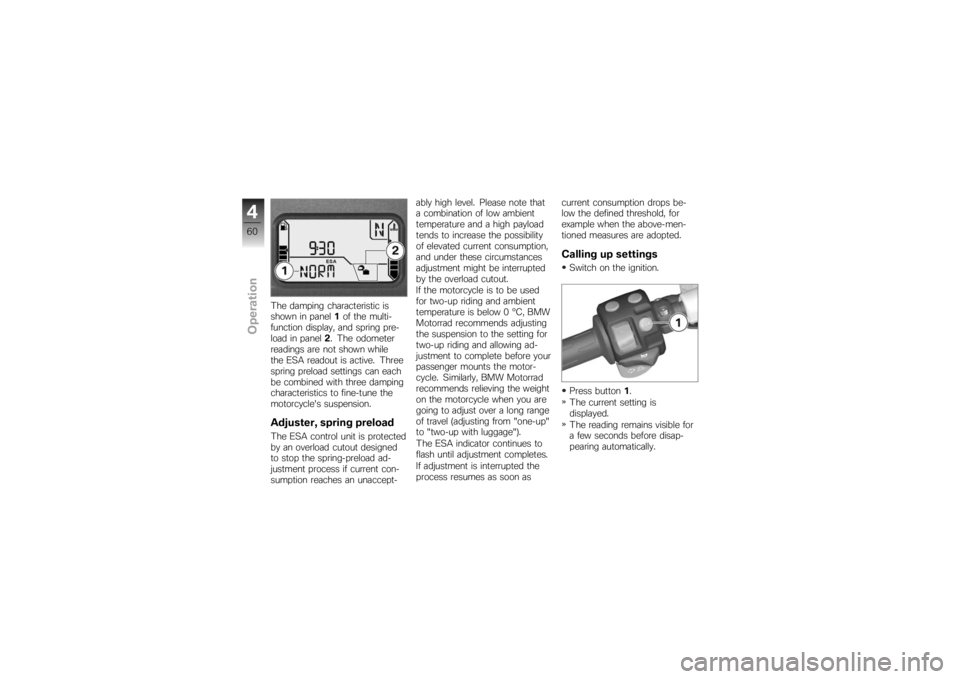
The damping characteristic is
shown in panel1of the multi-
function display, and spring pre-
load in panel 2. The odometer
readings are not shown while
the ESA readout is active. Three
spring preload settings can each
be combined with three damping
characteristics to fine-tune the
motorcycle's suspension.Adjuster, spring preloadThe ESA control unit is protected
by an overload cutout designed
to stop the spring-preload ad-
justment process if current con-
sumption reaches an unaccept- ably high level. Please note that
a combination of low ambient
temperature and a high payload
tends to increase the possibility
of elevated current consumption,
and under these circumstances
adjustment might be interrupted
by the overload cutout.
If the motorcycle is to be used
for two-up riding and ambient
temperature is below 0 °C, BMW
Motorrad recommends adjusting
the suspension to the setting for
two-up riding and allowing ad-
justment to complete before your
passenger mounts the motor-
cycle. Similarly, BMW Motorrad
recommends relieving the weight
on the motorcycle when you are
going to adjust over a long range
of travel (adjusting from "one-up"
to "two-up with luggage").
The ESA indicator continues to
flash until adjustment completes.
If adjustment is interrupted the
process resumes as soon as
current consumption drops be-
low the defined threshold, for
example when the above-men-
tioned measures are adopted.
Calling up settingsSwitch on the ignition.
Press button
1.
The current setting is
displayed.
The reading remains visible for
a few seconds before disap-
pearing automatically.
460zOperation
Page 63 of 166
Adjusting suspension
dampingSwitch on the ignition.You can adjust the damp-
ing characteristic while the
motorcycle is on the move.
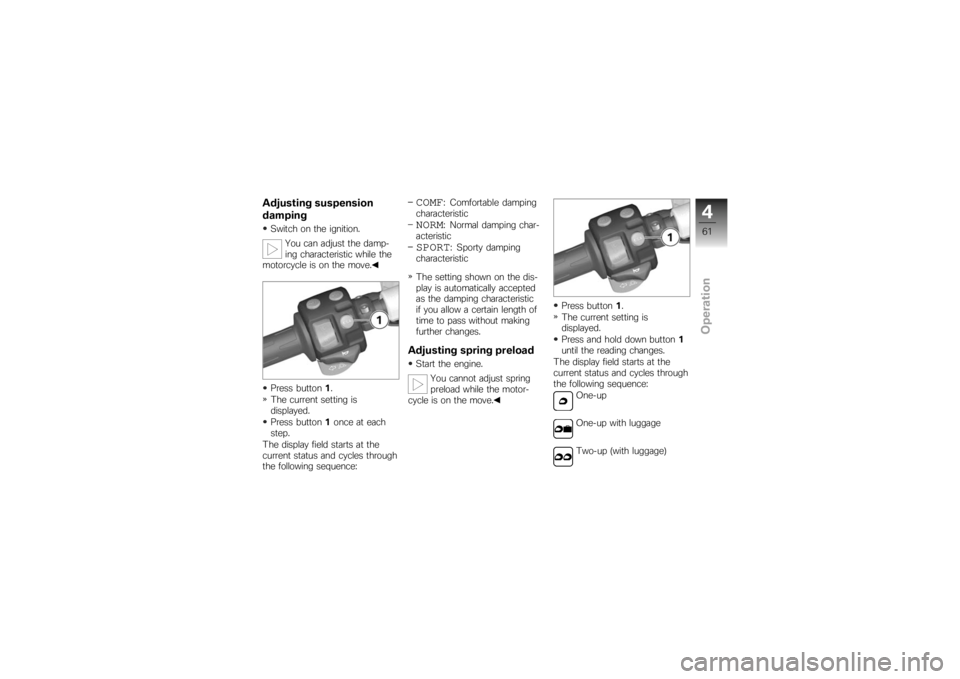
Press button 1.
The current setting is
displayed.
Press button 1once at each
step.
The display field starts at the
current status and cycles through
the following sequence:
COMF
: Comfortable damping
characteristic
NORM
: Normal damping char-
acteristic
SPORT
: Sporty damping
characteristic
The setting shown on the dis-
play is automatically accepted
as the damping characteristic
if you allow a certain length of
time to pass without making
further changes.
Adjusting spring preloadStart the engine.
You cannot adjust spring
preload while the motor-
cycle is on the move. Press button
1.
The current setting is
displayed.
Press and hold down button 1
until the reading changes.
The display field starts at the
current status and cycles through
the following sequence: One-up
One-up with luggage
Two-up (with luggage)
461zOperation
Page 64 of 166
The settings shown on the
display are automatically ac-
cepted as the spring preload
and, if applicable, the damp-
ing characteristic if you allow a
certain length of time to pass
without pressing making further
changes. The reading flashes
while spring preload adjustment
is in progress.
Wait until adjustment com-
pletes (reading stops flashing)
before pulling away.TyresChecking tyre pressureMake sure the ground is level
and firm and place the motor-
cycle on its stand.Incorrect tyre pressures im-
pair the motorcycle's hand-
ling characteristics and increase
the rate of tyre wear.
Always check that the tyre pres-
sures are correct. At high road speeds, tyre
valves have a tendency to
open as a result of centrifugal
force.
Fit metal valve caps with rubber
seals and screw them on firmly
to prevent sudden deflation.
Check that tyre pressures are
correct as per the data below.
Tyre pressure, front
2.5 bar (one-up, tyre cold)
2.5 bar (two-up and/or with
luggage, tyre cold) Tyre pressure, rear
2.9 bar (one-up, tyre cold)
2.9 bar (two-up and/or with
luggage, tyre cold) If tyre pressure is too low:
Correct tyre pressure.
HeadlightAdjusting headlight for
driving on left/driving on
rightIf the motorcycle is ridden in a
country where the opposite rule
of the road applies, its asymmet-
ric low-beam headlight will tend
to dazzle oncoming traffic.
Have the headlight set accord-
ingly by a specialist workshop,
preferably an authorised BMW
Motorrad dealer.
Commercially available ad-
hesive tape will damage the
plastic lens of the light.
Consult a specialist workshop,
preferably an authorised BMW
Motorrad dealer, in order to avoid
damaging the plastic lens of the
light.
462zOperation
Page 72 of 166
ChecklistUse the following checklist to
check important functions, set-
tings and wear limits before you
ride off.Brakes
Brake-fluid levels, front and rear
Clutch
Clutch fluid level
Shock absorber setting and
spring preload
Tyre-tread depth and tyre
pressures
Cases correctly installed and
luggage secured
At regular intervals: Engine oil level (every refuelling
stop)
Brake-pad wear (every third
refuelling stop)
StartingSide standYou cannot start the motorcycle
with the side stand extended and
a gear engaged. The engine will
switch itself off if you start it with
the gearbox in neutral and then
engage a gear before retracting
the side stand.GearboxYou can start the engine when
the gearbox is in neutral or if you
pull the clutch with a gear en-
gaged. Do not pull the clutch un-
til after you have switched on the
ignition, as otherwise the engine
will refuse to start. When the
gearbox is in neutral, the green
neutral telltale light is on and the
gear indicator in the multifunction
display shows N.
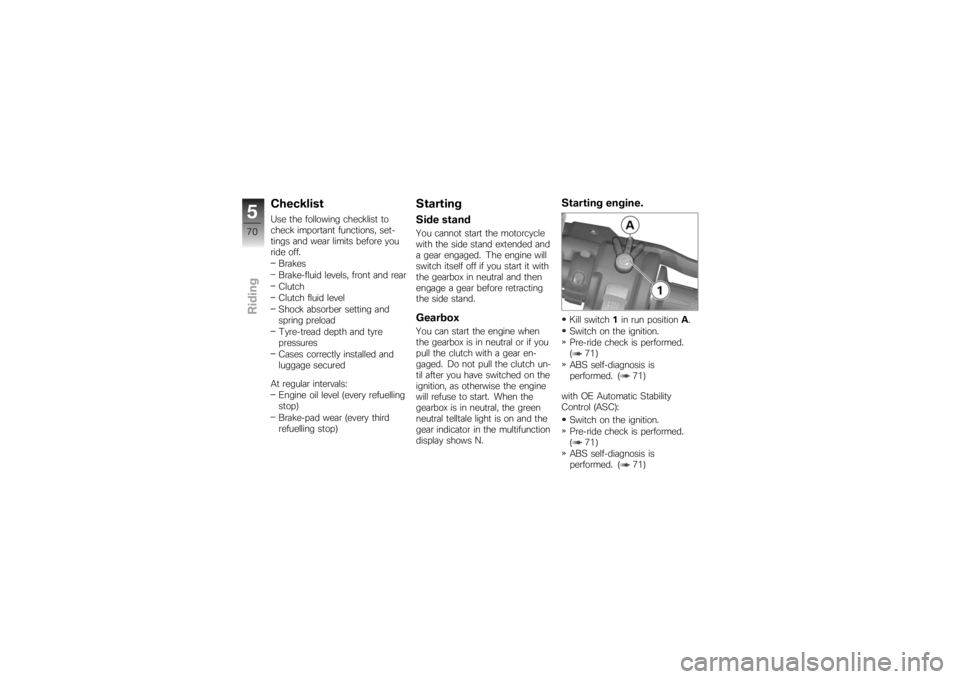
Starting engine.Kill switch 1in run position A.
Switch on the ignition.
Pre-ride check is performed.
( 71)
ABS self-diagnosis is
performed. ( 71)
with OE Automatic Stability
Control (ASC): Switch on the ignition.
Pre-ride check is performed.
( 71)
ABS self-diagnosis is
performed. ( 71)
570zRiding
Page 86 of 166

If the front wheel lifts clear of the
ground under severe accelera-
tion, the ASC reduces engine
torque until the front wheel re-
gains contact with the ground.
Under these circumstances,
BMW Motorrad recommends
rolling the throttle slightly closed
so as to restore stability with the
least possible delay.
When riding on a slippery sur-
face, never snap the throttle
twistgrip fully closed without
pulling the clutch at the same
time. Engine braking torque can
cause the rear wheel to lock, with
a corresponding loss of stability.
The BWM Motorrad ASC is un-
able to control a situation of this
nature.
Tyre pressure
monitoring RDC
OE
FunctionA sensor integrated into each
tyre measures the air temperat-
ure and the air pressure inside
the tyre and transmits this in-
formation to the control unit.
Each sensor has a centrifugal-
force tripswitch that does not
enable transmission of the meas-
ured values until the motorcycle
has accelerated to about 30 km/
h. The display shows
--
for
each tyre until the tyre-pressure
signal is received for the first
time. The sensors continue to
transmit the measured-value sig-
nals for approximately 15 minutes
after the motorcycle comes to a
stop.
The control unit can adminis-
trate four sensors, so two dif-
ferent sets of wheels with RDC
sensors can be alternated on the motorcycle. An error mes-
sage is issued if wheels without
sensors are fitted to a motorcycle
equipped with an RDC control
unit.
Temperature
compensationThe tyre-pressure readings
shown by the multifunction
display are temperature-
compensated; the reference tyre
temperature for these readings
is always 20 °C. The air lines
available to the public in petrol
stations and motorway service
areas almost invariably show
temperature-dependent tyre
pressures, so in most instances
these gauge readings will not
tally with the readings shown by
the multifunction display.
684zEngineering details
Page 117 of 166
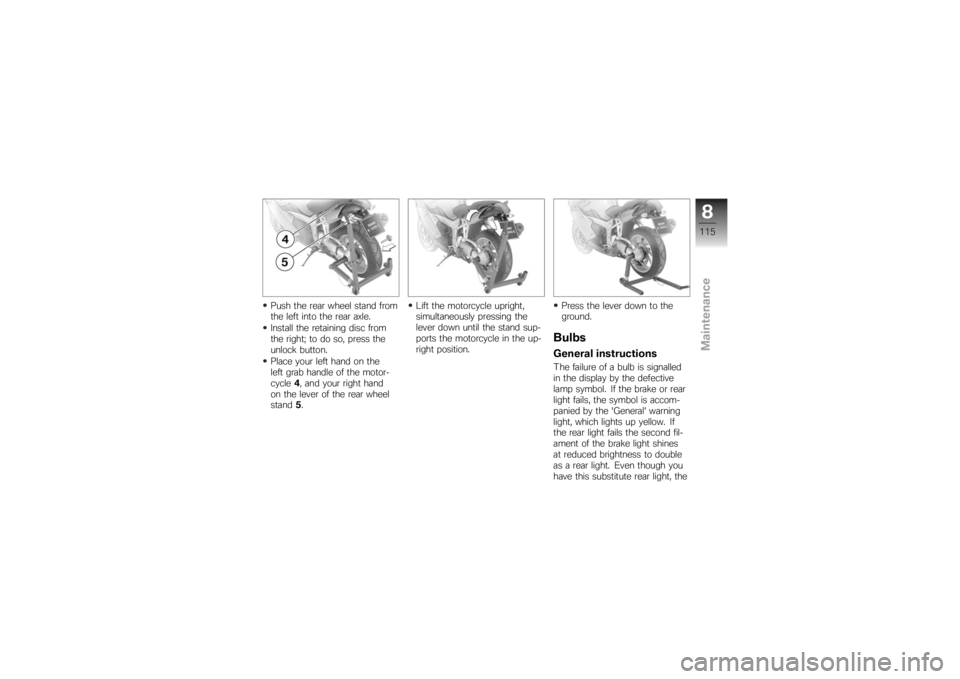
Push the rear wheel stand from
the left into the rear axle.
Install the retaining disc from
the right; to do so, press the
unlock button.
Place your left hand on the
left grab handle of the motor-
cycle4, and your right hand
on the lever of the rear wheel
stand 5. Lift the motorcycle upright,
simultaneously pressing the
lever down until the stand sup-
ports the motorcycle in the up-
right position.
Press the lever down to the
ground.
BulbsGeneral instructionsThe failure of a bulb is signalled
in the display by the defective
lamp symbol. If the brake or rear
light fails, the symbol is accom-
panied by the 'General' warning
light, which lights up yellow. If
the rear light fails the second fil-
ament of the brake light shines
at reduced brightness to double
as a rear light. Even though you
have this substitute rear light, the
8115zMaintenance
Page 118 of 166
indicators in the display tell you
that a bulb defect has occurred.A defective bulb places
your safety at risk because
it is easier for other users to
oversee the motorcycle.
Replace defective bulbs as
soon as possible; always carry a
complete set of spare bulbs if
possible.
The bulb is pressurised and
can cause injury if dam-
aged.
Wear protective goggles and
gloves when changing bulbs.
The types of bulb fitted to
your motorcycle are listed
in the section entitled "Technical
data".
Do not touch the glass of
new bulbs with your fingers.
Use a clean, dry cloth to hold
the bulbs when handling them.
Dirt deposits, in particular oil and
grease, interfere with heat radi- ation from the bulb. This leads
to overheating and shortens the
bulb's operating life.
Replacing low-beam
headlight bulb
If it is not standing firmly,
the motorcycle could topple
in the course of the operations
described below.
Always make sure that the
motorcycle is stable and firmly
supported.
Make sure the ground is level
and firm and place the motor-
cycle on its stand.
Switch off the ignition. Turn the handlebars to the
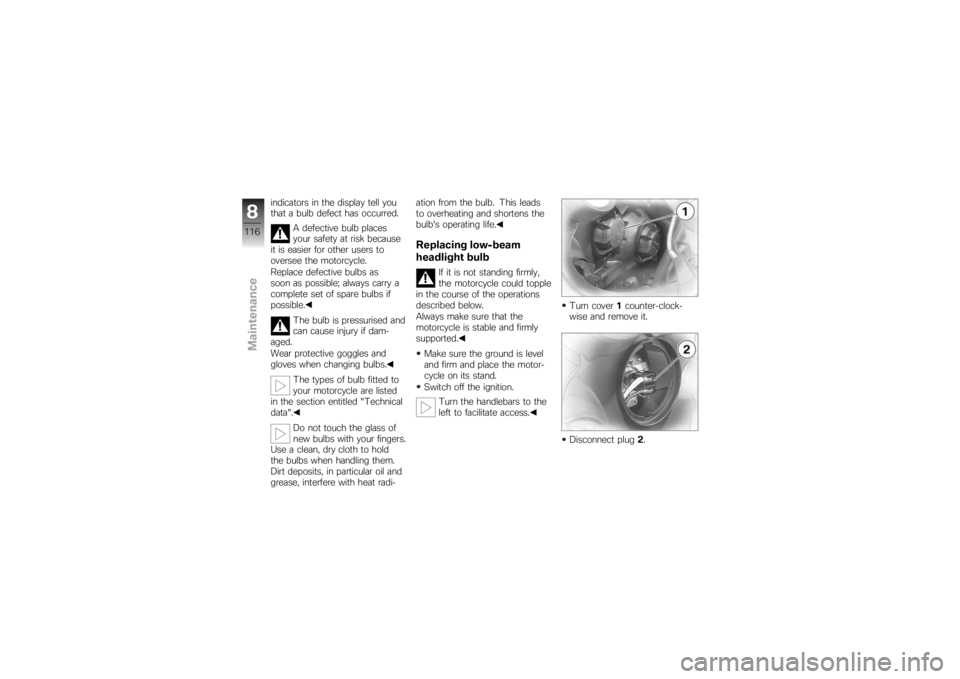
left to facilitate access. Turn cover
1counter-clock-
wise and remove it.
Disconnect plug 2.
8116zMaintenance
Page 128 of 166
Allow both engines to idle for a
few minutes before disconnect-
ing the jump leads.
Disconnect the jump lead from
the negative terminals first,
then disconnect the second
lead from the positive termin-
als.
Install the battery-compartment
cover ( 128)BatteryMaintenance instructionsCorrect upkeep, recharging and
storage will prolong the life of
the battery and are essential if
warranty claims are to be con-
sidered.
Compliance with the points be-
low is important in order to max-
imise battery life:Keep the surface of the battery
clean and dry
Do not open the battery
Do not top up with water Be sure to read and comply
with the instructions for char-
ging the battery on the follow-
ing pages
Do not turn the battery upside
down
If the battery is not discon-
nected, the on-board elec-
tronics (e.g. clock, etc.) gradually
drain the battery. This can cause
the battery to run flat. If this hap-
pens, warranty claims will not be
accepted.
If the motorcycle is to be out of
use for more than four weeks,
disconnect the battery or con-
nect a suitable trickle charger to
the battery.
BMW Motorrad has de-
veloped a float charger spe-
cially designed for compatibility
with the electronics of your mo-
torcycle. Using this charger, you
can keep the battery charged
during long periods of disuse, without having to disconnect the
battery from the motorcycle's
on-board systems. You can ob-
tain additional information from
your authorised BMW Motorrad
dealer.
Charging battery when
connected
Charging the connected
battery directly at the bat-
tery terminals can damage the
vehicle electronics.
Always disconnect the battery
from the on-board circuits be-
fore recharging it with a charger
connected directly to the battery
posts.
If you switch on the igni-
tion and the multifunction
display and telltale lights fail to
light up, the battery is completely
flat. Attempting to charge a com-
pletely flat battery via the on-
8126zMaintenance
Page 153 of 166

down, contact BMW Motorrad's
Mobile Service. The specialists
will provide the necessary advice
and assistance.
You will find important country-
specific contact addresses and
the after-sales service organisa-
tion phone numbers in the "Ser-
vice Kontakt / Service Contact"
brochures, along with informa-
tion on Mobile Service and the
dealership network.BMW Motorrad service
networkBMW Motorrad has an extens-
ive after-sales service network in
place to look after you and your
motorcycle in more than 100
countries. In Germany alone, you
have the best possible access
to approximately 200 authorised
BMW Motorrad dealers.
All information concerning the in-
ternational dealership network
can be found in the brochure"Service Contact Europe" or
"Service Contact Africa, Amer-
ica, Asia, Australia, Oceania".
Maintenance workBMW Pre-delivery CheckYour authorised BMW Motorrad
dealer conducts the BMW pre-
delivery check before handing
over the motorcycle to you.BMW Running-in CheckThe BMW running-in check has
to be performed when the mo-
torcycle has covered between
500 km and 1,200 kmBMW ServiceThe BMW Service is carried out
once a year; the extent of servi-
cing can vary, depending on the
age of the motorcycle and the
distance it has covered. Your au-
thorised BMW Motorrad dealer
confirms that the service work
has been carried out and enters
the date when the next service
will be due.
Riders who cover long distances
in a year might have to bring in
their motorcycles for service be-
fore the next scheduled date. It
is to allow for these cases that
a maximum odometer reading is
entered as well in the confirma-
tion of service. Servicing has to
be brought forward if this odo-
meter reading is reached before
the next scheduled date for the
annual service.
The service-due indicator in the
multifunction display reminds you
about one month or 1000 km
in advance when the time for a
service is approaching, on the
basis of the programmed values.
11151zService
Page 163 of 166

K
Keys, 42
L
Laying up, 134
LightsHeadlight flasher, 15, 52
High-beam headlight, 15, 52
Low-beam headlight, 52
Parking light, 52
Side light, 52
Luggage Correct loading, 89
Luggage loops, 66
M
Maintenance General instructions, 96
Mirrors Adjusting, 58
Motorcycle General view, left side, 11
General view, right side, 13
Laying up, 134
Restoring to use, 134 Multifunction display, 17
Overview, 20
O
Odometer and tripmeters Resetting, 46
Selecting readings, 45
On-board computer Ambient temperature, 48
Average consumption, 49
Average speed, 48
Oil level, 50
Range, 50
Selecting readings, 47
P
Power socket, 11
Pre-ride check, 71
R
Rear-wheel drive Technical data, 141
Rear-wheel stand, 114
Refuelling, 77 Reserve
Warning, 24
Residual range, 47
Restoring to use, 134
Rev. counter, 17
Rims Test, 105
Running gear Technical data, 141
Running in, 73
S
Seat Installation, 64
Lock, 11
Removal, 63
Service, 150 Status indicators on the
display, 20
Service Card, 150
Side stand For starting, 70
Spark plugs, 144
Speedometer, 17
12161zIndex