wheel BMW MOTORRAD K 1200 S 2007 Rider's Manual (in English)
[x] Cancel search | Manufacturer: BMW MOTORRAD, Model Year: 2007, Model line: K 1200 S, Model: BMW MOTORRAD K 1200 S 2007Pages: 166, PDF Size: 2.8 MB
Page 109 of 166
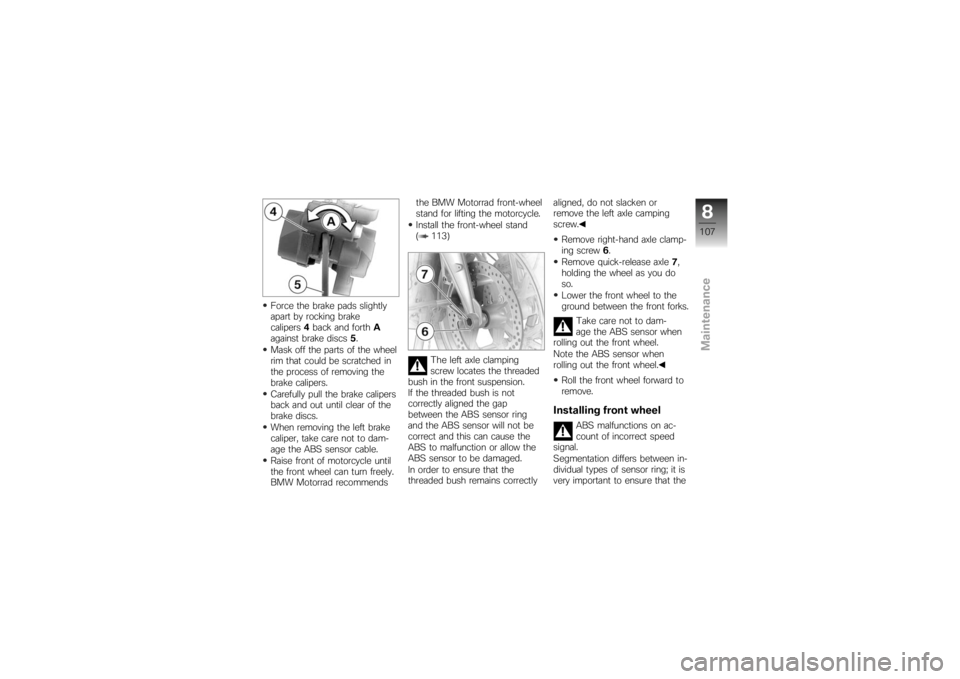
Force the brake pads slightly
apart by rocking brake
calipers4back and forth A
against brake discs 5.
Mask off the parts of the wheel
rim that could be scratched in
the process of removing the
brake calipers.
Carefully pull the brake calipers
back and out until clear of the
brake discs.
When removing the left brake
caliper, take care not to dam-
age the ABS sensor cable.
Raise front of motorcycle until
the front wheel can turn freely.
BMW Motorrad recommends the BMW Motorrad front-wheel
stand for lifting the motorcycle.
Install the front-wheel stand
( 113)
The left axle clamping
screw locates the threaded
bush in the front suspension.
If the threaded bush is not
correctly aligned the gap
between the ABS sensor ring
and the ABS sensor will not be
correct and this can cause the
ABS to malfunction or allow the
ABS sensor to be damaged.
In order to ensure that the
threaded bush remains correctly aligned, do not slacken or
remove the left axle camping
screw.
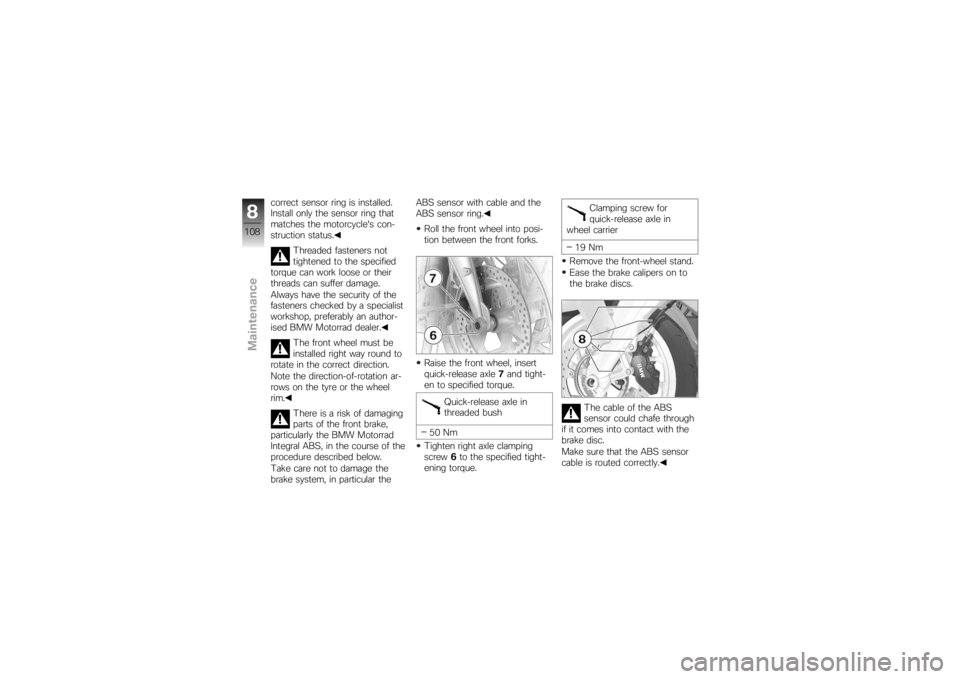
Remove right-hand axle clamp-
ing screw 6.
Remove quick-release axle 7,
holding the wheel as you do
so.
Lower the front wheel to the
ground between the front forks.
Take care not to dam-
age the ABS sensor when
rolling out the front wheel.
Note the ABS sensor when
rolling out the front wheel.
Roll the front wheel forward to
remove.
Installing front wheel
ABS malfunctions on ac-
count of incorrect speed
signal.
Segmentation differs between in-
dividual types of sensor ring; it is
very important to ensure that the
8107zMaintenance
Page 110 of 166
correct sensor ring is installed.
Install only the sensor ring that
matches the motorcycle's con-
struction status.Threaded fasteners not
tightened to the specified
torque can work loose or their
threads can suffer damage.
Always have the security of the
fasteners checked by a specialist
workshop, preferably an author-
ised BMW Motorrad dealer.
The front wheel must be
installed right way round to
rotate in the correct direction.
Note the direction-of-rotation ar-
rows on the tyre or the wheel
rim.
There is a risk of damaging
parts of the front brake,
particularly the BMW Motorrad
Integral ABS, in the course of the
procedure described below.
Take care not to damage the
brake system, in particular the ABS sensor with cable and the
ABS sensor ring.
Roll the front wheel into posi-
tion between the front forks.
Raise the front wheel, insert
quick-release axle 7and tight-
en to specified torque.
Quick-release axle in
threaded bush
50 Nm
Tighten right axle clamping
screw 6to the specified tight-
ening torque. Clamping screw for
quick-release axle in
wheel carrier
19 Nm
Remove the front-wheel stand.
Ease the brake calipers on to
the brake discs.
The cable of the ABS
sensor could chafe through
if it comes into contact with the
brake disc.
Make sure that the ABS sensor
cable is routed correctly.
8108zMaintenance
Page 111 of 166
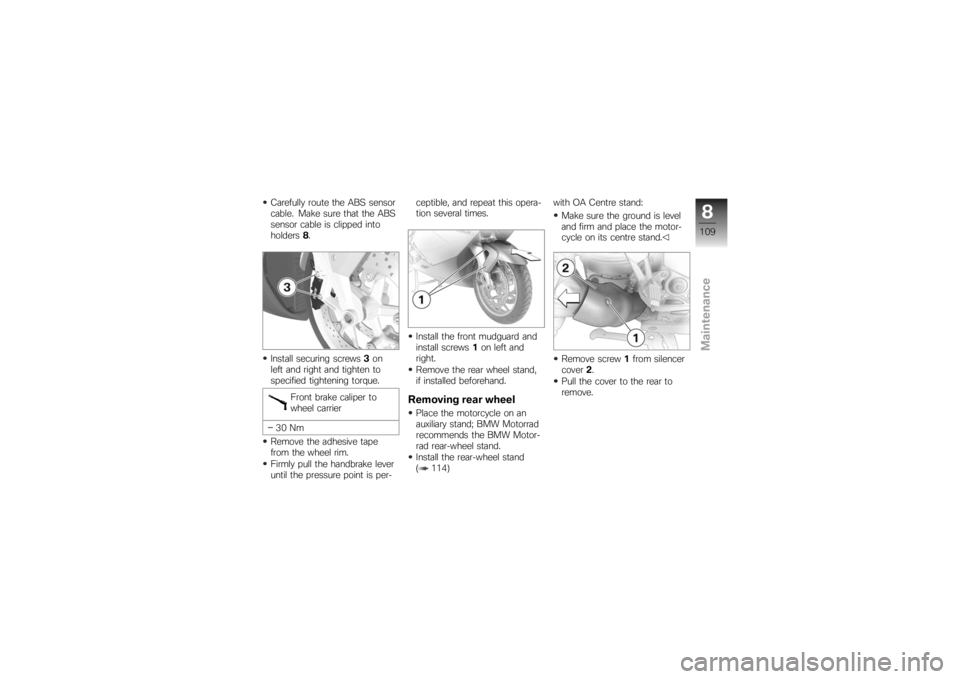
Carefully route the ABS sensor
cable. Make sure that the ABS
sensor cable is clipped into
holders8.
Install securing screws 3on
left and right and tighten to
specified tightening torque.
Front brake caliper to
wheel carrier
30 Nm
Remove the adhesive tape
from the wheel rim.
Firmly pull the handbrake lever
until the pressure point is per- ceptible, and repeat this opera-
tion several times.
Install the front mudguard and
install screws
1on left and
right.
Remove the rear wheel stand,
if installed beforehand.
Removing rear wheelPlace the motorcycle on an
auxiliary stand; BMW Motorrad
recommends the BMW Motor-
rad rear-wheel stand.
Install the rear-wheel stand
( 114) with OA Centre stand:
Make sure the ground is level
and firm and place the motor-
cycle on its centre stand.
Remove screw 1from silencer
cover 2.
Pull the cover to the rear to
remove.
8109zMaintenance
Page 112 of 166
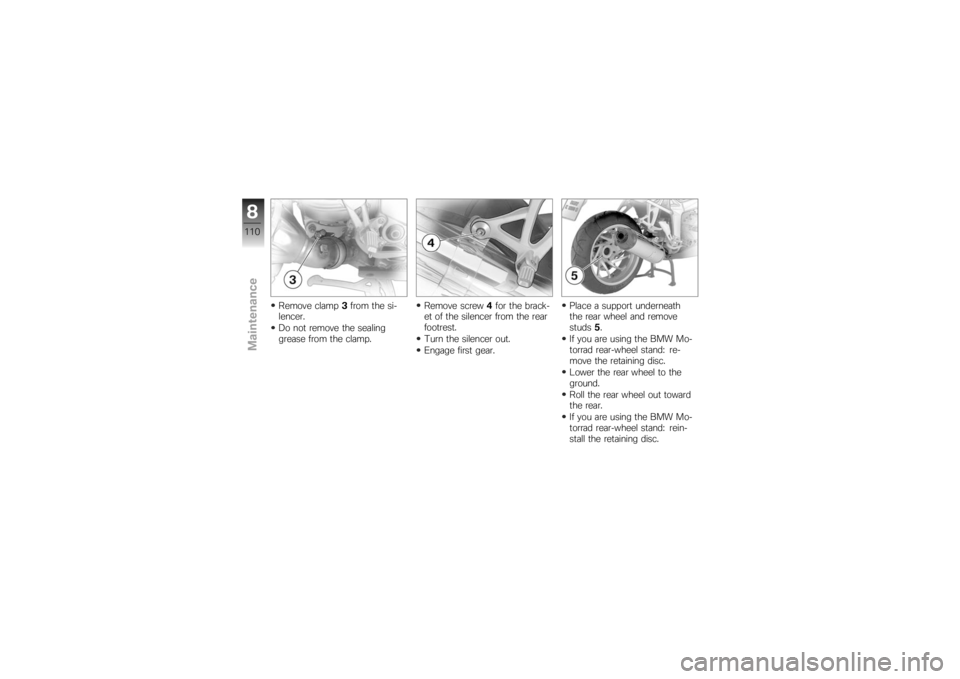
Remove clamp3from the si-
lencer.
Do not remove the sealing
grease from the clamp. Remove screw
4for the brack-
et of the silencer from the rear
footrest.
Turn the silencer out.
Engage first gear. Place a support underneath
the rear wheel and remove
studs
5.
If you are using the BMW Mo-
torrad rear-wheel stand: re-
move the retaining disc.
Lower the rear wheel to the
ground.
Roll the rear wheel out toward
the rear.
If you are using the BMW Mo-
torrad rear-wheel stand: rein-
stall the retaining disc.
8110zMaintenance
Page 113 of 166
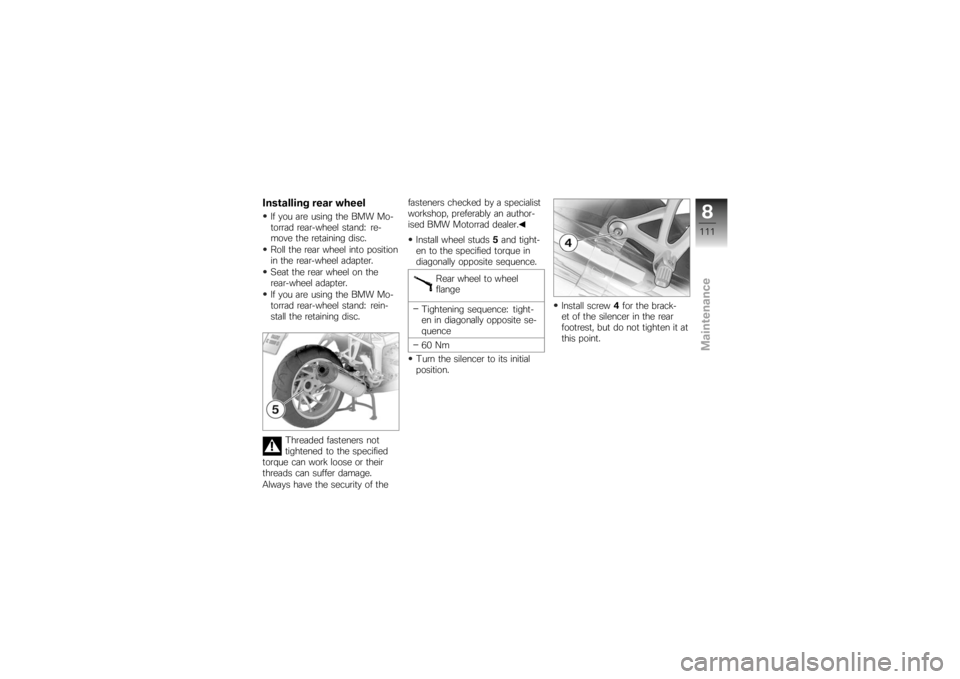
Installing rear wheelIf you are using the BMW Mo-
torrad rear-wheel stand: re-
move the retaining disc.
Roll the rear wheel into position
in the rear-wheel adapter.
Seat the rear wheel on the
rear-wheel adapter.
If you are using the BMW Mo-
torrad rear-wheel stand: rein-
stall the retaining disc.Threaded fasteners not
tightened to the specified
torque can work loose or their
threads can suffer damage.
Always have the security of the fasteners checked by a specialist
workshop, preferably an author-
ised BMW Motorrad dealer.
Install wheel studs 5and tight-
en to the specified torque in
diagonally opposite sequence.
Rear wheel to wheel
flange
Tightening sequence: tight-
en in diagonally opposite se-
quence
60 Nm
Turn the silencer to its initial
position. Install screw
4for the brack-
et of the silencer in the rear
footrest, but do not tighten it at
this point.
8111zMaintenance
Page 114 of 166
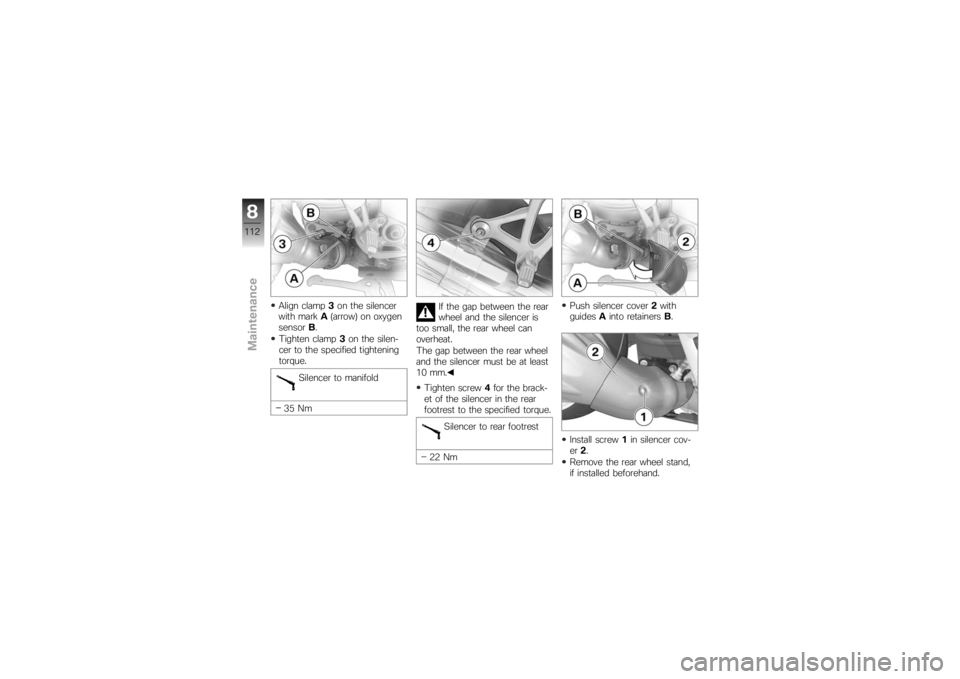
Align clamp3on the silencer
with mark A(arrow) on oxygen
sensor B.
Tighten clamp 3on the silen-
cer to the specified tightening
torque.
Silencer to manifold
35 Nm If the gap between the rear
wheel and the silencer is
too small, the rear wheel can
overheat.
The gap between the rear wheel
and the silencer must be at least
10 mm.
Tighten screw 4for the brack-
et of the silencer in the rear
footrest to the specified torque.
Silencer to rear footrest
22 Nm Push silencer cover
2with
guides Ainto retainers B.
Install screw 1in silencer cov-
er 2.
Remove the rear wheel stand,
if installed beforehand.
8112zMaintenance
Page 115 of 166
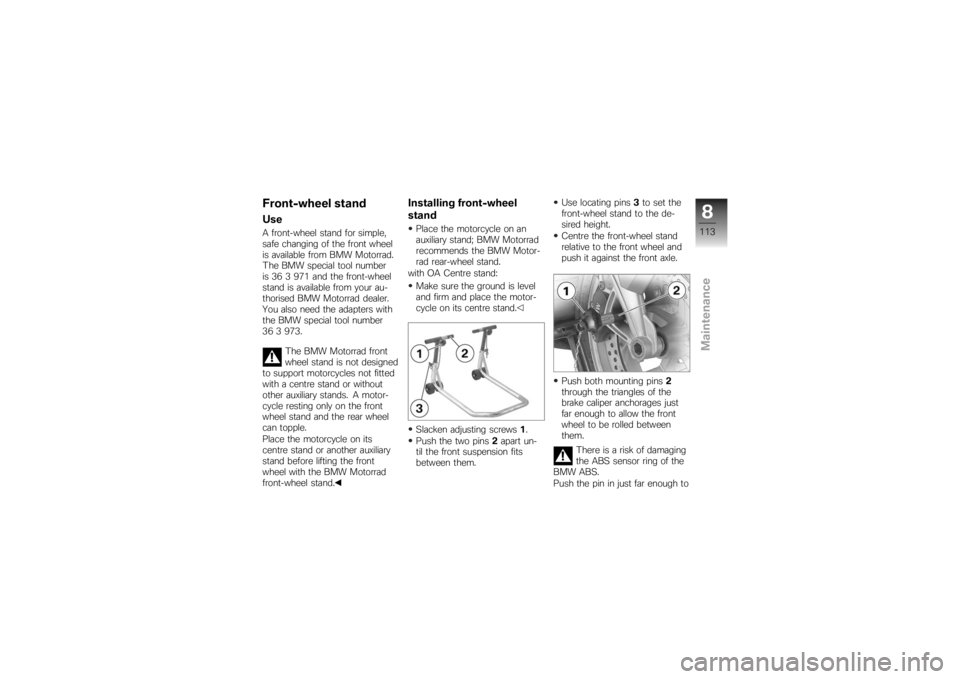
Front-wheel standUseA front-wheel stand for simple,
safe changing of the front wheel
is available from BMW Motorrad.
The BMW special tool number
is 36 3 971 and the front-wheel
stand is available from your au-
thorised BMW Motorrad dealer.
You also need the adapters with
the BMW special tool number
36 3 973.The BMW Motorrad front
wheel stand is not designed
to support motorcycles not fitted
with a centre stand or without
other auxiliary stands. A motor-
cycle resting only on the front
wheel stand and the rear wheel
can topple.
Place the motorcycle on its
centre stand or another auxiliary
stand before lifting the front
wheel with the BMW Motorrad
front-wheel stand.
Installing front-wheel
standPlace the motorcycle on an
auxiliary stand; BMW Motorrad
recommends the BMW Motor-
rad rear-wheel stand.
with OA Centre stand:
Make sure the ground is level
and firm and place the motor-
cycle on its centre stand.
Slacken adjusting screws 1.
Push the two pins 2apart un-
til the front suspension fits
between them. Use locating pins
3to set the
front-wheel stand to the de-
sired height.
Centre the front-wheel stand
relative to the front wheel and
push it against the front axle.
Push both mounting pins 2
through the triangles of the
brake caliper anchorages just
far enough to allow the front
wheel to be rolled between
them.
There is a risk of damaging
the ABS sensor ring of the
BMW ABS.
Push the pin in just far enough to
8113zMaintenance
Page 116 of 166
ensure that it clears the sensor
ring of the BMW ABS.Tighten adjusting screws 1.
If the motorcycle is on the
centre stand and is raised
too far, the centre stand will lift
clear of the ground and the mo-
torcycle could topple to one side.
When raising the motorcycle,
make sure that the centre stand
remains on the ground.
Apply uniform pressure to push
the front-wheel stand down
and raise the motorcycle.
Rear-wheel standUseBMW Motorrad offers a rear-
wheel stand for holding motor-
cycles (including those without
centre stands) securely upright
for maintenance work. The BMW
special tool number is 36 3 980
and the rear-wheel stand is avail-
able from your authorised BMW
Motorrad dealer.
Installing rear-wheel
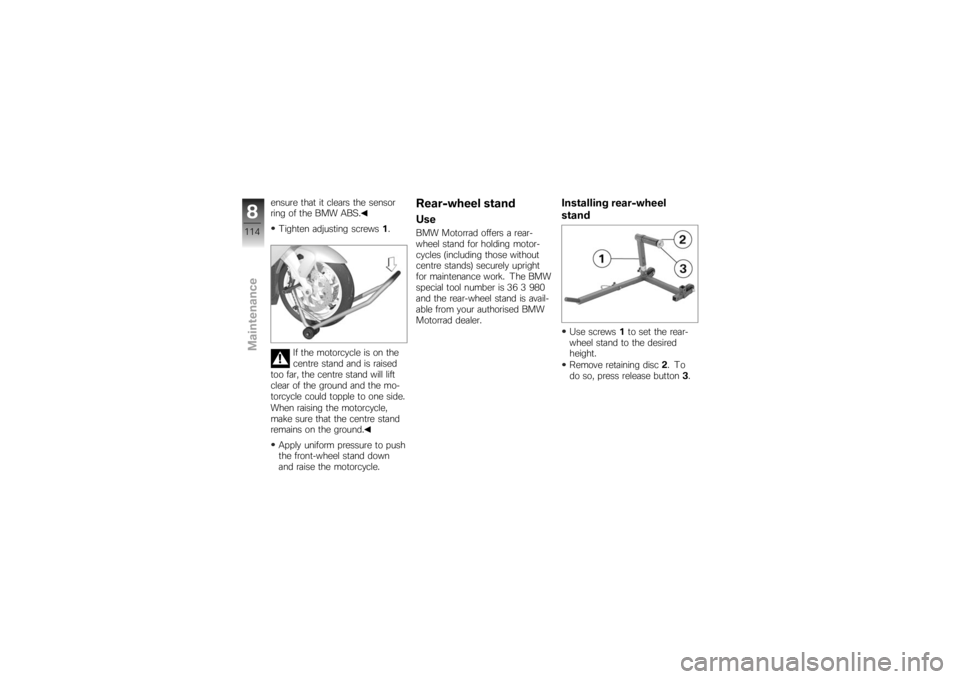
standUse screws 1to set the rear-
wheel stand to the desired
height.
Remove retaining disc 2.To
do so, press release button 3.
8114zMaintenance
Page 117 of 166
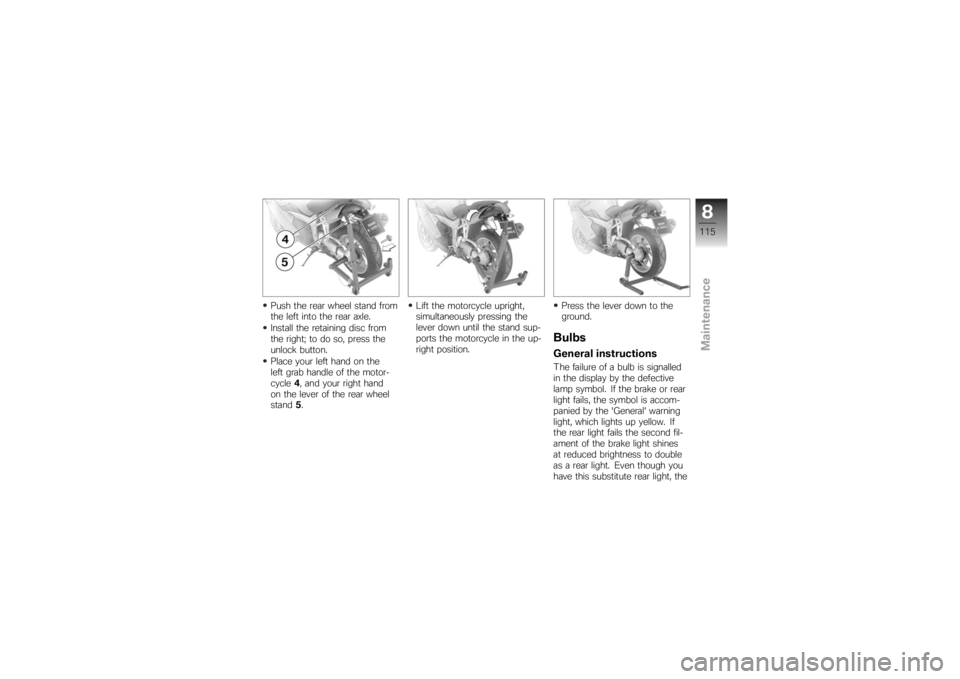
Push the rear wheel stand from
the left into the rear axle.
Install the retaining disc from
the right; to do so, press the
unlock button.
Place your left hand on the
left grab handle of the motor-
cycle4, and your right hand
on the lever of the rear wheel
stand 5. Lift the motorcycle upright,
simultaneously pressing the
lever down until the stand sup-
ports the motorcycle in the up-
right position.
Press the lever down to the
ground.
BulbsGeneral instructionsThe failure of a bulb is signalled
in the display by the defective
lamp symbol. If the brake or rear
light fails, the symbol is accom-
panied by the 'General' warning
light, which lights up yellow. If
the rear light fails the second fil-
ament of the brake light shines
at reduced brightness to double
as a rear light. Even though you
have this substitute rear light, the
8115zMaintenance
Page 136 of 166

Remove stains of this kind im-
mediately, using cleaning-grade
benzene or petroleum spirit on a
clean cloth or ball of cotton wool.
BMW Motorrad recommends
BMW tar remover for removing
specks of tar. Remember to wax
the parts treated in this way.Protective wax coatingBMW Motorrad recommends
applying only BMW car wax or
products containing carnauba
wax or synthetic wax.
It is time to rewax the paint-
work when water "puddles" on
the surface, instead of forming
beads.Laying up motorcycleClean the motorcycle.
Remove the battery.
Spray the brake and clutch
lever pivots and the main andside stand pivots with a suit-
able lubricant.
Coat bright metal and chrome-
plated parts with an acid-free
grease (e.g. Vaseline).
Stand the motorcycle in a dry
room in such a way that there
is no load on either wheel.
Before laying the vehicle
up out of use, have the en-
gine oil and the oil filter element
changed by a specialist work-
shop, preferably an authorised
BMW Motorrad dealer. Com-
bine work for laying up/restoring
to use with a BMW service or
inspection.
Restoring motorcycle
to useRemove the protective wax
coating.
Clean the motorcycle.
Install a charged battery. Before starting: work through
the checklist.
9134zCare