check engine light BMW X3 3.0I 2006 E83 Owner's Manual
[x] Cancel search | Manufacturer: BMW, Model Year: 2006, Model line: X3 3.0I, Model: BMW X3 3.0I 2006 E83Pages: 133, PDF Size: 8.37 MB
Page 14 of 133
Cockpit
12
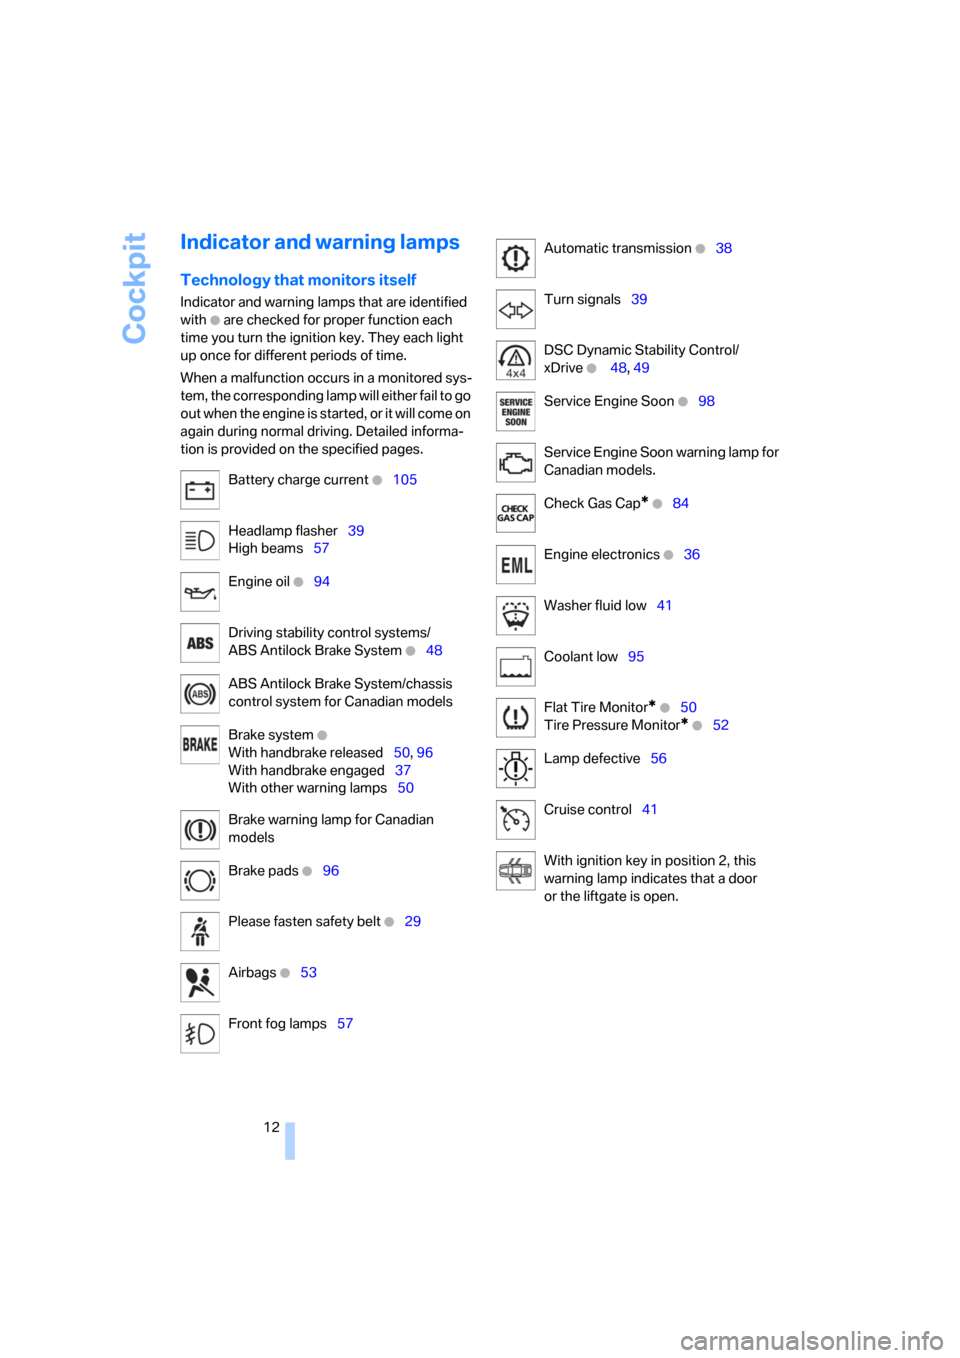
Indicator and warning lamps
Technology that monitors itself
Indicator and warning lamps that are identified
with
+ are checked for proper function each
time you turn the ignition key. They each light
up once for different periods of time.
When a malfunction occurs in a monitored sys-
tem, the corresponding lamp will either fail to go
o u t w h e n t h e e n g i n e i s s t a r t e d , o r i t w i l l c o m e o n
again during normal driving. Detailed informa-
tion is provided on the specified pages.
Battery charge current
+105
Headlamp flasher39
High beams57
Engine oil
+94
Driving stability control systems/
ABS Antilock Brake System
+48
ABS Antilock Brake System/chassis
control system for Canadian models
Brake system
+
With handbrake released50, 96
With handbrake engaged37
With other warning lamps50
Brake warning lamp for Canadian
models
Brake pads
+96
Please fasten safety belt
+29
Airbags
+53
Front fog lamps57
Automatic transmission +38
Turn signals39
DSC Dynamic Stability Control/
xDrive
+ 48, 49
Service Engine Soon
+98
Service Engine Soon warning lamp for
Canadian models.
Check Gas Cap
* +84
Engine electronics
+36
Washer fluid low41
Coolant low95
Flat Tire Monitor
* +50
Tire Pressure Monitor
* +52
Lamp defective56
Cruise control41
With ignition key in position 2, this
warning lamp indicates that a door
or the liftgate is open.
Page 38 of 133
Driving
36
Driving
Ignition lock
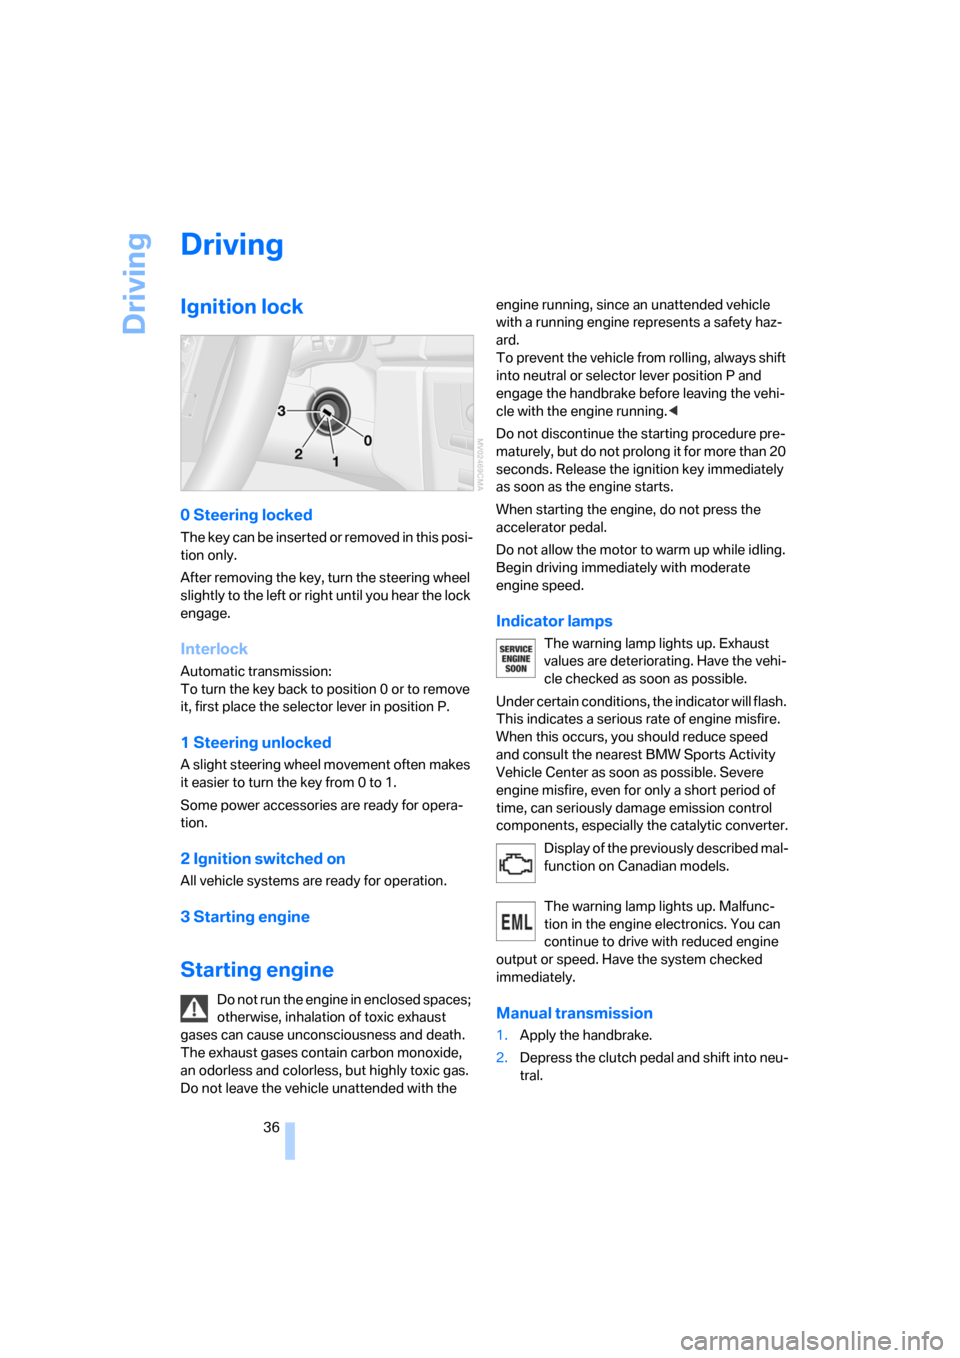
0 Steering locked
T h e k e y c a n b e in s e r t e d o r r e m o v e d in t h i s p o s i-
tion only.
After removing the key, turn the steering wheel
slightly to the left or right until you hear the lock
engage.
Interlock
Automatic transmission:
To turn the key back to position 0 or to remove
it, first place the selector lever in position P.
1 Steering unlocked
A slight steering wheel movement often makes
it easier to turn the key from 0 to 1.
Some power accessories are ready for opera-
tion.
2 Ignition switched on
All vehicle systems are ready for operation.
3 Starting engine
Starting engine
Do not run the engine in enclosed spaces;
otherwise, inhalation of toxic exhaust
gases can cause unconsciousness and death.
The exhaust gases contain carbon monoxide,
an odorless and colorless, but highly toxic gas.
Do not leave the vehicle unattended with the engine running, since an unattended vehicle
with a running engine represents a safety haz-
ard.
To prevent the vehicle from rolling, always shift
into neutral or selector lever position P and
engage the handbrake before leaving the vehi-
cle with the engine running.<
Do not discontinue the starting procedure pre-
maturely, but do not prolong it for more than 20
seconds. Release the ignition key immediately
as soon as the engine starts.
When starting the engine, do not press the
accelerator pedal.
Do not allow the motor to warm up while idling.
Begin driving immediately with moderate
engine speed.
Indicator lamps
The warning lamp lights up. Exhaust
values are deteriorating. Have the vehi-
cle checked as soon as possible.
Under certain conditions, the indicator will flash.
This indicates a serious rate of engine misfire.
When this occurs, you should reduce speed
and consult the nearest BMW Sports Activity
Vehicle Center as soon as possible. Severe
engine misfire, even for only a short period of
time, can seriously damage emission control
components, especially the catalytic converter.
Display of the previously described mal-
function on Canadian models.
The warning lamp lights up. Malfunc-
tion in the engine electronics. You can
continue to drive with reduced engine
output or speed. Have the system checked
immediately.
Manual transmission
1.Apply the handbrake.
2.Depress the clutch pedal and shift into neu-
tral.
Page 41 of 133
Reference
At a glance
Controls
Driving tips
Mobility
39
R Reverse
Select only when the vehicle is stationary.
N Neutral
You can shift into neutral, for example, in auto-
matic car washes. The vehicle can roll.
D Drive, automatic position
Under normal operating conditions, fuel con-
sumption is the lowest when the vehicle is
driven in position D.
Kick-down
The kick-down mode provides maximum accel-
eration.
Press the accelerator pedal past the increased
resistance point at the full-throttle position.
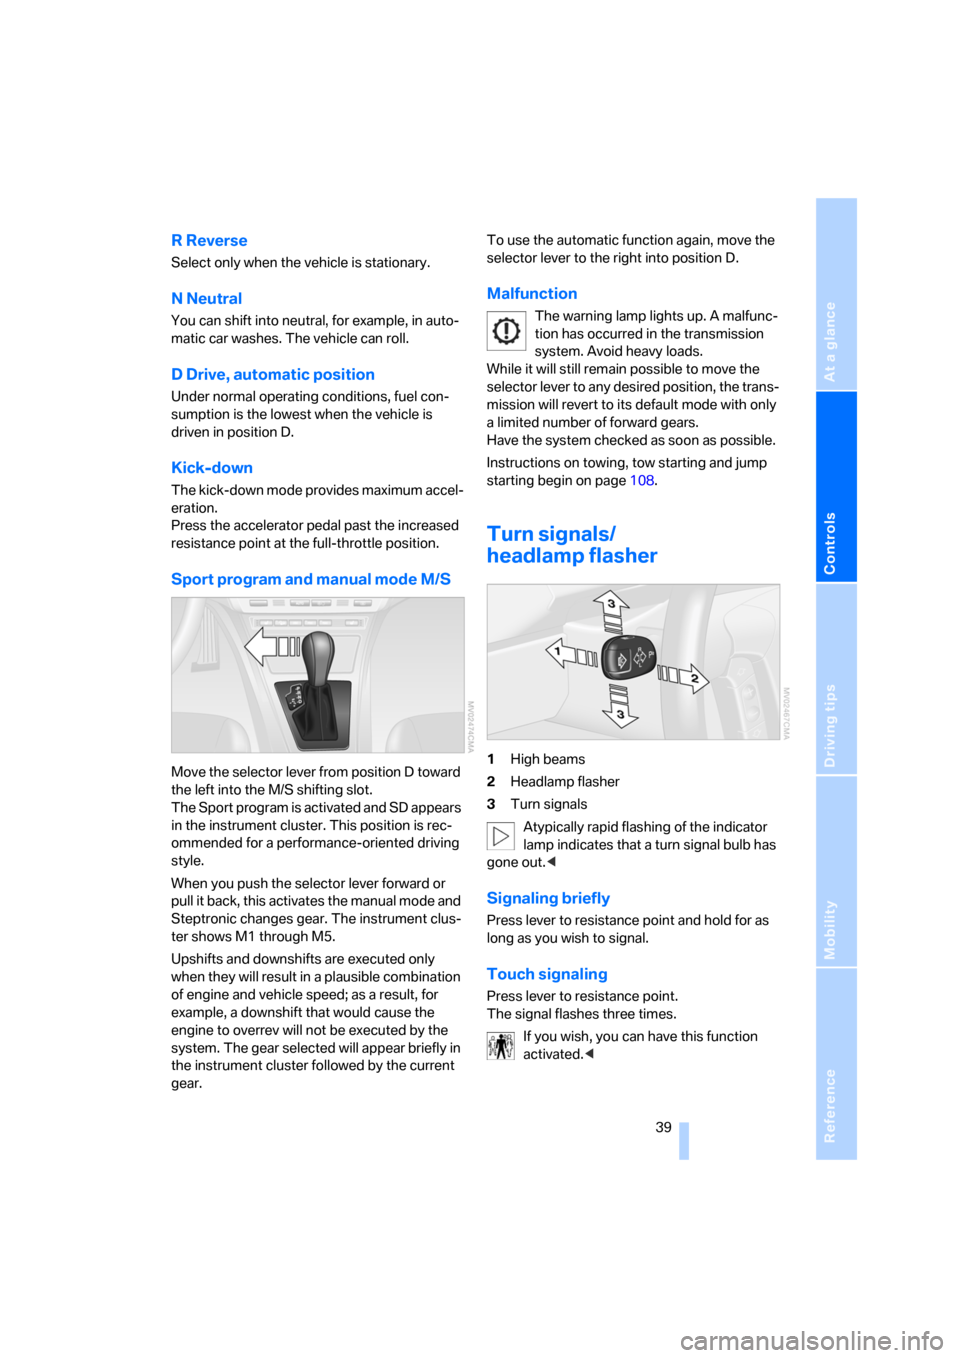
Sport program and manual mode M/S
Move the selector lever from position D toward
the left into the M/S shifting slot.
The Sport program is activated and SD appears
in the instrument cluster. This position is rec-
ommended for a performance-oriented driving
style.
When you push the selector lever forward or
pull it back, this activates the manual mode and
Steptronic changes gear. The instrument clus-
ter shows M1 through M5.
Upshifts and downshifts are executed only
when they will result in a plausible combination
of engine and vehicle speed; as a result, for
example, a downshift that would cause the
engine to overrev will not be executed by the
system. The gear selected will appear briefly in
the instrument cluster followed by the current
gear.To use the automatic function again, move the
selector lever to the right into position D.
Malfunction
The warning lamp lights up. A malfunc-
tion has occurred in the transmission
system. Avoid heavy loads.
While it will still remain possible to move the
selector lever to any desired position, the trans-
mission will revert to its default mode with only
a limited number of forward gears.
Have the system checked as soon as possible.
Instructions on towing, tow starting and jump
starting begin on page108.
Turn signals/
headlamp flasher
1High beams
2Headlamp flasher
3Turn signals
Atypically rapid flashing of the indicator
lamp indicates that a turn signal bulb has
gone out.<
Signaling briefly
Press lever to resistance point and hold for as
long as you wish to signal.
Touch signaling
Press lever to resistance point.
The signal flashes three times.
If you wish, you can have this function
activated.<
Page 52 of 133
Technology for comfort, convenience and safety
50
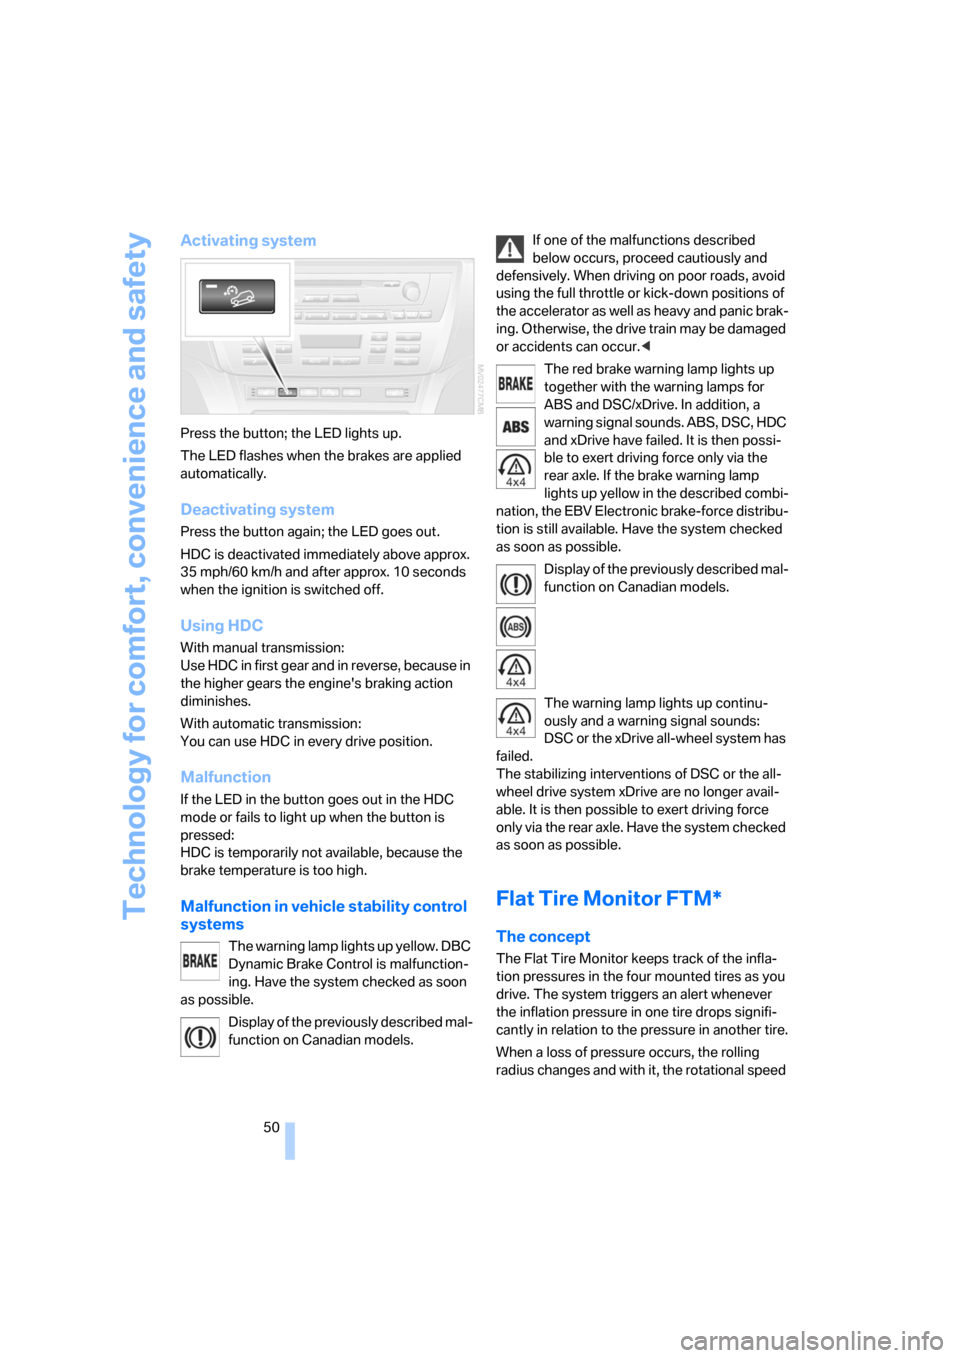
Activating system
Press the button; the LED lights up.
The LED flashes when the brakes are applied
automatically.
Deactivating system
Press the button again; the LED goes out.
HDC is deactivated immediately above approx.
35 mph/60 km/h and after approx. 10 seconds
when the ignition is switched off.
Using HDC
With manual transmission:
Use HDC in first gear and in reverse, because in
the higher gears the engine's braking action
diminishes.
With automatic transmission:
You can use HDC in every drive position.
Malfunction
If the LED in the button goes out in the HDC
mode or fails to light up when the button is
pressed:
HDC is temporarily not available, because the
brake temperature is too high.
Malfunction in vehicle stability control
systems
The warning lamp lights up yellow. DBC
Dynamic Brake Control is malfunction-
ing. Have the system checked as soon
as possible.
Display of the previously described mal-
function on Canadian models.If one of the malfunctions described
below occurs, proceed cautiously and
defensively. When driving on poor roads, avoid
using the full throttle or kick-down positions of
the accelerator as well as heavy and panic brak-
ing. Otherwise, the drive train may be damaged
or accidents can occur.<
The red brake warning lamp lights up
together with the warning lamps for
ABS and DSC/xDrive. In addition, a
warning signal sounds. ABS, DSC, HDC
and xDrive have failed. It is then possi-
ble to exert driving force only via the
rear axle. If the brake warning lamp
lights up yellow in the described combi-
nation, the EBV Electronic brake-force distribu-
tion is still available. Have the system checked
as soon as possible.
Display of the previously described mal-
function on Canadian models.
The warning lamp lights up continu-
ously and a warning signal sounds:
DSC or the xDrive all-wheel system has
failed.
The stabilizing interventions of DSC or the all-
wheel drive system xDrive are no longer avail-
able. It is then possible to exert driving force
only via the rear axle. Have the system checked
as soon as possible.
Flat Tire Monitor FTM*
The concept
The Flat Tire Monitor keeps track of the infla-
tion pressures in the four mounted tires as you
drive. The system triggers an alert whenever
the inflation pressure in one tire drops signifi-
cantly in relation to the pressure in another tire.
When a loss of pressure occurs, the rolling
radius changes and with it, the rotational speed
Page 53 of 133
Reference
At a glance
Controls
Driving tips
Mobility
51
of the wheels. This change is detected and sig-
naled as a flat tire.
Functional requirement
To ensure the reliable signaling of a flat tire, the
system must be initialized at the correct tire
inflation pressure.
The initialization must be repeated after
every correction of the tire inflation pres-
sure, after every tire or wheel change, and after
a trailer is hitched or unhitched.<
System limits
The Flat Tire Monitor cannot predict sud-
den severe tire damage caused by out-
side factors and does not detect a natural, even
pressure drop in all four tires.<
In the following situations, the system could be
delayed or malfunction:
>When the system has not been initialized
>When driving on snow-covered or slippery
road surfaces
>Sporty driving style: slip in the drive wheels,
high lateral acceleration.
>When driving with snow chains
When driving with a compact wheel, the Flat
Tire Monitor cannot operate.
Initializing system
The system must be reinitialized after
every correction of tire inflation pressure
and after every tire or wheel change. Do not ini-
tialize the system when driving with snow
chains or with a compact wheel.<
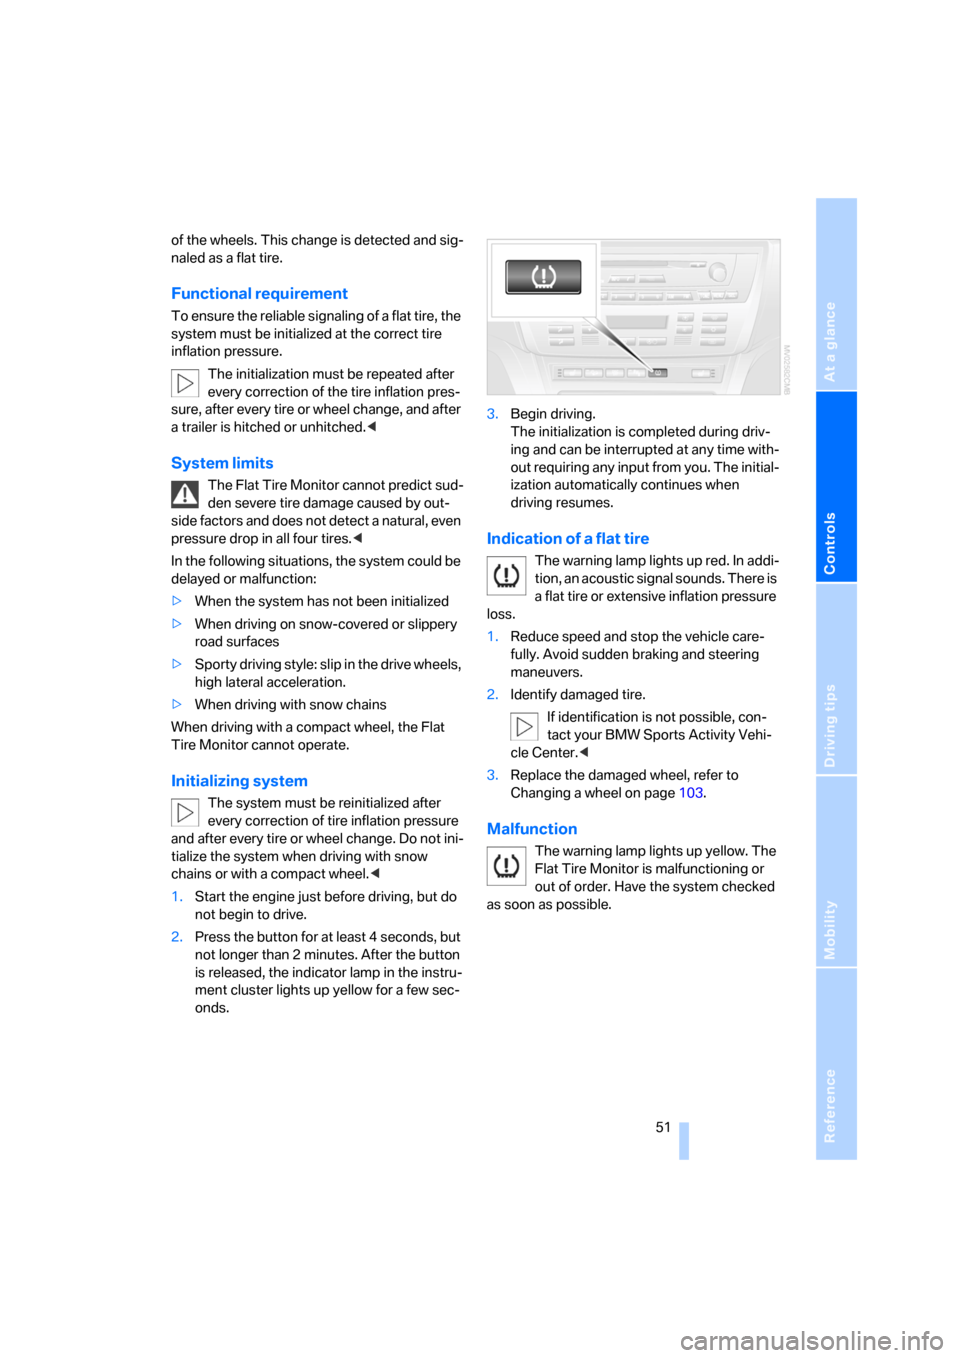
1.Start the engine just before driving, but do
not begin to drive.
2.Press the button for at least 4 seconds, but
not longer than 2 minutes. After the button
is released, the indicator lamp in the instru-
ment cluster lights up yellow for a few sec-
onds.3.Begin driving.
The initialization is completed during driv-
ing and can be interrupted at any time with-
out requiring any input from you. The initial-
ization automatically continues when
driving resumes.
Indication of a flat tire
The warning lamp lights up red. In addi-
tion, an acoustic signal sounds. There is
a flat tire or extensive inflation pressure
loss.
1.Reduce speed and stop the vehicle care-
fully. Avoid sudden braking and steering
maneuvers.
2.Identify damaged tire.
If identification is not possible, con-
tact your BMW Sports Activity Vehi-
cle Center.<
3.Replace the damaged wheel, refer to
Changing a wheel on page103.
Malfunction
The warning lamp lights up yellow. The
Flat Tire Monitor is malfunctioning or
out of order. Have the system checked
as soon as possible.
Page 54 of 133
Technology for comfort, convenience and safety
52
TPM Tire Pressure Monitor*
The concept
TPM controls the tire inflation pressure in the
four mounted wheels. The system notifies you
if the tire inflation pressure has fallen signifi-
cantly in one or more tires.
Functional requirement
To ensure the reliable signaling of a flat tire, the
system must be reset at the correct tire inflation
pressure.
Always use wheels equipped with TPM elec-
tronics, including a metal valve; otherwise, there
is no guarantee that the system will function
properly.
The system must be reset after every cor-
rection of tire inflation pressure and after
every tire or wheel change.<
System limits
TPM cannot warn you of sudden, serious
tire damage due to external factors.<
The system does not function properly if it has
not been reset, e.g. it may identify a tire as flat in
spite of the fact that the tire is filled to the cor-
rect inflation pressure.
The system is inactive and cannot indicate flat
tires if a wheel not equipped with TPM electron-
ics has been mounted, e.g. a compact wheel, or
if TPM is experiencing temporary interference
from other systems or devices that use the
same frequency.
Resetting system
The system must be reset after every cor-
rection of tire inflation pressure and after
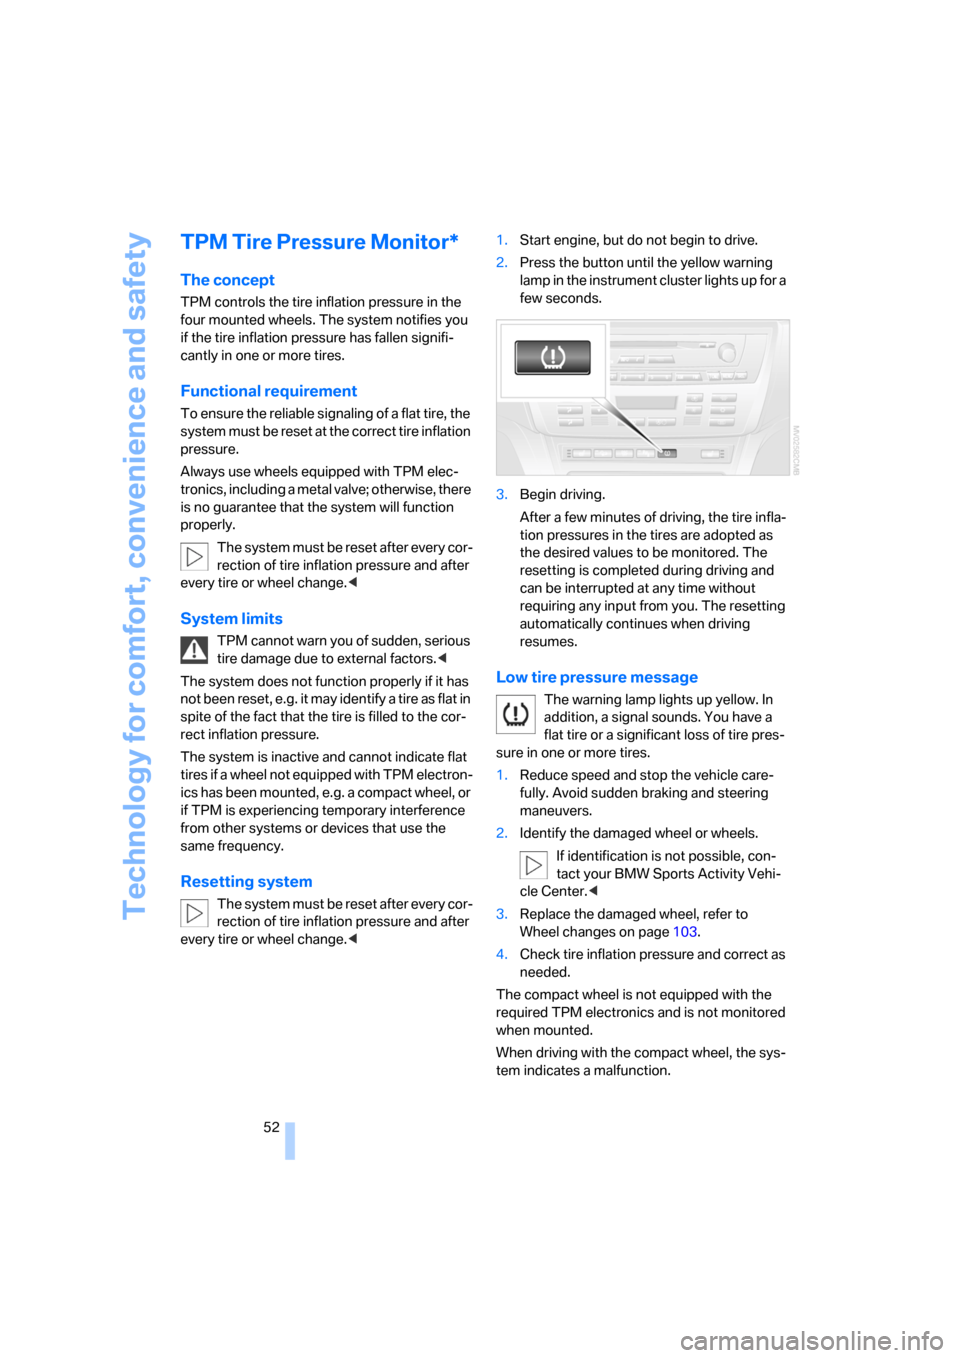
every tire or wheel change.<1.Start engine, but do not begin to drive.
2.Press the button until the yellow warning
lamp in the instrument cluster lights up for a
few seconds.
3.Begin driving.
After a few minutes of driving, the tire infla-
tion pressures in the tires are adopted as
the desired values to be monitored. The
resetting is completed during driving and
can be interrupted at any time without
requiring any input from you. The resetting
automatically continues when driving
resumes.
Low tire pressure message
The warning lamp lights up yellow. In
addition, a signal sounds. You have a
flat tire or a significant loss of tire pres-
sure in one or more tires.
1.Reduce speed and stop the vehicle care-
fully. Avoid sudden braking and steering
maneuvers.
2.Identify the damaged wheel or wheels.
If identification is not possible, con-
tact your BMW Sports Activity Vehi-
cle Center.<
3.Replace the damaged wheel, refer to
Wheel changes on page103.
4.Check tire inflation pressure and correct as
needed.
The compact wheel is not equipped with the
required TPM electronics and is not monitored
when mounted.
When driving with the compact wheel, the sys-
tem indicates a malfunction.
Page 59 of 133
Reference
At a glance
Controls
Driving tips
Mobility
57
Automatic headlamp control cannot
serve as a substitute for the driver's judg-
ment in determining when the vehicle lamps
should be switched on. For example, the sys-
tem cannot detect fog or hazy weather. To
avoid safety risks, you should always switch on
the lamps manually under these conditions.<
You can have the sensitivity of the head-
lamp control adjusted.<
Adaptive Head Light*
The concept
Adaptive Head Light is a variable headlamp
control system that enables better illumination
of the road surface. Depending on the steering
angle and other assumptions, the light from the
headlamp follows the course of the road.
Activating Adaptive Head Light
In ignition position 2, turn the light
switch into the automatic headlamp
control position, refer to page56.
The LED next to the symbol lights up.
In order not to blind oncoming traffic, the Adap-
tive Head Light is not active when driving in
reverse and only points toward the passenger
side when the vehicle is stationary.
Malfunction
The LED next to the symbol for automatic head-
lamp control flashes. Adaptive Head Light is
malfunctioning or has failed. Have the system
checked as soon as possible.
High beams/
roadside parking lamps
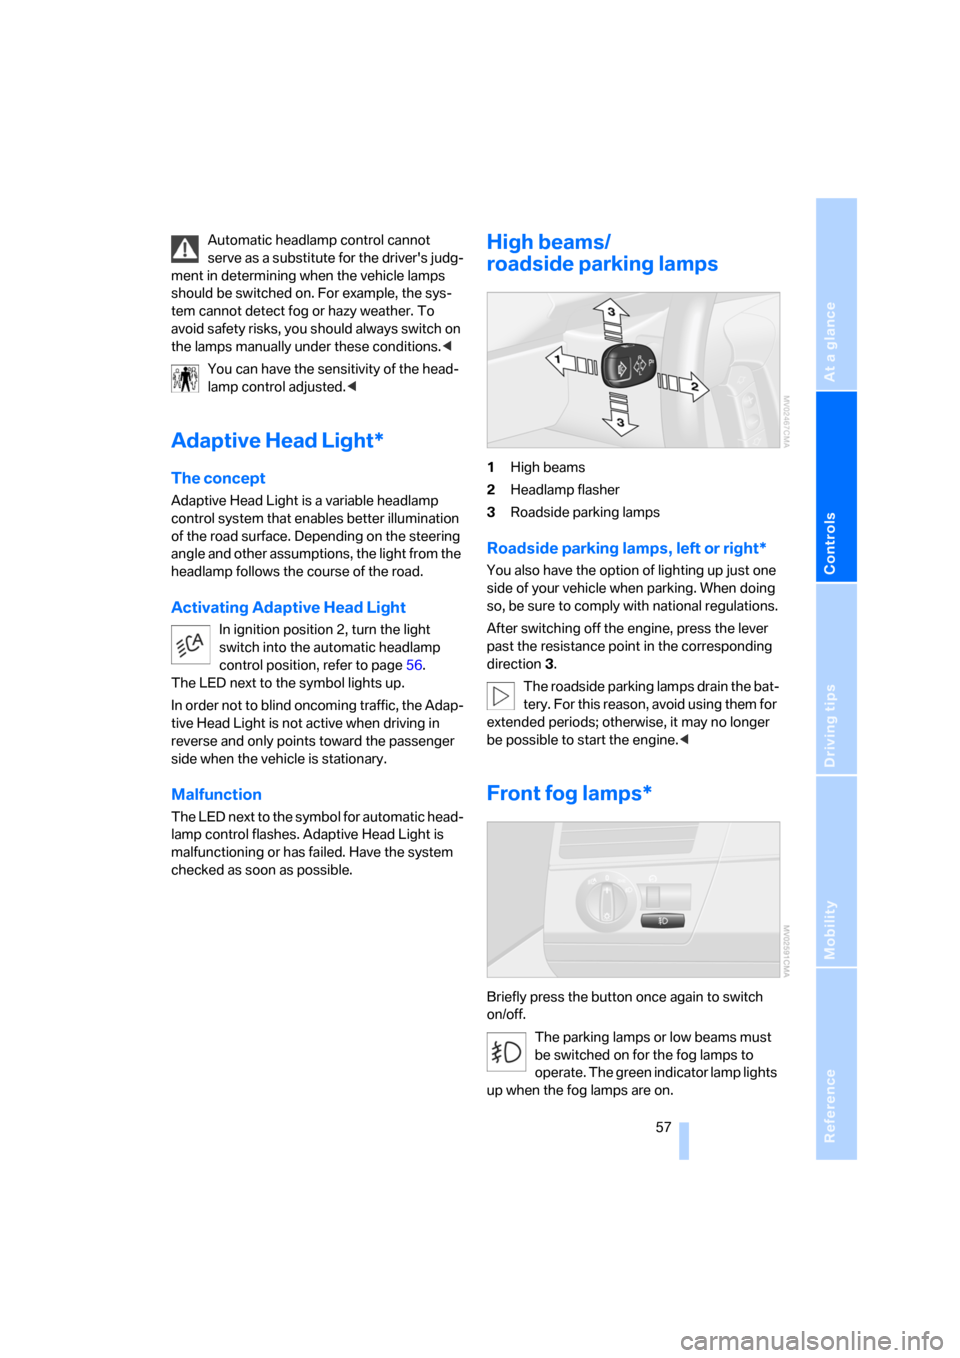
1High beams
2Headlamp flasher
3Roadside parking lamps
Roadside parking lamps, left or right*
You also have the option of lighting up just one
side of your vehicle when parking. When doing
so, be sure to comply with national regulations.
After switching off the engine, press the lever
past the resistance point in the corresponding
direction 3.
The roadside parking lamps drain the bat-
tery. For this reason, avoid using them for
extended periods; otherwise, it may no longer
be possible to start the engine.<
Front fog lamps*
Briefly press the button once again to switch
on/off.
The parking lamps or low beams must
be switched on for the fog lamps to
operate. The green indicator lamp lights
up when the fog lamps are on.
Page 68 of 133
Practical interior accessories
66 The corresponding memory button1 is now
programmed with the signal of the original
hand-held transmitter.
You can use the system when the engine is run-
ning or when the ignition is switched on.
If the system cannot be operated after
repeated programming, check whether
the original hand-held transmitter uses an alter-
nating-code system. To do so, either read the
instructions of the original hand-held transmit-
ter or press and hold down the programmed
memory button 1 of the integrated universal
remote control. If the LED2 on the integrated
universal remote control flashes rapidly for a
short time then lights up for approx. 2 seconds,
this indicates that the original hand-held trans-
mitter uses an alternating-code system. In the
case of an alternating-code system, program
the memory buttons 1 as described in the sec-
tion below on alternating-code transmitters.<
Alternating-code transmitters
Consult the operating instructions of the unit
you wish to set when programming the univer-
sal remote control. You will find information
there on the possibilities for synchronization.
When programming hand-held transmitters
that employ an alternating code, please follow
these additional instructions:
Programming will be easier with the aid of
a second person.<
1.Park your vehicle within the range of the
remote-controlled equipment.
2.Program the integrated universal remote
control as described above in the section on
Fixed-code hand-held transmitters.
3.Locate the button on the receiver of the
equipment to be set, e.g. on its drive unit.
4.Press the button on the receiver of the
device you want to set up. After step 4, you
have approx. 30 seconds for step 5.
5.Press the programmed memory button1
of the integrated universal remote control
three times.The corresponding memory button1 is now
programmed with the signal of the original
hand-held transmitter.
If you have questions, please contact your
BMW Sports Activity Vehicle Center.<
Deleting stored programs
Press both outer buttons1 for approx. 20 sec-
onds, maintaining pressure until the LED2
starts to flash: all stored programs are deleted.
It is not possible to delete individual programs.
Cup holders
Do not place glass containers in the cup
holders; otherwise, there is a danger of
injury in the event of an accident.<
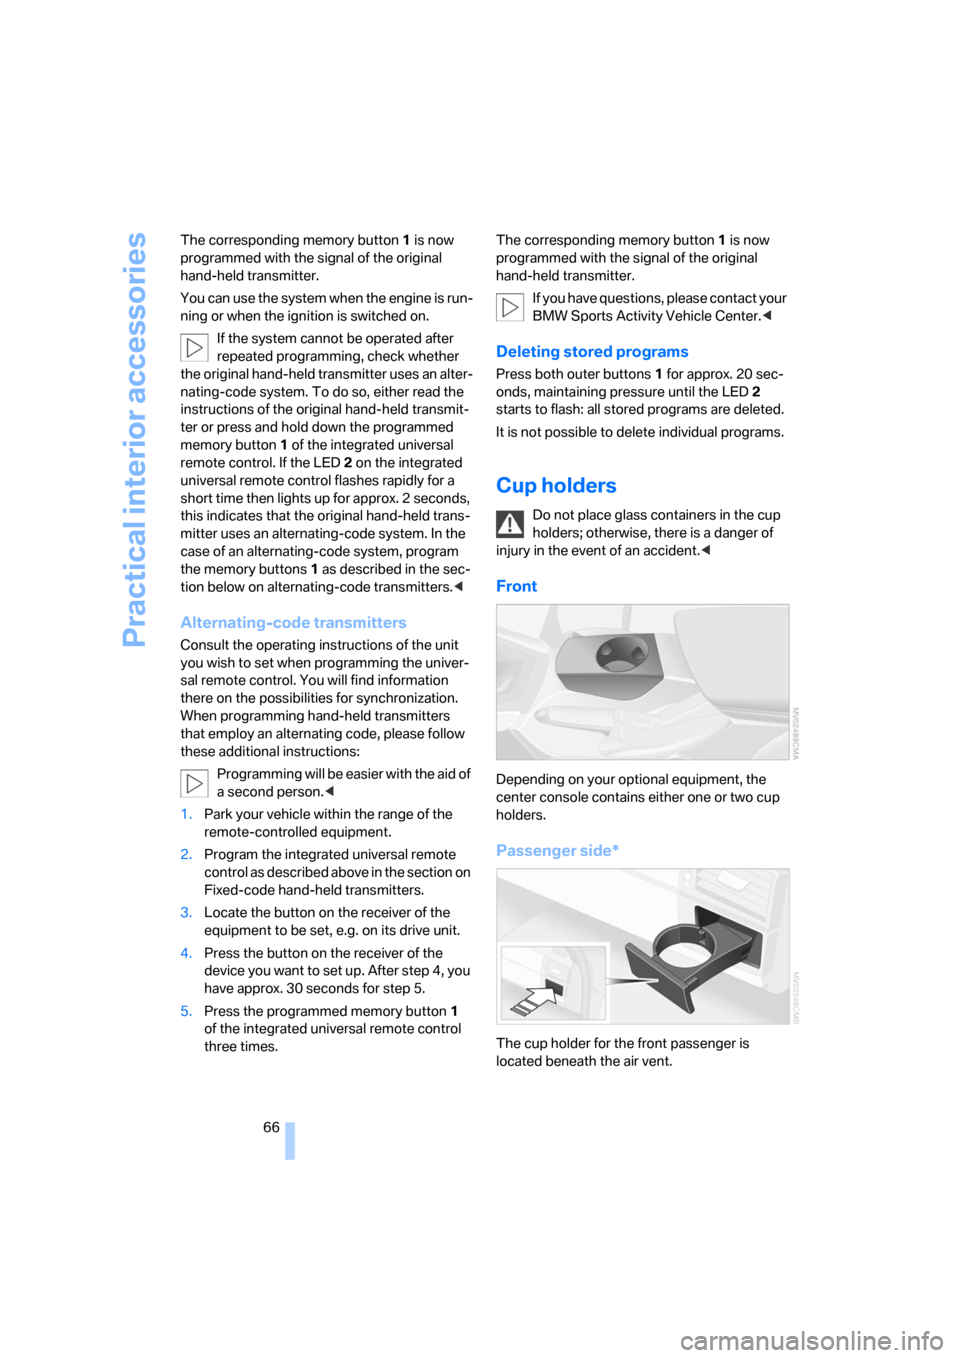
Front
Depending on your optional equipment, the
center console contains either one or two cup
holders.
Passenger side*
The cup holder for the front passenger is
located beneath the air vent.
Page 86 of 133
Refueling
84
Refueling
Fuel cap
Opening
Always switch off the engine before refu-
eling. Otherwise, no fuel can be dis-
pensed into the tank and the Service Engine
Soon lamp lights up.<
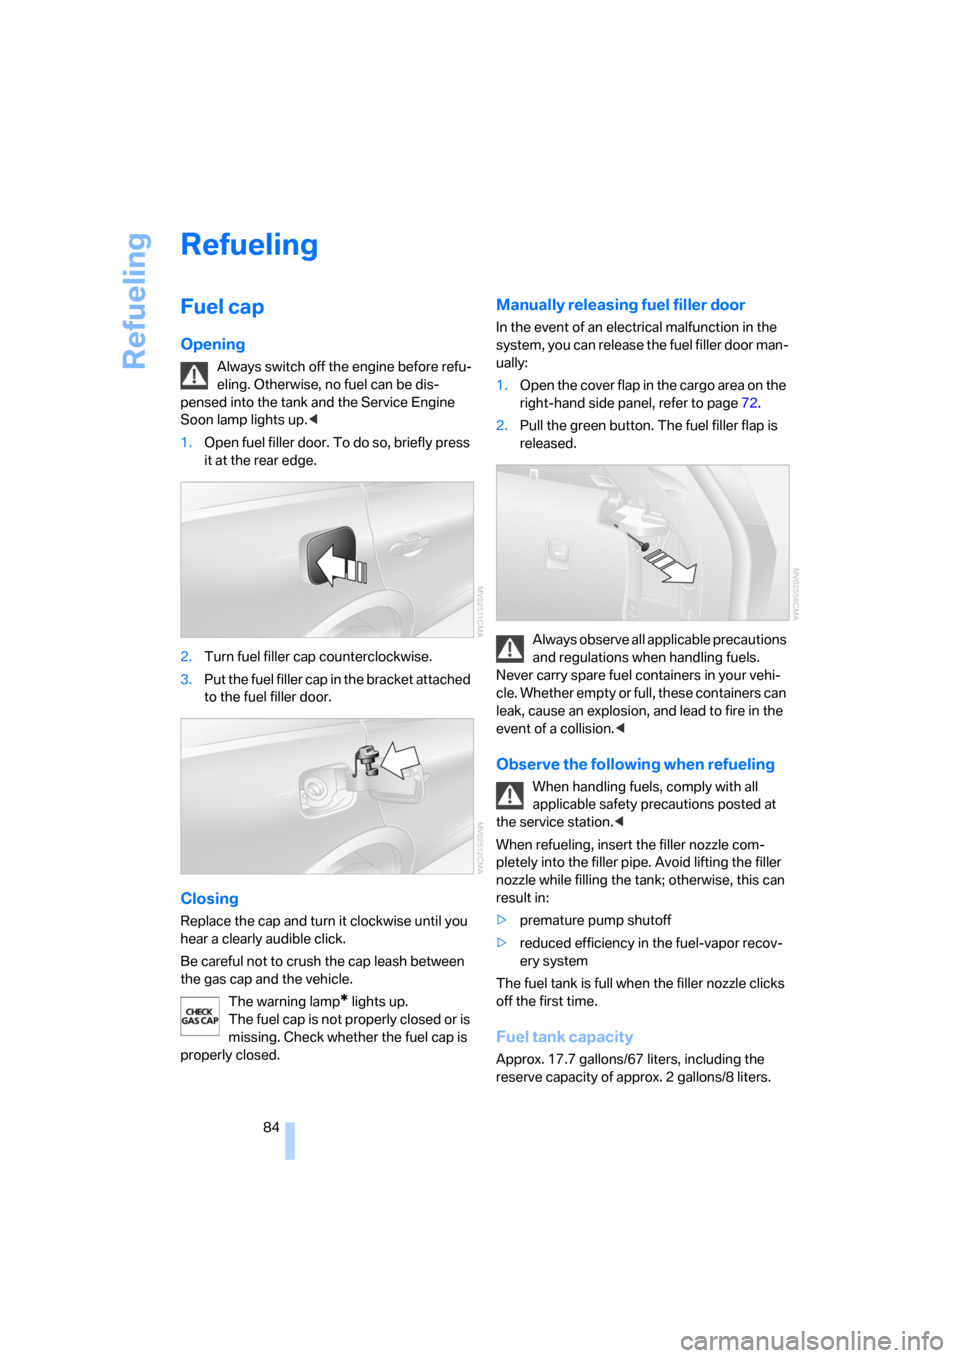
1.Open fuel filler door. To do so, briefly press
it at the rear edge.
2.Turn fuel filler cap counterclockwise.
3.Put the fuel filler cap in the bracket attached
to the fuel filler door.
Closing
Replace the cap and turn it clockwise until you
hear a clearly audible click.
Be careful not to crush the cap leash between
the gas cap and the vehicle.
The warning lamp
* lights up.
The fuel cap is not properly closed or is
missing. Check whether the fuel cap is
properly closed.
Manually releasing fuel filler door
In the event of an electrical malfunction in the
system, you can release the fuel filler door man-
ually:
1.Open the cover flap in the cargo area on the
right-hand side panel, refer to page72.
2.Pull the green button. The fuel filler flap is
released.
Always observe all applicable precautions
and regulations when handling fuels.
Never carry spare fuel containers in your vehi-
cle. Whether empty or full, these containers can
leak, cause an explosion, and lead to fire in the
event of a collision.<
Observe the following when refueling
When handling fuels, comply with all
applicable safety precautions posted at
the service station.<
When refueling, insert the filler nozzle com-
pletely into the filler pipe. Avoid lifting the filler
nozzle while filling the tank; otherwise, this can
result in:
>premature pump shutoff
>reduced efficiency in the fuel-vapor recov-
ery system
The fuel tank is full when the filler nozzle clicks
off the first time.
Fuel tank capacity
Approx. 17.7 gallons/67 liters, including the
reserve capacity of approx. 2 gallons/8 liters.
Page 96 of 133
Under the hood
94
Engine oil
Engine oil consumption depends on driving
style and operating conditions.
Warning lamp
Engine oil pressure
The warning lamp lights up red:
The engine oil pressure is too low.
Stop the vehicle immediately and
switch off the engine. Check the engine oil level
and top off as needed. If the oil level is correct:
have the system checked immediately.
Do not continue driving. The engine could
be damaged because of inadequate lubri-
cation.<
Engine oil level
The warning lamp lights up yellow dur-
ing driving. In addition, an acoustic sig-
nal sounds.
The oil level is at the absolute minimum. Add
engine oil as soon as possible. Until then, do not
drive more than approx. 30 miles/50 km.
The warning lamp lights up yellow after
the engine is switched off. In addition,
an acoustic signal sounds.
Top off engine oil at the earliest opportunity,
e.g. when refueling.
Engine oil sensor
The warning lamp lights up yellow
within 30 seconds after starting the
engine:
The oil level sensor is defective. Have it
checked as soon as possible.
Checking oil level
1.With the engine at operating temperature,
i.e. after at least 6 miles/10 km of uninter-
rupted driving, park the vehicle in a horizon-
tal position.
2.Switch off engine.
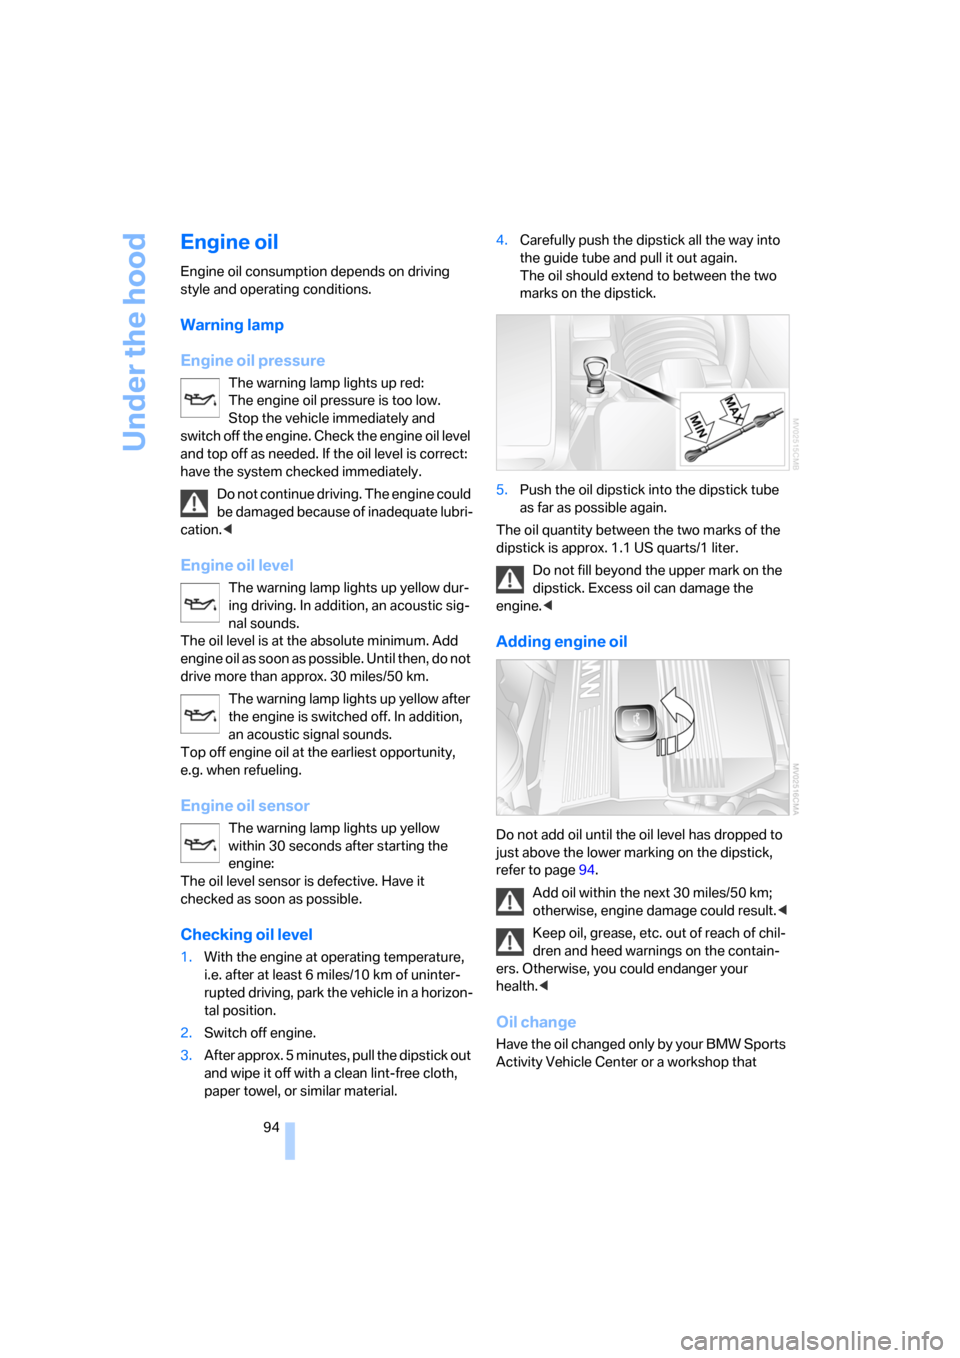
3.After approx. 5 minutes, pull the dipstick out
and wipe it off with a clean lint-free cloth,
paper towel, or similar material.4.Carefully push the dipstick all the way into
the guide tube and pull it out again.
The oil should extend to between the two
marks on the dipstick.
5.Push the oil dipstick into the dipstick tube
as far as possible again.
The oil quantity between the two marks of the
dipstick is approx. 1.1 US quarts/1 liter.
Do not fill beyond the upper mark on the
dipstick. Excess oil can damage the
engine.<
Adding engine oil
Do not add oil until the oil level has dropped to
just above the lower marking on the dipstick,
refer to page94.
Add oil within the next 30 miles/50 km;
otherwise, engine damage could result.<
Keep oil, grease, etc. out of reach of chil-
dren and heed warnings on the contain-
ers. Otherwise, you could endanger your
health.<
Oil change
Have the oil changed only by your BMW Sports
Activity Vehicle Center or a workshop that