BMW X3 XDRIVE 28I 2014 Owners Manual
Manufacturer: BMW, Model Year: 2014, Model line: X3 XDRIVE 28I, Model: BMW X3 XDRIVE 28I 2014Pages: 208, PDF Size: 5.21 MB
Page 121 of 208
Switch the system back on if necessary.
Switching on/off manually Press the button.▷On: the LED lights up.▷Off: the LED goes out.
Top View is displayed.
Switching on the backup camera via
the iDrive
With Top View switched on:
"Rear view camera"
The backup camera image is displayed. The
setting is stored for the remote control cur‐
rently in use.
Display
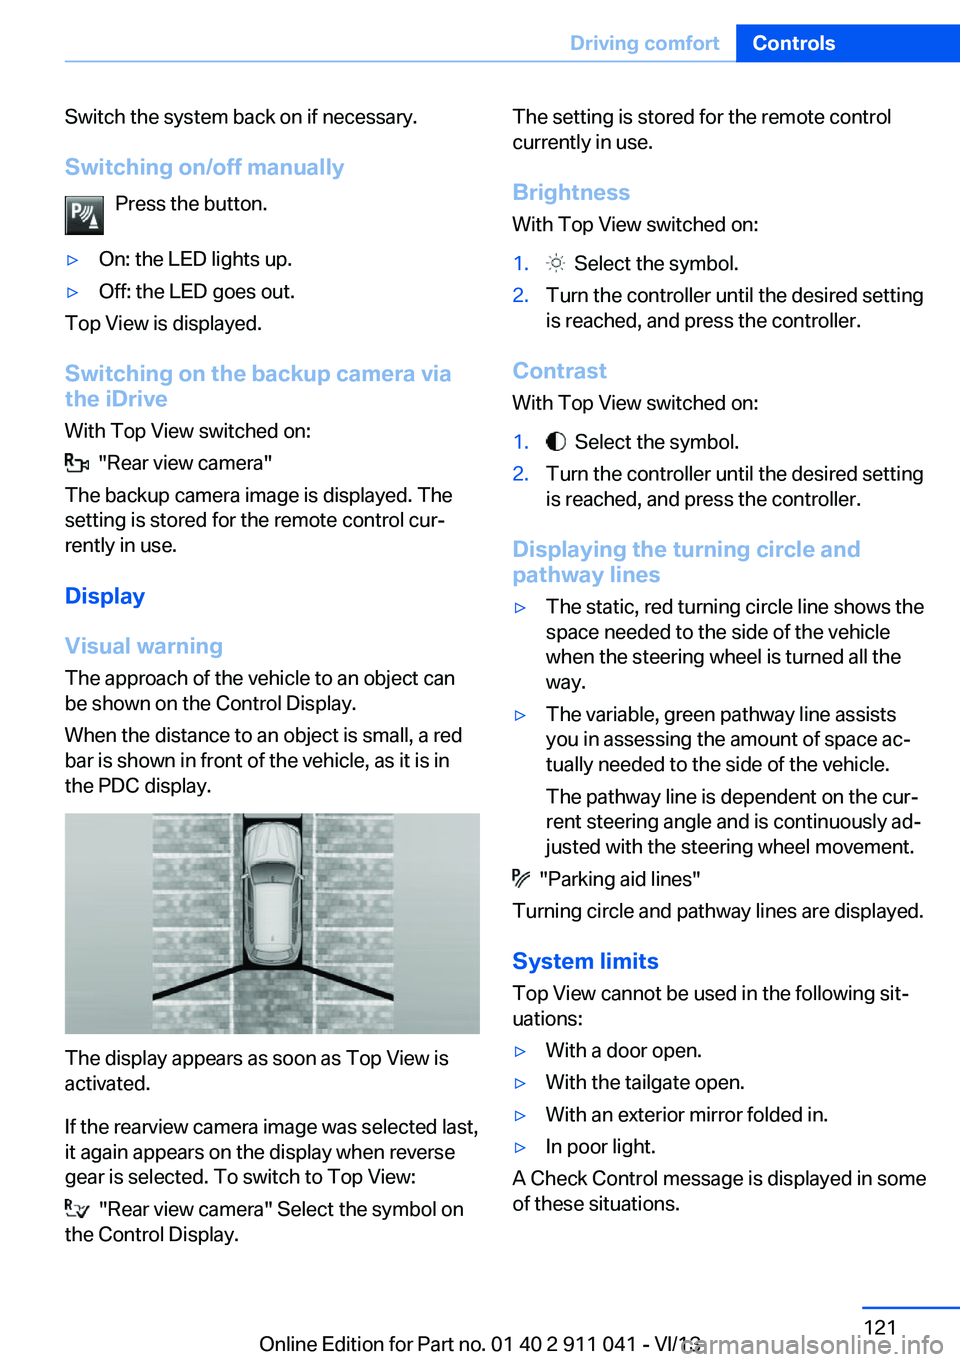
Visual warning The approach of the vehicle to an object can
be shown on the Control Display.
When the distance to an object is small, a red
bar is shown in front of the vehicle, as it is in
the PDC display.
The display appears as soon as Top View is
activated.
If the rearview camera image was selected last,
it again appears on the display when reverse
gear is selected. To switch to Top View:
"Rear view camera" Select the symbol on
the Control Display.
The setting is stored for the remote control
currently in use.
Brightness
With Top View switched on:1. Select the symbol.2.Turn the controller until the desired setting
is reached, and press the controller.
Contrast
With Top View switched on:
1. Select the symbol.2.Turn the controller until the desired setting
is reached, and press the controller.
Displaying the turning circle and
pathway lines
▷The static, red turning circle line shows the
space needed to the side of the vehicle
when the steering wheel is turned all the
way.▷The variable, green pathway line assists
you in assessing the amount of space ac‐
tually needed to the side of the vehicle.
The pathway line is dependent on the cur‐
rent steering angle and is continuously ad‐
justed with the steering wheel movement.
"Parking aid lines"
Turning circle and pathway lines are displayed.
System limits
Top View cannot be used in the following sit‐
uations:
▷With a door open.▷With the tailgate open.▷With an exterior mirror folded in.▷In poor light.
A Check Control message is displayed in some
of these situations.
Seite 121Driving comfortControls121
Online Edition for Part no. 01 40 2 911 041 - VI/13
Page 122 of 208
Head-up Display
The concept
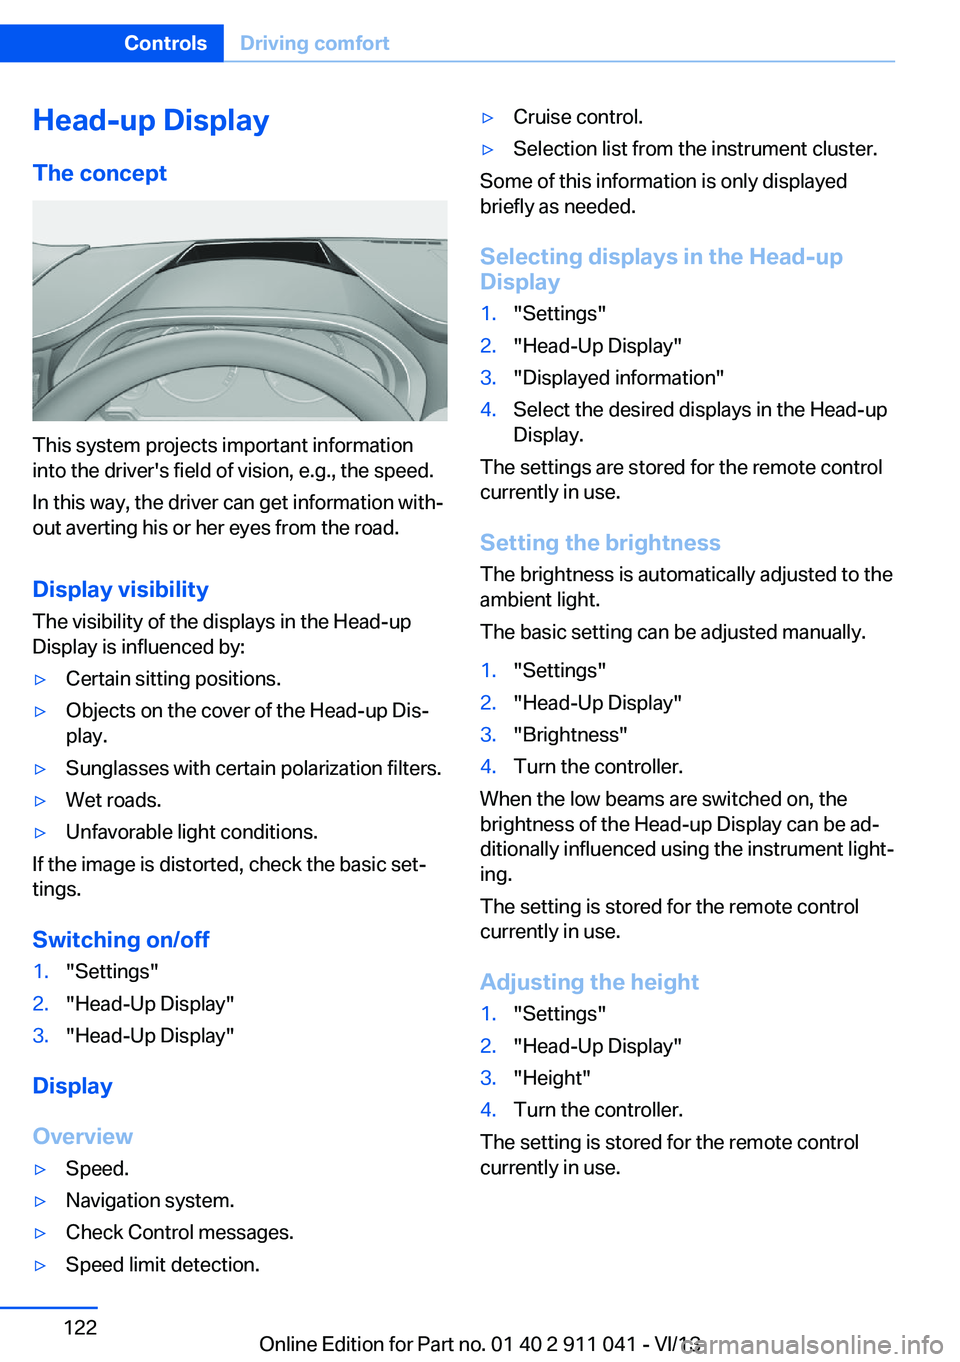
This system projects important information
into the driver's field of vision, e.g., the speed.
In this way, the driver can get information with‐
out averting his or her eyes from the road.
Display visibility The visibility of the displays in the Head-up
Display is influenced by:
▷Certain sitting positions.▷Objects on the cover of the Head-up Dis‐
play.▷Sunglasses with certain polarization filters.▷Wet roads.▷Unfavorable light conditions.
If the image is distorted, check the basic set‐
tings.
Switching on/off
1."Settings"2."Head-Up Display"3."Head-Up Display"
Display
Overview
▷Speed.▷Navigation system.▷Check Control messages.▷Speed limit detection.▷Cruise control.▷Selection list from the instrument cluster.
Some of this information is only displayed
briefly as needed.
Selecting displays in the Head-up
Display
1."Settings"2."Head-Up Display"3."Displayed information"4.Select the desired displays in the Head-up
Display.
The settings are stored for the remote control
currently in use.
Setting the brightness
The brightness is automatically adjusted to the
ambient light.
The basic setting can be adjusted manually.
1."Settings"2."Head-Up Display"3."Brightness"4.Turn the controller.
When the low beams are switched on, the
brightness of the Head-up Display can be ad‐
ditionally influenced using the instrument light‐
ing.
The setting is stored for the remote control
currently in use.
Adjusting the height
1."Settings"2."Head-Up Display"3."Height"4.Turn the controller.
The setting is stored for the remote control
currently in use.
Seite 122ControlsDriving comfort122
Online Edition for Part no. 01 40 2 911 041 - VI/13
Page 123 of 208
Setting the rotation1."Settings"2."Head-Up Display"3."Rotation"4.Turn the controller.
The setting is stored for the remote control
currently in use.
Special windshield
The windshield is part of the system.
The shape of the windshield makes it possible
to display a precise image.
A film in the windshield prevents double im‐
ages from being displayed.
Therefore, have the special windshield re‐
placed by a service center only.
Seite 123Driving comfortControls123
Online Edition for Part no. 01 40 2 911 041 - VI/13
Page 124 of 208
Climate controlVehicle equipment
All standard, country-specific and optional
equipment that is offered in the model series is
described in this chapter. Therefore, equip‐ment is also described that is not available in a
vehicle, e. g., because of the selected optional
equipment or country variant. This also applies
for safety-related functions and systems.
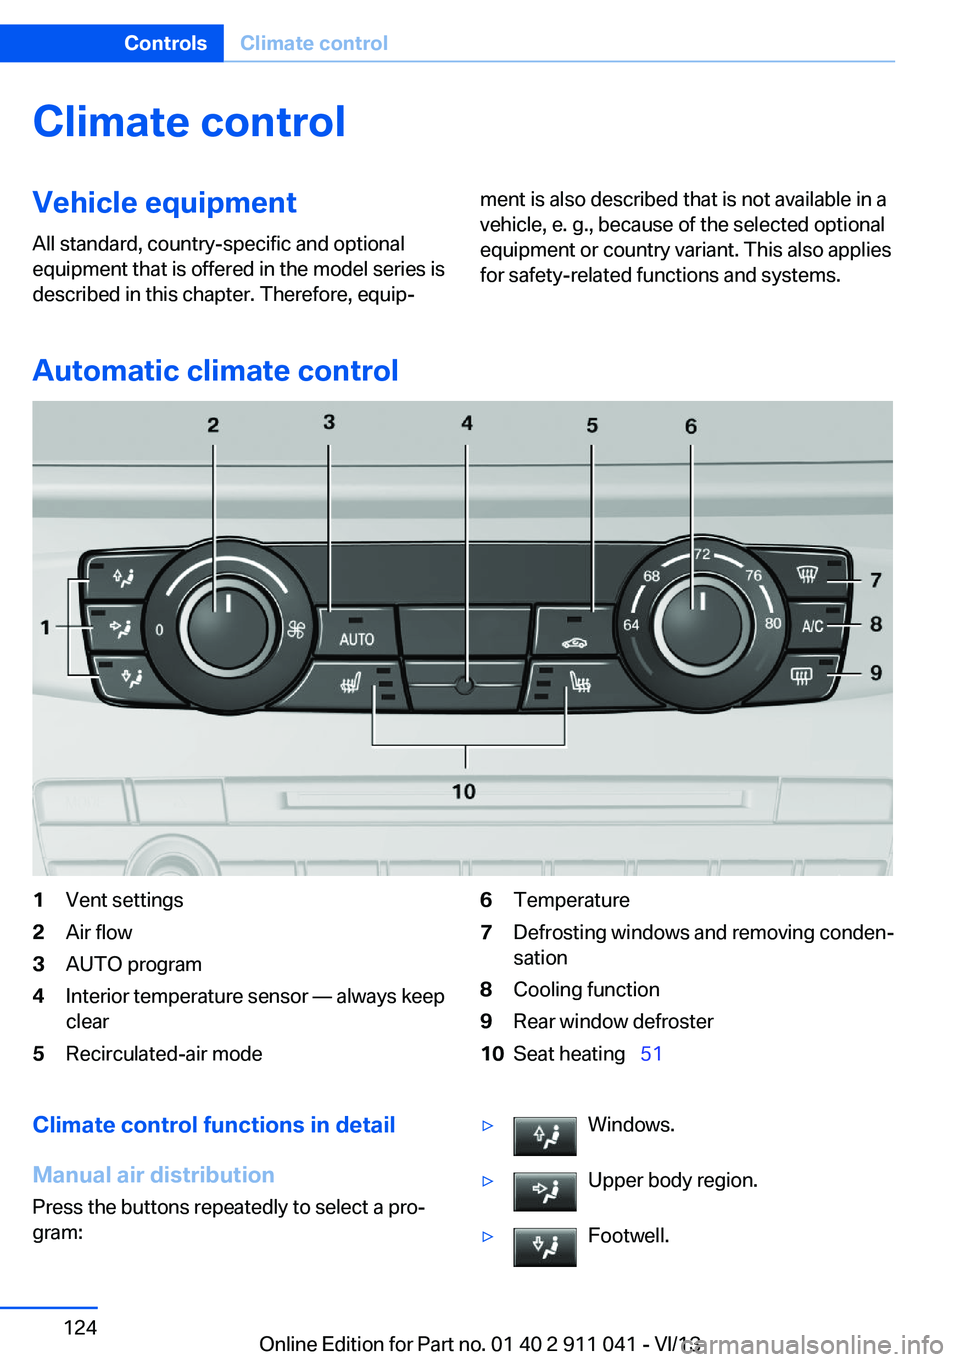
Automatic climate control
1Vent settings2Air flow3AUTO program4Interior temperature sensor — always keep
clear5Recirculated-air mode6Temperature7Defrosting windows and removing conden‐
sation8Cooling function9Rear window defroster10Seat heating 51Climate control functions in detail
Manual air distribution
Press the buttons repeatedly to select a pro‐
gram:▷Windows.▷Upper body region.▷Footwell.Seite 124ControlsClimate control124
Online Edition for Part no. 01 40 2 911 041 - VI/13
Page 125 of 208
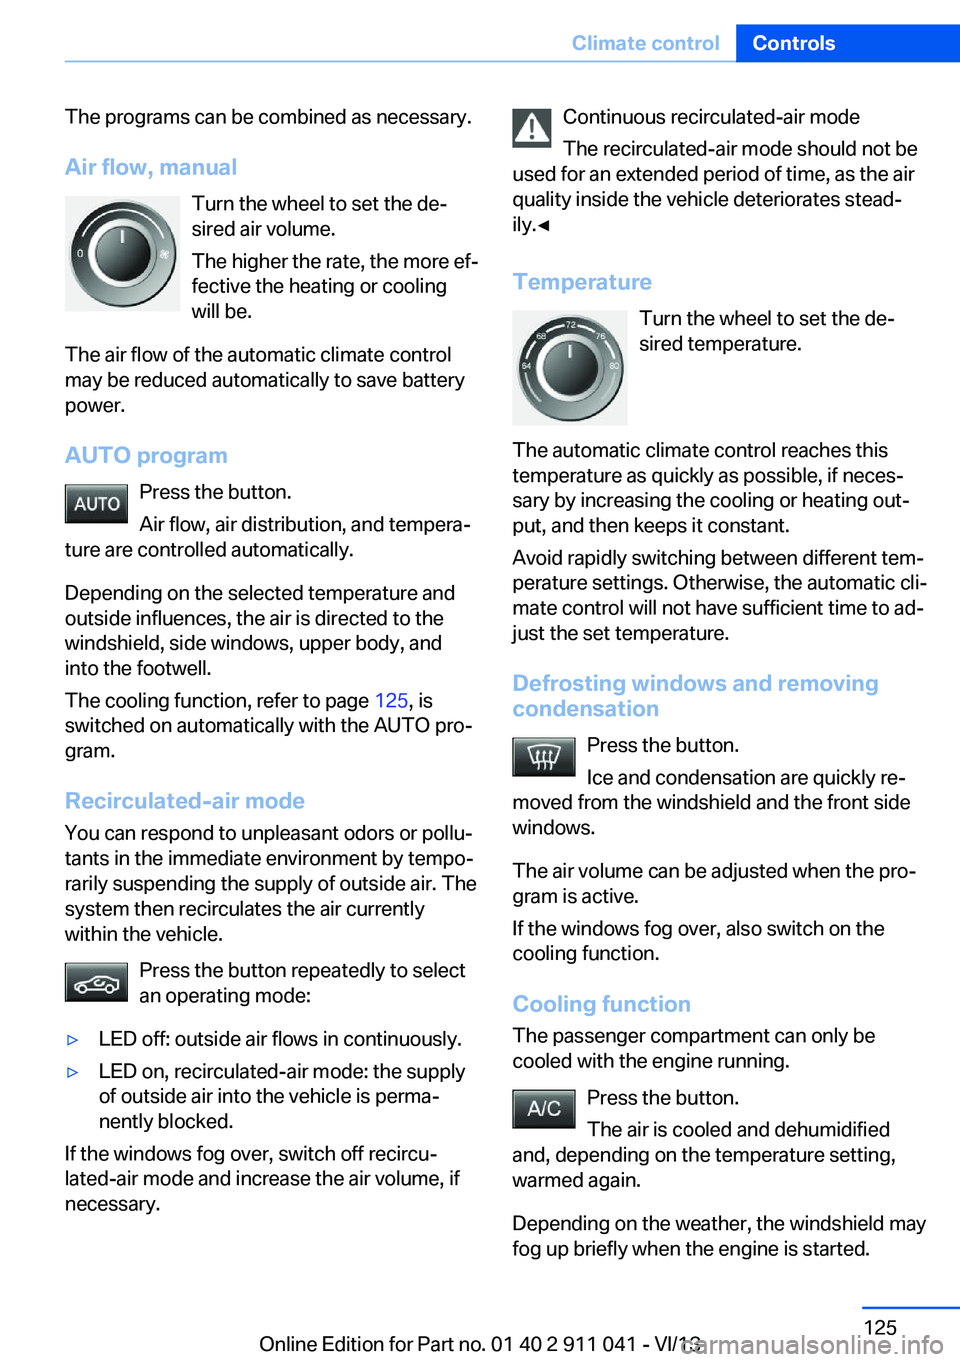
The programs can be combined as necessary.
Air flow, manual Turn the wheel to set the de‐
sired air volume.
The higher the rate, the more ef‐
fective the heating or cooling
will be.
The air flow of the automatic climate control
may be reduced automatically to save battery
power.
AUTO program Press the button.
Air flow, air distribution, and tempera‐
ture are controlled automatically.
Depending on the selected temperature and
outside influences, the air is directed to the
windshield, side windows, upper body, and
into the footwell.
The cooling function, refer to page 125, is
switched on automatically with the AUTO pro‐
gram.
Recirculated-air mode You can respond to unpleasant odors or pollu‐
tants in the immediate environment by tempo‐
rarily suspending the supply of outside air. The
system then recirculates the air currently
within the vehicle.
Press the button repeatedly to select
an operating mode:▷LED off: outside air flows in continuously.▷LED on, recirculated-air mode: the supply
of outside air into the vehicle is perma‐
nently blocked.
If the windows fog over, switch off recircu‐
lated-air mode and increase the air volume, if
necessary.
Continuous recirculated-air mode
The recirculated-air mode should not be
used for an extended period of time, as the air
quality inside the vehicle deteriorates stead‐
ily.◀
Temperature Turn the wheel to set the de‐sired temperature.
The automatic climate control reaches this
temperature as quickly as possible, if neces‐
sary by increasing the cooling or heating out‐
put, and then keeps it constant.
Avoid rapidly switching between different tem‐
perature settings. Otherwise, the automatic cli‐
mate control will not have sufficient time to ad‐
just the set temperature.
Defrosting windows and removing
condensation
Press the button.
Ice and condensation are quickly re‐
moved from the windshield and the front side
windows.
The air volume can be adjusted when the pro‐
gram is active.
If the windows fog over, also switch on the
cooling function.
Cooling functionThe passenger compartment can only be
cooled with the engine running.
Press the button.
The air is cooled and dehumidified
and, depending on the temperature setting,
warmed again.
Depending on the weather, the windshield may
fog up briefly when the engine is started.Seite 125Climate controlControls125
Online Edition for Part no. 01 40 2 911 041 - VI/13
Page 126 of 208
The cooling function is switched on automati‐
cally with the AUTO program.
When using the automatic climate control,
condensation water, refer to page 146, devel‐
ops that exits underneath the vehicle.
Rear window defroster Press the button.
The rear window defroster switches
off automatically after a certain period of time.
Switching the system on/off
Switching off
Turn the rotary switch for the air volume, refer
to page 125, to 0. The blower and automatic
climate control are switched off entirely.Switching on
Set any air volume.
The AUTO program can also be switched on
directly via the AUTO button.
Microfilter
The microfilter removes dust and pollen from
the incoming air.
This filter should be replaced during scheduled
maintenance, refer to page 172, of your vehi‐
cle.
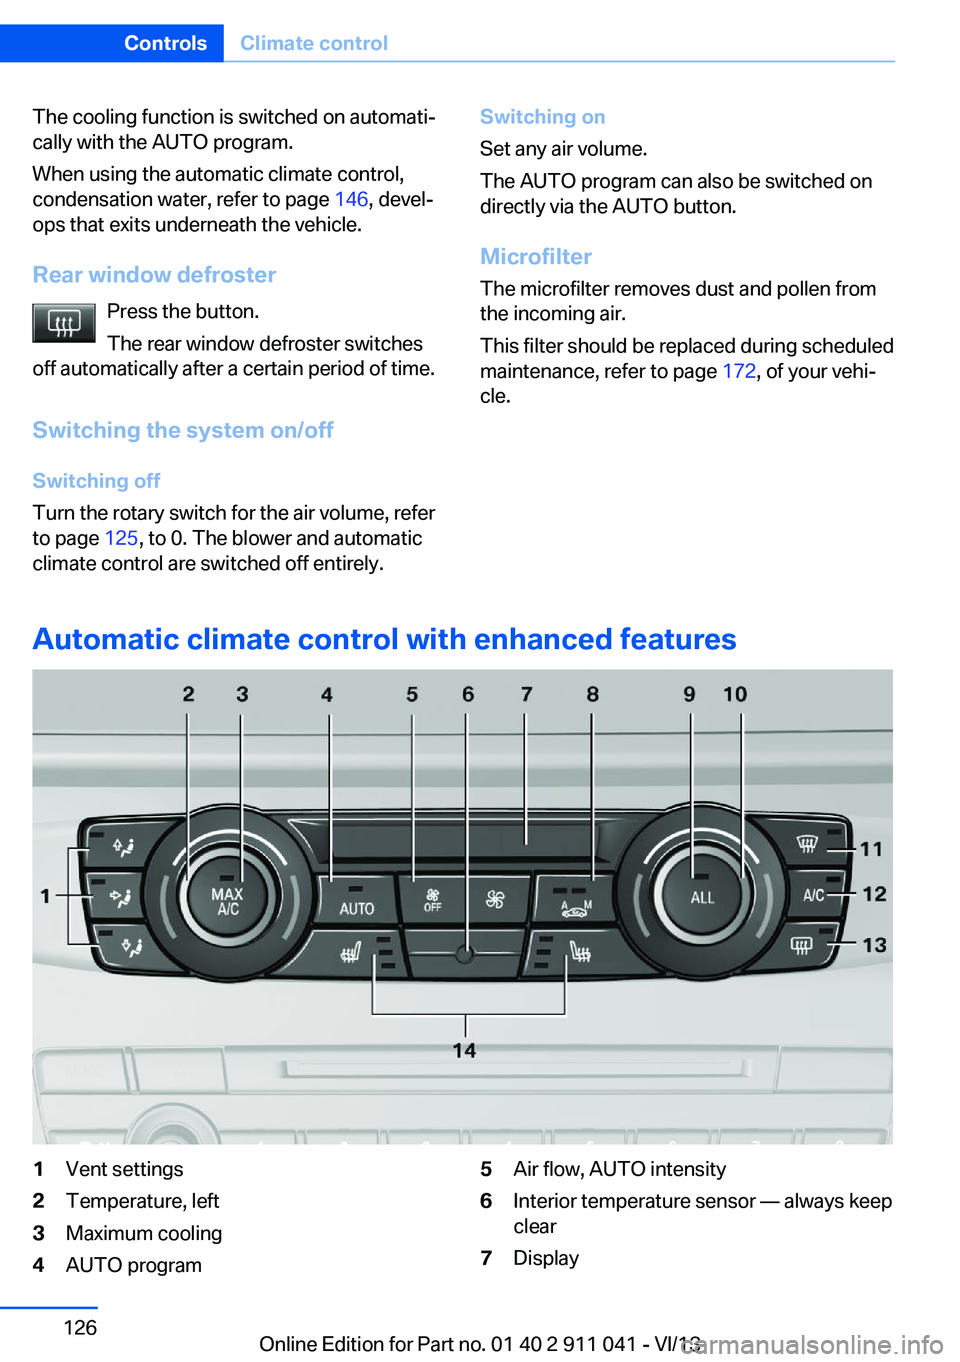
Automatic climate control with enhanced features
1Vent settings2Temperature, left3Maximum cooling4AUTO program5Air flow, AUTO intensity6Interior temperature sensor — always keep
clear7DisplaySeite 126ControlsClimate control126
Online Edition for Part no. 01 40 2 911 041 - VI/13
Page 127 of 208
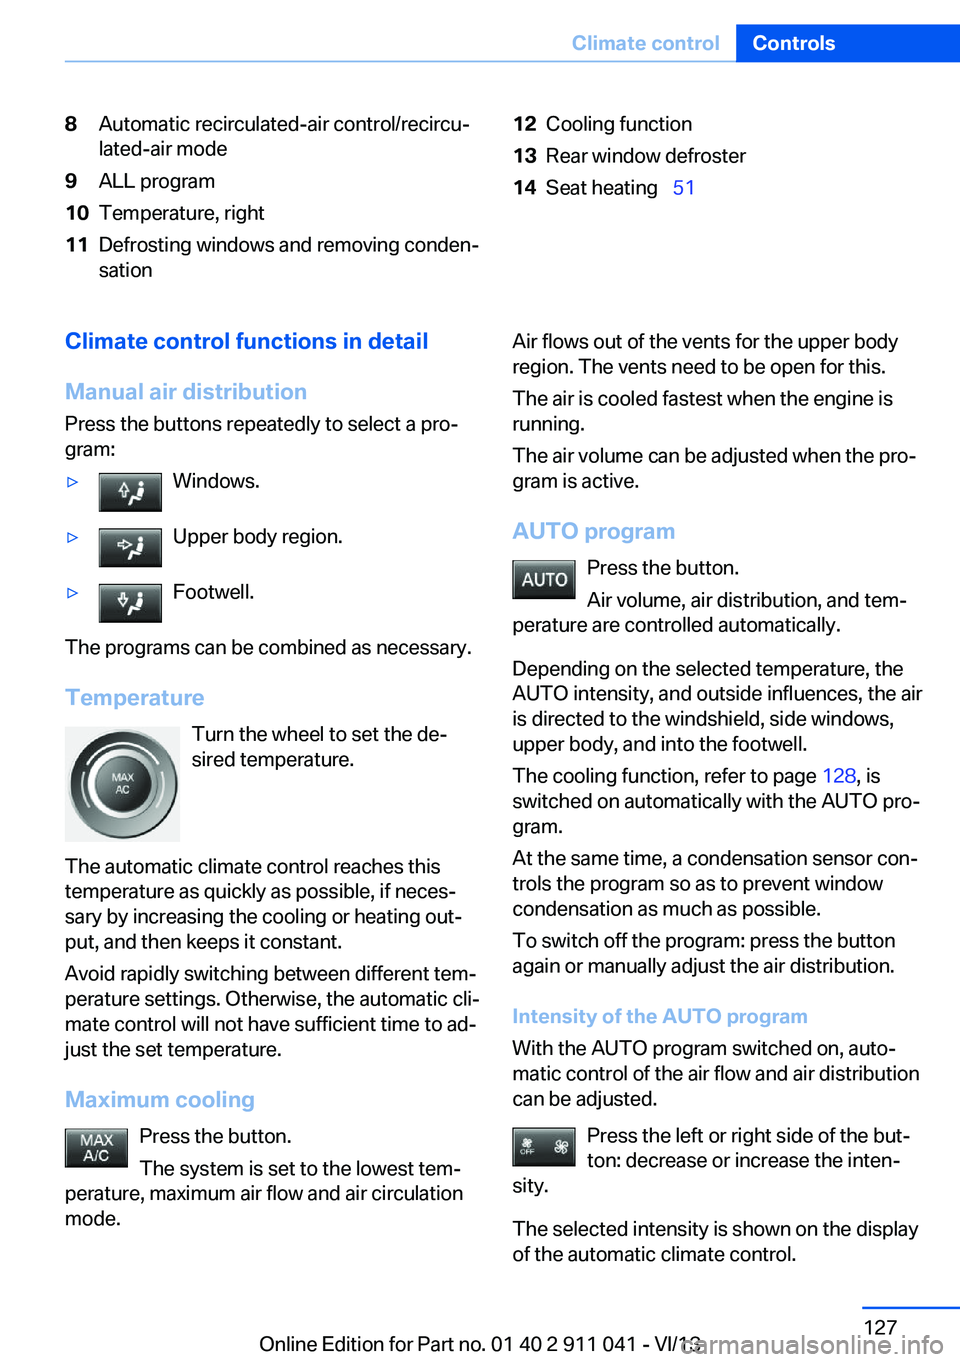
8Automatic recirculated-air control/recircu‐
lated-air mode9ALL program10Temperature, right11Defrosting windows and removing conden‐
sation12Cooling function13Rear window defroster14Seat heating 51Climate control functions in detail
Manual air distribution
Press the buttons repeatedly to select a pro‐
gram:▷Windows.▷Upper body region.▷Footwell.
The programs can be combined as necessary.
Temperature Turn the wheel to set the de‐
sired temperature.
The automatic climate control reaches this
temperature as quickly as possible, if neces‐
sary by increasing the cooling or heating out‐
put, and then keeps it constant.
Avoid rapidly switching between different tem‐
perature settings. Otherwise, the automatic cli‐
mate control will not have sufficient time to ad‐
just the set temperature.
Maximum cooling Press the button.
The system is set to the lowest tem‐
perature, maximum air flow and air circulation
mode.
Air flows out of the vents for the upper body
region. The vents need to be open for this.
The air is cooled fastest when the engine is
running.
The air volume can be adjusted when the pro‐
gram is active.
AUTO program Press the button.
Air volume, air distribution, and tem‐
perature are controlled automatically.
Depending on the selected temperature, the
AUTO intensity, and outside influences, the air
is directed to the windshield, side windows,
upper body, and into the footwell.
The cooling function, refer to page 128, is
switched on automatically with the AUTO pro‐
gram.
At the same time, a condensation sensor con‐
trols the program so as to prevent window
condensation as much as possible.
To switch off the program: press the button
again or manually adjust the air distribution.
Intensity of the AUTO program
With the AUTO program switched on, auto‐
matic control of the air flow and air distribution
can be adjusted.
Press the left or right side of the but‐
ton: decrease or increase the inten‐
sity.
The selected intensity is shown on the display
of the automatic climate control.Seite 127Climate controlControls127
Online Edition for Part no. 01 40 2 911 041 - VI/13
Page 128 of 208
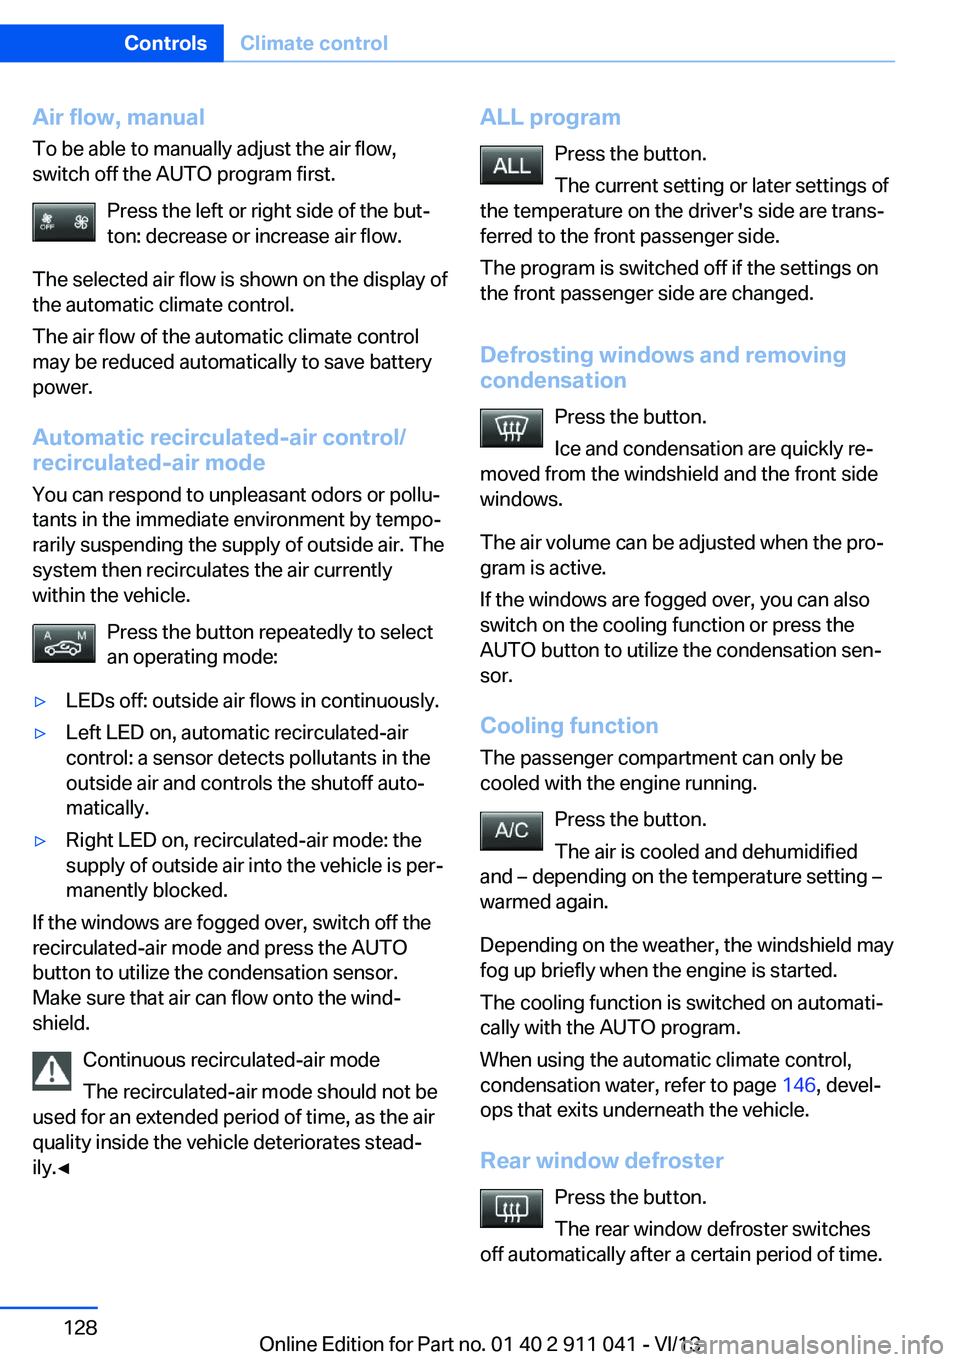
Air flow, manualTo be able to manually adjust the air flow,
switch off the AUTO program first.
Press the left or right side of the but‐
ton: decrease or increase air flow.
The selected air flow is shown on the display of
the automatic climate control.
The air flow of the automatic climate control
may be reduced automatically to save battery
power.
Automatic recirculated-air control/
recirculated-air mode
You can respond to unpleasant odors or pollu‐
tants in the immediate environment by tempo‐
rarily suspending the supply of outside air. The
system then recirculates the air currently
within the vehicle.
Press the button repeatedly to select
an operating mode:▷LEDs off: outside air flows in continuously.▷Left LED on, automatic recirculated-air
control: a sensor detects pollutants in the
outside air and controls the shutoff auto‐
matically.▷Right LED on, recirculated-air mode: the
supply of outside air into the vehicle is per‐
manently blocked.
If the windows are fogged over, switch off the
recirculated-air mode and press the AUTO
button to utilize the condensation sensor.
Make sure that air can flow onto the wind‐
shield.
Continuous recirculated-air mode
The recirculated-air mode should not be
used for an extended period of time, as the air
quality inside the vehicle deteriorates stead‐
ily.◀
ALL program
Press the button.
The current setting or later settings of
the temperature on the driver's side are trans‐
ferred to the front passenger side.
The program is switched off if the settings on
the front passenger side are changed.
Defrosting windows and removing condensation
Press the button.
Ice and condensation are quickly re‐
moved from the windshield and the front side
windows.
The air volume can be adjusted when the pro‐
gram is active.
If the windows are fogged over, you can also
switch on the cooling function or press the
AUTO button to utilize the condensation sen‐
sor.
Cooling function
The passenger compartment can only be
cooled with the engine running.
Press the button.
The air is cooled and dehumidified
and – depending on the temperature setting –
warmed again.
Depending on the weather, the windshield may
fog up briefly when the engine is started.
The cooling function is switched on automati‐
cally with the AUTO program.
When using the automatic climate control,
condensation water, refer to page 146, devel‐
ops that exits underneath the vehicle.
Rear window defroster Press the button.
The rear window defroster switches
off automatically after a certain period of time.Seite 128ControlsClimate control128
Online Edition for Part no. 01 40 2 911 041 - VI/13
Page 129 of 208
Switching the system on/off
Switching off Press and hold the left button until the
control switches off.
Switching on
Press any button except:▷ALL program.▷Rear window defroster.▷Left side of Air volume button.▷Seat heating.
Microfilter/activated-charcoal filter
In external and recirculated air mode the mi‐
crofilter/activated charcoal filter filters dust,
pollen, and gaseous pollutants out of the air.
This filter should be replaced during scheduled
maintenance, refer to page 172, of your vehi‐
cle.
Ventilation
Front ventilation
▷Lever for changing the air flow direction,
arrow 1.▷Thumbwheels for opening and closing the
vents continuously, arrows 2.▷Thumbwheel to vary the temperature, ar‐
row 3.
Toward blue: colder.Toward red: warmer.
Adjusting the ventilation
▷Ventilation for cooling:
Adjust the vent to direct the air in your di‐
rection, such as if the vehicle interior is hot
from the sun.▷Draft-free ventilation:
Adjust the vent to let the air flow past you.
Ventilation in the rear
▷Thumbwheel for continuous opening and
closing of the vents, arrow 1.▷Thumbwheel to vary the temperature, ar‐
row 2.
Toward blue: colder.
Toward red: warmer.▷Lever for changing the air flow direction,
arrow 3.
Parked-car ventilation
The concept The parked-car ventilation ventilates the vehi‐
cle interior and lowers its temperature, if nec‐
essary.
The system can be switched on and off at any
external temperature, either directly or by us‐
ing two preset switch-on times. It remains
switched on for 30 minutes.
Open the vents to allow air to flow out.
Seite 129Climate controlControls129
Online Edition for Part no. 01 40 2 911 041 - VI/13
Page 130 of 208
Operation can be performed via iDrive.Switching on/off directly1."Settings"2."Climate"3."Activate comf. ventilation"
The symbol on the automatic climate con‐
trol flashes if the system is switched on.
Preselecting the switch-on time
1."Settings"2."Climate"3."Timer 1:" or "Timer 2:"4.Set the desired time.
Activating the switch-on time
1."Settings"2."Climate"3."Activate timer 1" or "Activate timer 2"
The symbol on the automatic climate con‐
trol lights up when the switch-on time is acti‐
vated.
The symbol on the automatic climate con‐
trol flashes when the system has been
switched on.
The system will only be switched on within the
next 24 hours. After that, it needs to reacti‐
vated.
Seite 130ControlsClimate control130
Online Edition for Part no. 01 40 2 911 041 - VI/13