BMW X3 XDRIVE 28I 2014 Owners Manual
Manufacturer: BMW, Model Year: 2014, Model line: X3 XDRIVE 28I, Model: BMW X3 XDRIVE 28I 2014Pages: 208, PDF Size: 5.21 MB
Page 151 of 208
Use coasting conditions
When approaching a red light, take your foot
off the accelerator and let the vehicle coast to
a halt.
On a downhill gradient, take your foot off the
accelerator and let the vehicle roll.
The flow of fuel is interrupted while coasting.
Switch off the engine during longer stops
Switch off the engine during longer stops, e.g.,
at traffic lights, railroad crossings or in traffic
congestion.
Automatic Engine Start/Stop Function The Auto Start/Stop function of your vehicle
automatically switches off the engine during a
stop.
If the engine is switched off and then restarted
rather than leaving the engine running con‐
stantly, fuel consumption and emissions are
reduced. Savings can begin within a few sec‐
onds of switching off the engine.
Using this system can cause certain compo‐
nents of the vehicle to become worn prema‐
turely.
In addition, fuel consumption is also deter‐
mined by other factors, such as driving style,
road conditions, maintenance or environmental
factors.
Switch off any functions that
are not currently needed
Functions such as seat heating and the rear
window defroster require a lot of energy and
consume additional fuel, especially in city and
stop-and-go traffic.
Therefore, switch off these functions if they
are not actually needed.Have maintenance carried
out
Have vehicles maintained regularly to achieve
optimal vehicle economy and operating life.
Have the maintenance carried out by your
service center.
Please also note the BMW Maintenance Sys‐
tem, refer to page 172.
ECO PRO
The concept ECO PRO supports a driving style that saves
on fuel consumption. For this purpose, the en‐
gine control and comfort functions, e. g. the
climate control output, are adjusted.
The extension of the range that is achieved as
a result can be displayed in the instrument
cluster.
Activating ECO PRO Press button repeatedly until ECO
PRO is displayed in the instrument
cluster.
Configuring ECO PRO
Via the Driving Dynamics Control1.Activate ECO PRO.2."Configure ECO PRO"3.Configure the program.
Via the iDrive
1."Settings"2."ECO PRO mode"
Or
1."Settings"2."Driving mode"3."Configure ECO PRO"
Configure the program.
Seite 151Saving fuelDriving tips151
Online Edition for Part no. 01 40 2 911 041 - VI/13
Page 152 of 208
ECO PRO Tip▷"Tip at:":
Set ECO Pro speed at which an ECO PRO
Tip is to be displayed.▷"ECO PRO speed warning":
A reminder is displayed if the set ECO PRO
speed is exceeded.
ECO PRO climate control
"ECO PRO climate control"
The climate control is adjusted to be fuel-effi‐
cient.
By making a slight change to the set tempera‐
ture, or slowly adjusting the rate of heating or
cooling of the passenger compartment, fuel
consumption can be economized.
The outputs of the seat heater and the exterior
mirror heating are also reduced.
The exterior mirror heating is made available
when outside temperatures are very cold.
ECO PRO potentialThe percentage of potential savings that can
be achieved with the current configuration is
displayed.
Display in the instrument cluster
ECO PRO bonus range An extension of the range can
be achieved by an adjusted driv‐
ing style.
This may be displayed as the
bonus range in the instrument
cluster.
The bonus range is shown in the range display.
The bonus range is automatically reset every
time the vehicle is refueled.
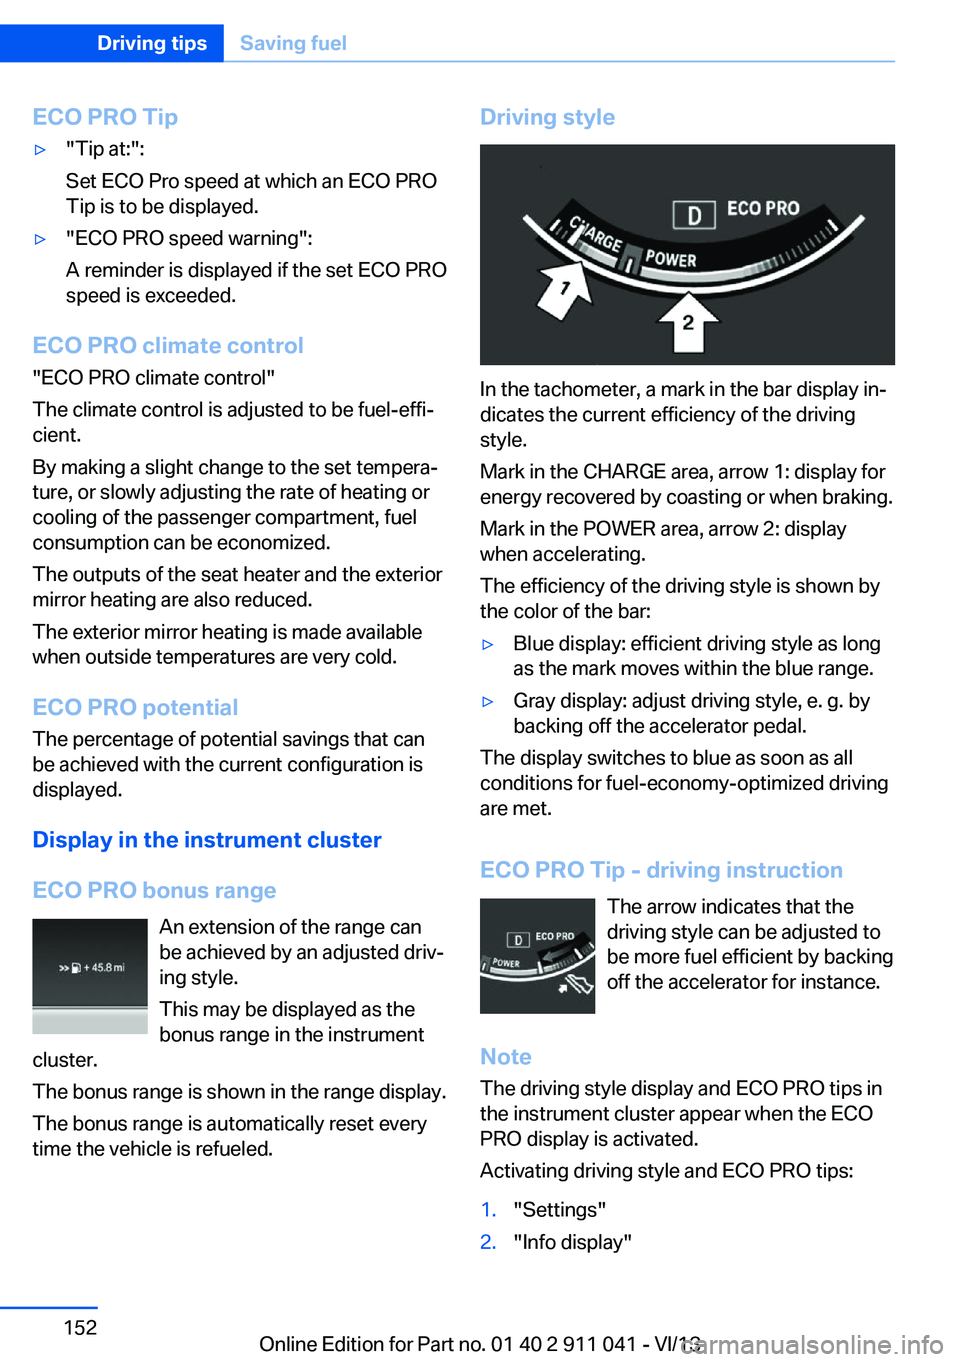
Driving style
In the tachometer, a mark in the bar display in‐
dicates the current efficiency of the driving
style.
Mark in the CHARGE area, arrow 1: display for
energy recovered by coasting or when braking.
Mark in the POWER area, arrow 2: display
when accelerating.
The efficiency of the driving style is shown by
the color of the bar:
▷Blue display: efficient driving style as long
as the mark moves within the blue range.▷Gray display: adjust driving style, e. g. by
backing off the accelerator pedal.
The display switches to blue as soon as all
conditions for fuel-economy-optimized driving
are met.
ECO PRO Tip - driving instruction The arrow indicates that the
driving style can be adjusted to
be more fuel efficient by backing off the accelerator for instance.
Note The driving style display and ECO PRO tips in
the instrument cluster appear when the ECO
PRO display is activated.
Activating driving style and ECO PRO tips:
1."Settings"2."Info display"Seite 152Driving tipsSaving fuel152
Online Edition for Part no. 01 40 2 911 041 - VI/13
Page 153 of 208
3."ECO PRO Info"
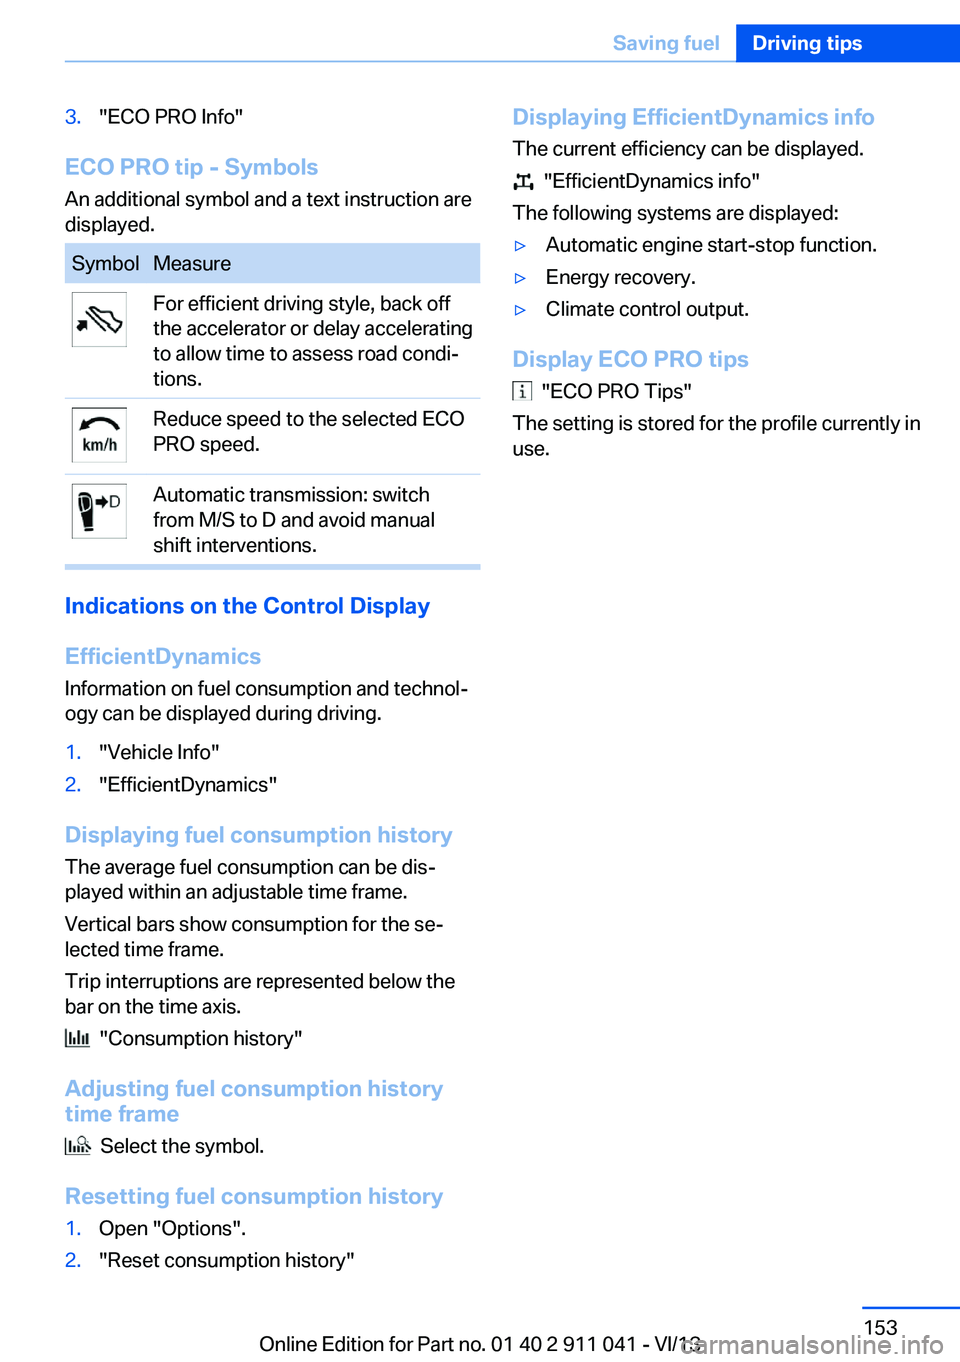
ECO PRO tip - SymbolsAn additional symbol and a text instruction are
displayed.
SymbolMeasureFor efficient driving style, back off
the accelerator or delay accelerating
to allow time to assess road condi‐
tions.Reduce speed to the selected ECO
PRO speed.Automatic transmission: switch
from M/S to D and avoid manual
shift interventions.
Indications on the Control Display
EfficientDynamics Information on fuel consumption and technol‐
ogy can be displayed during driving.
1."Vehicle Info"2."EfficientDynamics"
Displaying fuel consumption history
The average fuel consumption can be dis‐
played within an adjustable time frame.
Vertical bars show consumption for the se‐
lected time frame.
Trip interruptions are represented below the
bar on the time axis.
"Consumption history"
Adjusting fuel consumption history time frame
Select the symbol.
Resetting fuel consumption history
1.Open "Options".2."Reset consumption history"Displaying EfficientDynamics info
The current efficiency can be displayed.
"EfficientDynamics info"
The following systems are displayed:
▷Automatic engine start-stop function.▷Energy recovery.▷Climate control output.
Display ECO PRO tips
"ECO PRO Tips"
The setting is stored for the profile currently in
use.
Seite 153Saving fuelDriving tips153
Online Edition for Part no. 01 40 2 911 041 - VI/13
Page 154 of 208
Online Edition for Part no. 01 40 2 911 041 - VI/13
Page 155 of 208
Mobility
In order to always ensure your mobility, you will find important information on operating fluids,wheels and tires, maintenance and Roadside Assistance in the following.Online Edition for Part no. 01 40 2 911 041 - VI/13
Page 156 of 208
RefuelingVehicle equipment
All standard, country-specific and optional
equipment that is offered in the model series is
described in this chapter. Therefore, equip‐
ment is also described that is not available in a
vehicle, e. g., because of the selected optional
equipment or country variant. This also applies
for safety-related functions and systems.
General information Refuel promptly
Refuel no later than at a range of
30 miles/50 km, or operation of the engine is
not ensured and damage may occur.◀
Fuel cap
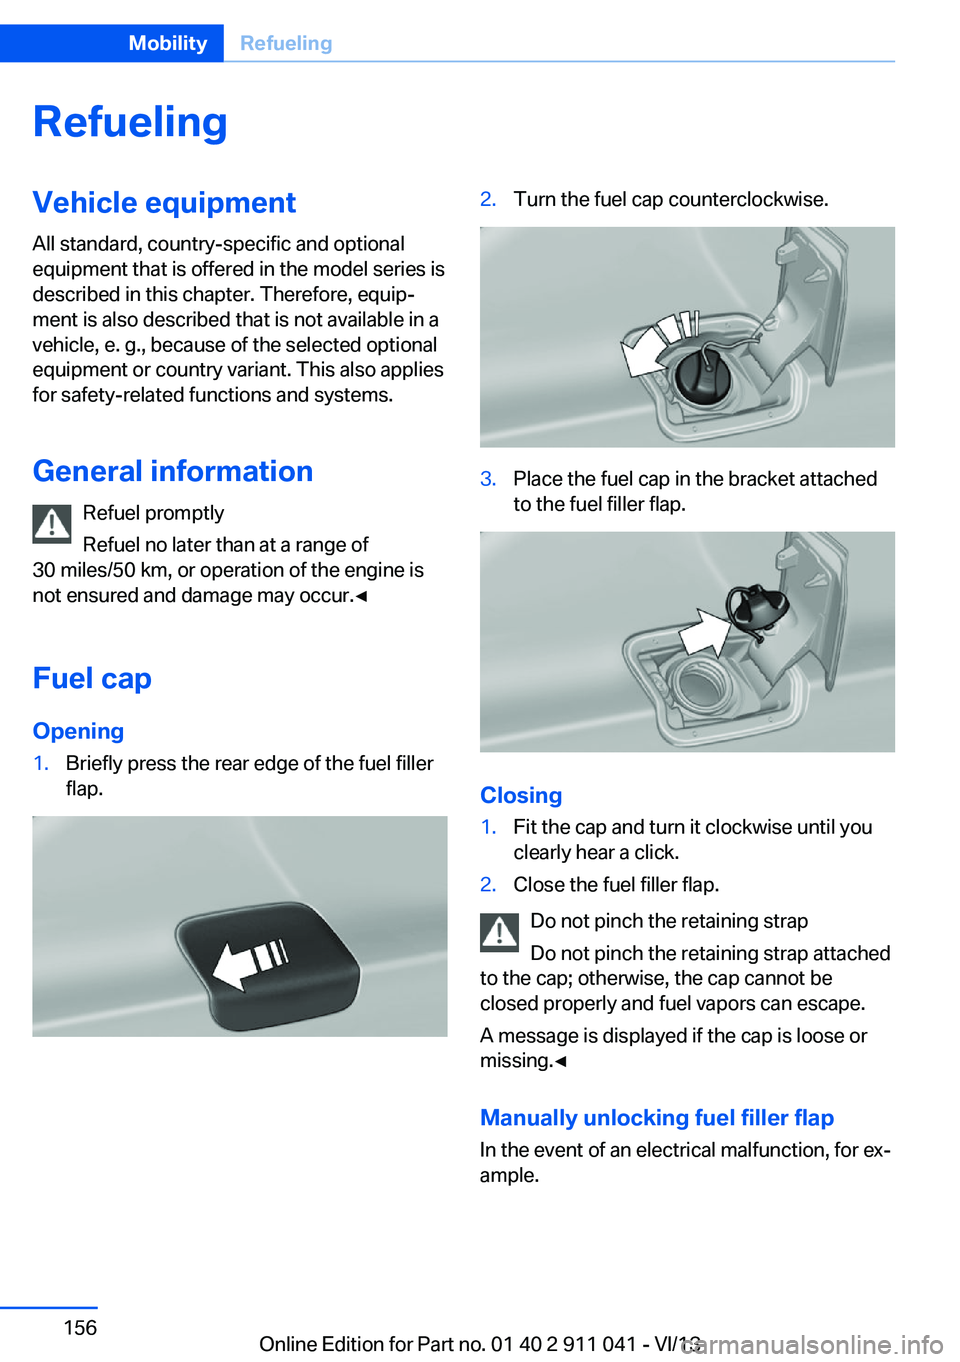
Opening1.Briefly press the rear edge of the fuel filler
flap.2.Turn the fuel cap counterclockwise.3.Place the fuel cap in the bracket attached
to the fuel filler flap.
Closing
1.Fit the cap and turn it clockwise until you
clearly hear a click.2.Close the fuel filler flap.
Do not pinch the retaining strap
Do not pinch the retaining strap attached
to the cap; otherwise, the cap cannot be
closed properly and fuel vapors can escape.
A message is displayed if the cap is loose or
missing.◀
Manually unlocking fuel filler flap In the event of an electrical malfunction, for ex‐
ample.
Seite 156MobilityRefueling156
Online Edition for Part no. 01 40 2 911 041 - VI/13
Page 157 of 208
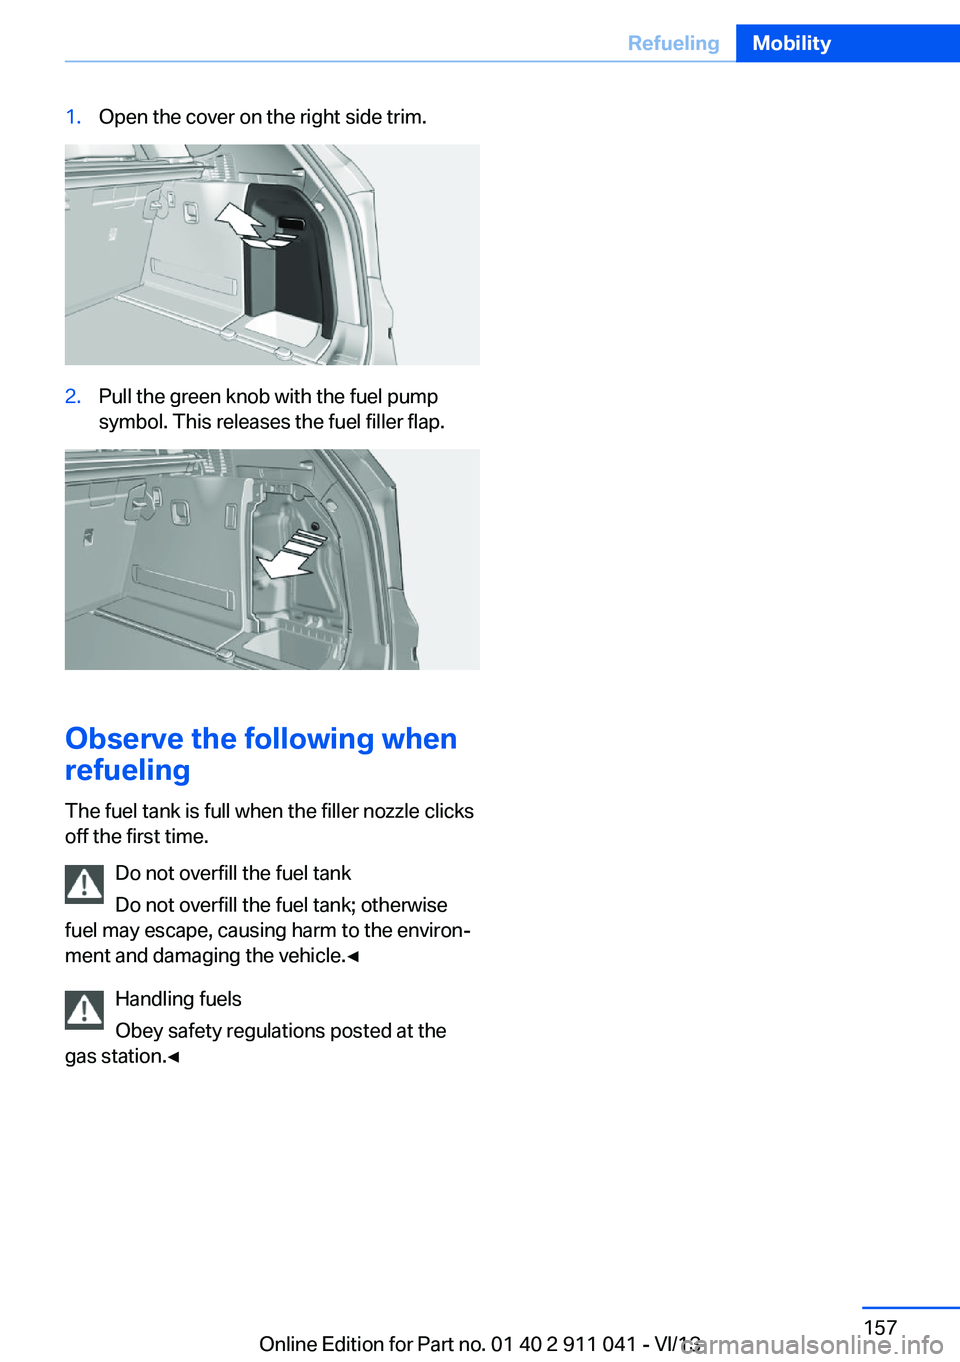
1.Open the cover on the right side trim.2.Pull the green knob with the fuel pump
symbol. This releases the fuel filler flap.
Observe the following when
refueling
The fuel tank is full when the filler nozzle clicks
off the first time.
Do not overfill the fuel tank
Do not overfill the fuel tank; otherwise
fuel may escape, causing harm to the environ‐
ment and damaging the vehicle.◀
Handling fuels
Obey safety regulations posted at the
gas station.◀
Seite 157RefuelingMobility157
Online Edition for Part no. 01 40 2 911 041 - VI/13
Page 158 of 208
FuelVehicle equipmentAll standard, country-specific and optional
equipment that is offered in the model series is
described in this chapter. Therefore, equip‐
ment is also described that is not available in a
vehicle, e. g., because of the selected optional
equipment or country variant. This also applies
for safety-related functions and systems.
Fuel recommendation Gasoline For the best fuel economy, the gasoline should
be sulfur-free or very low in sulfur content.
Fuels that are marked on the gas pump as con‐
taining metal must not be used.
Refuel only with unleaded gasoline with‐
out metallic additives.
Do not refuel with any leaded gasoline or gaso‐
line with metallic additives, e. g. manganese or
iron, or permanent damage to the catalytic
converter and other components.◀
Fuels with a maximum ethanol content of
10 %, i. e., E10, may be used for refueling.
Ethanol should satisfy the following quality
standards:
US: ASTM 4806–xx
CAN: CGSB-3.511–xx
xx: comply with the current standard in each
case.
Do not refuel with ethanol E85
Do not refuel with E85, i.e., fuel with an
ethanol content of 85 %, or with Flex Fuel, as
this would damage the engine and fuel supply
system.◀Gasoline quality
BMW recommends AKI 91.
Minimum fuel grade
BMW recommends AKI 89.
Minimum fuel grade
Do not use any gasoline below the mini‐
mum fuel grade as this may impair engine per‐
formance.◀
If you use gasoline with this minimum AKI Rat‐
ing, the engine may produce knocking sounds
when starting at high outside temperatures.
This has no effect on the engine life.
Fuel quality
The use of poor-quality fuels may result
in harmful engine deposits or damage. Addi‐
tionally, problems relating to drivability, start‐ ing and stalling, especially under certain envi‐
ronmental conditions such as high ambient
temperature and high altitude, may occur.
If drivability problems are encountered, we rec‐
ommend switching to a high quality gasoline
brand and a higher octane grade — AKI num‐
ber — for a few tank fills. To avoid harmful en‐
gine deposits, it is highly recommended to
purchase gasoline from BP or Top Tier retail‐
ers.
Failure to comply with these recommendations
may result in the need for unscheduled main‐
tenance.◀Seite 158MobilityFuel158
Online Edition for Part no. 01 40 2 911 041 - VI/13
Page 159 of 208
Wheels and tiresVehicle equipment
All standard, country-specific and optional
equipment that is offered in the model series is
described in this chapter. Therefore, equip‐
ment is also described that is not available in a
vehicle, e. g., because of the selected optional
equipment or country variant. This also applies
for safety-related functions and systems.
Tire inflation pressure Safety information
The tire characteristics and tire inflation pres‐
sure influence the following:▷The service life of the tires.▷Road safety.▷Driving comfort.
Checking the pressure
Only check the tire inflation pressure when the
tires are cold. This means after driving no more
than 1.25 miles/2 km or when the vehicle has
been parked for at least 2 hours. When the
tires are warm, the tire inflation pressure is
higher.
Check the tire inflation pressure regularly
Regularly check the tire inflation pres‐
sure, and correct it as needed: at least twice a
month and before a long trip. If you fail to ob‐
serve this precaution, you may be driving on
tires with incorrect tire pressures, a condition
that may not only compromise your vehicle's
driving stability, but also lead to tire damage
and the risk of an accident.◀
After correcting the tire inflation pressure:
▷Reinitialize the Flat Tire Monitor.▷Reinitialize the Tire Pressure Monitor.Pressure specifications The tire inflation pressure table, refer to
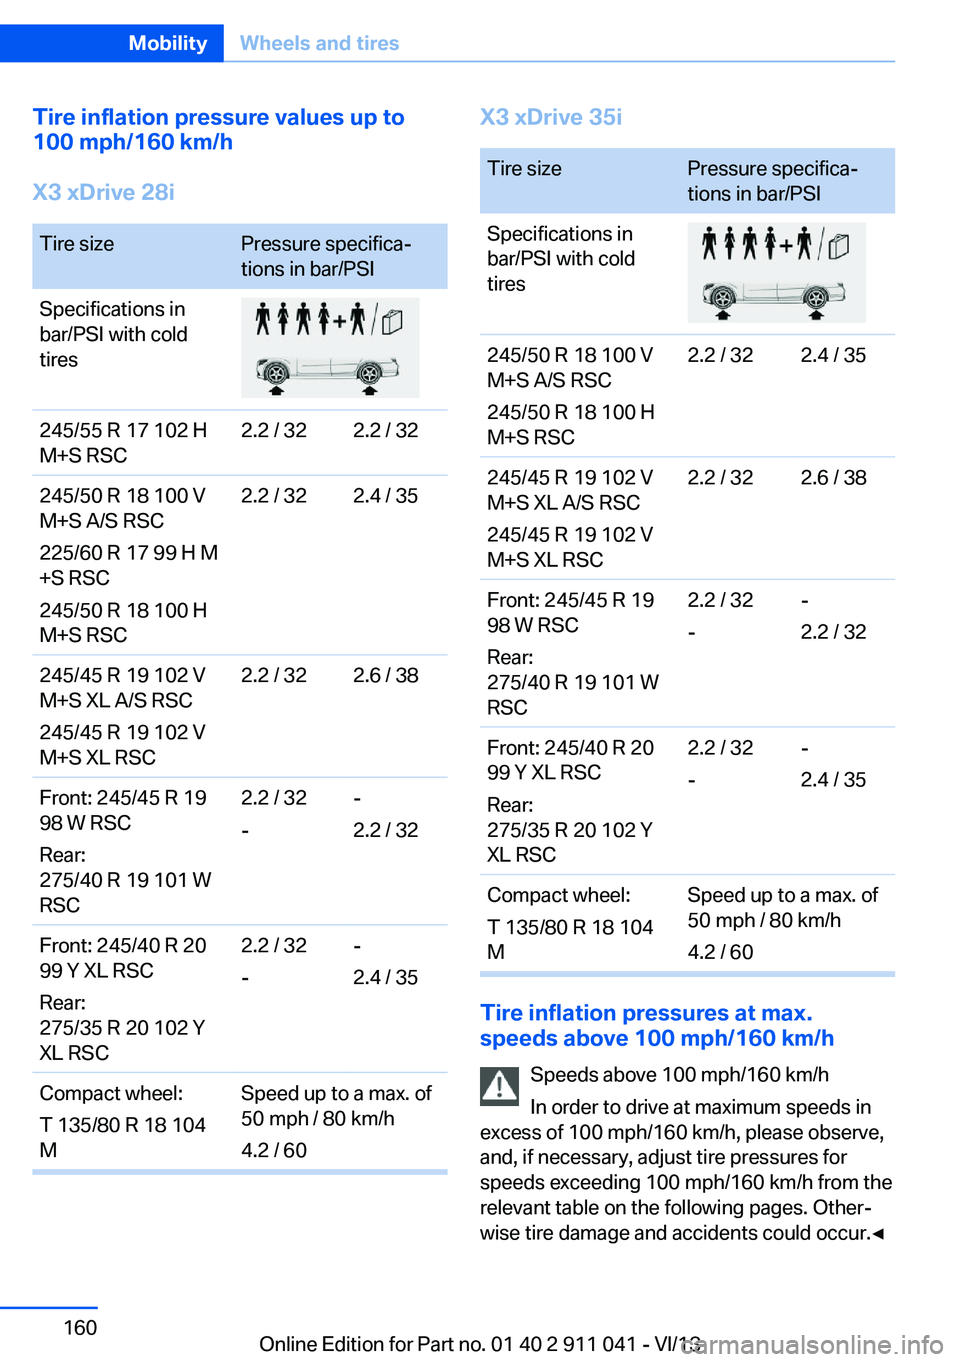
page 160, contains all pressure specifications
for the specified tire sizes at the ambient tem‐
perature. Pressure specifications apply to ap‐
proved tire sizes and recommended tire
brands. This information can be obtained from
your service center.
To identify the correct tire inflation pressure,
please note the following:▷Tire sizes of your vehicle.▷Maximum permitted driving speed.
Tire inflation pressures up to
100 mph/160 km/h
For speeds of up to 100 mph/160 km/h and for
optimum driving comfort, note the pressure
values in the tire inflation pressure table, refer
to page 160, and adjust as necessary.
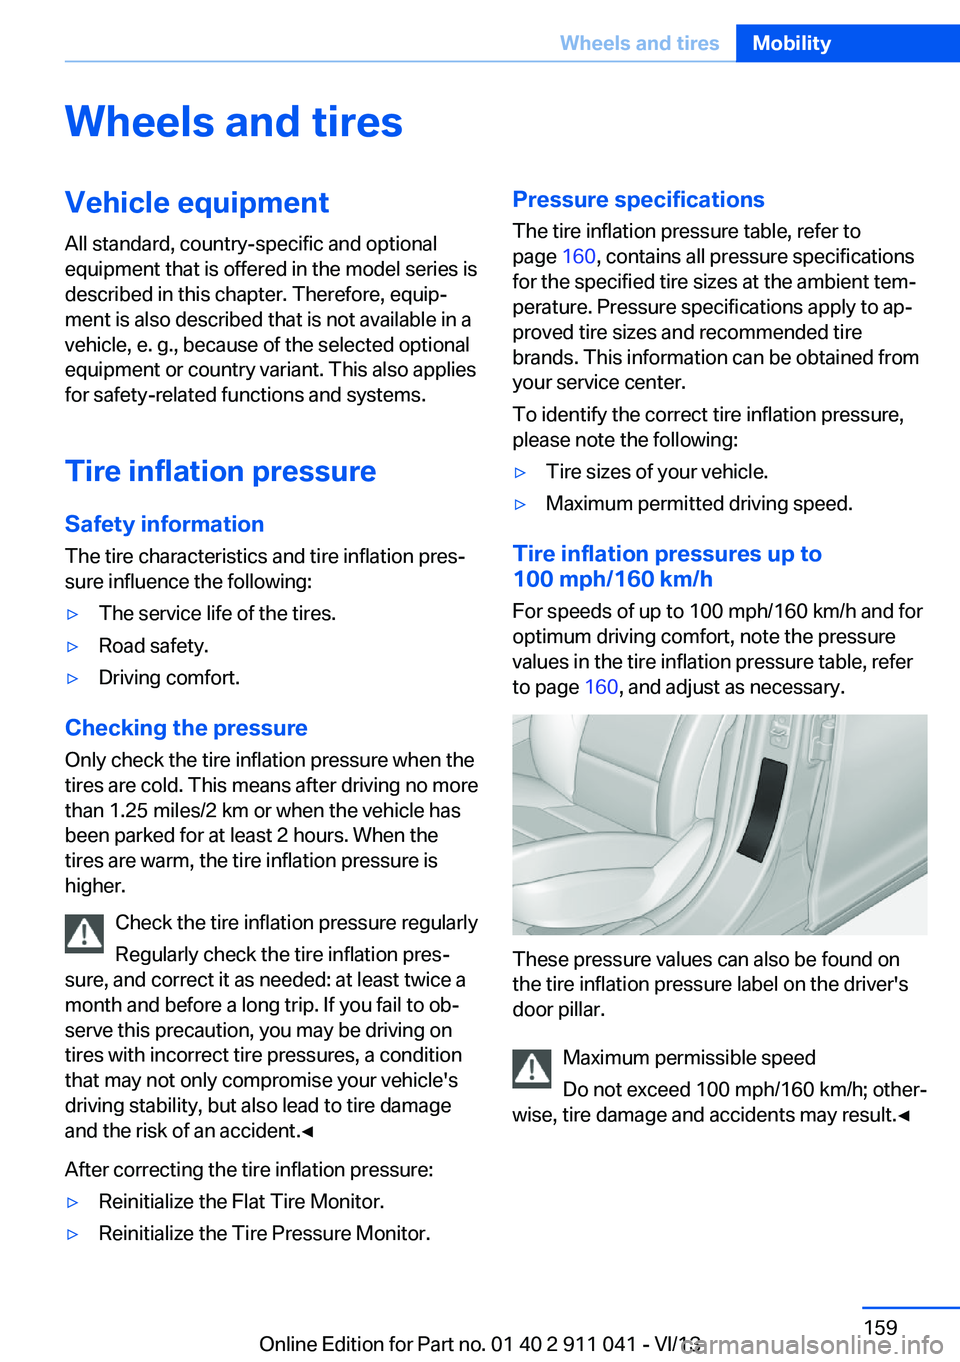
These pressure values can also be found on
the tire inflation pressure label on the driver's
door pillar.
Maximum permissible speed
Do not exceed 100 mph/160 km/h; other‐
wise, tire damage and accidents may result.◀
Seite 159Wheels and tiresMobility159
Online Edition for Part no. 01 40 2 911 041 - VI/13
Page 160 of 208
Tire inflation pressure values up to
100 mph/160 km/h
X3 xDrive 28iTire sizePressure specifica‐
tions in bar/PSISpecifications in
bar/PSI with cold
tires245/55 R 17 102 H
M+S RSC2.2 / 322.2 / 32245/50 R 18 100 V
M+S A/S RSC
225/60 R 17 99 H M
+S RSC
245/50 R 18 100 H
M+S RSC2.2 / 322.4 / 35245/45 R 19 102 V
M+S XL A/S RSC
245/45 R 19 102 V
M+S XL RSC2.2 / 322.6 / 38Front: 245/45 R 19
98 W RSC
Rear:
275/40 R 19 101 W
RSC2.2 / 32
--
2.2 / 32Front: 245/40 R 20
99 Y XL RSC
Rear:
275/35 R 20 102 Y
XL RSC2.2 / 32
--
2.4 / 35Compact wheel:
T 135/80 R 18 104
MSpeed up to a max. of
50 mph / 80 km/h
4.2 / 60X3 xDrive 35iTire sizePressure specifica‐
tions in bar/PSISpecifications in
bar/PSI with cold
tires245/50 R 18 100 V
M+S A/S RSC
245/50 R 18 100 H
M+S RSC2.2 / 322.4 / 35245/45 R 19 102 V
M+S XL A/S RSC
245/45 R 19 102 V
M+S XL RSC2.2 / 322.6 / 38Front: 245/45 R 19
98 W RSC
Rear:
275/40 R 19 101 W
RSC2.2 / 32
--
2.2 / 32Front: 245/40 R 20
99 Y XL RSC
Rear:
275/35 R 20 102 Y
XL RSC2.2 / 32
--
2.4 / 35Compact wheel:
T 135/80 R 18 104
MSpeed up to a max. of
50 mph / 80 km/h
4.2 / 60
Tire inflation pressures at max.
speeds above 100 mph/160 km/h
Speeds above 100 mph/160 km/h
In order to drive at maximum speeds in
excess of 100 mph/160 km/h, please observe,
and, if necessary, adjust tire pressures for
speeds exceeding 100 mph/160 km/h from the
relevant table on the following pages. Other‐
wise tire damage and accidents could occur.◀
Seite 160MobilityWheels and tires160
Online Edition for Part no. 01 40 2 911 041 - VI/13