lock BMW X5 4.4I 2000 Owners Manual
[x] Cancel search | Manufacturer: BMW, Model Year: 2000, Model line: X5 4.4I, Model: BMW X5 4.4I 2000Pages: 201, PDF Size: 1.93 MB
Page 10 of 201
Contents
Overview
Controls and features
Cockpit16
Instrument cluster18
Indicator and warning lamps22
Multifunction steering wheel26
Sports steering wheel27
Hazard warning flashers28
Warning triangle28
First-aid kit28
Refueling29
Fuel specifications30
Tire inflation pressure30
Locks and security systems:
Keys34
Electronic vehicle
immobilizer35
Central locking system36
Opening and closing
Ð from the outside36
Using the key36
Using the remote control37
Opening and closing
Ð from the inside40
Liftgate41
Tailgate41
Alarm system43
Electric power windows45
Sliding/Tilt sunroof with glass
moonroof46
Adjustments:
Seats48
Steering wheel51
Mirrors52
Seat, mirror and steering wheel
memory54
Car Memory, Key Memory55
Passenger safety systems:
Safety belts56
Airbags57
Child restraints60
Child seat security61
Child-safety locks62
Driving:
Steering/Ignition lock63
Starting the engine64
Switching off the engine65
Parking brake65
Automatic transmission with
Steptronic66
Turn signal indicator/Headlamp
flasher69
Washer/Wiper system/Rain
sensor69
Rear window defroster71
Cruise control72
Everything under control:
Odometer, outside temperature
display74
Tachometer75
Energy control75
Fuel gauge75
Coolant temperature gauge76
Service Interval Display76
Check Control77
Onboard computer80
Technology for safety and
driving convenience:
Park Distance Control (PDC)82
Dynamic Stability Control
(DSC)83
Hill Descent Control (HDC)84
Contents
Page 11 of 201
11n
Controls and features
Operation, care and maintenance
Lamps:
Side lamps/Low beams86
Instrument lightning86
High beams/Parking lamps87
Fog lamps87
Interior lamps87
Reading lamps88
Controlling the climate for
pleasant driving:
Automatic climate control90
Seat heating96
Steering wheel heating96
Roller sun blind97
Independent ventilation
system97
Cabin convenience:
BMW Universal Transmitter98
Glove compartment101
Storage compartments101
Cellular phone102
Cup holders102
Ashtray, front103
Cigarette lighter103
Ashtray, rear104
Loading and transporting:
Ski bag105
Cargo area
Fold the rear backrests
down107
Cargo area cover107
Partition net108
Cover panels in the cargo
area109
Power outlets110
Pull-out cargo floor111
Cargo loading112
Roof-mounted luggage rack113
Special operating instructions:
Break-in procedures116
Driving your BMW X5117
General driving notes118
Catalytic converter118
Antilock Brake System
(ABS)119
Disc brakes122
Brake system123
Winter operation123
Power steering125
Level control system125
Cellular phone126
Radio reception126
Wheels and tires:
Tire inflation pressure127
Tire condition127
Tire replacement128
Tire rotation129
Wheel and tire
combinations130
Winter tires131
Snow chains131
Approved wheel and tire
specifications132
Page 17 of 201
IndexDataTechnologyRepairsCar careControlsOverview
17n
1 Parking lamps/Low beams86
2 Fog lamps87
3
>
Turn signal indicator69
>
Parking lamp87
>
High beam87
>
Headlamp flasher69
>
Onboard computer80
4 Wiper/Washer system69
5 Rear window defroster71
6 Central locking system36
7 Hazard warning flashers28
8 Horn26
9 Adjusting steering wheel51
Cockpit
Page 19 of 201
IndexDataTechnologyRepairsCar careControlsOverview
19n
Instrument cluster
There are two versions, depending on
the equipment on your vehicle.
1 Fuel gauge with indicator lamp for
fuel reserve75
2 Indicator lamp for turn signal
indicator24
3 Speedometer
4 Indicator lamp for high beams24
5 Tachometer and Energy Control75
6 Engine coolant thermometer with
"Coolant temperature too high"
indicator76
7 Indicator and warning lamps (clock-
wise) for:
>
Parking brake/Brake hydraulic
system, Dynamic Brake Control
(DBC)22, 24
>
Antilock Brake System (ABS)23
>
Brake pads24
>
Airbags23
>
Automatic transmission24
>
Please fasten safety belts23
>
Cruise control25
8 Selector lever and program display
for automatic transmission66
9 Service Interval Display7610 Onboard computer display Ð
Operation via the turn signal lever:
Refer to page 80:
>
Outside temperature
>
Average fuel consumption
>
Cruising range
>
Average speed
11 Indicator lamp for Dynamic Stability
Control (DSC)24
12 Indicator lamp for level control
system24
13 Odometer and trip odometer74
14 Indicator for Check Control77
15 Reset button for trip odometer74
16 Indicator and warning lamps
(clockwise) for:
>
Fog lamps25
>
Battery charge current22
>
Engine oil level/Engine oil
pressure24, 22
>
Engine Power Control24
>
Service Engine Soon24
Page 21 of 201
IndexDataTechnologyRepairsCar careControlsOverview
21n
Instrument cluster
*
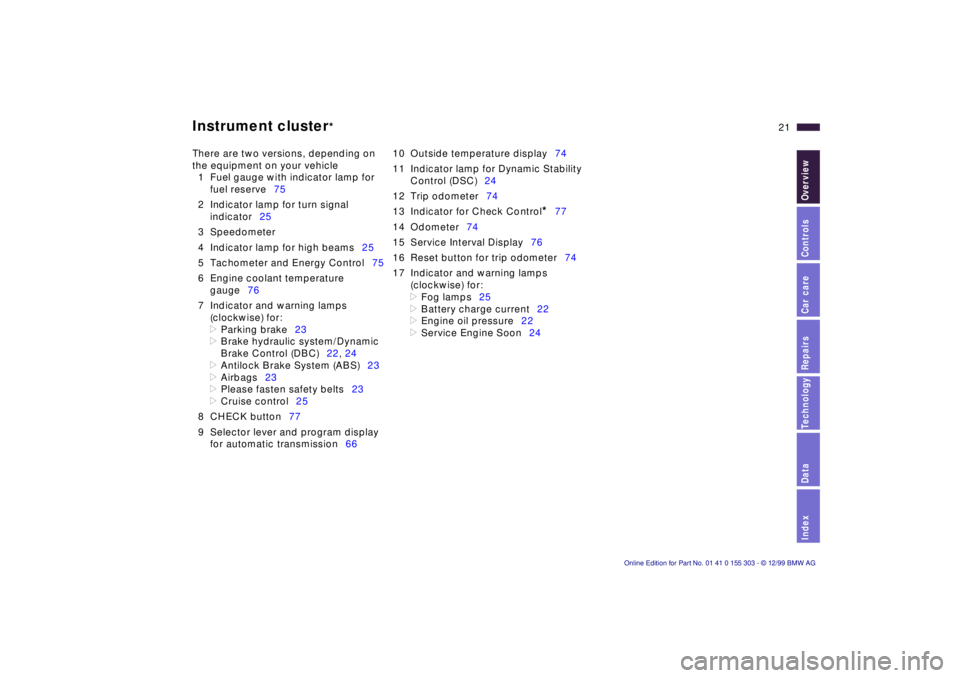
There are two versions, depending on
the equipment on your vehicle
1 Fuel gauge with indicator lamp for
fuel reserve75
2 Indicator lamp for turn signal
indicator25
3 Speedometer
4 Indicator lamp for high beams25
5 Tachometer and Energy Control75
6 Engine coolant temperature
gauge76
7 Indicator and warning lamps
(clockwise) for:
>
Parking brake23
>
Brake hydraulic system/Dynamic
Brake Control (DBC)22, 24
>
Antilock Brake System (ABS)23
>
Airbags23
>
Please fasten safety belts23
>
Cruise control25
8 CHECK button77
9 Selector lever and program display
for automatic transmission6610 Outside temperature display74
11 Indicator lamp for Dynamic Stability
Control (DSC)24
12 Trip odometer74
13 Indicator for Check Control
*
77
14 Odometer74
15 Service Interval Display76
16 Reset button for trip odometer74
17 Indicator and warning lamps
(clockwise) for:
>
Fog lamps25
>
Battery charge current22
>
Engine oil pressure22
>
Service Engine Soon24
Page 29 of 201
IndexDataTechnologyRepairsCar careControlsOverview
29n
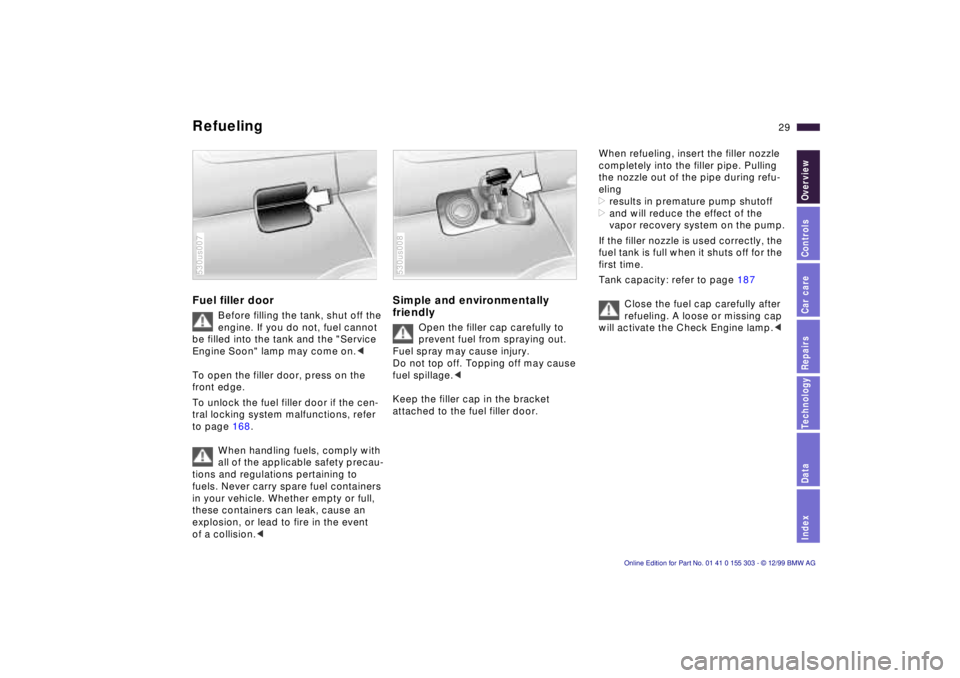
Refueling Fuel filler door
Before filling the tank, shut off the
engine. If you do not, fuel cannot
be filled into the tank and the "Service
Engine Soon" lamp may come on.<
To open the filler door, press on the
front edge.
To unlock the fuel filler door if the cen-
tral locking system malfunctions, refer
to page 168.
When handling fuels, comply with
all of the applicable safety precau-
tions and regulations pertaining to
fuels. Never carry spare fuel containers
in your vehicle. Whether empty or full,
these containers can leak, cause an
explosion, or lead to fire in the event
of a collision.<
530us007
Simple and environmentally
friendly
Open the filler cap carefully to
prevent fuel from spraying out.
Fuel spray may cause injury.
Do not top off. Topping off may cause
fuel spillage.<
Keep the filler cap in the bracket
attached to the fuel filler door.
530us008
When refueling, insert the filler nozzle
completely into the filler pipe. Pulling
the nozzle out of the pipe during refu-
eling
>results in premature pump shutoff
>and will reduce the effect of the
vapor recovery system on the pump.
If the filler nozzle is used correctly, the
fuel tank is full when it shuts off for the
first time.
Tank capacity: refer to page 187
Close the fuel cap carefully after
refueling. A loose or missing cap
will activate the Check Engine lamp.<
Page 32 of 201
32n
Locks and security systems:
Keys34
Electronic vehicle
immobilizer35
Central locking system36
Opening and closing
Ð from the outside36
Using the key36
Using the remote control37
Opening and closing
Ð from the inside40
Liftgate41
Tailgate41
Alarm system43
Electric power windows45
Sliding/Tilt sunroof with glass
moonroof46
Adjustments:
Seats48
Steering wheel51
Mirrors52
Seat, mirror and steering wheel
memory54
Car Memory, Key Memory55
Passenger safety systems:
Safety belts56
Airbags57
Child restraints60
Child seat security61
Child-safety locks62Driving:
Steering/Ignition lock63
Starting the engine64
Switching off the engine65
Parking brake65
Automatic transmission with
Steptronic66
Turn signal indicator/Headlamp
flasher69
Washer/Wiper system/Rain
sensor69
Rear window defroster71
Cruise control72
Everything under control:
Odometer, outside temperature
display74
Tachometer75
Energy control75
Fuel gauge75
Coolant temperature gauge76
Service Interval Display76
Check Control77
Onboard computer80
Technology for safety and
driving convenience:
Park Distance Control (PDC)82
Dynamic Stability Control
(DSC)83
Hill Descent Control (HDC)84
Controls
Page 34 of 201
34n
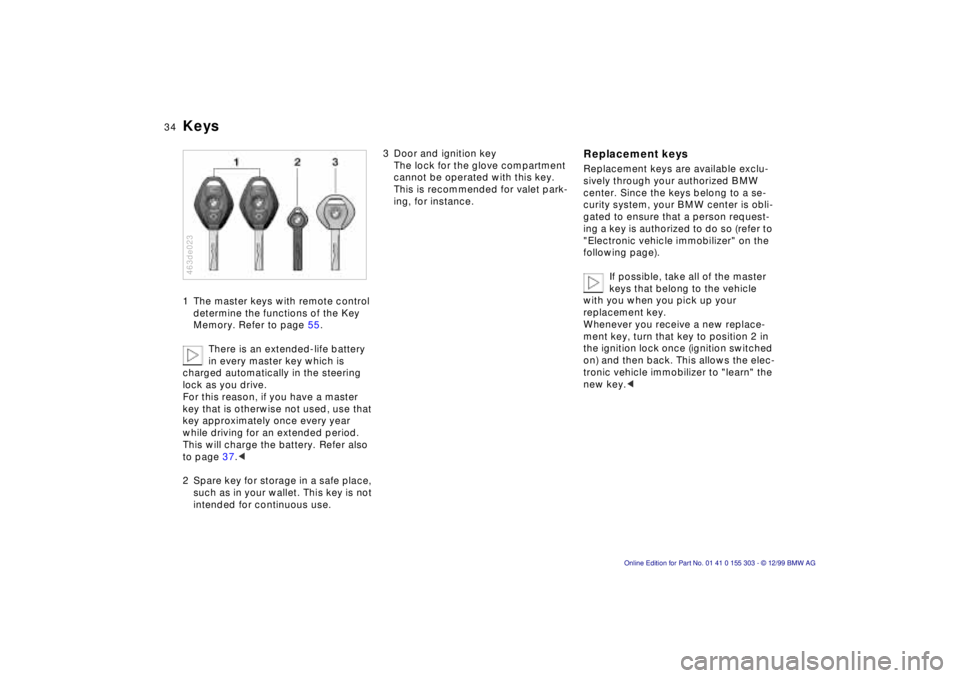
Keys 1 The master keys with remote control
determine the functions of the Key
Memory. Refer to page 55.
There is an extended-life battery
in every master key which is
charged automatically in the steering
lock as you drive.
For this reason, if you have a master
key that is otherwise not used, use that
key approximately once every year
while driving for an extended period.
This will charge the battery. Refer also
to page 37.<
2 Spare key for storage in a safe place,
such as in your wallet. This key is not
intended for continuous use. 463de023
3 Door and ignition key
The lock for the glove compartment
cannot be operated with this key.
This is recommended for valet park-
ing, for instance.
Replacement keys Replacement keys are available exclu-
sively through your authorized BMW
center. Since the keys belong to a se-
curity system, your BMW center is obli-
gated to ensure that a person request-
ing a key is authorized to do so (refer to
"Electronic vehicle immobilizer" on the
following page).
If possible, take all of the master
keys that belong to the vehicle
with you when you pick up your
replacement key.
Whenever you receive a new replace-
ment key, turn that key to position 2 in
the ignition lock once (ignition switched
on) and then back. This allows the elec-
tronic vehicle immobilizer to "learn" the
new key.<
Page 35 of 201
IndexDataTechnologyRepairsCar careControlsOverview
35n
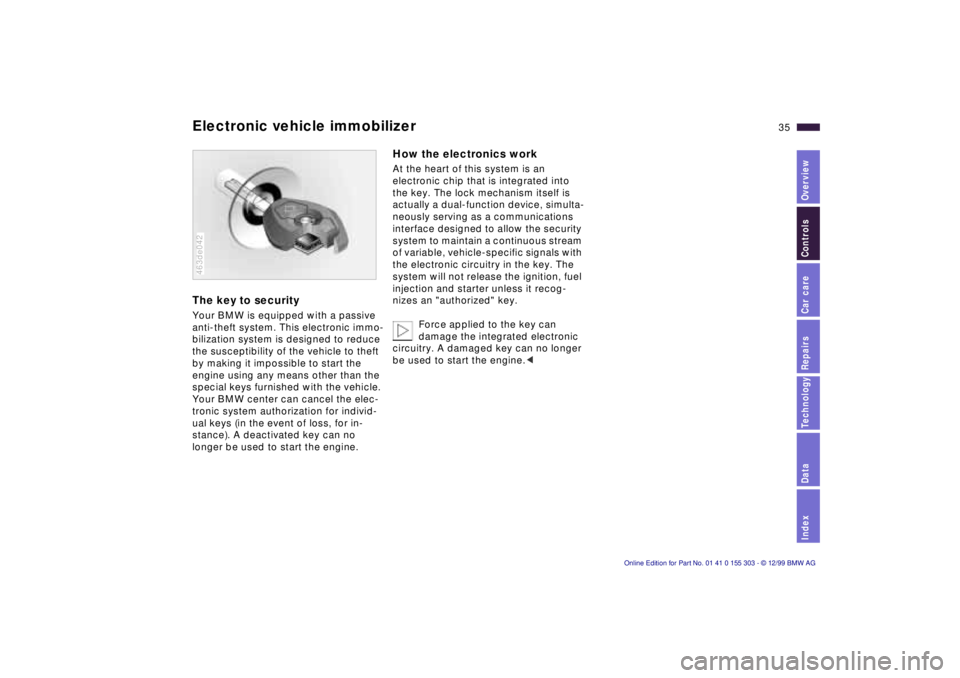
Electronic vehicle immobilizer The key to security Your BMW is equipped with a passive
anti-theft system. This electronic immo-
bilization system is designed to reduce
the susceptibility of the vehicle to theft
by making it impossible to start the
engine using any means other than the
special keys furnished with the vehicle.
Your BMW center can cancel the elec-
tronic system authorization for individ-
ual keys (in the event of loss, for in-
stance). A deactivated key can no
longer be used to start the engine. 463de042
How the electronics work At the heart of this system is an
electronic chip that is integrated into
the key. The lock mechanism itself is
actually a dual-function device, simulta-
neously serving as a communications
interface designed to allow the security
system to maintain a continuous stream
of variable, vehicle-specific signals with
the electronic circuitry in the key. The
system will not release the ignition, fuel
injection and starter unless it recog-
nizes an "authorized" key.
Force applied to the key can
damage the integrated electronic
circuitry. A damaged key can no longer
be used to start the engine.<
Page 36 of 201
36n
Central locking system Opening and closing Ð from the outside The concept The central locking system is ready for
operation as soon as you close the front
doors. The system engages and re-
leases the locks on the
>doors
>liftgate
>fuel filler door.
The central locking system can be
operated
>from outside via the driver's door lock
as well as via the remote control.
>from inside via the button for the
central locking system.
If the system is locked from inside, the
fuel filler door remains unlocked. Refer
to page 40.
When the system is actuated from out-
side of the vehicle, the anti-theft pro-
tection is actuated simultaneously. The
alarm system is also activated or
deactivated.
In the event of an accident, the central
locking system unlocks automatically
(only those doors which were not
locked separately with the safety lock
buttons). Refer to page 40. In addition,
the hazard warning flashers and interior
lamps come on.
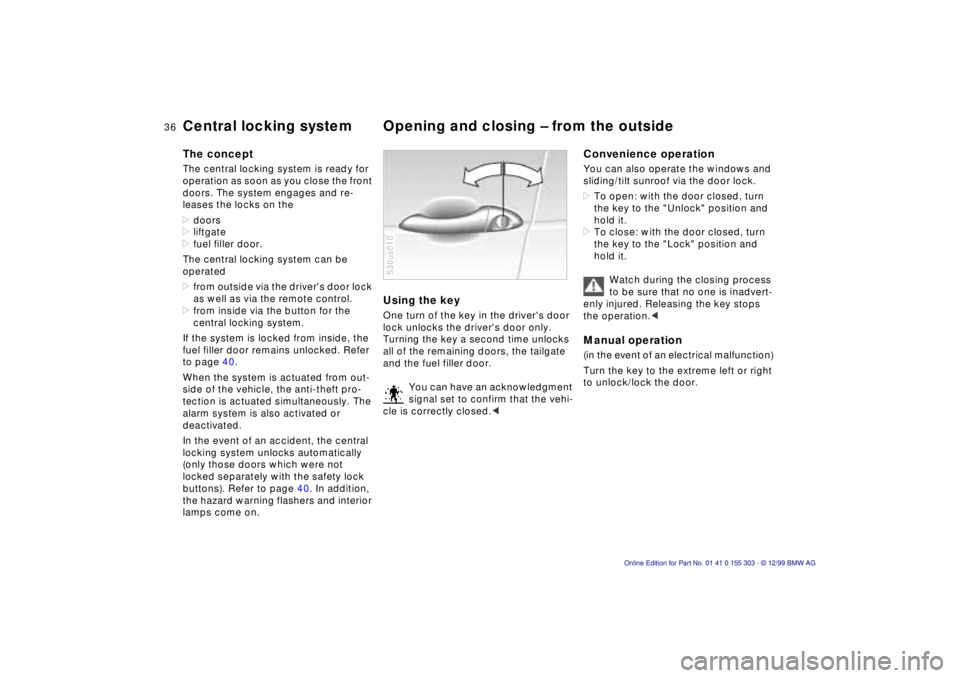
Using the key One turn of the key in the driver's door
lock unlocks the driver's door only.
Turning the key a second time unlocks
all of the remaining doors, the tailgate
and the fuel filler door.
You can have an acknowledgment
signal set to confirm that the vehi-
cle is correctly closed.< 530us010
Convenience operation You can also operate the windows and
sliding/tilt sunroof via the door lock.
>To open: with the door closed, turn
the key to the "Unlock" position and
hold it.
>To close: with the door closed, turn
the key to the "Lock" position and
hold it.
Watch during the closing process
to be sure that no one is inadvert-
enly injured. Releasing the key stops
the operation.< Manual operation (in the event of an electrical malfunction)
Turn the key to the extreme left or right
to unlock/lock the door.