key BMW X5 4.4I 2005 E53 Owner's Guide
[x] Cancel search | Manufacturer: BMW, Model Year: 2005, Model line: X5 4.4I, Model: BMW X5 4.4I 2005 E53Pages: 200, PDF Size: 3.55 MB
Page 65 of 200
OverviewControlsMaintenanceRepairsDataIndex
65n
Starting engine Switching off engineDo not allow the engine to warm up
by leaving it running while the vehicle
remains stationary. Instead, begin to
drive immediately at a moderate engine
speed.
X5 3.0i:
Do not end the starting procedure
too soon, however at the latest after
approx. 20 seconds. Release the igni-
tion key immediately as soon as the
engine starts.
X5 4.4i, 4.8is:
Your BMW is equipped with the conve-
nience starting feature. Here, it is suffi-
cient to turn the ignition key only briefly
to position 3 'Start engine' and to let go
of it right away. The starter actuation
continues to operate automatically for a
certain period of time and is stopped
automatically as soon as the engine has
started.
The automatic starting mode will not
operate or will be canceled if the bat-
tery voltage is insufficient. The engine
can be jump started, refer to page171.Should the engine fail to start on the
first attempt, if it is very hot or cold, for
instance:
>Press the accelerator pedal halfway
down while engaging the starter.
Cold starts at altitudes above 3,300 ft/
1,000 meters and at very low tempera-
tures, from approx. +57/–156:
>For the initial starting attempt, allow
the starter to remain engaged some-
what longer, approx. 10 seconds.
Engine idle speed is controlled by the
engine computer system. Increased
speeds at startup are normal and
should decrease as the engine warms
up. If engine speed does not decrease,
service is required.
To prevent the battery from discharg-
ing, always switch off electrical devices
that are not in use. Switch the ignition
off when the vehicle is not being driven.
Extended starting attempts, char-
acterized by excessively frequent
or long periods with the starter
engaged, can lead to damage of the
catalytic converter.<
Manual transmission:
1. Turn the ignition key to position 1
or 0.
2. Shift into first gear or reverse.
Automatic transmission:
1. Shift into selector lever position P.
2. Turn the ignition key to position 1
or 0.
Do not remove the ignition key
when the vehicle is moving, as
otherwise the steering could lock.
When leaving the vehicle, always
remove the ignition key and lock the
steering.
Vehicles with manual transmission:
Always engage the handbrake when
parking on slopes and inclined sur-
faces. Even placing the gearshift lever
in 1st gear or reverse may not provide
adequate resistance to rolling.
Vehicles with automatic transmission:
Place the selector lever in Park.<
Vehicles with automatic transmission:
The vehicle must be stationary and the
selector lever in Park before you can
remove the ignition key.
Page 66 of 200
66n
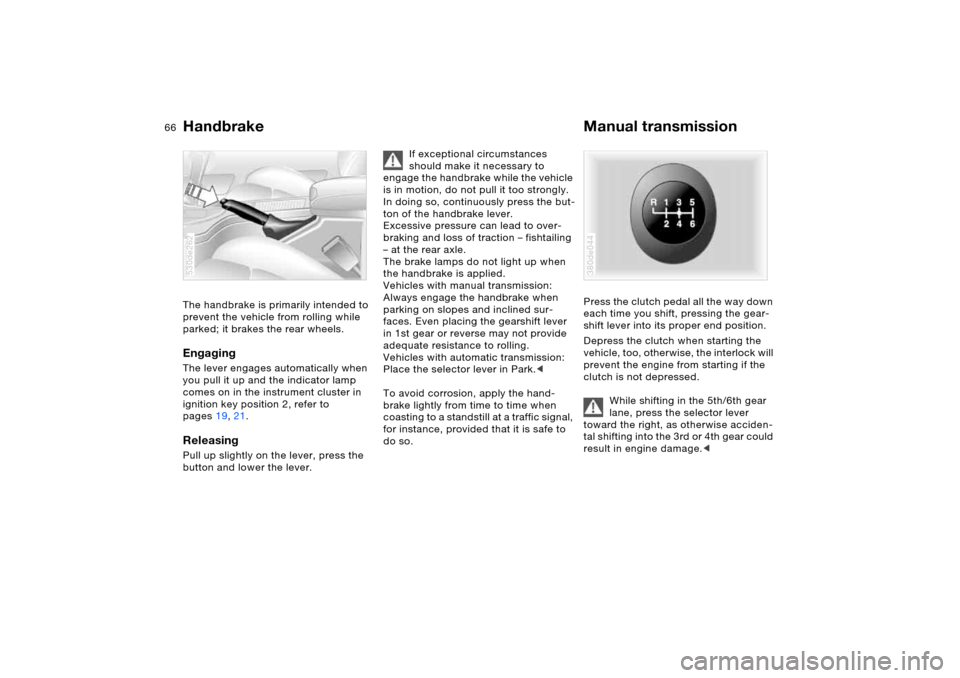
Handbrake Manual transmissionThe handbrake is primarily intended to
prevent the vehicle from rolling while
parked; it brakes the rear wheels.EngagingThe lever engages automatically when
you pull it up and the indicator lamp
comes on in the instrument cluster in
ignition key position 2, refer to
pages19, 21.Releasing Pull up slightly on the lever, press the
button and lower the lever. 530de262
If exceptional circumstances
should make it necessary to
engage the handbrake while the vehicle
is in motion, do not pull it too strongly.
In doing so, continuously press the but-
ton of the handbrake lever.
Excessive pressure can lead to over-
braking and loss of traction – fishtailing
– at the rear axle.
The brake lamps do not light up when
the handbrake is applied.
Vehicles with manual transmission:
Always engage the handbrake when
parking on slopes and inclined sur-
faces. Even placing the gearshift lever
in 1st gear or reverse may not provide
adequate resistance to rolling.
Vehicles with automatic transmission:
Place the selector lever in Park.<
To avoid corrosion, apply the hand-
brake lightly from time to time when
coasting to a standstill at a traffic signal,
for instance, provided that it is safe to
do so.
Press the clutch pedal all the way down
each time you shift, pressing the gear-
shift lever into its proper end position.
Depress the clutch when starting the
vehicle, too, otherwise, the interlock will
prevent the engine from starting if the
clutch is not depressed.
While shifting in the 5th/6th gear
lane, press the selector lever
toward the right, as otherwise acciden-
tal shifting into the 3rd or 4th gear could
result in engine damage.< 380de044
Page 67 of 200
OverviewControlsMaintenanceRepairsDataIndex
67n
Manual transmission Automatic transmission with Steptronic
*
Reverse Select only when the vehicle is station-
ary. Press the gearshift lever to the left
to overcome the resistance.
As you do this, the backup lamps will
turn on automatically when the ignition
key is in position 2.
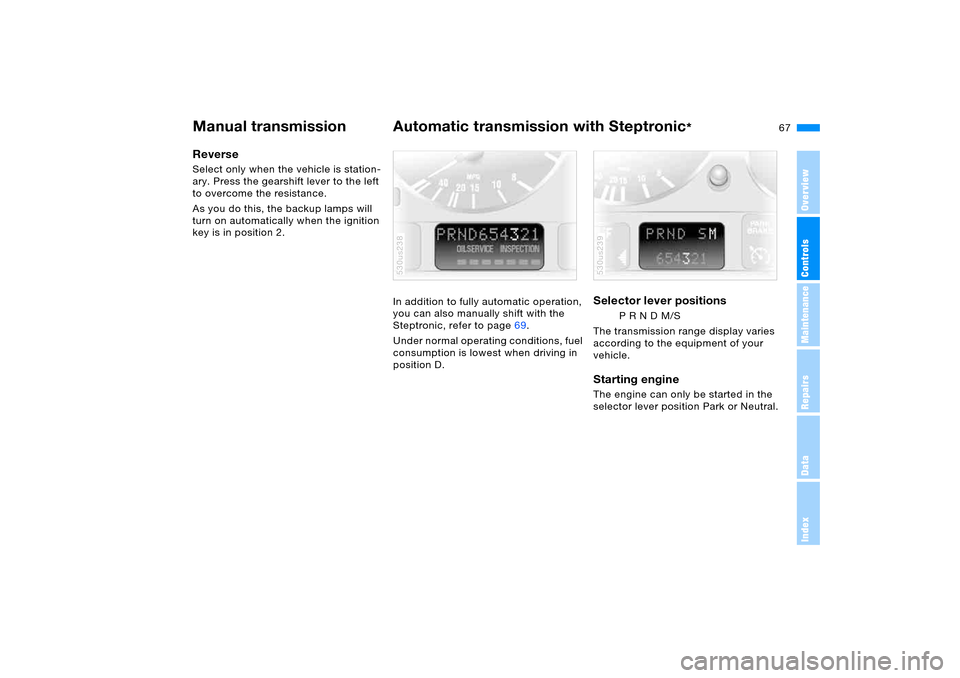
In addition to fully automatic operation,
you can also manually shift with the
Steptronic, refer to page69.
Under normal operating conditions, fuel
consumption is lowest when driving in
position D.
530us238
Selector lever positions
P R N D M/S
The transmission range display varies
according to the equipment of your
vehicle.
Starting engine The engine can only be started in the
selector lever position Park or Neutral. 530us239
Page 69 of 200
OverviewControlsMaintenanceRepairsDataIndex
69n
Automatic transmission with Steptronic
*
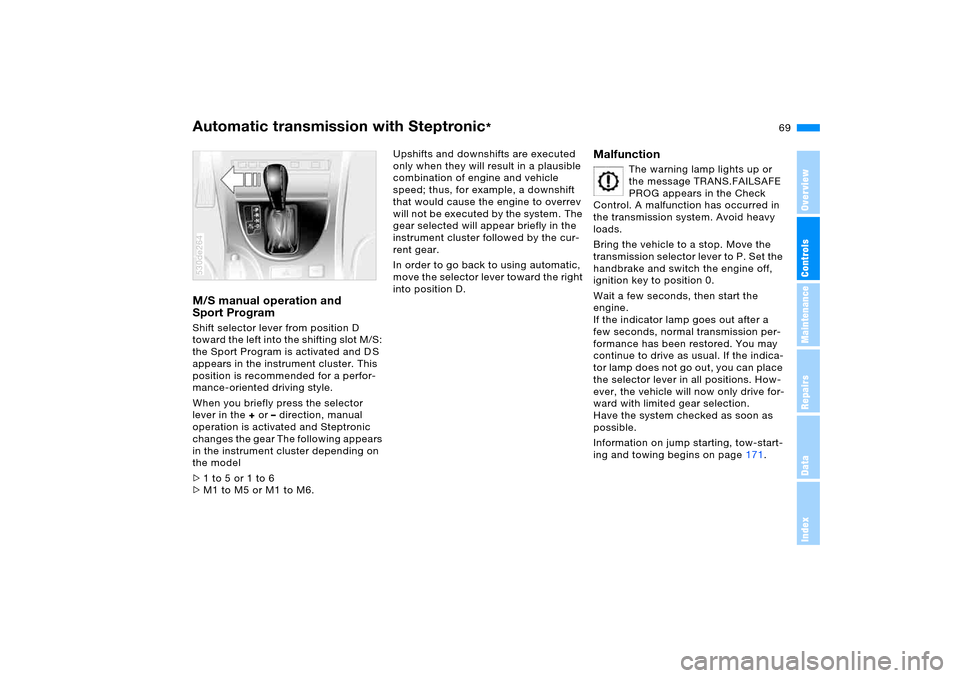
M/S manual operation and
Sport Program Shift selector lever from position D
toward the left into the shifting slot M/S:
the Sport Program is activated and D S
appears in the instrument cluster. This
position is recommended for a perfor-
mance-oriented driving style.
When you briefly press the selector
lever in the + or – direction, manual
operation is activated and Steptronic
changes the gear The following appears
in the instrument cluster depending on
the model
>1 to 5 or 1 to 6
>M1 to M5 or M1 to M6. 530de264
Upshifts and downshifts are executed
only when they will result in a plausible
combination of engine and vehicle
speed; thus, for example, a downshift
that would cause the engine to overrev
will not be executed by the system. The
gear selected will appear briefly in the
instrument cluster followed by the cur-
rent gear.
In order to go back to using automatic,
move the selector lever toward the right
into position D.
Malfunction
The warning lamp lights up or
the message TRANS.FAILSAFE
PROG appears in the Check
Control. A malfunction has occurred in
the transmission system. Avoid heavy
loads.
Bring the vehicle to a stop. Move the
transmission selector lever to P. Set the
handbrake and switch the engine off,
ignition key to position 0.
Wait a few seconds, then start the
engine.
If the indicator lamp goes out after a
few seconds, normal transmission per-
formance has been restored. You may
continue to drive as usual. If the indica-
tor lamp does not go out, you can place
the selector lever in all positions. How-
ever, the vehicle will now only drive for-
ward with limited gear selection.
Have the system checked as soon as
possible.
Information on jump starting, tow-start-
ing and towing begins on page171.
Page 71 of 200
OverviewControlsMaintenanceRepairsDataIndex
71n
Washer/wiper system/rain sensor
*
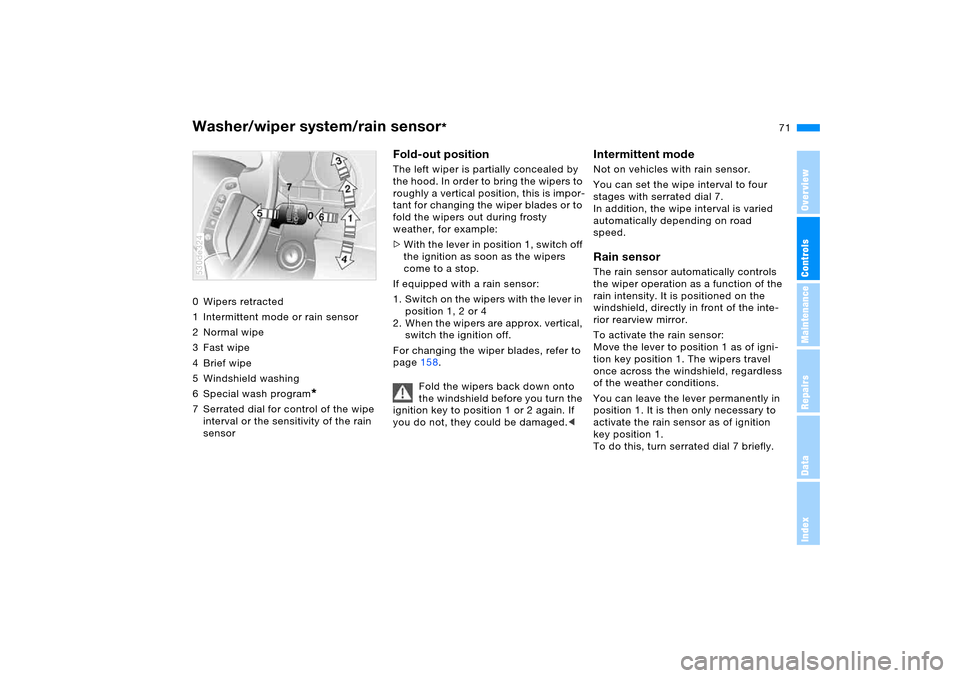
0 Wipers retracted
1 Intermittent mode or rain sensor
2Normal wipe
3Fast wipe
4Brief wipe
5 Windshield washing
6 Special wash program
*
7 Serrated dial for control of the wipe
interval or the sensitivity of the rain
sensor530de324
Fold-out positionThe left wiper is partially concealed by
the hood. In order to bring the wipers to
roughly a vertical position, this is impor-
tant for changing the wiper blades or to
fold the wipers out during frosty
weather, for example:
>With the lever in position 1, switch off
the ignition as soon as the wipers
come to a stop.
If equipped with a rain sensor:
1. Switch on the wipers with the lever in
position 1, 2 or 4
2. When the wipers are approx. vertical,
switch the ignition off.
For changing the wiper blades, refer to
page158.
Fold the wipers back down onto
the windshield before you turn the
ignition key to position 1 or 2 again. If
you do not, they could be damaged.<
Intermittent mode Not on vehicles with rain sensor.
You can set the wipe interval to four
stages with serrated dial 7.
In addition, the wipe interval is varied
automatically depending on road
speed. Rain sensor The rain sensor automatically controls
the wiper operation as a function of the
rain intensity. It is positioned on the
windshield, directly in front of the inte-
rior rearview mirror.
To activate the rain sensor:
Move the lever to position 1 as of igni-
tion key position 1. The wipers travel
once across the windshield, regardless
of the weather conditions.
You can leave the lever permanently in
position 1. It is then only necessary to
activate the rain sensor as of ignition
key position 1.
To do this, turn serrated dial 7 briefly.
Page 72 of 200
72n
Washer/wiper system/rain sensor
*
To adjust the sensitivity of the rain sen-
sor:
Turn serrated dial 7.
Deactivating the rain sensor:
Move lever to position 0.
Deactivate the rain sensor when
passing through an automatic car
wash. Failure to do so could result in
damage caused by undesired wiper
activation.< Normal wipe The system switches automatically to
intermittent mode when the vehicle is
stationary, not on vehicles with rain
sensor. Fast wipe The wipers operate at normal speed
when the vehicle is not moving, not on
vehicles with rain sensor. Windshield washing The system sprays washer fluid against
the windshield and activates the wipers
for a brief period.
Special wash program
*
As with 5; several additional wash
cycles are carried out and the head-
lamps are cleaned
*.
This program is recommended after you
have driven on extremely dirty roads.
Headlamp washing
*
>With the special wash program 6
>With every actuation of clean the
windshield 5 when the vehicle's light-
ing is switched on, the headlamps
will be cleaned at appropriate inter-
vals.
Do not use the washers if there
is any danger that the fluid will
freeze on the windshield. If you do so,
your vision could be obscured. There-
fore use antifreeze, refer to page150.
Do not actuate washer systems when
the fluid reservoir is empty, as other-
wise the washer pump will be dam-
aged.<
Windshield washer nozzles The windshield washer jets are warmed
automatically when the ignition key is in
position 2.
Page 74 of 200
74n
Cruise control
*
You can automatically maintain and
store any desired vehicle speed above
approx. 20 mph/30 km/h.
You can use cruise control whenever
the system is active while the engine is
running.
On the sports steering wheel
*, there
are +/– buttons on the right side of the
steering wheel for the cruise control.
Do not use the cruise control
when unfavorable conditions do
not permit driving at constant speed.
Otherwise you could loose control of
the vehicle and cause an accident.
These unfavorable conditions include
winding roads, heavy traffic or poor
road conditions, e.g. snow, rain, ice or
a loose road surface.<
Activating system As of ignition key position 2:
Press button; the indicator lamp in the
instrument cluster comes on, refer to
page22. You are able to use the cruise
control.Deactivating systemPress the button repeatedly until the
indicator lamp in the instrument cluster
goes out.
The cruise control is also deactivated
when the ignition key is turned into
position 0.
The speed stored in the memory is
deleted.
Maintaining and storing speed
or accelerating Briefly press button
+:
The system maintains and stores the
current vehicle speed. Every time you
briefly press the button, the speed
increases by approx. 0.6 mph/1 km/h.
Press and hold button +:
The vehicle accelerates without pres-
sure on the accelerator pedal. When
you release the button, the system
maintains and stores the current speed.
If, on a downhill grade, the engine's
braking effect is not sufficient, the con-
trolled speed can be exceeded. Speed
can drop on uphill grades if the engine
output is insufficient.
Page 76 of 200
76n
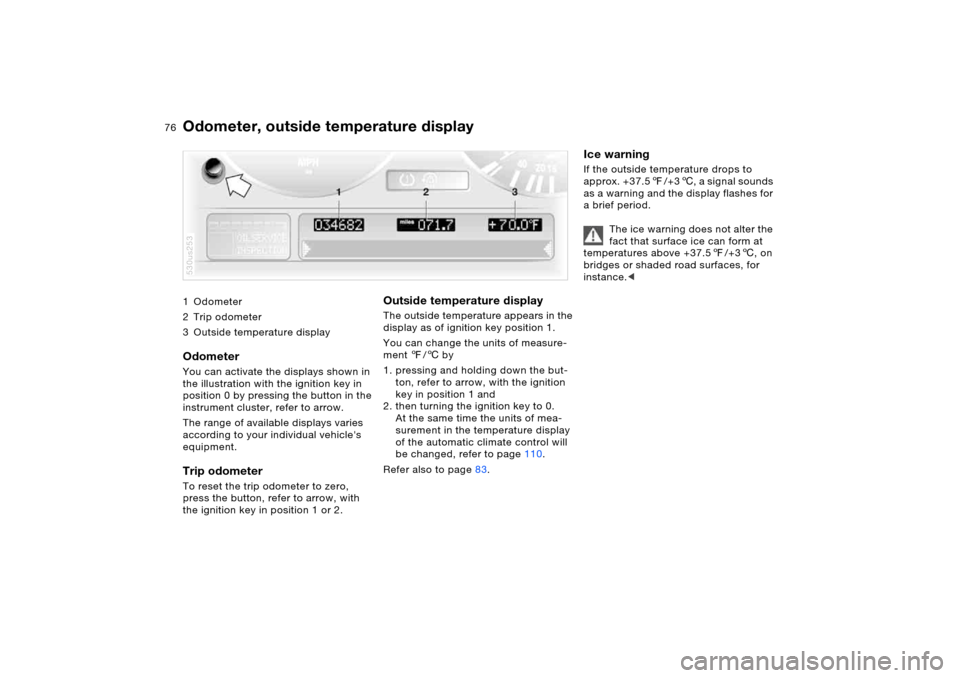
1Odometer
2Trip odometer
3 Outside temperature display
Odometer You can activate the displays shown in
the illustration with the ignition key in
position 0 by pressing the button in the
instrument cluster, refer to arrow.
The range of available displays varies
according to your individual vehicle's
equipment.Trip odometer To reset the trip odometer to zero,
press the button, refer to arrow, with
the ignition key in position 1 or 2. 530us253
Outside temperature display The outside temperature appears in the
display as of ignition key position 1.
You can change the units of measure-
ment 7/6 by
1. pressing and holding down the but-
ton, refer to arrow, with the ignition
key in position 1 and
2. then turning the ignition key to 0.
At the same time the units of mea-
surement in the temperature display
of the automatic climate control will
be changed, refer to page110.
Refer also to page83.
Ice warning If the outside temperature drops to
approx. +37.57/+36, a signal sounds
as a warning and the display flashes for
a brief period.
The ice warning does not alter the
fact that surface ice can form at
temperatures above +37.57/+36, on
bridges or shaded road surfaces, for
instance.<
Odometer, outside temperature display
Page 80 of 200
80n
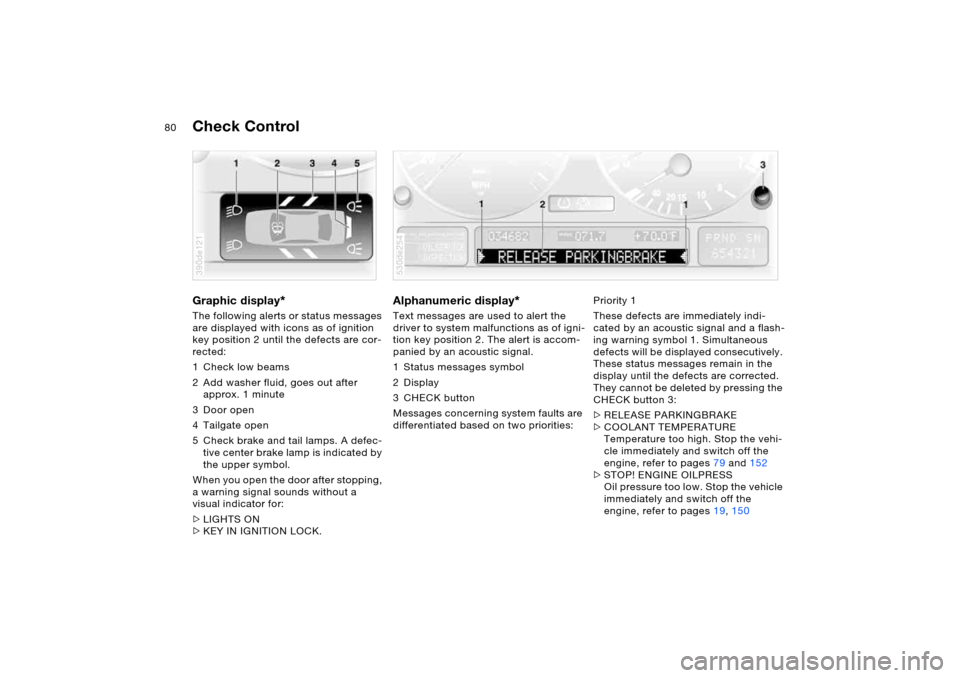
Check Control Graphic display
*
The following alerts or status messages
are displayed with icons as of ignition
key position 2 until the defects are cor-
rected:
1 Check low beams
2 Add washer fluid, goes out after
approx. 1 minute
3Door open
4 Tailgate open
5 Check brake and tail lamps. A defec-
tive center brake lamp is indicated by
the upper symbol.
When you open the door after stopping,
a warning signal sounds without a
visual indicator for:
>LIGHTS ON
>KEY IN IGNITION LOCK. 390de121
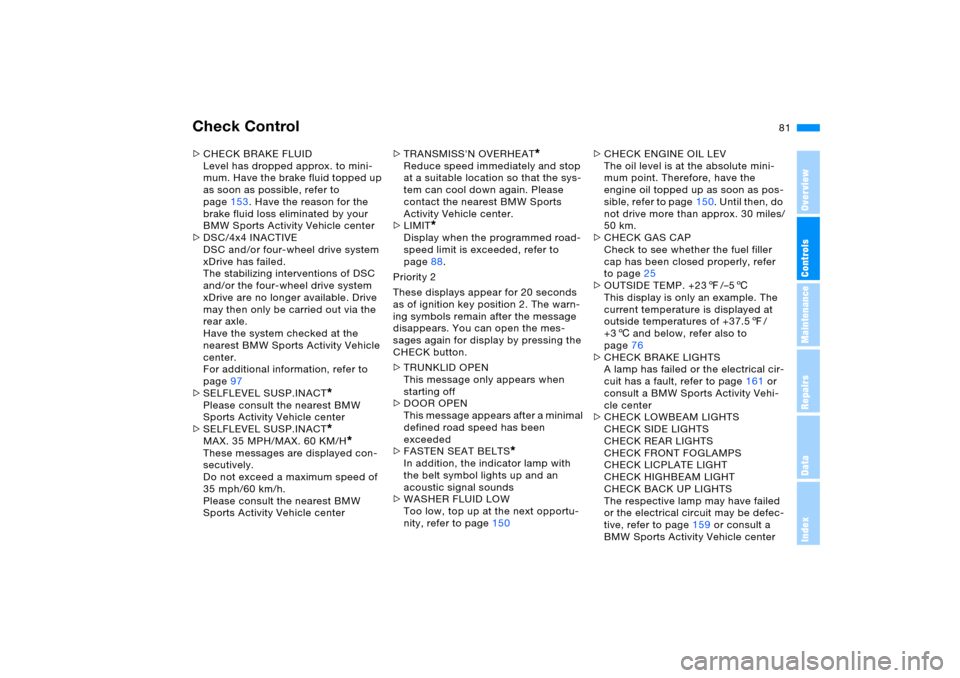
Alphanumeric display
*
Text messages are used to alert the
driver to system malfunctions as of igni-
tion key position 2. The alert is accom-
panied by an acoustic signal.
1 Status messages symbol
2Display
3CHECK button
Messages concerning system faults are
differentiated based on two priorities: 530de254
Priority 1
These defects are immediately indi-
cated by an acoustic signal and a flash-
ing warning symbol 1. Simultaneous
defects will be displayed consecutively.
These status messages remain in the
display until the defects are corrected.
They cannot be deleted by pressing the
CHECK button 3:
>RELEASE PARKINGBRAKE
>COOLANT TEMPERATURE
Temperature too high. Stop the vehi-
cle immediately and switch off the
engine, refer to pages79 and152
>STOP! ENGINE OILPRESS
Oil pressure too low. Stop the vehicle
immediately and switch off the
engine, refer to pages19, 150
Page 81 of 200
81n
OverviewControlsMaintenanceRepairsDataIndex
Check Control >CHECK BRAKE FLUID
Level has dropped approx. to mini-
mum. Have the brake fluid topped up
as soon as possible, refer to
page153. Have the reason for the
brake fluid loss eliminated by your
BMW Sports Activity Vehicle center
>DSC/4x4 INACTIVE
DSC and/or four-wheel drive system
xDrive has failed.
The stabilizing interventions of DSC
and/or the four-wheel drive system
xDrive are no longer available. Drive
may then only be carried out via the
rear axle.
Have the system checked at the
nearest BMW Sports Activity Vehicle
center.
For additional information, refer to
page97
>SELFLEVEL SUSP.INACT
*
Please consult the nearest BMW
Sports Activity Vehicle center
>SELFLEVEL SUSP.INACT*
MAX. 35 MPH/MAX. 60 KM/H
*
These messages are displayed con-
secutively.
Do not exceed a maximum speed of
35 mph/60 km/h.
Please consult the nearest BMW
Sports Activity Vehicle center>TRANSMISS'N OVERHEAT
*
Reduce speed immediately and stop
at a suitable location so that the sys-
tem can cool down again. Please
contact the nearest BMW Sports
Activity Vehicle center.
>LIMIT
*
Display when the programmed road-
speed limit is exceeded, refer to
page88.
Priority 2
These displays appear for 20 seconds
as of ignition key position 2. The warn-
ing symbols remain after the message
disappears. You can open the mes-
sages again for display by pressing the
CHECK button.
>TRUNKLID OPEN
This message only appears when
starting off
>DOOR OPEN
This message appears after a minimal
defined road speed has been
exceeded
>FASTEN SEAT BELTS
*
In addition, the indicator lamp with
the belt symbol lights up and an
acoustic signal sounds
>WASHER FLUID LOW
Too low, top up at the next opportu-
nity, refer to page150>CHECK ENGINE OIL LEV
The oil level is at the absolute mini-
mum point. Therefore, have the
engine oil topped up as soon as pos-
sible, refer to page150. Until then, do
not drive more than approx. 30 miles/
50 km.
>CHECK GAS CAP
Check to see whether the fuel filler
cap has been closed properly, refer
to page25
>OUTSIDE TEMP. +237/–56
This display is only an example. The
current temperature is displayed at
outside temperatures of +37.57/
+36 and below, refer also to
page76
>CHECK BRAKE LIGHTS
A lamp has failed or the electrical cir-
cuit has a fault, refer to page161 or
consult a BMW Sports Activity Vehi-
cle center
>CHECK LOWBEAM LIGHTS
CHECK SIDE LIGHTS
CHECK REAR LIGHTS
CHECK FRONT FOGLAMPS
CHECK LICPLATE LIGHT
CHECK HIGHBEAM LIGHT
CHECK BACK UP LIGHTS
The respective lamp may have failed
or the electrical circuit may be defec-
tive, refer to page159 or consult a
BMW Sports Activity Vehicle center