jacking BMW Z3 2002 Owners Manual
[x] Cancel search | Manufacturer: BMW, Model Year: 2002, Model line: Z3, Model: BMW Z3 2002Pages: 187, PDF Size: 2.73 MB
Page 146 of 187

146n
Wheel change
Safety measures in the event of a
flat tire or a wheel change:
Stop the vehicle on a firm, level surface
as far as possible from the flow of
traffic. Turn on the hazard warning
flashers.
Turn the steering wheel to the straight-
ahead position and engage the steering
lock, engage the parking brake and
shift into 1st or reverse gear (selector
lever in "Park" with automatic transmis-
sion).
All passengers should be outside the
vehicle and well away from your imme-
diate working area (for instance, behind
the guardrail).
If a warning triangle or portable hazard
warning lamp is available, set it up on
the roadside at an appropriate distance
from the rear of the vehicle. Comply
with all safety guidelines and regula-
tions.
Change the wheel only on a level, firm
surface which is not slippery. Avoid
jacking the vehicle on a soft or slippery
support surface (snow, ice, tiles, loose
gravel, etc.), since it could slide side-
ways.
Place the jack on a firm support
surface.
Do not place wooden blocks or similar
objects under the jack. If this is done,
the jack might not be able to reach its
full support capacity because of the
limited height.
Do not lie under the vehicle or start the
engine when the vehicle is supported
by the jack. This creates the risk of fatal
injury.<
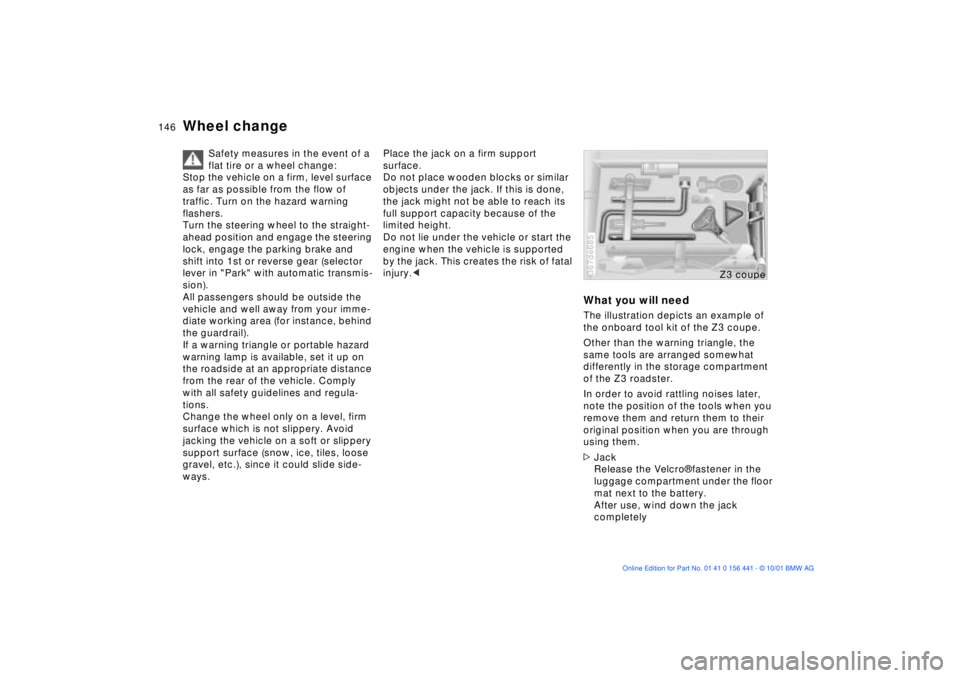
What you will needThe illustration depicts an example of
the onboard tool kit of the Z3 coupe.
Other than the warning triangle, the
same tools are arranged somewhat
differently in the storage compartment
of the Z3 roadster.
In order to avoid rattling noises later,
note the position of the tools when you
remove them and return them to their
original position when you are through
using them.
>Jack
Release the Velcro¨ fastener in the
luggage compartment under the floor
mat next to the battery.
After use, wind down the jack
completely367de685
Z3 coupe
Page 151 of 187

151n
IndexDataTechnologyRepairsMaintenanceControlsOverview
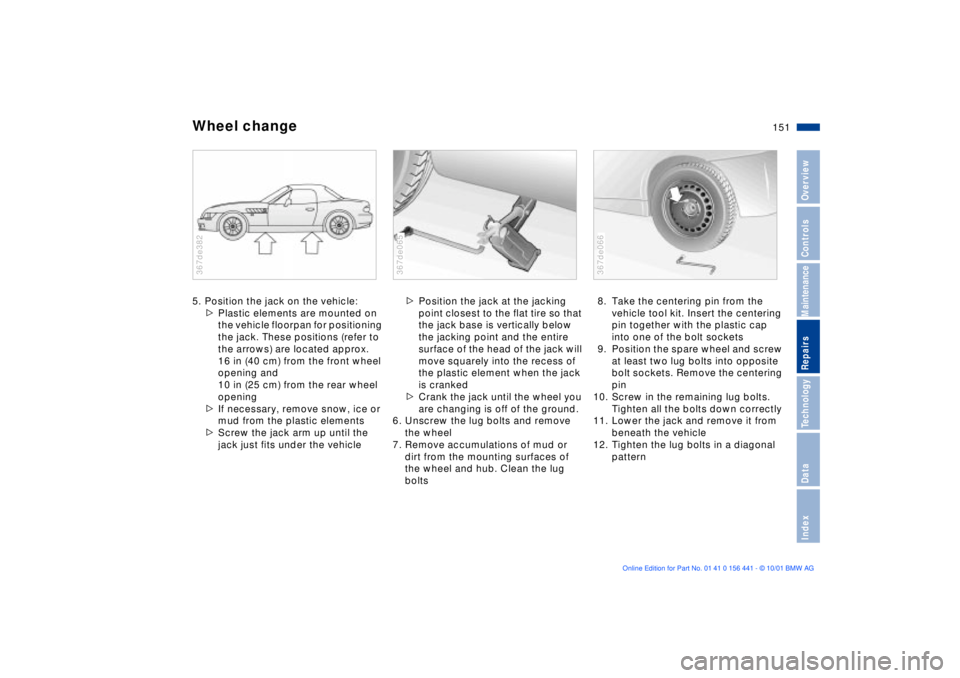
Wheel change5. Position the jack on the vehicle:
>Plastic elements are mounted on
the vehicle floorpan for positioning
the jack. These positions (refer to
the arrows) are located approx.
16 in (40 cm) from the front wheel
opening and
10 in (25 cm) from the rear wheel
opening
>If necessary, remove snow, ice or
mud from the plastic elements
>Screw the jack arm up until the
jack just fits under the vehicle367de382
>Position the jack at the jacking
point closest to the flat tire so that
the jack base is vertically below
the jacking point and the entire
surface of the head of the jack will
move squarely into the recess of
the plastic element when the jack
is cranked
>Crank the jack until the wheel you
are changing is off of the ground.
6. Unscrew the lug bolts and remove
the wheel
7. Remove accumulations of mud or
dirt from the mounting surfaces of
the wheel and hub. Clean the lug
bolts367de065
8. Take the centering pin from the
vehicle tool kit. Insert the centering
pin together with the plastic cap
into one of the bolt sockets
9. Position the spare wheel and screw
at least two lug bolts into opposite
bolt sockets. Remove the centering
pin
10. Screw in the remaining lug bolts.
Tighten all the bolts down correctly
11. Lower the jack and remove it from
beneath the vehicle
12. Tighten the lug bolts in a diagonal
pattern367de066