buttons BMW Z4 COUPE 2006 E86 Owner's Manual
[x] Cancel search | Manufacturer: BMW, Model Year: 2006, Model line: Z4 COUPE, Model: BMW Z4 COUPE 2006 E86Pages: 128, PDF Size: 4.41 MB
Page 11 of 128
At a glance
This overview of buttons, switches and displays
is intended to familiarize you with your vehicle's
operating environment. The section will also
assist you in becoming acquainted with the
control concepts and options available for
operating the various systems.
At a glance
Page 13 of 128
At a glance
Controls
Driving tips
Mobility Reference
11
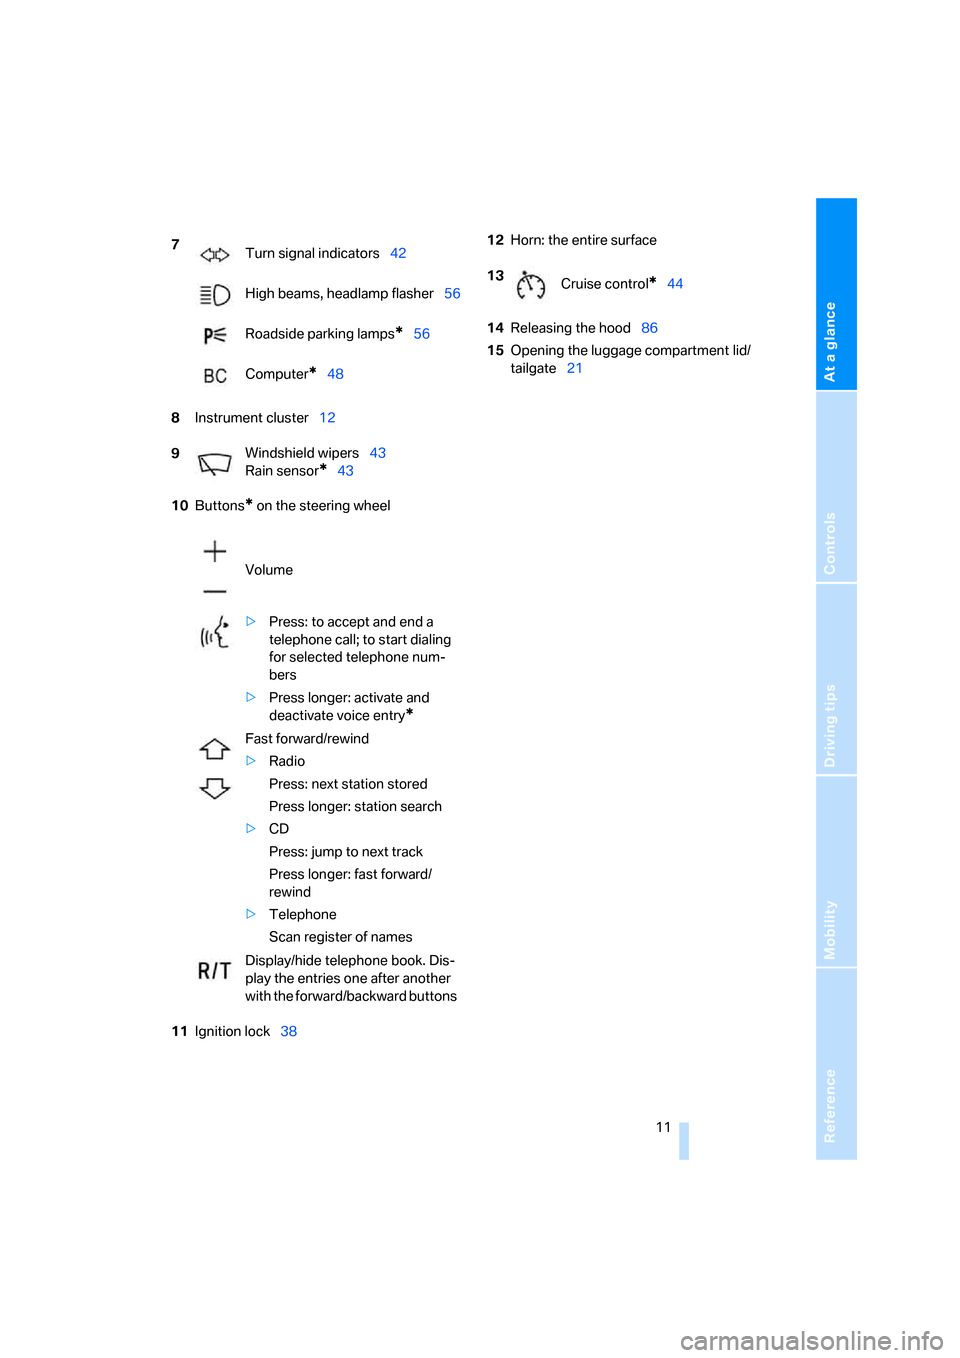
8Instrument cluster12
10Buttons
* on the steering wheel
11Ignition lock3812Horn: the entire surface
14Releasing the hood86
15Opening the luggage compartment lid/
tailgate21 7
Turn signal indicators42
High beams, headlamp flasher56
Roadside parking lamps
*56
Computer
*48
9Windshield wipers43
Rain sensor
*43
Volume
>Press: to accept and end a
telephone call; to start dialing
for selected telephone num-
bers
>Press longer: activate and
deactivate voice entry
*
Fast forward/rewind
>Radio
Press: next station stored
Press longer: station search
>CD
Press: jump to next track
Press longer: fast forward/
rewind
>Telephone
Scan register of names
Display/hide telephone book. Dis-
play the entries one after another
with the forward/backward buttons
13
Cruise control*44
Page 21 of 128
Reference
At a glance
Controls
Driving tips
Mobility
19
>Activation/deactivation and duration of
pathway lighting, refer to page56
>Adjustment of sensitivity of automatic
headlamp control
*, refer to page55
>Setting unit of measure for displaying the
time and outside temperature in the instru-
ment cluster, refer to page48
Examples for Key Memory
>Automatic call-up* of the driver's seat posi-
tion after unlocking, refer to page33
>Locking of the vehicle after starting off, refer
to page21
Central locking system
The concept
The central locking system is ready for opera-
tion whenever the driver's door is closed.
The system simultaneously engages and
releases the locks on the following:
>Doors
>Luggage compartment lid/tailgate
>Fuel filler door
>Storage compartment between the back-
rests
>Roadster: opened manual convertible top
Operating from outside
>Via the remote control
>Via the door lock
The anti-theft system is operated at the same
time. It prevents the doors from being unlocked
with the lock buttons or release handles. The
remote control is also used to switch the interior
lamps on and off. In addition, the alarm system
*
is armed or disarmed.
For further details of the alarm system
*, refer to
page23.
Operating from inside
By means of the button for central locking, refer
to page21.In the event of a sufficiently severe accident, the
central locking system unlocks automatically. In
addition, the hazard warning flashers and inte-
rior lamps come on.
Opening and closing:
from outside
With the remote control
Persons or animals in the vehicle could
lock the doors from the inside. You should
therefore take the remote control with you so
that the car can be opened from the outside.<
Unlocking
1.Press the button once.
The driver's door and fuel filler door are
unlocked.
2.Press the button again.
The entire vehicle is unlocked.
Convenience opening
Hold the button down.
Coupe: the windows are opened.
Roadster: the windows and the fully automatic
convertible top
* are opened.
Locking
Press the button.
The hazard warning flashers light up once.
If you wish, you can have this special fea-
ture activated/deactivated.<
Switching on interior lamps
With the vehicle locked:
Press the button.
With this function, you can also search for your
vehicle when parked in an underground garage,
for instance.
Unlocking the luggage compartment
lid/tailgate
Press the button for approx. 1 second.
Page 30 of 128
Opening and closing
28 Before closing the convertible top, remove any
objects from the windshield frame that other-
wise could prevent the convertible top from
closing properly.<
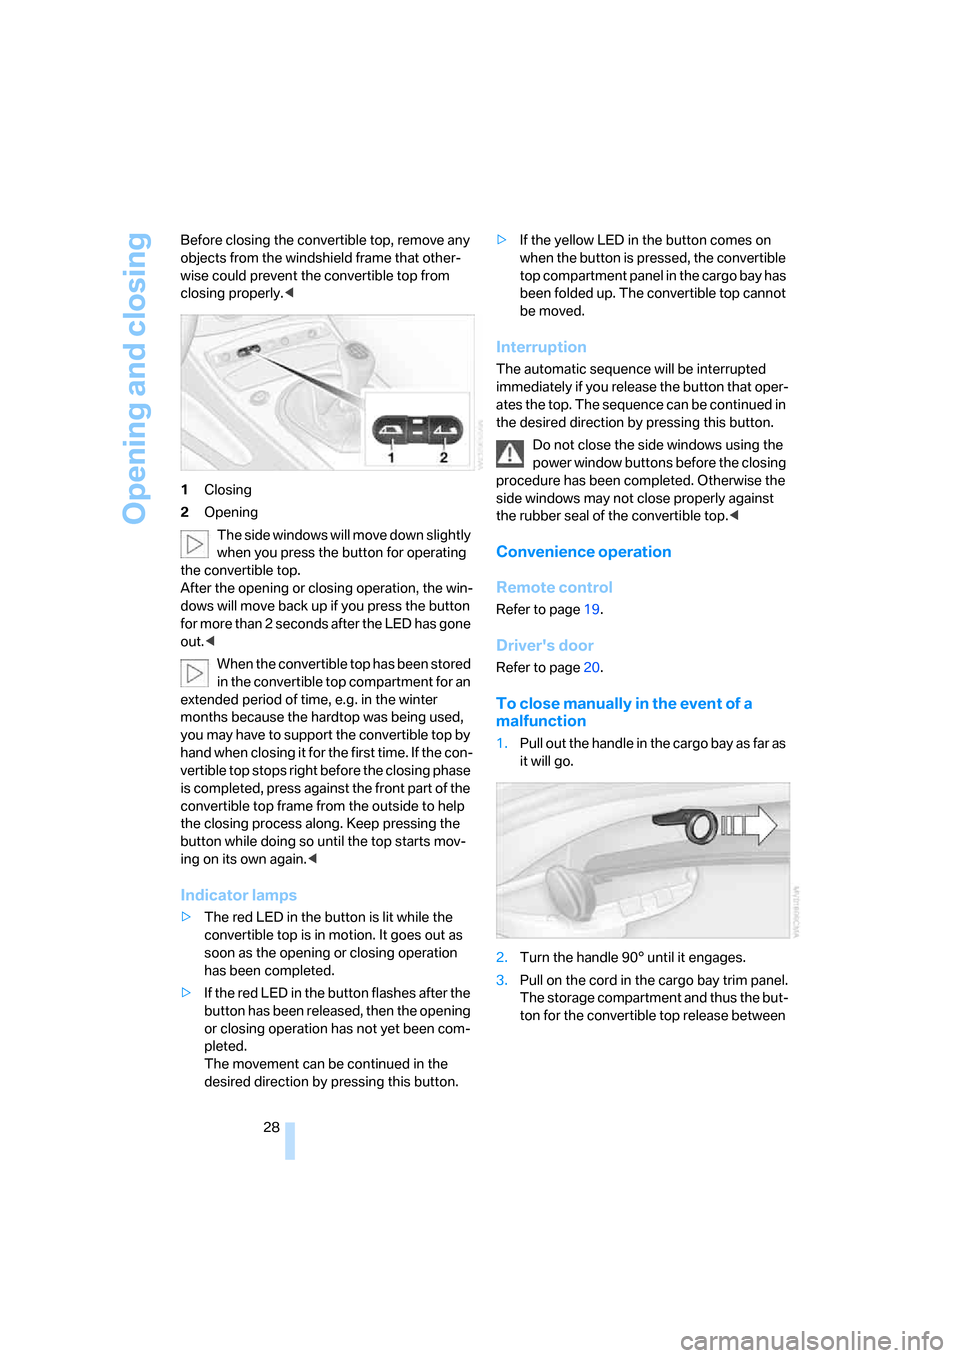
1Closing
2Opening
The side windows will move down slightly
when you press the button for operating
the convertible top.
After the opening or closing operation, the win-
dows will move back up if you press the button
for more than 2 seconds after the LED has gone
out.<
When the convertible top has been stored
in the convertible top compartment for an
extended period of time, e.g. in the winter
months because the hardtop was being used,
you may have to support the convertible top by
hand when closing it for the first time. If the con-
vertible top stops right before the closing phase
is completed, press against the front part of the
convertible top frame from the outside to help
the closing process along. Keep pressing the
button while doing so until the top starts mov-
ing on its own again.<
Indicator lamps
>The red LED in the button is lit while the
convertible top is in motion. It goes out as
soon as the opening or closing operation
has been completed.
>If the red LED in the button flashes after the
button has been released, then the opening
or closing operation has not yet been com-
pleted.
The movement can be continued in the
desired direction by pressing this button.>If the yellow LED in the button comes on
when the button is pressed, the convertible
top compartment panel in the cargo bay has
been folded up. The convertible top cannot
be moved.
Interruption
The automatic sequence will be interrupted
immediately if you release the button that oper-
ates the top. The sequence can be continued in
the desired direction by pressing this button.
Do not close the side windows using the
power window buttons before the closing
procedure has been completed. Otherwise the
side windows may not close properly against
the rubber seal of the convertible top.<
Convenience operation
Remote control
Refer to page19.
Driver's door
Refer to page20.
To close manually in the event of a
malfunction
1.Pull out the handle in the cargo bay as far as
it will go.
2.Turn the handle 90° until it engages.
3.Pull on the cord in the cargo bay trim panel.
The storage compartment and thus the but-
ton for the convertible top release between
Page 35 of 128
Reference
At a glance
Controls
Driving tips
Mobility
33
Convenience function
1.Unlock and open the driver's door or turn
the key to position 1, refer to page38.
2.Press memory button 1, 2 or 3 briefly.
Movement stops immediately when one of the
seat adjustment or memory buttons is operated
during the adjustment process.
You can have this feature programmed so
that after you use the remote control from
your personalized key to unlock your door, your
seat will move into your own preferred posi-
tion.<
Safety function
1.Close the driver's door and turn the key to
position 0 or 2.
2.Press the desired memory button 1, 2 or 3
until the adjustment process is completed.
If you press the M
EMORY button accidentally:
Press the button again; the LED goes out.
Before activating the programmed
adjustment feature, ensure that the space
behind the driver's seat is empty and unob-
structed. If you fail to do so, objects behind the
seat could be damaged, should the seat move
backward.<
Seat heating*
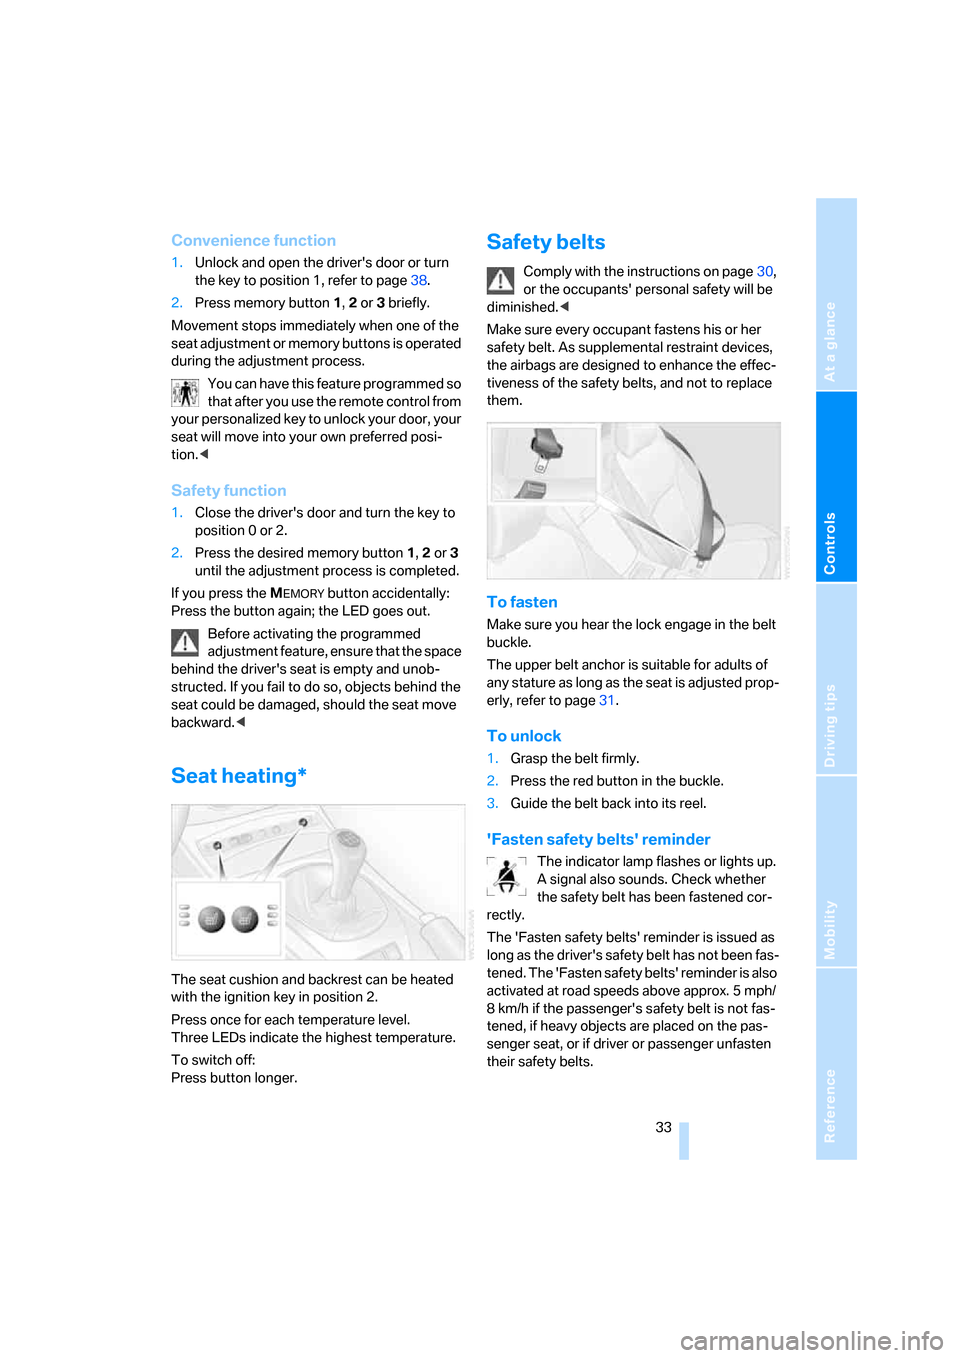
The seat cushion and backrest can be heated
with the ignition key in position 2.
Press once for each temperature level.
Three LEDs indicate the highest temperature.
To switch off:
Press button longer.
Safety belts
Comply with the instructions on page30,
or the occupants' personal safety will be
diminished.<
Make sure every occupant fastens his or her
safety belt. As supplemental restraint devices,
the airbags are designed to enhance the effec-
tiveness of the safety belts, and not to replace
them.
To fasten
Make sure you hear the lock engage in the belt
buckle.
The upper belt anchor is suitable for adults of
any stature as long as the seat is adjusted prop-
erly, refer to page31.
To unlock
1.Grasp the belt firmly.
2.Press the red button in the buckle.
3.Guide the belt back into its reel.
'Fasten safety belts' reminder
The indicator lamp flashes or lights up.
A signal also sounds. Check whether
the safety belt has been fastened cor-
rectly.
The 'Fasten safety belts' reminder is issued as
long as the driver's safety belt has not been fas-
tened. The 'Fasten safety belts' reminder is also
activated at road speeds above approx. 5 mph/
8 km/h if the passenger's safety belt is not fas-
tened, if heavy objects are placed on the pas-
senger seat, or if driver or passenger unfasten
their safety belts.
Page 66 of 128
Practical interior accessories
64
Practical interior accessories
Glove compartment
To open
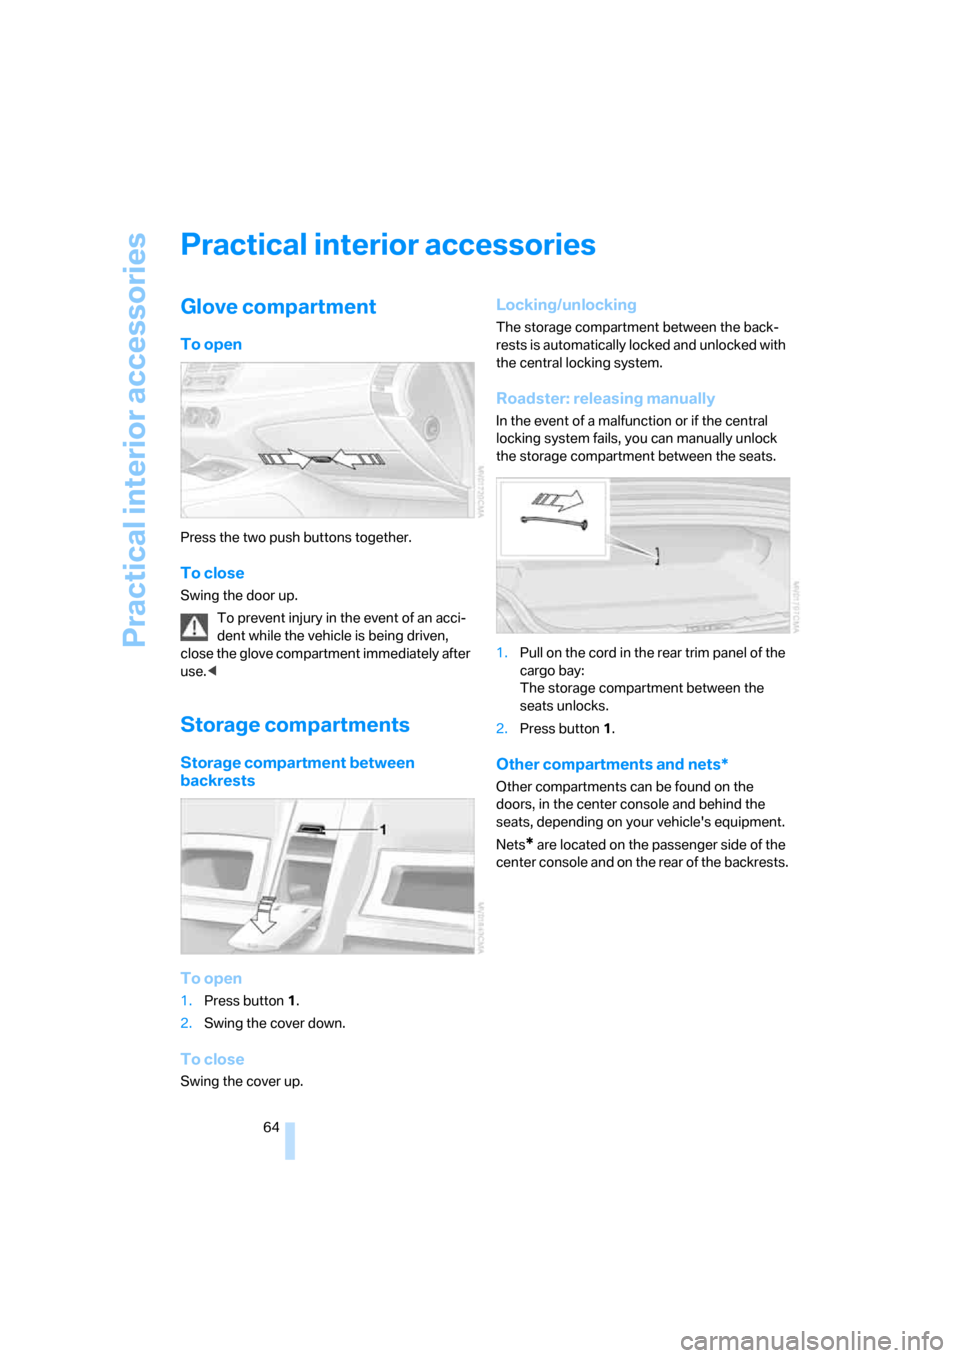
Press the two push buttons together.
To close
Swing the door up.
To prevent injury in the event of an acci-
dent while the vehicle is being driven,
close the glove compartment immediately after
use.<
Storage compartments
Storage compartment between
backrests
To open
1.Press button1.
2.Swing the cover down.
To close
Swing the cover up.
Locking/unlocking
The storage compartment between the back-
rests is automatically locked and unlocked with
the central locking system.
Roadster: releasing manually
In the event of a malfunction or if the central
locking system fails, you can manually unlock
the storage compartment between the seats.
1.Pull on the cord in the rear trim panel of the
cargo bay:
The storage compartment between the
seats unlocks.
2.Press button1.
Other compartments and nets*
Other compartments can be found on the
doors, in the center console and behind the
seats, depending on your vehicle's equipment.
Nets
* are located on the passenger side of the
center console and on the rear of the backrests.
Page 100 of 128
Giving and receiving assistance
98
Giving and receiving assistance
Receiving assistance
If your vehicle has the necessary equipment,
you can use buttons in the center console to
contact Roadside Assistance or issue an emer-
gency call.
Requirements for initiating an emergency call or
contacting Roadside Assistance:
>The key must be in position 1 or higher.
>The car phone must be logged on to a
mobile telephone network.
>The emergency call system must be opera-
ble.
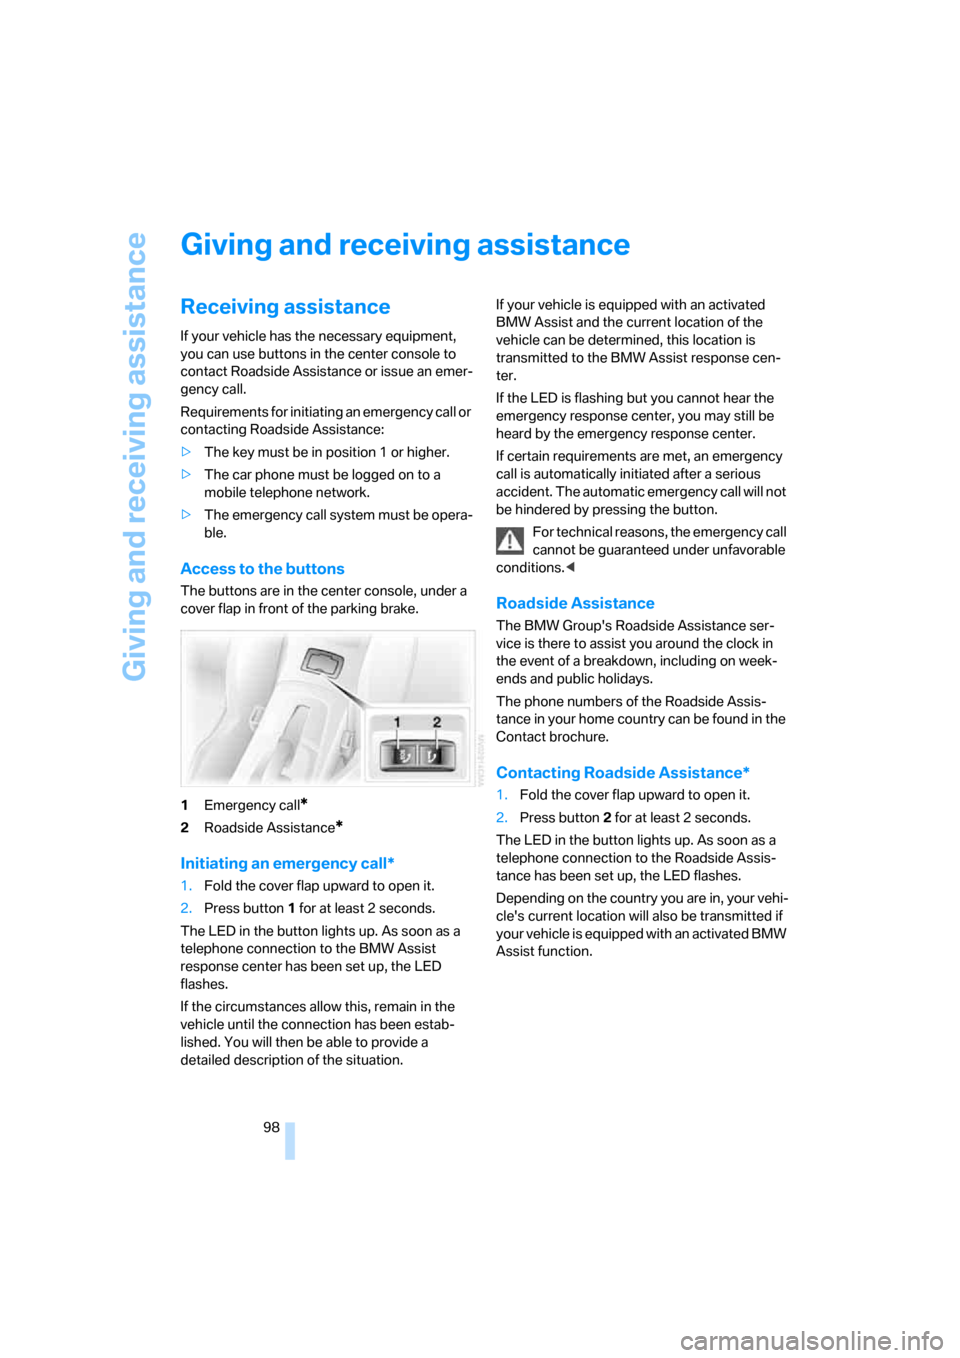
Access to the buttons
The buttons are in the center console, under a
cover flap in front of the parking brake.
1Emergency call
*
2Roadside Assistance*
Initiating an emergency call*
1.Fold the cover flap upward to open it.
2.Press button1 for at least 2 seconds.
The LED in the button lights up. As soon as a
telephone connection to the BMW Assist
response center has been set up, the LED
flashes.
If the circumstances allow this, remain in the
vehicle until the connection has been estab-
lished. You will then be able to provide a
detailed description of the situation.If your vehicle is equipped with an activated
BMW Assist and the current location of the
vehicle can be determined, this location is
transmitted to the BMW Assist response cen-
ter.
If the LED is flashing but you cannot hear the
emergency response center, you may still be
heard by the emergency response center.
If certain requirements are met, an emergency
call is automatically initiated after a serious
accident. The automatic emergency call will not
be hindered by pressing the button.
For technical reasons, the emergency call
cannot be guaranteed under unfavorable
conditions.<
Roadside Assistance
The BMW Group's Roadside Assistance ser-
vice is there to assist you around the clock in
the event of a breakdown, including on week-
ends and public holidays.
The phone numbers of the Roadside Assis-
tance in your home country can be found in the
Contact brochure.
Contacting Roadside Assistance*
1.Fold the cover flap upward to open it.
2.Press button2 for at least 2 seconds.
The LED in the button lights up. As soon as a
telephone connection to the Roadside Assis-
tance has been set up, the LED flashes.
Depending on the country you are in, your vehi-
cle's current location will also be transmitted if
your vehicle is equipped with an activated BMW
Assist function.
Page 115 of 128
Reference
At a glance
Controls
Driving tips
Mobility
113
Backup lamps
– bulb replacement96
Bandages, refer to First-aid
kit99
Bar, refer to Towing
methods101
Battery97
– charging97
– disposal97
– indicator/warning
lamp12,97
– jump-starting99
– power supply interruption97
– remote control18
Being towed101
Belts, refer to Safety belts33
Belt tensioner, refer to Safety
belts33
Beverage holders65
Blower, refer to Air flow
rate59,62
BMW Homepage4
BMW Maintenance
System91
Bottle holders, refer to
Beverage holders65
Brake assist, refer to Dynamic
Brake Control DBC49
Brake fluid90
– indicator/warning lamp13
– level90
– warning lamp90
Brake Force Display52
Brake hydraulics, refer to
Brake system90
Brake hydraulic system
– indicator/warning lamp13
Brake lamps
– brake force display52
– bulb replacement96
– indicator lamp, defective
lamp13
Brake pads90
– break-in procedures70
– warning lamp90
Brake pad wear indicator
– brake pads90
– indicator/warning lamp13Brake rotors72
– brake system72
– break-in procedures70
Brakes
– ABS49
– brake fluid90
– brake pads90
– braking safely71
– break-in procedures
70
– indicator/warning
lamps13,50
– parking brake39
Brake system90
– brake fluid90
– brake pads90
– break-in procedures70
– disc brakes72
– indicator/warning lamp13
Brake wear warning90
Breakdown
– Flat Tire Monitor51
Breaking in the clutch70
Breaking in the differential,
refer to Engine and
differential70
Break-in procedures70
Bridging, refer to Jump-
starting99
Bulb changing, refer to Lamps
and bulbs93
Bulb replacement, refer to
Lamps and bulbs93
Burned fuel, refer to
Fuel specifications79
Buttons on the steering
wheel11
C
California laws
– Event Data Recorders92
– Proposition 65 warning5
Can holders, refer to Beverage
holders65
Capacity
– cargo bay, refer to
Weights109
Car battery, refer to Vehicle
battery97Car care, refer to the Caring
for your vehicle brochure
Care, refer to the Caring for
your vehicle brochure
Care products, refer to the
Caring for your vehicle
brochure
Cargo bay23
– capacity109
– floor panel93
– increasing capacity23
– opening and closing21,22
– opening from inside the
vehicle21,22
– opening from the outside21
– roller-blind cover65
Cargo loading
– stowing cargo73
– vehicle72
Car jack
– jacking points97
Car keys, refer to The key
set18
Carpet care, refer to the
Caring for your vehicle
brochure
Car phone, refer to the
separate Owner's Manual
Car radio, refer to the separate
Owner's Manual
Car wash, refer to the Caring
for your vehicle brochure
Catalytic converter, refer to
Hot exhaust system70
CD changer, refer to Owner's
Manual for Radio/Onboard
Computer
CD operation, refer to Owner's
Manual for Radio/Onboard
Computer
Center console, refer to
Around the center
console14
Center high-mount brake
lamp, bulb replacement96
Central locking
– from inside21
Central locking system19
Page 120 of 128
Everything from A to Z
118 Lighting of the instruments,
refer to Instrument
lighting56
LIGHTS ON warning56
Light switch55
Loads, refer to Cargo
loading72
Loads, securing73
Locking the doors
– from inside21
– from outside19,20
Locking the vehicle
– from inside21
– from outside19
Longlife oils
– approved engine oils89
Low beams55
– automatic55
– bulb replacement94
– indicator lamp, defective
lamp13
Luggage compartment
– capacity109
– floor panel93
– increasing capacity23
– opening and closing21,22
– opening from inside the
vehicle21,22
– opening from the
outside21,22
Luggage compartment lid22
– emergency release23
– indicator lamp13
– opening from inside the
vehicle22
– opening from the outside22
– remote control19
M
M+S tires, refer to Winter
tires85
Maintenance91
– refer to Service Booklet
– refer to Service interval
display47,91
Making telephone calls, refer
to Owner's Manual for
TelephoneMalfunction
– automatic transmission with
Steptronic41
– convertible top28
– door lock20
– fuel filler door78
– luggage compartment lid22
– storage compartments64
– tailgate22
Malfunction of electrical
accessory97
Manual
– air distribution62
– air flow rate62
Manual convertible top26
Manual mode, refer to
Automatic transmission with
Steptronic41
Manual operation
– door lock20
– driver's door20
– fuel filler door78
– luggage compartment lid22
– power convertible top28
– storage compartments64
– tailgate22
– transmission lock, automatic
transmission40
Manual transmission40
Manufacturer5
Master keys with remote
control18
Maximum cooling62
Maximum speed
– with winter tires85
MD operation, refer to
Owner's Manual for Radio/
Onboard Computer
Measurements, refer to
Dimensions107,108
Mechanical seat31
Memory
– Seat memory32
– Vehicle Memory, Key
Memory18
Microfilter
– air conditioning60
– automatic climate control63Microphone, refer to Mobile
phone preparation
package67
Minidisc operation, refer to
Owner's Manual for Radio/
Onboard Computer
Mirrors34
– exterior mirrors
34
– heating34
– interior rearview mirror34
Mobile communications in the
vehicle, refer to the separate
Owner's Manual
Mobile phone, refer to the
separate Owner's Manual
Mobile phone preparation
package67
Mobile phones, use inside the
car, refer to Mobile
communications in the
vehicle70
Modifications, technical, refer
to For your own safety5
M Sports seat31
Multifunctional steering
wheel, refer to Buttons on
the steering wheel11
Multifunction switch
– refer to Turn signal
indicators/headlamp
flasher42
– refer to Washer/wiper
system43
N
Navigation system, refer to the
separate Owner's Manual
Neck support, refer to Head
restraints32
Nets64
New
– keys18
– tires84
Nylon rope, refer to Tow
rope101
Page 123 of 128
Reference
At a glance
Controls
Driving tips
Mobility
121
Starting assistance, refer to
Dynamic Stability Control
DSC49
Starting difficulties
– jump-starting99
– temperature39
Starting with a flat battery,
refer to Jump-starting99
Status of this Owner's Manual
at time of printing5
Steering wheel10
– adjusting34
– buttons on steering
wheel11
– lock38
Steptronic, refer to Sport
program and Manual
operation41
Storage compartments64
– electrical fault64
– eyeglasses compartment65
– glove compartment64
– opening manually64
Storage nets64
Storage space, refer to
– Cargo bay23
Storage space, refer to
Storage compartments64
Storing seat position, refer to
Seat memory32
Stowage, refer to Storage
compartments64
Summer tires, refer to Wheels
and tires80
Supply reservoir, refer to
Washer fluid reservoir44
Switches, refer to Cockpit10
Switch for passenger
airbags35
Switching cooling function on/
off manually59,62
Symbols4
T
Table of contents3
Tachometer46Tailgate21
– emergency operation22
– opening from inside the
vehicle21
– opening from the outside21
– opening manually22
– remote control19
– roller-blind cover65
Tail lamps, refer to Rear
lamps96
Tail lights, refer to Rear
lamps96
Tank contents
– refer to Capacities110
Tank indicator, refer to Fuel
gauge46
Technical data106
Technical modifications, refer
to For your own safety5
Telephone, refer to the
separate Owner's Manual
Telephone preparation
package67
Temperature
– air conditioning59
– automatic climate control62
– coolant, refer to Coolant
thermometer47
– engine47
Temperature display
– outside temperature46
– outside temperature
warning46
– setting unit of measure48
Tempomat, refer to Cruise
control44
Third brake lamp, refer to
Center high-mount brake
lamp96
Three-point safety belt, refer
to Safety belts33
Tilt alarm sensor25
Tilt function, passenger-side
mirror34
Tire inflation pressure80
– checking80
– loss51
– restoring80
Tire renewal84Tires
– age82,84
– break-in procedures70
– changing84
– coding82
– condition83
– damage84
– DOT quality grades82
– flat
51
– inflation pressure80
– pressure monitoring, refer to
Flat Tire Monitor51
– replacement84
– size80
– storage85
– temperature83
– traction83
– tread83
– tread wear83
– Uniform Tire Quality
Grading82
– wear indicators, refer to
Minimum tread depth83
– wheel and tire
replacement84
– winter tires85
– with emergency features,
refer to Run-Flat Tires84
Tire storage85
Tool kit, refer to Onboard tool
kit93
Torque, refer to Engine
data106
Tow bar101
Towing eyelet100
Towing the vehicle100
– methods101
– with automatic
transmission101
Tow rope101
Tow-starting101
Tow truck101
Track width, refer to
Dimensions107,108
Traction control, refer to
Dynamic Stability Control
DSC49