BMW Z8 CONVERTIBLE 2002 Owners Manual
Manufacturer: BMW, Model Year: 2002, Model line: Z8 CONVERTIBLE, Model: BMW Z8 CONVERTIBLE 2002Pages: 174, PDF Size: 2.37 MB
Page 131 of 174
131n
IndexDataTechnologyRepairsCar careControlsOverview
Lamps and bulbs The lamps and bulbs make essential
contributions to the safety of your
vehicle. Therefore, comply fully with the
following instructions during bulb
replacement. If you are not familiar with
any of the procedures, consult your
BMW center.
Do not touch the glass portion of a
new bulb with your bare hands
since even small amounts of impurities
burn into the surface and reduce the
service life of the bulb. Use a clean
cloth, paper napkin, or a similar mate-
rial, or hold the bulb by its metallic
base.<
A replacement bulb set is available from
your BMW center.
Whenever working on the elec-
trical system, switch off the elec-
trical accessory you are working on or
disconnect the cable from the negative
terminal of the battery. Failure to do this
could result in short circuits.
To prevent injuries and damage,
comply with any instructions provided
by the bulb manufacturer.<
When cleaning the headlamps,
please observe the following:
>Do not wipe dry (scratches). Never
use abrasives or strong solvents to
clean the covers
>Remove dirt and contamination (such
as insects) by soaking with BMW Car
Shampoo and then rinsing with plenty
of water
>Always use a deicer spray to remove
accumulated ice and snow Ð never
use a scraper.<
Xenon lamps
The main headlamps for your BMW
Z8 roadster have been designed using
xenon-light technology. The service life
of these bulbs is very long and the
probability of a failure is very low,
provided that they are not switched on
and off an unusual number of times.
Should a lamp ever fail, however,
please contact your BMW center for
assistance.
The xenon-light unit operates at
extremely high voltages; contact
with the unit's electrical components
can be fatal. We therefore urge you to
refer all service and repairs, including
bulb changes, to qualified professional
technicians.<
Neon lampsThe front turn signal indicators (side
marker lamps), the rear turn signal indi-
cators, the rear and brake lamps, as
well as the high-mounted brake lamp
are of neon-light technology. The
service life for these lamps is very high
and the likelihood of failure very
minimal.
Should a lamp ever fail, however,
please contact your BMW center for
assistance.
Page 132 of 174
132n
Lamps and bulbsSide turn signal indicators10 watt bulb
Please contact a BMW center in the
event of a malfunction.Parking lamps5 watt bulb
Please contact a BMW center in the
event of a malfunction.
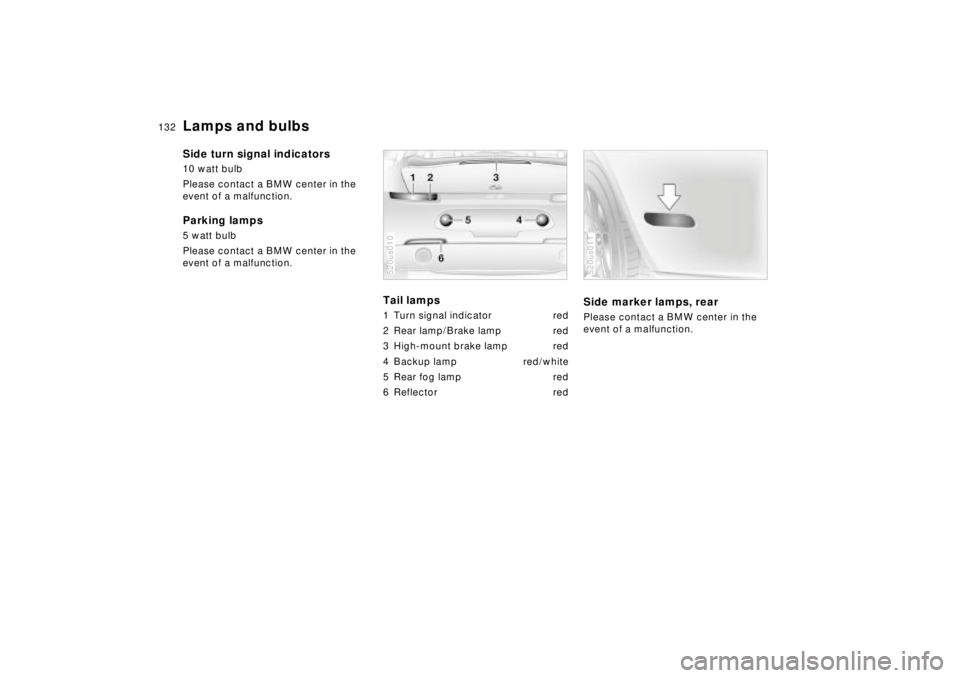
Tail lamps 1 Turn signal indicator red
2 Rear lamp/Brake lamp red
3 High-mount brake lamp red
4 Backup lamp red/white
5 Rear fog lamp red
6 Reflector red520us010
Side marker lamps, rearPlease contact a BMW center in the
event of a malfunction.520us011
Page 133 of 174
133n
IndexDataTechnologyRepairsCar careControlsOverview
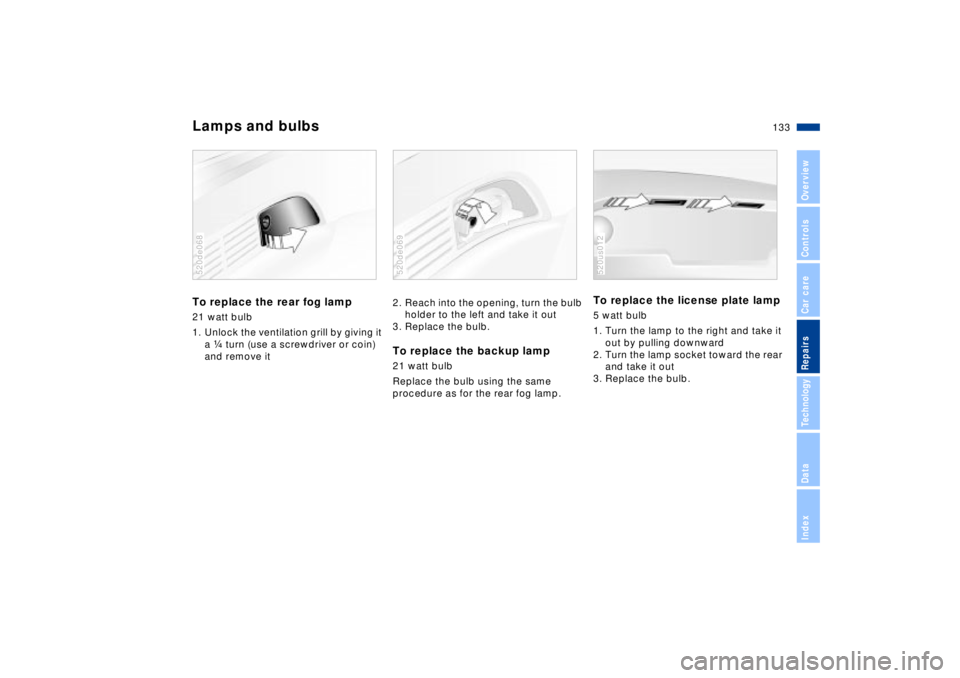
Lamps and bulbsTo replace the rear fog lamp 21 watt bulb
1. Unlock the ventilation grill by giving it
a f turn (use a screwdriver or coin)
and remove it520de068
2. Reach into the opening, turn the bulb
holder to the left and take it out
3. Replace the bulb.To replace the backup lamp21 watt bulb
Replace the bulb using the same
procedure as for the rear fog lamp. 520de069
To replace the license plate lamp5 watt bulb
1. Turn the lamp to the right and take it
out by pulling downward
2. Turn the lamp socket toward the rear
and take it out
3. Replace the bulb.520us012
Page 134 of 174
134n
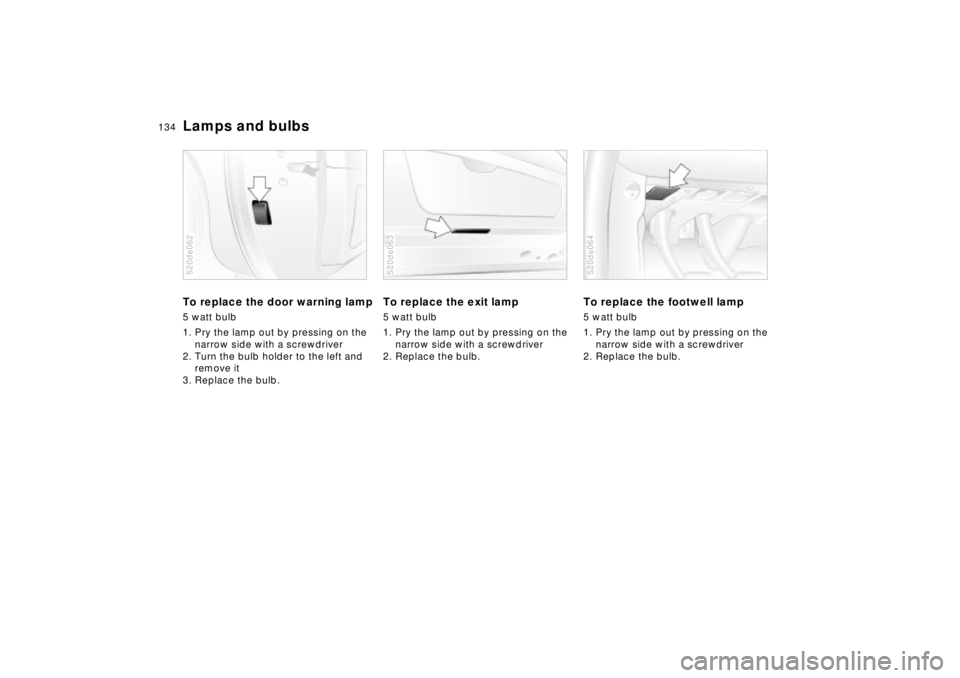
Lamps and bulbsTo replace the door warning lamp5 watt bulb
1. Pry the lamp out by pressing on the
narrow side with a screwdriver
2. Turn the bulb holder to the left and
remove it
3. Replace the bulb.520de062
To replace the exit lamp5 watt bulb
1. Pry the lamp out by pressing on the
narrow side with a screwdriver
2. Replace the bulb.520de063
To replace the footwell lamp5 watt bulb
1. Pry the lamp out by pressing on the
narrow side with a screwdriver
2. Replace the bulb.520de064
Page 135 of 174
135n
IndexDataTechnologyRepairsCar careControlsOverview
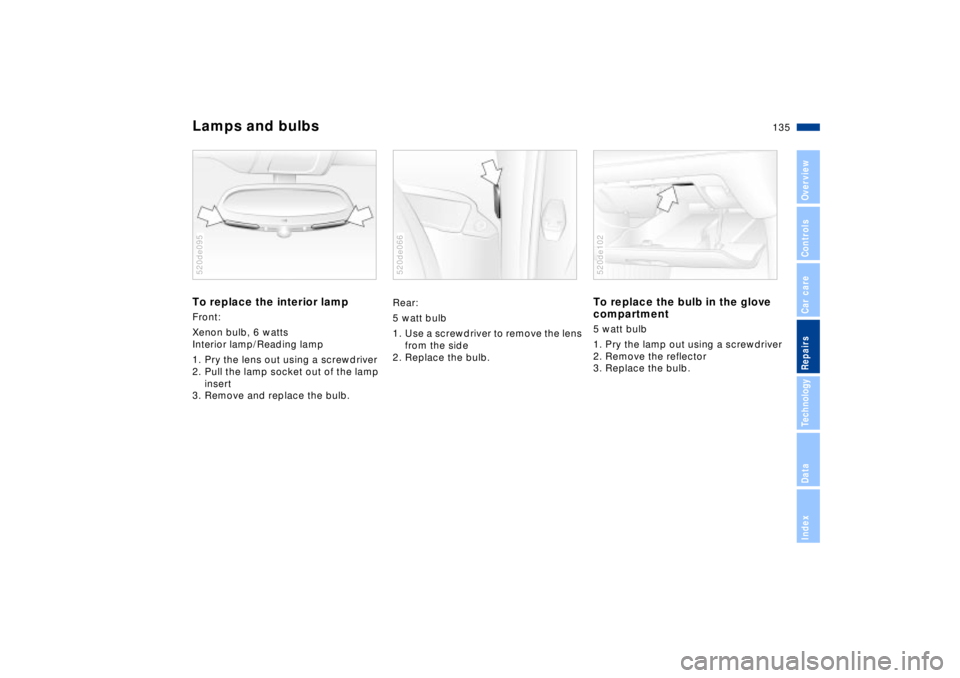
Lamps and bulbsTo replace the interior lampFront:
Xenon bulb, 6 watts
Interior lamp/Reading lamp
1. Pry the lens out using a screwdriver
2. Pull the lamp socket out of the lamp
insert
3. Remove and replace the bulb.520de095
Rear:
5 watt bulb
1. Use a screwdriver to remove the lens
from the side
2. Replace the bulb.520de066
To replace the bulb in the glove
compartment 5 watt bulb
1. Pry the lamp out using a screwdriver
2. Remove the reflector
3. Replace the bulb.520de102
Page 136 of 174
136n
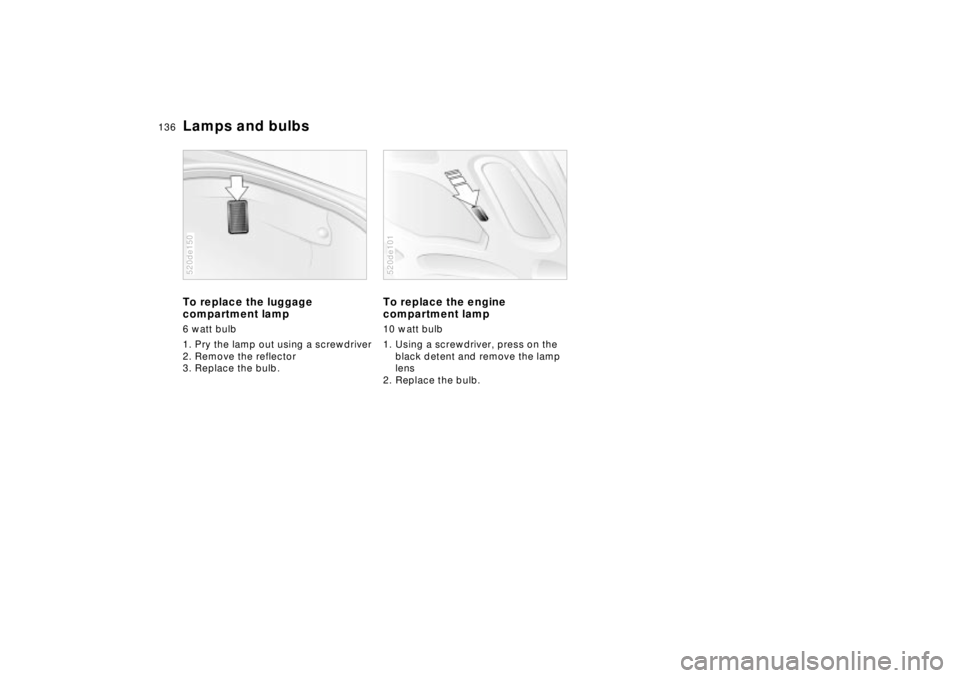
Lamps and bulbsTo replace the luggage
compartment lamp6 watt bulb
1. Pry the lamp out using a screwdriver
2. Remove the reflector
3. Replace the bulb.520de150
To replace the engine
compartment lamp10 watt bulb
1. Using a screwdriver, press on the
black detent and remove the lamp
lens
2. Replace the bulb.520de101
Page 137 of 174
137n
IndexDataTechnologyRepairsCar careControlsOverview
Changing a wheel Safety tiresYour BMW Z8 roadster is equipped
with safety tires.
The safety tires are made of self-
supporting tires mounted on specially-
designed wheel rims. Special reinforce-
ment elements support the sidewalls in
the event of pressure loss. Although tire
performance is then restricted, the
vehicle can still be driven on the
deflated tire for a limited distance. Your
vehicle is equipped with a tire pressure
monitor that signals you in case of a flat
tire.
In the event of a flat tireThe red indicator lamp on the instru-
ment panel will flash in the event of a
flat tire. In addition, a gong will sound.
Refer to page 67.
Carefully reduce speed to less than
50 mph (80 km/h), avoiding any hard
braking or steering maneuvers while
doing so.
You will still be able to drive approx.
155 miles (250 km) on your safety tire,
until you can get to a safe place to park,
a gas station, or to your nearest BMW
center. Under minimum vehicle loading,
it could conceivably last more than
155 miles (250 km).
If you cannot immediately determine
which tire is defective just by looking
at it, then check the tire pressure in all
four tires.Have your BMW center replace
your tires. For safety reasons, do
not have safety tires repaired. Your
BMW center has been trained to work
with the safety tires and is equipped
with the necessary special tools.<
If necessary, please have your
BMW center switch the tires on
your vehicle from summer to winter
tires, or the reverse.<
Page 138 of 174
138n
Battery
Battery posts, terminals, and
related accessories contain lead
and lead compounds. Wash hands after
handling.<
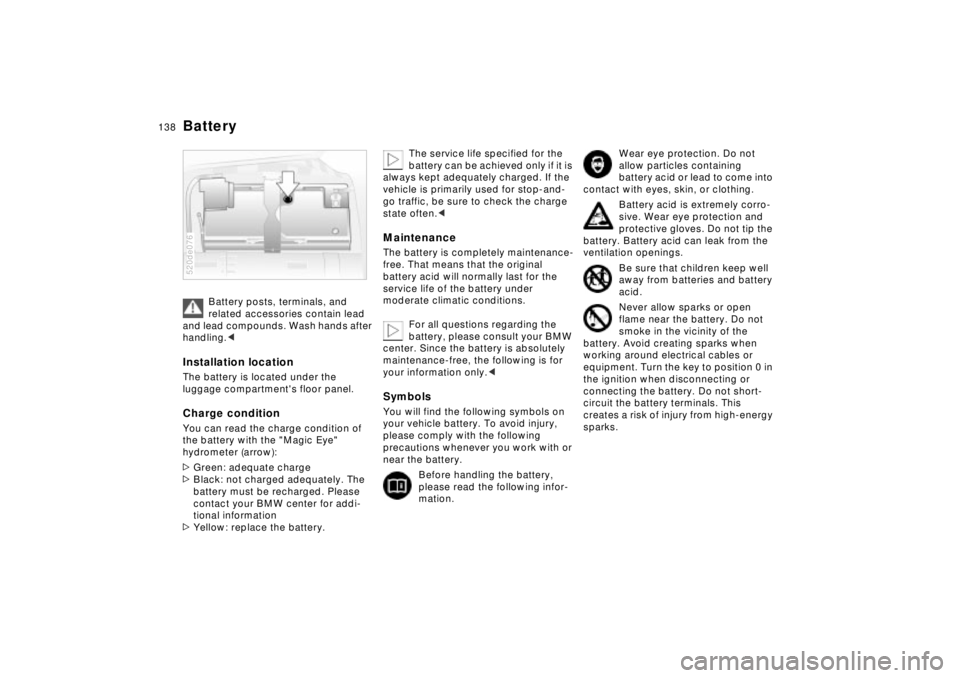
Installation location The battery is located under the
luggage compartment's floor panel. Charge conditionYou can read the charge condition of
the battery with the "Magic Eye"
hydrometer (arrow):
>Green: adequate charge
>Black: not charged adequately. The
battery must be recharged. Please
contact your BMW center for addi-
tional information
>Yellow: replace the battery.520de076
The service life specified for the
battery can be achieved only if it is
always kept adequately charged. If the
vehicle is primarily used for stop-and-
go traffic, be sure to check the charge
state often.<
MaintenanceThe battery is completely maintenance-
free. That means that the original
battery acid will normally last for the
service life of the battery under
moderate climatic conditions.
For all questions regarding the
battery, please consult your BMW
center. Since the battery is absolutely
maintenance-free, the following is for
your information only.
please comply with the following
precautions whenever you work with or
near the battery.
Before handling the battery,
please read the following infor-
mation.
Wear eye protection. Do not
allow particles containing
battery acid or lead to come into
contact with eyes, skin, or clothing.
Battery acid is extremely corro-
sive. Wear eye protection and
protective gloves. Do not tip the
battery. Battery acid can leak from the
ventilation openings.
Be sure that children keep well
away from batteries and battery
acid.
Never allow sparks or open
flame near the battery. Do not
smoke in the vicinity of the
battery. Avoid creating sparks when
working around electrical cables or
equipment. Turn the key to position 0 in
the ignition when disconnecting or
connecting the battery. Do not short-
circuit the battery terminals. This
creates a risk of injury from high-energy
sparks.
Page 139 of 174
139n
IndexDataTechnologyRepairsCar careControlsOverview
Battery
A highly explosive gas is
generated when the battery is
charged.
If you happen to get acid in your
eyes, rinse thoroughly for
15 minutes with clear water.
Consult a physician immediately. If you
get acid spray on your skin or clothing,
rinse with plenty of water. If acid is
accidentally ingested, consult a physi-
cian immediately.
In order to protect the battery
case from ultraviolet radiation,
do not place it in direct sunlight.
A discharged battery can freeze. Store
the battery in areas where temperature
remains above freezing.
Removing and installing
Do not disconnect the battery
cable when the engine is running.
Disconnecting the battery cable when
the engine is running will cause a
voltage surge which will damage the
vehicle's onboard electronics.
Do not make any modifications in the
wires to the positive terminal. If you do
so, the protective function of the safety
battery terminal is no longer ensured.
Repairs and disposal may only be
performed by specially trained
personnel.<
When removing, first disconnect the
cable to the negative terminal, then
disconnect the cable to the positive
terminal. Loosen the center adjusting
screw for the battery's retaining strap
(use the screwdriver found in the
onboard tool kit) and remove the
bracket.
When installing, first connect the cable
for the positive terminal, then the cable
for the negative terminal.
When installing, make sure that
the battery is seated properly, and
that the battery bracket is installed with
the center adjusting screw. Failure to
observe these precautions could result
in an inadequately secured battery,
which could then shift in an accident.<
Charging the battery Charge the battery in the vehicle only
when the engine is not running. Use the
connections provided in the engine
compartment (for correct connections,
refer to "Jump-starting" on page 145).
Before performing any work on
the electrical system, disconnect
the cable from the negative terminal. If
you do not, short circuits can create the
risk of fire or personal injury.<
If you plan to park the vehicle for longer
than 4 weeks, disconnect the battery
from the vehicle's electrical system by
disconnecting the cable at the negative
terminal. Then recharge the battery with
an appropriate battery charger.
If you intend to store the vehicle for
longer than 12 weeks, remove the
battery, charge it and store it in a cool
and dust-free room where there is no
danger of freezing. During storage,
have the battery recharged every six
months. Also, recharge the battery
before it is reinstalled. Failure to
observe these precautions can render
the battery unsuitable for continued
use. Every time the battery is
discharged, especially over extended
periods, its service life is reduced.
Page 140 of 174
140n
Battery Fuses
Return used batteries to a recy-
cling point or your BMW center.
Maintain the battery in an upright posi-
tion for transport and storage. Secure
the battery to prevent it from tilting
during transport.<
If an electrical accessory should fail,
switch it off and check the fuse.
The fuses, their individual ampere
ratings and the equipment in the
circuits they protect are all indicated on
the cover of the fuse box in the glove
compartment and on the inside of the
cover panel for the storage compart-
ment located behind the passenger's
seat.
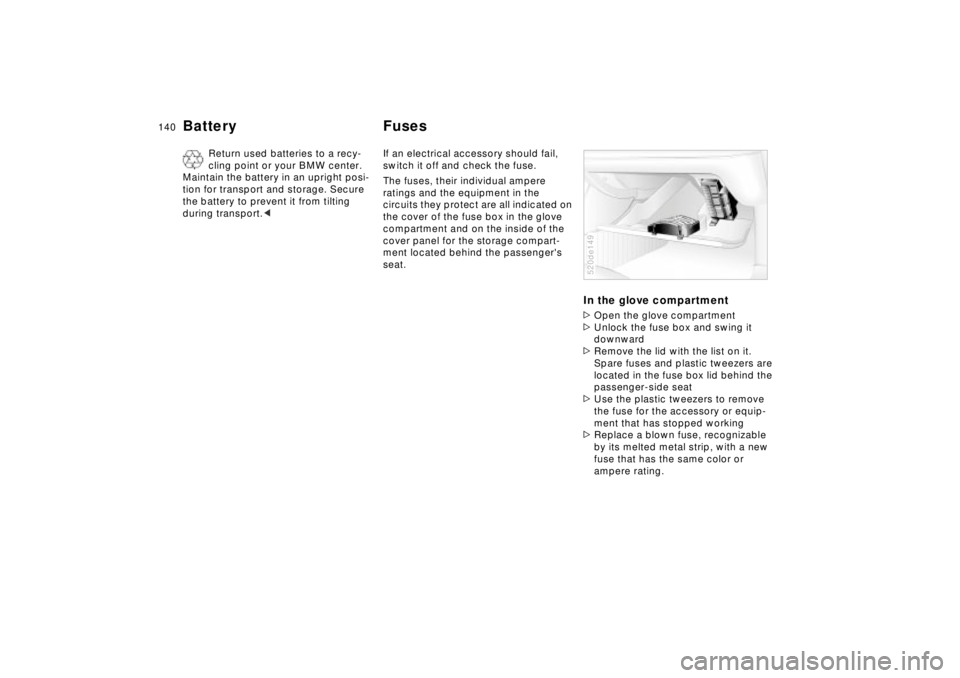
In the glove compartment>Open the glove compartment
>Unlock the fuse box and swing it
downward
>Remove the lid with the list on it.
Spare fuses and plastic tweezers are
located in the fuse box lid behind the
passenger-side seat
>Use the plastic tweezers to remove
the fuse for the accessory or equip-
ment that has stopped working
>Replace a blown fuse, recognizable
by its melted metal strip, with a new
fuse that has the same color or
ampere rating.520de149