key BUICK CASCADA 2017 Get To Know Guide
[x] Cancel search | Manufacturer: BUICK, Model Year: 2017, Model line: CASCADA, Model: BUICK CASCADA 2017Pages: 20, PDF Size: 3.25 MB
Page 4 of 20

4
Remote Keyless Entry Transmitter
Door Locks/Trunk Release
F Optional equipment
Remote Vehicle Start
Press and release the Lock button and then press and hold the button until the turn signal lamps flash to start the engine from outside the vehicle.
After entering the vehicle, turn on the ignition. During a remote start, the engine will run for 10 minutes
Repeat these steps for an addition-al 10 minutes. A remote start can be extended once.
Press and hold the button until the parking lamps turn off to
cancel a remote start.
Note: To change the remote lock, unlock, and remote start settings, go to Remote Lock, Unlock, Start in the Vehicle Settings menu.
See Keys, Doors and Windows in your Owner Manual.
Door Locks
To lock or unlock the doors, trunk and fuel door, press the power door Lock/ Unlock button located on the center of the instrument panel.
Note: To change the door lock and unlock settings, go to Power Door Locks in the Vehicle Settings menu.
To open a locked door from inside, pull the inside door handle to unlock the door; pull the door handle again to open the door.
Trunk Release
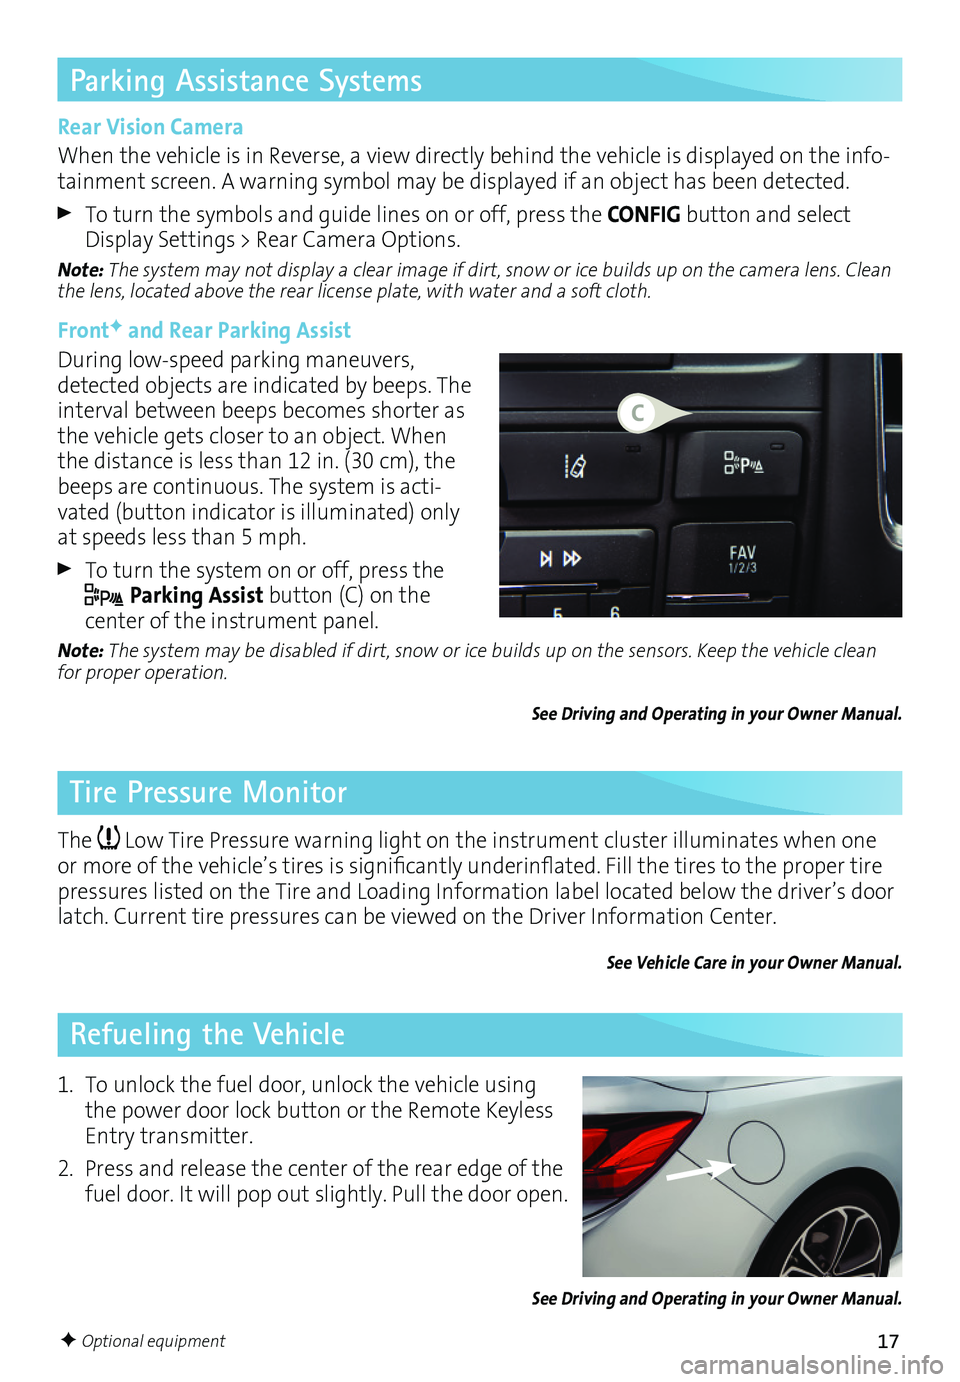
To open the trunk, press the lower half of the Buick emblem (A) on the trunk.
See Keys, Doors and Windows in your Owner Manual.
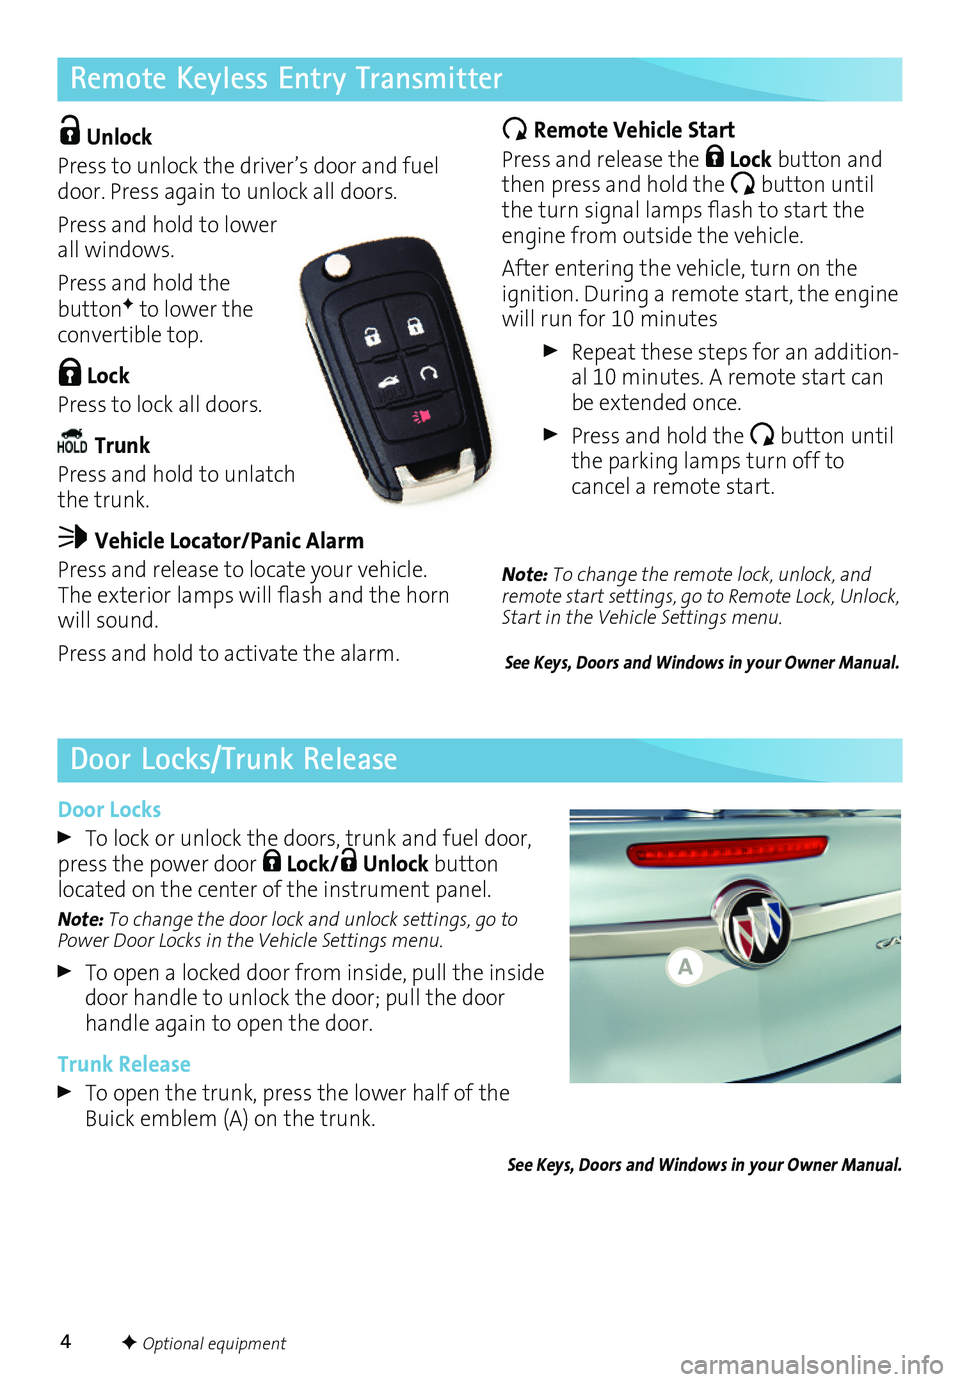
Unlock
Press to unlock the driver’s door and fuel door. Press again to unlock all doors.
Press and hold to lower all windows.
Press and hold the buttonF to lower the convertible top.
Lock
Press to lock all doors.
Trunk
Press and hold to unlatch the trunk.
Vehicle Locator/Panic Alarm
Press and release to locate your vehicle. The exterior lamps will flash and the horn will sound.
Press and hold to activate the alarm.
A
Page 17 of 20

17
Parking Assistance Systems
Tire Pressure Monitor
Refueling the Vehicle
Rear Vision Camera
When the vehicle is in Reverse, a view directly behind the vehicle is displayed on the info-tainment screen. A warning symbol may be displayed if an object has been detected.
To turn the symbols and guide lines on or off, press the CONFIG button and select Display Settings > Rear Camera Options.
Note: The system may not display a clear image if dirt, snow or ice builds up on the camera lens. Clean the lens, located above the rear license plate, with water and a soft cloth.
FrontF and Rear Parking Assist
During low-speed parking maneuvers, detected objects are indicated by beeps. The interval between beeps becomes shorter as the vehicle gets closer to an object. When the distance is less than 12 in. (30 cm), the beeps are continuous. The system is acti-vated (button indicator is illuminated) only at speeds less than 5 mph.
To turn the system on or off, press the
Parking Assist button (C) on the
center of the instrument panel.
Note: The system may be disabled if dirt, snow or ice builds up on the sensors. Keep the vehicle clean for proper operation.
See Driving and Operating in your Owner Manual.
The Low Tire Pressure warning light on the instrument cluster illuminates when one or more of the vehicle’s tires is significantly underinflated. Fill the tires to the proper tire pressures listed on the Tire and Loading Information label located below the driver’s door latch. Current tire pressures can be viewed on the Driver Information Center.
See Vehicle Care in your Owner Manual.
1. To unlock the fuel door, unlock the vehicle using the power door lock button or the Remote Keyless Entry transmitter.
2. Press and release the center of the rear edge of the fuel door. It will pop out slightly. Pull the door open.
See Driving and Operating in your Owner Manual.
F Optional equipment
C
Page 18 of 20

18
Convertible Top Operation
Before operating the convertible top, the cargo partition must be in the lowered position and the trunk must be closed.
Pull the strap (A) to lower the cargo
partition. Push up the cargo partition for additional cargo space in the trunk when the convertible top is raised.
The top can be operated at vehicle speeds up to 31 mph.
Operating the Power Top
1. Start the engine or place the ignition in Accessory mode.
2. Pull or press and hold the Open/Close switch (B) on the center console until the top is fully opened or closed. The windows will lower automatically. A chime will sound when top operation is completed.
3. Pull the convertible top power window switch (C) on the center console to close all windows.
See Keys, Doors and Windows in your Owner Manual.
A
Loss of Vehicle Power If the electrical functions of the vehicle have been lost, the convertible top can be closed manually. Refer to your Owner Manual for manual closing instructions.
After a loss of battery power, reset the window indexing to operate the power top. Refer to your Owner Manual for the indexing procedure.
Note: The top may not operate in cold temperatures. A message will be displayed on the Driver Information Center if the top will not operate due to low temperatures.
C
B
Page 19 of 20

19
Convertible Top Wind DeflectorsF
The wind deflectors are located in a bag behind the rear seatbacks. The small wind deflector fits between the rear head restraints. The large wind deflector installs behind the front seats.
Small Wind Deflector Installation
1. Lower the rear seatbacks.
2. Slide the cover between the rear head restraints toward the driver’s side of the vehicle to remove it.
3. Insert the small wind deflector (A) into the channel and slide it toward the pas-senger’s side of the vehicle until it locks.
4. Raise the rear seatbacks.
Large Wind Deflector InstallationNote: The rear seat cannot be occupied with the large wind deflector installed.
1. On each corner of the wind deflector, turn out the upper locking pins (B) and lift the detents to release the lower locking pins (C).
2. Open the wind deflector.
3. Insert the pins into the side recesses (D) on the passenger’s side of the vehicle.
4. Slightly fold the deflector and insert the pins into the side recesses on the driver’s side of the vehicle.
5. Push down the center of the deflector to fully engage the pins.
6. Fold the deflector to the vertical position.
Stowing the Wind Deflectors
Stow the wind deflectors in the stowage bag when not in use. Place the bag behind the rear seatbacks and secure the bag with the straps.
See Keys, Doors and Windows in your Owner Manual.
C
B
C
A
D
D
F Optional equipment
B