stop start BUICK CASCADA 2017 User Guide
[x] Cancel search | Manufacturer: BUICK, Model Year: 2017, Model line: CASCADA, Model: BUICK CASCADA 2017Pages: 381, PDF Size: 6.58 MB
Page 106 of 381
Buick Cascada Owner Manual (GMNA-Localizing-U.S.-9967834) - 2017 - crc -
7/18/16
Instruments and Controls 105
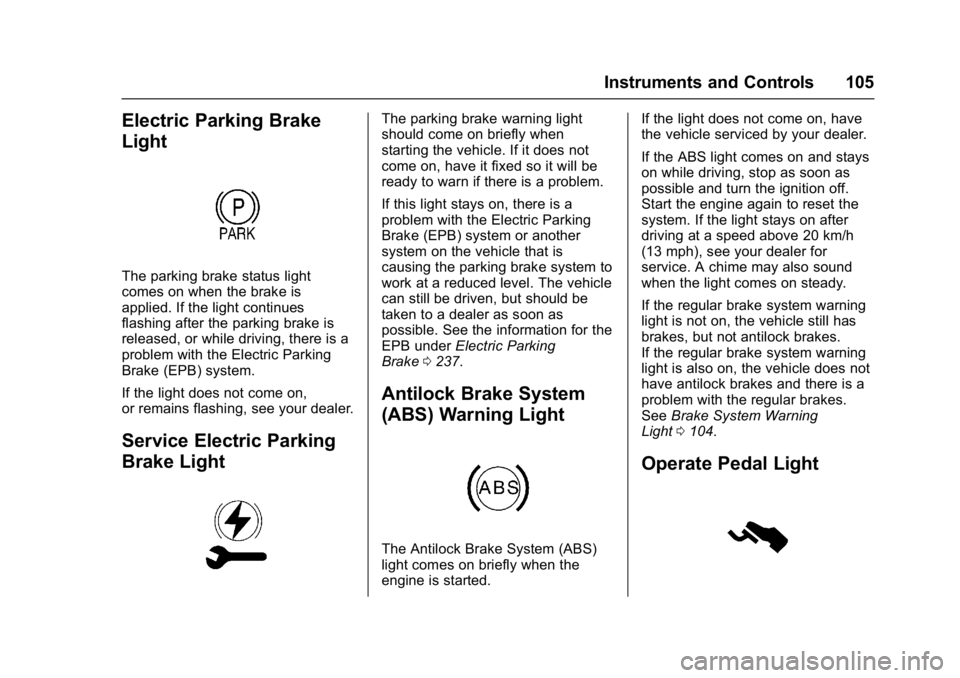
Electric Parking Brake
Light
The parking brake status light
comes on when the brake is
applied. If the light continues
flashing after the parking brake is
released, or while driving, there is a
problem with the Electric Parking
Brake (EPB) system.
If the light does not come on,
or remains flashing, see your dealer.
Service Electric Parking
Brake Light
The parking brake warning light
should come on briefly when
starting the vehicle. If it does not
come on, have it fixed so it will be
ready to warn if there is a problem.
If this light stays on, there is a
problem with the Electric Parking
Brake (EPB) system or another
system on the vehicle that is
causing the parking brake system to
work at a reduced level. The vehicle
can still be driven, but should be
taken to a dealer as soon as
possible. See the information for the
EPB underElectric Parking
Brake 0237.
Antilock Brake System
(ABS) Warning Light
The Antilock Brake System (ABS)
light comes on briefly when the
engine is started. If the light does not come on, have
the vehicle serviced by your dealer.
If the ABS light comes on and stays
on while driving, stop as soon as
possible and turn the ignition off.
Start the engine again to reset the
system. If the light stays on after
driving at a speed above 20 km/h
(13 mph), see your dealer for
service. A chime may also sound
when the light comes on steady.
If the regular brake system warning
light is not on, the vehicle still has
brakes, but not antilock brakes.
If the regular brake system warning
light is also on, the vehicle does not
have antilock brakes and there is a
problem with the regular brakes.
See
Brake System Warning
Light 0104.
Operate Pedal Light
Page 108 of 381
Buick Cascada Owner Manual (GMNA-Localizing-U.S.-9967834) - 2017 - crc -
7/18/16
Instruments and Controls 107
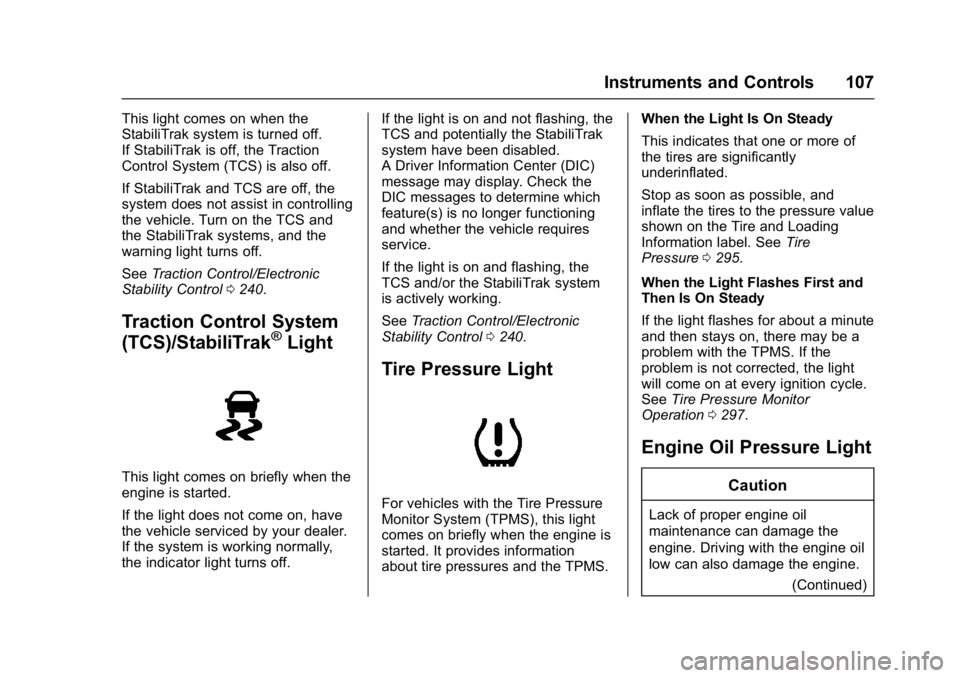
This light comes on when the
StabiliTrak system is turned off.
If StabiliTrak is off, the Traction
Control System (TCS) is also off.
If StabiliTrak and TCS are off, the
system does not assist in controlling
the vehicle. Turn on the TCS and
the StabiliTrak systems, and the
warning light turns off.
SeeTraction Control/Electronic
Stability Control 0240.
Traction Control System
(TCS)/StabiliTrak®Light
This light comes on briefly when the
engine is started.
If the light does not come on, have
the vehicle serviced by your dealer.
If the system is working normally,
the indicator light turns off. If the light is on and not flashing, the
TCS and potentially the StabiliTrak
system have been disabled.
A Driver Information Center (DIC)
message may display. Check the
DIC messages to determine which
feature(s) is no longer functioning
and whether the vehicle requires
service.
If the light is on and flashing, the
TCS and/or the StabiliTrak system
is actively working.
See
Traction Control/Electronic
Stability Control 0240.
Tire Pressure Light
For vehicles with the Tire Pressure
Monitor System (TPMS), this light
comes on briefly when the engine is
started. It provides information
about tire pressures and the TPMS. When the Light Is On Steady
This indicates that one or more of
the tires are significantly
underinflated.
Stop as soon as possible, and
inflate the tires to the pressure value
shown on the Tire and Loading
Information label. See
Tire
Pressure 0295.
When the Light Flashes First and
Then Is On Steady
If the light flashes for about a minute
and then stays on, there may be a
problem with the TPMS. If the
problem is not corrected, the light
will come on at every ignition cycle.
See Tire Pressure Monitor
Operation 0297.
Engine Oil Pressure Light
Caution
Lack of proper engine oil
maintenance can damage the
engine. Driving with the engine oil
low can also damage the engine.
(Continued)
Page 112 of 381

Buick Cascada Owner Manual (GMNA-Localizing-U.S.-9967834) - 2017 - crc -
7/18/16
Instruments and Controls 111
the last reset for the trip odometer.
The trip odometer can be reset to
zero by pressing SET/CLR, or the
trip odometer reset stem in the
instrument cluster, while the trip
odometer display is showing.
Fuel Range
This display shows the approximate
distance the vehicle can be driven
without refueling. The fuel range
estimate is based on an average of
the vehicle's fuel economy over
recent driving history and the
amount of fuel remaining in the fuel
tank. Fuel range cannot be reset.
Average Fuel Economy
This display shows the approximate
average liters per 100 kilometers
(L/100 km) or miles per gallon
(mpg). Average fuel economy is
calculated based on the number of
L/100 km (mpg) recorded since the
last time this menu item was reset.
This number reflects only the
approximate average fuel economy
that the vehicle has right now, and
will change as driving conditions
change. The average fuel economycan be reset by pressing SET/CLR
while the Average Fuel Economy
display is showing.
Instantaneous Fuel Economy
The instantaneous fuel economy
display shows the current fuel
economy in liters per 100 kilometers
(L/100 km) or miles per gallon
(mpg). The instantaneous fuel
economy reflects only the current
approximate fuel economy, and
changes frequently as driving
conditions change. Unlike average
economy, this display cannot be
reset.
Average Vehicle Speed
This display shows the average
speed of the vehicle in kilometers
per hour (km/h) or miles per
hour (mph). This average is
calculated based on the various
vehicle speeds recorded since the
last reset of this value. The average
speed can be reset by pressing
SET/CLR while the Average Vehicle
Speed display is showing.
Timer
This display can be used as a timer.
To start the timer, press SET/CLR
while Timer is displayed. The
display will show the amount of time
that has passed since the timer was
last reset, not including time the
ignition is off. Time will continue to
be counted as long as the ignition is
on, even if another display is being
shown on the DIC. The timer will
record up to 99 hours, 59 minutes,
and 59 seconds (99:59:59) after
which the display will return to zero.
To stop the timer, press SET/CLR
briefly while Timer is displayed. To
reset the timer to zero, press and
hold SET/CLR.
Navigation
This display is used for the
Navigation System Turn-by-Turn
guidance. If equipped with
navigation, see
Using the
Navigation System 0168.
Page 163 of 381
Buick Cascada Owner Manual (GMNA-Localizing-U.S.-9967834) - 2017 - crc -
7/18/16
162 Infotainment System
.Pressb/gon the steering
wheel controls to play CD, Artist,
Album, Song Title, or Song
Genre. See Voice
Recognition 0192.
The following playlist formats are
supported:
. M3U (Standard and Extended)
. iTunes
. PLS (Standard)
. WAX
. ASX
. RMP
The radio supports plugging a cell
phone in as a USB device as long
as the cell phone supports USB
mass storage class or has USB disc
drive support enabled.
While the USB source is active, use
the following to operate USB
function:
ZKnob : Turn to scroll through
the list. Turn quickly to fast scroll
alphabetically through large lists.
J: Touch to start, pause,
or resume play of the current media
source.
s ©:
. Touch to seek to the beginning
of the current or previous track.
If the track has been playing for
less than five seconds, the
previous track plays. If playing
longer than five seconds, the
current track restarts.
. Touch and hold to reverse
quickly through playback.
Release to return to playing
speed. Elapsed time displays.
¨\:
. Touch to seek to the next track.
. Touch and hold to advance
quickly through playback.
Release to return to playing
speed. Elapsed time displays.
USB Menu
The following are available through
the USB Menu: Shuffle :
Touch to play the tracks
randomly. Touch again to stop
shuffle.
Play More Like This : Touch to
automatically create a playlist of
songs that are like the song
currently playing.
The radio will show Playlist Creation
Succeeded and continue playing the
current song.
Playlist Creation Failed may appear
if a song is not found in the
Gracenote Database.
Delete Automatic Playlist : Touch
to delete a More Like This playlist.
Folders : Touch to open a folder list
to access the files within the folder
structure.
Playlists:
1. Touch to view the playlists on the USB.
2. Select a playlist to view the list of all songs in that playlist.
3. Select a song from the list to begin playback.
Page 190 of 381
Buick Cascada Owner Manual (GMNA-Localizing-U.S.-9967834) - 2017 - crc -
7/18/16
Infotainment System 189
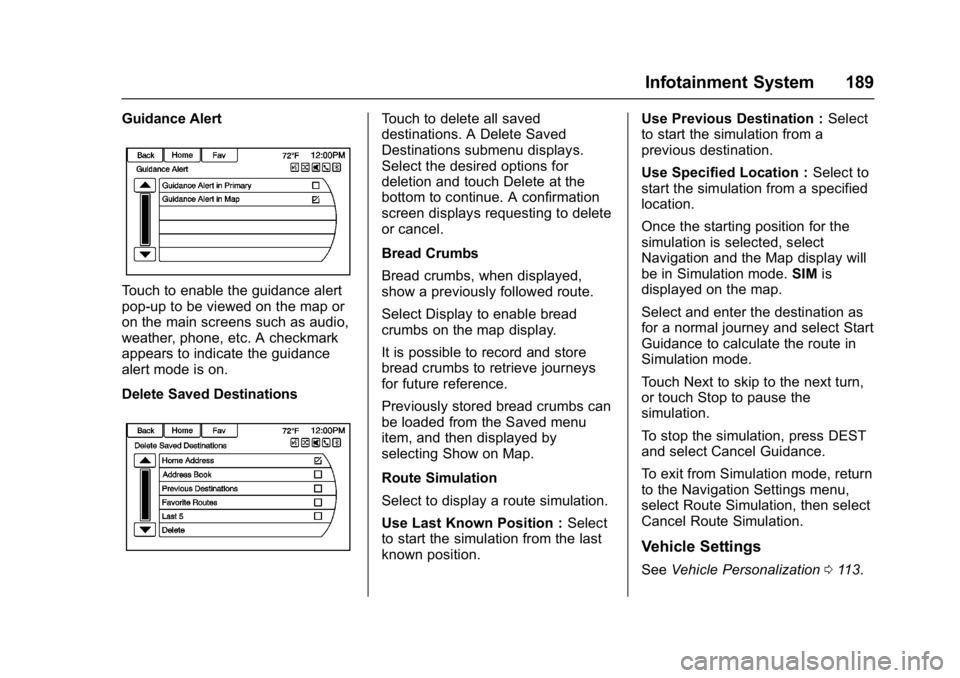
Guidance Alert
Touch to enable the guidance alert
pop-up to be viewed on the map or
on the main screens such as audio,
weather, phone, etc. A checkmark
appears to indicate the guidance
alert mode is on.
Delete Saved Destinations
Touch to delete all saved
destinations. A Delete Saved
Destinations submenu displays.
Select the desired options for
deletion and touch Delete at the
bottom to continue. A confirmation
screen displays requesting to delete
or cancel.
Bread Crumbs
Bread crumbs, when displayed,
show a previously followed route.
Select Display to enable bread
crumbs on the map display.
It is possible to record and store
bread crumbs to retrieve journeys
for future reference.
Previously stored bread crumbs can
be loaded from the Saved menu
item, and then displayed by
selecting Show on Map.
Route Simulation
Select to display a route simulation.
Use Last Known Position :Select
to start the simulation from the last
known position. Use Previous Destination :
Select
to start the simulation from a
previous destination.
Use Specified Location : Select to
start the simulation from a specified
location.
Once the starting position for the
simulation is selected, select
Navigation and the Map display will
be in Simulation mode. SIMis
displayed on the map.
Select and enter the destination as
for a normal journey and select Start
Guidance to calculate the route in
Simulation mode.
Touch Next to skip to the next turn,
or touch Stop to pause the
simulation.
To stop the simulation, press DEST
and select Cancel Guidance.
To exit from Simulation mode, return
to the Navigation Settings menu,
select Route Simulation, then select
Cancel Route Simulation.
Vehicle Settings
See Vehicle Personalization 0113.
Page 192 of 381
Buick Cascada Owner Manual (GMNA-Localizing-U.S.-9967834) - 2017 - crc -
7/18/16
Infotainment System 191
.The vehicle is driving on slippery
road surfaces such as sand,
gravel, or snow.
. The vehicle is traveling on
winding roads or long straight
roads.
. The vehicle is approaching a tall
building or a large vehicle.
. The surface streets run parallel
to a freeway.
. The vehicle has been transferred
by a vehicle carrier or a ferry.
. The current position calibration
is set incorrectly.
. The vehicle is traveling at high
speed.
. The vehicle changes directions
more than once, or the vehicle is
turning on a turn table in a
parking lot.
. The vehicle is entering and/or
exiting a parking lot, garage, or a
lot with a roof.
. The GPS signal is not received.
. A roof carrier is installed on the
vehicle. .
Tire chains have been installed.
. The tires are replaced or worn.
. The tire pressure for the tires is
incorrect.
. This is the first navigation use
after the map data is updated.
. The 12-volt battery was
disconnected for several days.
. The vehicle is driving in heavy
traffic where driving is at low
speeds, and the vehicle is
stopped and started repeatedly.
Problems with Route
Guidance
Inappropriate route guidance can
occur under one or more of the
following conditions:
.
The turn was not made on the
road indicated.
. Route guidance might not be
available when using automatic
rerouting for the next right or
left turn.
. The route might not be changed
when using automatic rerouting. .
There is no route guidance when
turning at an intersection.
. Plural names of places might be
announced occasionally.
. It could take a long time to
operate automatic rerouting
during high-speed driving.
. Automatic rerouting might
display a route returning to the
set waypoint if heading for a
destination without passing
through a set waypoint.
. The route prohibits the entry of a
vehicle due to a regulation by
time or season or any other
regulation which may be given.
. Some routes might not be
searched.
. The route to the destination
might not be shown if there are
new roads, if roads have
recently changed, or if certain
roads are not listed in the map
data. See Maps0172.
To recalibrate the vehicle's position
on the map, park with the vehicle
running for two to five minutes, until
the vehicle position updates. Make
Page 224 of 381

Buick Cascada Owner Manual (GMNA-Localizing-U.S.-9967834) - 2017 - crc -
7/18/16
Driving and Operating 223
clear roads in shaded areas.
The surface of a curve or an
overpass can remain icy when
the surrounding roads are clear.
Avoid sudden steering
maneuvers and braking while
on ice.
. Turn off cruise control.
Blizzard Conditions
Stop the vehicle in a safe place and
signal for help. Stay with the vehicle
unless there is help nearby.
If possible, use Roadside
Assistance. See Roadside
Assistance Program 0351. To get
help and keep everyone in the
vehicle safe:
. Turn on the hazard warning
flashers.
. Tie a red cloth to an outside
mirror.
{Warning
Snow can trap engine exhaust
under the vehicle. This may
cause exhaust gases to get
inside. Engine exhaust contains
carbon monoxide (CO), which
cannot be seen or smelled. It can
cause unconsciousness and even
death.
If the vehicle is stuck in snow:
. Clear snow from the base of
the vehicle, especially any
blocking the exhaust pipe.
. Open a window about 5 cm
(2 in) on the vehicle side
that is away from the wind,
to bring in fresh air.
. Fully open the air outlets on
or under the instrument
panel.
. Adjust the climate control
system to circulate the air
inside the vehicle and set
(Continued)
Warning (Continued)
the fan speed to the highest
setting. See“Climate
Control Systems.”
For more information about CO,
see Engine Exhaust 0233.
To save fuel, run the engine for
short periods to warm the vehicle
and then shut the engine off and
partially close the window. Moving
about to keep warm also helps.
If it takes time for help to arrive,
when running the engine, push the
accelerator pedal slightly so the
engine runs faster than the idle
speed. This keeps the battery
charged to restart the vehicle and to
signal for help with the headlamps.
Do this as little as possible, to
save fuel.
If the Vehicle Is Stuck
Slowly and cautiously spin the
wheels to free the vehicle when
stuck in sand, mud, ice, or snow.
Page 228 of 381
Buick Cascada Owner Manual (GMNA-Localizing-U.S.-9967834) - 2017 - crc -
7/18/16
Driving and Operating 227
weight of the driver, passengers,
and cargo should never exceed
the vehicle's capacity weight.
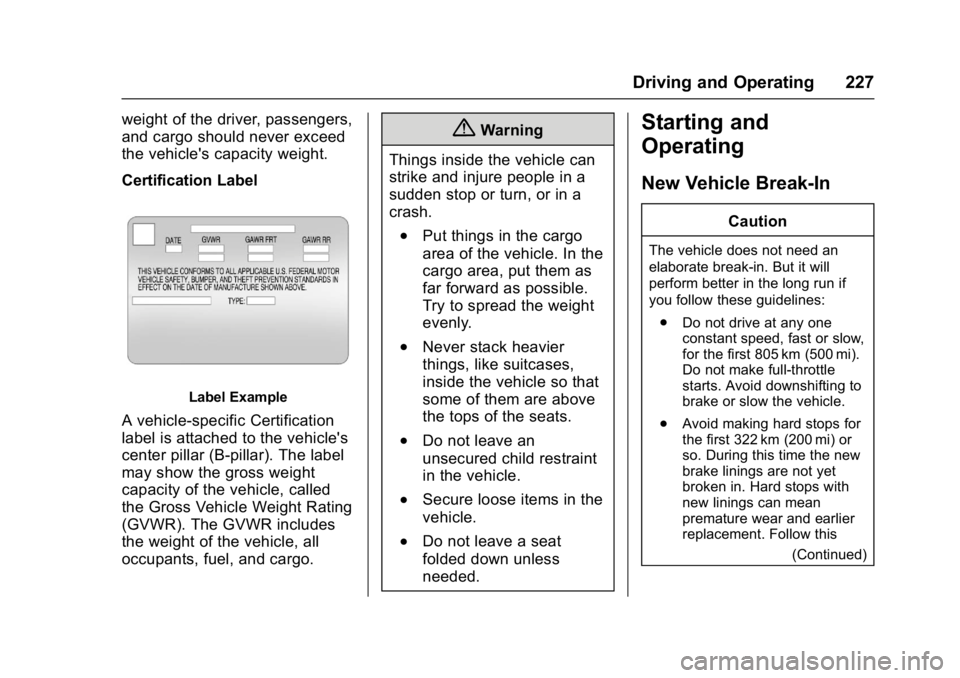
Certification Label
Label Example
A vehicle-specific Certification
label is attached to the vehicle's
center pillar (B-pillar). The label
may show the gross weight
capacity of the vehicle, called
the Gross Vehicle Weight Rating
(GVWR). The GVWR includes
the weight of the vehicle, all
occupants, fuel, and cargo.
{Warning
Things inside the vehicle can
strike and injure people in a
sudden stop or turn, or in a
crash.
.Put things in the cargo
area of the vehicle. In the
cargo area, put them as
far forward as possible.
Try to spread the weight
evenly.
.Never stack heavier
things, like suitcases,
inside the vehicle so that
some of them are above
the tops of the seats.
.Do not leave an
unsecured child restraint
in the vehicle.
.Secure loose items in the
vehicle.
.Do not leave a seat
folded down unless
needed.
Starting and
Operating
New Vehicle Break-In
Caution
The vehicle does not need an
elaborate break-in. But it will
perform better in the long run if
you follow these guidelines: . Do not drive at any one
constant speed, fast or slow,
for the first 805 km (500 mi).
Do not make full-throttle
starts. Avoid downshifting to
brake or slow the vehicle.
. Avoid making hard stops for
the first 322 km (200 mi) or
so. During this time the new
brake linings are not yet
broken in. Hard stops with
new linings can mean
premature wear and earlier
replacement. Follow this
(Continued)
Page 229 of 381

Buick Cascada Owner Manual (GMNA-Localizing-U.S.-9967834) - 2017 - crc -
7/18/16
228 Driving and Operating
Caution (Continued)
breaking-in guideline every
time you get new brake
linings.
Following break-in, engine speed
and load can be gradually
increased.
Ignition Positions
The ignition switch has four different
positions.
Caution
Using a tool to force the key to
turn in the ignition could cause
damage to the switch or break the
key. Use the correct key, make
sure it is all the way in, and turn it
only with your hand. If the key
cannot be turned by hand, see
your dealer.
The key must be fully extended to
start the vehicle.
To shift out of P (Park), turn the
ignition to ON/RUN and apply the
brake pedal.
0 Stopping the Engine : When the
vehicle is stopped, turn the ignition
switch to LOCK/OFF to turn the
engine off. Retained Accessory
Power (RAP) will remain active. See
Retained Accessory Power
(RAP) 0231.
This is the only position from which
the key can be removed. This locks
the ignition and automatic
transmission. Do not turn the engine off when the
vehicle is moving. This will cause a
loss of power assist in the brake
and steering systems and disable
the airbags.
If the vehicle must be shut off in an
emergency:
1. Brake using a firm and steady pressure. Do not pump the
brakes repeatedly. This may
deplete power assist, requiring
increased brake pedal force.
2. Shift the vehicle to N (Neutral). This can be done while the
vehicle is moving. After shifting
to N (Neutral), continue to
firmly apply the brakes and
steer the vehicle to a safe
location.
3. Come to a complete stop. Shift to P (Park). Turn the ignition to
LOCK/OFF.
4. Set the parking brake. See Electric Parking Brake 0237.
Page 231 of 381
Buick Cascada Owner Manual (GMNA-Localizing-U.S.-9967834) - 2017 - crc -
7/18/16
230 Driving and Operating
Starting the Engine
Move the shift lever to P (Park) or
N (Neutral). To restart the vehicle
when it is already moving, use
N (Neutral) only.
Caution
Do not try to shift to P (Park) if the
vehicle is moving. If you do, you
could damage the transmission.
Shift to P (Park) only when the
vehicle is stopped.
Caution
If you add electrical parts or
accessories, you could change
the way the engine operates. Any
resulting damage would not be
covered by the vehicle warranty.
SeeAdd-On Electrical
Equipment 0253.
Caution
If the steering wheel is turned
until it reaches the end of its
travel, and is held in that position
while starting the vehicle, damage
may occur to the hydraulic power
steering system and there may be
loss of power steering assist.
Starting Procedure 1. With your foot off the accelerator pedal, turn the
ignition key to START. When
the engine starts, let go of the
key. The idle speed will go
down as the engine warms. Do
not race the engine
immediately after starting it.
Operate the engine and
transmission gently to allow the
oil to warm up and lubricate all
moving parts.
Caution
Cranking the engine for long
periods of time, by returning the
ignition to the START position
immediately after cranking has
ended, can overheat and damage
the cranking motor, and drain the
battery. Wait at least 15 seconds
between each try, to let the
cranking motor cool down.
2. If the engine does not start after five to 10 seconds,
especially in very cold weather
(below −18 °C or 0 °F), it could
be flooded with too much
gasoline. Push the accelerator
pedal all the way to the floor
and hold it there as you hold
the key in START for a
maximum of 15 seconds. Wait
at least 15 seconds between
each try, to allow the cranking
motor to cool. When the engine
starts, let go of the key and
accelerator. If the vehicle starts
briefly but then stops again,
repeat the procedure. This