tow BUICK CENTURY 1994 Owners Manual
[x] Cancel search | Manufacturer: BUICK, Model Year: 1994, Model line: CENTURY, Model: BUICK CENTURY 1994Pages: 308, PDF Size: 16.3 MB
Page 23 of 308
d
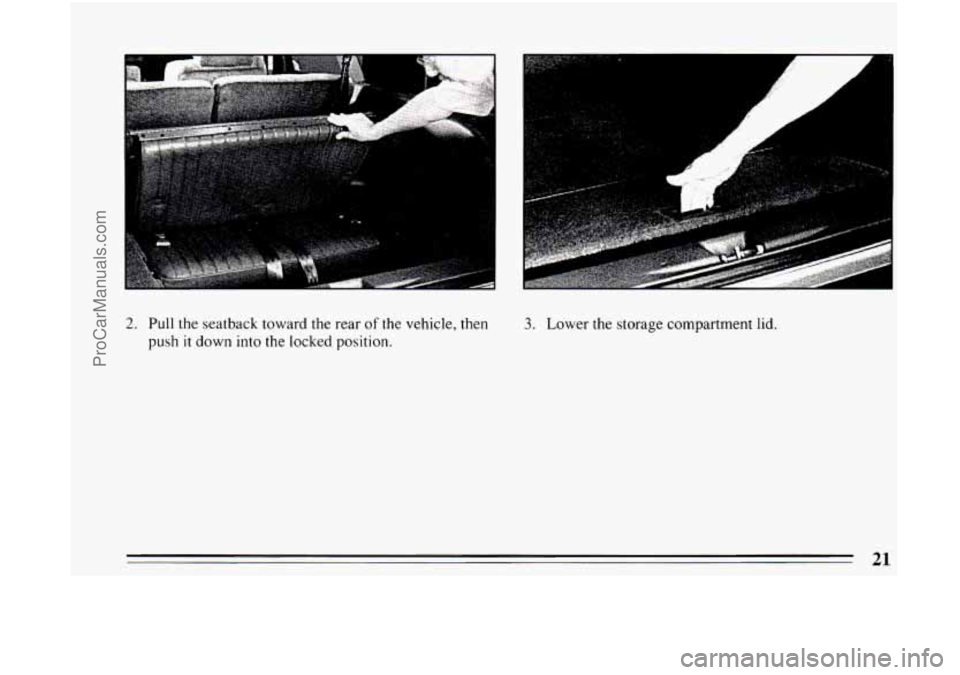
2. Pull the seatback toward the rear of the vehicle, then
push
it down into the locked position.
3. Lower the storage compartment lid.
21
ProCarManuals.com
Page 42 of 308
What makes an air bag inflate?
In a frontal impact of sufficient severity, the air bag
sensing system detects that the vehicle is suddenly
stopping as a result of a crash. The sensing system
triggers a chemical reaction
of the sodium azide sealed
in the inflator. The reaction produces nitrogen gas,
which inflates the cloth bag. The inflator, cloth bag, and
related hardware are all part
of the air bag inflator
module packed inside the steering wheel.
How does an air bag restrain?
In moderate to severe frontal or near-frontal collisions,
even belted occupants can contact the steering wheel.
The air bag supplements
the protection provided by
safety belts. Air bags distribute the force of the impact
more evenly over the occupant’s upper body, stopping
the occupant more gradually. But air bags would not
provide protection in many types
of collisions, including
rollovers and rear and side impacts, primarily because
an occupant’s motion is not toward the air bag. Air bags
should never be regarded as anything more than a
supplement to safety belt protection in moderate
to
severe frontal and near-frontal collisions.
What will you see after an air bag inflation?
After the air bag has inflated, it will then quickly
deflate. This occurs
so quickly that some people may
not even realize that the air bag inflated. Some
components of the air bag module in the steering wheel
hub may be hot for a short time, but the portion of the
bag that comes into contact with
you will not be hot to
the touch. There will be small amounts of smoke and
dust coming from vents in the deflated air bag. The air
bag will
not impede the driver’s vision or ability to steer
the vehi,cle, nor will it hinder the occupants from exiting
the vehicle.
The air bag is designed to inflate only once. After it
inflates, you’ll need some new parts for your air bag
system. If you don’t get them, the air bag system
won’t be there to help protect you in another crash.
A new system will include the air bag module and
possibly other parts. The service manual has
information about the need to replace other parts.
0 Your vehicle is equipped with a diagnostic module,
which records information about the air bag system.
The module records information about the readiness
of the system, when the sensors are activated and
whether the driver’s safety belt was
in use.
40
ProCarManuals.com
Page 64 of 308
A
P --
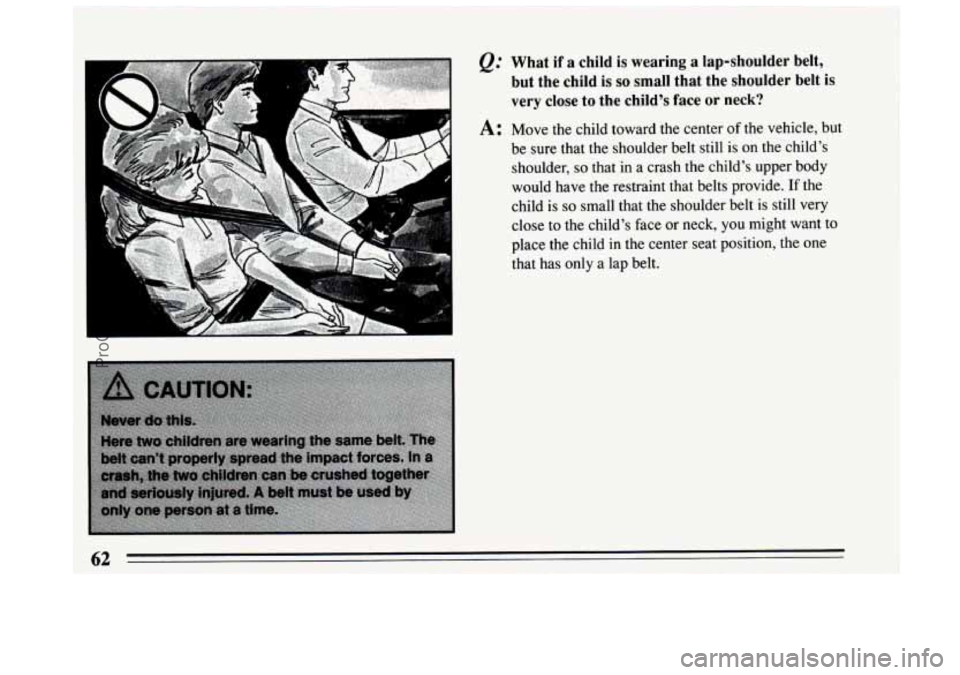
&: What if a child is wearing a lap-shoulder belt,
but the child is
so small that the shoulder belt is
very close to the child’s face or neck?
A: Move the child toward the center of the vehicle, but
be sure that the shoulder belt still is on the child’s
shoulder,
so that in a crash the child’s upper body
would have the restraint that belts provide. If the
child
is so small that the shoulder belt is still very
close to the child’s
face or neck, you might want to
place the child in the center seat position. the one
that has only a lap belt.
62
ProCarManuals.com
Page 77 of 308
Ignition Key Positions
C
9.5 B
A i E
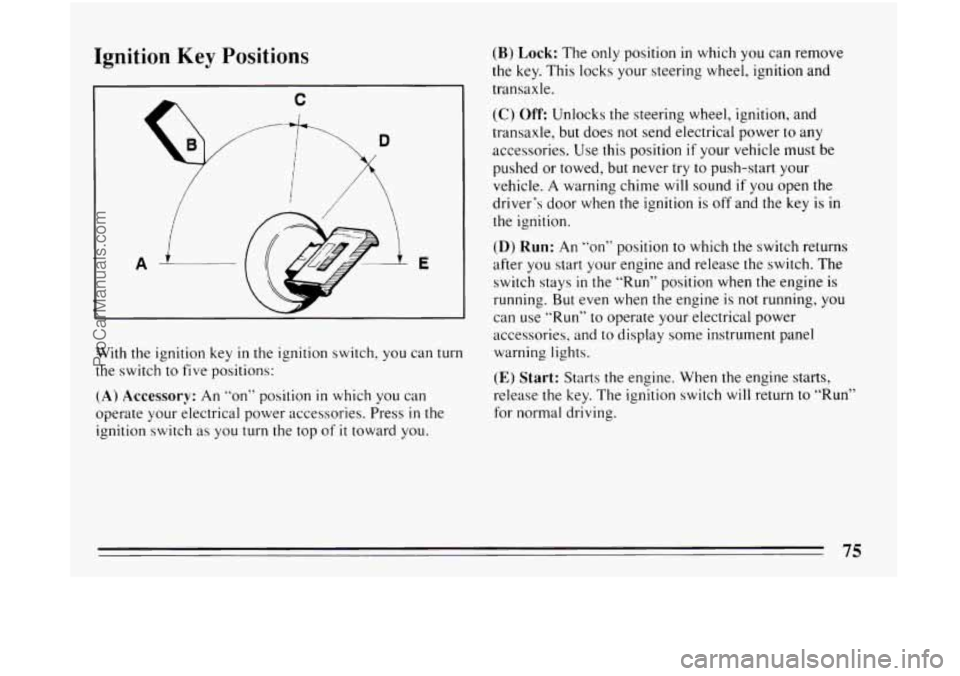
With the ignition key in the ignition switch, you can turn
the switch to five positions:
(A) Accessory: An “on” position in which you can
operate your electrical power accessories. Press
in the
ignition switch as you turn the top
of it toward you.
(B) Lock: The only position in which you can remove
the key. This locks
your steering wheel, ignition and
transaxle.
(C) Off: Unlocks the steering wheel, ignition, and
transaxle, but does not send electrical power
to any
accessories. Use this position
if your vehicle must be
pushed or towed, but never
try to push-start your
vehicle.
A warning chime will sound if you open the
driver’s door when the ignition is off and the
key is in
the ignition.
(D) Run: An ‘‘on’’ position to which the switch returns
after you start your engine and release
the switch. The
switch stays
in the “Run” position when the engine is
running. But even when the engine is
not running, you
can use
“Run” to operate your electrical power
accessories, and to display some instrument panel
warning lights.
(E) Start: Starts the engine. When the engine starts,
release the key. The ignition switch will return
to “Run”
for normal driving.
ProCarManuals.com
Page 79 of 308
2. If your engine won’t start (or starts but then stops), it
could be flooded with too much gasoline. Try
pushing your accelerator pedal
all the way to the
floor and holding it there as you hold the key in
“Start” for about three seconds. If the car starts
briefly but then stops again, do the same thing, but
this time keep
the pedal down for five or six seconds.
This clears the extra gasoline from the engine.
I NOTICE:
Your engine is designed to work with the
electronics
in your vehicle. If you add electrical
parts or accessories, you could change the way
the fuel injection system operates. Before adding
electrical equipment, check with your dealer.
If
you don’t, your engine might not perform
properly.
If you ever have to have your vehicle towed, see
the part
of this manual that tells how to do it
without damaging your vehicle. See “Towing
Your Buick”
in the Index.
Driving Through Deep Standing
Water
I NOTICE:
If you drive too quickly through deep puddles or
standing water, water can come
in through your
engine’s air intake and badly damage your
engine.
If you can’t avoid deep puddles or
standing water, drive through them very slowly.
77
ProCarManuals.com
Page 82 of 308
R (Reverse)
Use this gear to back up.
I
I NOTICE:
Shifting to “R” (Reverse) while your vehicle is
moving forward could damage your transaxle.
Shift to
“R” only after your vehicle is stopped.
To rock your vehicle back and forth to get out of snow,
ice or sand without damaging your transaxle, see “If
You’re Stuck: In Sand, Mud, Ice
or Snow” in the Index.
N (Neutral)
In this position, your engine doesn’t connect with the
wheels. To restart when you’re already moving, use
“N” (Neutral) only. Also, use “N” when your vehicle
is being towed.
I NOTICE:
Damage to your transaxle caused by shifting out
of
“P” (Park) or “N” (Neutral) with the engine
racing isn’t covered by your warranty.
80
ProCarManuals.com
Page 83 of 308
@ Automatic Overdrive
If your automatic transaxle has automatic overdrive,
this position is for normal driving.
If you need more
power for passing, and you’re:
- Going less than 35 mph (56 km/h), push your
accelerator pedal about halfway down.
accelerator all
the way down.
- Going about 35 mph (56 km/h) or more, push the
You’ll shift down to the next gear and have more power.
D (Third Gear)
If your automatic transaxle does not have Overdrive,
this position is for normal driving, at all speeds,
in
most street and highway situations.
If your automatic transaxle has Overdrive,
“D” is
like
@, but you never go into Overdrive.
Here are some times
you might choose “D” instead
of
03:
- When driving on hilly, winding roads
- When towing a trailer, so there is less shifting
- When going down a steep hill
between gears
2 (Second
Gear)
This position gives you more power but lower fuel
economy.
You can use “2” on hills. It can help
control your speed as you go down steep mountain
roads, but then
you would also want to use your
brakes off and
on.
I NOTICE:
Don’t drive in “2” (Second Gear) for more than 5
miles (8 km), or at speeds over 55 mph (88 km/h),
or you can damage your transaxle. Use “D”
(‘@’’
or “D” if your vehicle has Overdrive) as much as
possible.
Don’t shift into
“2” unless you are going slower
than
65 mph (1 05 km/h), or you can damage your
engine.
81
ProCarManuals.com
Page 85 of 308
I NOTICE:
Driving with the parking brake on can cause your
rear brakes
to overheat. You may have to replace
them, and you could also damage other parts
of
your vehicle.
If you are towing a trailer and are parking on any
hill:
See “Towing a Trailer” in the Index. That section
shows what to
do first to keep the trailer from moving.
Shifting Into ‘‘P” (Park)
A CAUTION:
Steering Column Shift Lever
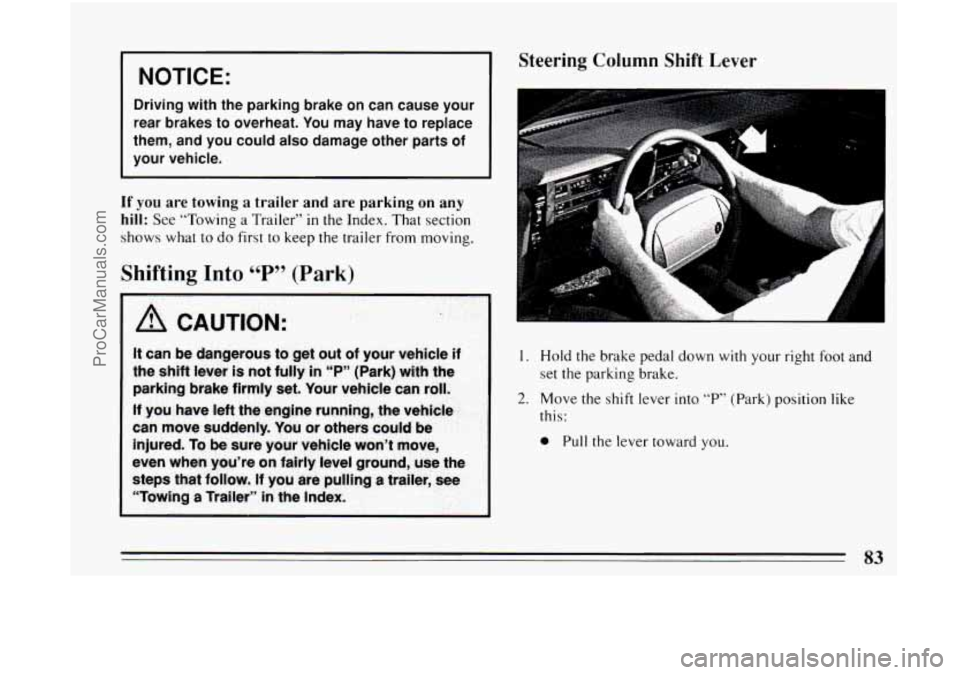
1. Hold the brake pedal down with your right foot and
set the parking brake.
2. Move the shift lever into “P” (Park) position like
this:
0 Pull the lever toward you.
83
ProCarManuals.com
Page 86 of 308
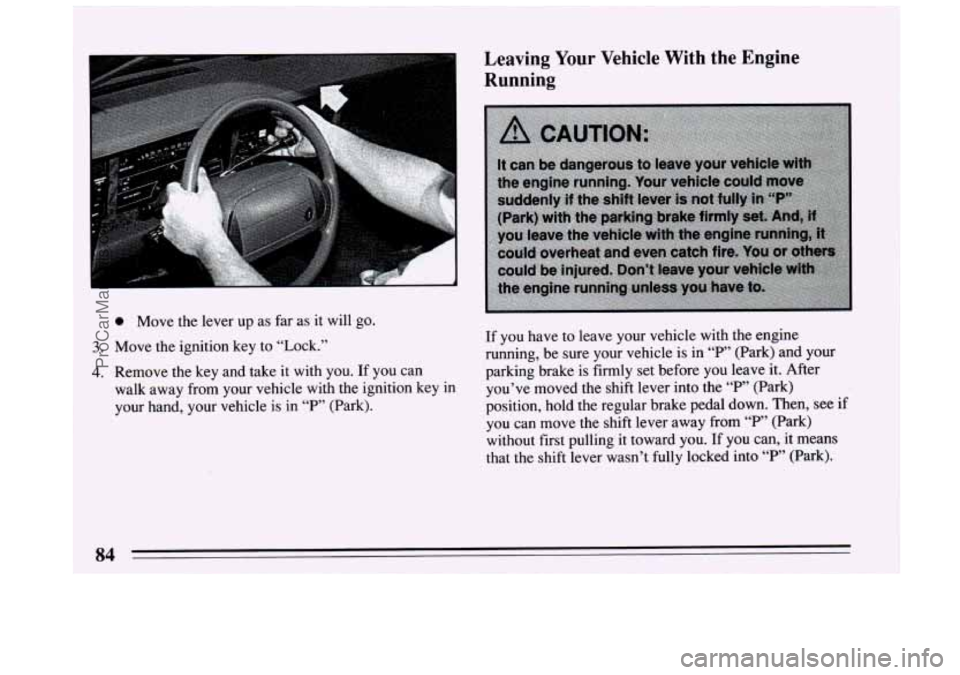
0 Move the lever up as far as it will go.
3. Move the ignition key to “Lock.”
4. Remove the key and take it with you. If you can
walk away from your vehicle with the ignition key in
your hand, your vehicle is in
“P’, (Park).
Leaving Your Vehicle With the Engine
Running
If you have to leave your vehicle with the engine
running, be sure your vehicle
is in “P’, (Park) and your
‘parking brake is firmly set before you leave it. After
you’ve moved the shift lever into the
“P,’ (Park)
position, hold the regular brake pedal down. Then, see if
you can move the shift lever away
from “P” (Park)
without first pulling it toward you. If you can, it means
that the shift lever wasn’t fully locked into “P” (Park).
ProCarManuals.com
Page 89 of 308
Follow the proper steps to be sure your vehicle won’t
move. See “Shifting Into
‘P’ (Park)” in the Index.
If you are parking on a hill and if you’re pulling a
trailer,
also see “Towing a Trailer” in the Index.
Windows
On a vehicle with manual windows, use the window
crank to open and close
each window.
Power Windows (Option)
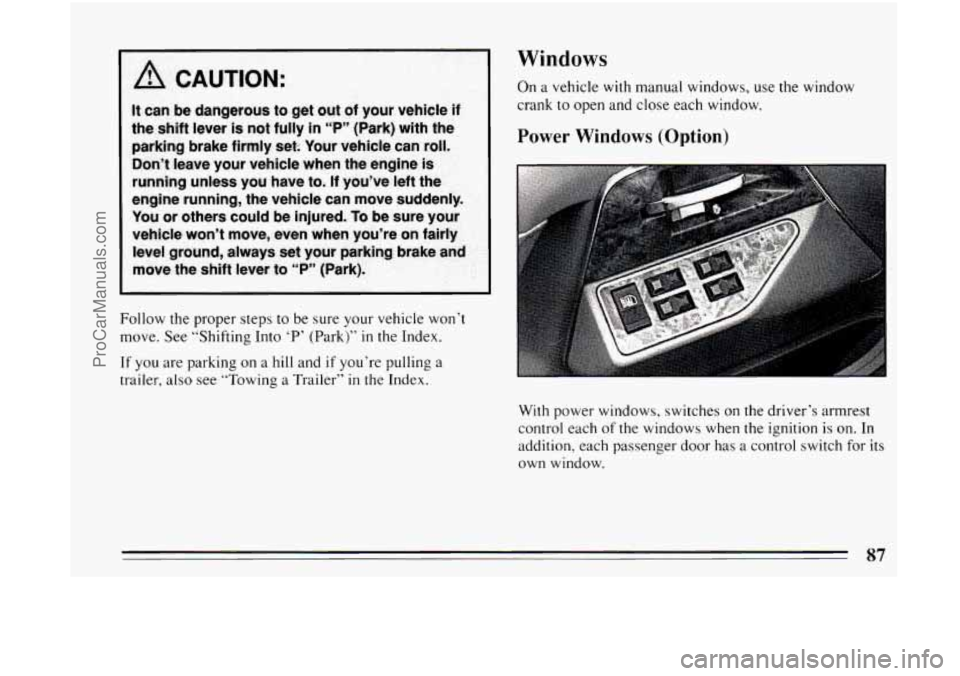
With power windows, switches on the driver’s armrest
control each
of the windows when the ignition is on. In
addition, each passenger door has
a control switch for its
own window.
87
ProCarManuals.com