CD player BUICK CENTURY 2003 Owner's Manual
[x] Cancel search | Manufacturer: BUICK, Model Year: 2003, Model line: CENTURY, Model: BUICK CENTURY 2003Pages: 344, PDF Size: 2.57 MB
Page 107 of 344
Instrument Panel Overview...............................3-2
Hazard Warning Flashers................................3-3
Other Warning Devices...................................3-4
Horn.............................................................3-4
Tilt Wheel.....................................................3-4
Turn Signal/Multifunction Lever.........................3-5
Exterior Lamps.............................................3-11
Interior Lamps..............................................3-14
Auxiliary Power Connection
(Power Drop)............................................3-16
Ashtrays and Cigarette Lighter........................3-16
Climate Controls............................................3-17
Dual Climate Control System..........................3-17
Outlet Adjustment.........................................3-20
Passenger Compartment Air Filter...................3-20
Warning Lights, Gages and Indicators.............3-22
Instrument Panel Cluster................................3-23
Speedometer and Odometer...........................3-24
Safety Belt Reminder Light.............................3-24
Air Bag Readiness Light................................3-25
Charging System Light..................................3-26
Brake System Warning Light..........................3-27
Anti-Lock Brake System Warning Light.............3-28
Enhanced Traction System Warning Light.........3-28
Low Traction Light........................................3-29Engine Coolant Temperature Warning Light......3-29
Engine Coolant Temperature Gage..................3-30
Tire Pressure Light.......................................3-30
Malfunction Indicator Lamp.............................3-31
Oil Pressure Light.........................................3-34
Low Oil Level Light.......................................3-35
Change Engine Oil Light................................3-35
Security Light...............................................3-36
Cruise Control Light......................................3-36
Low Washer Fluid Warning Light.....................3-36
Door/Trunk Ajar Warning Light........................3-36
Service Vehicle Soon Light............................3-37
Fuel Gage...................................................3-37
Low Fuel Warning Light.................................3-38
Audio System(s).............................................3-39
Setting the Time...........................................3-39
AM-FM Radio...............................................3-40
Radio with Cassette and CD..........................3-42
Theft-Deterrent Feature..................................3-48
Audio Steering Wheel Controls.......................3-50
Understanding Radio Reception......................3-50
Care of Your Cassette Tape Player.................3-51
Care of Your CDs.........................................3-52
Care of Your CD Player................................3-52
Fixed Mast Antenna......................................3-52
Section 3 Instrument Panel
3-1
Page 145 of 344
Audio System(s)
Notice:Before you add any sound equipment to
your vehicle ± like a tape player, CB radio, mobile
telephone or two-way radio ± be sure you can
add what you want. If you can, it's very important to
do it properly. Added sound equipment may
interfere with the operation of your vehicle's engine,
radio or other systems, and even damage them.
Your vehicle's systems may interfere with the
operation of sound equipment that has been added
improperly.
So, before adding sound equipment, check with
your dealer and be sure to check federal rules
covering mobile radio and telephone units.
Your audio system has been designed to operate easily
and to give years of listening pleasure. You will get
the most enjoyment out of it if you acquaint yourself with
it ®rst. Figure out which radio you have in your vehicle,®nd out what your audio system can do and how to
operate all of its controls to be sure you're getting the
most out of the advanced engineering that went into it.
Your vehicle has a feature called Retained Accessory
Power (RAP). With RAP, you can play your audio
system even after the ignition is turned off. See
ªRetained Accessory Power (RAP)º under
Ignition
Positions on page 2-19.
Setting the Time
Press and hold HRS until the correct hour appears on
the display. Press and hold MIN until the correct minute
also appears.
You may set the time with the ignition off if you push
RECALL ®rst.
3-39
Page 151 of 344

6 RAND (Dolbyž):Press this pushbutton to reduce
background noise. The double-D symbol will appear on
the display.
Dolby
žNoise Reduction is manufactured under a
license from DolbyžLaboratories Licensing Corporation.
Dolbyžand the double-D symbol are trademarks of
DolbyžLaboratories Licensing Corporation.
AM-FM:Press this button to listen to the radio when a
cassette tape is playing.
SOURCE:Press this button to play a cassette tape or
a CD when listening to the radio. TAPE SIDE and
an arrow will appear on the display. If this button is
pressed again, the system will go to disc play;
CD PLAY will appear on the display.
wSEEKx:Your tape must have at least three
seconds of silence between each selection for seek to
work. Press the up or the down arrow to go to the
next or to the previous selection on the tape.
EJECT:Press this button, located next to the cassette
tape slot, to stop a tape when it is playing and to
remove a tape when it is not playing. Eject may be
activated with the radio off.
Cassette Tape Messages
TIGHT TAPE:The tape is tight and the player can't turn
the tape hubs. Remove the tape. Hold the tape with the
open end down and try to turn the right hub
counterclockwise with a pencil. Turn the tape over and
repeat. If the hubs do not turn easily, your tape may be
damaged and should not be used in the player. Try a new
tape to make sure your player is working properly.
BROKEN TAPE:The tape is broken. Try a new tape.
WRAPPED:The tape is wrapped. Try a new tape.
CLEAN PLAYR (Clean Player):If this message
appears on the display, the cassette tape player needs
to be cleaned. It will still play tapes, but you should
clean it as soon as possible to prevent damage to the
tapes and player. See
Care of Your Cassette Tape
Player on page 3-51.
If any error occurs repeatedly or if an error can't be
corrected, contact your dealer. If your radio displays an
error number, write it down and provide it to your
dealer when reporting the problem.
3-45
Page 152 of 344
Playing a Compact Disc
Insert a disc partway into the slot, label side up. The
player will pull it in. The disc should begin playing. If you
want to insert a CD while the ignition or the radio is
off, ®rst press EJECT or RECALL.
If you turn off the ignition or radio with a disc in the
player, it will stay in the player. When you turn on the
ignition or system, the disc will start playing where
it stopped, if it was the last selected audio source.
Also, as a protection feature, if a CD is ejected and left
in the player, it will be pulled back in the player with
the ignition on or off.
The integral CD player can play the smaller 8 cm single
discs with an adapter ring. Full-size compact discs
and the smaller discs are loaded in the same manner.
If playing a CD-R the sound quality may be reduced due
to CD-R quality, the method of recording, the quality of
the music that has been recorded and the way the CD-R
has been handled. You may experience an increase in
skipping, difficulty in ®nding tracks and/or difficulty in
loading and ejecting. If these problems occur try a known
good CD.Do not add paper labels to discs, they could get caught
in the CD player.
Do not play 3 inch discs without a standard adapter disc.
If an error appears on the display, see ªCompact Disc
Messagesº later in this section.
1 PREV (Previous):Press this pushbutton to go to the
start of the current track, if more than eight seconds
have played. If you hold this pushbutton or press it more
than once, the player will continue moving back
through the disc.
2 NEXT:Press this pushbutton to go to the next track.
If you hold this pushbutton or press it more than
once, the player will continue moving forward through
the disc.
3
r(Reverse):Press and hold this pushbutton to
quickly reverse within a track. You will hear sound at a
reduced level. Release it to play the passage.
4
[(Forward):Press and hold this pushbutton to
quickly advance within a track. You will hear sound at a
reduced level. Release it to play the passage.
6 RAND (Random):Press this pushbutton to hear the
tracks in random, rather than sequential, order.
Press it again to turn off random play.
3-46
Page 153 of 344
RECALL:Press this button to see which track is
playing. Press it again within ®ve seconds to see how
long it has been playing. To change what is normally
shown on the display (track or elapsed time), press this
button until you see the display you want, then hold
this button until the display ¯ashes.
AM-FM:Press this button to listen to the radio when a
CD is playing.
SOURCE:Press this button to play a cassette tape or
a CD when listening to the radio. TAPE SIDE and
an arrow will appear on the display. If this button is
pressed again, the system will go to disc play; CD PLAY
will appear on the display.
wSEEKx:Press the up or the down arrow to go to
the previous or to the next track on the CD.
EJECT:Press this button, located next to the CD slot,
to stop a CD when it is playing and to remove a CD
when it is not playing. Eject may be activated with the
radio off.
Compact Disc Messages
If the disc comes out or CHECK CD appears on the
display, it could be for one of the following reasons:
·You're driving on a very rough road. When the road
becomes smoother, the disc should play.
·It's very hot. When the temperature returns to
normal, the disc should play.
·The disc is dirty, scratched, wet, or upside down.
·It is very humid. If so, wait about an hour and
try again.
·There may have been a problem while burning
the CD.
·The label may be caught in the CD player.
If the CD is not playing correctly, for any other reason,
try a known good CD.
If any error occurs repeatedly or if an error can't be
corrected, contact your dealer. If your radio displays an
error number, write it down and provide it to your
dealer when reporting the problem.
3-47
Page 156 of 344
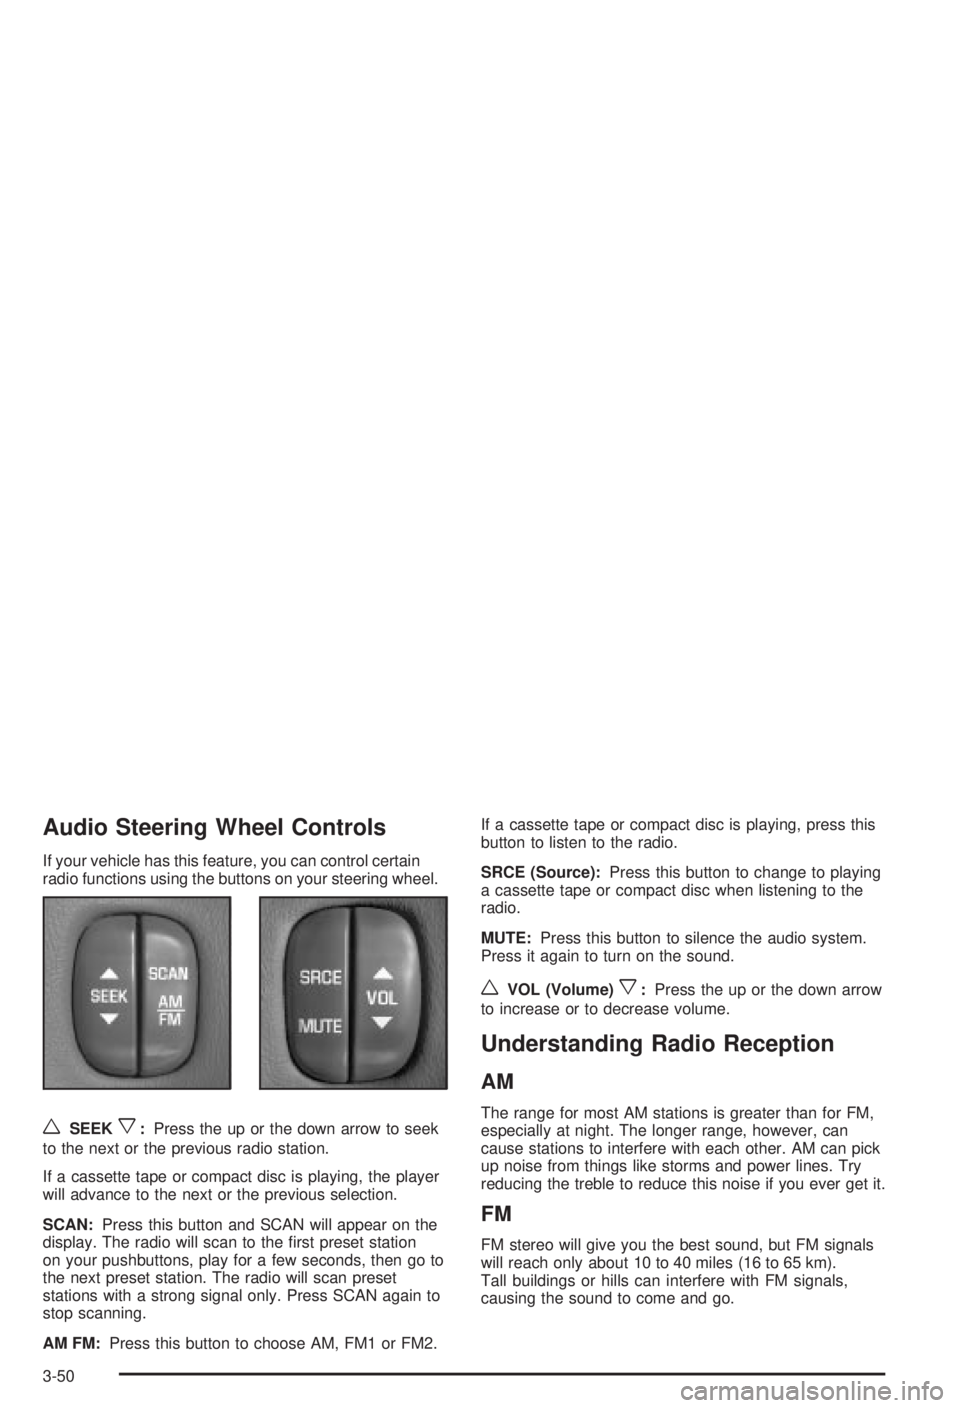
Audio Steering Wheel Controls
If your vehicle has this feature, you can control certain
radio functions using the buttons on your steering wheel.
wSEEKx:Press the up or the down arrow to seek
to the next or the previous radio station.
If a cassette tape or compact disc is playing, the player
will advance to the next or the previous selection.
SCAN:Press this button and SCAN will appear on the
display. The radio will scan to the ®rst preset station
on your pushbuttons, play for a few seconds, then go to
the next preset station. The radio will scan preset
stations with a strong signal only. Press SCAN again to
stop scanning.
AM FM:Press this button to choose AM, FM1 or FM2.If a cassette tape or compact disc is playing, press this
button to listen to the radio.
SRCE (Source):Press this button to change to playing
a cassette tape or compact disc when listening to the
radio.
MUTE:Press this button to silence the audio system.
Press it again to turn on the sound.
wVOL (Volume)x:Press the up or the down arrow
to increase or to decrease volume.
Understanding Radio Reception
AM
The range for most AM stations is greater than for FM,
especially at night. The longer range, however, can
cause stations to interfere with each other. AM can pick
up noise from things like storms and power lines. Try
reducing the treble to reduce this noise if you ever get it.
FM
FM stereo will give you the best sound, but FM signals
will reach only about 10 to 40 miles (16 to 65 km).
Tall buildings or hills can interfere with FM signals,
causing the sound to come and go.
3-50
Page 157 of 344
Care of Your Cassette Tape Player
A tape player that is not cleaned regularly can cause
reduced sound quality, ruined cassettes or a damaged
mechanism. Cassette tapes should be stored in their
cases away from contaminants, direct sunlight and
extreme heat. If they aren't, they may not operate
properly or may cause failure of the tape player.
Your tape player should be cleaned regularly after every
50 hours of use. Your radio may display CLEAN
PLAYR to indicate that you have used your tape player
for 50 hours without resetting the tape clean timer. If
this message appears on the display, your cassette tape
player needs to be cleaned. It will still play tapes, but
you should clean it as soon as possible to prevent
damage to your tapes and player. If you notice a
reduction in sound quality, try a known good cassette to
see if the tape or the tape player is at fault. If this
other cassette has no improvement in sound quality,
clean the tape player.
For best results, use a scrubbing action, non-abrasive
cleaning cassette with pads which scrub the tape
head as the hubs of the cleaner cassette turn. The
recommended cleaning cassette is available through
your dealership.The cut tape detection feature of your cassette tape
player may identify the cleaning cassette as a damaged
tape, in error. If the cleaning cassette ejects, insert
the cassette at least three times to ensure thorough
cleaning.
You may also choose a non-scrubbing action, wet-type
cleaner which uses a cassette with a fabric belt to
clean the tape head. This type of cleaning cassette will
not eject on its own. A non-scrubbing action cleaner
may not clean as thoroughly as the scrubbing type
cleaner. The use of a non-scrubbing action, dry-type
cleaning cassette is not recommended.
After you clean the player, press and hold the EJECT
button for ®ve seconds with the ignition on and the radio
power off to reset the CLEAN PLAYR indicator. The
radio will display Ð to show the indicator was reset.
Cassettes are subject to wear and the sound quality may
degrade over time. Always make sure the cassette
tape is in good condition before you have your
tape player serviced.
3-51
Page 158 of 344
Care of Your CDs
Handle discs carefully. Store them in their original cases
or other protective cases and away from direct sunlight
and dust. If the surface of a disc is soiled, dampen
a clean, soft cloth in a mild, neutral detergent solution
and clean it, wiping from the center to the edge.
Be sure never to touch the side without writing when
handling discs. Pick up discs by grasping the outer
edges or the edge of the hole and the outer edge.
Care of Your CD Player
The use of CD lens cleaner discs is not advised, due to
the risk of contaminating the lens of the CD optics
with lubricants internal to the CD mechanism.
Fixed Mast Antenna
The ®xed mast antenna can withstand most car washes
without being damaged. If the mast should ever
become slightly bent, you can straighten it out by hand.
If the mast is badly bent, as it might be by vandals,
you should replace it.
Check occasionally to be sure the mast is still tightened
to the fender. If tightening is required, tighten by
hand, then with a wrench one quarter turn.
3-52
Page 306 of 344
Part B: Owner Checks and Services
Listed in this part are owner checks and services
which should be performed at the intervals speci®ed to
help ensure the safety, dependability and emission
control performance of your vehicle.
Be sure any necessary repairs are completed at once.
Whenever any ¯uids or lubricants are added to your
vehicle, make sure they are the proper ones, as shown
in Part D.
At Each Fuel Fill
It is important for you or a service station attendant to
perform these underhood checks at each fuel ®ll.
Engine Oil Level Check
Check the engine oil level and add the proper oil if
necessary. SeeEngine Oil on page 5-13for further
details.
Engine Coolant Level Check
Check the engine coolant level and add DEX-COOLž
coolant mixture if necessary. SeeEngine Coolant
on page 5-23for further details.
Windshield Washer Fluid Level Check
Check the windshield washer ¯uid level in the windshield
washer tank and add the proper ¯uid if necessary.
See
Windshield Washer Fluid on page 5-38for further
details.
At Least Once a Month
Tire In¯ation Check
Make sure tires are in¯ated to the correct pressures.
Don't forget to check your spare tire. SeeTires on
page 5-57for further details.
Cassette Tape Player Service
Clean cassette tape player. Cleaning should be done
every 50 hours of tape play. SeeAudio System(s)
on page 3-39for further details.
6-10
Page 329 of 344
A
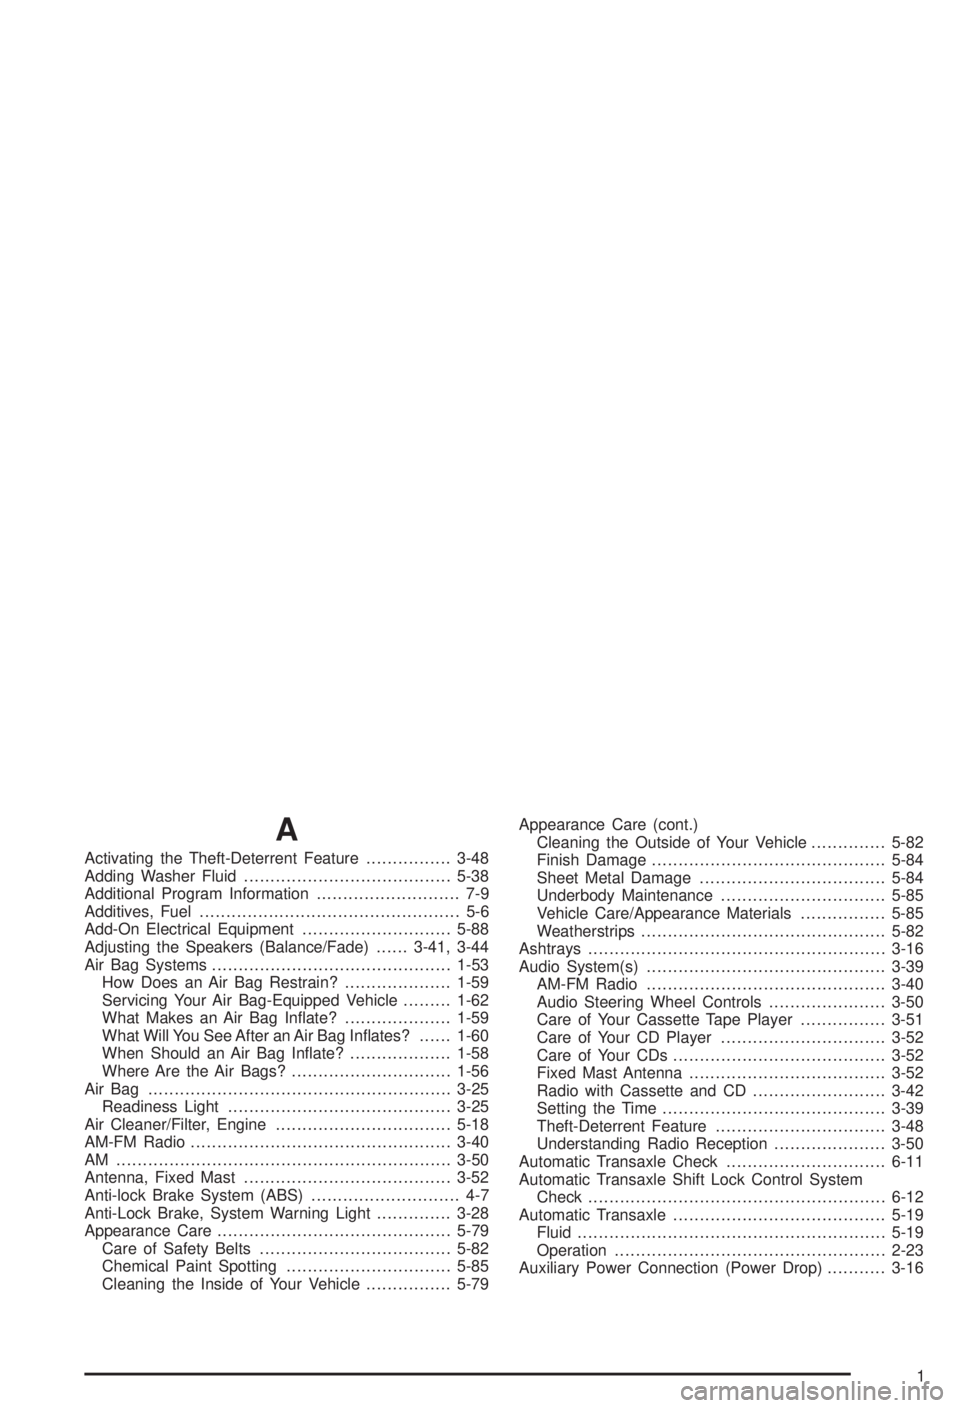
Activating the Theft-Deterrent Feature................3-48
Adding Washer Fluid.......................................5-38
Additional Program Information........................... 7-9
Additives, Fuel................................................. 5-6
Add-On Electrical Equipment............................5-88
Adjusting the Speakers (Balance/Fade)......3-41, 3-44
Air Bag Systems.............................................1-53
How Does an Air Bag Restrain?....................1-59
Servicing Your Air Bag-Equipped Vehicle.........1-62
What Makes an Air Bag In¯ate?....................1-59
What Will You See After an Air Bag In¯ates?......1-60
When Should an Air Bag In¯ate?...................1-58
Where Are the Air Bags?..............................1-56
Air Bag .........................................................3-25
Readiness Light..........................................3-25
Air Cleaner/Filter, Engine.................................5-18
AM-FM Radio.................................................3-40
AM ...............................................................3-50
Antenna, Fixed Mast.......................................3-52
Anti-lock Brake System (ABS)............................ 4-7
Anti-Lock Brake, System Warning Light..............3-28
Appearance Care............................................5-79
Care of Safety Belts....................................5-82
Chemical Paint Spotting...............................5-85
Cleaning the Inside of Your Vehicle................5-79Appearance Care (cont.)
Cleaning the Outside of Your Vehicle..............5-82
Finish Damage............................................5-84
Sheet Metal Damage...................................5-84
Underbody Maintenance...............................5-85
Vehicle Care/Appearance Materials................5-85
Weatherstrips..............................................5-82
Ashtrays........................................................3-16
Audio System(s).............................................3-39
AM-FM Radio.............................................3-40
Audio Steering Wheel Controls......................3-50
Care of Your Cassette Tape Player................3-51
Care of Your CD Player...............................3-52
Care of Your CDs........................................3-52
Fixed Mast Antenna.....................................3-52
Radio with Cassette and CD.........................3-42
Setting the Time..........................................3-39
Theft-Deterrent Feature................................3-48
Understanding Radio Reception.....................3-50
Automatic Transaxle Check..............................6-11
Automatic Transaxle Shift Lock Control System
Check........................................................6-12
Automatic Transaxle........................................5-19
Fluid..........................................................5-19
Operation...................................................2-23
Auxiliary Power Connection (Power Drop)...........3-16
1