reset BUICK CENTURY 2004 Get To Know Guide
[x] Cancel search | Manufacturer: BUICK, Model Year: 2004, Model line: CENTURY, Model: BUICK CENTURY 2004Pages: 12, PDF Size: 0.32 MB
Page 5 of 12

5
high beams are on, a symbol
located in the instrument panel will
illuminate.
Flash-to-Pass
This feature uses the vehicle’s high
beams to alert the driver in front of you
that you intend to pass. To use it, pull
the turn signal lever toward you slightly,
but not so far that you hear a click. The
high beams will remain on for as long as
you hold the lever toward you.
Windshield Wipers
To operate the windshield wipers, turn
the WIPER band located on the multi-
function lever upward or downward.
To turn off the windshield wipers, turn
the band to OFF.
For low speed wiping, turn the band
away from you to the LO setting. For
high speeds, turn the band to HI.
Five sensitivity settings, located between
the OFF and HI settings, are provided
for a delayed wiping cycle.
Turn the band to the MIST setting for a
single wiping cycle. Hold the band until
the wipers begin, then let it go.
Windshield Washers
The windshield washer paddle is
marked PUSH and is located on top of
the multifunction lever. Push the paddle
to spray washer fluid onto the wind-
shield. The wipers will run for several
sweeps, then stop or return to your pre-
set speed.
See Section 3 of your Owner Manual.
Cruise Control
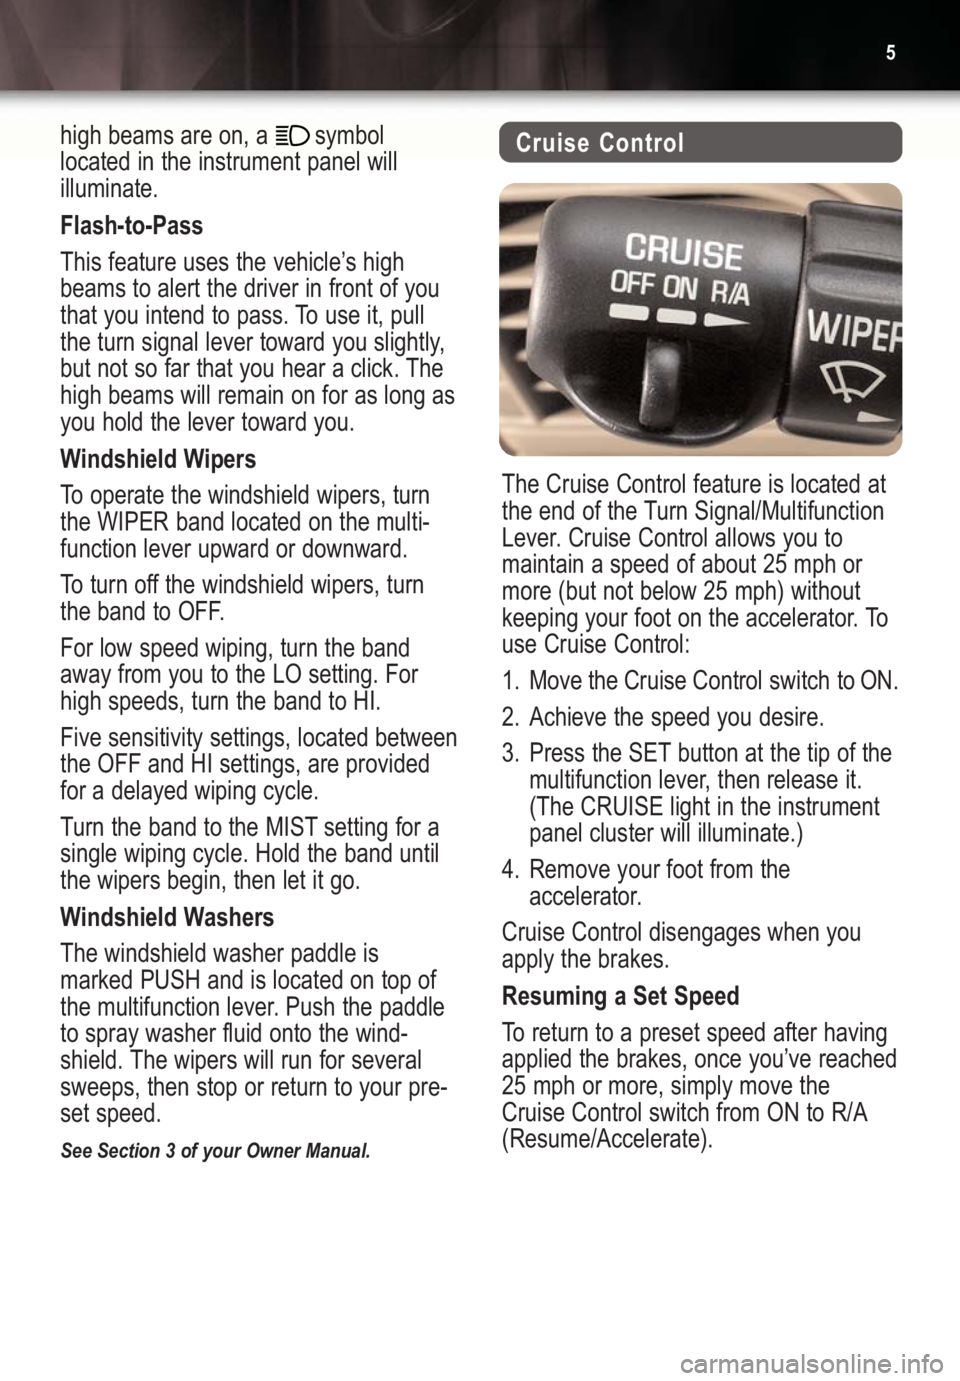
The Cruise Control feature is located at
the end of the Turn Signal/Multifunction
Lever. Cruise Control allows you to
maintain a speed of about 25 mph or
more (but not below 25 mph) without
keeping your foot on the accelerator. To
use Cruise Control:
1. Move the Cruise Control switch to ON.
2. Achieve the speed you desire.
3. Press the SET button at the tip of the
multifunction lever, then release it.
(The CRUISE light in the instrument
panel cluster will illuminate.)
4. Remove your foot from the
accelerator.
Cruise Control disengages when you
apply the brakes.
Resuming a Set Speed
To return to a preset speed after having
applied the brakes, once you’ve reached
25 mph or more, simply move the
Cruise Control switch from ON to R/A
(Resume/Accelerate).
Page 6 of 12

Getting to Know Your2004 Century6
Oil Life Monitor
The Oil Life Monitor shows an estimate
of the oil’s remaining useful life. When
the oil life index is less than 10 percent,
the CHANGE OIL SOON light will illumi-
nate in the instrument panel. After hav-
ing the oil changed, reset the system so
it can calculate when the next oil change
is required. If you change your oil prior
to the illumination of the CHANGE OIL
SOON light, reset the system.
Resetting the Oil Life Monitor
To reset the Oil Life Monitor, follow
these steps:
1. With the engine off, turn the ignition
key to RUN.
2. Fully push and release the accelera-
tor pedal slowly three times within
five seconds. (If the CHANGE OIL
SOON light flashes, the system is
resetting.)
3. Turn the key to OFF, then start the
vehicle. The oil life will change to 100
percent.
See Section 5 of your Owner Manual.
Increasing Speed While Using Cruise
Control
There are three ways to increase vehicle
speed while using Cruise Control:
1. Use the accelerator pedal to reach
the higher speed. Press the SET but-
ton, then release the button and the
accelerator pedal.
2. Move the Cruise Control switch from
ON to R/A. Hold it there until reaching
the desired speed, then release it.
3. Momentarily push the R/A button. For
every push, vehicle speed will
increase by about 1 mph (1.6 km/h).
Reducing Speed While Using Cruise
Control
To reduce speed while using Cruise
Control, use one of the following
methods:
•Press the SET button until you reach
the lower speed you want, then
release it.
•To reduce speed in smaller incre-
ments, press the SET button briefly.
Each time you press it, you’ll reduce
speed by about 1 mph (1.6 km/h).
Passing Another Vehicle While Using
Cruise Control
Use the accelerator pedal to increase
speed. After removing your foot from the
pedal, the vehicle will return to the
Cruise Control speed set earlier.
Ending Cruise Control
There are two ways to disengage Cruise
Control:
•Step lightly on the brake pedal.
•Move the cruise switch to off.
See Section 3 of your Owner Manual.
Page 7 of 12

7
Audio System
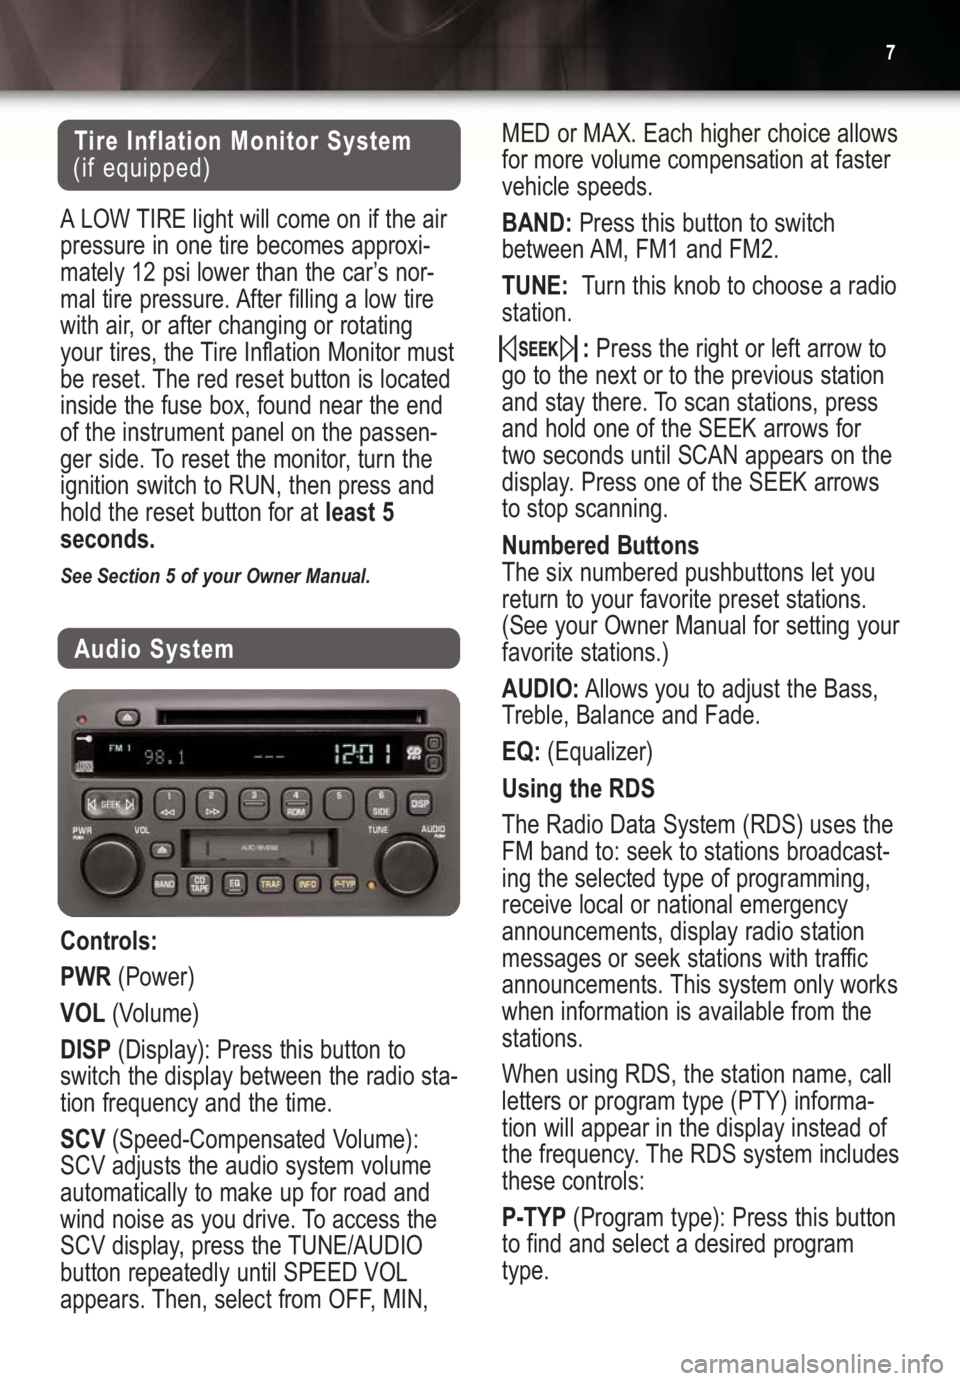
Controls:
PWR(Power)
VOL(Volume)
DISP(Display): Press this button to
switch the display between the radio sta-
tion frequency and the time.
SCV(Speed-Compensated Volume):
SCV adjusts the audio system volume
automatically to make up for road and
wind noise as you drive. To access the
SCV display, press the TUNE/AUDIO
button repeatedly until SPEED VOL
appears. Then, select from OFF, MIN,
Tire Inflation Monitor System
(if equipped)
ALOW TIRE light will come on if the air
pressure in one tire becomes approxi-
mately 12 psi lower than the car’s nor-
mal tire pressure. After filling a low tire
with air, or after changing or rotating
your tires, the Tire Inflation Monitor must
be reset. The red reset button is located
inside the fuse box, found near the end
of the instrument panel on the passen-
ger side. To reset the monitor, turn the
ignition switch to RUN, then press and
hold the reset button for at least 5
seconds.
See Section 5 of your Owner Manual.
MED or MAX. Each higher choice allows
for more volume compensation at faster
vehicle speeds.
BAND:Press this button to switch
between AM, FM1 and FM2.
TUNE:Turn this knob to choose a radio
station.
:Press the right or left arrow to
go to the next or to the previous station
and stay there. To scan stations, press
and hold one of the SEEK arrows for
two seconds until SCAN appears on the
display. Press one of the SEEK arrows
to stop scanning.
Numbered Buttons
The six numbered pushbuttons let you
return to your favorite preset stations.
(See your Owner Manual for setting your
favorite stations.)
AUDIO:Allows you to adjust the Bass,
Treble, Balance and Fade.
EQ:(Equalizer)
Using the RDS
The Radio Data System (RDS) uses the
FM band to: seek to stations broadcast-
ing the selected type of programming,
receive local or national emergency
announcements, display radio station
messages or seek stations with traffic
announcements. This system only works
when information is available from the
stations.
When using RDS, the station name, call
letters or program type (PTY) informa-
tion will appear in the display instead of
the frequency. The RDS system includes
these controls:
P-TYP(Program type): Press this button
to find and select a desired program
type.