display BUICK ENCLAVE 2008 Owner's Manual
[x] Cancel search | Manufacturer: BUICK, Model Year: 2008, Model line: ENCLAVE, Model: BUICK ENCLAVE 2008Pages: 436
Page 10 of 436

Heated Seats
Your vehicle may have heated front seats. To operate
the heated seats, the ignition must be on.
The buttons are located on
the front doors.
J(Heated Seat Cushion and Seatback):Press this
button to turn on the heated seat cushion and seatback.
I(Heated Seatback):Press this button to turn on
the heated seatback.
Press the button to turn on the desired feature. A light
on that button will display to show which feature is on.There are three temperature settings for each feature.
A column of three lights next to the buttons will display
which setting the feature is in: high, medium or low.
Three lights indicate the highest setting, two lights
indicate medium and one light indicates the lowest
setting.
When you press a button, the feature will turn on at the
highest setting. Each time you press the button, the
feature will decrease one temperature setting.
To turn the feature off, keep pressing the button until
the display lights turn off.
If your vehicle has remote vehicle start and is started
using the remote keyless entry transmitter, the front
heated seats will be turned on to the high setting if
it is cold outside. See “Remote Vehicle Start” under
Remote Keyless Entry (RKE) System Operation
on page 2-5. When the key is inserted into the ignition
and the ignition is turned on, the heated seat feature
will turn off. To turn the heated seat feature back
on, press the desired button. Driver’s Side Buttons
shown
1-6
Page 11 of 436
Heated and Cooled Seats
The front seats may have the heated and cooled seat
feature. To heat or cool the seats, the ignition must
be on.
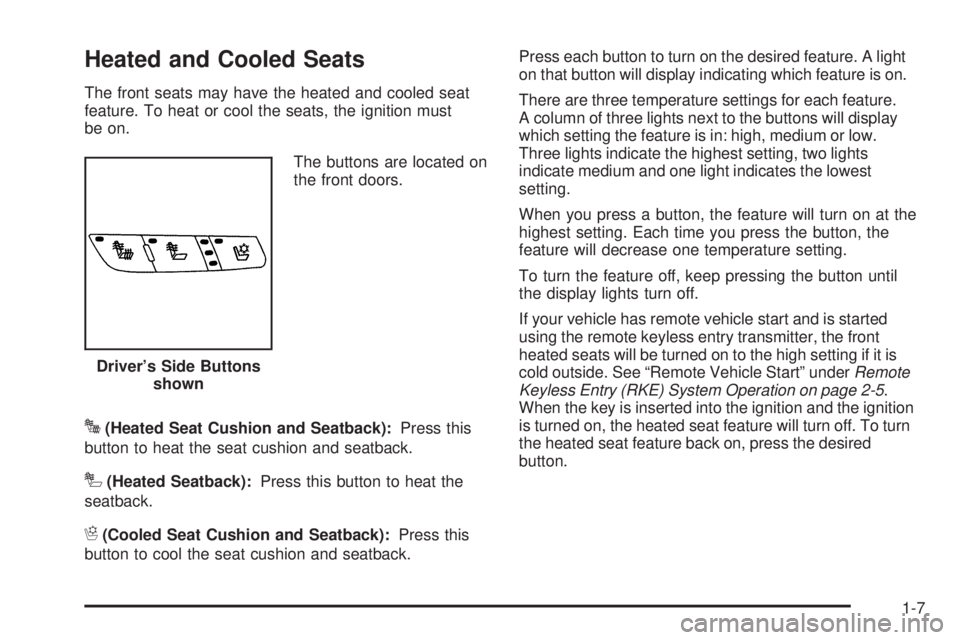
The buttons are located on
the front doors.
J(Heated Seat Cushion and Seatback):Press this
button to heat the seat cushion and seatback.
I(Heated Seatback):Press this button to heat the
seatback.
H(Cooled Seat Cushion and Seatback):Press this
button to cool the seat cushion and seatback.Press each button to turn on the desired feature. A light
on that button will display indicating which feature is on.
There are three temperature settings for each feature.
A column of three lights next to the buttons will display
which setting the feature is in: high, medium or low.
Three lights indicate the highest setting, two lights
indicate medium and one light indicates the lowest
setting.
When you press a button, the feature will turn on at the
highest setting. Each time you press the button, the
feature will decrease one temperature setting.
To turn the feature off, keep pressing the button until
the display lights turn off.
If your vehicle has remote vehicle start and is started
using the remote keyless entry transmitter, the front
heated seats will be turned on to the high setting if it is
cold outside. See “Remote Vehicle Start” underRemote
Keyless Entry (RKE) System Operation on page 2-5.
When the key is inserted into the ignition and the ignition
is turned on, the heated seat feature will turn off. To turn
the heated seat feature back on, press the desired
button. Driver’s Side Buttons
shown
1-7
Page 86 of 436
V(Remote Trunk Release):Press and hold for
about one second to unlock the trunk. The transmission
must be in P (Park).
L(Vehicle Locator/Panic Alarm):Press and release
to locate the vehicle. The turn signal lamps �ash and
the horn sounds three times.
Press and hold
Lfor more than two seconds to
activate the panic alarm. The turn signal lamps �ash
and the horn sounds repeatedly for 30 seconds.
The alarm turns off when the ignition is moved to
ON/RUN or
Lis pressed again. The ignition must
be in LOCK/OFF for the panic alarm to work.
Programming Transmitters to the
Vehicle
Only RKE transmitters programmed to the vehicle
will work. If a transmitter is lost or stolen, a replacement
can be purchased and programmed through your
dealer/retailer. When the replacement transmitter is
programmed to the vehicle, all remaining transmitters
must also be programmed. Any lost or stolen transmitters
no longer work once the new transmitter is programmed.
Each vehicle can have up to eight transmitters
programmed to it. See “Remote Key” underDIC
Operation and Displays on page 3-49.
2-6
Page 101 of 436
Ignition Positions
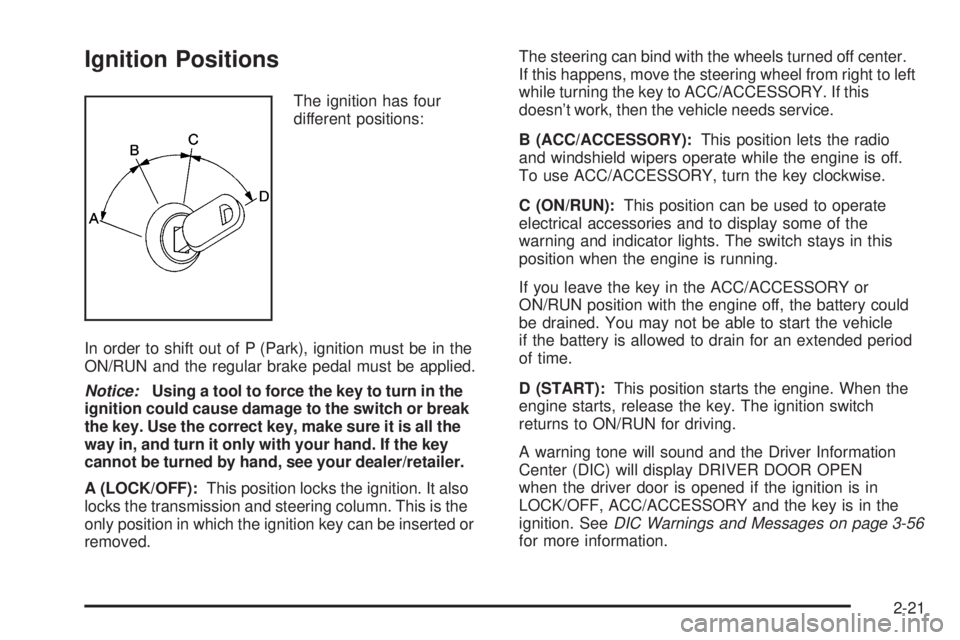
The ignition has four
different positions:
In order to shift out of P (Park), ignition must be in the
ON/RUN and the regular brake pedal must be applied.
Notice:Using a tool to force the key to turn in the
ignition could cause damage to the switch or break
the key. Use the correct key, make sure it is all the
way in, and turn it only with your hand. If the key
cannot be turned by hand, see your dealer/retailer.
A (LOCK/OFF):This position locks the ignition. It also
locks the transmission and steering column. This is the
only position in which the ignition key can be inserted or
removed.The steering can bind with the wheels turned off center.
If this happens, move the steering wheel from right to left
while turning the key to ACC/ACCESSORY. If this
doesn’t work, then the vehicle needs service.
B (ACC/ACCESSORY):This position lets the radio
and windshield wipers operate while the engine is off.
To use ACC/ACCESSORY, turn the key clockwise.
C (ON/RUN):This position can be used to operate
electrical accessories and to display some of the
warning and indicator lights. The switch stays in this
position when the engine is running.
If you leave the key in the ACC/ACCESSORY or
ON/RUN position with the engine off, the battery could
be drained. You may not be able to start the vehicle
if the battery is allowed to drain for an extended period
of time.
D (START):This position starts the engine. When the
engine starts, release the key. The ignition switch
returns to ON/RUN for driving.
A warning tone will sound and the Driver Information
Center (DIC) will display DRIVER DOOR OPEN
when the driver door is opened if the ignition is in
LOCK/OFF, ACC/ACCESSORY and the key is in the
ignition. SeeDIC Warnings and Messages on page 3-56
for more information.
2-21
Page 114 of 436
Mirrors
Automatic Dimming Rearview Mirror
The vehicle may have an automatic dimming rearview
mirror with OnStar®and/or a compass display.
Vehicles with OnStar have three control buttons located
at the bottom of the mirror. See your dealer/retailer for
more information on the system and how to subscribe to
OnStar. SeeOnStar
®System on page 2-46for more
information about the services OnStar provides.
O(On/Off):Press to turn the dimming feature on or off.
Automatic Dimming Mirror Operation
Automatic dimming reduces the glare of lights from
behind the vehicle. The dimming feature comes on and
the indicator light illuminates each time the vehicle is
started.
Cleaning the Mirror
Do not spray glass cleaner directly on the mirror. Use a
soft towel dampened with water.
Compass
Compass Operation
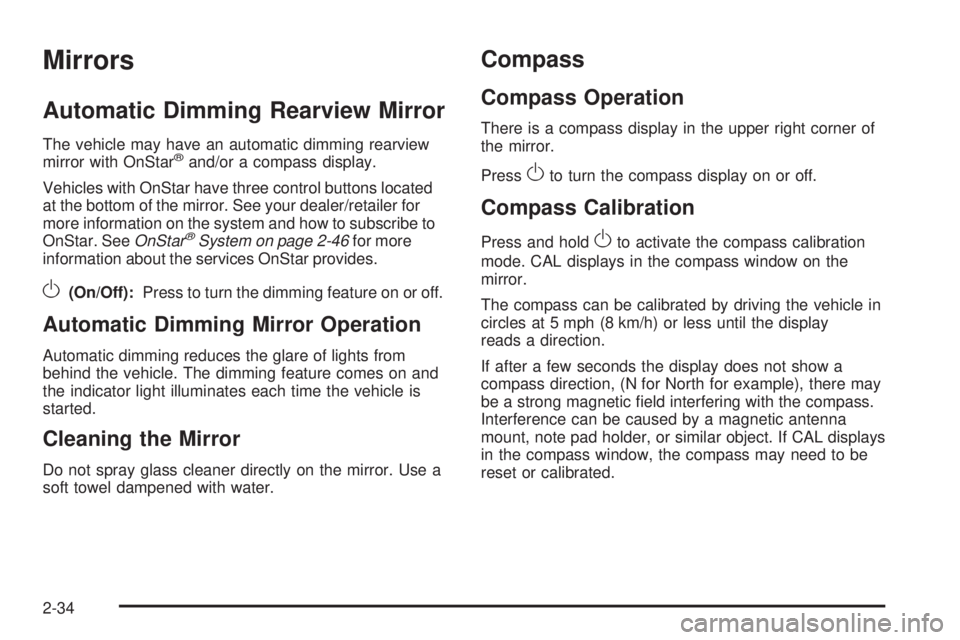
There is a compass display in the upper right corner of
the mirror.
Press
Oto turn the compass display on or off.
Compass Calibration
Press and holdOto activate the compass calibration
mode. CAL displays in the compass window on the
mirror.
The compass can be calibrated by driving the vehicle in
circles at 5 mph (8 km/h) or less until the display
reads a direction.
If after a few seconds the display does not show a
compass direction, (N for North for example), there may
be a strong magnetic �eld interfering with the compass.
Interference can be caused by a magnetic antenna
mount, note pad holder, or similar object. If CAL displays
in the compass window, the compass may need to be
reset or calibrated.
2-34
Page 115 of 436

Compass Variance
The compass is set to zone eight. If you do not live
in zone eight or drive out of the area, the compass
variance needs to be changed to the appropriate zone.
To adjust for compass variance:
1. Find your current location and variance zone number
on the following zone map.
2. Press and hold
Ountil the zone number displays.
The number shown is the current zone number.
3. Once the zone number displays, press
Orepeatedly
until the correct zone number displays. Stop pressing
the button and the mirror returns to normal operation.
If CAL appears in the compass window, the compass
may need calibration. See “Compass Calibration”
listed previously.
2-35
Page 118 of 436
Object Detection Systems
Ultrasonic Rear Parking
Assist (URPA)
For vehicles with the URPA system, it operates at
speeds less than 5mph (8 km/h), and assists the driver
with parking and avoiding objects while in R (Reverse).
The sensors on the rear bumper are used to detect
the distance to an object up to 8 feet (2.5 m) behind
the vehicle, and at least 10 inches (25.4 cm) off
the ground.
{CAUTION:
The Ultrasonic Rear Parking Assist (URPA)
system does not replace driver vision. It cannot
detect:
objects that are below the bumper,
underneath the vehicle, or if they are
too close or far from the vehicle
children, pedestrians, bicyclists, or pets.
CAUTION: (Continued)
CAUTION: (Continued)
If you do not use proper care before and while
backing; vehicle damage, injury, or death could
occur. Even with URPA, always check behind the
vehicle before backing up. While backing, be sure
to look for objects and check the vehicle’s mirrors.
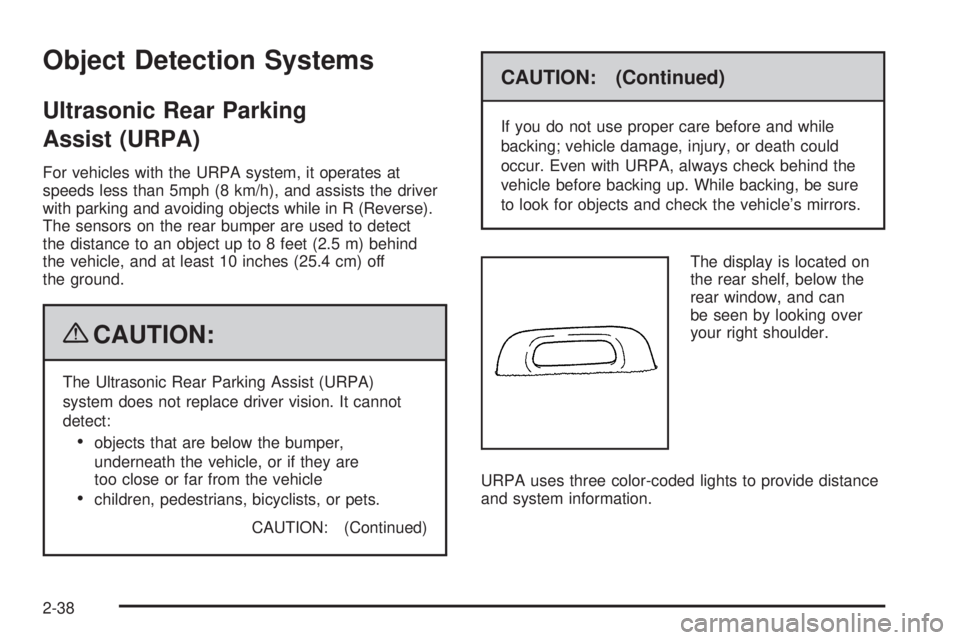
The display is located on
the rear shelf, below the
rear window, and can
be seen by looking over
your right shoulder.
URPA uses three color-coded lights to provide distance
and system information.
2-38
Page 119 of 436

How the System Works
URPA comes on automatically when the shift lever is
moved into R (Reverse). The rear display brie�y
illuminates to indicate the system is working.
URPA operates only at speeds less than 5 mph (8 km/h).
If the vehicle is above this speed, the red light on the rear
display will �ash.
To be detected, objects must be at least 10 inches
(25.4 cm) off the ground and below trunk level. Objects
must also be within 8 feet (2.5 m) from the rear bumper.
This distance may be less during warmer or humid
weather.
A single beep will sound the �rst time an object is
detected between 23 inches (0.5 m) and 8 feet
(2.6 m) away. Beeping will occur for a short time
when the vehicle is closer than 1 foot (0.3 m) from
the object.The following describes what will occur with the URPA
display as the vehicle gets closer to a detected object:
Description English Metric
amber light 8 ft 2.5 m
amber/amber lights 40 in 1.0 m
amber/amber/red lights 23 in 0.6 m
amber/amber/red lights
�ashing and beep for
�ve seconds1 ft 0.3 m
The system can be disabled through the Driver
Information Center (DIC). See “Park Assist” under
DIC Operation and Displays on page 3-49for more
information.
2-39
Page 120 of 436
When the System Does Not Seem to
Work Properly
If the URPA system will not activate due to a temporary
condition, the message PARK ASSIST OFF will be
displayed on the DIC and a red light will be shown on
the rear URPA display when the shift lever is moved into
R (Reverse). This occurs under the following conditions:
The driver disables the system.
The ultrasonic sensors are not clean. Keep the
vehicle’s rear bumper free of mud, dirt, snow, ice and
slush. For cleaning instructions, seeWashing Your
Vehicle on page 5-96.
A trailer was attached to the vehicle, or a bicycle or
an object was hanging out of the trunk during the last
drive cycle, the red light may illuminate in the rear
display. Once the attached object is removed, URPA
will return to normal operation.
A tow bar is attached to the vehicle.
The vehicle’s bumper is damaged. Take the vehicle
to your dealer/retailer to repair the system.
Other conditions may affect system performance,
such as vibrations from a jackhammer or the
compression of air brakes on a very large truck.
If the system is still disabled after driving forward at least
15 mph (25 km/h), take the vehicle to your dealer/retailer.
Side Blind Zone Alert (SBZA)
The vehicle may have a Side Blind Zone Alert (SBZA)
system. Read this entire section before using the system.
The SBZA system operates on a radio frequency
subject to Federal Communications Commission (FCC)
Rules and with Industry Canada.
This device complies with Part 15 of the FCC Rules.
Operation is subject to the following two conditions:
1. This device may not cause harmful interference.
2. This device must accept any interference received,
including interference that may cause undesired
operation.
This device complies with RSS-310 of Industry Canada.
Operation is subject to the following two conditions:
1. This device may not cause harmful interference.
2. This device must accept any interference received,
including interference that may cause undesired
operation.
Frequency of operation: 24.05GHz – 24.25GHz
Field Strength: Not greater than 2.5V/m peak
(0.25V/m average) at a distance of 3m
The manufacturer is not responsible for any radio or TV
interference caused by unauthorized modi�cations to
this equipment. Such modi�cations could void the user’s
authority to operate the equipment.
2-40
Page 121 of 436
{CAUTION:
SBZA is only a lane changing aid and does not
replace driver vision. SBZA does not detect:
Vehicles outside the side blind zones which
may be rapidly approaching.
Pedestrians, bicyclists, or animals.
Failure to use proper care when changing lanes
may result in damage to the vehicle, injury, or
death. Always check the outside and rearview
mirrors, glance over your shoulder, and use the
turn signal before changing lanes.
When the system detects a vehicle in the side blind
zone, amber SBZA displays will light up in the side
mirrors. This indicates that it may be unsafe to change
lanes. Before making a lane change, always check
the SBZA display, check the outside and rearview
mirrors, look over your shoulder for vehicles and
hazards, and use the turn signal.
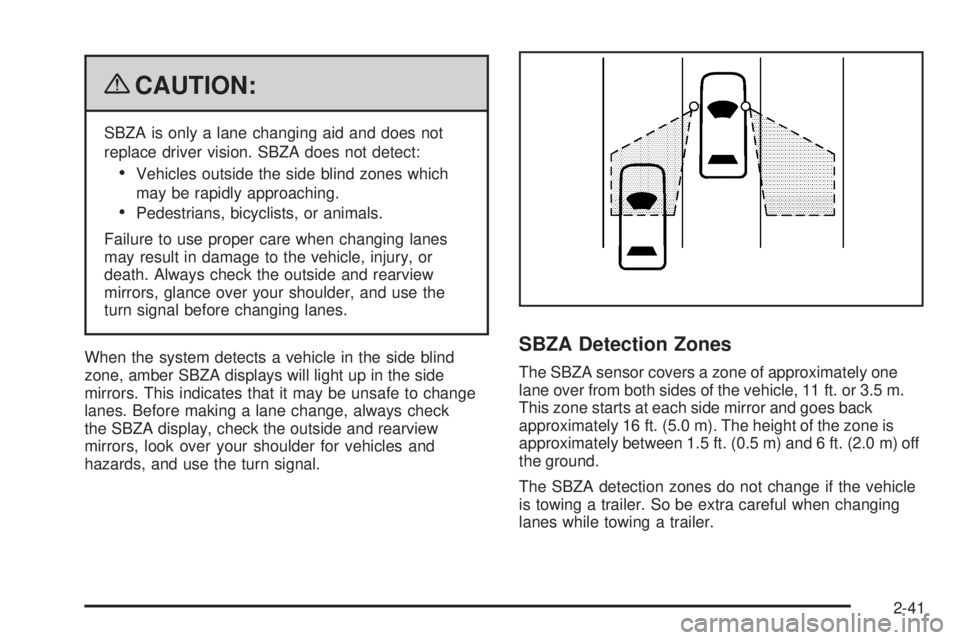
SBZA Detection Zones
The SBZA sensor covers a zone of approximately one
lane over from both sides of the vehicle, 11 ft. or 3.5 m.
This zone starts at each side mirror and goes back
approximately 16 ft. (5.0 m). The height of the zone is
approximately between 1.5 ft. (0.5 m) and 6 ft. (2.0 m) off
the ground.
The SBZA detection zones do not change if the vehicle
is towing a trailer. So be extra careful when changing
lanes while towing a trailer.
2-41