Call BUICK ENCLAVE 2010 User Guide
[x] Cancel search | Manufacturer: BUICK, Model Year: 2010, Model line: ENCLAVE, Model: BUICK ENCLAVE 2010Pages: 438, PDF Size: 2.47 MB
Page 39 of 438
Keys, Doors and Windows 2-11
If the transmission is shifted out of
P (Park) while the power function is
in progress, the liftgate power
function will continue to completion.
If the transmission is shifted out of
P (Park) and the vehicle accelerates
before the power liftgate latches
closed, the liftgate may reverse to
the open position. Cargo could fall
out of the vehicle. Always make
sure the power liftgate is closed and
latched before you drive away.
If you power open the liftgate and
the liftgate support struts have lost
pressure, the lights will flash and a
chime will sound. The liftgate will
stay open temporarily, then slowly
close. See your dealer/retailer for
service before using the liftgate if
this occurs.
Obstacle Detection Features
A warning chime will sound and the
liftgate will automatically reverse
direction to the full closed or open
position if the liftgate encounters an
obstacle during a power open orclose cycle. After removing the
obstruction, the power liftgate
operation can be used again.
If the liftgate comes across more
obstacles on the same power cycle,
the power function deactivates, and
you must manually open or close
the liftgate. A message displays,
LIFTGATE OPEN, to indicate that
the liftgate is open. See
Driver
Information Center (DIC)
on
page 5‑25for more information.
After removing the obstructions,
manually open the liftgate to the full
open position or close the liftgate to
the fully closed and latched position.
The liftgate resumes normal power
operation.
The vehicle has pinch sensors
located on the side edges of the
liftgate. If an object is caught
between the liftgate and the body
and presses against this sensor, the
liftgate will reverse direction and
open fully. The liftgate will remain
open until it is activated again or closed manually. Do not force the
liftgate open or closed during a
power cycle.
Manual Operation of Power
Liftgate
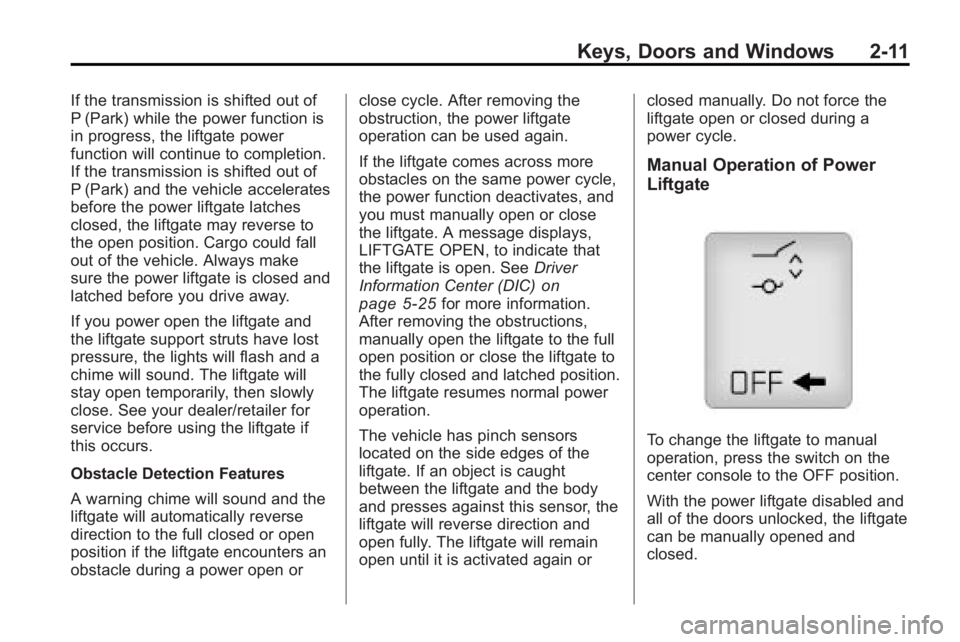
To change the liftgate to manual
operation, press the switch on the
center console to the OFF position.
With the power liftgate disabled and
all of the doors unlocked, the liftgate
can be manually opened and
closed.
Page 41 of 438
Keys, Doors and Windows 2-13
during the ten second pre-alarm, the
alarm goes off. The headlamps flash
and the horn sounds for about
30 seconds, then turns off to save
the battery power.
The vehicle can be started with the
correct ignition key if the alarm has
been set off.
To avoid setting off the alarm by
accident:
.Lock the vehicle with the door
key after the doors are closed.
.Unlock the door with the RKE
transmitter. Unlocking a door any
other way sets off the alarm if
the system has been armed.
Press
Kor place the key in the
ignition and turn it to START to turn
off the alarm.
Testing the Alarm
To test the alarm:
1. From inside the vehicle, lower the driver side window and open
the driver door.
2. Press
Q.
3. Get out of the vehicle, close the door and wait for the security
light to go out.
4. Then reach in through the window, unlock the door with the
manual door lock and open the
door. This should set off the
alarm.
If the alarm does not sound when it
should, but the vehicle's headlamps
flash, check to see if the horn
works. The horn fuse may be blown.
To replace the fuse, see Fuses and
Circuit Breakers on page 10‑31.
If the alarm does not sound or the
vehicle's headlamps do not flash,
see your dealer/retailer for service.
Immobilizer
See Radio Frequency Statementon
page 13‑16for information
regarding Part 15 of the Federal
Communications Commission (FCC)
Rules and RSS-210/211 of Industry
and Science Canada.
Immobilizer Operation
This vehicle has PASS-Key®III+
(Personalized Automotive Security
System) theft-deterrent system.
PASS-Key
®III+ is a passive
theft-deterrent system.
The system is automatically armed
when the key is removed from the
ignition.
The system is automatically
disarmed when the key is turned to
ON/RUN, ACC/ACCESSORY or
START from the LOCK/OFF
position.
Page 53 of 438

Seats and Restraints 3-3
Front Seats
Power Seat Adjustment
Driver Seat with Power SeatControl, Power Recline,
and Power Lumbar shown
A. Power Seat Adjustment Control
B. Reclining Seatbacks
on
page 3‑5.
C. Lumbar Adjustment
on
page 3‑4. If the vehicle has power seats, the
controls are located on the outboard
side of the seats.
Move the seat forward or rearward
by sliding the power seat
adjustment control (A) forward or
rearward.
The vehicle may have additional
features to adjust the power seat:
.Raise or lower the entire seat by
moving the power seat
adjustment control (A) up
or down.
.Raise or lower the front part of
the seat cushion by moving the
front of the control up or down.
.Raise or lower the rear part of
the seat cushion by moving the
rear of the control up or down.
The vehicle may have a memory
function which allows seat settings
to be saved and recalled. See
“Memory Seat and Mirrors” later in
this section for more information.
Memory Seat and Mirrors
On vehicles with the memory
package, the controls are located on
the driver door.
1: Saves the seating position for
driver 1.
2: Saves the seating position for
driver 2.
S: Recalls the easy exit position.
To save a position in memory:
1. Adjust the driver seat, including the seatback recliner, both
outside mirrors, and the power
steering column to a comfortable
position.
See Power Mirrors
on
page 2‑16for more information.
Not all vehicles will have the
ability to save and recall the
mirror positions.
2. Press and hold button 1 until two beeps sound to let you know
that the position has been
stored.
Page 54 of 438
3-4 Seats and Restraints
A second seating and mirror
position can be programmed by
repeating the above steps and
pressing button 2.
To recall the memory positions, the
vehicle must be in P (Park). Press
and release either button 1 or 2. The
seat, outside mirrors, and power
steering column will move to the
position previously stored. You will
hear a single beep.
If the RKE transmitter is used to
enter the vehicle and the remote
recall memory feature has been
turned on, automatic seat and mirror
movement will occur. See
“MEMORY SEAT RECALL”under
Vehicle Personalization
on
page 5‑40for more information.
To stop recall movement of the
memory feature at any time, press
one of the power seat controls,
memory buttons, or power mirror
buttons. If something has blocked the driver
seat while recalling a memory
position, the driver seat recall may
stop working. If this happens,
remove the obstruction and press
the appropriate control for the area
that is not recalling for two seconds.
Try pressing the memory button
again. If the memory position is still
not being recalled, see your dealer/
retailer for service.
Easy Exit Seat
S:
With the vehicle in P (Park),
press the exit button. You will hear a
single beep. The driver seat will
move back into the exit position.
If the easy exit seat feature has
been turned on in the Driver
Information Center (DIC), automatic
seat movement will occur when the
key is removed from the ignition.
For programming information, see
Vehicle Personalization
on
page 5‑40for more information.
Lumbar Adjustment
Manual Lumbar
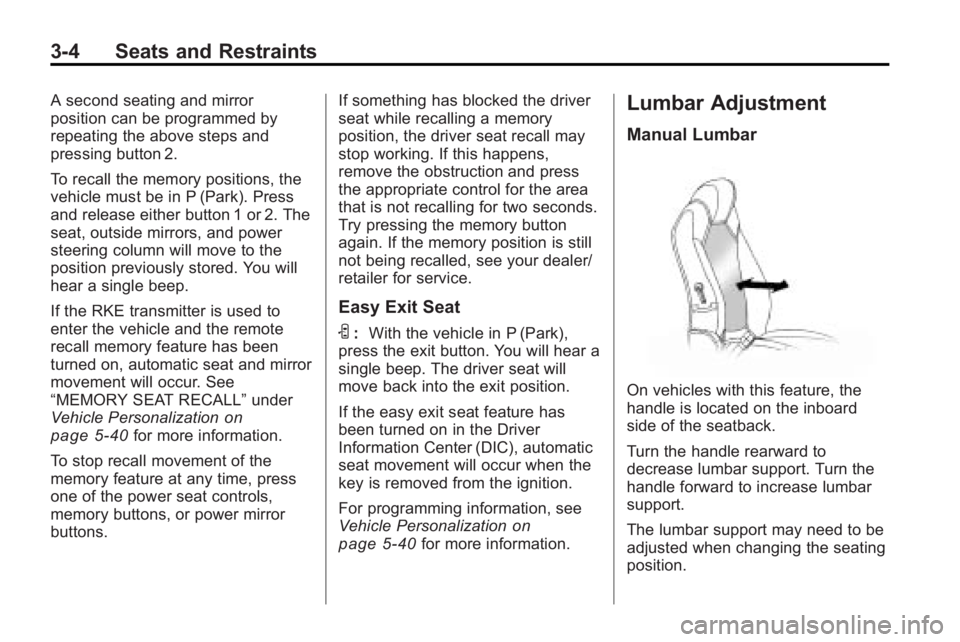
On vehicles with this feature, the
handle is located on the inboard
side of the seatback.
Turn the handle rearward to
decrease lumbar support. Turn the
handle forward to increase lumbar
support.
The lumbar support may need to be
adjusted when changing the seating
position.
Page 61 of 438
Seats and Restraints 3-11
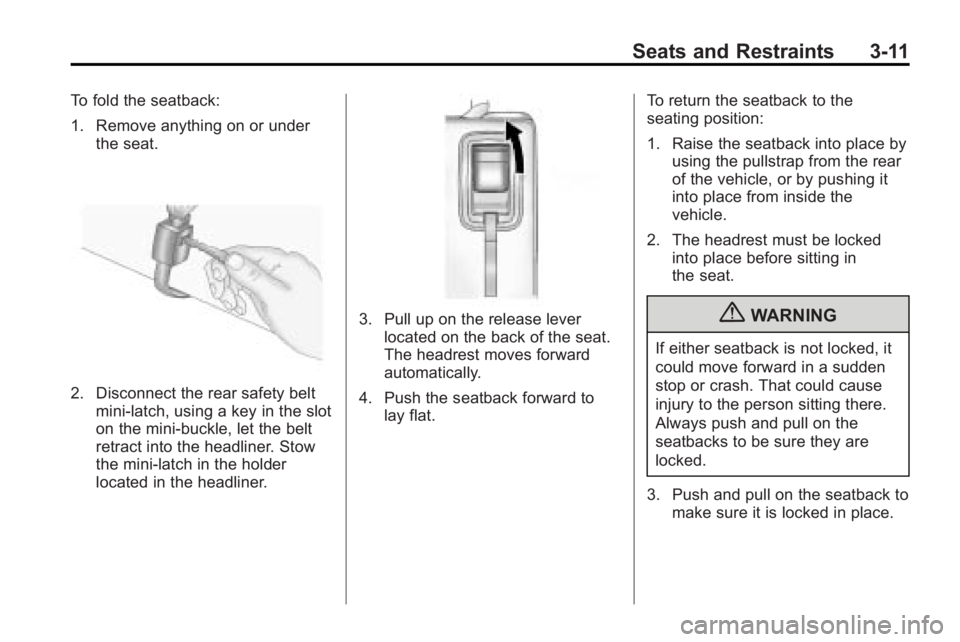
To fold the seatback:
1. Remove anything on or underthe seat.
2. Disconnect the rear safety beltmini-latch, using a key in the slot
on the mini-buckle, let the belt
retract into the headliner. Stow
the mini-latch in the holder
located in the headliner.
3. Pull up on the release leverlocated on the back of the seat.
The headrest moves forward
automatically.
4. Push the seatback forward to lay flat. To return the seatback to the
seating position:
1. Raise the seatback into place by
using the pullstrap from the rear
of the vehicle, or by pushing it
into place from inside the
vehicle.
2. The headrest must be locked into place before sitting in
the seat.{WARNING
If either seatback is not locked, it
could move forward in a sudden
stop or crash. That could cause
injury to the person sitting there.
Always push and pull on the
seatbacks to be sure they are
locked.
3. Push and pull on the seatback to make sure it is locked in place.
Page 85 of 438
Seats and Restraints 3-35
Seat-mounted side impact and
roof-rail airbags distribute the force
of the impact more evenly over the
occupant's upper body.
Rollover capable roof-rail airbags
are designed to help contain the
head and chest of occupants in the
outboard seating positions in the
first and second rows. The rollover
capable roof-rail airbags are
designed to help reduce the risk of
full or partial ejection in rollover
events, although no system can
prevent all such ejections.
But airbags would not help in many
types of collisions, primarily
because the occupant's motion is
not toward those airbags. SeeWhen
Should an Airbag Inflate?
on
page 3‑33for more information.
Airbags should never be regarded
as anything more than a supplement
to safety belts.
What Will You See After
an Airbag Inflates?
After the frontal airbags and
seat-mounted side impact airbags
inflate, they quickly deflate, so
quickly that some people may not
even realize an airbag inflated.
Roof-rail airbags may still be at least
partially inflated for some time after
they deploy. Some components of
the airbag module may be hot for
several minutes. For location of the
airbag modules, see What Makes
an Airbag Inflate? on page 3‑34.
The parts of the airbag that come
into contact with you may be warm,
but not too hot to touch. There may
be some smoke and dust coming
from the vents in the deflated
airbags. Airbag inflation does not
prevent the driver from seeing out of
the windshield or being able to steer
the vehicle, nor does it prevent
people from leaving the vehicle.
{WARNING
When an airbag inflates, there
may be dust in the air. This dust
could cause breathing problems
for people with a history of
asthma or other breathing trouble.
To avoid this, everyone in the
vehicle should get out as soon as
it is safe to do so. If you have
breathing problems but cannot
get out of the vehicle after an
airbag inflates, then get fresh air
by opening a window or a door.
If you experience breathing
problems following an airbag
deployment, you should seek
medical attention.
The vehicle has a feature that may
automatically unlock the doors, turn
on the interior lamps and hazard
warning flashers, and shut off the
fuel system after the airbags inflate.
Page 92 of 438
3-42 Seats and Restraints
Adding Equipment to the
Airbag-Equipped Vehicle
Q: Is there anything I might addto or change about the vehicle
that could keep the airbags
from working properly?
A: Yes. If you add things that
change the vehicle's frame,
bumper system, height, front end
or side sheet metal, they may
keep the airbag system from
working properly. Changing or
moving any parts of the front
seats, safety belts, the airbag
sensing and diagnostic module,
steering wheel, instrument
panel, roof-rail airbag modules,
ceiling headliner or pillar garnish
trim, overhead console, front
sensors, side impact sensors,
rollover sensor module, or airbag
wiring can affect the operation of
the airbag system.
In addition, the vehicle has a
passenger sensing system for
the right front passenger position, which includes sensors
that are part of the passenger
seat. The passenger sensing
system may not operate properly
if the original seat trim is
replaced with non-GM covers,
upholstery or trim, or with GM
covers, upholstery or trim
designed for a different vehicle.
Any object, such as an
aftermarket seat heater or a
comfort enhancing pad or
device, installed under or on top
of the seat fabric, could also
interfere with the operation of
the passenger sensing system.
This could either prevent proper
deployment of the passenger
airbag(s) or prevent the
passenger sensing system from
properly turning off the
passenger airbag(s). See
Passenger Sensing System
on
page 3‑37.
If you have questions, call
Customer Assistance. The
phone numbers and addresses
for Customer Assistance are in Step Two of the Customer
Satisfaction Procedure in this
manual.
If the vehicle has rollover
roof-rail airbags, see
Different
Size Tires and Wheels
on
page 10‑54for additional
important information.
Q: Because I have a disability, I have to get my vehicle
modified. How can I find out
whether this will affect my
airbag system?
A: If you have questions, call
Customer Assistance. The
phone numbers and addresses
for Customer Assistance are in
Step Two of the Customer
Satisfaction Procedure in this
manual.
In addition, your dealer/retailer and
the service manual have information
about the location of the airbag
sensors, sensing and diagnostic
module and airbag wiring.
Page 122 of 438
5-4 Instruments and Controls
To navigate folders on an iPod or
USB device for vehicles without a
navigation system:
1. Press and hold
worxwhile
listening to a song until the
contents of the current folder
display on the radio display.
2. Press and hold
xto go back to
the previous folder list.
3. Press and release
worxto
scroll up or down the list.
.To select a folder, press
and hold
w, or press¨
when the folder is
highlighted.
.To go back further in the
folder list, press and
hold
x. To navigate folders on an iPod or
USB device for vehicles with a
navigation system:
1. Go to the Music Navigator by
first touching the center touch
screen folder button in the main
audio page.
2. While in Music Navigator, select the folder/artist/genre/category,
etc. using the touch screen.
3. Press and release
xto scroll
through the selected music list.
Touch the track label on the
touch screen to highlight and
begin playing the track from
that list.
4. Press and hold
xto quickly
scroll through the selected
music list
b g(Mute/Push to Talk): Press
to silence the vehicle speakers only.
Press again to turn the sound on.
For vehicles with Bluetooth or
OnStar
®systems, press and hold
for longer than two seconds to interact with those systems. See
Bluetooth
on page 7‑44and the
OnStar Owner's Guide for more
information.
c(End): Press to reject an
incoming call, or end a current call.
SRCE (Source/Voice
Recognition): Press to switch
between the radio, CD, and for
vehicles with, DVD, front auxiliary,
and rear auxiliary.
For vehicles with the navigation
system, press and hold this button
for longer than one second to
initiate voice recognition. See “Voice
Recognition” in the Navigation
System manual for more
information.
¨(Seek): Press to go to the next
radio station while in AM,
FM, or XM™.
For vehicles with or without a
navigation system:
Press
¨to go to the next track or
chapter while sourced to the CD or
DVD slot.
Page 125 of 438
Instruments and Controls 5-7
Compass variance is the difference
between the earth's magnetic north
and true geographic north. If the
compass is not set to the zone
where you live, the compass may
give false readings. The compass
must be set to the variance zone in
which the vehicle is traveling.
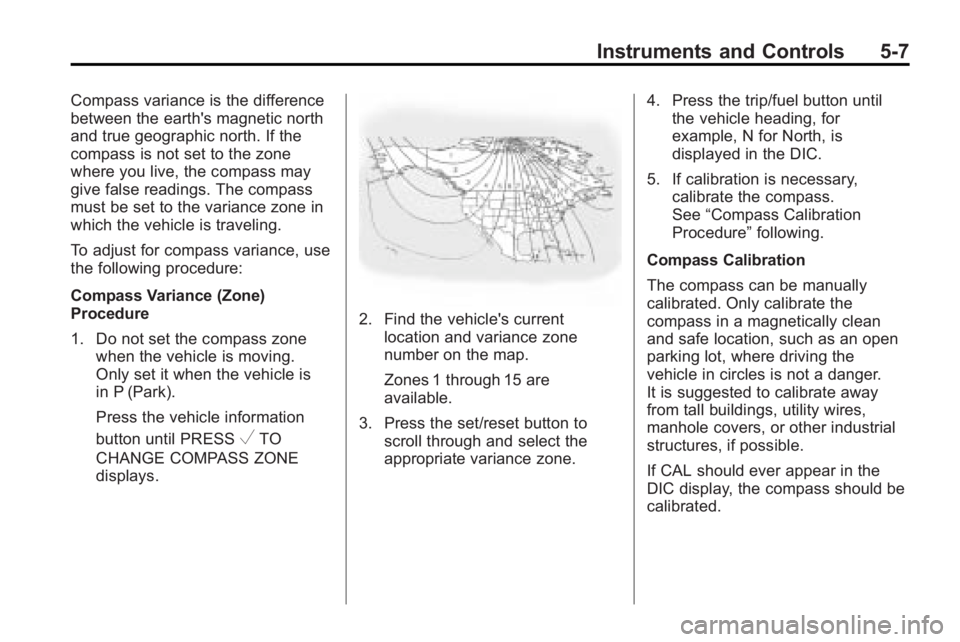
To adjust for compass variance, use
the following procedure:
Compass Variance (Zone)
Procedure
1. Do not set the compass zonewhen the vehicle is moving.
Only set it when the vehicle is
in P (Park).
Press the vehicle information
button until PRESS
VTO
CHANGE COMPASS ZONE
displays.
2. Find the vehicle's current location and variance zone
number on the map.
Zones 1 through 15 are
available.
3. Press the set/reset button to scroll through and select the
appropriate variance zone. 4. Press the trip/fuel button until
the vehicle heading, for
example, N for North, is
displayed in the DIC.
5. If calibration is necessary, calibrate the compass.
See “Compass Calibration
Procedure” following.
Compass Calibration
The compass can be manually
calibrated. Only calibrate the
compass in a magnetically clean
and safe location, such as an open
parking lot, where driving the
vehicle in circles is not a danger.
It is suggested to calibrate away
from tall buildings, utility wires,
manhole covers, or other industrial
structures, if possible.
If CAL should ever appear in the
DIC display, the compass should be
calibrated.
Page 136 of 438
5-18 Instruments and Controls
If, after several seconds, both status
indicator lights remain on, or if there
are no lights at all, there may be a
problem with the lights or the
passenger sensing system. See
your dealer/retailer for service.
{WARNING
If the airbag readiness light ever
comes on and stays on, it means
that something may be wrong
with the airbag system. To help
avoid injury to yourself or others,
have the vehicle serviced right
away. SeeAirbag Readiness
Light
on page 5‑16for more
information, including important
safety information.
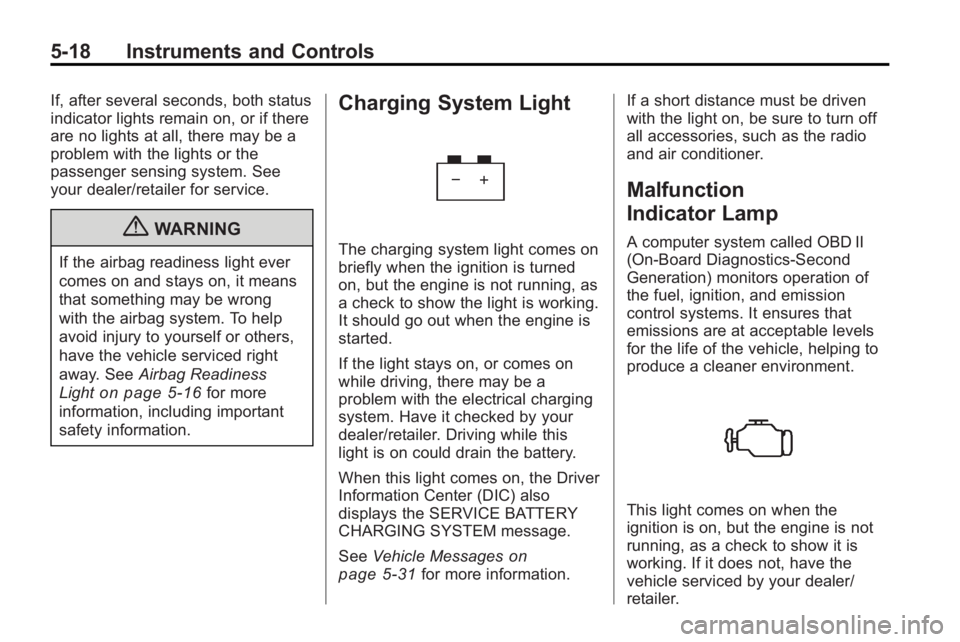
Charging System Light
The charging system light comes on
briefly when the ignition is turned
on, but the engine is not running, as
a check to show the light is working.
It should go out when the engine is
started.
If the light stays on, or comes on
while driving, there may be a
problem with the electrical charging
system. Have it checked by your
dealer/retailer. Driving while this
light is on could drain the battery.
When this light comes on, the Driver
Information Center (DIC) also
displays the SERVICE BATTERY
CHARGING SYSTEM message.
See Vehicle Messages
on
page 5‑31for more information. If a short distance must be driven
with the light on, be sure to turn off
all accessories, such as the radio
and air conditioner.
Malfunction
Indicator Lamp
A computer system called OBD II
(On-Board Diagnostics-Second
Generation) monitors operation of
the fuel, ignition, and emission
control systems. It ensures that
emissions are at acceptable levels
for the life of the vehicle, helping to
produce a cleaner environment.
This light comes on when the
ignition is on, but the engine is not
running, as a check to show it is
working. If it does not, have the
vehicle serviced by your dealer/
retailer.