wheel BUICK ENCLAVE 2010 Owner's Guide
[x] Cancel search | Manufacturer: BUICK, Model Year: 2010, Model line: ENCLAVE, Model: BUICK ENCLAVE 2010Pages: 438, PDF Size: 2.47 MB
Page 156 of 438
5-38 Instruments and Controls
SERVICE TIRE MONITOR
SYSTEM
On vehicles with the Tire Pressure
Monitor System (TPMS), this
message displays if a part on the
TPMS is not working properly. The
tire pressure light also flashes and
then remains on during the same
ignition cycle. SeeTire Pressure
Light
on page 5‑23. Several
conditions may cause this message
to appear. See Tire Pressure
Monitor Operation
on page 10‑46for
more information. If the warning
comes on and stays on, there may
be a problem with the TPMS.
See your dealer/retailer.
TIRE LEARNING ACTIVE
This message displays when the
Tire Pressure Monitor System
(TPMS) is re-learning the tire
positions on your vehicle. The tire
positions must be re-learned after rotating the tires or after replacing a
tire or sensor. See
Tire Rotation
on
page 10‑50, Tire Pressure Monitor
Systemon page 10‑45, and Tire
Pressureon page 10‑44for more
information.
Transmission Messages
ALL WHEEL DRIVE OFF
If your vehicle has the All-Wheel
Drive (AWD) system, this message
displays when there is a compact
spare tire on the vehicle, when the
Antilock Brake System (ABS)
warning light comes on, or when the
rear differential fluid is overheating.
This message turns off when the
differential fluid cools.
The AWD system is disabled until
the compact spare tire is replaced
by a full-size tire. If the warning
message is still on after putting on
the full-size tire, you need to reset
the warning message. To reset the warning message, turn the ignition
off and then back on again after
30 seconds. If the message stays
on, see your dealer/retailer right
away. See
All-Wheel Drive
on
page 9‑26for more information.
SERVICE ALL WHEEL DRIVE
If your vehicle has the All-Wheel
Drive (AWD) system, this message
displays if there is a problem with
this system. If this message
appears, stop as soon as possible
and turn off the vehicle. Restart the
vehicle after 30 seconds and check
for the message on the DIC display.
If the message is still displayed or
appears again when you begin
driving, the AWD system needs
service. See your dealer/retailer.
SERVICE TRANSMISSION
This message displays when there
is a problem with the transmission.
See your dealer/retailer for service.
Page 163 of 438
Instruments and Controls 5-45
Press the customization button until
PARK TILT MIRRORS appears on
the DIC display. Press the set/reset
button once to access the settings
for this feature. Then press the
customization button to scroll
through the following settings:
OFF (default):Neither outside
mirror will be tilted down when the
vehicle is shifted into R (Reverse).
DRIVER MIRROR: The driver's
outside mirror will be tilted down
when the vehicle is shifted into
R (Reverse).
PASSENGER MIRROR: The
passenger's outside mirror will be
tilted down when the vehicle is
shifted into R (Reverse).
BOTH MIRRORS: The driver's and
passenger's outside mirrors will be
tilted down when the vehicle is
shifted into R (Reverse).
NO CHANGE: No change will be
made to this feature. The current
setting will remain. To select a setting, press the set/
reset button while the desired
setting is displayed on the DIC.
EASY EXIT SEAT
If your vehicle has this feature, it
allows you to select your preference
for the automatic easy exit seat
feature. See
Delayed Locking
on
page 2‑7for more information.
Press the customization button until
EASY EXIT SEAT appears on the
DIC display. Press the set/reset
button once to access the settings
for this feature. Then press the
customization button to scroll
through the following settings:
OFF (default): No automatic seat
exit recall will occur.
ON: The driver's seat will move
back when the key is removed from
the ignition. The steering column will
also move up and forward on
vehicles with the power tilt and
telescopic steering feature. See
Steering Wheel Adjustment
on
page 5‑2for more information. The automatic easy exit seat
movement will only occur one time
after the key is removed from the
ignition. If the automatic movement
has already occurred, and you put
the key back in the ignition and
remove it again, the seat and
steering column will stay in the
original exit position, unless a
memory recall took place prior to
removing the key again.
NO CHANGE:
No change will be
made to this feature. The current
setting will remain.
To select a setting, press the set/
reset button while the desired
setting is displayed on the DIC.
MEMORY SEAT RECALL
If your vehicle has this feature, it
allows you to select your preference
for the remote memory seat recall
feature. See Delayed Locking
on
page 2‑7for more information.
Page 164 of 438
5-46 Instruments and Controls
Press the customization button until
MEMORY SEAT RECALL appears
on the DIC display. Press the set/
reset button once to access the
settings for this feature. Then press
the customization button to scroll
through the following settings:
OFF (default):No remote memory
seat recall will occur.
ON: The driver's seat and outside
mirrors will automatically move to
the stored driving position when the
unlock button on the Remote
Keyless Entry (RKE) transmitter is
pressed. The steering column will
also move on vehicles with the
power tilt and telescopic steering
feature. See Steering Wheel
Adjustment
on page 5‑2for more
information. See “Relearn Remote
Key” under Driver Information
Center (DIC)
on page 5‑25for
more information on matching
transmitters to driver ID numbers.
NO CHANGE: No change will be
made to this feature. The current
setting will remain. To select a setting, press the set/
reset button while the desired
setting is displayed on the DIC.
REMOTE START
If your vehicle has this feature, it
allows you to turn the remote start
off or on. The remote start feature
allows you to start the engine from
outside of the vehicle using the
Remote Keyless Entry (RKE)
transmitter. See
Remote Vehicle
Start
on page 2‑5for more
information.
Press the customization button until
REMOTE START appears on the
DIC display. Press the set/reset
button once to access the settings
for this feature. Then press the
customization button to scroll
through the following settings:
OFF: The remote start feature will
be disabled.
ON (default): The remote start
feature will be enabled. NO CHANGE:
No change will be
made to this feature. The current
setting will remain.
To select a setting, press the set/
reset button while the desired
setting is displayed on the DIC.
FACTORY SETTINGS
This feature allows you to set all of
the customization features back to
their factory default settings.
Press the customization button until
FACTORY SETTINGS appears on
the DIC display. Press the set/reset
button once to access the settings
for this feature. Then press the
customization button to scroll
through the following settings:
RESTORE ALL (default): The
customization features will be set to
their factory default settings.
DO NOT RESTORE: The
customization features will not be
set to their factory default settings.
Page 171 of 438
Lighting 6-1
Lighting
Exterior Lighting
Exterior Lamp Controls . . . . . . . . 6-1
Headlamp High/Low-BeamChanger . . . . . . . . . . . . . . . . . . . . . 6-2
Flash-to-Pass . . . . . . . . . . . . . . . . . 6-3
Daytime Running Lamps (DRL)/Automatic Headlamp
System . . . . . . . . . . . . . . . . . . . . . . 6-3
Delayed Headlamps . . . . . . . . . . 6-3
Adaptive Forward Lighting (AFL) . . . . . . . . . . . . . . . 6-4
Hazard Warning Flashers . . . . . 6-4
Turn and Lane-Change Signals . . . . . . . . . . . . . . . . . . . . . . 6-4
Fog Lamps . . . . . . . . . . . . . . . . . . . . 6-5
Interior Lighting
Instrument Panel Illumination Control . . . . . . . . . . . . . . . . . . . . . . 6-5
Dome Lamps . . . . . . . . . . . . . . . . . 6-5
Reading Lamps . . . . . . . . . . . . . . . 6-5
Lighting Features
Entry Lighting . . . . . . . . . . . . . . . . . 6-6
Delayed Entry Lighting . . . . . . . . 6-6
Delayed Exit Lighting . . . . . . . . . 6-6
Parade Dimming . . . . . . . . . . . . . . 6-7
Battery Load Management . . . . 6-7
Battery Power Protection . . . . . . 6-8
Exterior Lighting
Exterior Lamp Controls
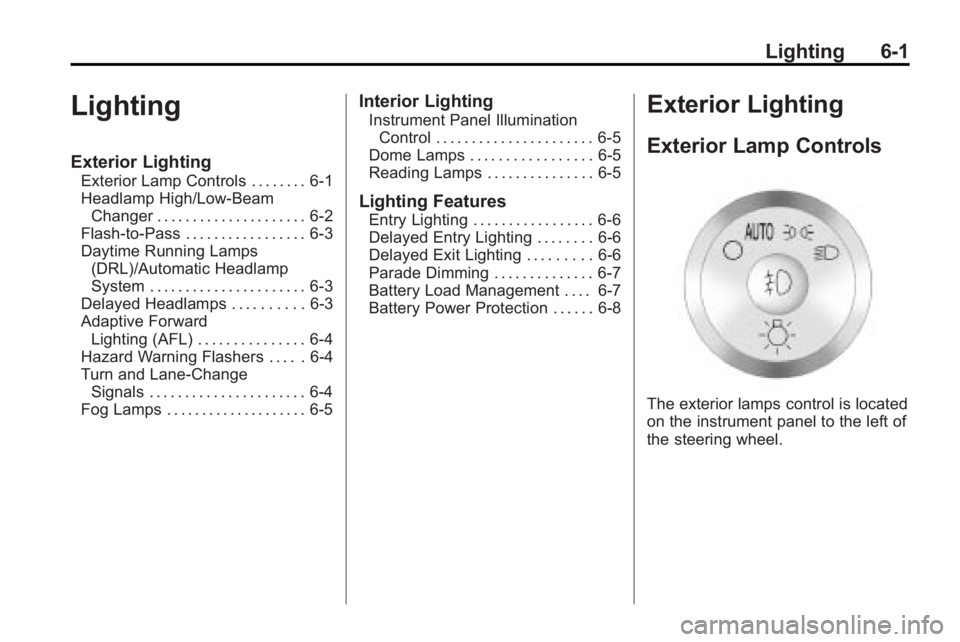
The exterior lamps control is located
on the instrument panel to the left of
the steering wheel.
Page 175 of 438
Lighting 6-5
Fog Lamps
Use the fog lamps for better vision
in foggy or misty conditions.
The fog lamps button is on the
exterior lamps control to the left of
the steering column.
#(Fog Lamps):Press the exterior
lamps button to turn the fog lamps
on or off. A light comes on in the
instrument panel cluster when the
fog lamps are in use. The ignition
must be on for the fog lamps
to work.
When the headlamps are changed
to high-beam, the fog lamps turn off.
The fog lamps come back on again
when the high-beam headlamps are
turned off.
Some localities have laws that
require the headlamps to be on
along with the fog lamps.
Interior Lighting
Instrument Panel
Illumination Control
D
(Instrument Panel
Brightness): The knob with this
symbol on it is next to the exterior
lamps control to the left of the
steering wheel. Push the knob in
all the way until it extends out and
then turn the knob clockwise or
counterclockwise to brighten or dim
the lights. Push the knob back in
when finished.
Dome Lamps
The dome lamps are located in the
overhead console and above the
rear seat passengers.
The dome lamps automatically
come on when a door is opened,
unless the dome lamp override
button is pressed in. The lamps can also be turned on
and off by turning the instrument
panel brightness control clockwise
to the farthest position.
Dome Lamp Override
The dome lamp override button is
next to the exterior lamps control.
E
(Dome Lamp Override): Press
the button in and the dome lamps
remain off when a door is opened.
Press the button again to return it to
the extended position so that the
dome lamps come on when a door
is opened.
Reading Lamps
Press the button near each lamp to
turn them on or off.
Page 185 of 438
Infotainment System 7-7
©SEEK¨:Press to go to the
previous or to the next station and
stay there.
To scan stations, press and hold
©
or¨until a beep sounds. The
radio goes to a station, plays for a
few seconds, then goes to the next
station. Press either arrow again to
stop scanning.
The radio only seeks and scans
stations with a strong signal that are
in the selected band.
Storing a Radio Station as a
Favorite
Drivers are encouraged to set up
their radio station favorites while the
vehicle is in P (Park). Tune to
favorite stations using the presets,
favorites button, and steering wheel
controls. See Steering Wheel
Controls on page 5‑3. FAV (Favorites):
A maximum of
36 stations can be programmed as
favorites using the six softkeys
below the radio station frequency
tabs and by using the radio favorites
page button (FAV button). Press to
go through up to six pages of
favorites, each having six favorite
stations available per page. Each
page of favorites can contain any
combination of AM, FM, or XM
stations.
The balance/fade and tone settings
that were previously adjusted, are
stored with the favorite stations.
To store a station as a favorite:
1. Tune to the desired radio station.
2. Press FAV to display the page to
store the station.
3. Press and hold one of the six softkeys until a beep sounds.
When that softkey is pressed
and released, the station that
was set, returns.
4. Repeat the steps for each radio station to be stored as a favorite. To setup the number of favorites
pages:
1. Press MENU to display the radio
setup menu.
2. Press the softkey below the FAV 1-6 tab.
3. Select the desired number of favorites pages by pressing the
softkey below the displayed
page numbers.
4. Press FAV, or let the menu time out, to return to the original main
radio screen showing the radio
station frequency tabs and to
begin the process of
programming favorites for the
chosen amount of numbered
pages.
Satellite Radio
XM™ Satellite Radio Service
XM is a satellite radio service that is
based in the 48 contiguous United
States and 10 Canadian provinces.
Page 187 of 438
Infotainment System 7-9
4. Press the softkey under theRemove tab until the category
name along with the word
Removed displays.
5. Repeat the steps to remove more categories.
Removed categories can be
restored by pressing the softkey
under the Add tab when a removed
category is displayed or by pressing
the softkey under the Restore
All tab.
Categories cannot be removed or
added while the vehicle is moving
faster than 8 km/h (5 mph).
Storing a Radio Station as a
Favorite
Drivers are encouraged to set up
their radio station favorites while the
vehicle is in P (Park). Tune to
favorite stations using the presets,
favorites button, and steering wheel
controls. See Steering Wheel
Controls on page 5‑3. FAV (Favorites):
A maximum of
36 stations can be programmed as
favorites using the six softkeys
below the radio station frequency
tabs and by using the radio favorites
page button (FAV button). Press to
go through up to six pages of
favorites, each having six favorite
stations available per page. Each
page of favorites can contain any
combination of AM, FM, or XM
stations.
The balance/fade and tone settings
that were previously adjusted, are
stored with the favorite stations.
To store a station as a favorite:
1. Tune to the desired radio station.
2. Press FAV to display the page to
store the station.
3. Press and hold one of the six softkeys until a beep sounds.
When that softkey is pressed
and released, the station that
was set, returns.
4. Repeat the steps for each radio station to be stored as a favorite. To setup the number of favorites
pages:
1. Press MENU to display the radio
setup menu.
2. Press the softkey below the FAV 1-6 tab.
3. Select the desired number of favorites pages by pressing the
softkey below the displayed
page numbers.
4. Press FAV, or let the menu time out, to return to the original main
radio screen showing the radio
station frequency tabs and to
begin the process of
programming favorites for the
chosen amount of numbered
pages.XM™ Radio Messages
XL (Explicit Language
Channels): These channels, or any
others, can be blocked at a
customer's request, by calling
1-800-852-XMXM (9696).
Page 222 of 438
7-44 Infotainment System
When a CD or DVD audio disc is
playing, press PROG to go to the
beginning of the CD or DVD audio.
This function is inactive, with some
radios, if the front seat passengers
are listening to the disc.
When a disc is playing in the CD or
DVD changer, press PROG to
select the next disc, if multiple discs
are loaded. This function is inactive,
with some radios, if the front seat
passengers are listening to the disc.
When a DVD video menu is being
displayed, press PROG to perform
the ENTER menu function.Phone
Bluetooth
Vehicles with a Bluetooth system
can use a Bluetooth capable cell
phone with a Hands Free Profile to
make and receive phone calls. The
system can be used while the key is
in ON/RUN or ACC/ACCESSORY
position. The range of the Bluetooth
system can be up to 9.1 m (30 ft.).
Not all phones support all functions,
and not all phones are guaranteed
to work with the in-vehicle Bluetooth
system. See gm.com/bluetooth for
more information on compatible
phones.
Voice Recognition
The Bluetooth system uses voice
recognition to interpret voice
commands to dial phone numbers
and name tags.
Noise:Keep interior noise levels to
a minimum. The system may not
recognize voice commands if there
is too much background noise. When to Speak:
A short tone
sounds after the system responds
indicating when it is waiting for a
voice command. Wait until the tone
and then speak.
How to Speak: Speak clearly in a
calm and natural voice.
Audio System
When using the in-vehicle Bluetooth
system, sound comes through the
vehicle's front audio system
speakers and overrides the audio
system. Use the audio system
volume knob, during a call, to
change the volume level. The
adjusted volume level remains in
memory for later calls. To prevent
missed calls, a minimum volume
level is used if the volume is turned
down too low.
Bluetooth Controls
Use the buttons located on the
steering wheel to operate the
in-vehicle Bluetooth system. See
Steering Wheel Controls
on
page 5‑3for more information.
Page 241 of 438
Climate Controls 8-9
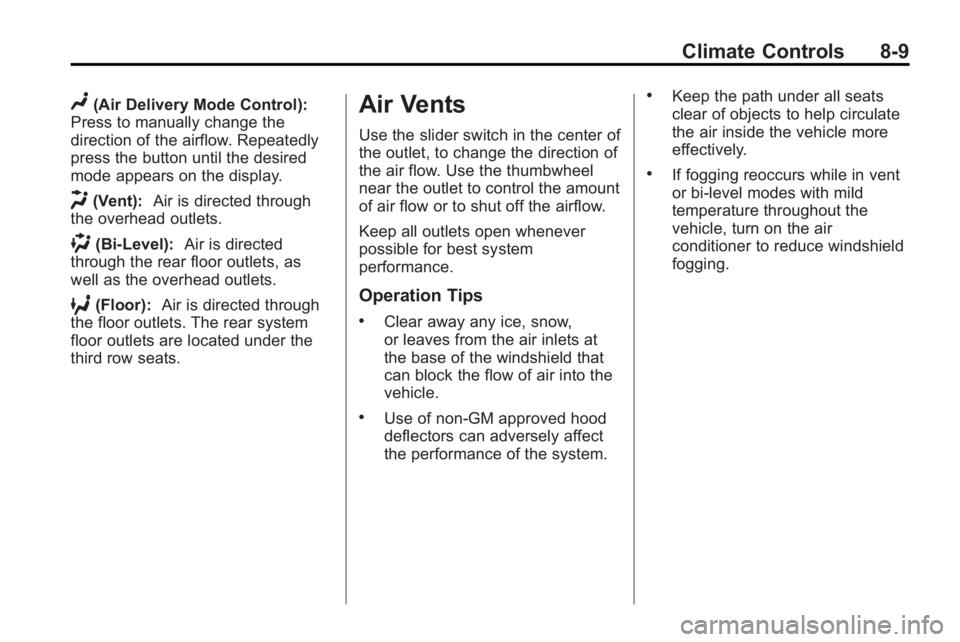
N(Air Delivery Mode Control):
Press to manually change the
direction of the airflow. Repeatedly
press the button until the desired
mode appears on the display.
H(Vent): Air is directed through
the overhead outlets.
)(Bi-Level): Air is directed
through the rear floor outlets, as
well as the overhead outlets.
6(Floor): Air is directed through
the floor outlets. The rear system
floor outlets are located under the
third row seats.
Air Vents
Use the slider switch in the center of
the outlet, to change the direction of
the air flow. Use the thumbwheel
near the outlet to control the amount
of air flow or to shut off the airflow.
Keep all outlets open whenever
possible for best system
performance.
Operation Tips
.Clear away any ice, snow,
or leaves from the air inlets at
the base of the windshield that
can block the flow of air into the
vehicle.
.Use of non-GM approved hood
deflectors can adversely affect
the performance of the system.
.Keep the path under all seats
clear of objects to help circulate
the air inside the vehicle more
effectively.
.If fogging reoccurs while in vent
or bi-level modes with mild
temperature throughout the
vehicle, turn on the air
conditioner to reduce windshield
fogging.
Page 243 of 438
Driving and Operating 9-1
Driving and
Operating
Driving Information
Defensive Driving . . . . . . . . . . . . . 9-2
Drunk Driving . . . . . . . . . . . . . . . . . 9-2
Control of a Vehicle . . . . . . . . . . . 9-3
Braking . . . . . . . . . . . . . . . . . . . . . . . 9-3
Steering . . . . . . . . . . . . . . . . . . . . . . . 9-4
Off-Road Recovery . . . . . . . . . . . . 9-5
Loss of Control . . . . . . . . . . . . . . . . 9-5
Driving on Wet Roads . . . . . . . . . 9-6
Highway Hypnosis . . . . . . . . . . . . 9-7
Hill and Mountain Roads . . . . . . 9-8
Winter Driving . . . . . . . . . . . . . . . . . 9-9
If the Vehicle is Stuck . . . . . . . . 9-11
Vehicle Load Limits . . . . . . . . . . 9-12
Starting and Operating
New Vehicle Break-In . . . . . . . . 9-16
Ignition Positions . . . . . . . . . . . . 9-16
Retained AccessoryPower (RAP) . . . . . . . . . . . . . . . 9-17
Starting the Engine . . . . . . . . . . 9-18
Engine Heater . . . . . . . . . . . . . . . 9-19 Shifting Into Park . . . . . . . . . . . . 9-20
Shifting Out of Park . . . . . . . . . . 9-21
Parking Over Things
That Burn . . . . . . . . . . . . . . . . . . 9-21
Engine Exhaust
Engine Exhaust . . . . . . . . . . . . . . 9-22
Running the Vehicle WhileParked . . . . . . . . . . . . . . . . . . . . . 9-22
Automatic Transmission
Automatic Transmission . . . . . 9-23
Manual Mode . . . . . . . . . . . . . . . . 9-25
Tow/Haul Mode . . . . . . . . . . . . . . 9-25
Drive Systems
All-Wheel Drive . . . . . . . . . . . . . . 9-26
Brakes
Antilock BrakeSystem (ABS) . . . . . . . . . . . . . . 9-26
Parking Brake . . . . . . . . . . . . . . . 9-27
Brake Assist . . . . . . . . . . . . . . . . . 9-28
Ride Control Systems
StabiliTrak System . . . . . . . . . . . 9-28
Cruise Control
Cruise Control . . . . . . . . . . . . . . . 9-30
Object Detection Systems
Ultrasonic Parking Assist . . . . 9-33
Rear Vision Camera (RVC) . . . . . . . . . . . . . 9-34
Fuel
Fuel . . . . . . . . . . . . . . . . . . . . . . . . . 9-39
Recommended Fuel . . . . . . . . . 9-40
Gasoline Specifications . . . . . . 9-40
California FuelRequirements . . . . . . . . . . . . . . 9-40
Fuels in Foreign Countries . . . 9-40
Fuel Additives . . . . . . . . . . . . . . . 9-41
Filling the Tank . . . . . . . . . . . . . . 9-42
Filling a Portable Fuel Container . . . . . . . . . . . . . . . . . . . 9-44
Towing
General TowingInformation . . . . . . . . . . . . . . . . . 9-44
Driving Characteristics and Towing Tips . . . . . . . . . . . . . . . . 9-45
Trailer Towing . . . . . . . . . . . . . . . . 9-50
Towing Equipment . . . . . . . . . . . 9-53
Conversions and Add-Ons
Add-On Electrical Equipment . . . . . . . . . . . . . . . . . 9-55