wheel BUICK ENCLAVE 2010 User Guide
[x] Cancel search | Manufacturer: BUICK, Model Year: 2010, Model line: ENCLAVE, Model: BUICK ENCLAVE 2010Pages: 438, PDF Size: 2.47 MB
Page 81 of 438

Seats and Restraints 3-31
There is an airbag readiness light
on the instrument panel cluster,
which shows the airbag symbol.
The system checks the airbag
electrical system for malfunctions.
The light tells you if there is an
electrical problem. SeeAirbag
Readiness Light
on page 5‑16for
more information.
Where Are the Airbags?
The driver frontal airbag is in the
middle of the steering wheel.
The right front passenger frontal
airbag is in the instrument panel on
the passenger side.
Page 82 of 438
3-32 Seats and Restraints
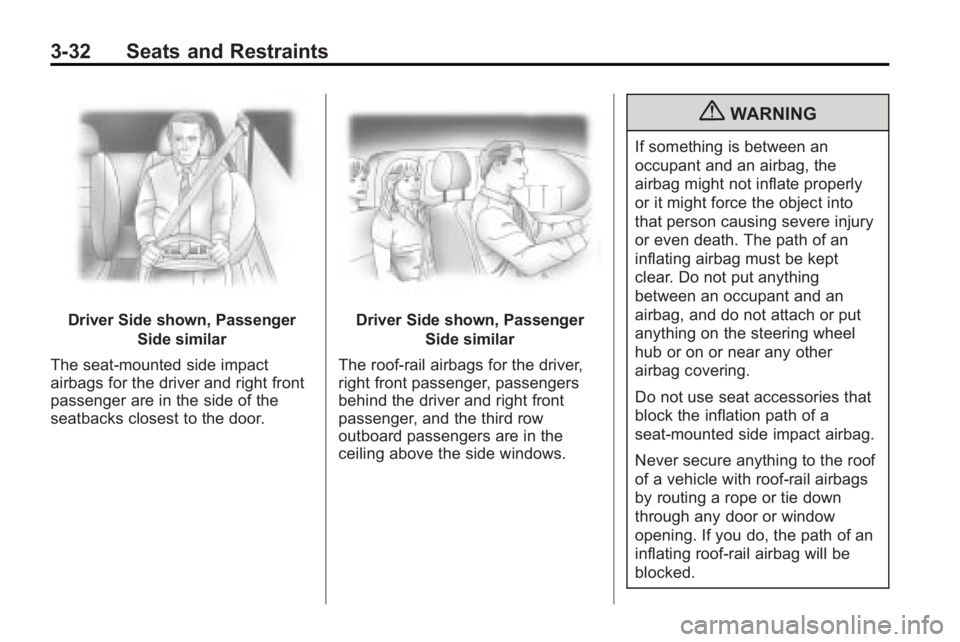
Driver Side shown, PassengerSide similar
The seat-mounted side impact
airbags for the driver and right front
passenger are in the side of the
seatbacks closest to the door.Driver Side shown, Passenger Side similar
The roof-rail airbags for the driver,
right front passenger, passengers
behind the driver and right front
passenger, and the third row
outboard passengers are in the
ceiling above the side windows.
{WARNING
If something is between an
occupant and an airbag, the
airbag might not inflate properly
or it might force the object into
that person causing severe injury
or even death. The path of an
inflating airbag must be kept
clear. Do not put anything
between an occupant and an
airbag, and do not attach or put
anything on the steering wheel
hub or on or near any other
airbag covering.
Do not use seat accessories that
block the inflation path of a
seat-mounted side impact airbag.
Never secure anything to the roof
of a vehicle with roof-rail airbags
by routing a rope or tie down
through any door or window
opening. If you do, the path of an
inflating roof-rail airbag will be
blocked.
Page 84 of 438

3-34 Seats and Restraints
Seat-mounted side impact and
roof-rail airbags will inflate if the
crash severity is above the system's
designed threshold level. The
threshold level can vary with
specific vehicle design.
Seat-mounted side impact airbags
are not intended to inflate in frontal
impacts, near-frontal impacts,
rollovers, or rear impacts. Roof-rail
airbags are not intended to inflate in
rear impacts. A seat-mounted side
impact airbag is intended to deploy
on the side of the vehicle that is
struck. Both roof-rail airbags will
deploy when either side of the
vehicle is struck, or if the sensing
system predicts that the vehicle is
about to roll over, or in a severe
frontal impact.
In any particular crash, no one can
say whether an airbag should have
inflated simply because of the
damage to a vehicle or because
of what the repair costs were.For frontal airbags, inflation is
determined by what the vehicle hits,
the angle of the impact, and how
quickly the vehicle slows down. For
seat-mounted side impact and
roof-rail airbags, deployment is
determined by the location and
severity of the side impact. In a
rollover event, roof-rail airbag
deployment is determined by the
direction of the roll.
What Makes an Airbag
Inflate?
In a deployment event, the sensing
system sends an electrical signal
triggering a release of gas from the
inflator. Gas from the inflator fills the
airbag causing the bag to break out
of the cover and deploy. The inflator,
the airbag, and related hardware are
all part of the airbag module.
Frontal airbag modules are located
inside the steering wheel and
instrument panel. For vehicles with
seat-mounted side impact airbags,
there are airbag modules in the side
of the front seatbacks closest to the
door. For vehicles with roof-rail
airbags, there are airbag modules in
the ceiling of the vehicle, near the
side windows that have occupant
seating positions.
How Does an Airbag
Restrain?
In moderate to severe frontal or
near frontal collisions, even belted
occupants can contact the steering
wheel or the instrument panel. In
moderate to severe side collisions,
even belted occupants can contact
the inside of the vehicle.
Airbags supplement the protection
provided by safety belts. Frontal
airbags distribute the force of the
impact more evenly over the
occupant's upper body, stopping
the occupant more gradually.
Page 92 of 438
3-42 Seats and Restraints
Adding Equipment to the
Airbag-Equipped Vehicle
Q: Is there anything I might addto or change about the vehicle
that could keep the airbags
from working properly?
A: Yes. If you add things that
change the vehicle's frame,
bumper system, height, front end
or side sheet metal, they may
keep the airbag system from
working properly. Changing or
moving any parts of the front
seats, safety belts, the airbag
sensing and diagnostic module,
steering wheel, instrument
panel, roof-rail airbag modules,
ceiling headliner or pillar garnish
trim, overhead console, front
sensors, side impact sensors,
rollover sensor module, or airbag
wiring can affect the operation of
the airbag system.
In addition, the vehicle has a
passenger sensing system for
the right front passenger position, which includes sensors
that are part of the passenger
seat. The passenger sensing
system may not operate properly
if the original seat trim is
replaced with non-GM covers,
upholstery or trim, or with GM
covers, upholstery or trim
designed for a different vehicle.
Any object, such as an
aftermarket seat heater or a
comfort enhancing pad or
device, installed under or on top
of the seat fabric, could also
interfere with the operation of
the passenger sensing system.
This could either prevent proper
deployment of the passenger
airbag(s) or prevent the
passenger sensing system from
properly turning off the
passenger airbag(s). See
Passenger Sensing System
on
page 3‑37.
If you have questions, call
Customer Assistance. The
phone numbers and addresses
for Customer Assistance are in Step Two of the Customer
Satisfaction Procedure in this
manual.
If the vehicle has rollover
roof-rail airbags, see
Different
Size Tires and Wheels
on
page 10‑54for additional
important information.
Q: Because I have a disability, I have to get my vehicle
modified. How can I find out
whether this will affect my
airbag system?
A: If you have questions, call
Customer Assistance. The
phone numbers and addresses
for Customer Assistance are in
Step Two of the Customer
Satisfaction Procedure in this
manual.
In addition, your dealer/retailer and
the service manual have information
about the location of the airbag
sensors, sensing and diagnostic
module and airbag wiring.
Page 119 of 438
Instruments and Controls 5-1
Instruments and
Controls
Controls
Steering Wheel Adjustment . . . 5-2
Steering Wheel Controls . . . . . . 5-3
Horn . . . . . . . . . . . . . . . . . . . . . . . . . . 5-5
Windshield Wiper/Washer . . . . . 5-5
Rear Window Wiper/Washer . . . . . . . . . . . . . . . . . . . . . . 5-6
Compass . . . . . . . . . . . . . . . . . . . . . 5-6
Clock . . . . . . . . . . . . . . . . . . . . . . . . . 5-8
Power Outlets . . . . . . . . . . . . . . . 5-10
Warning Lights, Gages, and
Indicators
Warning Lights, Gages, and Indicators . . . . . . . . . . . . . . . . . . 5-12
Instrument Cluster . . . . . . . . . . . 5-13
Speedometer . . . . . . . . . . . . . . . . 5-14
Odometer . . . . . . . . . . . . . . . . . . . . 5-14
Tachometer . . . . . . . . . . . . . . . . . . 5-14
Fuel Gage . . . . . . . . . . . . . . . . . . . 5-14
Engine Coolant Temperature Gage . . . . . . . . . 5-15 Voltmeter Gage . . . . . . . . . . . . . . 5-15
Safety Belt Reminders . . . . . . . 5-16
Airbag Readiness Light . . . . . . 5-16
Passenger Airbag Status
Indicator . . . . . . . . . . . . . . . . . . . . 5-17
Charging System Light . . . . . . 5-18
Malfunction Indicator Lamp . . . . . . . . . . . . . 5-18
Brake System Warning Light . . . . . . . . . . . . . . . . . . . . . . . 5-21
Antilock Brake System (ABS) Warning Light . . . . . . . . . . . . . . 5-22
Tow/Haul Mode Light . . . . . . . . 5-22
StabiliTrak
®Indicator Light . . . 5-22
Engine Coolant Temperature Warning Light . . . . . . . . . . . . . . 5-23
Tire Pressure Light . . . . . . . . . . 5-23
Engine Oil Pressure Light . . . . 5-24
Security Light . . . . . . . . . . . . . . . . 5-24
High-Beam on Light . . . . . . . . . 5-24
Fog Lamp Light . . . . . . . . . . . . . . 5-25
Cruise Control Light . . . . . . . . . 5-25
Information Displays
Driver Information Center (DIC) . . . . . . . . . . . . . . . 5-25
Vehicle Messages
Vehicle Messages . . . . . . . . . . . 5-31
Battery Voltage and ChargingMessages . . . . . . . . . . . . . . . . . . 5-31
Brake System Messages . . . . 5-32
Cruise Control Messages . . . . 5-32
Door Ajar Messages . . . . . . . . . 5-32
Engine Cooling System Messages . . . . . . . . . . . . . . . . . . 5-33
Engine Oil Messages . . . . . . . . 5-34
Engine Power Messages . . . . 5-34
Fuel System Messages . . . . . . 5-34
Key and Lock Messages . . . . . 5-35
Lamp Messages . . . . . . . . . . . . . 5-35
Object Detection System Messages . . . . . . . . . . . . . . . . . . 5-35
Ride Control System Messages . . . . . . . . . . . . . . . . . . 5-36
Airbag System Messages . . . . 5-36
Anti-Theft Alarm System Messages . . . . . . . . . . . . . . . . . . 5-36
Service Vehicle Messages . . . 5-37
Tire Messages . . . . . . . . . . . . . . . 5-37
Transmission Messages . . . . . 5-38
Page 120 of 438
5-2 Instruments and Controls
Vehicle ReminderMessages . . . . . . . . . . . . . . . . . . 5-39
Vehicle Speed Messages . . . . 5-39
Washer Fluid Messages . . . . . 5-39
Vehicle Personalization
Vehicle Personalization . . . . . . 5-40
Universal Remote System
Universal Remote System . . . 5-47
Universal Remote System Programming . . . . . . . . . . . . . . . 5-47
Universal Remote System Operation . . . . . . . . . . . . . . . . . . 5-51
Controls
Steering Wheel
Adjustment
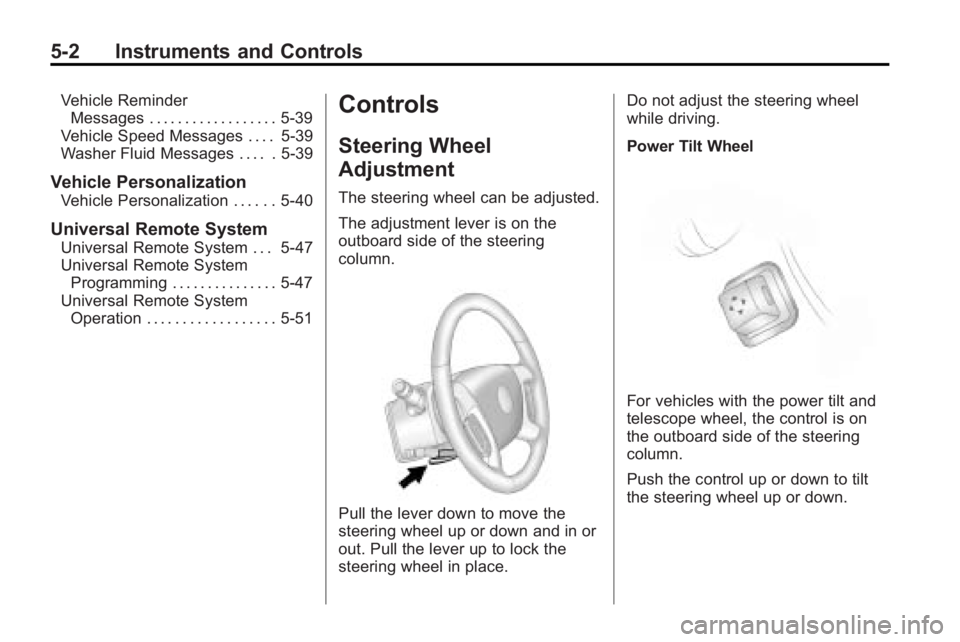
The steering wheel can be adjusted.
The adjustment lever is on the
outboard side of the steering
column.
Pull the lever down to move the
steering wheel up or down and in or
out. Pull the lever up to lock the
steering wheel in place. Do not adjust the steering wheel
while driving.
Power Tilt Wheel
For vehicles with the power tilt and
telescope wheel, the control is on
the outboard side of the steering
column.
Push the control up or down to tilt
the steering wheel up or down.
Page 121 of 438
Instruments and Controls 5-3
Push the control forward or
rearward to move the steering wheel
toward the front or rear of the
vehicle. To set the memory position,
seeVehicle Personalization
on
page 5‑40.
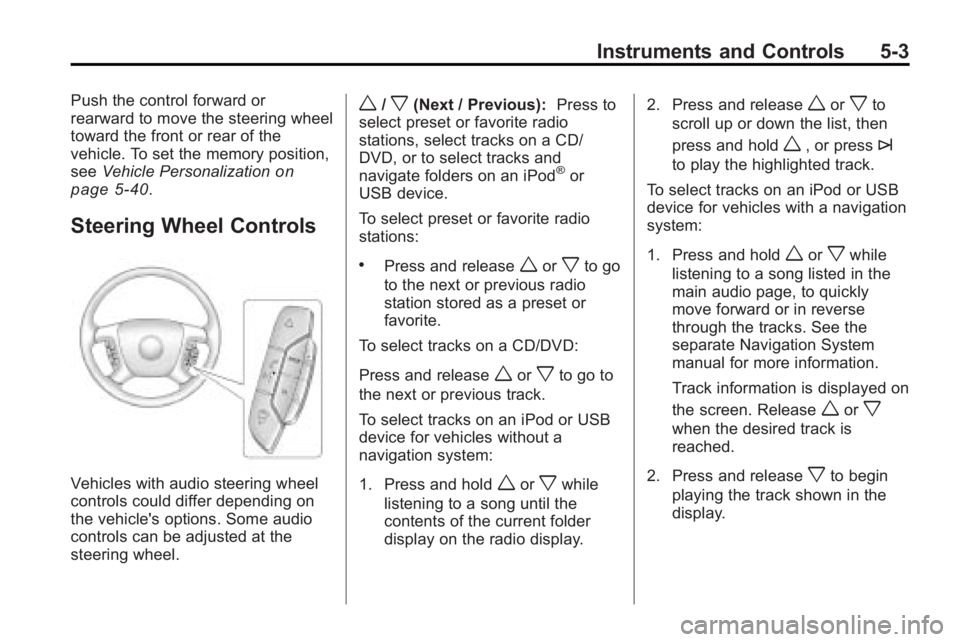
Steering Wheel Controls
Vehicles with audio steering wheel
controls could differ depending on
the vehicle's options. Some audio
controls can be adjusted at the
steering wheel.
w/x(Next / Previous): Press to
select preset or favorite radio
stations, select tracks on a CD/
DVD, or to select tracks and
navigate folders on an iPod
®or
USB device.
To select preset or favorite radio
stations:
.Press and releaseworxto go
to the next or previous radio
station stored as a preset or
favorite.
To select tracks on a CD/DVD:
Press and release
worxto go to
the next or previous track.
To select tracks on an iPod or USB
device for vehicles without a
navigation system:
1. Press and hold
worxwhile
listening to a song until the
contents of the current folder
display on the radio display. 2. Press and release
worxto
scroll up or down the list, then
press and hold
w, or press¨
to play the highlighted track.
To select tracks on an iPod or USB
device for vehicles with a navigation
system:
1. Press and hold
worxwhile
listening to a song listed in the
main audio page, to quickly
move forward or in reverse
through the tracks. See the
separate Navigation System
manual for more information.
Track information is displayed on
the screen. Release
worx
when the desired track is
reached.
2. Press and release
xto begin
playing the track shown in the
display.
Page 123 of 438
Instruments and Controls 5-5
Press¨to select a track or a
folder when navigating folders on an
iPod or USB device.
For vehicles with a navigation
system:
1. Press and hold
¨until a beep
is heard, to place the radio into
SCAN mode, a station will play
for five seconds before moving
to the next station.
2. To stop the SCAN function, press
¨again.
3. In CD/DVD, iPod, or AUX USB, press and hold to quickly move
forward through the tracks.
Release to stop on the desired
track.
+
e−e(Volume): Press to
increase or to decrease the volume.
Horn
Press near or on the horn symbols
on the steering wheel pad to sound
the horn.
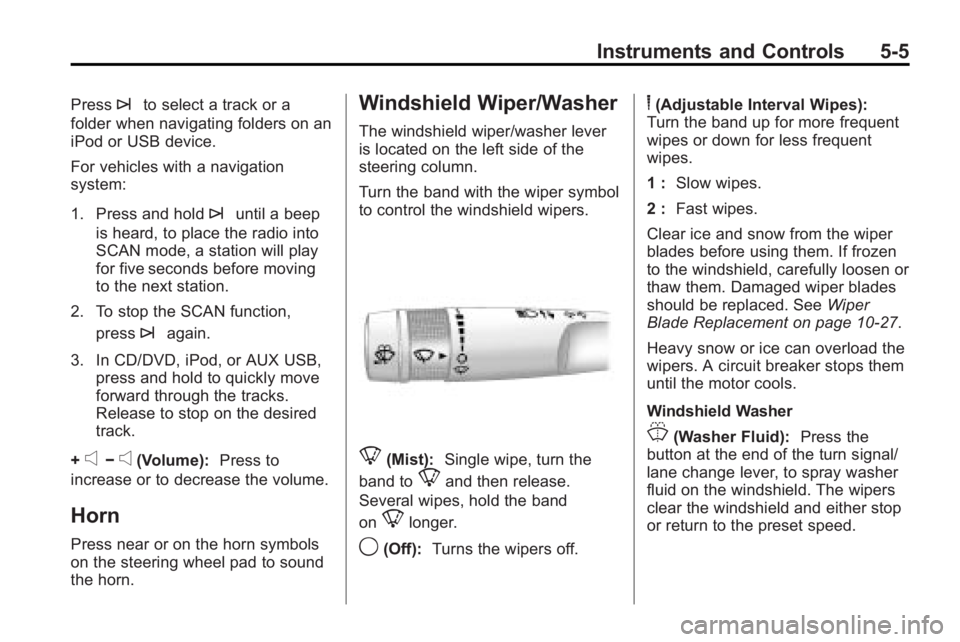
Windshield Wiper/Washer
The windshield wiper/washer lever
is located on the left side of the
steering column.
Turn the band with the wiper symbol
to control the windshield wipers.
8(Mist): Single wipe, turn the
band to
8and then release.
Several wipes, hold the band
on
8longer.
9(Off): Turns the wipers off.
6(Adjustable Interval Wipes):
Turn the band up for more frequent
wipes or down for less frequent
wipes.
1 : Slow wipes.
2 : Fast wipes.
Clear ice and snow from the wiper
blades before using them. If frozen
to the windshield, carefully loosen or
thaw them. Damaged wiper blades
should be replaced. See Wiper
Blade Replacement on page 10‑27.
Heavy snow or ice can overload the
wipers. A circuit breaker stops them
until the motor cools.
Windshield Washer
J(Washer Fluid): Press the
button at the end of the turn signal/
lane change lever, to spray washer
fluid on the windshield. The wipers
clear the windshield and either stop
or return to the preset speed.
Page 140 of 438
5-22 Instruments and Controls
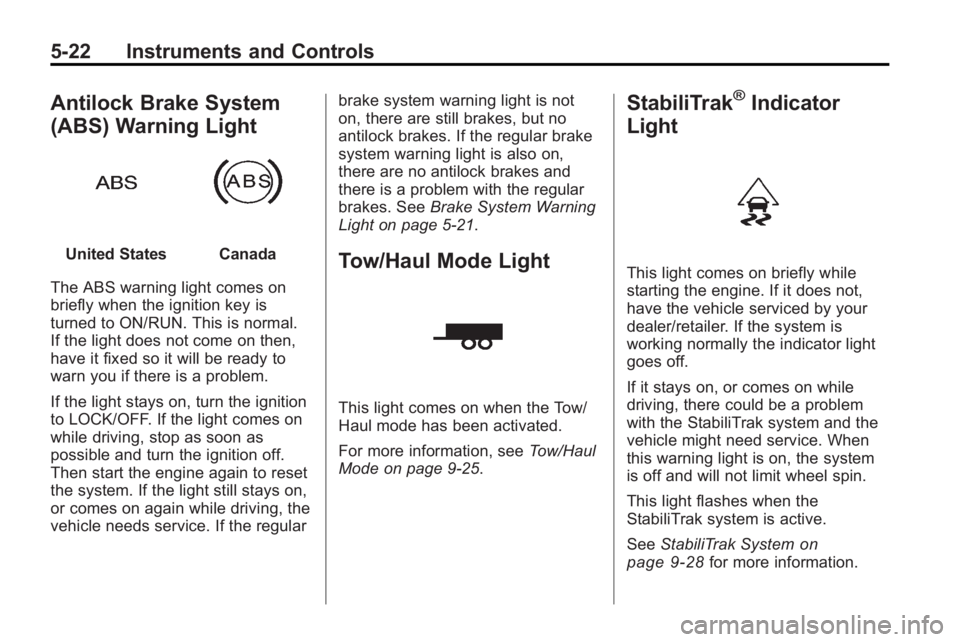
Antilock Brake System
(ABS) Warning Light
United StatesCanada
The ABS warning light comes on
briefly when the ignition key is
turned to ON/RUN. This is normal.
If the light does not come on then,
have it fixed so it will be ready to
warn you if there is a problem.
If the light stays on, turn the ignition
to LOCK/OFF. If the light comes on
while driving, stop as soon as
possible and turn the ignition off.
Then start the engine again to reset
the system. If the light still stays on,
or comes on again while driving, the
vehicle needs service. If the regular brake system warning light is not
on, there are still brakes, but no
antilock brakes. If the regular brake
system warning light is also on,
there are no antilock brakes and
there is a problem with the regular
brakes. See
Brake System Warning
Light on page 5‑21.Tow/Haul Mode Light
This light comes on when the Tow/
Haul mode has been activated.
For more information, see Tow/Haul
Mode on page 9‑25.
StabiliTrak®Indicator
Light
This light comes on briefly while
starting the engine. If it does not,
have the vehicle serviced by your
dealer/retailer. If the system is
working normally the indicator light
goes off.
If it stays on, or comes on while
driving, there could be a problem
with the StabiliTrak system and the
vehicle might need service. When
this warning light is on, the system
is off and will not limit wheel spin.
This light flashes when the
StabiliTrak system is active.
See StabiliTrak System
on
page 9‑28for more information.
Page 154 of 438
5-36 Instruments and Controls
Press the set/reset button or the
trip odometer reset stem to
acknowledge this message and
clear it from the DIC display. For
more information seeUltrasonic
Parking Assist on page 9‑33.
SERVICE PARK ASSIST
If your vehicle has the Ultrasonic
Rear Parking Assist (URPA) system,
this message displays if there is a
problem with the URPA system. Do
not use this system to help you
park. See Ultrasonic Parking Assist
on page 9‑33for more information.
See your dealer/retailer for service.
Ride Control System
Messages
SERVICE STABILITRAK
This message displays if there is a
problem with the StabiliTrak®
system. If this message appears, try
to reset the system. Stop; turn off
the engine for at least 15 seconds;
then start the engine again. If this message still comes on, it means
there is a problem. See your dealer/
retailer for service. The vehicle is
safe to drive, however, you do not
have the benefit of StabiliTrak, so
reduce your speed and drive
accordingly.
SERVICE TRACTION
CONTROL
This message displays when there
is a problem with the Traction
Control System (TCS). When this
message is displayed, the system
will not limit wheel spin. Adjust your
driving accordingly. See your dealer/
retailer for service. See
StabiliTrak
System
on page 9‑28for more
information.
TRACTION CONTROL OFF
This message displays when the
Traction Control System (TCS) is
turned off. Adjust your driving
accordingly. See StabiliTrak System
on page 9‑28for more information.
This message clears itself after
10 seconds.
Airbag System Messages
SERVICE AIR BAG
This message displays if there is a
problem with the airbag system.
Have your dealer/retailer inspect the
system for problems. See Airbag
Readiness Light
on page 5‑16and
Airbag Systemon page 3‑29for
more information.
Anti-Theft Alarm System
Messages
SERVICE THEFT DETERRENT
SYSTEM
This message displays when there
is a problem with the theft-deterrent
system. The vehicle may or may not
restart so you may want to take the
vehicle to your dealer/retailer before
turning off the engine. See
Immobilizer Operation
on
page 2‑13for more information.