key off BUICK ENCLAVE 2010 Service Manual
[x] Cancel search | Manufacturer: BUICK, Model Year: 2010, Model line: ENCLAVE, Model: BUICK ENCLAVE 2010Pages: 438, PDF Size: 2.47 MB
Page 208 of 438
7-30 Infotainment System
moves to the next album in
alphabetical order on the CD and
begins playing MP3 files from that
album.
To exit music navigator mode, press
the softkey below the Back tab to
return to normal MP3 playback.
Connecting a USB Storage
Device or iPod®
The USB Port can be used to
control an iPod or a USB storage
device.
To connect a USB storage device,
connect the device to the USB port
located in the center console.
To connect an iPod, connect one
end of the USB cable that came
with the iPod to the iPod’s dock
connector and connect the other
end to the USB port located in the
center console. If the vehicle is on
and the USB connection works,
“OK to disconnect”and a GM logo
may appear on the iPod and iPod
appears on the radio's display. The iPod music appears on the
radio’s display and begins playing.
The iPod charges while it is
connected to the vehicle if the
vehicle is in the ACC/ACCESSORY
or ON/RUN position. When the
vehicle is turned off, the iPod
automatically powers off and will not
charge or draw power from the
vehicle's battery.
If you have an older iPod model that
is not supported, it can still be used
by connecting it to the Auxiliary
Input Jack using a standard 3.5 mm
(1/8 in) stereo cable. See
“Using the
Auxiliary Input Jack” earlier for more
information.
Using the Radio to Control a
USB Storage Device or iPod
The radio can control a USB
storage device or an iPod using the
radio buttons and knobs and display
song information on the radio’s
display.
f(Tune): Turn to select files.
©SEEK:Press to go to the
start of the track, if more than
ten seconds have played. Press and
hold or press multiple times to
continue moving backward through
tracks.
¨SEEK: Press to go to the next
track. Press and hold or press
multiple times to continue moving
forward through tracks.
sREV (Reverse): Press and
hold to reverse playback quickly.
Sound is heard at a reduced
volume. Release
sREV to
resume playing. The elapsed time of
the file displays.
\FWD (Fast Forward): Press
and hold to advance playback
quickly. Sound is heard at a reduced
volume. Release
\FWD to
resume playing. The elapsed time of
the file displays.
4(Information): Press to display
additional information about the
selected track.
Page 210 of 438
7-32 Infotainment System
4. Turnfto scroll through the
folders or files in the
selected menu.
5. Press
fto select the file to be
played.
To skip through large lists, the five
softkeys can be used to navigate in
the following order:
.First softkey, first item in the list.
.Second softkey, 1% through the
list each time the softkey is
pressed.
.Third softkey, 5% through the list
each time the softkey is pressed.
.Fourth softkey, 10% through the
list each time the softkey is
pressed.
.Fifth softkey, end of the list.
Repeat Functionality
To use Repeat:
Press the softkey below
"or'
to select between Repeat All and
Repeat Track.
"(Repeat All): Press the softkey
below
"to repeat all tracks. The
tab appears lowered when Repeat
All is being used. This is the default
mode when a USB storage device
or iPod is first connected.
'(Repeat Track): Press the
softkey below
'to repeat one
track. The tab appears raised when
Repeat Track is being used.
Shuffle Functionality
To use Shuffle:
Press the softkey below
>,2,
Shuffle Songs, Shuffle Album,
or Shuffle Folder.
>(Shuffle Off): This is the
default mode when a USB storage
device or iPod is first connected.
2(Shuffle All Songs / Shuffle
Songs): Shuffles all songs on the
USB storage device or iPod.
<(Shuffle Album): Shuffles all
songs in the current album on
an iPod.
=(Shuffle Folder): Shuffles all
songs in the current folder on a USB
storage device.
Auxiliary Devices
The vehicle may have a 3.5 mm
(1/8 in) auxiliary input jack located
on the lower right side of the
faceplate and for vehicles with a
USB port, it is located in the center
console.
Using the 3.5 mm (1/8 in)
Auxiliary Input Jack
The auxiliary input jack is located on
the lower right side of the faceplate.
This is not an audio output; do not
plug a headphone set into the front
auxiliary input jack. Connect an
auxiliary input device such as an
iPod
®, laptop computer, MP3 player,
CD player, or cassette tape player,
Page 217 of 438
Infotainment System 7-39
c(Stop):Press to stop playing,
rewinding, or fast forwarding a DVD.
Press twice to return to the
beginning of the DVD.
s(Play/Pause): Press to start
playing a DVD. Press while a DVD
is playing to pause it. Press again to
continue playing the DVD.
When the DVD is playing,
depending on the radio, play may
be slowed down by pressing
s
then[. The DVD continues
playing in a slow play mode.
Depending on the radio, perform
reverse slow play by pressing
s
thenr. To cancel slow play mode,
press
sagain.
t(Previous Track/Chapter):
Press to return to the start of the
current track or chapter. Press again
to go to the previous track or
chapter. This button might not work
when the DVD is playing the
copyright information or the
previews.
u(Next Track/Chapter): Press to
go to the beginning of the next
chapter or track. This button might
not work when the DVD is playing
the copyright information or the
previews.
r(Fast Reverse): Press to
quickly reverse the DVD or CD. To
stop fast reversing a DVD video,
press
s. To stop fast reversing a
DVD audio or CD, release
r. This
button might not work when the
DVD is playing the copyright
information or the previews.
[(Fast Forward): Press to fast
forward the DVD or CD. To stop fast
forwarding a DVD video, press
s.
To stop fast forwarding a DVD audio
or CD, release
[. This button
might not work when the DVD is
playing the copyright information or
the previews.
e(Audio): Press to change audio
tracks on DVDs that have this
feature when the DVD is playing.
The format and content of this
function vary for each disc.
{(Subtitles): Press to turn ON/
OFF subtitles and to move through
subtitle options when a DVD is
playing. The format and content of
this function vary for each disc.
AUX (Auxiliary): Press to switch
the system between the DVD player
and an auxiliary source.
d(Camera): Press to change
camera angles on DVDs that have
this feature when a DVD is playing.
The format and content of this
function vary for each disc.
1 through 0 (Numeric Keypad):
The numeric keypad provides the
capability of direct chapter or track
number selection.
\(Clear): Press within
three seconds after entering a
numeric selection, to clear all
numerical inputs.
Page 259 of 438
Driving and Operating 9-17
Notice:Using a tool to force the
key to turn in the ignition could
cause damage to the switch or
break the key. Use the correct
key, make sure it is all the way in,
and turn it only with your hand.
If the key cannot be turned by
hand, see your dealer/retailer.
((LOCK/OFF): This position locks
the ignition and transmission. The
key can be removed in LOCK/OFF.
The shift lever must be in P (Park)
to turn the ignition switch to
LOCK/OFF.
The steering can bind with the
wheels turned off center. If this
happens, move the steering wheel
from right to left while turning the
key to ACC/ACCESSORY. If this
doesn't work, then the vehicle needs
service.
ACC (ACC/ACCESSORY): This is
the position in which you can
operate the electrical accessories or
items plugged into the accessory power outlets. This position unlocks
the ignition and steering wheel.
Use this position if the vehicle must
be pushed or towed.
R(ON/RUN):
This position can be
used to operate the electrical
accessories and to display some
instrument panel warning and
indicator lights. The switch stays in
this position when the engine is
running. The transmission is also
unlocked in this position. If you
leave the key in the ACC/
ACCESSORY or ON/RUN position
with the engine off, the battery could
be drained. You may not be able to
start the vehicle if the battery is
allowed to drain for an extended
period of time.
/(START): This is the position
that starts the engine. When the
engine starts, release the key. The
ignition switch will return to ON/RUN
for driving.
Retained Accessory
Power (RAP)
These vehicle accessories can be
used for up to 10 minutes after the
ignition key is turned off:
.Audio System
.Power Windows
.Sunroof (if equipped)
Power to the windows and sunroof
will work up to 10 minutes or until a
door is opened.
The radio continues to work for
10 minutes or until the driver's door
is opened.
For an additional 10 minutes of
operation, close all the doors and
turn the key to ON/RUN and then
back to LOCK/OFF.
All these features will work when
the key is in the ON/RUN or
ACC/ACCESSORY positions.
Page 260 of 438
9-18 Driving and Operating
Starting the Engine
Move the shift lever to P (Park) or
N (Neutral). The engine will not start
in any other position. To restart the
engine when the vehicle is already
moving, use N (Neutral) only.
Notice:Do not try to shift to
P (Park) if the vehicle is moving.
If you do, you could damage the
transmission. Shift to P (Park)
only when the vehicle is stopped.
Starting Procedure
1. With your foot off the accelerator
pedal, turn the ignition to START.
When the engine starts, let go of
the key. The idle speed will slow
down as the engine warms. Do
not race the engine immediately
after starting it. Operate the
engine and transmission gently
to allow the oil to warm up and
lubricate all moving parts.
The vehicle has a
Computer-Controlled Cranking
System. This feature assists in
starting the engine and protects components. If the ignition key is
turned to the START position,
and then released when the
engine begins cranking, the
engine will continue cranking for
a few seconds or until the
vehicle starts. If the engine does
not start and the key is held in
START, cranking will be stopped
after 15 seconds to prevent
cranking motor damage. To
prevent gear damage, this
system also prevents cranking if
the engine is already running.
Engine cranking can be stopped
by turning the ignition switch to
the ACC/ACCESSORY or
LOCK/OFF position.
Notice: Cranking the engine for
long periods of time, by returning
the key to the START position
immediately after cranking has
ended, can overheat and damage
the cranking motor, and drain the
battery. Wait at least 15 seconds
between each try, to let the
cranking motor cool down. 2. If the engine does not start after
5-10 seconds, especially in very
cold weather (below 0°F or
−18°C), it could be flooded with
too much gasoline. Try pushing
the accelerator pedal all the way
to the floor and holding it there
as you hold the key in START
for up to a maximum of
15 seconds. Wait at least
15 seconds between each try, to
allow the cranking motor to cool
down. When the engine starts,
let go of the key and accelerator.
If the vehicle starts briefly but
then stops again, repeat these
steps. This clears the extra
gasoline from the engine. Do not
race the engine immediately
after starting it. Operate the
engine and transmission gently
until the oil warms up and
lubricates all moving parts.
Page 262 of 438
9-20 Driving and Operating
Shifting Into Park
{WARNING
It can be dangerous to get out of
the vehicle if the shift lever is not
fully in P (Park) with the parking
brake firmly set. The vehicle can
roll. If you have left the engine
running, the vehicle can move
suddenly. You or others could be
injured. To be sure the vehicle will
not move, even when you are on
fairly level ground, use the steps
that follow. If you are pulling a
trailer, seeDriving Characteristics
and Towing Tips on page 9‑45.
1. Hold the brake pedal down and set the parking brake. See
Parking Brake
on page 9‑27for
more information.
2. Move the shift lever into P (Park) by holding in the button on the
shift lever and pushing the shift
lever all the way toward the front
of the vehicle. 3. Turn the ignition key to
LOCK/OFF.
4. Remove the key and take it with you. If you can leave the vehicle
with the ignition key in your
hand, the vehicle is in P (Park).
Leaving the Vehicle with the
Engine Running
{WARNING
It can be dangerous to leave the
vehicle with the engine running.
The vehicle could move suddenly
if the shift lever is not fully in
P (Park) with the parking brake
firmly set. And, if you leave the
vehicle with the engine running, it
could overheat and even catch
fire. You or others could be
injured. Do not leave the vehicle
with the engine running.
If you have to leave the vehicle with
the engine running, be sure the
vehicle is in P (Park) and the
parking brake is firmly set before you leave it. After you have moved
the shift lever into P (Park), hold the
regular brake pedal down. Then,
see if you can move the shift lever
away from P (Park) without first
pushing the button.
If you can, it means that the shift
lever was not fully locked in
P (Park).
Torque Lock
Torque lock is when the weight of
the vehicle puts too much force on
the parking pawl in the
transmission. This happens when
parking on a hill and shifting the
transmission into P (Park) is not
done properly and then it is difficult
to shift out of P (Park). To prevent
torque lock, set the parking brake
and then shift into P (Park). To find
out how, see
“Shifting Into Park”
listed previously.
If torque lock does occur, your
vehicle may need to be pushed
uphill by another vehicle to relieve
the parking pawl pressure, so you
can shift out of P (Park).
Page 277 of 438
Driving and Operating 9-35
WARNING (Continued)
Your judged distances using the
screen will differ from actual
distances.
So if you do not use proper care
before backing up, you could hit a
vehicle, child, pedestrian,
bicyclist, or pet, resulting in
vehicle damage, injury, or death.
Even though the vehicle has the
RVC system, always check
carefully before backing up by
checking behind and around the
vehicle.
Vehicles Without Navigation
System
The rear vision camera system is
designed to help the driver when
backing up by displaying a view of
the area behind the vehicle. When
the key is in the ON/RUN position
and the driver shifts the vehicle into
R (Reverse), the video image
automatically appears on the inside
rear view mirror. Once the driver
shifts out of R (Reverse), the video
image automatically disappears
from the inside rear view mirror.
Turning the Rear Vision Camera
System Off or On
To turn off the rear vision camera
system, press and hold
z, located
on the inside rearview mirror, until
the left indicator light turns off. The
rear camera vision display is now
disabled. To turn the rear vision camera
system on again, press and
hold
zuntil the left indicator light
illuminates. The rear vision camera
system display is now enabled and
the display will appear in the mirror
normally.
Vehicles With Navigation
System
The rear vision camera system is
designed to help the driver when
backing up by displaying a view of
the area behind the vehicle. When
the driver shifts the vehicle into
R (Reverse), the video image
automatically appears on the
navigation screen. Once the driver
shifts out of R (Reverse), the
navigation screen will go back to the
last screen that had been displayed,
after a delay.
Page 278 of 438
9-36 Driving and Operating
Turning the Rear Vision Camera
System On or Off
To turn the rear vision camera
system on or off:
1. Shift into P (Park).
2. Press the MENU button to enterthe configure menu options, then
press the MENU hard key to
select Display or touch the
Display screen button.
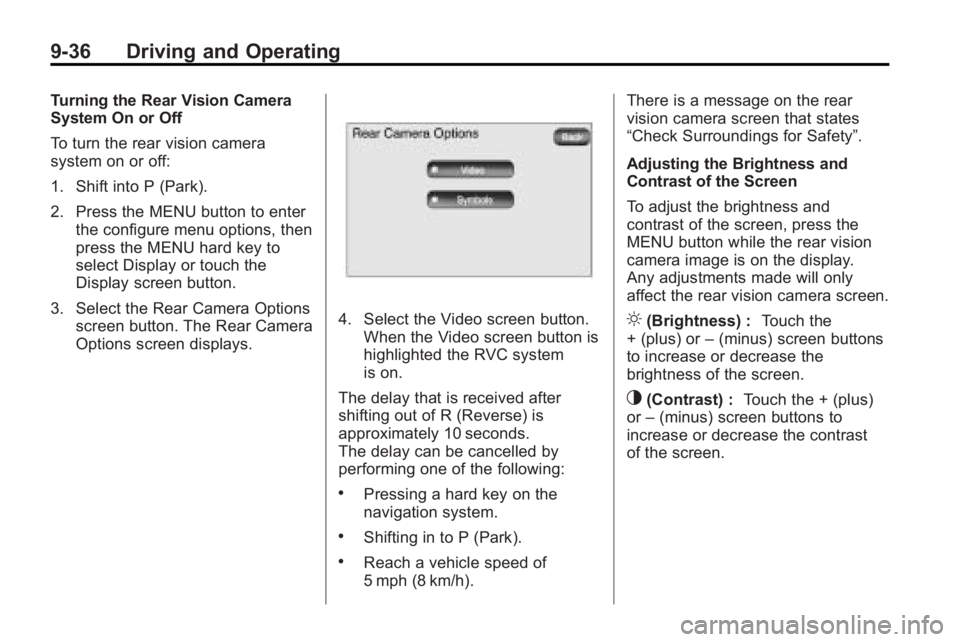
3. Select the Rear Camera Options screen button. The Rear Camera
Options screen displays.
4. Select the Video screen button.
When the Video screen button is
highlighted the RVC system
is on.
The delay that is received after
shifting out of R (Reverse) is
approximately 10 seconds.
The delay can be cancelled by
performing one of the following:
.Pressing a hard key on the
navigation system.
.Shifting in to P (Park).
.Reach a vehicle speed of
5 mph (8 km/h). There is a message on the rear
vision camera screen that states
“Check Surroundings for Safety”.
Adjusting the Brightness and
Contrast of the Screen
To adjust the brightness and
contrast of the screen, press the
MENU button while the rear vision
camera image is on the display.
Any adjustments made will only
affect the rear vision camera screen.
](Brightness) :
Touch the
+ (plus) or –(minus) screen buttons
to increase or decrease the
brightness of the screen.
_(Contrast) : Touch the + (plus)
or –(minus) screen buttons to
increase or decrease the contrast
of the screen.
Page 279 of 438
Driving and Operating 9-37
Symbols
The navigation system may have a
feature that lets the driver view
symbols on the navigation screen
while using the rear vision camera.
The Ultrasonic Rear Park Assist
(URPA) system must not be
disabled to use the caution symbols.
If URPA has been disabled and the
symbols have been turned on, the
Rear Parking Assist Symbols
Unavailable error message may
display. SeeUltrasonic Parking
Assist on page 9‑33.
The symbols appear when an object
has been detected by the URPA
system. The symbol may cover the
object when viewing the navigation
screen.
To turn the symbols on or off:
1. Make sure that URPA has not been disabled.
2. Shift into P (Park). 3. Press the MENU hard key to
enter the configure menu
options, then press the MENU
hard key repeatedly until Display
is selected or touch the Display
screen button.
4. Select the Rear Camera Options screen button. The Rear Camera
Options screen will display.
5. Touch the Symbols screen button. The screen button will be
highlighted when on.
Rear Vision Camera Error
Messages
Service Rear Vision Camera
System: This message can display
when the system is not receiving
information it requires from other
vehicle systems.
If any other problem occurs or if a
problem persists, see your dealer/
retailer.Rear Vision Camera Location
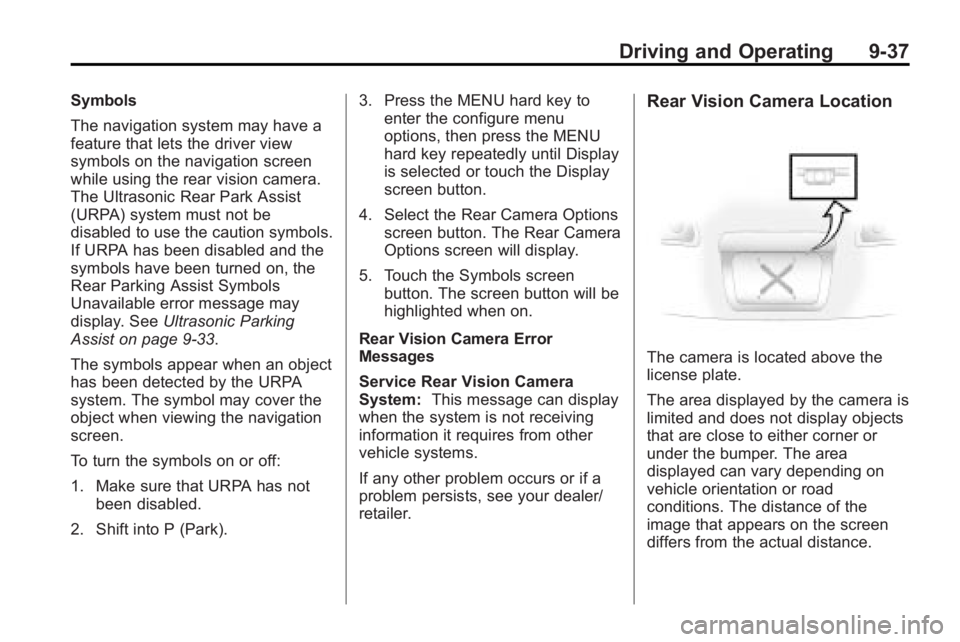
The camera is located above the
license plate.
The area displayed by the camera is
limited and does not display objects
that are close to either corner or
under the bumper. The area
displayed can vary depending on
vehicle orientation or road
conditions. The distance of the
image that appears on the screen
differs from the actual distance.
Page 309 of 438
Vehicle Care 10-11
To reset the Engine Oil Life System:
1. Turn the ignition to ON/RUN,with the engine off.
2. Press the vehicle information button until OIL LIFE
REMAINING displays.
3. Press and hold the set/reset button until 100% is displayed.
Three chimes sound and the
CHANGE ENGINE OIL SOON
message goes off.
4. Turn the key to LOCK/OFF.
If the CHANGE ENGINE OIL SOON
message comes back on when the
vehicle is started, the engine oil life
system has not reset. Repeat the
procedure.What to Do with Used Oil
Used engine oil contains certain
elements that can be unhealthy for
your skin and could even cause
cancer. Do not let used oil stay on
your skin for very long. Clean your
skin and nails with soap and water,
or a good hand cleaner. Wash or
properly dispose of clothing or rags
containing used engine oil. See the
manufacturer's warnings about the
use and disposal of oil products.
Used oil can be a threat to the
environment. If you change your
own oil, be sure to drain all the oil
from the filter before disposal. Never
dispose of oil by putting it in the
trash, pouring it on the ground, into
sewers, or into streams or bodies of
water. Recycle it by taking it to a
place that collects used oil.
Automatic Transmission
Fluid
It is not necessary to check the
transmission fluid level.
A transmission fluid leak is the only
reason for fluid loss. If a leak
occurs, take the vehicle to the
dealer/retailer and have it repaired
as soon as possible.
Change the fluid at the intervals
listed in Scheduled Maintenance
on
page 11‑2, and be sure to use the
transmission fluid listed in
Recommended Fluids and
Lubricants on page 11‑7.