tow BUICK ENCLAVE 2010 Workshop Manual
[x] Cancel search | Manufacturer: BUICK, Model Year: 2010, Model line: ENCLAVE, Model: BUICK ENCLAVE 2010Pages: 438, PDF Size: 2.47 MB
Page 300 of 438
10-2 Vehicle Care
Tire Inspection . . . . . . . . . . . . . . 10-50
Tire Rotation . . . . . . . . . . . . . . . 10-50
When It Is Time for NewTires . . . . . . . . . . . . . . . . . . . . . . 10-51
Buying New Tires . . . . . . . . . . . 10-52
Different Size Tires and
Wheels . . . . . . . . . . . . . . . . . . . 10-54
Uniform Tire Quality Grading . . . . . . . . . . . . . . . . . . . 10-54
Wheel Alignment and Tire Balance . . . . . . . . . . . . . . . . . . . 10-56
Wheel Replacement . . . . . . . . 10-56
Tire Chains . . . . . . . . . . . . . . . . . 10-57
If a Tire Goes Flat . . . . . . . . . . 10-58
Tire Sealant and Compressor Kit . . . . . . . . . . . 10-60
Storing the Tire Sealant and Compressor Kit . . . . . . . . . . . 10-68
Tire Changing . . . . . . . . . . . . . . 10-68
Secondary Latch System . . . 10-78
Compact Spare Tire . . . . . . . . 10-80Jump Starting
Jump Starting . . . . . . . . . . . . . . 10-81
Towing
Towing the Vehicle . . . . . . . . . 10-85
Recreational Vehicle Towing . . . . . . . . . . . . . . . . . . . . 10-85
Appearance Care
Exterior Care . . . . . . . . . . . . . . . 10-88
Interior Care . . . . . . . . . . . . . . . . 10-92
Floor Mats . . . . . . . . . . . . . . . . . . 10-95
General Information
For service and parts needs, visit
your dealer/retailer. You will receive
genuine GM parts and GM-trained
and supported service people.
Genuine GM parts have one of
these marks:
Page 306 of 438
10-8 Vehicle Care
Engine Oil
Checking Engine Oil
It is a good idea to check the engine
oil level at each fuel fill. In order to
get an accurate reading, the oil
must be warm and the vehicle must
be on level ground.
The engine oil dipstick handle
is a yellow loop. SeeEngine
Compartment Overview
on
page 10‑6for the location of the
engine oil dipstick.
1. Turn off the engine and give the oil several minutes to drain back
into the oil pan. If this is not
done, the oil dipstick might not
show the actual level.
2. Pull out the dipstick and clean it with a paper towel or cloth, then
push it back in all the way.
Remove it again, keeping the tip
down, and check the level.
When to Add Engine Oil
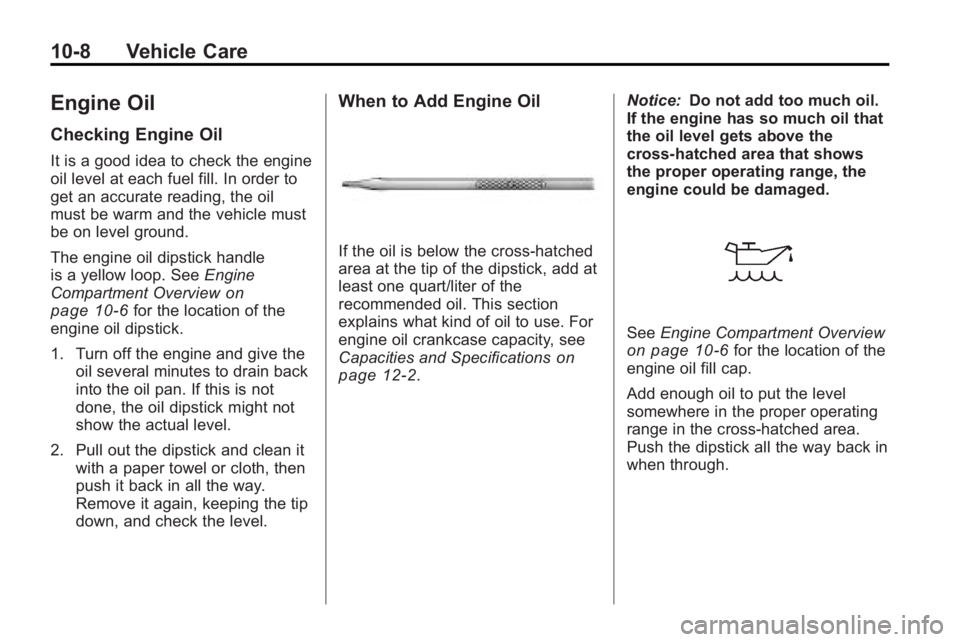
If the oil is below the cross-hatched
area at the tip of the dipstick, add at
least one quart/liter of the
recommended oil. This section
explains what kind of oil to use. For
engine oil crankcase capacity, see
Capacities and Specifications
on
page 12‑2. Notice:
Do not add too much oil.
If the engine has so much oil that
the oil level gets above the
cross-hatched area that shows
the proper operating range, the
engine could be damaged.
See Engine Compartment Overviewon page 10‑6for the location of the
engine oil fill cap.
Add enough oil to put the level
somewhere in the proper operating
range in the cross-hatched area.
Push the dipstick all the way back in
when through.
Page 317 of 438
Vehicle Care 10-19
If you do decide to lift the hood ,
make sure the vehicle is parked on
a level surface.
Then check to see if the engine
cooling fans are running. If the
engine is overheating, both fans
should be running. If they are not,
do not continue to run the engine
and have the vehicle serviced.
Notice:Engine damage from
running the engine without
coolant is not covered by the
warranty.
Notice: If the engine catches fire
while driving with no coolant, the
vehicle can be badly damaged.
The costly repairs would not be
covered by the vehicle warranty.
See Overheated Engine
Protection Operating Mode
on
page 10‑20for information on
driving to a safe place in an
emergency.
If Steam Is Coming From The
Engine Compartment
{WARNING
Steam from an overheated engine
can burn you badly, even if you
just open the hood. Stay away
from the engine if you see or hear
steam coming from it. Turn it off
and get everyone away from the
vehicle until it cools down. Wait
until there is no sign of steam or
coolant before you open
the hood.
If you keep driving when the
vehicles engine is overheated,
the liquids in it can catch fire. You
or others could be badly burned.
Stop the engine if it overheats,
and get out of the vehicle until the
engine is cool.
(Continued)
WARNING (Continued)
SeeOverheated Engine
Protection Operating Mode
on
page 10‑20
for information on
driving to a safe place in an
emergency.
If No Steam Is Coming From
The Engine Compartment
If an engine overheat warning is
displayed but no steam can be seen
or heard, the problem may not be
too serious. Sometimes the engine
can get a little too hot when the
vehicle:
.Climbs a long hill on a hot day.
.Stops after high-speed driving.
.Idles for long periods in traffic.
.Tows a trailer.
Page 318 of 438
10-20 Vehicle Care
If the overheat warning is displayed
with no sign of steam:
1. Turn the air conditioning off.
2. Turn the heater on to the highesttemperature and to the highest
fan speed. Open the windows as
necessary.
3. If in a traffic jam, shift to N (Neutral), otherwise, shift to
the highest gear while
driving —D (Drive) or L (Low).
If the temperature overheat gage is
no longer in the overheat zone or an
overheat warning no longer
displays, the vehicle can be driven.
Continue to drive the vehicle slow
for about 10 minutes. Keep a safe
vehicle distance from the car in front
of you. If the warning does not come
back on, continue to drive normally.
If the warning continues, pull over,
stop, and park the vehicle
right away. If there is no sign of steam, idle the
engine for three minutes while
parked. If the warning is still
displayed, turn off the engine until it
cools down. Also, see
“Overheated
Engine Protection Operating Mode”
next in this section.
Overheated Engine
Protection
Operating Mode
This emergency operating mode lets
the vehicle be driven to a safe place
in an emergency situation. If an
overheated engine condition exists,
an overheat protection mode which
alternates firing groups of cylinders
helps prevent engine damage. In
this mode, there is a significant loss
in power and engine performance.
The temperature gage indicates an
overheat condition exists. Driving
extended distances and/or towing a
trailer in the overheat protection
mode should be avoided. Notice:
After driving in the
overheated engine protection
operating mode, to avoid engine
damage, allow the engine to cool
before attempting any repair. The
engine oil will be severely
degraded. Repair the cause of
coolant loss, change the oil and
reset the oil life system. See
Engine Oil on page 10‑8.
Power Steering Fluid
The power steering fluid reservoir is
located under the engine cover on
the passenger side of the vehicle.
See Engine Compartment Overview
on page 10‑6for reservoir location.
Page 349 of 438
Vehicle Care 10-51
{WARNING
Rust or dirt on a wheel, or on the
parts to which it is fastened, can
make wheel nuts become loose
after time. The wheel could come
off and cause an accident. When
changing a wheel, remove any
rust or dirt from places where the
wheel attaches to the vehicle. In
an emergency, use a cloth or a
paper towel to do this; but be sure
to use a scraper or wire brush
later, if needed, to get all the rust
or dirt off. SeeIf a Tire Goes Flat
on page 10‑58.
Make sure the spare tire, if the
vehicle has one, is stored
securely. Push, pull, and then try
to rotate or turn the tire. If it
moves, tighten the cable. See
Tire Changing
on page 10‑68.
When It Is Time for New
Tires
Various factors, such as
maintenance, temperatures, driving
speeds, vehicle loading, and road
conditions influence when you need
new tires.
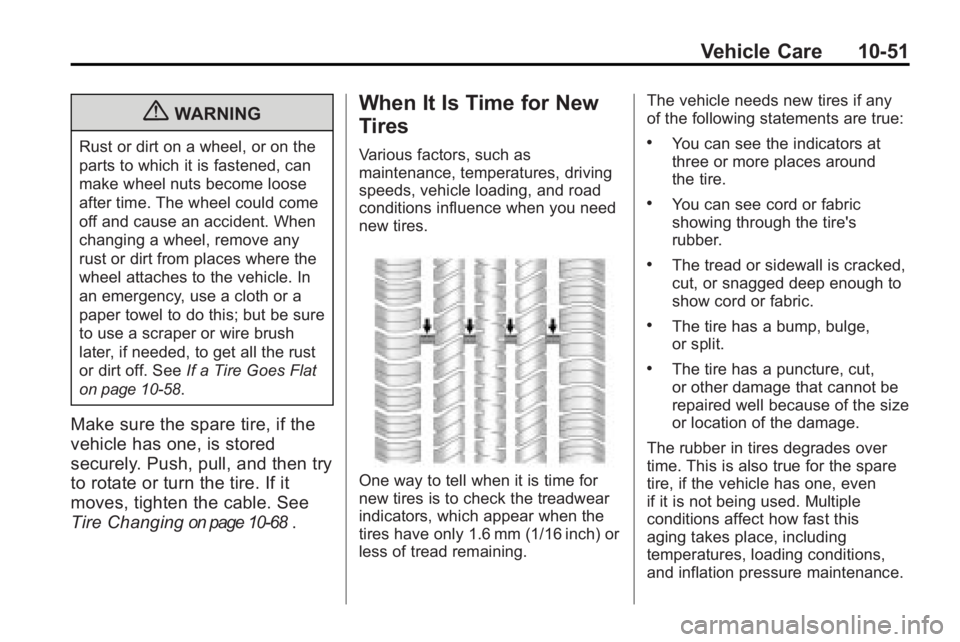
One way to tell when it is time for
new tires is to check the treadwear
indicators, which appear when the
tires have only 1.6 mm (1/16 inch) or
less of tread remaining. The vehicle needs new tires if any
of the following statements are true:
.You can see the indicators at
three or more places around
the tire.
.You can see cord or fabric
showing through the tire's
rubber.
.The tread or sidewall is cracked,
cut, or snagged deep enough to
show cord or fabric.
.The tire has a bump, bulge,
or split.
.The tire has a puncture, cut,
or other damage that cannot be
repaired well because of the size
or location of the damage.
The rubber in tires degrades over
time. This is also true for the spare
tire, if the vehicle has one, even
if it is not being used. Multiple
conditions affect how fast this
aging takes place, including
temperatures, loading conditions,
and inflation pressure maintenance.
Page 356 of 438

10-58 Vehicle Care
If a Tire Goes Flat
It is unusual for a tire to blowout
while you are driving, especially if
you maintain your vehicle's tires
properly. If air goes out of a tire, it is
much more likely to leak out slowly.
But if you should ever have a
blowout, here are a few tips about
what to expect and what to do:
If a front tire fails, the flat tire
creates a drag that pulls the vehicle
toward that side. Take your foot off
the accelerator pedal and grip the
steering wheel firmly. Steer to
maintain lane position, and then
gently brake to a stop well out of the
traffic lane.A rear blowout, particularly on a
curve, acts much like a skid and
may require the same correction
you would use in a skid. In any rear
blowout remove your foot from the
accelerator pedal. Get the vehicle
under control by steering the
way you want the vehicle to go.
It may be very bumpy and noisy, but
you can still steer. Gently brake to a
stop, well off the road if possible.{WARNING
Lifting a vehicle and getting
under it to do maintenance or
repairs is dangerous without the
appropriate safety equipment and
training. If a jack is provided with
the vehicle, it is designed only for
changing a flat tire. If it is used for
anything else, you or others could
be badly injured or killed if the
vehicle slips off the jack. If a jack
is provided with the vehicle, only
use it for changing a flat tire.
If a tire goes flat, avoid further tire
and wheel damage by driving slowly
to a level place. Turn on the hazard
warning flashers. See Hazard
Warning Flashers on page 6‑4.
Page 366 of 438
10-68 Vehicle Care
Storing the Tire Sealant
and Compressor Kit
The tire sealant and compressor
kit is located in the storage
compartment on the driver side,
at the rear of the vehicle.
1. Press down on the latch tab andpull the cover off to access the
storage compartment. 2. Press the two tabs on the quick
release buckle to release the
tire sealant and compressor
kit strap.
3. Remove the sealant and compressor kit from its tray.
To store the tire sealant and
compressor kit, reverse the steps.
Tire Changing
Removing Tools
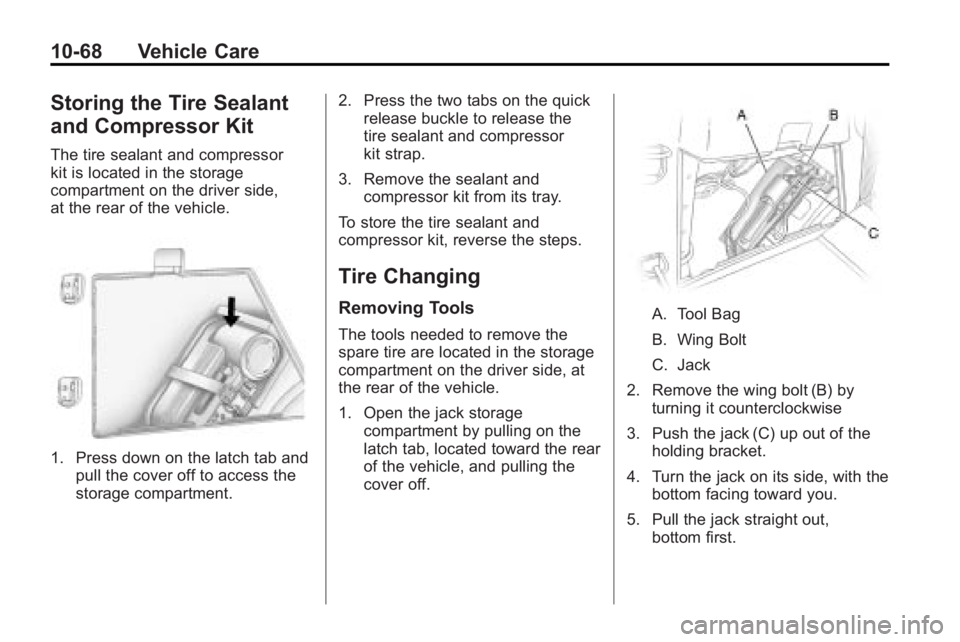
The tools needed to remove the
spare tire are located in the storage
compartment on the driver side, at
the rear of the vehicle.
1. Open the jack storage compartment by pulling on the
latch tab, located toward the rear
of the vehicle, and pulling the
cover off.
A. Tool Bag
B. Wing Bolt
C. Jack
2. Remove the wing bolt (B) by turning it counterclockwise
3. Push the jack (C) up out of the holding bracket.
4. Turn the jack on its side, with the bottom facing toward you.
5. Pull the jack straight out, bottom first.
Page 371 of 438

Vehicle Care 10-73
9. Remove the plastic spare tireheat shield by pulling the rubber
latch. Store the plastic spare tire
heat shield. See “Storing a Flat
or Spare Tire and Tools” later in
this section for more information.
{WARNING
Rust or dirt on a wheel, or on the
parts to which it is fastened, can
make wheel nuts become loose
after time. The wheel could come
off and cause an accident. When
changing a wheel, remove any
rust or dirt from places where the
wheel attaches to the vehicle. In
an emergency, use a cloth or a
paper towel to do this; but be sure
to use a scraper or wire brush
later, if needed, to get all the rust
or dirt off. See If a Tire Goes Flat
on page 10‑58.
{WARNING
Never use oil or grease on bolts
or nuts because the nuts might
come loose. The vehicle's wheel
could fall off, causing a crash. 10. Remove any rust or dirt from
the wheel bolts, mounting
surfaces, and spare wheel.
11. Place the spare tire on the wheel mounting surface.
12. Put the nuts on by hand by turning them clockwise until the
wheel is held against the
mounting surface. Make sure
the rounded end is toward the
wheel.
13. Lower the vehicle by attaching the lug wrench to the jack
and turning the wrench
counterclockwise. Lower the
jack completely.
Page 373 of 438

Vehicle Care 10-75
{WARNING
Storing a jack, a tire, or other
equipment in the passenger
compartment of the vehicle could
cause injury. In a sudden stop or
collision, loose equipment could
strike someone. Store all these in
the proper place.
To store the spare tire:
1. Lay the compact spare tire near the rear of the vehicle with the
valve stem down.
2. Reinstall the plastic spare tire heat shield on the compact
spare tire.
3. Slide the cable retainer through the center of the wheel and start
to raise the compact spare tire.
Make sure the retainer is fully
seated across the underside of
the wheel. 4. When the compact spare tire is
almost in the stored position,
turn the tire so the valve is
toward the rear of the vehicle.
This position helps when
checking the air pressure in the
compact spare tire.
5. Raise the tire fully against the underside of the vehicle.
Continue turning the lug wrench
until you feel more than two
clicks. This indicates that the
compact spare tire is secure and
the cable is tight. The spare tire
hoist cannot be overtightened.
6. Make sure the tire is stored
securely. Push, pull (A), and then
try to turn (B) the tire. If the tire
moves, use the lug wrench to
tighten the cable.
Page 374 of 438

10-76 Vehicle Care
Storing the Flat Tire
1. Remove the cable package fromthe jack storage area.
2. Remove the small center cap by tapping the back of the cap with
the extension of the shaft, if the
vehicle has aluminum wheels.
3. Put the flat tire in the rear storage area with the valve stem
pointing toward the rear of the
vehicle.
4. Pull the cable (A) through thedoor striker (E), the center of the
wheel (D), and the plastic spare
tire heat shield (C), as shown.5. Hook the cable onto the outsideportion of the liftgate hinges (B).
6. Hook the other end of the cable onto the outside portion of the
liftgate hinge (A).
7. Pull on the cable to make sure it is secure.