light BUICK ENCLAVE 2010 Manual Online
[x] Cancel search | Manufacturer: BUICK, Model Year: 2010, Model line: ENCLAVE, Model: BUICK ENCLAVE 2010Pages: 438, PDF Size: 2.47 MB
Page 268 of 438
9-26 Driving and Operating
Automatic Engine Grade
Braking
Automatic Engine Grade Braking
assists when driving on a downhill
grade. It maintains vehicle speed by
automatically implementing a shift
schedule that uses the engine and
the transmission to slow the vehicle.
The system will automatically
command downshifts to reduce
vehicle speed, until the brake pedal
is no longer being pressed.
While in the Electronic Range
Select (ERS) mode, grade braking
is deactivated, allowing the driver to
select a range and limiting the
highest gear available. Grade
braking is available for normal
driving and in Tow/Haul mode.
SeeAutomatic Transmission
on
page 9‑23.
Drive Systems
All-Wheel Drive
With this feature, engine power is
always sent to all four wheels. It is
fully automatic, and adjusts itself as
needed for road conditions.
When using a compact spare tire on
an AWD vehicle, the system
automatically detects the compact
spare and disables AWD. To restore
AWD operation and prevent
excessive wear on system, replace
the compact spare with a full-size
tire as soon as possible. See
Compact Spare Tire
on page 10‑80for more information.
Brakes
Antilock Brake
System (ABS)
This vehicle has the Antilock Brake
System (ABS), an advanced
electronic braking system that helps
prevent a braking skid.
When the engine is started and the
vehicle begins to drive away, ABS
checks itself. A momentary motor or
clicking noise might be heard while
this test is going on, and it might
even be noticed that the brake
pedal moves a little. This is normal.
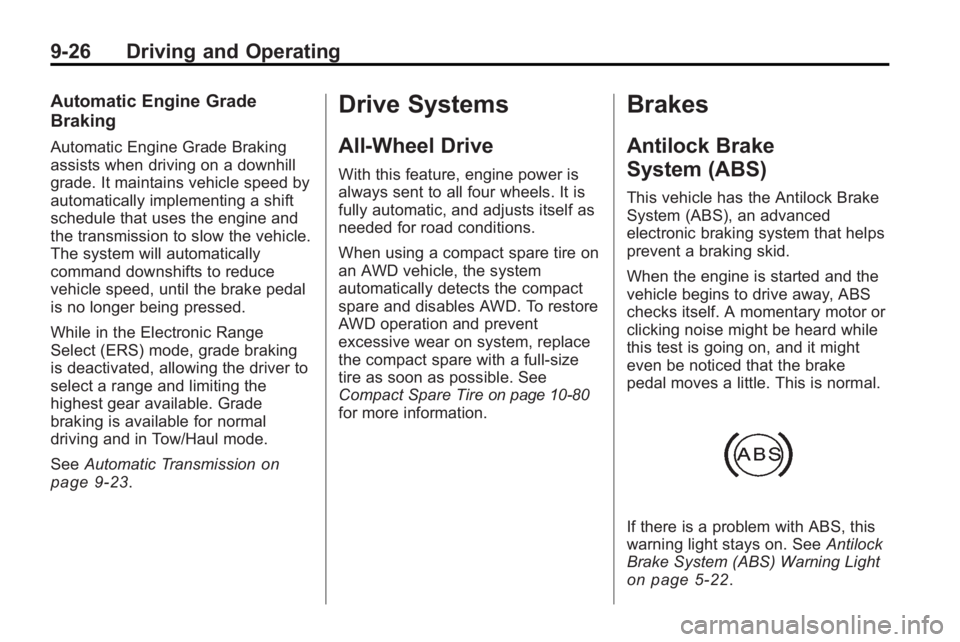
If there is a problem with ABS, this
warning light stays on. See Antilock
Brake System (ABS) Warning Light
on page 5‑22.
Page 269 of 438
Driving and Operating 9-27
If driving safely on a wet road and it
becomes necessary to slam on the
brakes and continue braking to
avoid a sudden obstacle, a
computer senses that the wheels
are slowing down. If one of the
wheels is about to stop rolling, the
computer will separately work the
brakes at each wheel.
ABS can change the brake pressure
to each wheel, as required, faster
than any driver could. This can help
the driver steer around the obstacle
while braking hard.
As the brakes are applied, the
computer keeps receiving updates
on wheel speed and controls
braking pressure accordingly.Remember: ABS does not change
the time needed to get a foot up to
the brake pedal or always decrease
stopping distance. If you get too
close to the vehicle in front of you,
there will not be enough time to
apply the brakes if that vehicle
suddenly slows or stops. Always
leave enough room up ahead to
stop, even with ABS.
Using ABS
Do not pump the brakes. Just hold
the brake pedal down firmly and let
ABS work. The ABS pump or motor
might be heard operating, and the
brake pedal might be felt to pulsate,
but this is normal.
Braking in Emergencies
ABS allows the driver to steer and
brake at the same time. In many
emergencies, steering can help
more than even the very best
braking.
Parking Brake
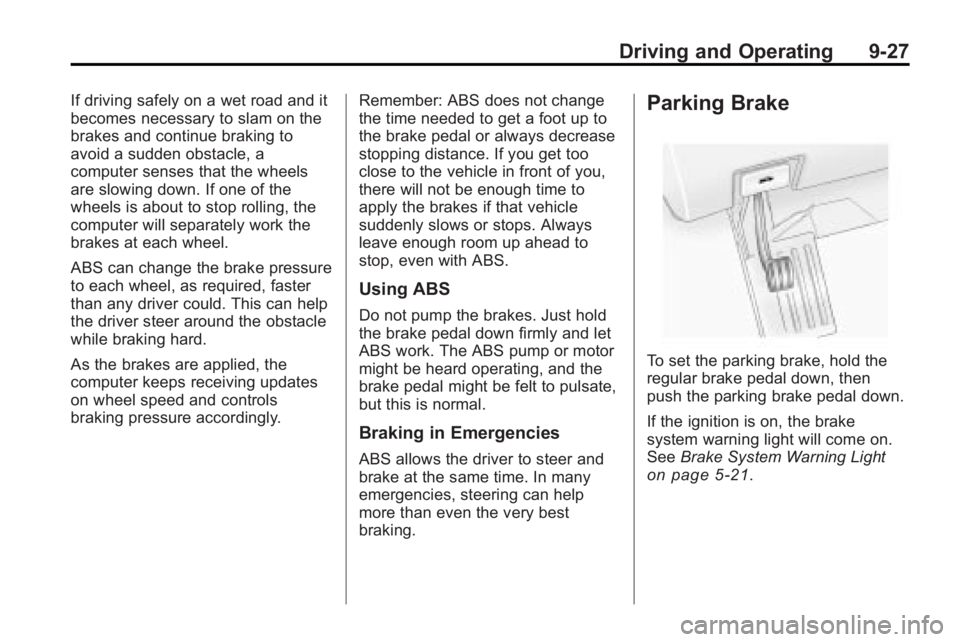
To set the parking brake, hold the
regular brake pedal down, then
push the parking brake pedal down.
If the ignition is on, the brake
system warning light will come on.
See
Brake System Warning Light
on page 5‑21.
Page 270 of 438
9-28 Driving and Operating
Notice:Driving with the parking
brake on can overheat the brake
system and cause premature
wear or damage to brake system
parts. Make sure that the parking
brake is fully released and the
brake warning light is off before
driving.
To release the parking brake, hold
the regular brake pedal down, then
push down momentarily on the
parking brake pedal until you feel
the pedal release. Slowly pull your
foot up off the park brake pedal.
If the parking brake is not released
when you begin to drive, the brake
system warning light will be on and
a chime will sound warning you that
the parking brake is still on.
If you are towing a trailer and are
parking on a hill, see Trailer Towing
on page 9‑50.
Brake Assist
This vehicle has a Brake Assist
feature designed to assist the driver
in stopping or decreasing vehicle
speed in emergency driving
conditions. This feature uses the
stability system hydraulic brake
control module to supplement the
power brake system under
conditions where the driver has
quickly and forcefully applied the
brake pedal in an attempt to quickly
stop or slow down the vehicle. The
stability system hydraulic brake
control module increases brake
pressure at each corner of the
vehicle until the ABS activates.
Minor brake pedal pulsations or
pedal movement during this time is
normal and the driver should
continue to apply the brake pedal as
the driving situation dictates. The
Brake Assist feature will
automatically disengage when the
brake pedal is released or brake
pedal pressure is quickly
decreased.
Ride Control Systems
StabiliTrak System
The vehicle has the StabiliTrak
system which combines antilock
brake, traction and stability control
systems and helps the driver
maintain directional control of the
vehicle in most driving conditions.
When you first start the vehicle and
begin to drive away, the system
performs several diagnostic checks
to ensure there are no problems.
The system may be heard or felt
while it is working. This is normal
and does not mean there is a
problem with the vehicle. The
system should initialize before the
vehicle reaches 32 km/h (20 mph).
In some cases, it may take
approximately 3.2 km (2 miles) of
driving before the system initializes.
If the system fails to turn on or
activate, the StabiliTrak light along
with one of the following messages
Page 271 of 438

Driving and Operating 9-29
will be displayed on the Driver
Information Center (DIC):
TRACTION CONTROL OFF,
SERVICE TRACTION CONTROL,
SERVICE STABILITRAK. If these
conditions are observed, turn the
vehicle off, wait 15 seconds, and
then turn it back on again to reset
the system. If any of these
messages still appear on the Driver
Information Center (DIC), the
vehicle should be taken in for
service. For more information on the
DIC messages, seeDriver
Information Center (DIC)
on
page 5‑25.
The StabiliTrak light will flash on the
instrument panel cluster when the
system is both on and activated.
The system may be heard or felt
while it is working; this is normal.
The traction control disable button is
located on the instrument panel
below the climate controls.
The traction control part of
StabiliTrak can be turned off by
pressing and releasing the traction
control disable button.
Traction control can be turned on by
pressing and releasing the traction
control disable button if not
automatically shut off for any other
reason.
When the traction control system is
turned off, the StabiliTrak light and
the appropriate traction control off
message will be displayed on the
DIC to warn the driver. The vehicle
will still have brake-traction control
when traction control is off, but will
not be able to use the engine speed management system. See
“Traction
Control Operation” next for more
information.
When the traction control system
has been turned off, system noises
may be heard and felt as a result of
the brake-traction control working.
It is recommended to leave the
system on for normal driving
conditions, but it may be necessary
to turn the system off if the vehicle
is stuck in sand, mud, ice or snow,
and you want to “rock”the vehicle to
attempt to free it. It may also be
necessary to turn off the system
when driving in extreme off-road
conditions where high wheel spin is
required. See If the Vehicle is Stuck
on page 9‑11.
Traction Control Operation
The traction control system is part of
the StabiliTrak system. Traction
control limits wheel spin by
reducing engine power to the
wheels (engine speed management)
Page 272 of 438

9-30 Driving and Operating
and by applying brakes to each
individual wheel (brake-traction
control) as necessary.
The traction control system is
enabled automatically when the
vehicle is started. It will activate and
the StabiliTrak light will flash if it
senses that any of the wheels are
spinning or beginning to lose
traction while driving. If traction
control is turned off, only the
brake-traction control portion of
traction control will work. The
engine speed management will be
disabled. In this mode, engine
power is not reduced automatically
and the driven wheels can spin
more freely. This can cause the
brake-traction control to activate
constantly.
Notice:If the wheel(s) of one axle
is allowed to spin excessively
while the StabiliTrak, ABS and
brake warning lights and any
relevant DIC messages are
displayed, the transfer case could
be damaged. The repairs would not be covered by the vehicle
warranty. Reduce engine power
and do not spin the wheel(s)
excessively while these lights and
messages are displayed.
The traction control system may
activate on dry or rough roads or
under conditions such as heavy
acceleration while turning or abrupt
upshifts/downshifts of the
transmission. When this happens, a
reduction in acceleration may be
noticed, or a noise or vibration may
be heard. This is normal.
If cruise control is being used when
the system activates, the StabiliTrak
light will flash and cruise control will
automatically disengage. Cruise
control may be reengaged when
road conditions allow. See
Cruise
Control on page 9‑30.
StabiliTrak may also turn off
automatically if it determines that a
problem exists with the system.
If the problem does not clear itself
after restarting the vehicle, see your
dealer/retailer for service.Cruise Control
With cruise control, a speed of
about 40 km/h (25 mph) or more can
be maintained without keeping your
foot on the accelerator. Cruise
control does not work at speeds
below about 40 km/h (25 mph).
When the brakes are applied, the
cruise control is disengaged.
{WARNING
Cruise control can be dangerous
where you cannot drive safely at
a steady speed. So, do not use
the cruise control on winding
roads or in heavy traffic.
Cruise control can be dangerous
on slippery roads. On such roads,
fast changes in tire traction can
cause excessive wheel slip, and
you could lose control. Do not use
cruise control on slippery roads.
Page 273 of 438

Driving and Operating 9-31
The cruise control buttons are
located on left side of the steering
wheel.
T(On/Off):Press to turn cruise
control on and off. The indicator
comes on when cruise control is on.
+ RES (Resume/Accelerate):
Press to make the vehicle
accelerate or resume to a previously
set speed.
SET– :Press to set the speed or
make the vehicle decelerate.
[(Cancel): Press to cancel cruise
control. Setting Cruise Control
Cruise control will not work if the
parking brake is set, or if the master
cylinder brake fluid level is low.
The cruise control light on the
instrument panel cluster comes on
after the cruise control has been set
to the desired speed.
{WARNING
If you leave your cruise control on
when you are not using cruise,
you might hit a button and go into
cruise when you do not want to.
You could be startled and even
lose control. Keep the cruise
control switch off until you want to
use cruise control.
1. Press the
Ibutton.
2. Get up to the speed desired. 3. Press and release the
SET– button located on the
steering wheel.
4. Take your foot off the accelerator.
Resuming a Set Speed
If the cruise control is set at a
desired speed and then the brakes
are applied, the cruise control is
disengaged. But it does not need to
be reset.
Once the vehicle speed is 40 km/h
(25 mph) or greater, press the
+RES button on the steering wheel.
The vehicle returns to the previously
set speed and stays there.
Page 274 of 438

9-32 Driving and Operating
Increasing Speed While Using
Cruise Control
There are two ways to increase the
vehicle speed while using cruise
control:
.Press and hold the +RES button
on the steering wheel until the
desired speed is reached, then
release it.
.To increase vehicle speed in
small increments, press the
+RES button briefly. Each time
this is done, the vehicle goes
about 1.6 km/h (1 mph) faster.
Reducing Speed While Using
Cruise Control
There are two ways to reduce the
vehicle speed while using cruise
control:
.Press and hold the SET– button
on the steering wheel until the
lower speed desired is reached,
then release it.
.To slow down in very small
amounts, press the SET– button
briefly. Each time this is done,
the vehicle goes about 1.6 km/h
(1 mph) slower.
Passing Another Vehicle While
Using Cruise Control
Use the accelerator pedal to
increase vehicle speed. When you
take your foot off the pedal, the
vehicle will slow down to the
previously set cruise speed.
Using Cruise Control on Hills
How well the cruise control will work
on hills depends upon the vehicle
speed, load, and the steepness of
the hills. When going up steep hills,
you might have to step on the
accelerator pedal to maintain the
vehicle speed. When going
downhill, you might have to brake or
shift to a lower gear to keep the
vehicle speed down. When the
brakes are applied the cruise control
is disengaged. Ending Cruise Control
There are three ways to end cruise
control:
.Step lightly on the brake pedal.
.Press the[button.
.Press theTbutton.
Erasing Speed Memory
The cruise control set speed
memory is erased when the cruise
control or the ignition is turned off.
Page 277 of 438
Driving and Operating 9-35
WARNING (Continued)
Your judged distances using the
screen will differ from actual
distances.
So if you do not use proper care
before backing up, you could hit a
vehicle, child, pedestrian,
bicyclist, or pet, resulting in
vehicle damage, injury, or death.
Even though the vehicle has the
RVC system, always check
carefully before backing up by
checking behind and around the
vehicle.
Vehicles Without Navigation
System
The rear vision camera system is
designed to help the driver when
backing up by displaying a view of
the area behind the vehicle. When
the key is in the ON/RUN position
and the driver shifts the vehicle into
R (Reverse), the video image
automatically appears on the inside
rear view mirror. Once the driver
shifts out of R (Reverse), the video
image automatically disappears
from the inside rear view mirror.
Turning the Rear Vision Camera
System Off or On
To turn off the rear vision camera
system, press and hold
z, located
on the inside rearview mirror, until
the left indicator light turns off. The
rear camera vision display is now
disabled. To turn the rear vision camera
system on again, press and
hold
zuntil the left indicator light
illuminates. The rear vision camera
system display is now enabled and
the display will appear in the mirror
normally.
Vehicles With Navigation
System
The rear vision camera system is
designed to help the driver when
backing up by displaying a view of
the area behind the vehicle. When
the driver shifts the vehicle into
R (Reverse), the video image
automatically appears on the
navigation screen. Once the driver
shifts out of R (Reverse), the
navigation screen will go back to the
last screen that had been displayed,
after a delay.
Page 278 of 438
9-36 Driving and Operating
Turning the Rear Vision Camera
System On or Off
To turn the rear vision camera
system on or off:
1. Shift into P (Park).
2. Press the MENU button to enterthe configure menu options, then
press the MENU hard key to
select Display or touch the
Display screen button.
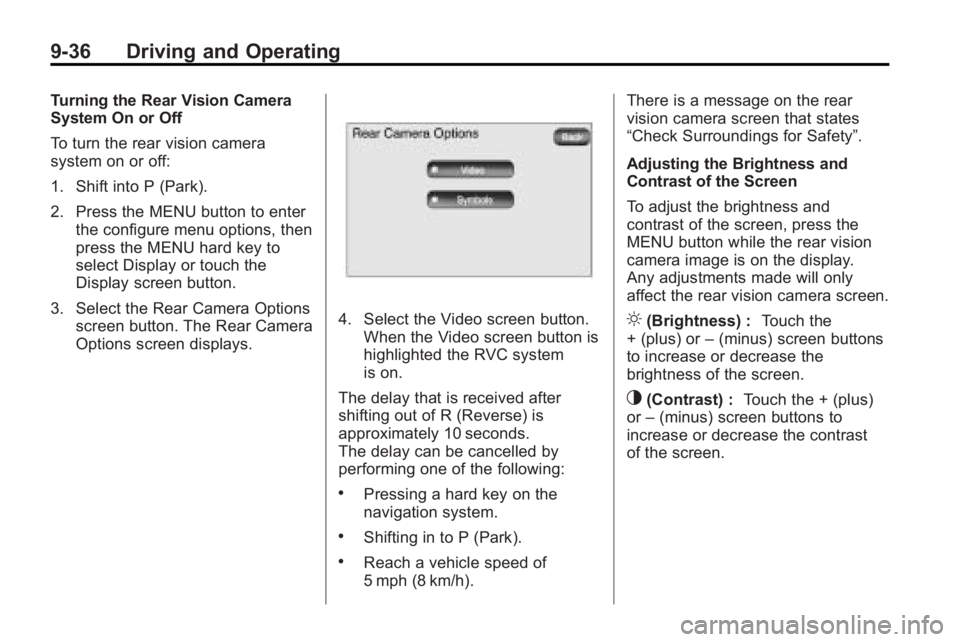
3. Select the Rear Camera Options screen button. The Rear Camera
Options screen displays.
4. Select the Video screen button.
When the Video screen button is
highlighted the RVC system
is on.
The delay that is received after
shifting out of R (Reverse) is
approximately 10 seconds.
The delay can be cancelled by
performing one of the following:
.Pressing a hard key on the
navigation system.
.Shifting in to P (Park).
.Reach a vehicle speed of
5 mph (8 km/h). There is a message on the rear
vision camera screen that states
“Check Surroundings for Safety”.
Adjusting the Brightness and
Contrast of the Screen
To adjust the brightness and
contrast of the screen, press the
MENU button while the rear vision
camera image is on the display.
Any adjustments made will only
affect the rear vision camera screen.
](Brightness) :
Touch the
+ (plus) or –(minus) screen buttons
to increase or decrease the
brightness of the screen.
_(Contrast) : Touch the + (plus)
or –(minus) screen buttons to
increase or decrease the contrast
of the screen.
Page 279 of 438
Driving and Operating 9-37
Symbols
The navigation system may have a
feature that lets the driver view
symbols on the navigation screen
while using the rear vision camera.
The Ultrasonic Rear Park Assist
(URPA) system must not be
disabled to use the caution symbols.
If URPA has been disabled and the
symbols have been turned on, the
Rear Parking Assist Symbols
Unavailable error message may
display. SeeUltrasonic Parking
Assist on page 9‑33.
The symbols appear when an object
has been detected by the URPA
system. The symbol may cover the
object when viewing the navigation
screen.
To turn the symbols on or off:
1. Make sure that URPA has not been disabled.
2. Shift into P (Park). 3. Press the MENU hard key to
enter the configure menu
options, then press the MENU
hard key repeatedly until Display
is selected or touch the Display
screen button.
4. Select the Rear Camera Options screen button. The Rear Camera
Options screen will display.
5. Touch the Symbols screen button. The screen button will be
highlighted when on.
Rear Vision Camera Error
Messages
Service Rear Vision Camera
System: This message can display
when the system is not receiving
information it requires from other
vehicle systems.
If any other problem occurs or if a
problem persists, see your dealer/
retailer.Rear Vision Camera Location
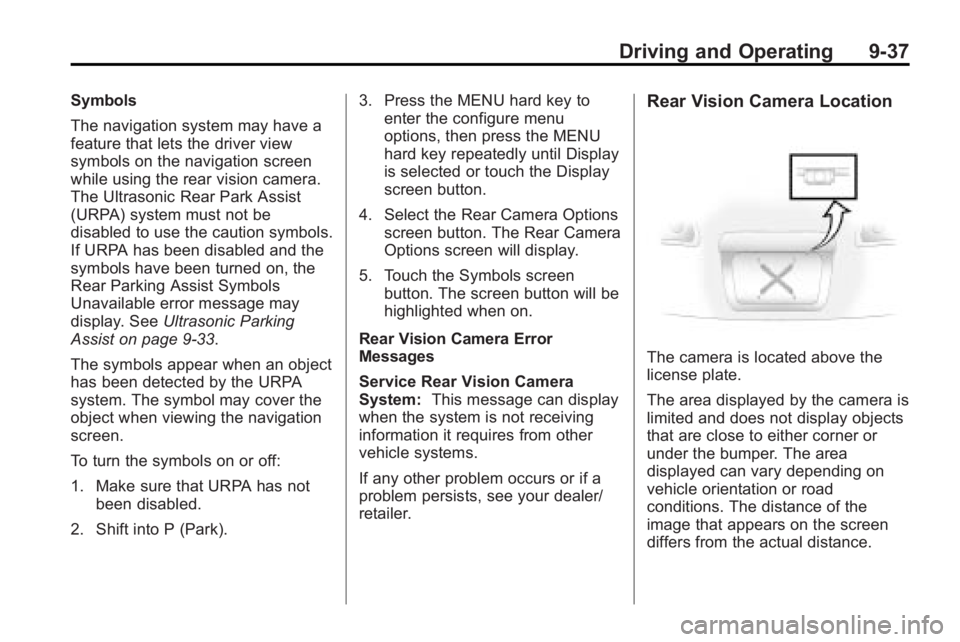
The camera is located above the
license plate.
The area displayed by the camera is
limited and does not display objects
that are close to either corner or
under the bumper. The area
displayed can vary depending on
vehicle orientation or road
conditions. The distance of the
image that appears on the screen
differs from the actual distance.