rear door BUICK ENCORE 2013 Get To Know Guide
[x] Cancel search | Manufacturer: BUICK, Model Year: 2013, Model line: ENCORE, Model: BUICK ENCORE 2013Pages: 16, PDF Size: 1.68 MB
Page 3 of 16

3
Refer to your Owner Manual to learn about the information being conveyed by the lights,
gauges and indicators on the instrument cluster, as well as what to do for safe operation
and to prevent damage to your vehicle.
See In Brief in your Owner Manual.
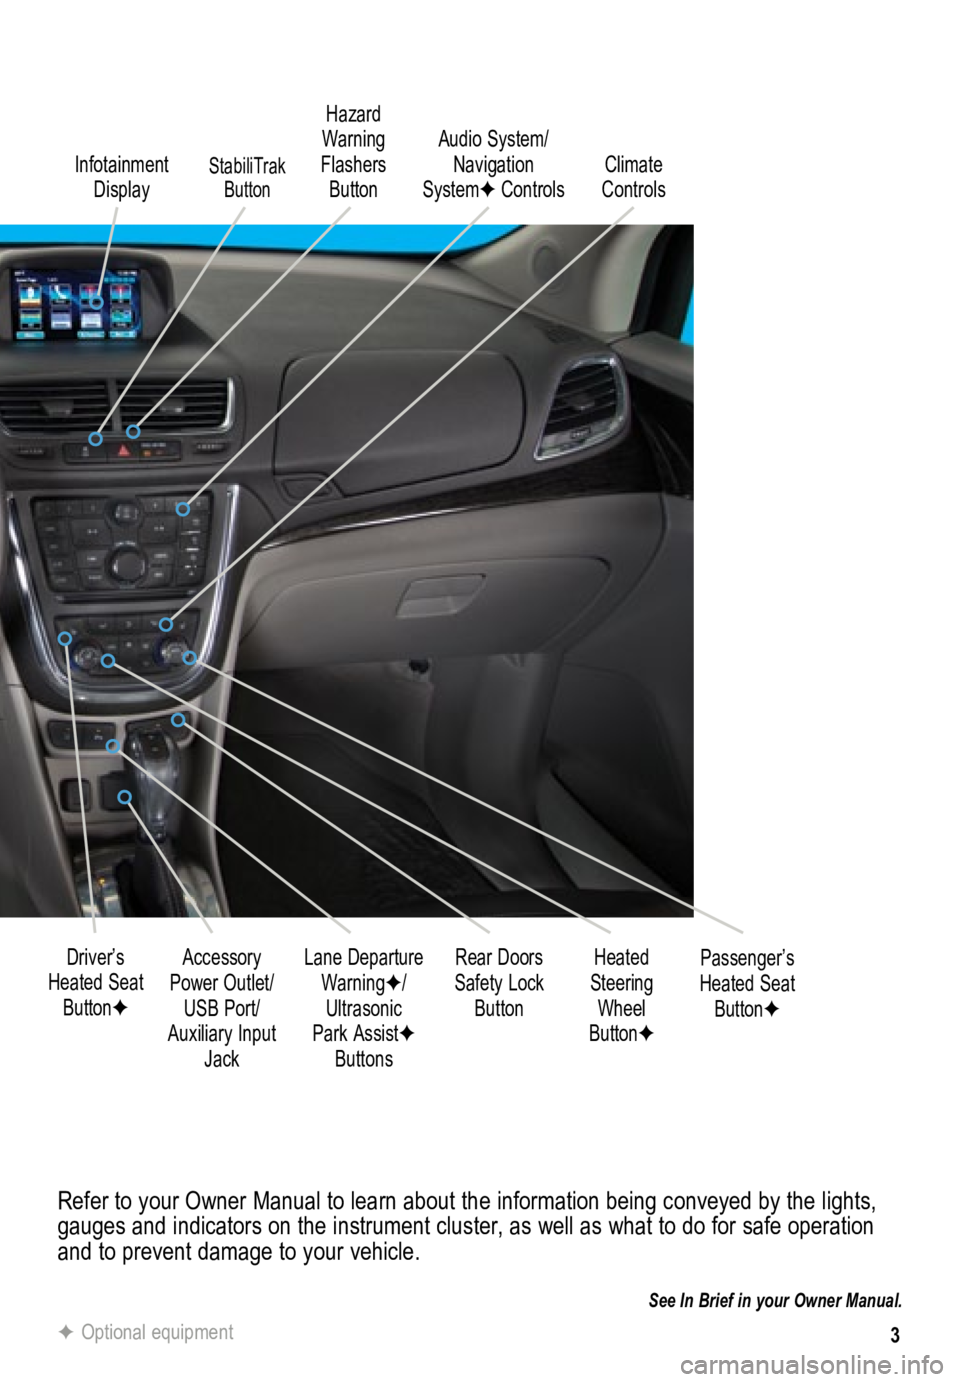
Infotainment Display
Rear Doors
Safety Lock Button
Lane Departure
WarningF/Ultrasonic
Park AssistF Buttons Passenger’s
Heated Seat ButtonF
Hazard
Warning
Flashers Button
Accessory
Power Outlet/ USB Port/
Auxiliary Input Jack
Driver’s
Heated Seat ButtonF Heated
Steering Wheel
ButtonF
Audio System/
Navigation
SystemF Controls Climate
Controls
F Optional equipment
StabiliTrak
Button
Page 9 of 16

9
Infotainment System
Refer to your Owner Manual for important safety information about using the infotainment system
while driving.
Setting the Time
1. Turn on the infotainment system.
2. Press the
Clock button.
3. Turn the MENU knob to highlight Set Time; press the knob to select it.
4. Turn the MENU knob to change the value; press the knob to confirm the set value.
5. Press the
BACK button to exit the menu.
Storing Favorite Stations
Radio stations from all bands (AM, FM or XMF) can be stored, in any order, on up to six
pages of favorites.
1. Tune in the desired radio station.
2. Press the FAV button to display page where the station is to be stored.
3. Press and hold one of the six numeric pushbuttons until a beep is heard.
4. Repeat the steps for each desired station.
Portable Audio Devices
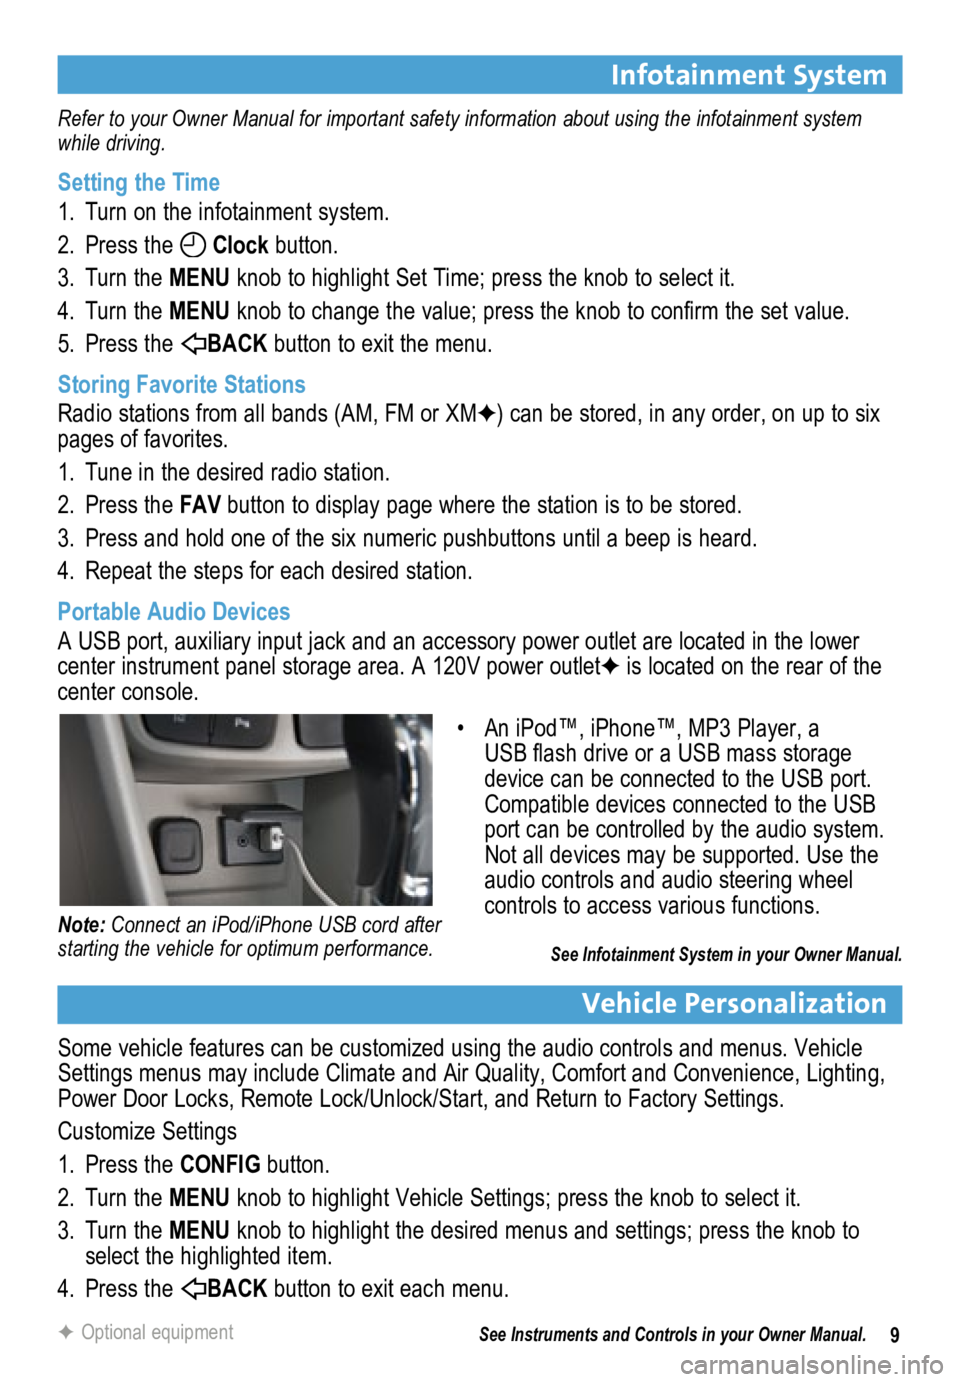
A USB port, auxiliary input jack and an accessory power outlet are located in the lower
center instrument panel storage area. A 120V power outletF is located on the rear of the
center console.
Vehicle Personalization
Some vehicle features can be customized using the audio controls and menus. Vehicle
Settings menus may include Climate and Air Quality, Comfort and Convenience, Lighting,
Power Door Locks, Remote Lock/Unlock/Start, and Return to Factory Settings.
Customize Settings
1. Press the CONFIG button.
2. Turn the MENU knob to highlight Vehicle Settings; press the knob to select it.
3. Turn the MENU knob to highlight the desired menus and settings; press the knob to
select the highlighted item.
4. Press the
BACK button to exit each menu.
See Instruments and Controls in your Owner Manual.
F Optional equipment
• An iPod™, iPhone™, MP3 Player, a
USB flash drive or a USB mass storage
device can be connected to the USB port.
Compatible devices connected to the USB
port can be controlled by the audio system.
Not all devices may be supported. Use the
audio controls and audio steering wheel
controls to access various functions.
See Infotainment System in your Owner Manual.
Note: Connect an iPod/iPhone USB cord after
starting the vehicle for optimum performance.
Page 15 of 16

15
Tire Pressure Monitor
Engine Oil Life System
The Low Tire Pressure warning light on the instrument cluster illuminates when one
or more of the vehicle's tires is significantly under-inflated. The proper tire pressures for
the vehicle are listed on the Tire and Loading Information label located\
below the driver’s
door latch. Current tire pressures can be viewed in the Driver Information Ce\
nter Vehicle
Information menu.
Tire pressure is affected by cold weather and distance driven. If the low tire pressure
warning light illuminates when the vehicle is first started and then turns off as the vehicle is
driven, check for the proper tire pressures.
Refer to your owner manual for information about normal monthly tire maintenance.
See Vehicle Care in your Owner Manual.
The Oil Life System calculates engine oil life based on vehicle use and displays Change
Engine Oil Soon on the Driver Information Center (DIC) when it’s necessary to change the
engine oil and filter. The system should be reset to 100% only following an oil change.
Resetting the Oil Life System
1. Press the MENU button to display the Vehicle Information menu on the DIC.
2. Rotate the
switch to view Remaining Oil Life.
3. Press the SET/CLR button until 100% is displayed.
See Vehicle Care in your Owner Manual.
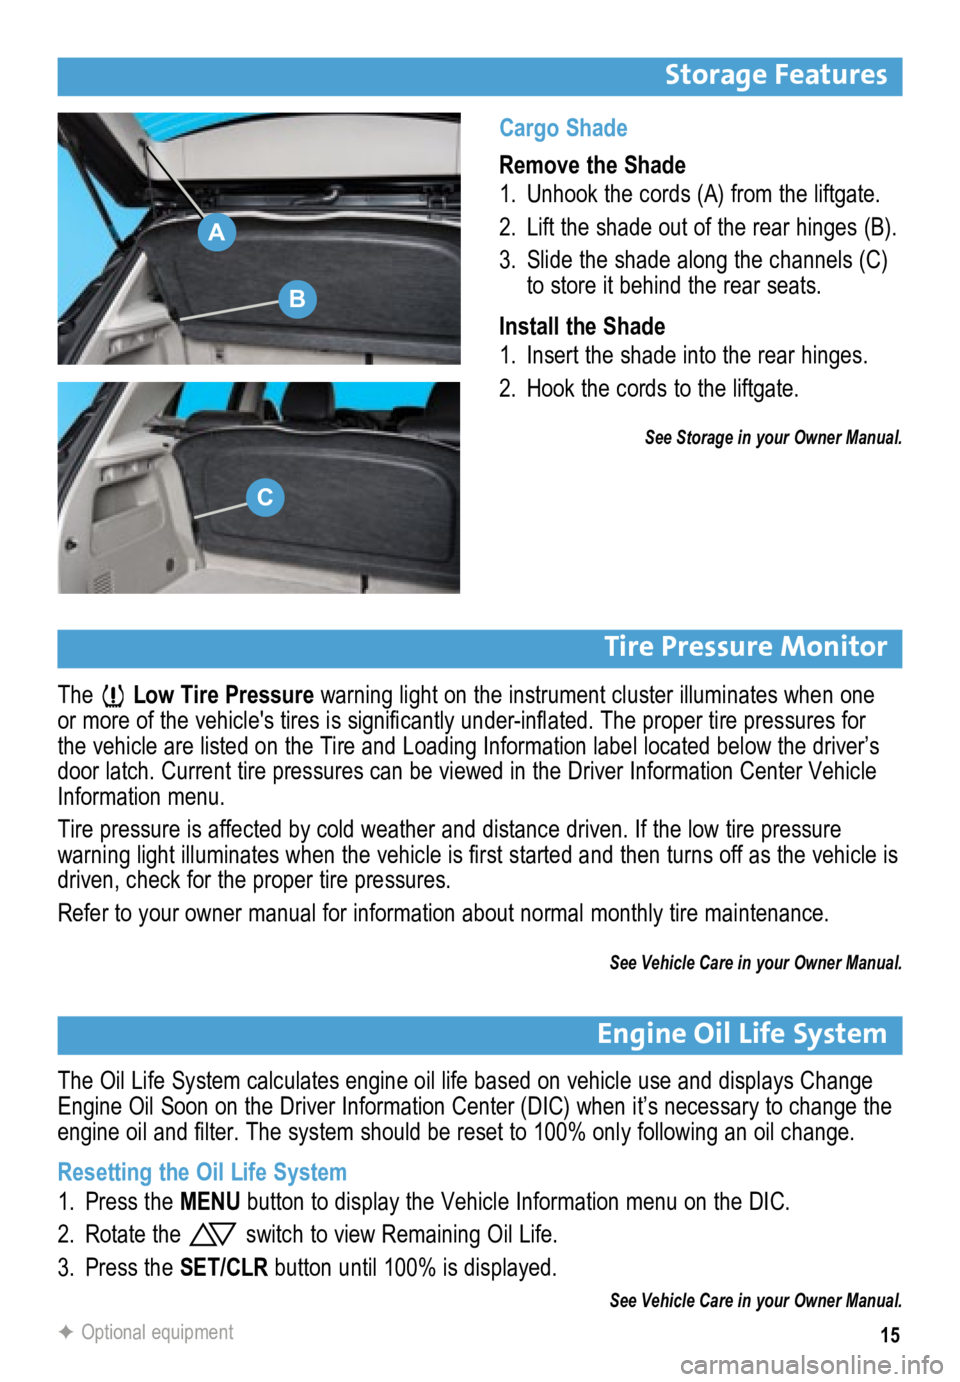
Cargo Shade
Remove the Shade
1. Unhook the cords (A) from the liftgate.
2. Lift the shade out of the rear hinges (B).
3. Slide the shade along the channels (C)
to store it behind the rear seats.
Install the Shade
1. Insert the shade into the rear hinges.
2. Hook the cords to the liftgate.
See Storage in your Owner Manual.
Storage Features
F Optional equipment
B
C
A