light BUICK ENVISION 2016 User Guide
[x] Cancel search | Manufacturer: BUICK, Model Year: 2016, Model line: ENVISION, Model: BUICK ENVISION 2016Pages: 432, PDF Size: 5.68 MB
Page 24 of 432

Buick Envision Owner Manual (GMNA-Localizing-U.S./Canada/Mexico-
8534310) - 2016 - crc - 2/29/16
In Brief 23
Performance and
Maintenance
Traction Control/
Electronic Stability
Control
The Traction Control System (TCS)
limits wheel spin. The system is on
when the vehicle is started.
The StabiliTrak system assists with
directional control of the vehicle in
difficult driving conditions. The
system is on when the vehicle is
started.
.To turn off TCS, press and
release
gon the center console.
The traction off light
i
illuminates in the instrument
cluster.
. Press and release
gagain to
turn TCS back on. The traction
off light
iin the instrument
cluster will turn off. .
To turn off both TCS and
StabiliTrak, press and hold
g
until the traction off lightiand
StabiliTrak OFF light
g
illuminate in the instrument
cluster.
. Press and release
gagain to
turn on both systems. The
traction off light
iand
StabiliTrak OFF light
gin the
instrument cluster will turn off.
See Traction Control/Electronic
Stability Control 0273.
Tire Pressure Monitor
This vehicle may have a Tire
Pressure Monitor System (TPMS).
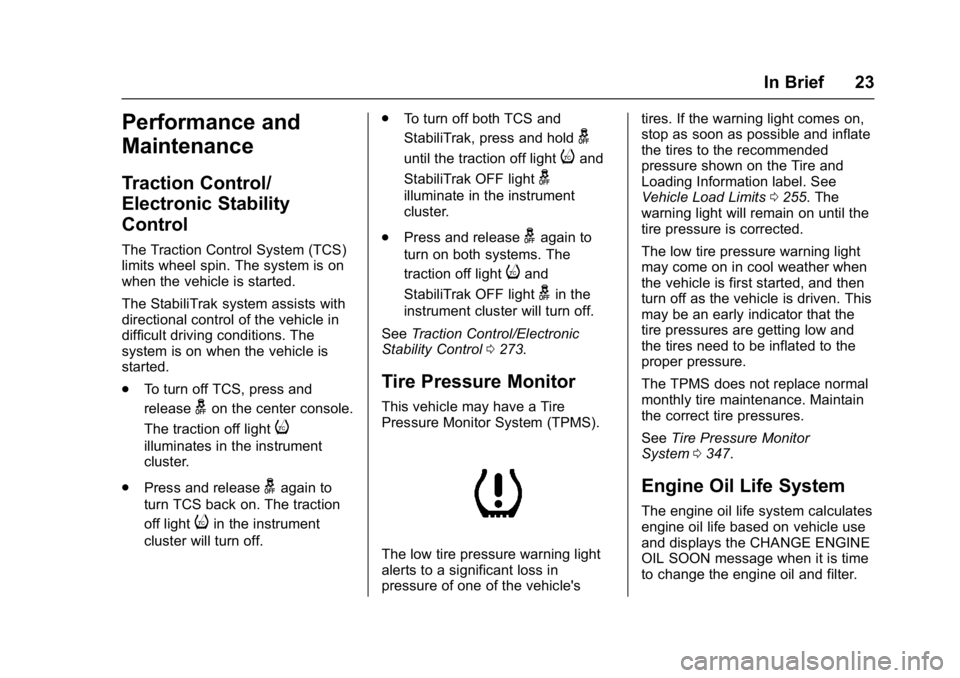
The low tire pressure warning light
alerts to a significant loss in
pressure of one of the vehicle's tires. If the warning light comes on,
stop as soon as possible and inflate
the tires to the recommended
pressure shown on the Tire and
Loading Information label. See
Vehicle Load Limits
0255. The
warning light will remain on until the
tire pressure is corrected.
The low tire pressure warning light
may come on in cool weather when
the vehicle is first started, and then
turn off as the vehicle is driven. This
may be an early indicator that the
tire pressures are getting low and
the tires need to be inflated to the
proper pressure.
The TPMS does not replace normal
monthly tire maintenance. Maintain
the correct tire pressures.
See Tire Pressure Monitor
System 0347.
Engine Oil Life System
The engine oil life system calculates
engine oil life based on vehicle use
and displays the CHANGE ENGINE
OIL SOON message when it is time
to change the engine oil and filter.
Page 36 of 432

Buick Envision Owner Manual (GMNA-Localizing-U.S./Canada/Mexico-
8534310) - 2016 - crc - 2/29/16
Keys, Doors, and Windows 35
Automatic Door Locks
The doors will lock automatically
when all doors are closed, the
ignition is on, and the vehicle is
shifted out of P (Park).
To unlock the doors:
.Press
Kon the power door lock
switch.
. Shift the transmission into
P (Park).
Automatic door locking cannot be
disabled. Automatic door unlocking
can be programmed. See Vehicle
Personalization 0146.
Lockout Protection
If the vehicle is in ACC/
ACCESSORY or ON/RUN/START
and the power door lock switch is
pressed with the driver door open,
all the doors will lock and only the
driver door will unlock.
If the vehicle is off and locking is
requested while a door is open,
when all doors are closed the
vehicle will check for RKE
transmitters inside. If an RKE transmitter is detected and the
number of RKE transmitters inside
has not reduced, the driver door will
unlock and the horn will chirp three
times.
Lockout Protection can be manually
overridden with the driver door open
by pressing and holding
Qon the
power door lock switch.
Unlocked Door Anti Lockout
If Unlocked Door Anti Lockout is
turned on and the vehicle is off, the
driver door is open, and locking is
requested, all the doors will lock and
only the driver door will unlock. The
Unlocked Door Anti Lockout feature
can be turned on or off using the
vehicle personalization menus. See
Vehicle Personalization 0146.
Safety Locks
The rear door safety locks prevent
passengers from opening the rear
doors from inside the vehicle.
Press
Z {to activate the rear door
safety locks. The indicator light
comes on when activated.
Press
Z {again to deactivate the
safety locks.
If an inside rear door handle is
being pulled at the same time a
safety lock is deactivated, only that
door will remain locked and the
indicator light may flash. Release
Page 40 of 432

Buick Envision Owner Manual (GMNA-Localizing-U.S./Canada/Mexico-
8534310) - 2016 - crc - 2/29/16
Keys, Doors, and Windows 39
liftgate from completely closing, the
horn will sound as an alert that the
liftgate did not close.
Pinch sensors are on the side
edges of the liftgate. If an object is
caught between the liftgate and the
vehicle and presses against this
sensor, the liftgate will reverse
direction and open fully. The liftgate
will remain open until it is activated
again or closed manually.
Setting the 3/4 Mode
To change the position the liftgate
stops at when opening:1. Select MAX or 3/4 mode and power open the liftgate.
2. Stop the liftgate movement at the desired height by pressing
any liftgate switch. Manually
adjust the liftgate position if
needed.
3. Press and hold
lnext to the
pull cup on the outside of the
liftgate until the turn signals
flash and a beep sounds. This
indicates the setting has been
recorded. The liftgate cannot be set below a
minimum programmable height.
If there is no light flash or sound,
then the height adjustment may be
too low.
Manual Operation
Select OFF to manually operate the
liftgate. See
“Manual Liftgate” at the
beginning of this section.
Caution
Attempting to move the liftgate
too quickly and with excessive
force may result in damage to the
vehicle.
Operate the liftgate manually with a
smooth motion and moderate
speed. The system includes a
feature which limits the manual
closing speed to protect the
components.
Hands-Free Operation
If equipped, the liftgate may be
operated with a kicking motion
under the rear bumper.
The liftgate will not operate if the
RKE transmitter is not within
1 m (3 ft).
The hands-free feature will not work
while the liftgate is moving. To stop
the liftgate while in motion use one
of the liftgate switches.
Page 41 of 432

Buick Envision Owner Manual (GMNA-Localizing-U.S./Canada/Mexico-
8534310) - 2016 - crc - 2/29/16
40 Keys, Doors, and Windows
Length of Kick Zone
To operate, kick your foot straight up
in one swift motion under the left
corner of the rear bumper, then pull
it back.
Caution
Splashing water may cause the
liftgate to open. Keep the RKE
transmitter away from the rear
bumper detection area or turn the
liftgate mode to OFF when
cleaning or working near the rear
bumper to avoid accidental
opening.
. Do not sweep your foot side
to side.
. Do not keep your foot under the
bumper; the liftgate will not
activate.
. Do not touch the liftgate until it
has stopped moving.
. This feature may temporarily be
disabled under some conditions.
If the liftgate does not respond to
the kick, open or close the
liftgate by another method or
start the vehicle. The feature will
be re-enabled. When closing the liftgate using this
feature, there will be a short delay.
The rear lights will flash and a
chime will sound. Step away from
the liftgate before it starts moving.
Page 42 of 432

Buick Envision Owner Manual (GMNA-Localizing-U.S./Canada/Mexico-
8534310) - 2016 - crc - 2/29/16
Keys, Doors, and Windows 41
Vehicle Security
This vehicle has theft-deterrent
features; however, they do not make
the vehicle impossible to steal.
Vehicle Alarm System
This vehicle has an anti-theft alarm
system.
The indicator light, on the
instrument panel near the
windshield, indicates the status of
the system:
Off :Alarm system is disarmed. On Solid :
Vehicle is secured
during the delay to arm the system.
Fast Flash : Vehicle is unsecured.
A door, the hood, or the liftgate
is open.
Slow Flash : Alarm system is
armed.
Arming the Alarm System
1. Turn off the vehicle.
2. Lock the vehicle in one of three ways:
.Use the RKE transmitter.
. Use the Keyless Access
system.
. With a door open, press the
inside
Q.
3. After 30 seconds the alarm system will arm, and the
indicator light will begin to
slowly flash indicating the
alarm system is operating.
Pressing
Qon the RKE
transmitter a second time will
bypass the 30-second delay
and immediately arm the alarm
system. The vehicle alarm system will not
arm if the doors are locked with
the key.
If the driver door is opened without
first unlocking with the RKE
transmitter, the horn will chirp and
the lights will flash to indicate
pre-alarm. If the vehicle is not
started, or the door is not unlocked
by pressing
Kon the RKE
transmitter during the 10-second
pre-alarm, the alarm will be
activated.
The aIarm will also be activated if a
door, the hood, or the liftgate is
opened without first disarming the
system. When the alarm is
activated, the turn signals will flash
and the horn will sound for about
30 seconds. The alarm system will
then re-arm to monitor for the next
unauthorized event.
Disarming the Alarm System
To disarm the alarm system or turn
off the alarm if it has been activated:
. Press
Kon the RKE transmitter.
Page 43 of 432

Buick Envision Owner Manual (GMNA-Localizing-U.S./Canada/Mexico-
8534310) - 2016 - crc - 2/29/16
42 Keys, Doors, and Windows
.Unlock the vehicle using the
Keyless Access system.
. Start the vehicle.
To avoid setting off the alarm by
accident:
. Lock the vehicle after all
occupants have exited.
. Always unlock the vehicle with
the RKE transmitter, or use the
Keyless Access system.
Unlocking the driver door with the
key will not disarm the system or
turn off the alarm.
How to Detect a Tamper
Condition
IfKis pressed on the RKE
transmitter and the horn chirps and
the lights flash three times, an alarm
occurred previously while the alarm
system was armed.
If the alarm has been activated, a
message will appear on the DIC.
See Security Messages 0143.
Immobilizer
See Radio Frequency
Statement 0406.
Immobilizer Operation
This vehicle has a passive
theft-deterrent system.
The system does not have to be
manually armed or disarmed.
The vehicle is automatically
immobilized when the transmitter
leaves the vehicle.
The immobilization system is
disarmed when the ignition button is
pushed in and a valid transmitter is
found in the vehicle.
The security light in the instrument
cluster comes on when there is a
problem with arming or disarming
the theft-deterrent system.
The system has one or more
transmitters matched to an
immobilizer control unit in your
vehicle. Only a correctly matched
transmitter will start the vehicle.
If the transmitter is ever damaged,
you may not be able to start your
vehicle.
When trying to start the vehicle, the
security light comes on briefly when
the ignition is turned on.
If the engine does not start and the
security light stays on, there is a
problem with the system. Turn the
vehicle off and try again.
If the RKE transmitter appears to be
undamaged, try another transmitter.
Or, you may try placing the
transmitter in the transmitter pocket
in the front cupholder. See “Starting
the Vehicle with a Low Transmitter
Battery” underRemote Keyless
Entry (RKE) System Operation 026.
Page 48 of 432

Buick Envision Owner Manual (GMNA-Localizing-U.S./Canada/Mexico-
8534310) - 2016 - crc - 2/29/16
Keys, Doors, and Windows 47
Window Lockout
This feature prevents the rear
passenger windows from operating,
except from the driver position.
.PressZ{to activate the rear
window locks. An indicator light
will illuminate when the feature
is on.
. Press
Z{again to deactivate
the rear window locks.
The safety locks are also enabled.
See Safety Locks 035.
Sun Visors
Pull the sun visor down to block
glare. Detach the sun visor from the
center mount to pivot to the side
window or, if equipped, extend
along the rod.
Roof
Sunroof
1. Sunroof Switch
2. Sunshade Switch
If equipped, the sunroof only
operates when the ignition is in
ACC/ACCESSORY or ON/RUN,
or when Retained Accessory Power
(RAP) is active. See Retained
Accessory Power (RAP) 0264.
Vent : From the closed position,
press the rear of the switch (1) to
vent the sunroof.
Page 56 of 432

Buick Envision Owner Manual (GMNA-Localizing-U.S./Canada/Mexico-
8534310) - 2016 - crc - 2/29/16
Seats and Restraints 55
feature not recalling for
two seconds. Then try recalling
the exit position again.
If the memory position is still not
recalling, see your dealer for
service.
Heated and Cooled Front
Seats
{Warning
If you cannot feel temperature
change or pain to the skin, the
seat heater may cause burns. To
reduce the risk of burns, people
with such a condition should use
care when using the seat heater,
especially for long periods of
time. Do not place anything on
the seat that insulates against
heat, such as a blanket, cushion,
cover, or similar item. This may
cause the seat heater to
overheat. An overheated seat
heater may cause a burn or may
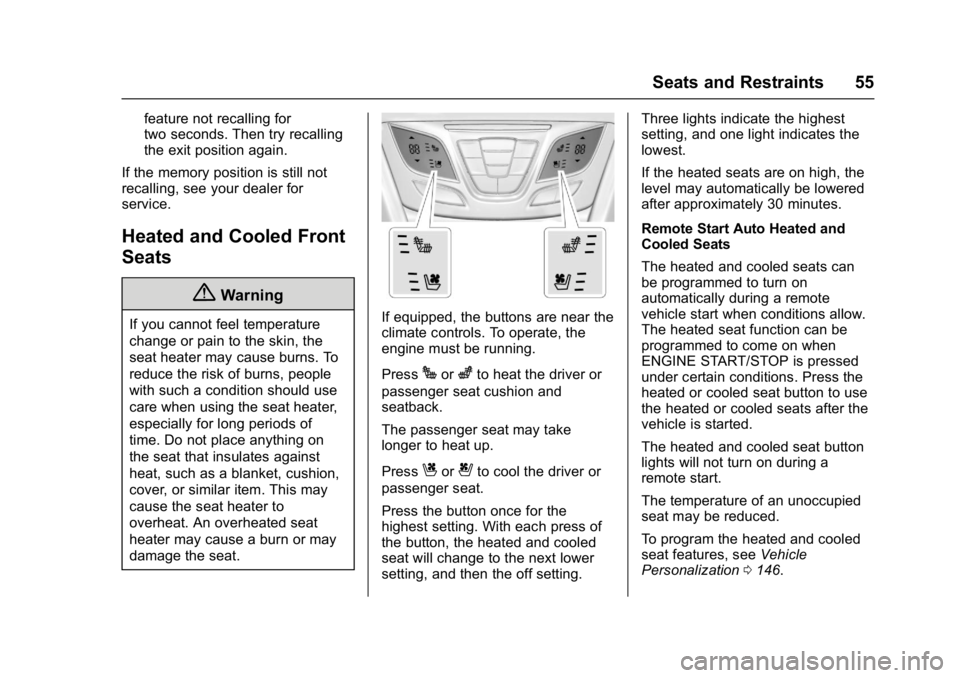
damage the seat.If equipped, the buttons are near the
climate controls. To operate, the
engine must be running.
Press
Jorzto heat the driver or
passenger seat cushion and
seatback.
The passenger seat may take
longer to heat up.
Press
Cor{to cool the driver or
passenger seat.
Press the button once for the
highest setting. With each press of
the button, the heated and cooled
seat will change to the next lower
setting, and then the off setting. Three lights indicate the highest
setting, and one light indicates the
lowest.
If the heated seats are on high, the
level may automatically be lowered
after approximately 30 minutes.
Remote Start Auto Heated and
Cooled Seats
The heated and cooled seats can
be programmed to turn on
automatically during a remote
vehicle start when conditions allow.
The heated seat function can be
programmed to come on when
ENGINE START/STOP is pressed
under certain conditions. Press the
heated or cooled seat button to use
the heated or cooled seats after the
vehicle is started.
The heated and cooled seat button
lights will not turn on during a
remote start.
The temperature of an unoccupied
seat may be reduced.
To program the heated and cooled
seat features, see
Vehicle
Personalization 0146.
Page 59 of 432

Buick Envision Owner Manual (GMNA-Localizing-U.S./Canada/Mexico-
8534310) - 2016 - crc - 2/29/16
58 Seats and Restraints
If equipped, the rear seat has an
armrest in the center of the
seatback. Lower the armrest to
access the cupholders.
To fold, lift the armrest up and push
it rearward until it is flush with the
seatback.
Heated Rear Seats
{WARNING
If you cannot feel temperature
change or pain to the skin, the
seat heater may cause burns.
See the Warning underHeated
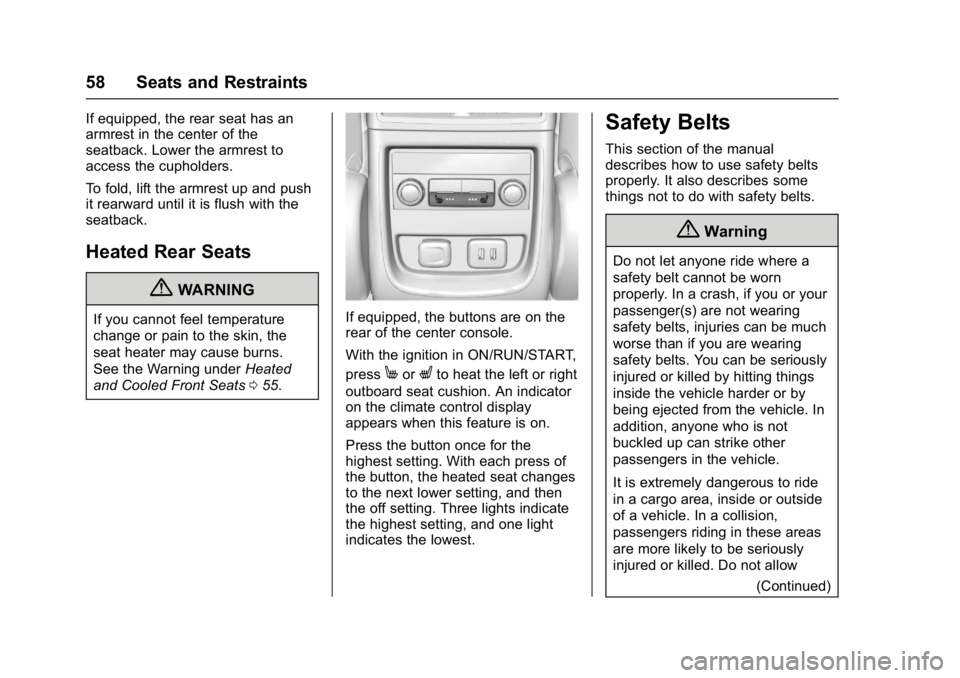
and Cooled Front Seats 055.If equipped, the buttons are on the
rear of the center console.
With the ignition in ON/RUN/START,
press
MorLto heat the left or right
outboard seat cushion. An indicator
on the climate control display
appears when this feature is on.
Press the button once for the
highest setting. With each press of
the button, the heated seat changes
to the next lower setting, and then
the off setting. Three lights indicate
the highest setting, and one light
indicates the lowest.
Safety Belts
This section of the manual
describes how to use safety belts
properly. It also describes some
things not to do with safety belts.
{Warning
Do not let anyone ride where a
safety belt cannot be worn
properly. In a crash, if you or your
passenger(s) are not wearing
safety belts, injuries can be much
worse than if you are wearing
safety belts. You can be seriously
injured or killed by hitting things
inside the vehicle harder or by
being ejected from the vehicle. In
addition, anyone who is not
buckled up can strike other
passengers in the vehicle.
It is extremely dangerous to ride
in a cargo area, inside or outside
of a vehicle. In a collision,
passengers riding in these areas
are more likely to be seriously
injured or killed. Do not allow
(Continued)
Page 62 of 432

Buick Envision Owner Manual (GMNA-Localizing-U.S./Canada/Mexico-
8534310) - 2016 - crc - 2/29/16
Seats and Restraints 61
The lap-shoulder belt may lock
if you pull the belt across you
very quickly. If this happens, let
the belt go back slightly to
unlock it. Then pull the belt
across you more slowly.
If the shoulder portion of a
passenger belt is pulled out all
the way, the child restraint
locking feature may be
engaged. If this happens, let
the belt go back all the way
and start again.
Engaging the child restraint
locking feature in the front
outboard seating position may
affect the passenger sensing
system. SeePassenger
Sensing System 072.
If the webbing locks in the latch
plate before it reaches the
buckle, tilt the latch plate flat to
unlock.
3. Push the latch plate into the
buckle until it clicks.
Pull up on the latch plate to
make sure it is secure. If the
belt is not long enough, see
Safety Belt Extender 064.
Position the release button on
the buckle so that the safety
belt could be quickly unbuckled
if necessary.
4. If equipped with a shoulder belt height adjuster, move it to the
height that is right for you. See
“Shoulder Belt Height Adjuster”
later in this section for
instructions on use and
important safety information.