Acc BUICK ENVISION 2019 Owner's Guide
[x] Cancel search | Manufacturer: BUICK, Model Year: 2019, Model line: ENVISION, Model: BUICK ENVISION 2019Pages: 377, PDF Size: 6.03 MB
Page 95 of 377
Buick Envision Owner Manual (GMNA-Localizing-U.S./Canada/Mexico-
12032235) - 2019 - CRC - 6/27/18
94 Seats and Restraints
Not all vehicle seating positions
have lower anchors. In this case,
the seat belt must be used (with top
tether where available) to secure
the child restraint. SeeSecuring
Child Restraints (With the Seat Belt
in the Rear Seat) 099 orSecuring
Child Restraints (With the Seat Belt
in the Front Seat) 0101.
Lower Anchors
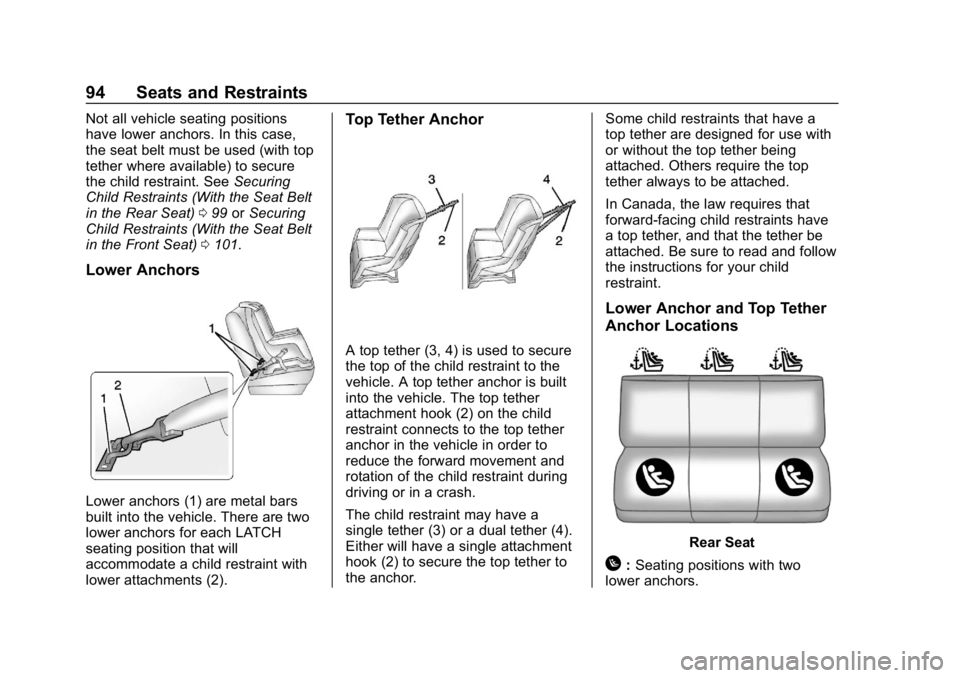
Lower anchors (1) are metal bars
built into the vehicle. There are two
lower anchors for each LATCH
seating position that will
accommodate a child restraint with
lower attachments (2).
Top Tether Anchor
A top tether (3, 4) is used to secure
the top of the child restraint to the
vehicle. A top tether anchor is built
into the vehicle. The top tether
attachment hook (2) on the child
restraint connects to the top tether
anchor in the vehicle in order to
reduce the forward movement and
rotation of the child restraint during
driving or in a crash.
The child restraint may have a
single tether (3) or a dual tether (4).
Either will have a single attachment
hook (2) to secure the top tether to
the anchor. Some child restraints that have a
top tether are designed for use with
or without the top tether being
attached. Others require the top
tether always to be attached.
In Canada, the law requires that
forward-facing child restraints have
a top tether, and that the tether be
attached. Be sure to read and follow
the instructions for your child
restraint.
Lower Anchor and Top Tether
Anchor Locations
Rear Seat
H:
Seating positions with two
lower anchors.
Page 96 of 377
Buick Envision Owner Manual (GMNA-Localizing-U.S./Canada/Mexico-
12032235) - 2019 - CRC - 6/27/18
Seats and Restraints 95
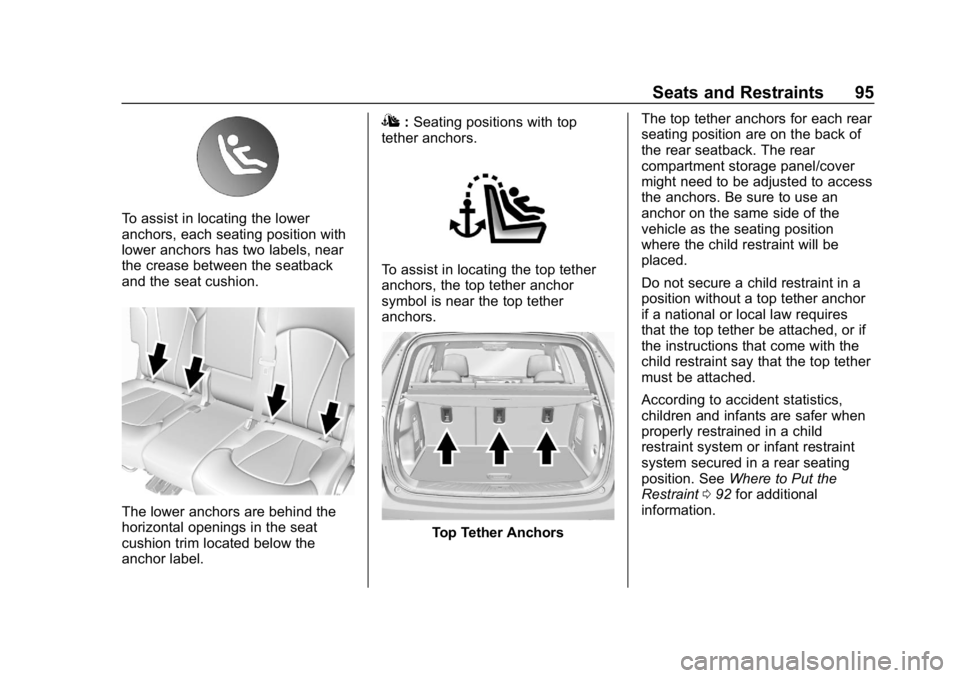
To assist in locating the lower
anchors, each seating position with
lower anchors has two labels, near
the crease between the seatback
and the seat cushion.
The lower anchors are behind the
horizontal openings in the seat
cushion trim located below the
anchor label.
I:Seating positions with top
tether anchors.
To assist in locating the top tether
anchors, the top tether anchor
symbol is near the top tether
anchors.
Top Tether Anchors The top tether anchors for each rear
seating position are on the back of
the rear seatback. The rear
compartment storage panel/cover
might need to be adjusted to access
the anchors. Be sure to use an
anchor on the same side of the
vehicle as the seating position
where the child restraint will be
placed.
Do not secure a child restraint in a
position without a top tether anchor
if a national or local law requires
that the top tether be attached, or if
the instructions that come with the
child restraint say that the top tether
must be attached.
According to accident statistics,
children and infants are safer when
properly restrained in a child
restraint system or infant restraint
system secured in a rear seating
position. See
Where to Put the
Restraint 092 for additional
information.
Page 98 of 377
Buick Envision Owner Manual (GMNA-Localizing-U.S./Canada/Mexico-
12032235) - 2019 - CRC - 6/27/18
Seats and Restraints 97
restraint with the top tether and
the seat belts. Refer to the
child restraint manufacturer
instructions and the
instructions in this manual.
1.1. Find the lower anchorsfor the desired seating
position.
1.2. Put the child restraint on the seat.
If the head restraint
interferes with the proper
installation of the child
restraint, the head
restraint may be
removed. See “Head
Restraint Removal and
Reinstallation” at the end
of this section.
1.3. Attach and tighten the lower attachments on the
child restraint to the lower
anchors.
2. If the child restraint manufacturer recommends that
the top tether be attached,
adjust the top tether to its full
length and attach it to the anchor, if equipped. Refer to
the child restraint instructions
and the following steps:
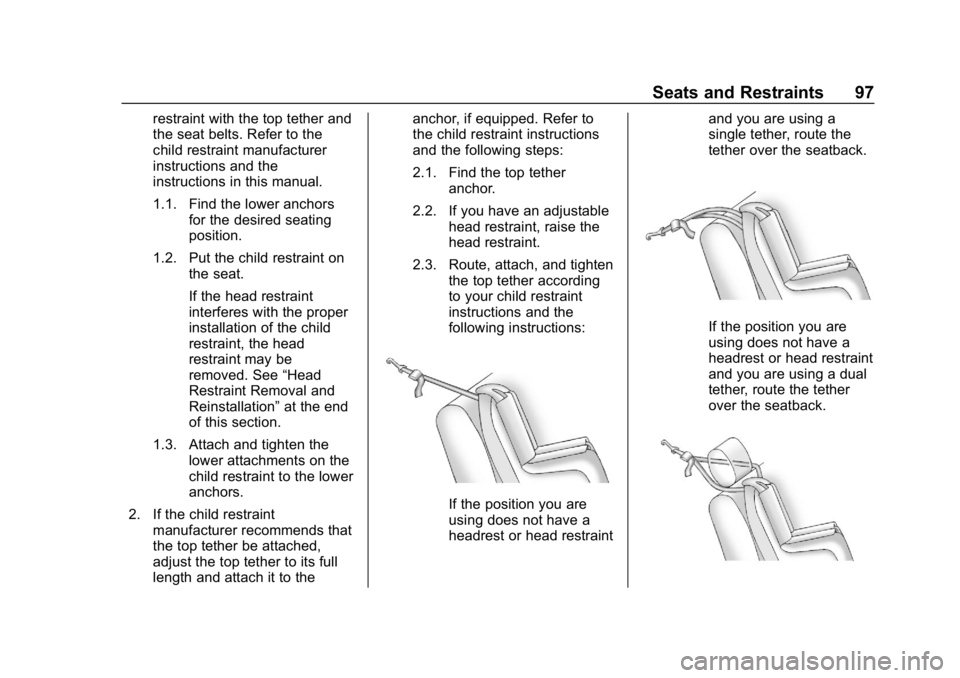
2.1. Find the top tether
anchor.
2.2. If you have an adjustable head restraint, raise the
head restraint.
2.3. Route, attach, and tighten the top tether according
to your child restraint
instructions and the
following instructions:
If the position you are
using does not have a
headrest or head restraint and you are using a
single tether, route the
tether over the seatback.
If the position you are
using does not have a
headrest or head restraint
and you are using a dual
tether, route the tether
over the seatback.
Page 106 of 377
Buick Envision Owner Manual (GMNA-Localizing-U.S./Canada/Mexico-
12032235) - 2019 - CRC - 6/27/18
Storage 105
Storage
Storage Compartments
Storage Compartments . . . . . . . 105
Glove Box . . . . . . . . . . . . . . . . . . . . 105
Cupholders . . . . . . . . . . . . . . . . . . . 105
Front Storage . . . . . . . . . . . . . . . . . 106
Sunglasses Storage . . . . . . . . . . 106
Rear Storage . . . . . . . . . . . . . . . . . 106
Center Console Storage . . . . . . 107
Additional Storage Features
Cargo Cover . . . . . . . . . . . . . . . . . . 108
Cargo Tie-Downs . . . . . . . . . . . . . 108
Cargo ManagementSystem . . . . . . . . . . . . . . . . . . . . . . 109
Convenience Net . . . . . . . . . . . . . 110
Roof Rack System
Roof Rack System . . . . . . . . . . . . 110
Storage
Compartments
{Warning
Do not store heavy or sharp
objects in storage compartments.
In a crash, these objects may
cause the cover to open and
could result in injury.
Glove Box
Open the glove box by lifting up on
the lever.
Cupholders
Front
There are two cupholders in the
center console. Rear
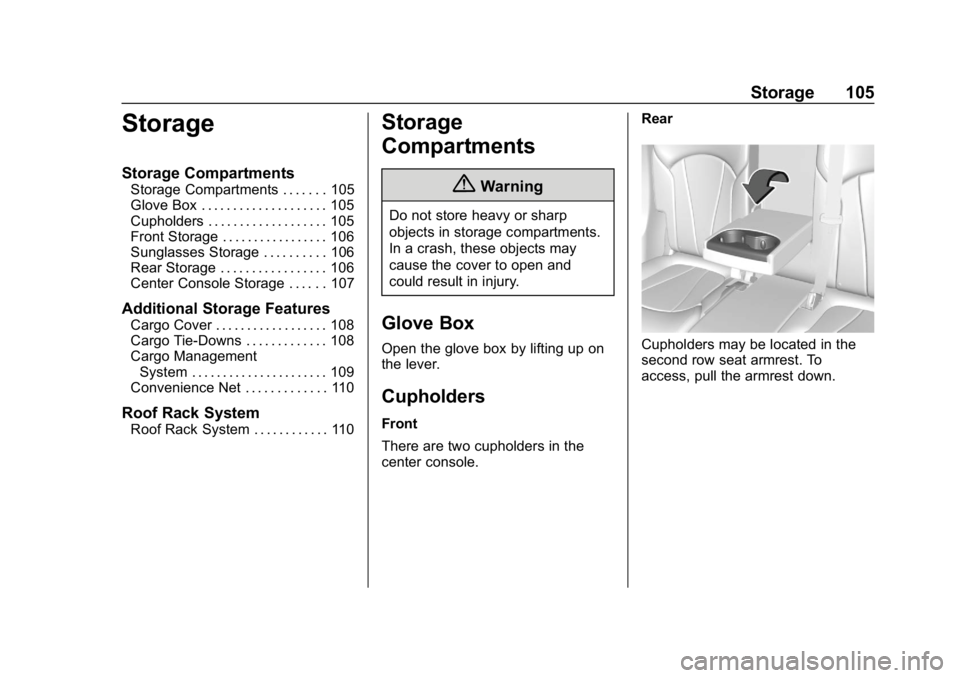
Cupholders may be located in the
second row seat armrest. To
access, pull the armrest down.
Page 107 of 377
Buick Envision Owner Manual (GMNA-Localizing-U.S./Canada/Mexico-
12032235) - 2019 - CRC - 6/27/18
106 Storage
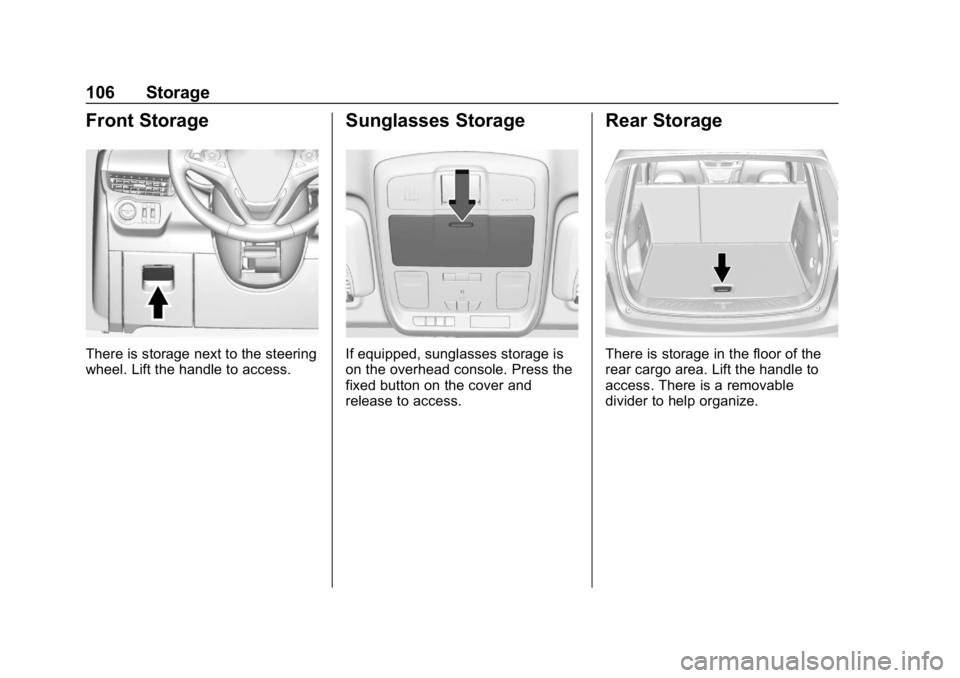
Front Storage
There is storage next to the steering
wheel. Lift the handle to access.
Sunglasses Storage
If equipped, sunglasses storage is
on the overhead console. Press the
fixed button on the cover and
release to access.
Rear Storage
There is storage in the floor of the
rear cargo area. Lift the handle to
access. There is a removable
divider to help organize.
Page 108 of 377
Buick Envision Owner Manual (GMNA-Localizing-U.S./Canada/Mexico-
12032235) - 2019 - CRC - 6/27/18
Storage 107
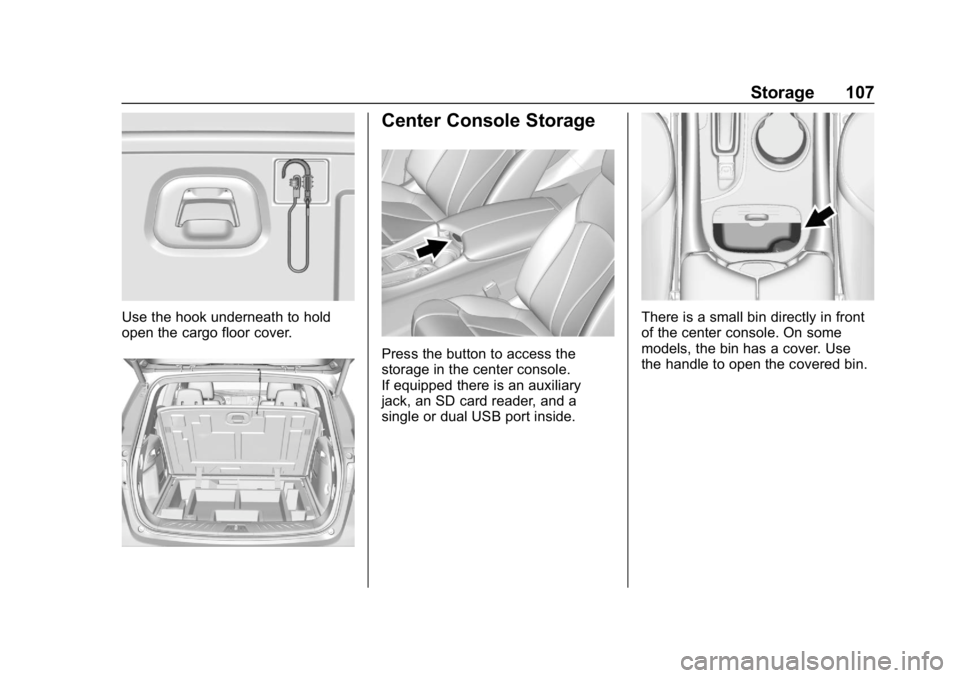
Use the hook underneath to hold
open the cargo floor cover.
Center Console Storage
Press the button to access the
storage in the center console.
If equipped there is an auxiliary
jack, an SD card reader, and a
single or dual USB port inside.
There is a small bin directly in front
of the center console. On some
models, the bin has a cover. Use
the handle to open the covered bin.
Page 110 of 377
Buick Envision Owner Manual (GMNA-Localizing-U.S./Canada/Mexico-
12032235) - 2019 - CRC - 6/27/18
Storage 109
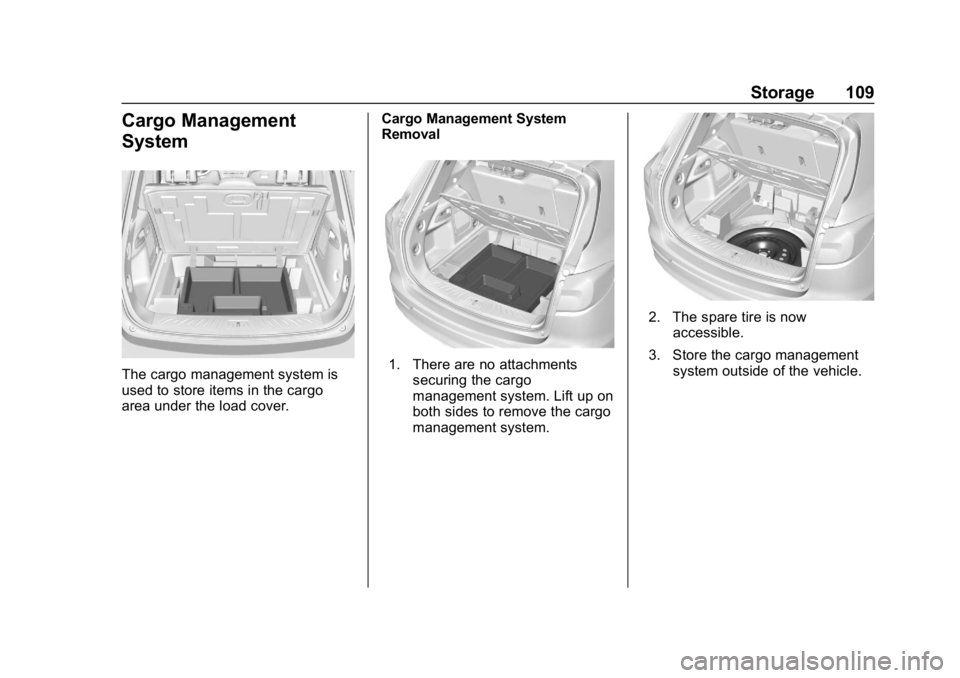
Cargo Management
System
The cargo management system is
used to store items in the cargo
area under the load cover.Cargo Management System
Removal1. There are no attachments
securing the cargo
management system. Lift up on
both sides to remove the cargo
management system.
2. The spare tire is nowaccessible.
3. Store the cargo management system outside of the vehicle.
Page 111 of 377
Buick Envision Owner Manual (GMNA-Localizing-U.S./Canada/Mexico-
12032235) - 2019 - CRC - 6/27/18
110 Storage
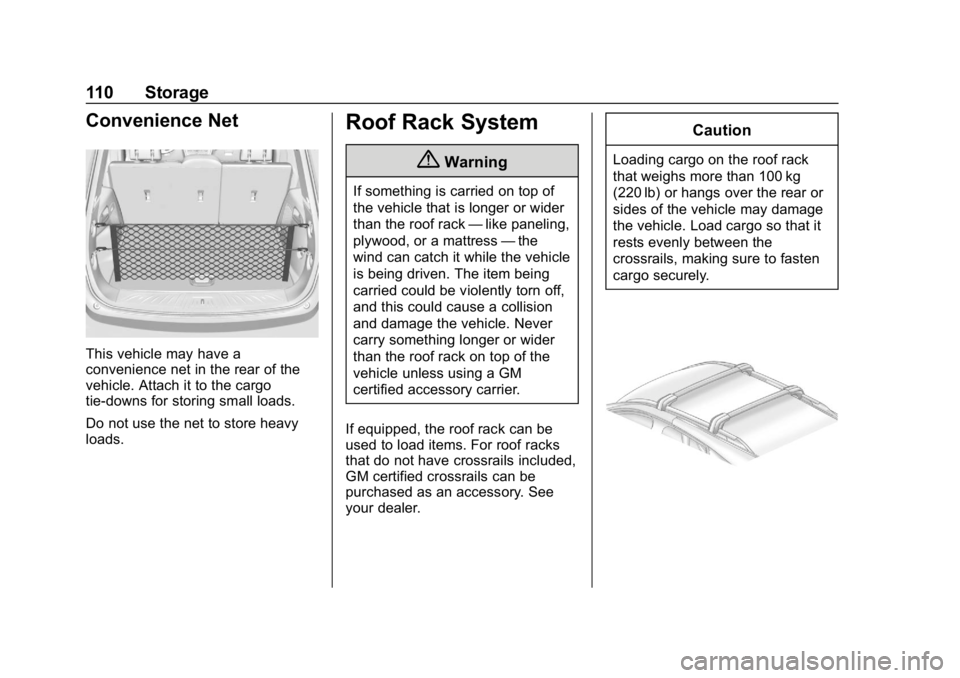
Convenience Net
This vehicle may have a
convenience net in the rear of the
vehicle. Attach it to the cargo
tie-downs for storing small loads.
Do not use the net to store heavy
loads.
Roof Rack System
{Warning
If something is carried on top of
the vehicle that is longer or wider
than the roof rack—like paneling,
plywood, or a mattress —the
wind can catch it while the vehicle
is being driven. The item being
carried could be violently torn off,
and this could cause a collision
and damage the vehicle. Never
carry something longer or wider
than the roof rack on top of the
vehicle unless using a GM
certified accessory carrier.
If equipped, the roof rack can be
used to load items. For roof racks
that do not have crossrails included,
GM certified crossrails can be
purchased as an accessory. See
your dealer.
Caution
Loading cargo on the roof rack
that weighs more than 100 kg
(220 lb) or hangs over the rear or
sides of the vehicle may damage
the vehicle. Load cargo so that it
rests evenly between the
crossrails, making sure to fasten
cargo securely.
Page 115 of 377

Buick Envision Owner Manual (GMNA-Localizing-U.S./Canada/Mexico-
12032235) - 2019 - CRC - 6/27/18
114 Instruments and Controls
Windshield Wiper with IntermittentWipes (INT Shown)
With the ignition on or in ACC/
ACCESSORY, move the windshield
wiper lever to select the wiper
speed.
HI : Use for fast wipes.
LO : Use for slow wipes.
INT : Use for intermittent wipes or
Rainsense, if equipped and
enabled. To adjust wipe frequency,
turn the band up for more frequent
wipes or down for less frequent
wipes. If Rainsense is enabled, see
“Rainsense” later in this section.
OFF : Use to turn the wipers off.
1x : For a single wipe, briefly move
the wiper lever down. For several
wipes, hold the wiper lever down.
Clear snow and ice from the wiper
blades before using them. If frozen
to the windshield, carefully loosen or
thaw them. Damaged blades should
be replaced. See Wiper Blade
Replacement 0265.
Heavy snow or ice can overload the
wiper motor.
Wipe Parking
If the ignition is turned off while the
wipers are on LO, HI, or INT, they
will immediately stop. If the windshield wiper lever is then
moved to OFF before the driver
door is opened or within 10 minutes,
the wipers will restart and move to
the base of the windshield.
If the ignition is turned off while the
wipers are performing wipes due to
windshield washing or Rainsense,
the wipers continue to run until they
reach the base of the windshield.
Rainsense
If equipped with Rainsense, a
sensor located near the top center
of the windshield detects the
amount of water on the windshield
and automatically controls the
frequency of the windshield wiper.
When Rainsense is enabled, the
normal intermittent control operates
as a sensitivity control.
Keep this area of the windshield
clear of debris to allow for best
system performance.
Page 116 of 377
Buick Envision Owner Manual (GMNA-Localizing-U.S./Canada/Mexico-
12032235) - 2019 - CRC - 6/27/18
Instruments and Controls 115
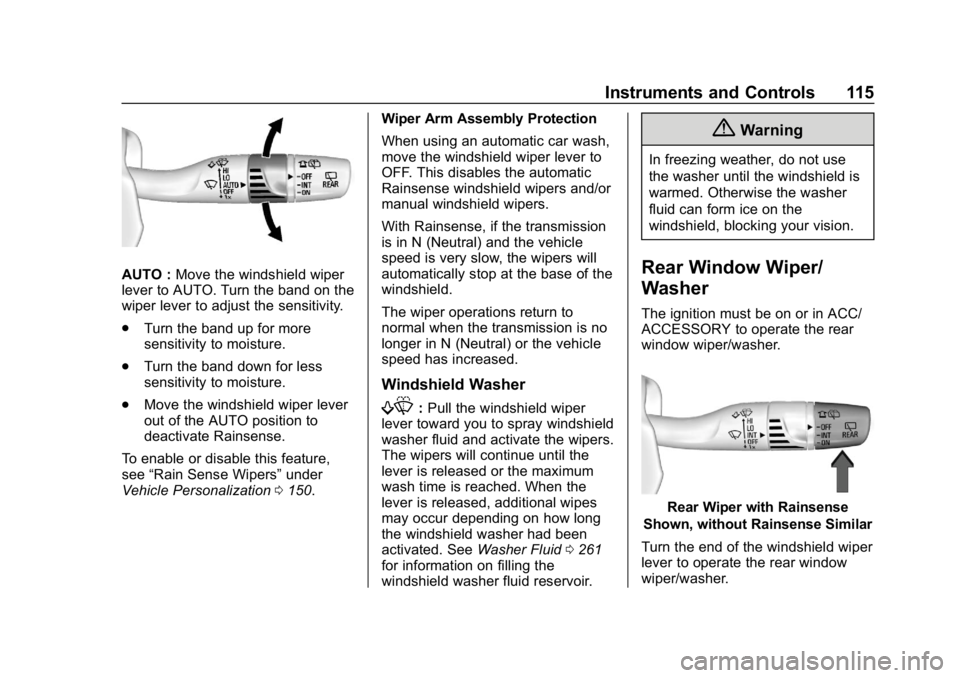
AUTO :Move the windshield wiper
lever to AUTO. Turn the band on the
wiper lever to adjust the sensitivity.
. Turn the band up for more
sensitivity to moisture.
. Turn the band down for less
sensitivity to moisture.
. Move the windshield wiper lever
out of the AUTO position to
deactivate Rainsense.
To enable or disable this feature,
see “Rain Sense Wipers” under
Vehicle Personalization 0150. Wiper Arm Assembly Protection
When using an automatic car wash,
move the windshield wiper lever to
OFF. This disables the automatic
Rainsense windshield wipers and/or
manual windshield wipers.
With Rainsense, if the transmission
is in N (Neutral) and the vehicle
speed is very slow, the wipers will
automatically stop at the base of the
windshield.
The wiper operations return to
normal when the transmission is no
longer in N (Neutral) or the vehicle
speed has increased.
Windshield Washer
f:
Pull the windshield wiper
lever toward you to spray windshield
washer fluid and activate the wipers.
The wipers will continue until the
lever is released or the maximum
wash time is reached. When the
lever is released, additional wipes
may occur depending on how long
the windshield washer had been
activated. See Washer Fluid0261
for information on filling the
windshield washer fluid reservoir.
{Warning
In freezing weather, do not use
the washer until the windshield is
warmed. Otherwise the washer
fluid can form ice on the
windshield, blocking your vision.
Rear Window Wiper/
Washer
The ignition must be on or in ACC/
ACCESSORY to operate the rear
window wiper/washer.
Rear Wiper with Rainsense
Shown, without Rainsense Similar
Turn the end of the windshield wiper
lever to operate the rear window
wiper/washer.