reset BUICK LACROSSE 2005 Owner's Manual
[x] Cancel search | Manufacturer: BUICK, Model Year: 2005, Model line: LACROSSE, Model: BUICK LACROSSE 2005Pages: 410, PDF Size: 2.59 MB
Page 80 of 410
Do not use the remote start feature if your vehicle is low
on fuel. Your vehicle may run out of fuel.
Your vehicle’s remote keyless entry transmitter, with the
remote start button, provides an increased range of
operation. However, the range may be less while
the vehicle is running and as a result, you may need to
be closer to your vehicle to turn it off, than you were
to turn it on.
There are other conditions which can affect the
performance of the transmitter, seeRemote Keyless
Entry System on page 2-3for additional information.
The remote vehicle start feature needs to be reset after
your vehicle’s engine is started two times using the
transmitter’s remote start button. The remote start
system is reset by Inserting the vehicle’s key into the
ignition lock cylinder and turning it to RUN and then to
OFF. SeeIgnition Positions on page 2-21for
information regarding the ignition positions on
your vehicle.
/(Remote Start):If your vehicle has the remote start
feature, the keyless entry transmitter will have a
button with this symbol on it.To start the vehicle using the remote start feature, do
the following:
1. Aim the transmitter at the vehicle.
2. Press and release the transmitter’s lock button,
then immediately press and hold the transmitter’s
remote start button until the turn signal lamps �ash
or for four seconds, if the vehicle’s lights are not
visible. The vehicle’s doors will lock.
3. When the vehicle starts, the parking lamps will turn
on and remain on while the engine is running.
The engine will shut off automatically after
10 minutes, unless a time extension has been done
or the vehicle’s key is inserted into the ignition
lock cylinder and turned to RUN.
4. To manually shut off a remote start, do any of the
following:
Aim the remote keyless entry transmitter at the
vehicle and press the remote start button until
the parking lamps turn off.
Turn on the hazard warning �ashers.
Turn the ignition switch to RUN and then to OFF.
2-8
Page 81 of 410
If you enter the vehicle after a remote start, and the
engine is still running, insert the key into the ignition lock
cylinder and turn it to the RUN position to drive the
vehicle.
Your vehicle’s engine can be started two times using
the transmitter’s remote start feature.
If only one remote start procedure has been done, since
last driving the vehicle or resetting the remote start
system, the engine may be started again remotely
following the remote start procedure a second time.
If the remote start procedure is used again before the
�rst ten minute time frame has ended, 10 minutes will be
added to the remaining minutes. The added
10 minutes are considered a second remote start.
The remote vehicle start feature will not operate if:
The remote start system is disabled.
The vehicle’s key is in the ignition.
A door is open or the vehicle’s hood is not closed.
The hazard warning �ashers are on.
There is an emission control system malfunction.
The engine coolant temperature is too high.
The oil pressure is low.
Two remote vehicle starts have already been
provided. The maximum number of remote starts or
remote start attempts between ignition cycles
with the key is two.
If a remote start is attempted and is unsuccessful, the
Driver Information Center (DIC) will display REMOTE
START DISABLED.
Vehicles equipped with the remote vehicle start feature
are shipped from the factory with the remote vehicle
start system enabled. The system may be disabled
through the DIC. See “REMOTE START” under
DIC Vehicle Personalization on page 3-71for additional
information.
2-9
Page 123 of 410
Windshield Wipers
You control the windshield wipers by turning the band
with the wiper symbol on it.
8(Mist):For a single wiping cycle, turn the band to
mist. Hold it there until the wipers start. Then let go. The
wipers will stop after one wipe. If you want more
wipes, hold the band on mist longer.
N(Delay):You can set the wiper speed for a long or
short delay between wipes. This can be very useful
in light rain or snow. Turn the band to choose the delay
time. The closer to the top of the lever, the shorter
the delay.
6(Low Speed):For steady wiping at low speed,
turn the band away from you to the �rst solid band past
the delay settings. For high-speed wiping, turn the
band further, to the second solid band past the delay
settings. To stop the wipers, move the band to off.
1(High Speed):For high-speed wiping, turn
the band further, to the second solid band past the
delay settings.
9(Off):To stop the wipers, move the band to off.
Be sure to clear ice and snow from the wiper blades
before using them. If they’re frozen to the windshield,
carefully loosen or thaw them. If your blades do become
worn or damaged, get new blades or blade inserts.
Windshield Washer
LQ(Washer Fluid):There is a paddle marked
with the windshield washer symbol at the top of
the multifunction lever. To spray washer �uid on the
windshield, push the paddle. The wipers will clear
the window and then either stop or return to your
preset speed.
{CAUTION:
In freezing weather, do not use your washer
until the windshield is warmed. Otherwise the
washer �uid can form ice on the windshield,
blocking your vision.
3-9
Page 151 of 410
Anti-Lock Brake System
Warning Light
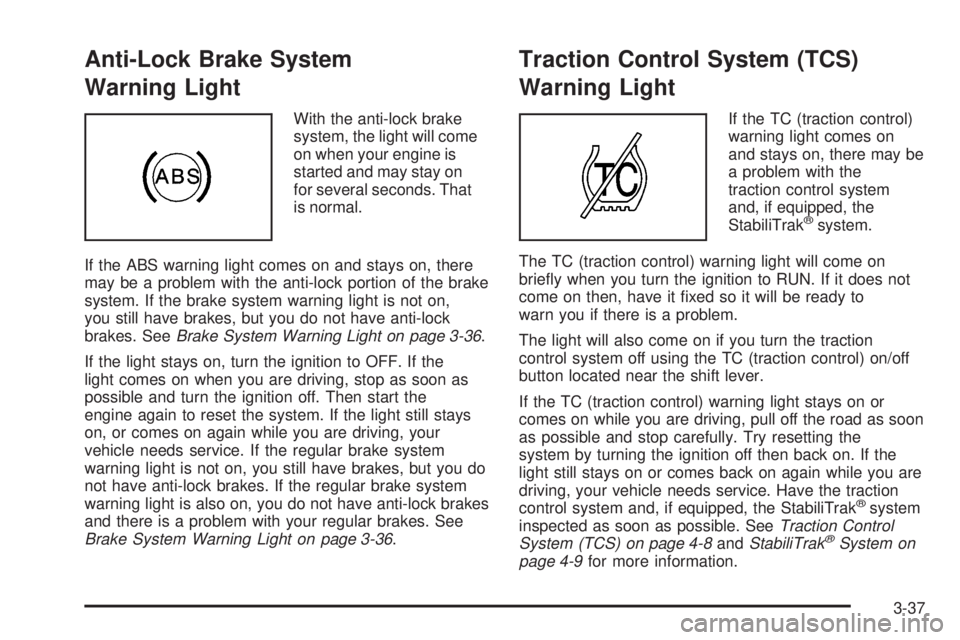
With the anti-lock brake
system, the light will come
on when your engine is
started and may stay on
for several seconds. That
is normal.
If the ABS warning light comes on and stays on, there
may be a problem with the anti-lock portion of the brake
system. If the brake system warning light is not on,
you still have brakes, but you do not have anti-lock
brakes. SeeBrake System Warning Light on page 3-36.
If the light stays on, turn the ignition to OFF. If the
light comes on when you are driving, stop as soon as
possible and turn the ignition off. Then start the
engine again to reset the system. If the light still stays
on, or comes on again while you are driving, your
vehicle needs service. If the regular brake system
warning light is not on, you still have brakes, but you do
not have anti-lock brakes. If the regular brake system
warning light is also on, you do not have anti-lock brakes
and there is a problem with your regular brakes. See
Brake System Warning Light on page 3-36.
Traction Control System (TCS)
Warning Light
If the TC (traction control)
warning light comes on
and stays on, there may be
a problem with the
traction control system
and, if equipped, the
StabiliTrak
®system.
The TC (traction control) warning light will come on
brie�y when you turn the ignition to RUN. If it does not
come on then, have it �xed so it will be ready to
warn you if there is a problem.
The light will also come on if you turn the traction
control system off using the TC (traction control) on/off
button located near the shift lever.
If the TC (traction control) warning light stays on or
comes on while you are driving, pull off the road as soon
as possible and stop carefully. Try resetting the
system by turning the ignition off then back on. If the
light still stays on or comes back on again while you are
driving, your vehicle needs service. Have the traction
control system and, if equipped, the StabiliTrak
®system
inspected as soon as possible. SeeTraction Control
System (TCS) on page 4-8andStabiliTrak
®System on
page 4-9for more information.
3-37
Page 157 of 410
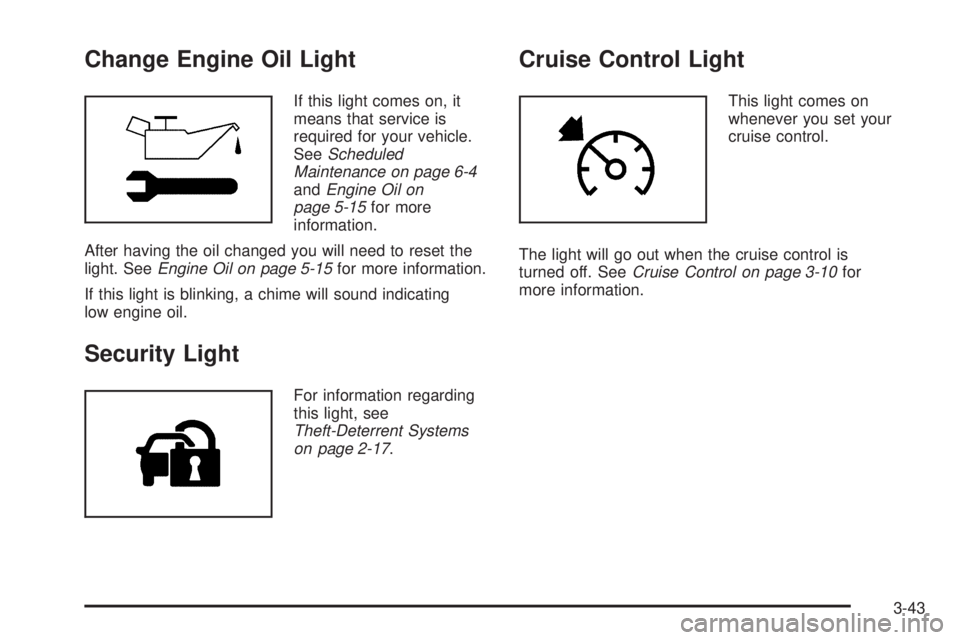
Change Engine Oil Light
If this light comes on, it
means that service is
required for your vehicle.
SeeScheduled
Maintenance on page 6-4
andEngine Oil on
page 5-15for more
information.
After having the oil changed you will need to reset the
light. SeeEngine Oil on page 5-15for more information.
If this light is blinking, a chime will sound indicating
low engine oil.
Security Light
For information regarding
this light, see
Theft-Deterrent Systems
on page 2-17.
Cruise Control Light
This light comes on
whenever you set your
cruise control.
The light will go out when the cruise control is
turned off. SeeCruise Control on page 3-10for
more information.
3-43
Page 161 of 410
Driver Information Center (DIC)
Your vehicle may have a Driver Information
Center (DIC).
All messages will appear in the DIC display located in
the instrument panel cluster, below the speedometer.
The DIC buttons are located on the center of the
instrument panel, below the center outlets.
The DIC comes on when the ignition is on. After a short
delay, the DIC on the uplevel vehicle will display the
WELCOME DRIVER (1 or 2) if a personalized key 1 or 2
is used, and then the information that was last
displayed before the engine was turned off.
The DIC on the base level vehicle displays the odometer
and trip odometers only.
The DIC on the uplevel vehicle displays the odometer,
trip odometers, fuel economy, trip computer, vehicle
system, and compass display information. It also
displays warning messages if a system problem is
detected. In addition, the DIC on the uplevel vehicle
displays phone numbers that are called using the
OnStar
®system, if equipped. SeeOnStar®System on
page 2-34.The outside air temperature automatically appears in
the bottom right corner of the uplevel DIC display when
viewing the trip/odometer screens, fuel screens and
some of the gages screens. If the outside air
temperature is at or below 37°F (3°C), the temperature
reading will toggle between displaying the outside
temperature and the word ICE for two minutes. If there
is a problem with the system that controls the
temperature display, the letters OC (open circuit) or SC
(short circuit) will appear on the display. If this occurs,
have the vehicle serviced by your GM dealer.
The DIC on the uplevel vehicle also allows some
features to be customized or personalized. SeeDIC
Vehicle Personalization on page 3-71for more
information.
DIC Operation and Displays
The DIC has different modes which can be accessed by
pressing the DIC buttons located on the center of the
instrument panel. Depending on whether your vehicle
has the base level or uplevel DIC, the buttons and
modes available will differ.
The buttons on the base level vehicle are the
trip/odometer and English/Metric buttons.
The buttons on the uplevel vehicle are the trip/odometer,
set/reset, gages, fuel, and option buttons.
The button functions are detailed in the following pages.
3-47
Page 162 of 410
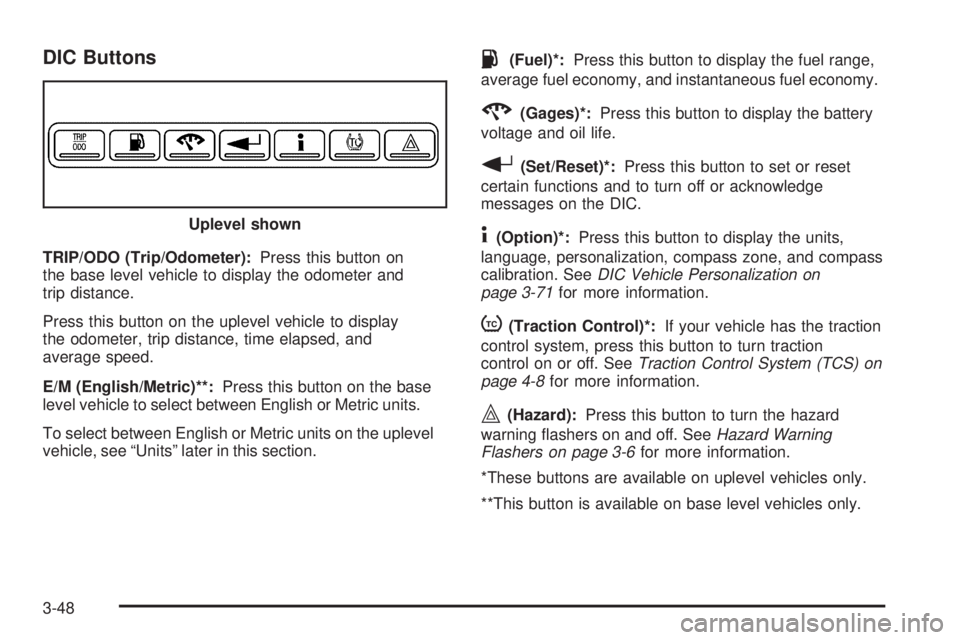
DIC Buttons
TRIP/ODO (Trip/Odometer):Press this button on
the base level vehicle to display the odometer and
trip distance.
Press this button on the uplevel vehicle to display
the odometer, trip distance, time elapsed, and
average speed.
E/M (English/Metric)**:Press this button on the base
level vehicle to select between English or Metric units.
To select between English or Metric units on the uplevel
vehicle, see “Units” later in this section.
.(Fuel)*:Press this button to display the fuel range,
average fuel economy, and instantaneous fuel economy.
2(Gages)*:Press this button to display the battery
voltage and oil life.
r(Set/Reset)*:Press this button to set or reset
certain functions and to turn off or acknowledge
messages on the DIC.
4(Option)*:Press this button to display the units,
language, personalization, compass zone, and compass
calibration. SeeDIC Vehicle Personalization on
page 3-71for more information.
t(Traction Control)*:If your vehicle has the traction
control system, press this button to turn traction
control on or off. SeeTraction Control System (TCS) on
page 4-8for more information.
|(Hazard):Press this button to turn the hazard
warning �ashers on and off. SeeHazard Warning
Flashers on page 3-6for more information.
*These buttons are available on uplevel vehicles only.
**This button is available on base level vehicles only. Uplevel shown
3-48
Page 163 of 410
Trip/Odometer Menu Items
TRIP/ODO (Trip Odometer):Press this button to scroll
through the following menu items:
Odometer
Press the trip/odometer button until the odometer
displays. This mode shows the distance the vehicle has
been driven in either miles or kilometers.
Trip A and Trip B
Press the trip/odometer button until A or B displays. This
mode shows the current distance traveled in either
miles or kilometers since the last reset for each
trip odometer. Both trip odometers can be used at the
same time.
Each trip odometer can be reset to zero separately by
pressing the set/reset button on the uplevel vehicle or by
pressing and holding the trip odometer button on the
base level vehicle while the desired trip odometer
is displayed.
The display will show the odometer on the top line and
the trip odometer information, either A or B, on the
bottom line.
Time Elapsed (Uplevel Only)
Press the trip/odometer button until TIME ELAPSED :00
displays. This mode is like a stopwatch, in that you
can clock the time it takes to get from one point
to another. Each of the �elds for the hours, minutes,
and seconds are two numeric digits.
Once TIME ELAPSED :00 is displayed, press the
set/reset button on the uplevel vehicle to start the timing
feature. Press the set/reset button again to stop it. If
you will be starting and stopping your vehicle, during a
trip for instance, the TIME ELAPSED feature will
automatically start timing where it left off when you last
stopped. To reset it, press and hold the set/reset
button for approximately 1.5 seconds. The display will
return to zero. Press the trip/odometer button to
exit from the TIME ELAPSED display.
Average Speed (Uplevel Only)
Press the trip/odometer button until AVERAGE SPEED
displays. This mode shows the average speed of
the vehicle in miles per hour (mph) or kilometers per
hour (km/h). This average is calculated based on
the various vehicle speed recorded since the last reset
of this value. To reset the value, press the trip/odometer
button to display AVERAGE SPEED, then press and
hold the set/reset button on the uplevel vehicle.
The display will return to zero.
3-49
Page 164 of 410
Fuel Menu Items (Uplevel Only)
.
(Fuel):Press this button to scroll through the
following menu items:
Fuel Range
Press the fuel button until FUEL RANGE displays.
This mode shows the approximate number of
remaining miles or kilometers the vehicle can be
driven without refueling.
Fuel range is based on several factors, including
distance travelled, fuel used, fuel capacity, etc. This
estimate will change if driving conditions change.
For example, if driving in traffic and making frequent
stops, this mode may read one number, but if the vehicle
is driven on a freeway, the number may change even
though the same amount of fuel is in the fuel tank. This
is because different driving conditions produce
different fuel economies. Generally, freeway driving
produces better fuel economy than city driving.
Fuel range cannot be reset.
If your vehicle is low on fuel, FUEL RANGE LOW will
display followed by the LOW FUEL message. See “LOW
FUEL” underDIC Warnings and Messages on
page 3-53for more information.
Average Fuel Economy
Press the fuel button until AVG ECONOMY displays.
This mode shows the approximate average miles per
gallon (mpg) or liters per 100 kilometers (L/100 km). This
number is calculated based on the number of mpg
(L/100 km) recorded since the last time this menu item
was reset. To reset AVG ECONOMY, press and hold the
set/reset button. The display will return to zero.
Instantaneous Fuel Economy
Press the fuel button until INST ECONOMY displays.
This mode shows the current fuel economy at a
particular moment and will change frequently as driving
conditions change. This mode shows the instantaneous
fuel economy in miles per gallon (mpg) or liters per
100 kilometers (L/100 km). Unlike average fuel
economy, this screen cannot be reset.
Gages Menu Items (Uplevel Only)
2
(Gages):Press this button to scroll through the
following menu items:
Battery
Press the gages button until BATTERY displays. This
mode shows the current battery voltage.
3-50
Page 165 of 410
If there is a problem with the battery charging system, a
DIC message will display. SeeDIC Warnings and
Messages on page 3-53for more information.
Your vehicle’s charging system regulates voltage based
on the state of the battery. The battery voltage may
�uctuate when viewing this information on the DIC. This
is normal.
Oil Life
Press the gages button until OIL LIFE displays. This
mode shows an estimate of the oil’s remaining useful
life. If you see OIL LIFE 99% on the display, that means
99% of the current oil life remains. The engine oil life
system will alert you to change your oil on a schedule
consistent with your driving conditions.
When the remaining oil life is low, the CHANGE OIL
SOON message will appear on the display. You should
change your oil as soon as possible. SeeEngine Oil
on page 5-15. In addition to the engine oil life system
monitoring the oil life, additional maintenance is
recommended in the Maintenance Schedule in this
manual. SeeScheduled Maintenance on page 6-4for
more information.
Remember, you must reset the OIL LIFE yourself after
each oil change. It will not reset itself. Also, be
careful not to reset the OIL LIFE accidentally at any
time other than when the oil has just been changed. It
cannot be reset accurately until the next oil change.To reset the engine oil life system, press and hold the
set/reset button while OIL LIFE is displayed. The display
will show 100% when the system is reset. SeeEngine
Oil Life System on page 5-18for more information.
Option Menu Items (Uplevel Only)
4
(Option):Press this button to scroll through the
following menu items:
Units
Press the option button until UNITS displays. This mode
allows you to select between English or Metric units
of measurement. Once in this mode, press the set/reset
button to select between ENGLISH or METRIC units.
Language
Press the option button until the language screen
displays. This mode allows you to select the language
in which the DIC messages will appear. Once in
this mode, press the set/reset button to select among
the following choices:
English
Francais (French)
Espanol (Spanish)
3-51