display BUICK LACROSSE 2008 User Guide
[x] Cancel search | Manufacturer: BUICK, Model Year: 2008, Model line: LACROSSE, Model: BUICK LACROSSE 2008Pages: 440
Page 146 of 440
Overhead Console Reading Lamps
Your vehicle may have reading lamps located on
the overhead console. Press the lens to turn them on
and off.
Rear Assist Handle Reading Lamps
Your vehicle may have reading lamps located near
the rear assist handles. Press the lens to turn them on
and off.
Electric Power Management
The vehicle has Electric Power Management (EPM) that
estimates the battery’s temperature and state of
charge. It then adjusts the voltage for best performance
and extended life of the battery.
When the battery’s state of charge is low, the voltage is
raised slightly to quickly put the charge back in. When the
state of charge is high, the voltage is lowered slightly to
prevent overcharging. If the vehicle has a voltmeter gage
or voltage display on the Driver Information Center (DIC),
you may see the voltage move up or down. This is
normal. If there is a problem, an alert will be displayed.The battery can be discharged at idle if the electrical
loads are very high. This is true for all vehicles. This is
because the generator (alternator) may not be
spinning fast enough at idle to produce all the power
that is needed for very high electrical loads.
A high electrical load occurs when several of the
following loads are on: headlamps, high beams, fog
lamps, rear window defogger, climate control fan at high
speed, heated seats, engine cooling fans, trailer
loads, and loads plugged into accessory power outlets.
EPM works to prevent excessive discharge of the
battery. It does this by balancing the generator’s output
and the vehicle’s electrical needs. It can increase
engine idle speed to generate more power, whenever
needed. It can temporarily reduce the power demands of
some accessories.
Normally, these actions occur in steps or levels, without
being noticeable. In rare cases at the highest levels
of corrective action, this action may be noticeable to the
driver. If so, the Driver Information Center (DIC)
message might display Battery Saver Active. If this
message is displayed, it is recommended that the driver
reduce the electrical loads as much as possible. See
DIC Warnings and Messages on page 3-58.
3-18
Page 152 of 440
Dual Automatic Climate Control
System
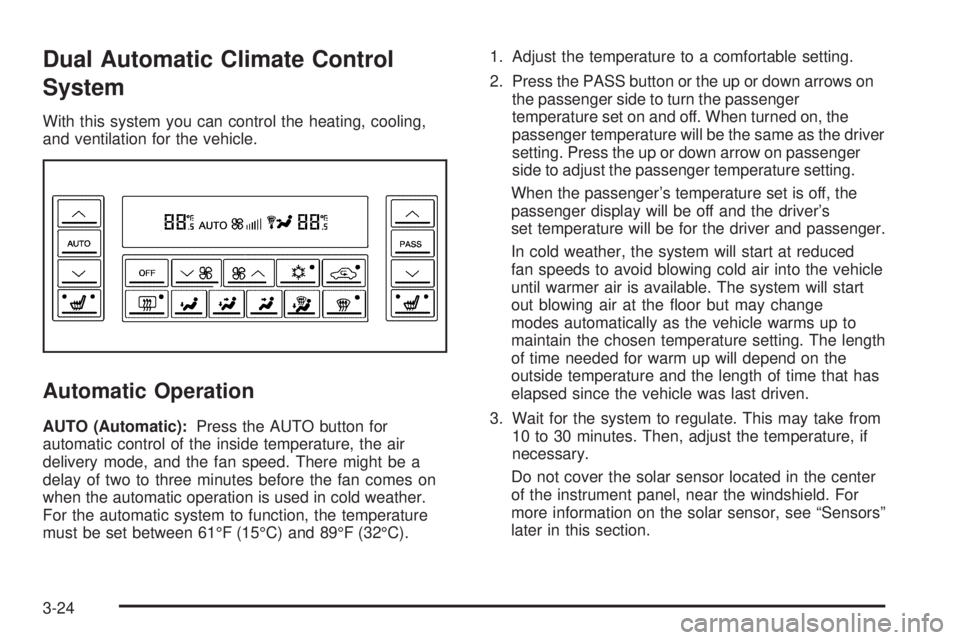
With this system you can control the heating, cooling,
and ventilation for the vehicle.
Automatic Operation
AUTO (Automatic):Press the AUTO button for
automatic control of the inside temperature, the air
delivery mode, and the fan speed. There might be a
delay of two to three minutes before the fan comes on
when the automatic operation is used in cold weather.
For the automatic system to function, the temperature
must be set between 61°F (15°C) and 89°F (32°C).1. Adjust the temperature to a comfortable setting.
2. Press the PASS button or the up or down arrows on
the passenger side to turn the passenger
temperature set on and off. When turned on, the
passenger temperature will be the same as the driver
setting. Press the up or down arrow on passenger
side to adjust the passenger temperature setting.
When the passenger’s temperature set is off, the
passenger display will be off and the driver’s
set temperature will be for the driver and passenger.
In cold weather, the system will start at reduced
fan speeds to avoid blowing cold air into the vehicle
until warmer air is available. The system will start
out blowing air at the �oor but may change
modes automatically as the vehicle warms up to
maintain the chosen temperature setting. The length
of time needed for warm up will depend on the
outside temperature and the length of time that has
elapsed since the vehicle was last driven.
3. Wait for the system to regulate. This may take from
10 to 30 minutes. Then, adjust the temperature, if
necessary.
Do not cover the solar sensor located in the center
of the instrument panel, near the windshield. For
more information on the solar sensor, see “Sensors”
later in this section.
3-24
Page 153 of 440
4. Press OFF to turn the climate control system off.
Only the rear defog and heated seats will function.
Press AUTO or any other button except the
heated seats or rear defog to turn the climate
control system back on.
This control has four types of operation.
Automatic can set/change the temperature only.
AUTO and temperature only will appear on the
display.
Semi-Automatic Fan can set/change the
temperature and mode. The fan operates
automatically. The temperature and mode will
appear on the display.
Semi-Automatic Mode can set/change the
temperature and fan speed. The mode operates
automatically. The fan speed and temperature will
appear on the display.
Manual can set/change the temperature, mode and
fan. The fan speed, temperature, and mode will
appear on the display.
If your vehicle has the remote start feature, the climate
control system will automatically regulate the inside
temperature of your vehicle when the remote start
system is activated. Normal operation and the last
setting of the climate control system will return after the
key is turned on.
Manual Operation
During daylight hours, the instrument panel brightness
control might need to be adjusted to the highest setting,
in order to see the indicator lights for the various
climate control settings.
OFF:Press this button to turn the climate control
system off.
yz(Temperature):Press these buttons to manually
adjust the temperature inside the vehicle. Press the
up arrow on the driver or passenger side to raise
the temperature, and press the down arrow to lower the
temperature. The display will show the selected
temperature.
z9(Fan):Press this button to decrease the fan
speed. Pressing the arrows cancels the automatic
operation and places the system in manual or
semi-automatic mode. Press the AUTO button to return
to automatic operation. If the air�ow seems low when
the fan is at the highest setting, the passenger
compartment air �lter may need to be replaced. For
more information seePassenger Compartment Air Filter
on page 3-29andScheduled Maintenance on page 6-4.
3-25
Page 160 of 440
Speedometer and Odometer
Your speedometer lets you see your speed in both
miles per hour (mph) and kilometers per hour (km/h).
Your vehicle’s odometer works together with the driver
information center. You can set a Trip A and Trip B
odometer. See “Trip Information” underDIC Operation
and Displays on page 3-50.
The odometer mileage can be checked without the
vehicle running. Simply press the odometer/trip switch
on the instrument panel cluster.
If your vehicle ever needs a new odometer installed, the
new one will be set to the correct mileage total of the
old odometer.
Tachometer
Your tachometer displays the engine speed in
revolutions per minute (rpm).
Safety Belt Reminders
Safety Belt Reminder Light
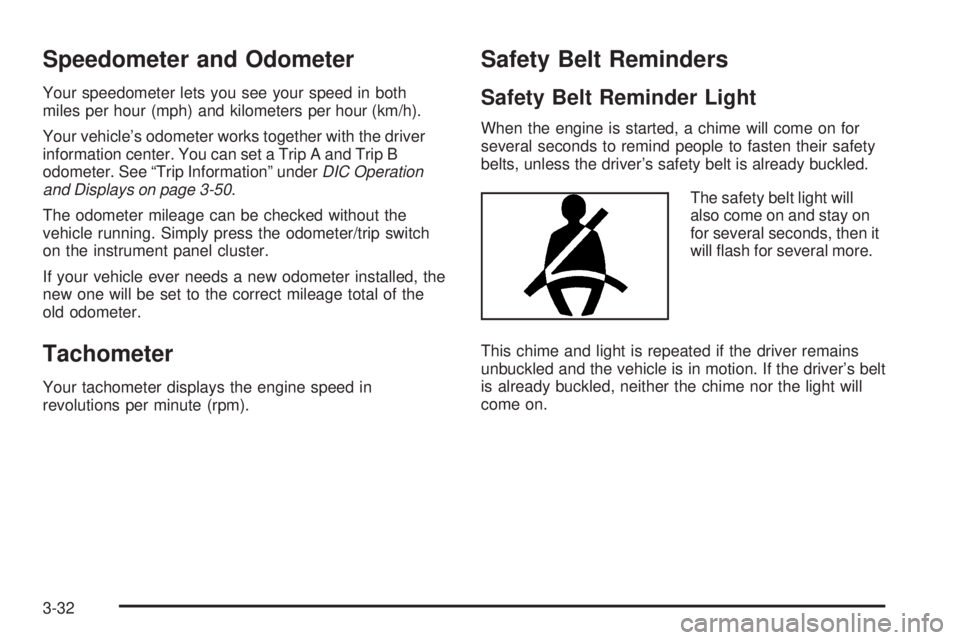
When the engine is started, a chime will come on for
several seconds to remind people to fasten their safety
belts, unless the driver’s safety belt is already buckled.
The safety belt light will
also come on and stay on
for several seconds, then it
will �ash for several more.
This chime and light is repeated if the driver remains
unbuckled and the vehicle is in motion. If the driver’s belt
is already buckled, neither the chime nor the light will
come on.
3-32
Page 177 of 440
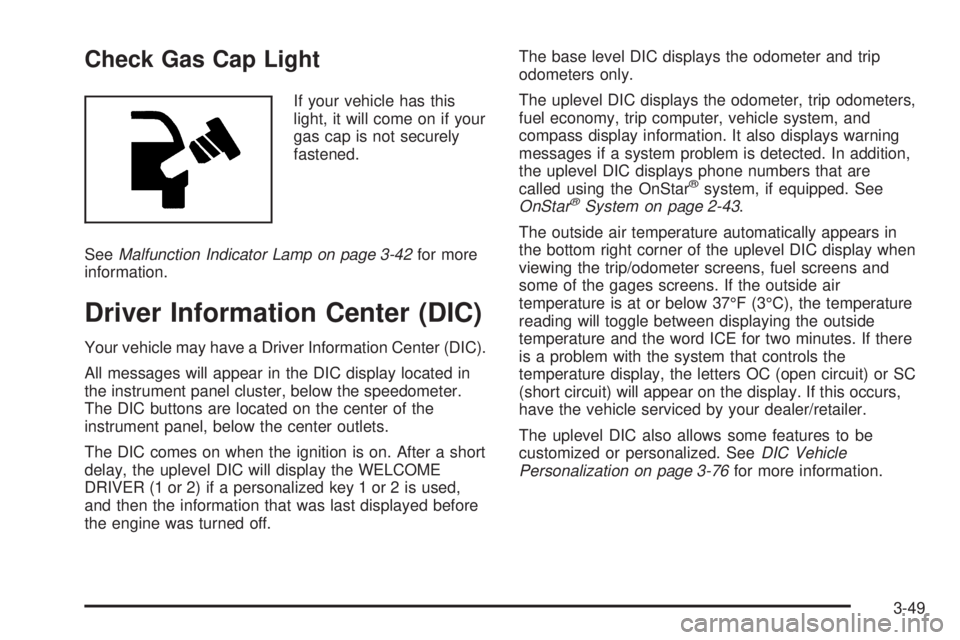
Check Gas Cap Light
If your vehicle has this
light, it will come on if your
gas cap is not securely
fastened.
SeeMalfunction Indicator Lamp on page 3-42for more
information.
Driver Information Center (DIC)
Your vehicle may have a Driver Information Center (DIC).
All messages will appear in the DIC display located in
the instrument panel cluster, below the speedometer.
The DIC buttons are located on the center of the
instrument panel, below the center outlets.
The DIC comes on when the ignition is on. After a short
delay, the uplevel DIC will display the WELCOME
DRIVER (1 or 2) if a personalized key 1 or 2 is used,
and then the information that was last displayed before
the engine was turned off.The base level DIC displays the odometer and trip
odometers only.
The uplevel DIC displays the odometer, trip odometers,
fuel economy, trip computer, vehicle system, and
compass display information. It also displays warning
messages if a system problem is detected. In addition,
the uplevel DIC displays phone numbers that are
called using the OnStar
®system, if equipped. See
OnStar®System on page 2-43.
The outside air temperature automatically appears in
the bottom right corner of the uplevel DIC display when
viewing the trip/odometer screens, fuel screens and
some of the gages screens. If the outside air
temperature is at or below 37°F (3°C), the temperature
reading will toggle between displaying the outside
temperature and the word ICE for two minutes. If there
is a problem with the system that controls the
temperature display, the letters OC (open circuit) or SC
(short circuit) will appear on the display. If this occurs,
have the vehicle serviced by your dealer/retailer.
The uplevel DIC also allows some features to be
customized or personalized. SeeDIC Vehicle
Personalization on page 3-76for more information.
3-49
Page 178 of 440
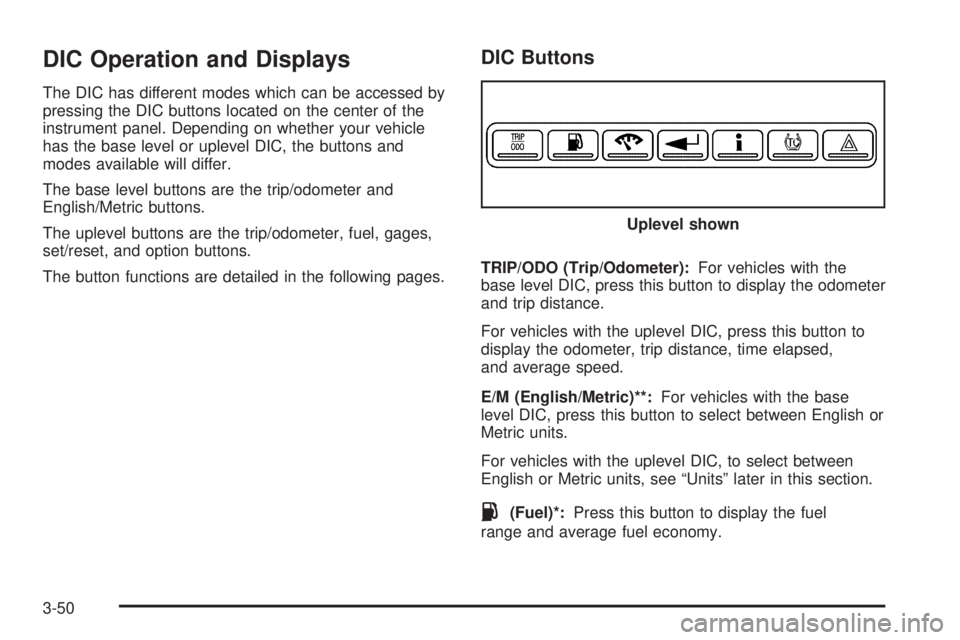
DIC Operation and Displays
The DIC has different modes which can be accessed by
pressing the DIC buttons located on the center of the
instrument panel. Depending on whether your vehicle
has the base level or uplevel DIC, the buttons and
modes available will differ.
The base level buttons are the trip/odometer and
English/Metric buttons.
The uplevel buttons are the trip/odometer, fuel, gages,
set/reset, and option buttons.
The button functions are detailed in the following pages.
DIC Buttons
TRIP/ODO (Trip/Odometer):For vehicles with the
base level DIC, press this button to display the odometer
and trip distance.
For vehicles with the uplevel DIC, press this button to
display the odometer, trip distance, time elapsed,
and average speed.
E/M (English/Metric)**:For vehicles with the base
level DIC, press this button to select between English or
Metric units.
For vehicles with the uplevel DIC, to select between
English or Metric units, see “Units” later in this section.
.(Fuel)*:Press this button to display the fuel
range and average fuel economy.Uplevel shown
3-50
Page 179 of 440
2(Gages)*:Press this button to display the battery
voltage, oil life, and tire pressure readings.
r(Set/Reset)*:Press this button to set or reset
certain functions and to turn off or acknowledge
messages on the DIC.
4(Option)*:Press this button to display the units,
language, personalization, compass zone, and compass
calibration. SeeDIC Vehicle Personalization on
page 3-76andDIC Compass (Uplevel Only) on
page 3-56for more information.
t(Traction Control):Press this button to turn
traction control on or off. SeeTraction Control System
(TCS) on page 4-6for more information.
Press and hold this button to turn StabiliTrak
®off, for
vehicles with this feature. Press this button again to turn
both traction control and StabiliTrak
®on. See
StabiliTrak®System on page 4-8for more information.
|(Hazard):Press this button to turn the hazard
warning �ashers on and off. SeeHazard Warning
Flashers on page 3-6for more information.
*These buttons are only available on vehicles with the
uplevel DIC.
**This button is only available on vehicles with the base
level DIC.
Trip/Odometer Menu Items
TRIP/ODO (Trip Odometer):Press this button to scroll
through the following menu items:
Odometer
Press the trip/odometer button until the odometer
displays. This mode shows the distance the vehicle has
been driven in either miles or kilometers.
Trip A and Trip B
Press the trip/odometer button until A or B displays.
This mode shows the current distance traveled in either
miles or kilometers since the last reset for each trip
odometer. Both trip odometers can be used at the
same time.
The display will show the odometer on the top line and
the trip odometer information, either A or B, on the
bottom line.
Each trip odometer can be reset to zero separately by
brie�y pressing the set/reset button on vehicles with the
uplevel DIC or by brie�y pressing and holding the trip
odometer button on vehicles with the base level
DIC while the desired trip odometer is displayed.
3-51
Page 180 of 440
There is also a retroactive trip odometer function that
performs the following for each trip odometer:
If the vehicle’s speed has exceeded 3 mph (5 km/h)
during the current ignition cycle, this function will
set the trip odometer to the distance driven
during the current ignition cycle.
If the vehicle’s speed has not exceeded
3 mph (5 km/h), this function will set the trip
odometer to the distance driven during the previous
ignition cycle plus the distance driven during the
current ignition cycle.
Press and hold the set/reset button on vehicles with the
uplevel DIC or the trip/odometer button on vehicles
with the base level DIC for three seconds, then release
the button. The retroactive trip odometer value will
be set into the currently displayed trip odometer.
Time Elapsed (Uplevel Only)
Press the trip/odometer button until TIME ELAPSED :00
displays. This mode is like a stopwatch, in that you
can clock the time it takes to get from one point
to another. Each of the �elds for the hours, minutes,
and seconds are two numeric digits.Once TIME ELAPSED :00 is displayed, press the
set/reset button on vehicles with the uplevel DIC to start
the timing feature. Press the set/reset button again to
stop it. If you will be starting and stopping your vehicle,
during a trip for instance, the TIME ELAPSED feature
will automatically start timing where it left off when
you last stopped. To reset it, press and hold the
set/reset button for about 1.5 seconds. The display will
return to zero. Press the trip/odometer button to exit
from the TIME ELAPSED display.
Average Speed (Uplevel Only)
Press the trip/odometer button until AVERAGE SPEED
displays. This mode shows the average speed of
the vehicle in miles per hour (mph) or kilometers per
hour (km/h). This average is calculated based on
the various vehicle speed recorded since the last reset
of this value. To reset the value, press the trip/odometer
button to display AVERAGE SPEED, then press and
hold the set/reset button on vehicles with the uplevel
DIC. The display will return to zero.
3-52
Page 181 of 440
Fuel Menu Items (Uplevel Only)
.
(Fuel):Press this button to scroll through the
following menu items:
Fuel Range
Press the fuel button until FUEL RANGE displays. This
mode shows the approximate number of remaining
miles or kilometers the vehicle can be driven without
refueling.
Fuel range is based on several factors, including
distance traveled, fuel used, fuel capacity, etc. This
estimate will change if driving conditions change. For
example, if driving in traffic and making frequent
stops, this mode may read one number, but if the vehicle
is driven on a freeway, the number may change even
though the same amount of fuel is in the fuel tank. This
is because different driving conditions produce
different fuel economies. Generally, freeway driving
produces better fuel economy than city driving.
Fuel range cannot be reset.
If your vehicle is low on fuel, FUEL RANGE LOW will
display followed by the LOW FUEL message. See “LOW
FUEL” underDIC Warnings and Messages on
page 3-58for more information.
Average Fuel Economy
Press the fuel button until AVG ECONOMY displays.
This mode shows the approximate average miles per
gallon (mpg) or liters per 100 kilometers (L/100 km). This
number is calculated based on the number of mpg
(L/100 km) recorded since the last time this menu item
was reset. To reset AVG ECONOMY, press and hold the
set/reset button. The display will return to zero.
Gages Menu Items (Uplevel Only)
2
(Gages):Press this button to scroll through the
following menu items:
Battery
Press the gages button until BATTERY displays. This
mode shows the current battery voltage.
Your vehicle’s charging system regulates voltage based
on the state of the battery. The battery voltage may
�uctuate when viewing this information on the DIC. This
is normal.
If there is a problem with the battery charging system, a
DIC message will display. SeeDIC Warnings and
Messages on page 3-58for more information.
SeeElectric Power Management on page 3-18for more
information.
3-53
Page 182 of 440
Oil Life
Press the gages button until OIL LIFE displays. This
mode shows an estimate of the oil’s remaining useful
life. If you see OIL LIFE 99% on the display, that means
99% of the current oil life remains. The engine oil life
system will alert you to change your oil on a schedule
consistent with your driving conditions.
When the remaining oil life is low, the CHANGE OIL
SOON message will appear on the display. You should
change your oil as soon as possible. SeeEngine Oil
on page 5-18. In addition to the engine oil life system
monitoring the oil life, additional maintenance is
recommended in the Maintenance Schedule in this
manual. SeeScheduled Maintenance on page 6-4for
more information.
Remember, you must reset the OIL LIFE yourself after
each oil change. It will not reset itself. Also, be
careful not to reset the OIL LIFE accidentally at any
time other than when the oil has just been changed. It
cannot be reset accurately until the next oil change.
To reset the engine oil life system, seeEngine Oil Life
System on page 5-21. The display will show 100%
when the system is reset.
Tire Pressure
Press the gages button until FRONT TIRE PRESSURE
displays. This mode shows the pressure for the front
tires. To view the pressure for the rear tires, press the
gages button again until REAR TIRE PRESSURE
displays. The tire pressure will be shown in either
pounds per square inch (psi) or kilopascals (kPa).
If a low tire pressure condition is detected by the system
while driving, a message advising you to check the
pressure in a speci�c tire will appear in the display. See
Inflation - Tire Pressure on page 5-70andDIC
Warnings and Messages on page 3-58for more
information.
If the tire pressure display shows dashes or blanks
instead of a value, there may be a problem with your
vehicle. If this consistently occurs, see your
dealer/retailer for service.
3-54