lights BUICK LACROSSE 2009 Owner's Manual
[x] Cancel search | Manufacturer: BUICK, Model Year: 2009, Model line: LACROSSE, Model: BUICK LACROSSE 2009Pages: 428
Page 1 of 428
Seats and Restraint System............................. 1-1
Front Seats
............................................... 1-2
Rear Seats
............................................... 1-7
Safety Belts
.............................................. 1-8
Child Restraints
.......................................1-29
Airbag System
.........................................1-53
Restraint System Check
............................1-68
Features and Controls..................................... 2-1
Keys
........................................................ 2-2
Doors and Locks
....................................... 2-9
Windows
.................................................2-14
Theft-Deterrent Systems
............................2-16
Starting and Operating Your Vehicle
...........2-21
Mirrors
....................................................2-35
Object Detection Systems
..........................2-37
OnStar
®System
......................................2-39
Universal Home Remote System
................2-43
Storage Areas
.........................................2-47
Sunroof
..................................................2-48
Instrument Panel............................................. 3-1
Instrument Panel Overview
.......................... 3-4
Climate Controls
......................................3-21
Warning Lights, Gages, and Indicators
........3-30
Driver Information Center (DIC)
..................3-47
Audio System(s)
.......................................3-82Driving Your Vehicle....................................... 4-1
Your Driving, the Road, and the Vehicle
....... 4-2
Towing
...................................................4-26
Service and Appearance Care.......................... 5-1
Service
..................................................... 5-3
Fuel
......................................................... 5-5
Checking Things Under
the Hood
.............................................5-10
Headlamp Aiming
.....................................5-46
Bulb Replacement
....................................5-49
Windshield Replacement
...........................5-53
Windshield Wiper Blade Replacement
.........5-53
Tires
......................................................5-54
Appearance Care
.....................................5-90
Vehicle Identi�cation
.................................5-98
Electrical System
......................................5-99
Capacities and Speci�cations
...................5-106
Maintenance Schedule..................................... 6-1
Maintenance Schedule
................................ 6-2
Customer Assistance Information.................... 7-1
Customer Assistance and Information
........... 7-2
Reporting Safety Defects
...........................7-15
Vehicle Data Recording and Privacy
...........7-17
Index................................................................ 1
2009 Buick LaCrosse Owner ManualM
Page 7 of 428
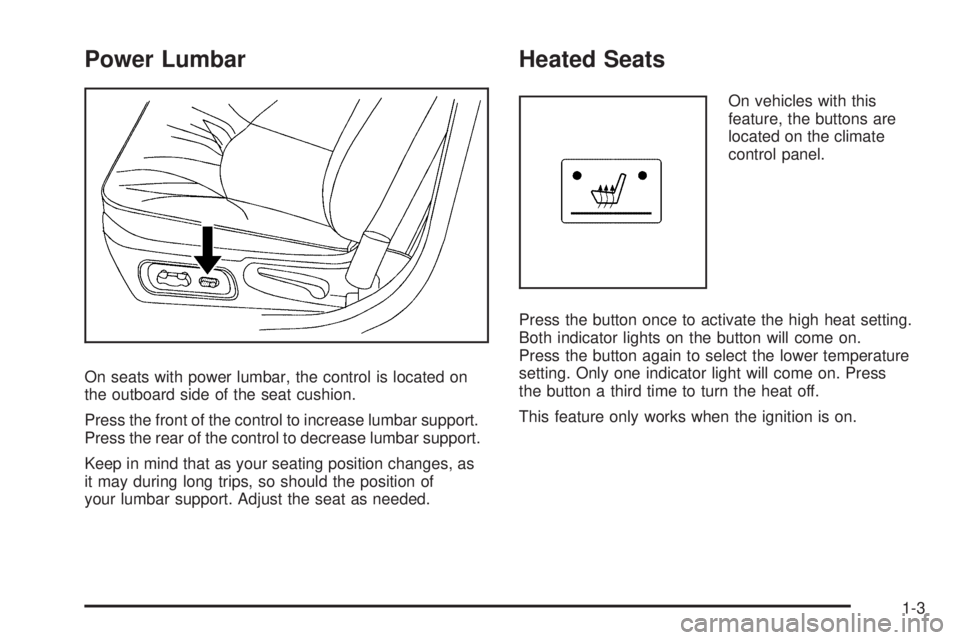
Power Lumbar
On seats with power lumbar, the control is located on
the outboard side of the seat cushion.
Press the front of the control to increase lumbar support.
Press the rear of the control to decrease lumbar support.
Keep in mind that as your seating position changes, as
it may during long trips, so should the position of
your lumbar support. Adjust the seat as needed.
Heated Seats
On vehicles with this
feature, the buttons are
located on the climate
control panel.
Press the button once to activate the high heat setting.
Both indicator lights on the button will come on.
Press the button again to select the lower temperature
setting. Only one indicator light will come on. Press
the button a third time to turn the heat off.
This feature only works when the ignition is on.
1-3
Page 96 of 428
The steering can bind with the wheels turned off center.
If this happens, move the steering wheel from left to
right while turning the key to ACC/ACCESSORY. If this
doesn’t work, then the vehicle needs service.
B (ACC/ACCESSORY):This is the position in which
you can operate the radio and windshield wipers
while the engine is off. To use ACC/ACCESSORY, turn
the key clockwise.
C (ON/RUN):This position can be used to operate the
electrical accessories and to display some instrument
panel cluster warning and indicator lights. The
switch stays in this position when the engine is running.
If you leave the key in the ACC/ACCESSORY or
ON/RUN position with the engine off, the battery could
be drained. You may not be able to start the vehicle
if the battery is allowed to drain for an extended period
of time.D (START):This is the position that starts the engine.
When the engine starts, release the key. The ignition
switch returns to ON/RUN for driving.
A warning chime will sound and the Driver Information
Center (DIC) will display DRIVER’S DOOR AJAR
when the driver door is opened, the ignition is in
ACC/ACCESSORY or LOCK/OFF and the key is in the
ignition. SeeDIC Warnings and Messages on
page 3-56for more information.
Retained Accessory Power (RAP)
These vehicle accessories can be used for up to
10 minutes after the engine is turned off:
Audio System
Power Windows
Power to these accessories continues to work for
10 minutes or until a door is opened.
2-22
Page 109 of 428
Mirrors
Manual Rearview Mirror
Hold the mirror in the center to move it for a clearer
view behind the vehicle.
Adjust the mirror to avoid glare from the headlamps
behind you. Push the tab forward for daytime use and
pull it for nighttime use.
If the vehicle has OnStar
®, the mirror has a day/night
control located at the bottom. Turn the control to
the right for the night position. Turn the control to the
front for the day position.
Vehicles with OnStar have three control buttons located
at the bottom of the mirror. See your dealer/retailer
for more information on the system and how to
subscribe to OnStar
®. SeeOnStar®System on
page 2-39for more information about the services
OnStar
®provides.
Automatic Dimming Rearview Mirror
Adjust the mirror to see clearly behind your vehicle.
Hold the mirror in the center to move it up or down and
side to side.The vehicle may have an automatic dimming rearview
mirror that reduces the glare of lights from behind
the vehicle. Press the AUTO button located in the lower
center of the mirror to turn automatic dimming on and
the
((off) button located next to the AUTO button
to turn automatic dimming off.
It the vehicle has the OnStar
®System. The automatic
dimming feature is turned on or off by pressing
O
for about three seconds. This button is located on the
lower part of the mirror.
Vehicles with OnStar
®have three control buttons
located at the bottom of the mirror. See your
dealer/retailer for more information on the system and
how to subscribe to OnStar
®. SeeOnStar®System
on page 2-39for more information about the services
OnStar
®provides.
Cleaning the Mirror
Do not spray glass cleaner directly on the mirror. Use a
soft towel dampened with water.
2-35
Page 112 of 428
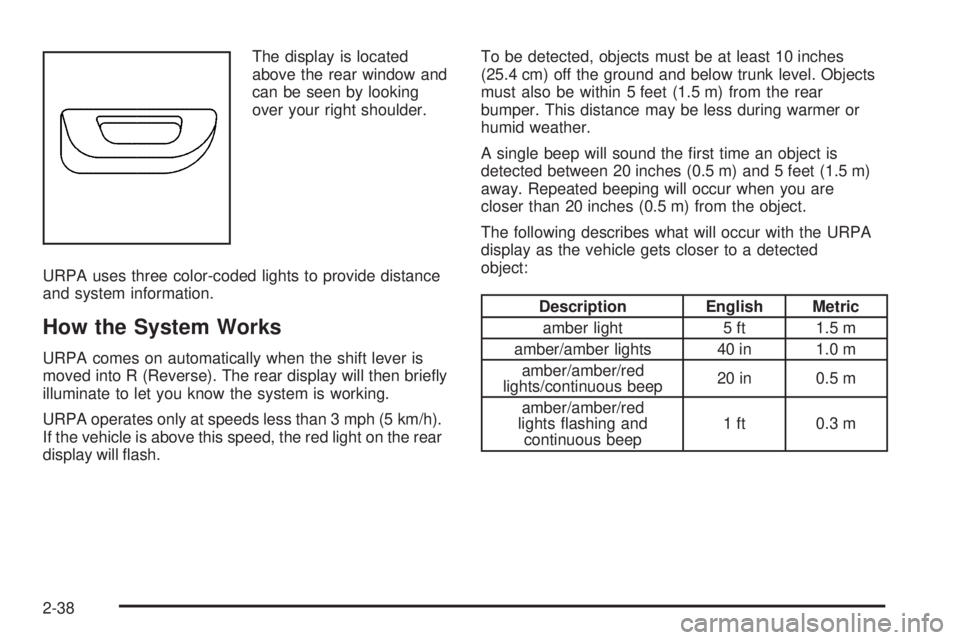
The display is located
above the rear window and
can be seen by looking
over your right shoulder.
URPA uses three color-coded lights to provide distance
and system information.
How the System Works
URPA comes on automatically when the shift lever is
moved into R (Reverse). The rear display will then brie�y
illuminate to let you know the system is working.
URPA operates only at speeds less than 3 mph (5 km/h).
If the vehicle is above this speed, the red light on the rear
display will �ash.To be detected, objects must be at least 10 inches
(25.4 cm) off the ground and below trunk level. Objects
must also be within 5 feet (1.5 m) from the rear
bumper. This distance may be less during warmer or
humid weather.
A single beep will sound the �rst time an object is
detected between 20 inches (0.5 m) and 5 feet (1.5 m)
away. Repeated beeping will occur when you are
closer than 20 inches (0.5 m) from the object.
The following describes what will occur with the URPA
display as the vehicle gets closer to a detected
object:
Description English Metric
amber light 5 ft 1.5 m
amber/amber lights 40 in 1.0 m
amber/amber/red
lights/continuous beep20 in 0.5 m
amber/amber/red
lights �ashing and
continuous beep1 ft 0.3 m
2-38
Page 123 of 428
Instrument Panel Overview...............................3-4
Hazard Warning Flashers................................3-6
Horn .............................................................3-6
Tilt Wheel.....................................................3-6
Turn Signal/Multifunction Lever.........................3-7
Turn and Lane-Change Signals........................3-8
Headlamp High/Low-Beam Changer..................3-8
Flash-to-Pass.................................................3-8
Windshield Wipers..........................................3-9
Windshield Washer.........................................3-9
Cruise Control..............................................3-10
Exterior Lamps.............................................3-13
Daytime Running Lamps (DRL)/Automatic
Headlamp System......................................3-14
Fog Lamps ..................................................3-15
Exterior Lighting Battery Saver........................3-15
Interior Lamps..............................................3-16
Instrument Panel Brightness...........................3-16
Courtesy Lamps...........................................3-16
Entry Lighting...............................................3-16
Delayed Entry Lighting...................................3-17
Theater Dimming..........................................3-17
Delayed Exit Lighting.....................................3-17
Perimeter Lighting.........................................3-18
Overhead Console Reading Lamps.................3-18
Rear Assist Handle Reading Lamps................3-18Electric Power Management...........................3-18
Battery Run-Down Protection..........................3-19
Accessory Power Outlet(s).............................3-20
Ashtray(s) and Cigarette Lighter......................3-21
Climate Controls............................................3-21
Climate Control System.................................3-21
Dual Automatic Climate Control System...........3-25
Outlet Adjustment.........................................3-28
Passenger Compartment Air Filter...................3-29
Warning Lights, Gages, and Indicators............3-30
Instrument Panel Cluster................................3-31
Speedometer and Odometer...........................3-32
Tachometer.................................................3-32
Safety Belt Reminders...................................3-32
Airbag Readiness Light..................................3-33
Passenger Airbag Status Indicator...................3-34
Charging System Light..................................3-35
Brake System Warning Light..........................3-35
Antilock Brake System (ABS) Warning Light........3-36
Traction Control System (TCS)
Warning Light...........................................3-37
Enhanced Traction System
Warning Light...........................................3-37
Engine Coolant Temperature Warning Light........3-38
Engine Coolant Temperature Gage..................3-38
Section 3 Instrument Panel
3-1
Page 135 of 428
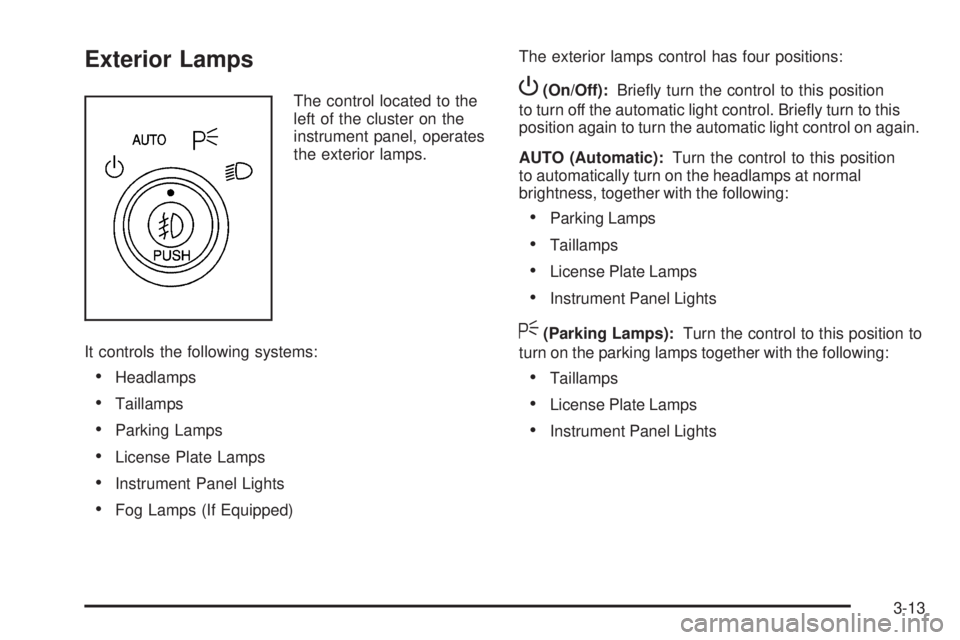
Exterior Lamps
The control located to the
left of the cluster on the
instrument panel, operates
the exterior lamps.
It controls the following systems:
Headlamps
Taillamps
Parking Lamps
License Plate Lamps
Instrument Panel Lights
Fog Lamps (If Equipped)The exterior lamps control has four positions:
P(On/Off):Brie�y turn the control to this position
to turn off the automatic light control. Brie�y turn to this
position again to turn the automatic light control on again.
AUTO (Automatic):Turn the control to this position
to automatically turn on the headlamps at normal
brightness, together with the following:
Parking Lamps
Taillamps
License Plate Lamps
Instrument Panel Lights
<(Parking Lamps):Turn the control to this position to
turn on the parking lamps together with the following:
Taillamps
License Plate Lamps
Instrument Panel Lights
3-13
Page 136 of 428
2(Headlamps):Turn the control to this position to
turn on the headlamps together with the following lamps
listed below.
A warning chime will sound if the driver’s door is
opened when the ignition switch is turned to LOCK/OFF
or ACC/ACCESSORY and the headlamps or parking
lamps are on.
Parking Lamps
Taillamps
License Plate Lamps
Instrument Panel Lights
#(Fog lamps) (If Equipped):Push the fog lamps
button to turn them on and off. SeeFog Lamps
on page 3-15for additional information.
Daytime Running Lamps (DRL)/
Automatic Headlamp System
Daytime Running Lamps (DRL) can make it easier for
others to see the front of your vehicle during the day.
DRL can be helpful in many different driving conditions,
but they can be especially helpful in the short periods
after dawn and before sunset. DRL lamps are required
to function at all times on all vehicles �rst sold in Canada.
A light sensor on top of the instrument panel makes the
DRL work, so be sure it is not covered.
The DRL system will make the low-beam headlamps
come on at reduced brightness when the following
conditions are met:
The ignition is on.
The exterior lamps control is off.
The parking brake is released.
While the DRL are on, only the vehicle’s low-beam
headlamps will be on at reduced brightness. The turn
signal, taillamps, sidemarker, and other lamps will not
be on. The instrument panel will not be lit up either.
3-14
Page 138 of 428
Interior Lamps
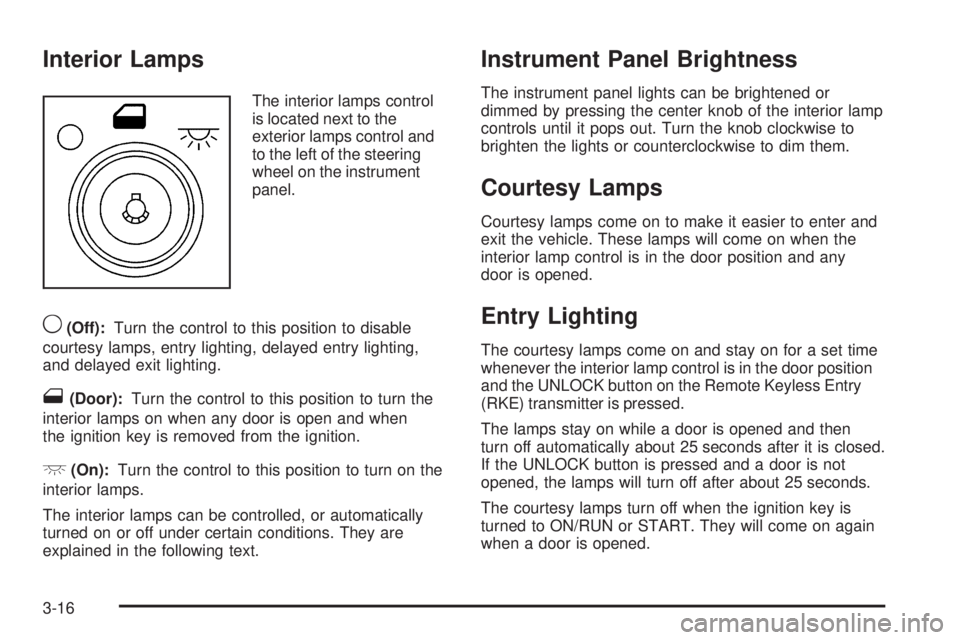
The interior lamps control
is located next to the
exterior lamps control and
to the left of the steering
wheel on the instrument
panel.
9(Off):Turn the control to this position to disable
courtesy lamps, entry lighting, delayed entry lighting,
and delayed exit lighting.
1(Door):Turn the control to this position to turn the
interior lamps on when any door is open and when
the ignition key is removed from the ignition.
+(On):Turn the control to this position to turn on the
interior lamps.
The interior lamps can be controlled, or automatically
turned on or off under certain conditions. They are
explained in the following text.
Instrument Panel Brightness
The instrument panel lights can be brightened or
dimmed by pressing the center knob of the interior lamp
controls until it pops out. Turn the knob clockwise to
brighten the lights or counterclockwise to dim them.
Courtesy Lamps
Courtesy lamps come on to make it easier to enter and
exit the vehicle. These lamps will come on when the
interior lamp control is in the door position and any
door is opened.
Entry Lighting
The courtesy lamps come on and stay on for a set time
whenever the interior lamp control is in the door position
and the UNLOCK button on the Remote Keyless Entry
(RKE) transmitter is pressed.
The lamps stay on while a door is opened and then
turn off automatically about 25 seconds after it is closed.
If the UNLOCK button is pressed and a door is not
opened, the lamps will turn off after about 25 seconds.
The courtesy lamps turn off when the ignition key is
turned to ON/RUN or START. They will come on again
when a door is opened.
3-16
Page 139 of 428
Delayed Entry Lighting
Delayed entry lighting lights the vehicle’s interior for a
period of time after all the doors have been closed.
After all the doors have been closed, the delayed entry
lighting feature will continue to work until one of the
following occurs:
The ignition is in ON/RUN.
The doors are locked.
25 seconds has passed.
If during the illumination period a door is opened, the
timed illumination period will be canceled and the interior
lamps will remain on.
Theater Dimming
This feature allows for a three to �ve second fade out of
the courtesy lamps instead of immediate turn off.
Delayed Exit Lighting
This feature can be programmed either on or off
using the Driver Information Center. SeeDIC Vehicle
Personalization on page 3-74under INT (Interior)
LIGHTS KEYS REMOVED. When activated, the interior
will be lit for a short period of time after the ignition key
is removed from the ignition.
The ignition must be off and the interior lamp control
must be in the door position for delayed exit lighting
to work. When the ignition key is removed, interior
illumination will activate and remain on until one of
the following occurs:
The ignition is in ON/RUN.
The power door locks are activated.
25 seconds has passed.
If during the illumination period a door is opened, the
timed illumination period will be canceled and the interior
lamps will remain on.
3-17