clock BUICK PARK AVENUE 2001 User Guide
[x] Cancel search | Manufacturer: BUICK, Model Year: 2001, Model line: PARK AVENUE, Model: BUICK PARK AVENUE 2001Pages: 392, PDF Size: 2.71 MB
Page 208 of 392
4-12
If you need to reduce your speed as you approach a
curve, do it before you enter the curve, while your front
wheels are straight ahead.
Try to adjust your speed so you can ªdriveº through the
curve. Maintain a reasonable, steady speed. Wait to
accelerate until you are out of the curve, and then
accelerate gently into the straightaway.
Steering in Emergencies
There are times when steering can be more effective than
braking. For example, you come over a hill and find a
truck stopped in your lane, or a car suddenly pulls out
from nowhere, or a child darts out from between parked
cars and stops right in front of you. You can avoid these
problems by braking
-- if you can stop in time. But
sometimes you can't; there isn't room. That's the time for
evasive action
-- steering around the problem.
Your vehicle can perform very well in emergencies like
these. First apply your brakes. See ªBraking in
Emergenciesº earlier in this section. It is better to
remove as much speed as you can from a possible
collision. Then steer around the problem, to the left or
right depending on the space available.
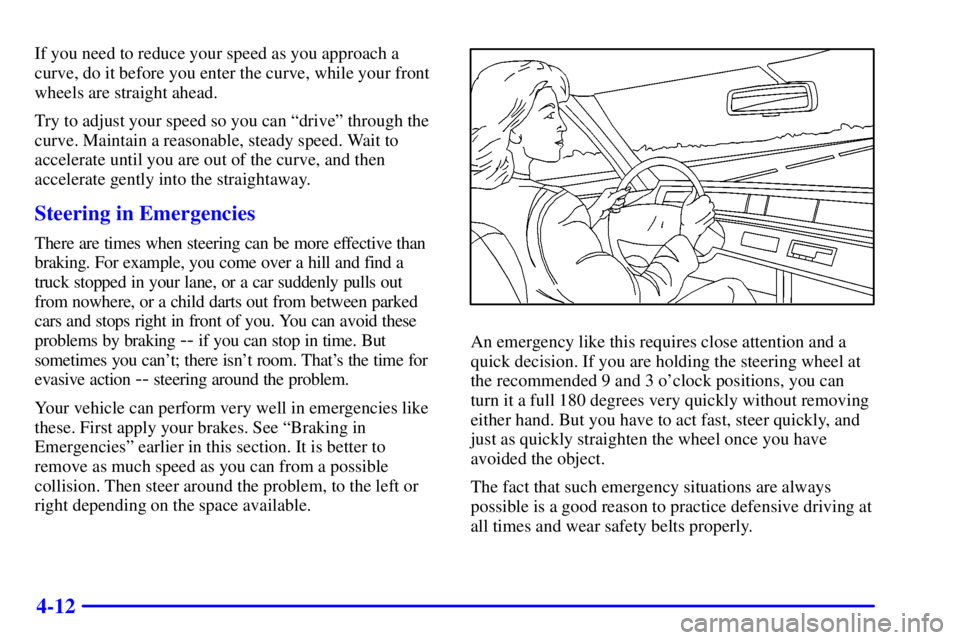
An emergency like this requires close attention and a
quick decision. If you are holding the steering wheel at
the recommended 9 and 3 o'clock positions, you can
turn it a full 180 degrees very quickly without removing
either hand. But you have to act fast, steer quickly, and
just as quickly straighten the wheel once you have
avoided the object.
The fact that such emergency situations are always
possible is a good reason to practice defensive driving at
all times and wear safety belts properly.
Page 250 of 392
5-14 How to Add Coolant to the Radiator
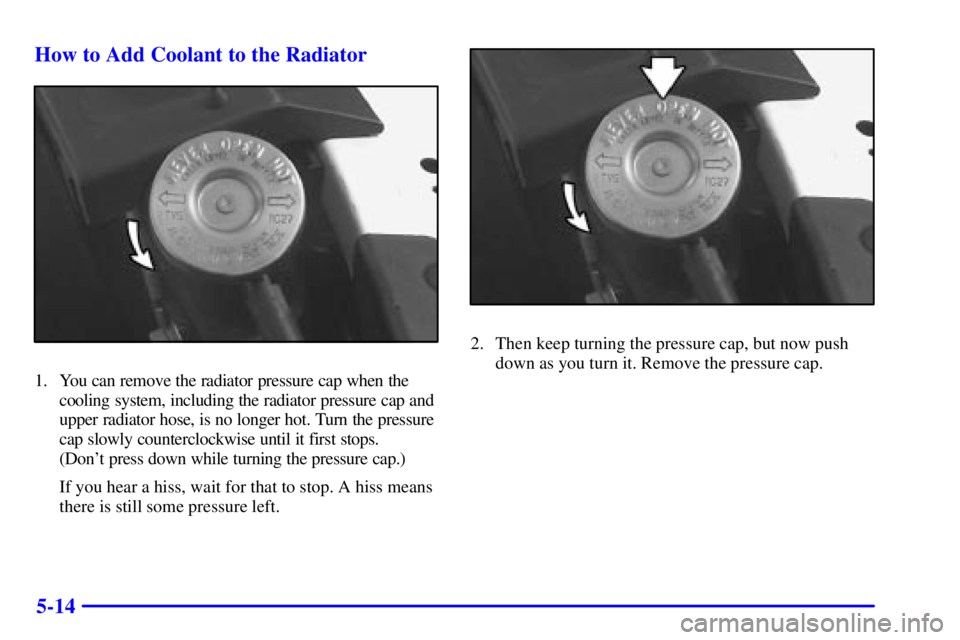
1. You can remove the radiator pressure cap when the
cooling system, including the radiator pressure cap and
upper radiator hose, is no longer hot. Turn the pressure
cap slowly counterclockwise until it first stops.
(Don't press down while turning the pressure cap.)
If you hear a hiss, wait for that to stop. A hiss means
there is still some pressure left.
2. Then keep turning the pressure cap, but now push
down as you turn it. Remove the pressure cap.
Page 256 of 392
5-20 Removing the Flat Tire and Installing
the Spare Tire
1. Use the wheel wrench to loosen the wheel nuts, but
don't remove them yet.
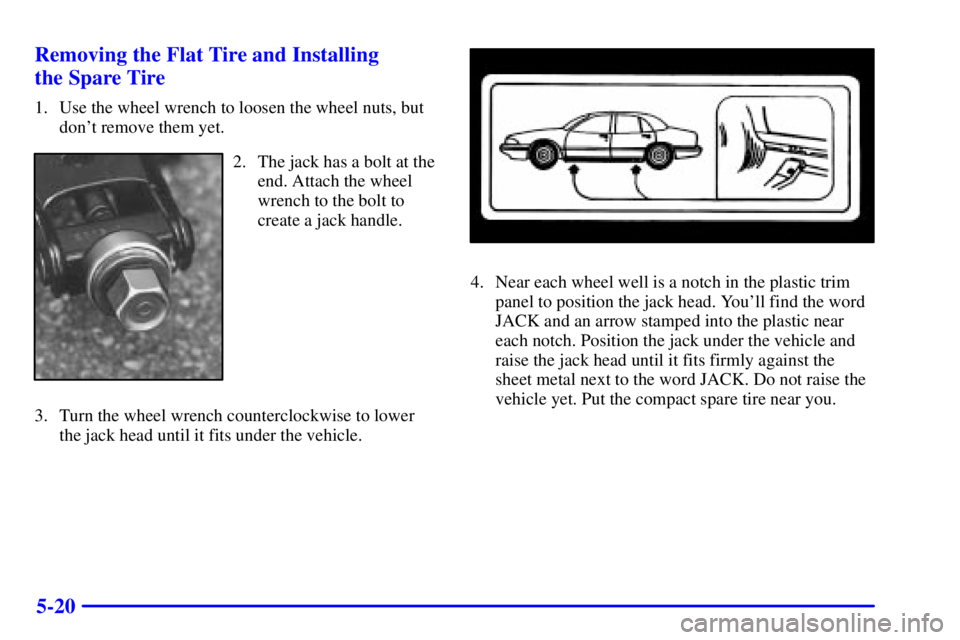
2. The jack has a bolt at the
end. Attach the wheel
wrench to the bolt to
create a jack handle.
3. Turn the wheel wrench counterclockwise to lower
the jack head until it fits under the vehicle.
4. Near each wheel well is a notch in the plastic trim
panel to position the jack head. You'll find the word
JACK and an arrow stamped into the plastic near
each notch. Position the jack under the vehicle and
raise the jack head until it fits firmly against the
sheet metal next to the word JACK. Do not raise the
vehicle yet. Put the compact spare tire near you.
Page 257 of 392
5-21
CAUTION:
Getting under a vehicle when it is jacked up is
dangerous. If the vehicle slips off the jack, you
could be badly injured or killed. Never get under
a vehicle when it is supported only by a jack.
CAUTION:
Raising your vehicle with the jack improperly
positioned can damage the vehicle and even make
the vehicle fall. To help avoid personal injury
and vehicle damage, be sure to fit the jack lift
head into the proper location before raising
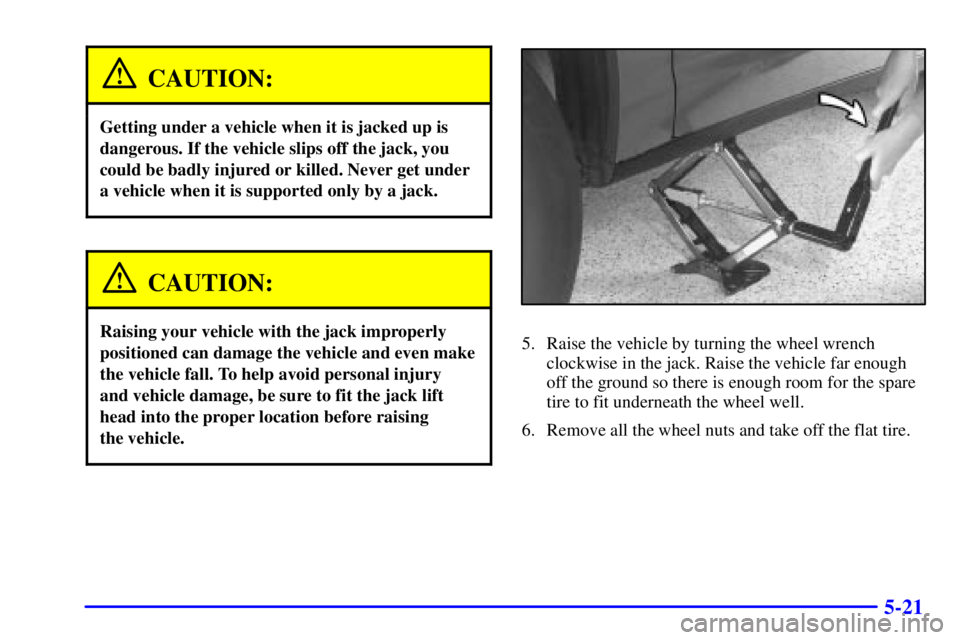
the vehicle.5. Raise the vehicle by turning the wheel wrench
clockwise in the jack. Raise the vehicle far enough
off the ground so there is enough room for the spare
tire to fit underneath the wheel well.
6. Remove all the wheel nuts and take off the flat tire.
Page 259 of 392
5-23
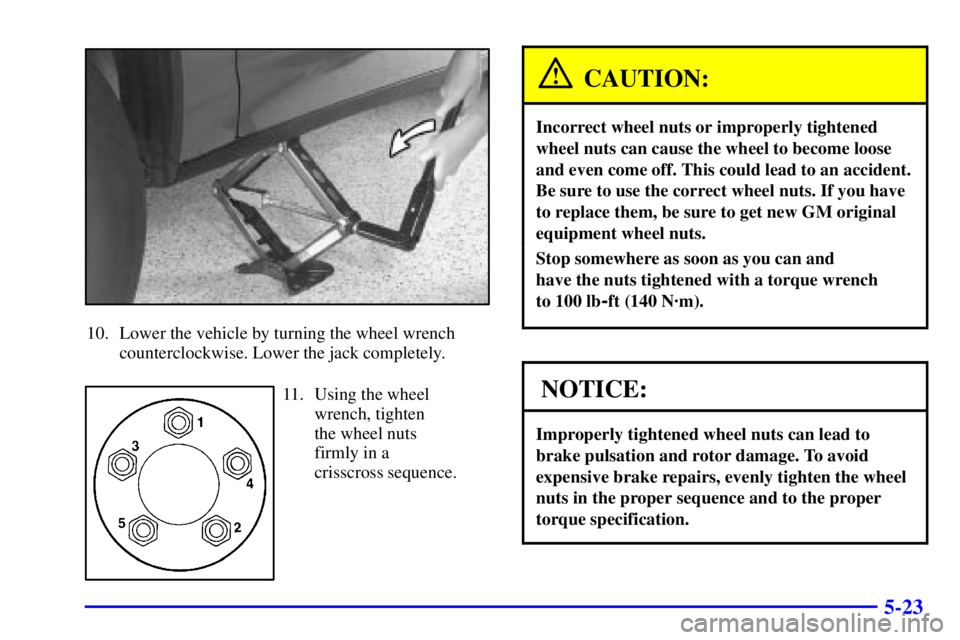
10. Lower the vehicle by turning the wheel wrench
counterclockwise. Lower the jack completely.
11. Using the wheel
wrench, tighten
the wheel nuts
firmly in a
crisscross sequence.
CAUTION:
Incorrect wheel nuts or improperly tightened
wheel nuts can cause the wheel to become loose
and even come off. This could lead to an accident.
Be sure to use the correct wheel nuts. If you have
to replace them, be sure to get new GM original
equipment wheel nuts.
Stop somewhere as soon as you can and
have the nuts tightened with a torque wrench
to 100 lb
-ft (140 N´m).
NOTICE:
Improperly tightened wheel nuts can lead to
brake pulsation and rotor damage. To avoid
expensive brake repairs, evenly tighten the wheel
nuts in the proper sequence and to the proper
torque specification.
Page 270 of 392
6-7
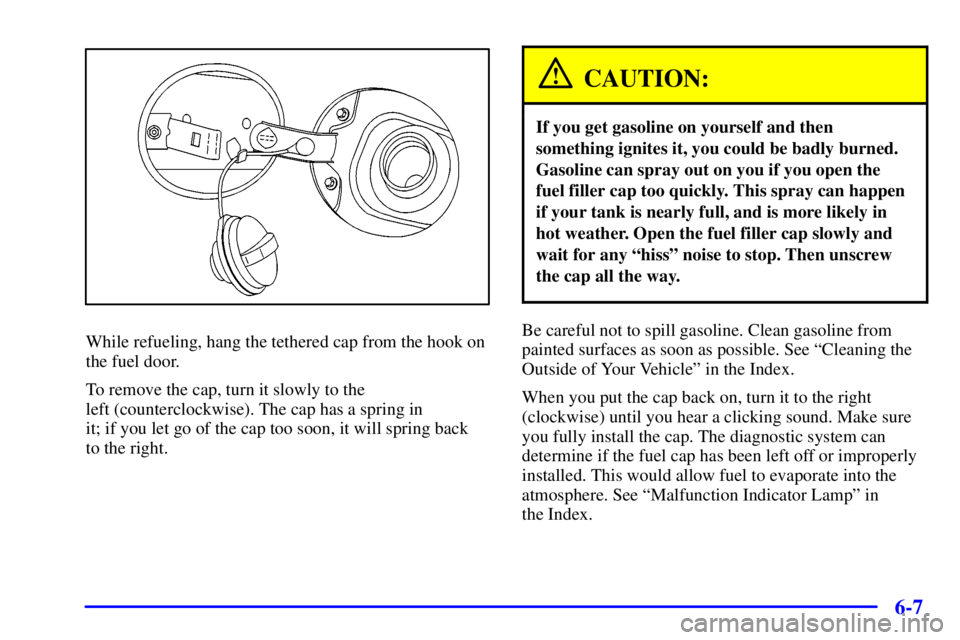
While refueling, hang the tethered cap from the hook on
the fuel door.
To remove the cap, turn it slowly to the
left (counterclockwise). The cap has a spring in
it; if you let go of the cap too soon, it will spring back
to the right.
CAUTION:
If you get gasoline on yourself and then
something ignites it, you could be badly burned.
Gasoline can spray out on you if you open the
fuel filler cap too quickly. This spray can happen
if your tank is nearly full, and is more likely in
hot weather. Open the fuel filler cap slowly and
wait for any ªhissº noise to stop. Then unscrew
the cap all the way.
Be careful not to spill gasoline. Clean gasoline from
painted surfaces as soon as possible. See ªCleaning the
Outside of Your Vehicleº in the Index.
When you put the cap back on, turn it to the right
(clockwise) until you hear a clicking sound. Make sure
you fully install the cap. The diagnostic system can
determine if the fuel cap has been left off or improperly
installed. This would allow fuel to evaporate into the
atmosphere. See ªMalfunction Indicator Lampº in
the Index.
Page 298 of 392
6-35
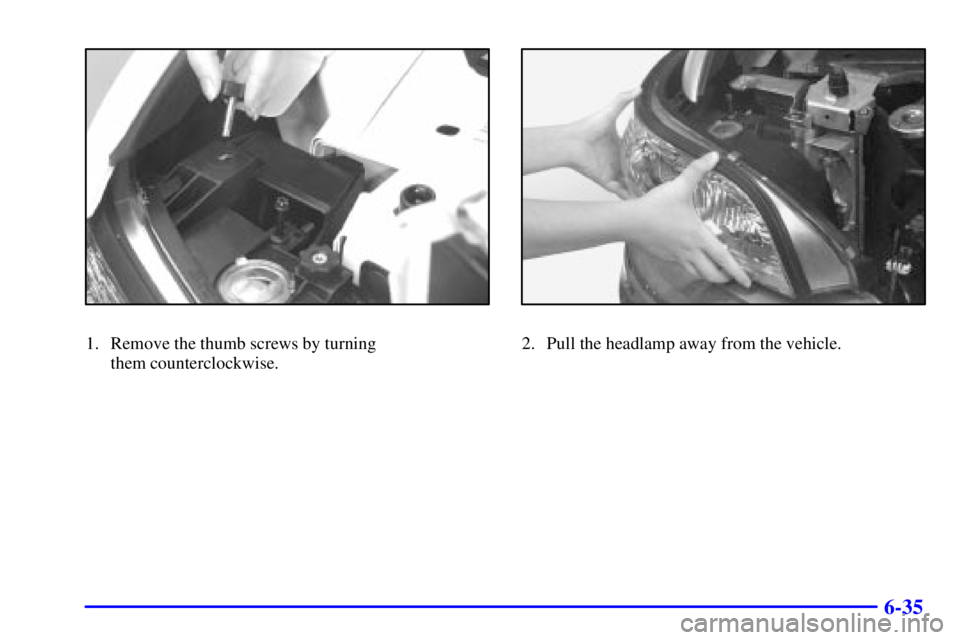
1. Remove the thumb screws by turning
them counterclockwise.2. Pull the headlamp away from the vehicle.
Page 299 of 392
6-36
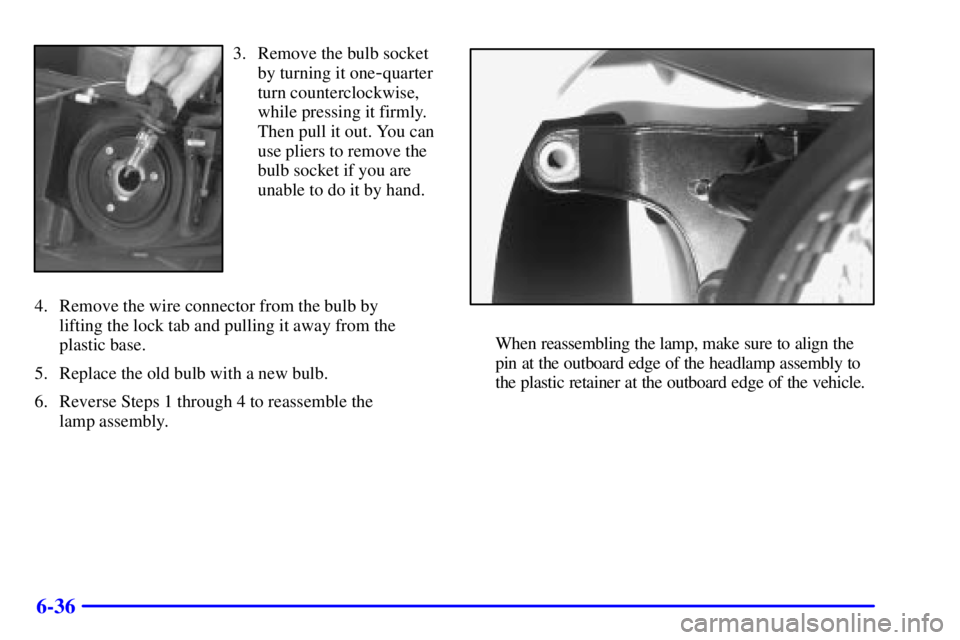
3. Remove the bulb socket
by turning it one
-quarter
turn counterclockwise,
while pressing it firmly.
Then pull it out. You can
use pliers to remove the
bulb socket if you are
unable to do it by hand.
4. Remove the wire connector from the bulb by
lifting the lock tab and pulling it away from the
plastic base.
5. Replace the old bulb with a new bulb.
6. Reverse Steps 1 through 4 to reassemble the
lamp assembly.
When reassembling the lamp, make sure to align the
pin at the outboard edge of the headlamp assembly to
the plastic retainer at the outboard edge of the vehicle.
Page 302 of 392
6-39
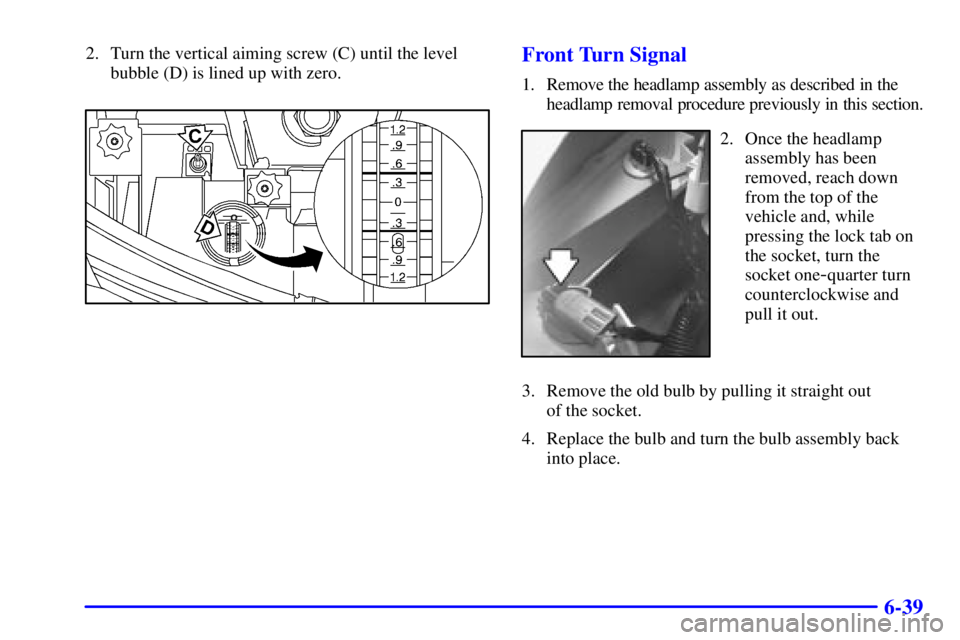
2. Turn the vertical aiming screw (C) until the level
bubble (D) is lined up with zero.Front Turn Signal
1. Remove the headlamp assembly as described in the
headlamp removal procedure previously in this section.
2. Once the headlamp
assembly has been
removed, reach down
from the top of the
vehicle and, while
pressing the lock tab on
the socket, turn the
socket one
-quarter turn
counterclockwise and
pull it out.
3. Remove the old bulb by pulling it straight out
of the socket.
4. Replace the bulb and turn the bulb assembly back
into place.
Page 303 of 392
6-40 Rear Quarterpanel Turn Signal Lamps
and Stoplamps
There are turn lamps and stoplamps that are part of the
taillamp assembly located at the rear of the vehicle on
each rear quarterpanel. The following instructions
explain how to access these bulbs. (To access the lamps
located on the trunk lid see the information following.)
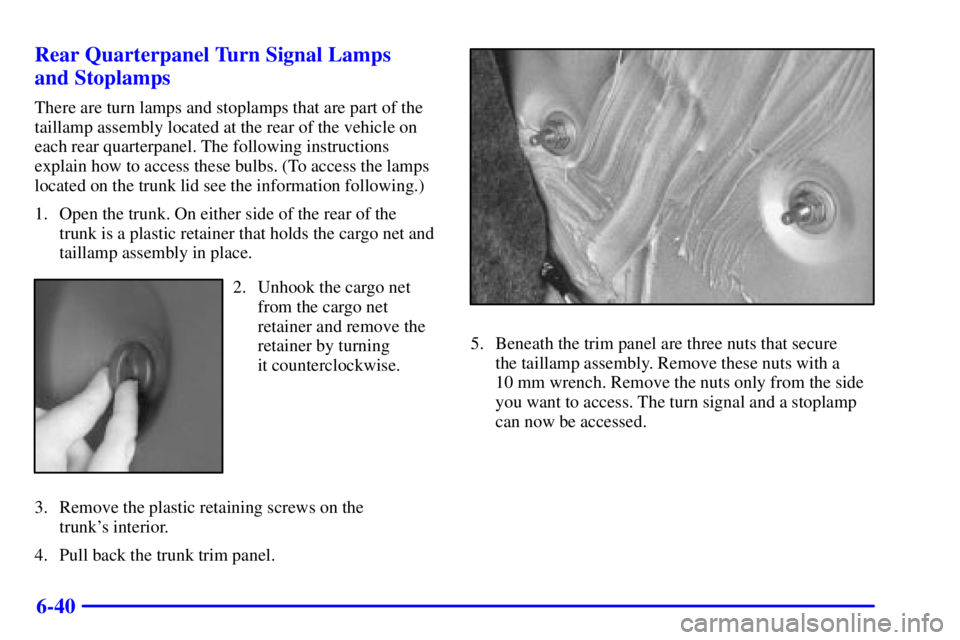
1. Open the trunk. On either side of the rear of the
trunk is a plastic retainer that holds the cargo net and
taillamp assembly in place.
2. Unhook the cargo net
from the cargo net
retainer and remove the
retainer by turning
it counterclockwise.
3. Remove the plastic retaining screws on the
trunk's interior.
4. Pull back the trunk trim panel.
5. Beneath the trim panel are three nuts that secure
the taillamp assembly. Remove these nuts with a
10 mm wrench. Remove the nuts only from the side
you want to access. The turn signal and a stoplamp
can now be accessed.