BUICK PARK AVENUE 2003 Owner's Manual
Manufacturer: BUICK, Model Year: 2003, Model line: PARK AVENUE, Model: BUICK PARK AVENUE 2003Pages: 372, PDF Size: 2.8 MB
Page 111 of 372
2. Adjust the driver's seat and lumbar position to a
safe and comfortable driving position. Adjust both
outside mirrors to suit you. See
Outside Power
Mirrors on page 2-36.
3. Press and hold the MEMORY button 1 or 2
corresponding with your DRIVER # displayed on the
DIC for longer than three seconds. You will hear
two beeps con®rming that the seat and mirror
positions have been entered into memory.
To set the seat and mirror positions for a second driver,
follow the previous steps, but start by pressing the
unlock button on the transmitter that displays the other
DRIVER # on the DIC. Be sure to use the MEMORY
button which corresponds to the DRIVER # identi®ed by
the second transmitter.
To recall your memory positions, your vehicle must
be in PARK (P). Push and release the MEMORY
button 1 or 2 corresponding to the desired driving
position. The seat and mirrors will move to the position
previously stored for the identi®ed driver. You will
hear one beep.
To store the exit position for an easy exit, use the
following procedure:
1. First identify the DRIVER # by pressing the
MEMORY button 1 or 2 or by pressing the unlock
button on the transmitter.
2. Adjust the driver's seat to the desired exit position.3. Press and hold the EXIT button for longer than
three seconds. You will hear two beeps con®rming
that the seat exit position has been entered into
memory.
To set the exit position for a second driver, follow the
previous steps, but start by pressing the unlock
button on the transmitter that displays the other
DRIVER # on the DIC. Be sure to use the MEMORY
button which corresponds to the DRIVER # identi®ed by
the other transmitter.
To recall the exit position, your vehicle must be in
PARK (P). Push and release the EXIT button and the
seat will move to the exit position previously stored
for the currently identi®ed driver. You will hear one beep.
If an exit position has not been stored for the currently
identi®ed driver, the seat will move all the way back.
To stop recall movement of the seat at any time, press
the driver's power seat control located on the outboard
side of the front seat.
Mirrors and lumbar positions will not be stored or
recalled for the exit position.
If you would like your stored driving or exit position to
be recalled when unlocking your vehicle with the
transmitter, see
DIC Vehicle Personalization on
page 3-46.
2-47
Page 112 of 372
-NOTES
2-48
Page 113 of 372
Instrument Panel Overview...............................3-2
Hazard Warning Flashers................................3-4
Other Warning Devices...................................3-4
Horn.............................................................3-5
Tilt Wheel.....................................................3-5
Turn Signal/Multifunction Lever.........................3-5
Exterior Lamps.............................................3-12
Interior Lamps..............................................3-14
Head-Up Display (HUD).................................3-17
Ultrasonic Rear Parking Assist (URPA)............3-19
Accessory Power Outlets...............................3-21
Ashtrays and Cigarette Lighter........................3-22
Climate Controls............................................3-22
Dual Automatic Climate Control System...........3-22
Outlet Adjustment.........................................3-26
Passenger Compartment Air Filter...................3-27
Steering Wheel Climate Controls.....................3-28
Climate Controls Personalization.....................3-28
Warning Lights, Gages and Indicators.............3-29
Instrument Panel Cluster................................3-30
Speedometer and Odometer...........................3-32
Tachometer.................................................3-32
Safety Belt Reminder Light.............................3-33
Air Bag Readiness Light................................3-33
Battery Warning Light....................................3-34
Brake System Warning Light..........................3-34Anti-Lock Brake System Warning Light.............3-36
Traction Control System (TCS) Warning Light . . .3-36
Engine Coolant Temperature Gage..................3-37
Malfunction Indicator Lamp.............................3-37
Oil Pressure Light.........................................3-40
Security Light...............................................3-41
Cruise Control Light......................................3-41
Service Vehicle Soon Light............................3-41
Fuel Gage...................................................3-42
Driver Information Center (DIC).......................3-43
DIC Controls and Displays.............................3-43
DIC Warnings and Messages.........................3-45
DIC Vehicle Personalization............................3-46
Audio System(s).............................................3-51
Setting the Time...........................................3-52
Radio with Cassette......................................3-52
Radio with Cassette and CD..........................3-56
Trunk-Mounted CD Changer...........................3-62
Personal Choice Radio Controls......................3-65
Theft-Deterrent Feature..................................3-66
Audio Steering Wheel Controls.......................3-68
Understanding Radio Reception......................3-68
Care of Your Cassette Tape Player.................3-69
Care of Your CDs.........................................3-70
Care of Your CD Player................................3-70
Heated Backlite Antenna................................3-70
Section 3 Instrument Panel
3-1
Page 114 of 372
Instrument Panel Overview
3-2
Page 115 of 372
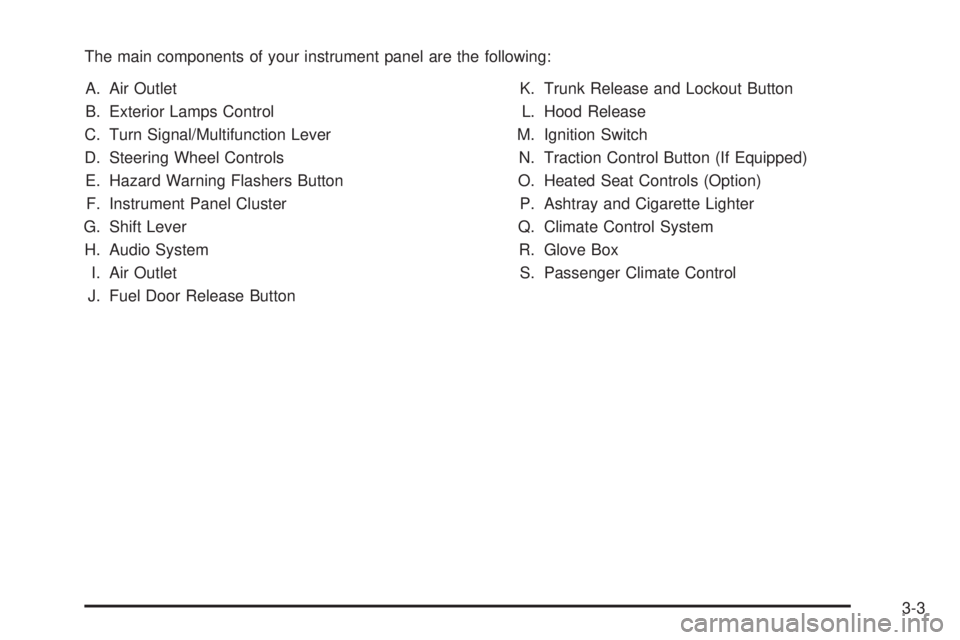
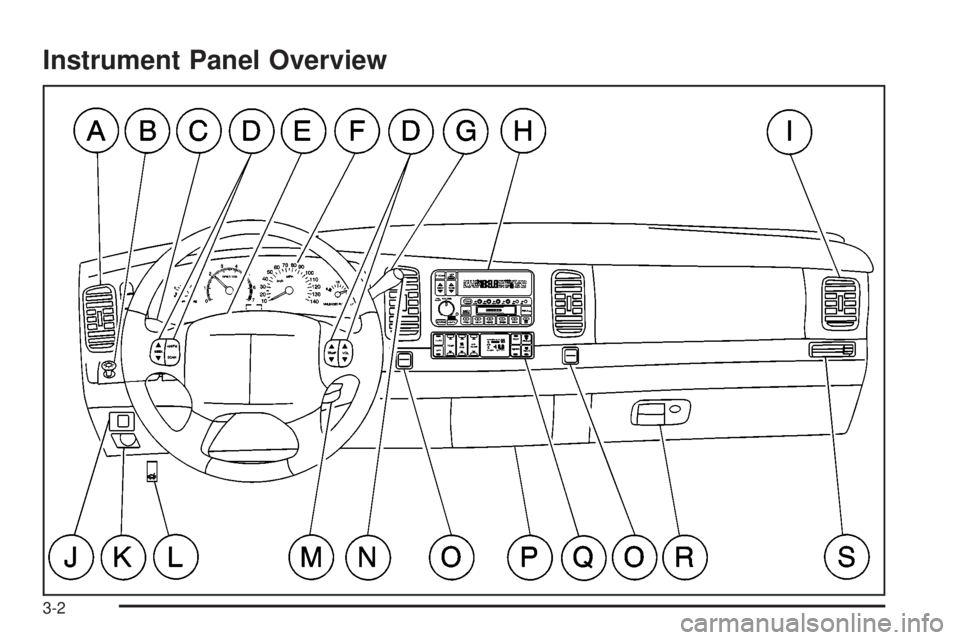
The main components of your instrument panel are the following:
A. Air Outlet
B. Exterior Lamps Control
C. Turn Signal/Multifunction Lever
D. Steering Wheel Controls
E. Hazard Warning Flashers Button
F. Instrument Panel Cluster
G. Shift Lever
H. Audio System
I. Air Outlet
J. Fuel Door Release ButtonK. Trunk Release and Lockout Button
L. Hood Release
M. Ignition Switch
N. Traction Control Button (If Equipped)
O. Heated Seat Controls (Option)
P. Ashtray and Cigarette Lighter
Q. Climate Control System
R. Glove Box
S. Passenger Climate Control
3-3
Page 116 of 372
Hazard Warning Flashers
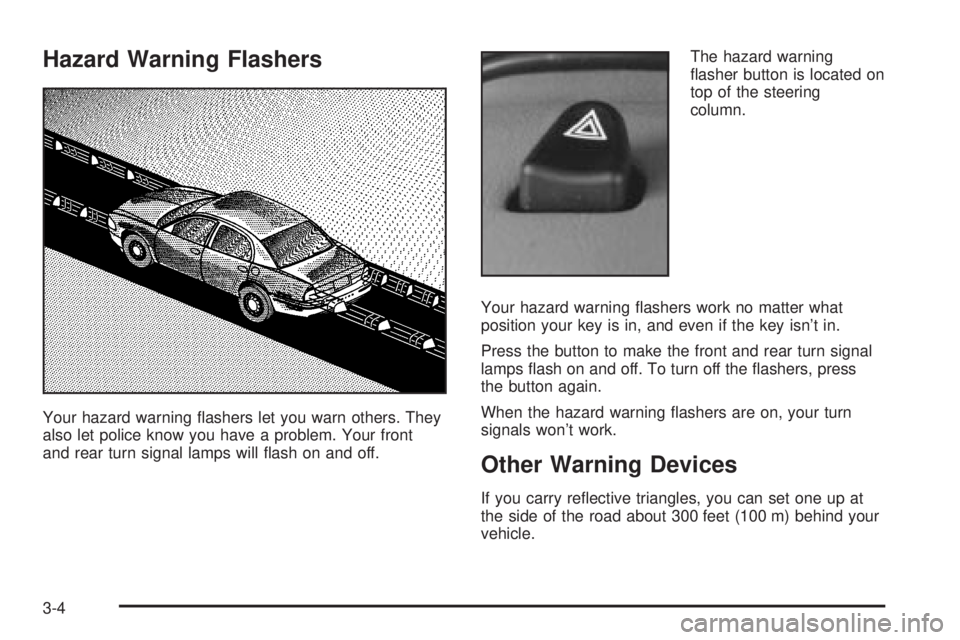
Your hazard warning ¯ashers let you warn others. They
also let police know you have a problem. Your front
and rear turn signal lamps will ¯ash on and off.The hazard warning
¯asher button is located on
top of the steering
column.
Your hazard warning ¯ashers work no matter what
position your key is in, and even if the key isn't in.
Press the button to make the front and rear turn signal
lamps ¯ash on and off. To turn off the ¯ashers, press
the button again.
When the hazard warning ¯ashers are on, your turn
signals won't work.
Other Warning Devices
If you carry re¯ective triangles, you can set one up at
the side of the road about 300 feet (100 m) behind your
vehicle.
3-4
Page 117 of 372
Horn
Press on the center area of the steering wheel to sound
the horn.
Tilt Wheel
A tilt wheel allows you to adjust the steering wheel
before you drive. You can also raise it to the highest
level to give your legs more room when you exit
and enter the vehicle.
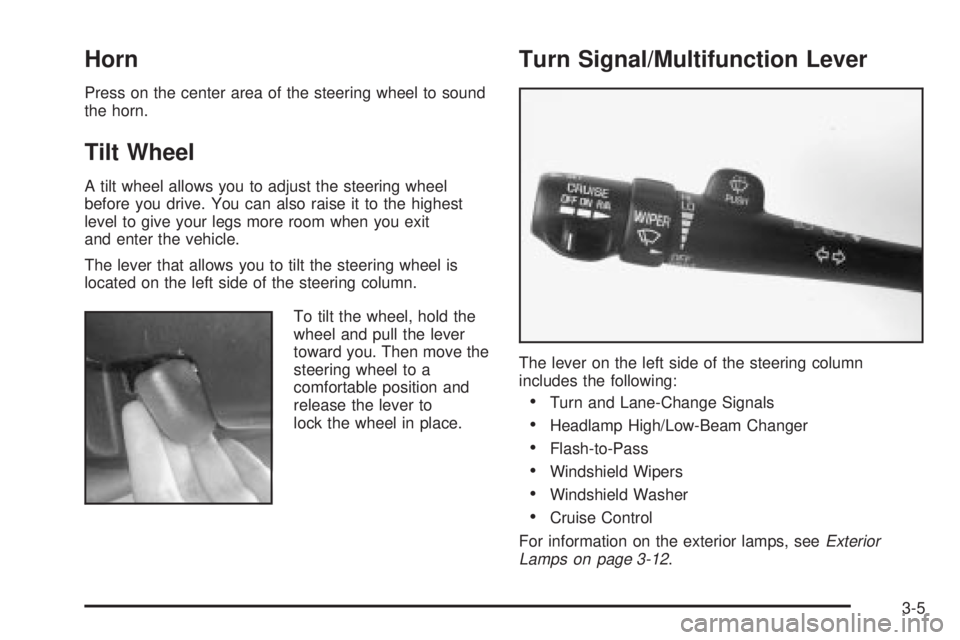
The lever that allows you to tilt the steering wheel is
located on the left side of the steering column.
To tilt the wheel, hold the
wheel and pull the lever
toward you. Then move the
steering wheel to a
comfortable position and
release the lever to
lock the wheel in place.
Turn Signal/Multifunction Lever
The lever on the left side of the steering column
includes the following:
·Turn and Lane-Change Signals
·Headlamp High/Low-Beam Changer
·Flash-to-Pass
·Windshield Wipers
·Windshield Washer
·Cruise Control
For information on the exterior lamps, see
Exterior
Lamps on page 3-12.
3-5
Page 118 of 372
Turn and Lane-Change Signals
The turn signal has two upward (for right) and two
downward (for left) positions. These positions allow you
to signal a turn or a lane change.
To signal a turn, move the lever all the way up or down.
When the turn is ®nished, the lever will return
automatically.
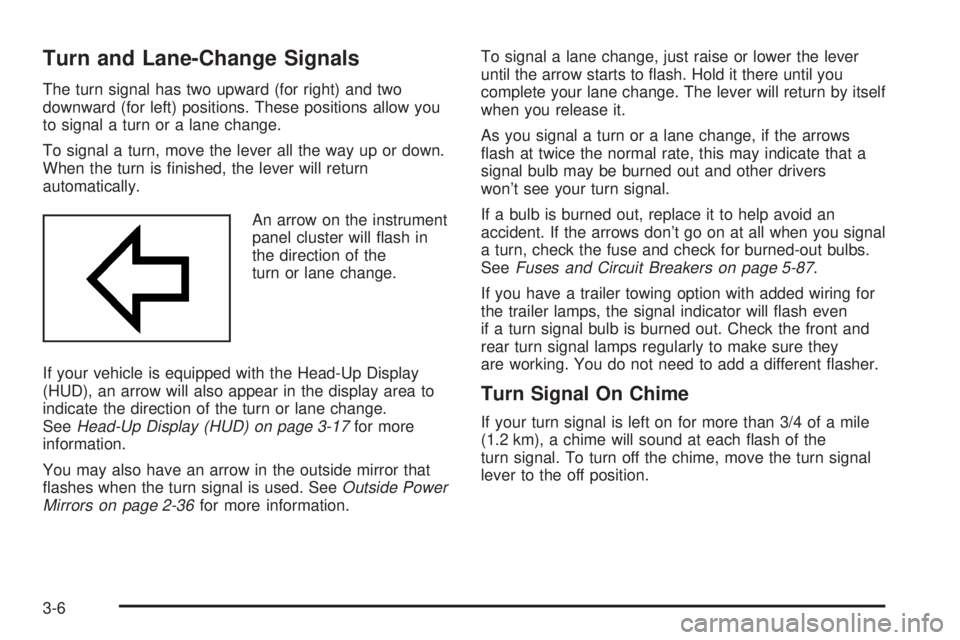
An arrow on the instrument
panel cluster will ¯ash in
the direction of the
turn or lane change.
If your vehicle is equipped with the Head-Up Display
(HUD), an arrow will also appear in the display area to
indicate the direction of the turn or lane change.
See
Head-Up Display (HUD) on page 3-17for more
information.
You may also have an arrow in the outside mirror that
¯ashes when the turn signal is used. See
Outside Power
Mirrors on page 2-36for more information.To signal a lane change, just raise or lower the lever
until the arrow starts to ¯ash. Hold it there until you
complete your lane change. The lever will return by itself
when you release it.
As you signal a turn or a lane change, if the arrows
¯ash at twice the normal rate, this may indicate that a
signal bulb may be burned out and other drivers
won't see your turn signal.
If a bulb is burned out, replace it to help avoid an
accident. If the arrows don't go on at all when you signal
a turn, check the fuse and check for burned-out bulbs.
See
Fuses and Circuit Breakers on page 5-87.
If you have a trailer towing option with added wiring for
the trailer lamps, the signal indicator will ¯ash even
if a turn signal bulb is burned out. Check the front and
rear turn signal lamps regularly to make sure they
are working. You do not need to add a different ¯asher.
Turn Signal On Chime
If your turn signal is left on for more than 3/4 of a mile
(1.2 km), a chime will sound at each ¯ash of the
turn signal. To turn off the chime, move the turn signal
lever to the off position.
3-6
Page 119 of 372
Headlamp High/Low-Beam Changer
To change the headlamps from low beam to high or high
to low, pull the turn signal lever toward you, then
release it.
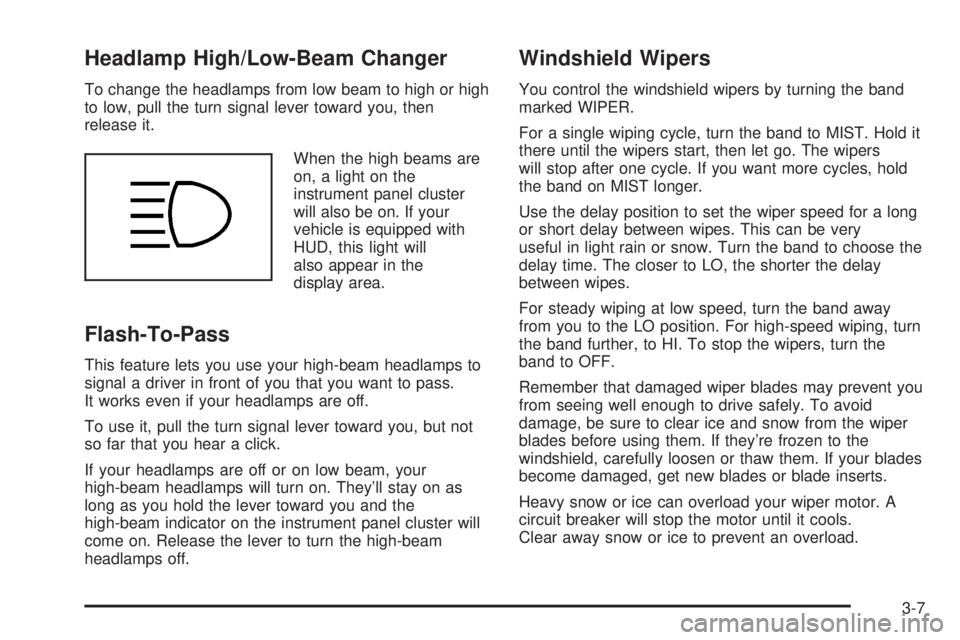
When the high beams are
on, a light on the
instrument panel cluster
will also be on. If your
vehicle is equipped with
HUD, this light will
also appear in the
display area.
Flash-To-Pass
This feature lets you use your high-beam headlamps to
signal a driver in front of you that you want to pass.
It works even if your headlamps are off.
To use it, pull the turn signal lever toward you, but not
so far that you hear a click.
If your headlamps are off or on low beam, your
high-beam headlamps will turn on. They'll stay on as
long as you hold the lever toward you and the
high-beam indicator on the instrument panel cluster will
come on. Release the lever to turn the high-beam
headlamps off.
Windshield Wipers
You control the windshield wipers by turning the band
marked WIPER.
For a single wiping cycle, turn the band to MIST. Hold it
there until the wipers start, then let go. The wipers
will stop after one cycle. If you want more cycles, hold
the band on MIST longer.
Use the delay position to set the wiper speed for a long
or short delay between wipes. This can be very
useful in light rain or snow. Turn the band to choose the
delay time. The closer to LO, the shorter the delay
between wipes.
For steady wiping at low speed, turn the band away
from you to the LO position. For high-speed wiping, turn
the band further, to HI. To stop the wipers, turn the
band to OFF.
Remember that damaged wiper blades may prevent you
from seeing well enough to drive safely. To avoid
damage, be sure to clear ice and snow from the wiper
blades before using them. If they're frozen to the
windshield, carefully loosen or thaw them. If your blades
become damaged, get new blades or blade inserts.
Heavy snow or ice can overload your wiper motor. A
circuit breaker will stop the motor until it cools.
Clear away snow or ice to prevent an overload.
3-7
Page 120 of 372
RainsenseŸ II Wipers
If your vehicle has this feature, the moisture sensor is
mounted on the interior of the windshield below the
rearview mirror and is used to automatically operate the
wipers. This system operates by monitoring the
amount of moisture build-up on the windshield. Wipes
occur as needed to clear the windshield depending
on the driving conditions and the sensitivity setting. In
light rain or snow, fewer wipes will occur. In heavy
rain or snow, wipes will occur more frequently.
The system will operate in the delay, low speed and
high speed modes. If the system is left on for long
periods of time, occasional wipes may occur without any
moisture on the windshield. This is normal and
indicates that the RainsenseŸ system is active.
The RainsenseŸ system is activated by turning the
wiper control band to one of the ®ve sensitivity levels
within the delay area. The delay position closest to
OFF/MIST is the lowest sensitivity setting, level
one. This allows more rain or snow to collect on the
windshield between wipes. You can increase the
sensitivity of the system and the frequency of wipes by
turning the wiper control band away from you to the
higher sensitivity levels. The highest sensitivity setting,
level ®ve, is closest to the LO position. A single wipe
will occur each time you turn the wiper control band to a
higher sensitivity level to indicate that the sensitivity
level has been increased.The windshield wipers also remain in a ªhigh parkº
position (the wipers are stopped on the windshield and
are not in the normal park position), even when the
ignition is turned off.
Notice:Turn the windshield wiper band on the
multifunction lever to off to avoid wiper damage
when going through an automatic car wash.
The MIST and wash cycles operate as normal and are
not affected by the moisture-sensing function. The
system can be overridden at any time by manually
turning the wiper band to LO or HI speed.
Notice:Do not place stickers or other items on the
exterior glass surface directly in front of the
moisture sensor. Doing this could cause the
moisture sensor to malfunction.
Windshield Washer
At the top of the multifunction lever there is a paddle
with the word PUSH on it. For ªprogrammedº operation,
press and release the paddle. The washer will provide
a measured amount of ¯uid to the windshield and
the wiper will either stop or return to your original wiping
speed. For ªdemandº operation, press and hold the
paddle for at least two seconds. Release the paddle
when you have enough ¯uid and the wipers will either
stop or return to your original wiping speed.
3-8