air condition BUICK PARK AVENUE 2003 Owner's Manual
[x] Cancel search | Manufacturer: BUICK, Model Year: 2003, Model line: PARK AVENUE, Model: BUICK PARK AVENUE 2003Pages: 372, PDF Size: 2.8 MB
Page 102 of 372
For more information, visit www.onstar.com, contact
OnStaržat 1-888-4-ONSTAR (1-888-466-7827),
or press the blue OnStaržbutton to speak to an OnStarž
advisor 24 hours a day, 7 days a week.
A completed Subscription Service Agreement is required
prior to delivery of OnStar
žservices and prepaid
calling minutes are also required for OnStaržPersonal
Calling and OnStaržVirtual Advisor use. Terms and
conditions of the Subscription Service Agreement can be
found at www.onstar.com.
OnStaržServices
One of the following plans is normally included for a
speci®c duration with each vehicle equipped with
OnStar
ž. You can upgrade or extend your OnStarž
service plan to meet your needs.
Safe and Sound Plan
·
Automatic Noti®cation of Air Bag Deployment
·Emergency Services
·Roadside Assistance
·Stolen Vehicle Assistance
·AccidentAssist
·Remote Door Unlock
·Remote Diagnostics
·Online Concierge
Directions and Connections Plan
·
All Safe and Sound Plan services
·Route Support
·RideAssist
·Information and Convenience Services
Luxury and Leisure Plan
·
All Directions and Connections Plan services
·Personal Concierge
OnStaržPersonal Calling
With OnStaržPersonal Calling, you have a safer way to
stay connected while driving. It's a hands-free wireless
phone that's integrated into your vehicle. You can place
calls nationwide using voice-activated dialing with no
contracts and no additional roaming charges. To ®nd out
more about OnStar
žPersonal Calling, refer to the
OnStaržowner's guide in your vehicle's glove box, or
call OnStaržat 1-888-4-ONSTAR (1-888-466-7827).
OnStaržVirtual Advisor
With OnStaržVirtual Advisor you can listen to your
favorite news, entertainment and information topics,
such as traffic and weather reports, stock quotes
and sports scores. You listen to your e-mail through
your vehicle's speakers, and reply with your hands on
the wheel and your eyes on the road.
2-38
Page 133 of 372
If the URPA system is not functioning properly, the
display will ¯ash red, indicating that there is a problem.
The light will also ¯ash red when you are driving if a
trailer is attached to your vehicle, or if you have a bicycle
or an object hanging out of your trunk. The light will
continue to ¯ash until the trailer or the object is removed
and your vehicle is driven forward at at least 15 mph
(25 km/h). It may also ¯ash red if the ultrasonic sensors
are not kept clean. For cleaning instructions, see
Cleaning the Outside of Your Vehicle on page 5-82.
So be sure to keep your rear bumper free of mud, dirt,
snow, ice and slush or the system may not work
properly. If after cleaning the rear bumper and then
driving at at least 15 mph (25 km/h), the display
continues to ¯ash red, see your dealer. It may also ¯ash
red if your vehicle is moving in REVERSE (R) at a
speed greater than 3 mph (5 km/h). Other conditions
that may affect system performance include things like,
the vibrations from a jackhammer or the compression
of airbrakes on a very large truck.
As always, drivers should use care when backing up a
vehicle. Always look behind you, being sure to check
for other vehicles, obstructions and blind spots.
Accessory Power Outlets
The accessory power outlets can be used to plug in
electrical equipment such as a cellular telephone or
CB radio.Your vehicle has two power outlets located in the rear
storage area of the front center console. See
Center
Console Storage Area on page 2-44for more
information on location.
Your vehicle may have a small cap that must be pulled
down to access the accessory power outlet. If it
does, when not using the outlet be sure to cover it with
the protective cap.
The accessory power outlets will only operate while the
ignition key is in RUN and for 10 minutes after turning
the ignition off. If you would like to operate an accessory
for an extended period of time, contact your dealer for
more information.
Notice:When using an accessory power outlet,
maximum electrical load must not exceed 15 amps.
Always turn off any electrical equipment when
not in use. Leaving electrical equipment on for
extended periods will drain your battery.
Certain electrical accessories may not be compatible to
the accessory power outlet and could result in blown
vehicle or adapter fuses. If you experience a problem
see your dealer for additional information on accessory
power outlets.
Notice:Adding some electrical equipment to your
vehicle can damage it or keep other things from
working as they should. This wouldn't be covered by
your warranty. Check with your dealer before
adding electrical equipment, and never use anything
that exceeds the amperage rating.
3-21
Page 136 of 372
WINDSHIELD-FLOOR:This mode directs most of the
air¯ow to the windshield with some air¯ow to the
outboard outlets (for the side windows) and the ¯oor
outlets.
MID:This mode directs air¯ow through the instrument
panel outlets.
FLOOR-MID:This mode directs air¯ow through both
the ¯oor and the instrument panel outlets. There is also
a small amount of air directed to the windshield and
the outboard outlets (for the side windows).
FLOOR:This mode directs most of the air¯ow to the
¯oor outlets with some directed to the outboard
outlets (for the side windows) and the windshield.
OFF:Press the OFF button once to turn off the
passenger climate control, if it has been activated.
Pressing the OFF button a second time will turn off the
main system. The outside temperature will be shown
on the display when the system is off.
VENT:Pressing the VENT button allows outside air to
¯ow through your vehicle without the air conditioning
compressor working. To turn off the VENT selection,
push the VENT button again.
Selecting the VENT and AUTO buttons at the same
time allows the system to control the air¯ow
automatically without using the air conditioning
compressor or the recirculation mode.RECIRC (Recirculation):Press this button to limit the
amount of outside air coming into the vehicle. It can
be used to prevent outside air and odors from entering
your vehicle or to help heat or cool the air inside
your vehicle more quickly. Press this button to turn the
recirculation mode on or off. When the button is
pressed, an indicator light will come on. The recirculation
mode cannot be used with the FRONT defrost or
VENT mode.
On hot days, open the windows to let hot air escape;
then close them. This helps to reduce the time it takes
for your vehicle to cool down. It also helps the system
to operate more efficiently.
For quick cool down on hot days, press the AUTO
button and the system will automatically enter
recirculation mode and the temperature will be at the full
cold position for maximum cooling.
Using these settings together for long periods of time
may cause the air inside of your vehicle to become too
dry. To prevent this from happening, after the air in
your vehicle has cooled, turn the recirculation mode off.
The air conditioning system removes moisture from
the air, so you may sometimes notice a small amount of
water dripping underneath your vehicle while idling or
after turning off the engine. This is normal.
3-24
Page 149 of 372
·If there's a brake system problem that is speci®cally
related to traction control, the traction control
system will turn off, the warning light will come on
and the chime will sound.
·If the traction control system is affected by an
engine-related problem, the system will turn off, the
warning light will come on and the chime will sound.
If the traction control system warning light comes on and
stays on for an extended period of time when the
system is turned on, your vehicle needs service.
Engine Coolant Temperature Gage
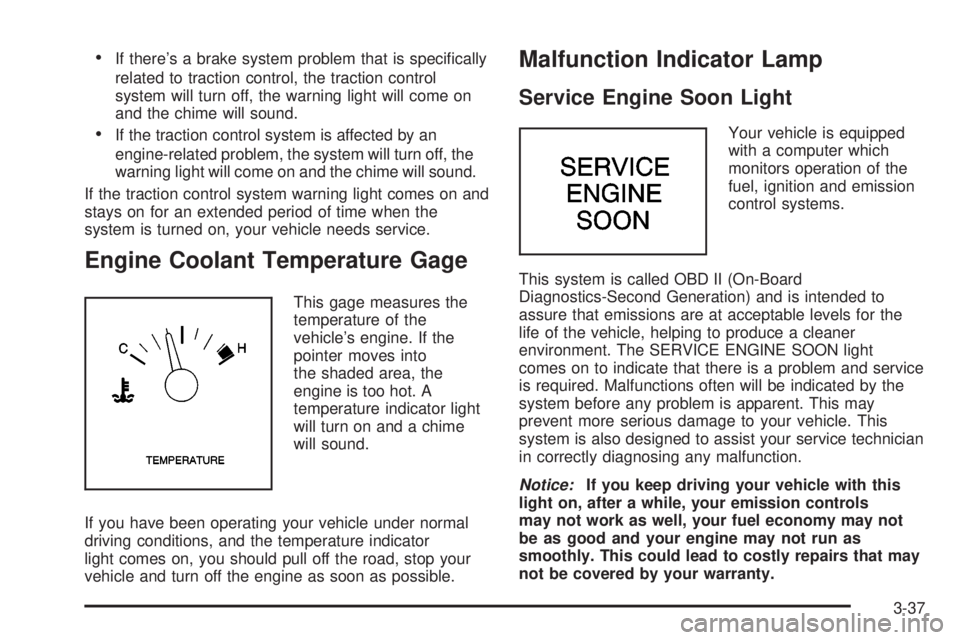
This gage measures the
temperature of the
vehicle's engine. If the
pointer moves into
the shaded area, the
engine is too hot. A
temperature indicator light
will turn on and a chime
will sound.
If you have been operating your vehicle under normal
driving conditions, and the temperature indicator
light comes on, you should pull off the road, stop your
vehicle and turn off the engine as soon as possible.
Malfunction Indicator Lamp
Service Engine Soon Light
Your vehicle is equipped
with a computer which
monitors operation of the
fuel, ignition and emission
control systems.
This system is called OBD II (On-Board
Diagnostics-Second Generation) and is intended to
assure that emissions are at acceptable levels for the
life of the vehicle, helping to produce a cleaner
environment. The SERVICE ENGINE SOON light
comes on to indicate that there is a problem and service
is required. Malfunctions often will be indicated by the
system before any problem is apparent. This may
prevent more serious damage to your vehicle. This
system is also designed to assist your service technician
in correctly diagnosing any malfunction.
Notice:If you keep driving your vehicle with this
light on, after a while, your emission controls
may not work as well, your fuel economy may not
be as good and your engine may not run as
smoothly. This could lead to costly repairs that may
not be covered by your warranty.
3-37
Page 150 of 372
Notice:Modi®cations made to the engine,
transaxle, exhaust, intake or fuel system of your
vehicle or the replacement of the original tires with
other than those of the same Tire Performance
Criteria (TPC) can affect your vehicle's emission
controls and may cause this light to come on.
Modi®cations to these systems could lead to costly
repairs not covered by your warranty. This may
also result in a failure to pass a required Emission
Inspection/Maintenance test.
This light should come on, as a check to show you it is
working, when the ignition is on and the engine is
not running. If the light doesn't come on, have it
repaired. This light will also come on during a
malfunction in one of two ways:
·Light FlashingÐ A mis®re condition has been
detected. A mis®re increases vehicle emissions and
may damage the emission control system on your
vehicle. Diagnosis and service may be required.
·Light On SteadyÐ An emission control system
malfunction has been detected on your vehicle.
Diagnosis and service may be required.
If the Light Is Flashing
The following may prevent more serious damage to
your vehicle:
·Reducing vehicle speed.
·Avoiding hard accelerations.
·Avoiding steep uphill grades.
·If you are towing a trailer, reduce the amount of
cargo being hauled as soon as it is possible.
If the light stops ¯ashing and remains on steady, see ªIf
the Light Is On Steadyº following.
If the light continues to ¯ash, when it is safe to do so,
stop the vehicle.Find a safe place to park your vehicle.
Turn the key off, wait at least 10 seconds and restart
the engine. If the light remains on steady, see ªIf
the Light Is On Steadyº following. If the light is still
¯ashing, follow the previous steps, and see your dealer
for service as soon as possible.
If the Light Is On Steady
You may be able to correct the emission system
malfunction by considering the following:
Did you recently put fuel into your vehicle?
If so, reinstall the fuel cap, making sure to fully install
the cap. See
Filling Your Tank on page 5-7. The
diagnostic system can determine if the fuel cap has
been left off or improperly installed. A loose or missing
fuel cap will allow fuel to evaporate into the atmosphere.
A few driving trips with the cap properly installed
should turn the light off.
3-38
Page 177 of 372
Compact Disc Changer Errors
E (Error):If this message and a number appear on the
display, an error has occurred and the compact disc
temporarily cannot play.
The CD changer will send an error message to the
receiver to indicate:
·E30:Disc Loaded Incorrectly (Label Side Up)
·E34:CD Changer Door Open (Completely close the
door to restore normal operation.)
·E35:CD Changer Cartridge Empty (Try the
magazine again with a disc loaded on one of
the trays.)
If the error occurred while trying to play a CD in the
compact disc player or changer, the following conditions
may have caused the error:
·You're driving on a very rough road. When the road
becomes smoother, the disc should play.
·The disc is dirty, scratched, wet or upside down.
·The air is very humid. If so, wait about an hour and
try again.
If any error occurs repeatedly or if an error cannot be
corrected, contact your dealership. If your radio displays
an error number other than the error codes listed
previously, write it down and provide it to your dealership
when reporting the problem.
Personal Choice Radio Controls
If your vehicle has this feature it will enable two drivers
to store and recall personal settings for radio presets,
last tuned station, volume, tone, and audio source
(radio, cassette, or CD).
The memory buttons 1 and 2 for this feature are located
on the driver's door panel and correspond to the
numbers 1 and 2 found on the back of each remote
keyless entry transmitter.
To recall audio sources, press the unlock button on the
remote keyless entry transmitter and turn the ignition
on. The source last listened to will be recalled for
the identi®ed driver 1 or 2.
To program this feature, do the following:
1. Set all radio preferences. For more information see
ªSetting Preset Stationsº and ªSetting the Toneº
listed for your particular radio.
2. Locate the memory buttons on the driver's door
panel.
3. Press one of the memory buttons 1 or 2 until you
hear two beeps. The beeps con®rm that your
selection has been saved and can now be recalled.
Follow these steps each time you want to change the
stored settings.
3-65
Page 225 of 372
Gasoline Speci®cations
It is recommended that gasoline meet speci®cations
which were developed by the American Automobile
Manufacturers Association and endorsed by the
Canadian Vehicle Manufacturers Association for better
vehicle performance and engine protection. Gasoline
meeting these speci®cations could provide improved
driveability and emission control system performance
compared to other gasoline.
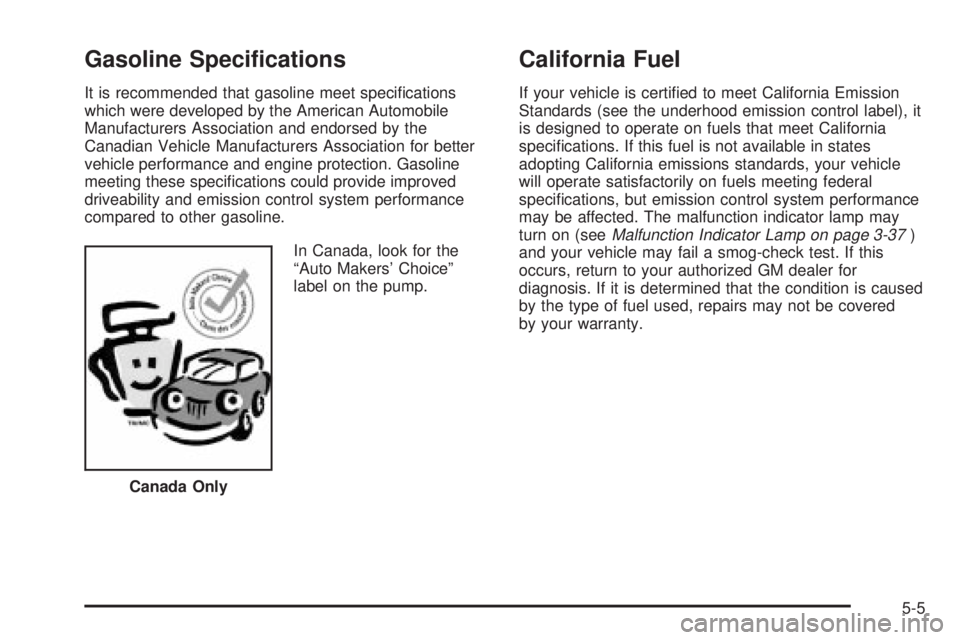
In Canada, look for the
ªAuto Makers' Choiceº
label on the pump.
California Fuel
If your vehicle is certi®ed to meet California Emission
Standards (see the underhood emission control label), it
is designed to operate on fuels that meet California
speci®cations. If this fuel is not available in states
adopting California emissions standards, your vehicle
will operate satisfactorily on fuels meeting federal
speci®cations, but emission control system performance
may be affected. The malfunction indicator lamp may
turn on (see
Malfunction Indicator Lamp on page 3-37)
and your vehicle may fail a smog-check test. If this
occurs, return to your authorized GM dealer for
diagnosis. If it is determined that the condition is caused
by the type of fuel used, repairs may not be covered
by your warranty.
Canada Only
5-5
Page 240 of 372
Engine Air Cleaner/Filter
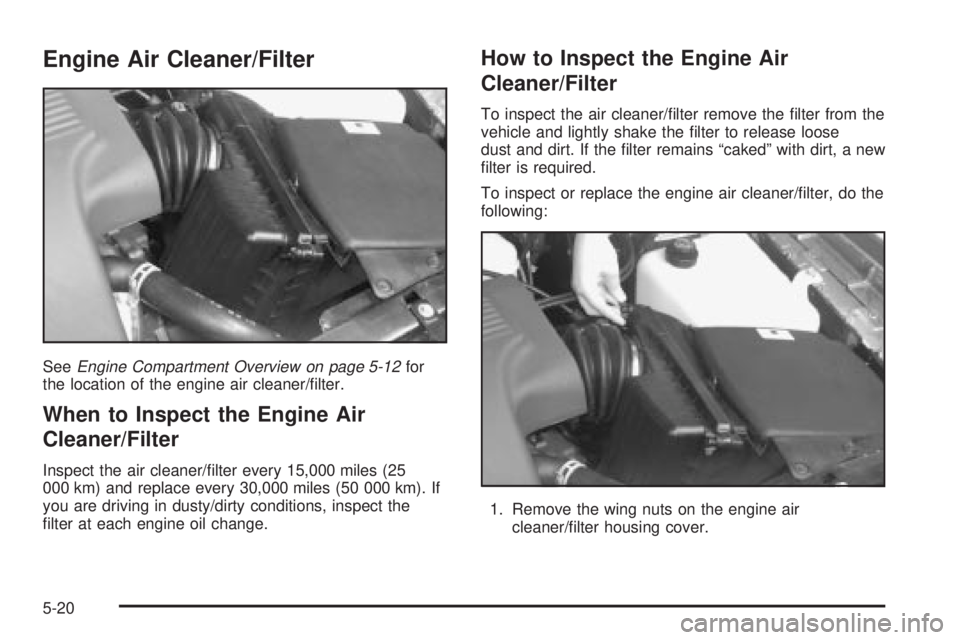
SeeEngine Compartment Overview on page 5-12for
the location of the engine air cleaner/®lter.
When to Inspect the Engine Air
Cleaner/Filter
Inspect the air cleaner/®lter every 15,000 miles (25
000 km) and replace every 30,000 miles (50 000 km). If
you are driving in dusty/dirty conditions, inspect the
®lter at each engine oil change.
How to Inspect the Engine Air
Cleaner/Filter
To inspect the air cleaner/®lter remove the ®lter from the
vehicle and lightly shake the ®lter to release loose
dust and dirt. If the ®lter remains ªcakedº with dirt, a new
®lter is required.
To inspect or replace the engine air cleaner/®lter, do the
following:
1. Remove the wing nuts on the engine air
cleaner/®lter housing cover.
5-20
Page 242 of 372
{CAUTION:
Operating the engine with the air cleaner/®lter
off can cause you or others to be burned. The
air cleaner not only cleans the air, it helps to
stop ¯ame if the engine back®res. If it is not
there and the engine back®res, you could be
burned. Do not drive with it off, and be
careful working on the engine with the air
cleaner/®lter off.
Notice:If the air cleaner/®lter is off, a back®re can
cause a damaging engine ®re. And, dirt can
easily get into your engine, which will damage it.
Always have the air cleaner/®lter in place when
you're driving.
Automatic Transaxle Fluid
When to Check and Change
A good time to check your automatic transaxle ¯uid
level is when the engine oil is changed.Change both the ¯uid and ®lter every 50,000 miles
(83 000 km) if the vehicle is mainly driven under one or
more of these conditions:
·In heavy city traffic where the outside temperature
regularly reaches 90ÉF (32ÉC) or higher.
·In hilly or mountainous terrain.
·When doing frequent trailer towing.
·Uses such as found in taxi, police or delivery
service.
If you do not use your vehicle under any of these
conditions, change the ¯uid and ®lter at 100,000 miles
(166 000 km).
How to Check
Because this operation can be a little difficult, you may
choose to have this done at the dealership service
department.
If you do it yourself, be sure to follow all the instructions
here, or you could get a false reading on the dipstick.
Notice:Too much or too little ¯uid can damage
your transaxle. Too much can mean that some of the
¯uid could come out and fall on hot engine or
exhaust system parts, starting a ®re. Too little ¯uid
could cause the transaxle to overheat. Be sure
to get an accurate reading if you check your
transaxle ¯uid.
5-22
Page 286 of 372
Temperature ± A, B, C
The temperature grades are A (the highest), B, and C,
representing the tire's resistance to the generation
of heat and its ability to dissipate heat when tested
under controlled conditions on a speci®ed indoor
laboratory test wheel. Sustained high temperature can
cause the material of the tire to degenerate and
reduce tire life, and excessive temperature can lead to
sudden tire failure. The grade C corresponds to a
level of performance which all passenger car tires must
meet under the Federal Motor Vehicle Safety Standard
No. 109. Grades B and A represent higher levels of
performance on the laboratory test wheel than the
minimum required by law.
Warning: The temperature grade for this tire is
established for a tire that is properly in¯ated and not
overloaded. Excessive speed, underin¯ation, or
excessive loading, either separately or in combination,
can cause heat buildup and possible tire failure.
Wheel Alignment and Tire Balance
The wheels on your vehicle were aligned and balanced
carefully at the factory to give you the longest tire life
and best overall performance.Scheduled wheel alignment and wheel balancing are
not needed. However, if you notice unusual tire wear or
your vehicle pulling one way or the other, the alignment
may need to be reset. If you notice your vehicle
vibrating when driving on a smooth road, your wheels
may need to be rebalanced.
Wheel Replacement
Replace any wheel that is bent, cracked or badly rusted
or corroded. If wheel nuts keep coming loose, the
wheel, wheel bolts and wheel nuts should be replaced.
If the wheel leaks air, replace it (except some
aluminum wheels, which can sometimes be repaired).
See your dealer if any of these conditions exist.
Your dealer will know the kind of wheel you need.
Each new wheel should have the same load-carrying
capacity, diameter, width, offset and be mounted
the same way as the one it replaces.
If you need to replace any of your wheels, wheel bolts
or wheel nuts, replace them only with new GM
original equipment parts. This way, you will be sure to
have the right wheel, wheel bolts and wheel nuts
for your vehicle.
5-66