power steering BUICK REGAL 1997 Owners Manual
[x] Cancel search | Manufacturer: BUICK, Model Year: 1997, Model line: REGAL, Model: BUICK REGAL 1997Pages: 422, PDF Size: 21.34 MB
Page 77 of 422
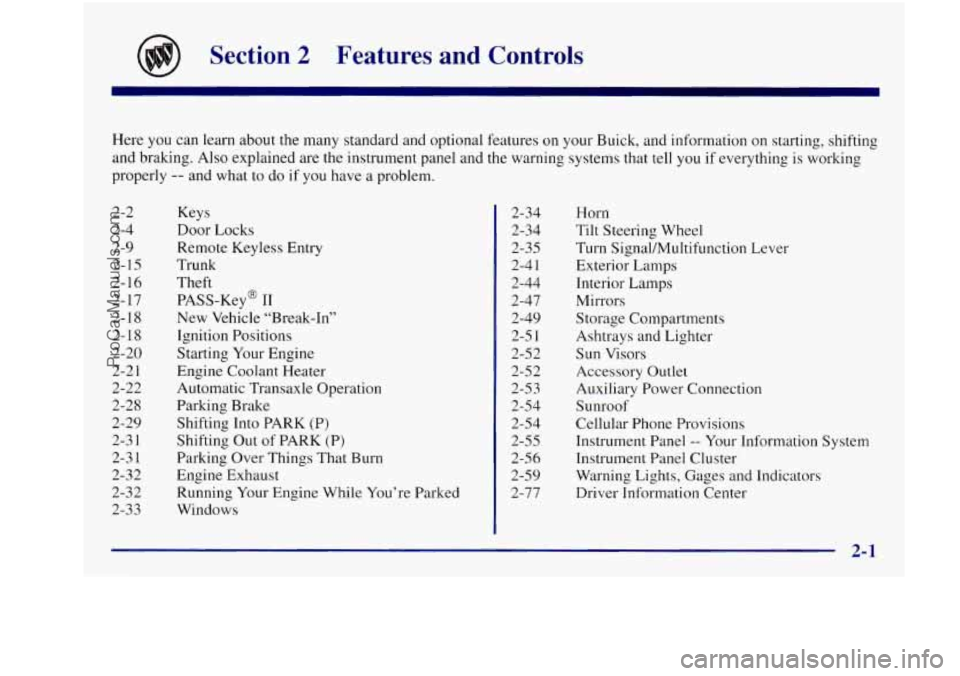
Section 2 Features and Controls
Here you can learn about the many standard and optional features on your Buick, and information on starting, shifting
and braking. Also explained are the instrument panel and the warning systems that tell you
if everything is working
properly
-- and what to do if you have a problem.
2-2
2-4
2-9
2-15
2-16
2- 17
2-18
2-18
2-20
2-2 1
2-22
2-28
2-29
2-3
1
2-3 1
2-32
2-3 2
2-33 Keys
Door
Locks
Remote Keyless
Entry
Trunk
Theft
PASS-Key@
I1
New Vehicle “Break-In”
Ignition Positions
Starting Your Engine
Engine Coolant Heater Automatic Transaxle Operation
Parking Brake Shifting Into PARK
(P)
Shifting Out of PARK (P)
Parking Over Things That Burn
Engine Exhaust
Running Your Engine While You’re Parked
Windows 2-34
2-34
2-35
2-4
1
2-44
2-47
2-49
2-5 1
2-52
2-52 2-5 3
2-54
2-54
2-55
2-56 2-59
2-77 Horn
Tilt Steering Wheel
Turn Signal/Multifunction Lever
Exterior Lamps
Interior Lamps
Mirrors
Storage Compartments
Ashtrays and Lighter
Sun Visors
Accessory Outlet
Auxiliary Power Connection
Sunroof
Cellular Phone Provisions
Instrument Panel
-- Your Information System
lnstrument Panel Cluster
Warning Lights, Gages and Indicators
Driver Information Center
ProCarManuals.com
Page 189 of 422
Disabling the Theft-Deterrent Feature
Enter your secret code as follows; pause no more than
15 seconds between steps:
1. Turn the ignition to ACCESSORY or RUN.
2. Turn the radio off.
3. Press the 1 and 4 buttons together. Hold them down
4. Press MIN and 000 will appear on the display.
5. Press MTN again to make the last two digits agree
6. Press HRS to make the first one or two digits agree
7. Press AM-FM after you have confirmed that the
until
SEC shows on the display.
with your code.
with your code.
code matches the secret code you have written down.
The display will show
---, indicating that the radio is
no longer secured.
If the code entered is incorrect, SEC will appear on the
display. The radio will remain secured until the correct
code is entered.
When battery power
is removed and later applied to a
secured radio, the radio won’t turn on and LOC will
appear on the display.
To unlock a secured radio see “Unlocking the
Theft-Deterrent Feature After a Power
Loss” earlier in
this section.
Audio Steering Wheel Controls
(If Equipped)
If your vehicle has this feature, you can control certain
radio functions using the buttons
on your steering wheel.
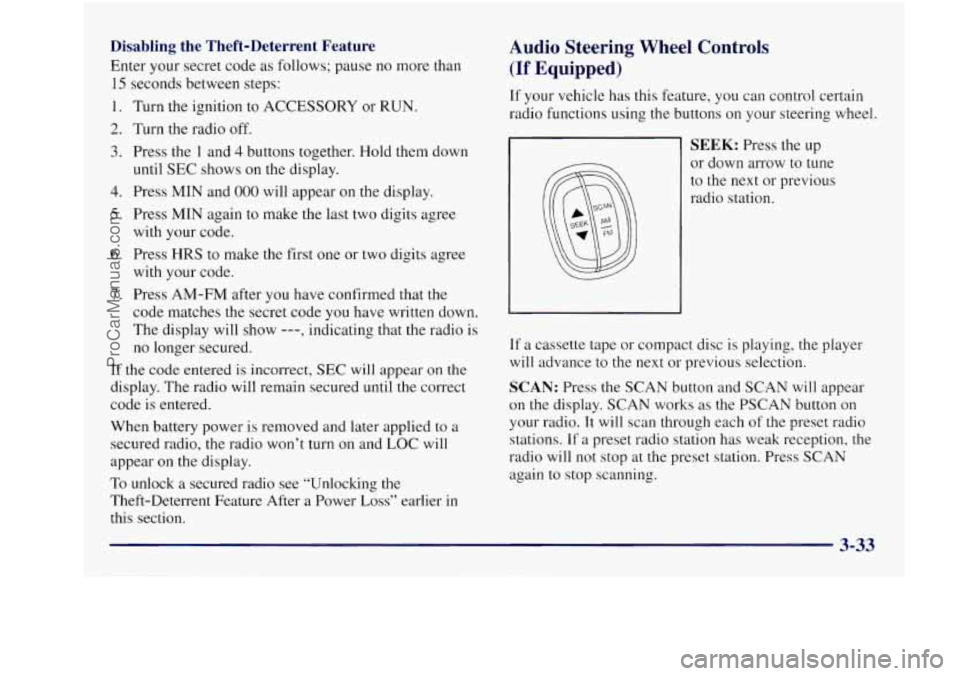
SEEK: Press the up
or down arrow to tune
to the next or previous
radio station.
If a cassette tape or compact disc is playing, the player
will advance to the next or previous selection.
SCAN: Press the SCAN button and SCAN will appear
on the display. SCAN works as the PSCAN button
on
your radio. It will scan through each of the preset radio
stations. If
a preset radio station has weak reception, the
radio will not stop at the preset station. Press
SCAN
again to stop scanning.
ProCarManuals.com
Page 208 of 422
0
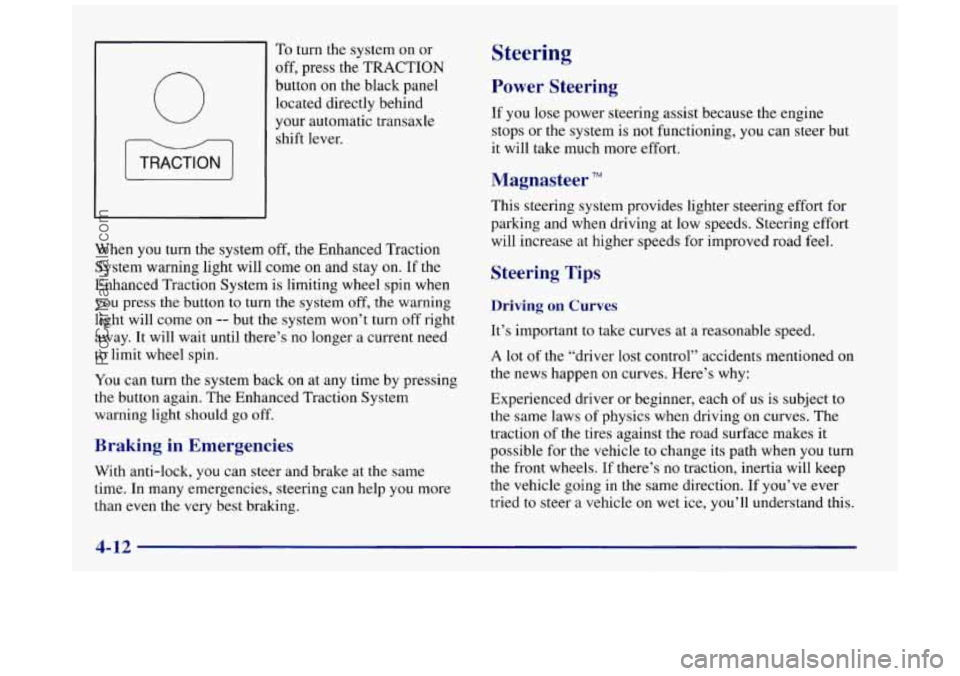
To turn the system on or
off, press the
TRACTION
button on the black panel
located directly behind
your automatic transaxle
shift lever.
When you turn the system off, the Enhanced Traction
System warning light will come on and stay on.
If the
Enhanced Traction System is limiting wheel spin when
you press the button to turn the system off, the warning
light will come on
-- but the system won’t turn off right
away. It will wait until there’s no longer a current need
to limit wheel spin.
You can turn the system back on at any time by pressing
the button again. The Enhanced Traction System
warning light should go off.
Braking in Emergencies
With anti-lock, you can steer and brake at the same
time. In many emergencies, steering can help you more
than even the very best braking.
Steering
Power Steering
If you lose power steering assist because the engine
stops or the system is not functioning,
you can steer but
it will take much more effort.
Magnasteer TM
This steering system provides lighter steering effort for
parking and when driving at low speeds. Steering effort
will increase at higher speeds for improved road feel.
Steering Tips
Driving on Curves
It’s important to take curves at a reasonable speed.
A lot of the “driver lost control” accidents mentioned on
the news happen on curves. Here’s why:
Experienced driver or beginner, each of us is subject to
the same laws of physics when driving on curves. The
traction
of the tires against the road surface makes it
possible for the vehicle
to change its path when you turn
the front wheels. If there’s no traction, inertia will keep
the vehicle going in
the same direction. If you’ve ever
tried
to steer a vehicle on wet ice, you’ll understand this.
ProCarManuals.com
Page 277 of 422
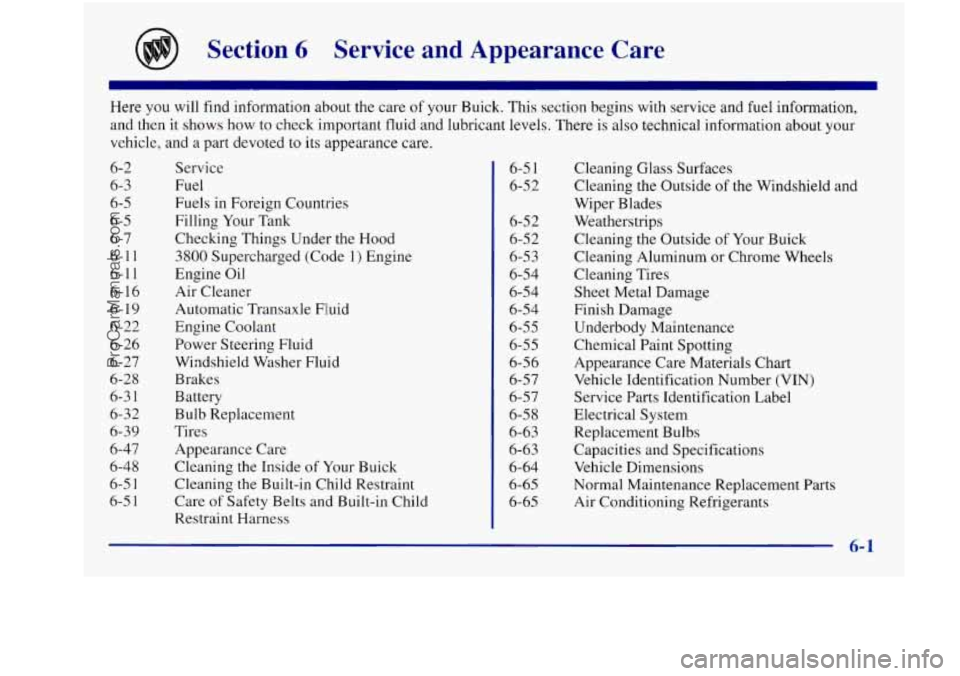
Section 6 Service and Appearance Care
Here you will find information about the care of your Buick. This section begins with service and fuel information,
and then it shows how
to check important fluid and lubricant levels. There is also technical information about your
6-2
6-3
6-5
6-5
6-7
6-11
6-1
1
6-16
6-19
6-22
6-26
6-27
6-28
6-3
1
6-32 6-39
6-47
6-48
6-5
1
6-5 1
vehicle, and a part devoted to its appearance care.
Service
Fuel
Fuels in Foreign Countries
Filling Your Tank
Checking Things Under the Hood
3800 Supercharged (Code 1) Engine
Engine Oil
Air Cleaner
Automatic Transaxle Fluid
Engine Coolant
Power Steering Fluid
Windshield Washer Fluid
Brakes
Battery
Bulb Replacement
Tires
Appearance Care
Cleaning the Inside
of Your Buick
Cleaning the Built-in Child Restraint
Care
of Safety Belts and Built-in Child
Restraint Harness 6-5
1
6-52
6-52
6-52
6-53
6-54 6-54
6-54
6-55
6-55
6-5 6
6-57
6-57
6-58
6-63
6-63
6-64
6-65
6-65 Cleaning Glass Surfaces
Cleaning
the Outside of the Windshield and
Wiper Blades
Weatherstrips Cleaning the Outside of Your Buick
Cleaning Aluminum or Chrome Wheels
Cleaning Tires
Sheet Metal Damage
Finish Damage
Underbody Maintenance
Chemical Paint Spotting
Appearance Care Materials Chart
Vehicle Identification Number
(VIN)
Service Parts Identification Label
Electrical System Replacement Bulbs
Capacities and Specifications
Vehicle Dimensions
Normal Maintenance Replacement Parts
Air Conditioning Refrigerants
6-1
ProCarManuals.com
Page 285 of 422
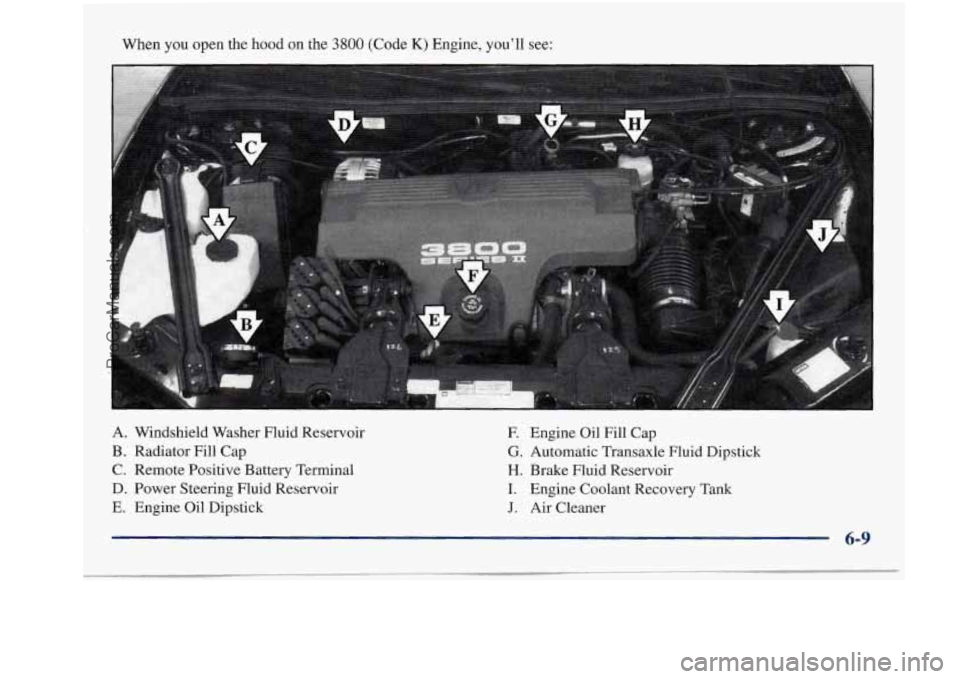
When you open the hood on the 3800 (Code K) Engine, you’ll see:
A. Windshield Washer Fluid Reservoir
F. Engine Oil Fill Cap
B. Radiator Fill Cap
G. Automatic Transaxle Fluid Dipstick
C. Remote Positive Battery Terminal H. Brake Fluid Reservoir
D. Power Steering Fluid Reservoir
I. Engine Coolant Recovery Tank
E. Engine Oil Dipstick J. Air Cleaner
6-9
ProCarManuals.com
Page 286 of 422
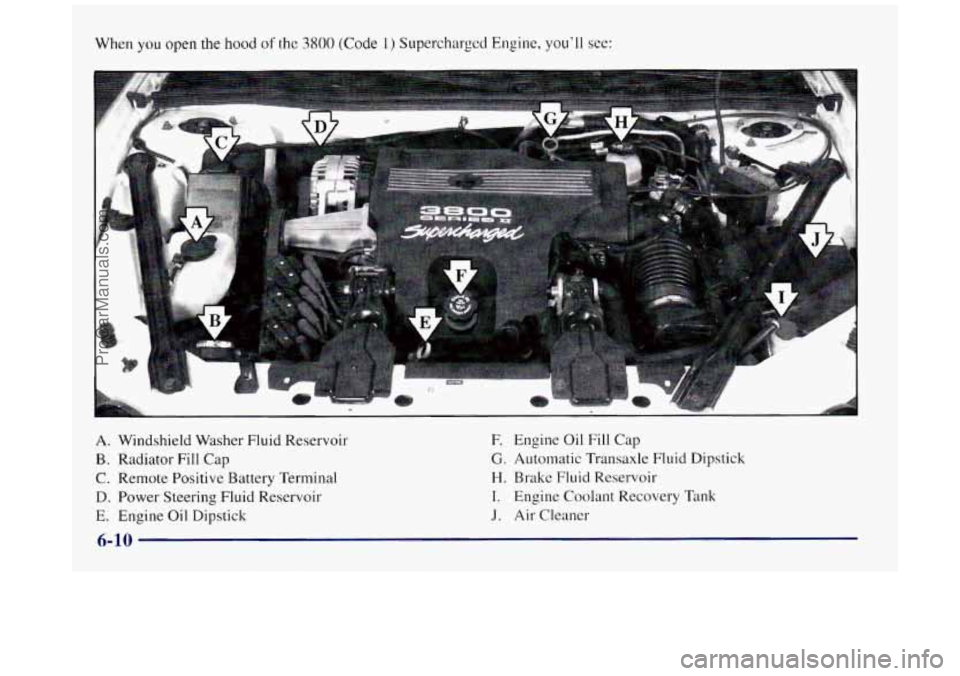
When you open the hood of the 3800 (Code 1) Supercharged Engine, you’ll see:
A. Windshield Washer Fluid Reservoir
B. Radiator Fill Cap
C. Remote Positive Battery Terminal
D. Power Steering Fluid Reservoir
E. Engine Oil Dipstick
E Engine Oil Fill Cap
G. Automatic Transaxle Fluid Dipstick
H. Brake Fluid Reservoir
I. Engine Coolant Recovery Tank
J. Air Cleaner
6-10
ProCarManuals.com
Page 302 of 422
Power Steering Fluid
When to Check Power Steering Fluid
It is not necessary to regularly check power steering
fluid unless you suspect there is a leak
in the system or
you hear an unusual noise.
A fluid loss in this system
could indicate a problem. Have the system inspected
and repaired.
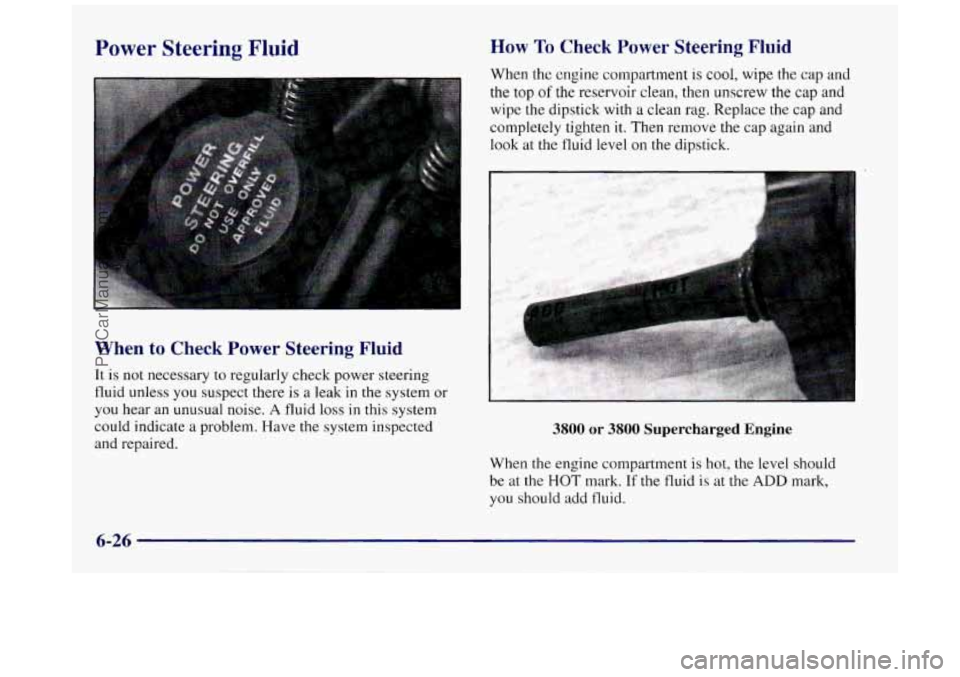
How To Check Power Steering Fluid
When the engine compartment is cool, wipe the cap and
the top of the reservoir clean, then unscrew the cap and
wipe the dipstick with a clean rag. Replace
the cap and
completely tighten it. Then remove the cap again and
look at the fluid level on the dipstick.
3800 or 3800 Supercharged Engine
When the engine compartment is hot, the level should
be at the
HOT mark. If the fluid is at the ADD mark,
you should add fluid.
6-26
ProCarManuals.com
Page 336 of 422
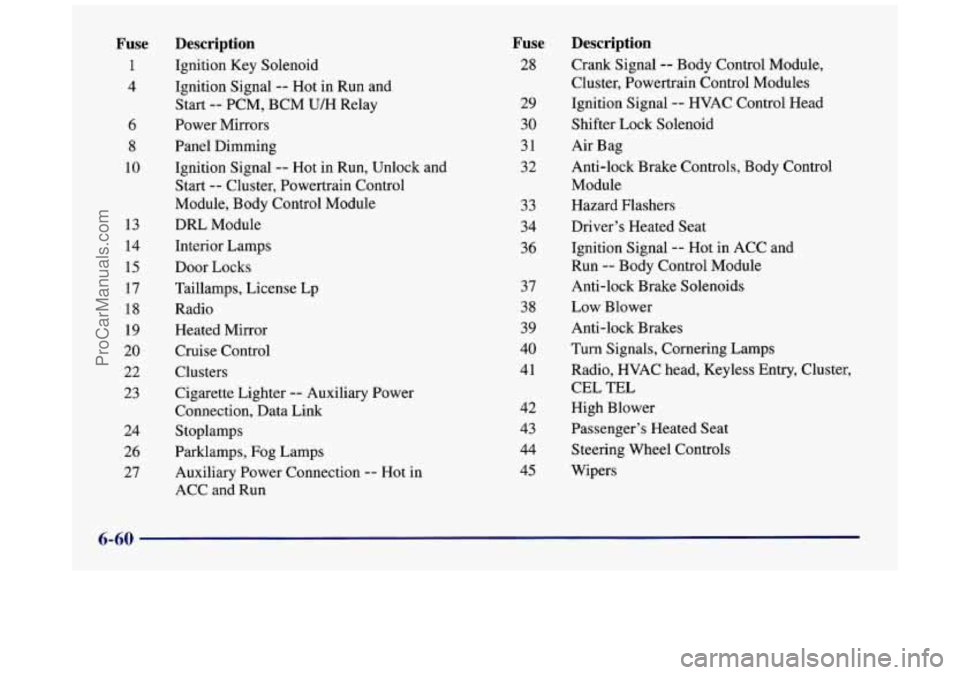
Fuse
1
4
6
8
10
13
14 15
17
18
19
20
22
23
24 26
27 Description
Ignition
Key Solenoid
Ignition Signal
-- Hot in Run and
Start
-- PCM, BCM U/H Relay
Power Mirrors
Panel Dimming Ignition Signal
-- Hot in Run, Unlock and
Start
-- Cluster, Powertrain Control
Module, Body Control Module
DRL Module
Interior Lamps
Door Locks
Taillamps, License Lp
Radio Heated Mirror
Cruise Control
Clusters
Cigarette Lighter
-- Auxiliary Power
Connection, Data Link
Stoplamps
Parklamps, Fog Lamps
Auxiliary Power Connection
-- Hot in
ACC and Run
Fuse
28
29
30
31
32
33
34
36
37
38
39
40
41
42
43
44
45
Description
Crank Signal -- Body Control Module,
Cluster, Powertrain Control Modules
Ignition Signal
-- HVAC Control Head
Shifter Lock Solenoid
Air Bag
Anti-lock Brake Controls, Body Control
Module
Hazard Flashers
Driver’s Heated Seat
Ignition Signal
-- Hot in ACC and
Run
-- Body Control Module
Anti-lock Brake Solenoids
Low Blower
Anti-lock Brakes
Turn Signals, Cornering Lamps
Radio, HVAC head, Keyless En
CEL
TEL
High Blower
Passenger’s Heated Seat
Steering Wheel Controls
Wipers ltry,
Clus
; ter,
6-60
ProCarManuals.com
Page 337 of 422
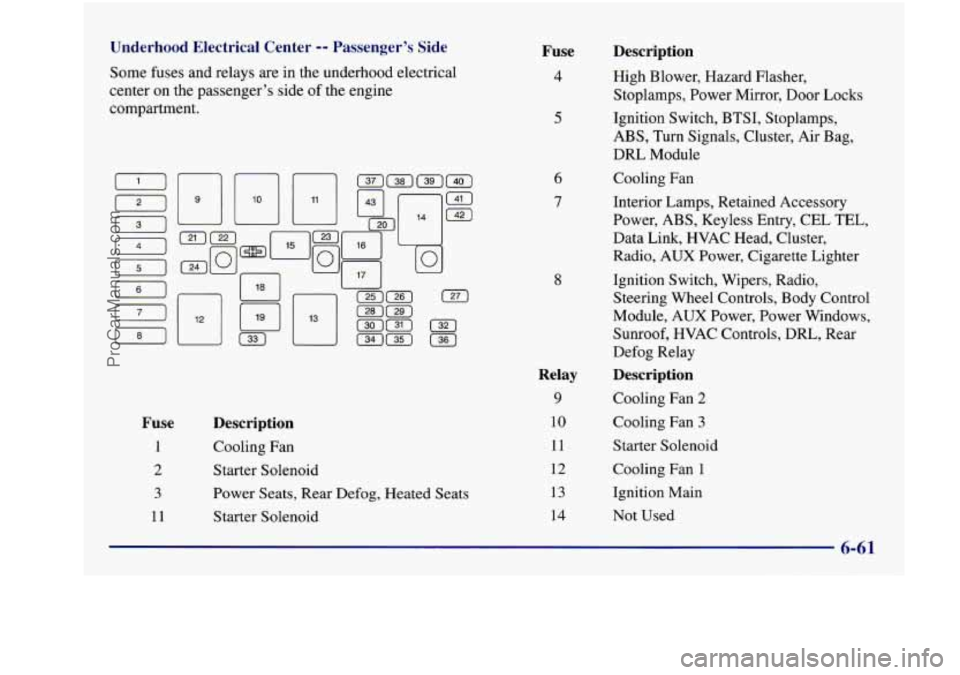
Underhood Electrical Center -- Passenger’s Side
Some fuses and relays are in the underhood electrical
center on the passenger’s side of the engine
compartment.
Fuse
1
2
3
11
Description
Cooling Fan
Starter Solenoid
Power Seats, Rear
Defog, Heated Seats
Starter Solenoid
Fuse
4
5
6
7
8
Relay
9
10
11
12
13
14
Description
High Blower, Hazard Flasher,
Stoplamps, Power Mirror, Door Locks
Ignition Switch, BTSI, Stoplamps,
ABS, Turn Signals, Cluster, Air Bag,
DRL Module
Cooling Fan
Interior Lamps, Retained Accessory
Power, ABS, Keyless Entry, CEL TEL,
Data Link,
HVAC Head, Cluster,
Radio, AUX Power, Cigarette Lighter
Ignition Switch, Wipers, Radio,
Steering Wheel Controls, Body Control
Module, AUX Power, Power Windows,
Sunroof, HVAC Controls, DRL, Rear
Defog Relay
Description
Cooling Fan 2
Cooling Fan
3
Starter Solenoid
Cooling Fan 1
Ignition Main
Not Used
6-61
ProCarManuals.com
Page 385 of 422
Part C: Periodic Maintenance
Inspections
Listed below are inspections and services which should
be performed at least twice a year (for instance, each
spring and fall). You should let your GM dealer’s
service department or other qualified service center do
these jobs. Make sure any necessary repairs are
completed at once.
Proper procedures to perform these services may be
found in a GM service manual. See “Service and Owner
Publications” in the Index.
Steering, Suspension and Front Drive Axle
Boot and Seal Inspection
Inspect the front and rear suspension and steering
system for damaged, loose or missing parts, signs of
wear or lack of lubrication. Inspect the power steering
lines and hoses for proper hook-up, binding, leaks,
cracks, chafing, etc. Clean and then inspect the drive
axle boot seals for damage, tears or leakage. Replace
seals if necessary.
Exhaust System Inspection
Inspect the complete exhaust system. Inspect the body
near the exhaust system. Look for broken, damaged, missing
or out-of-position parts as well as open seams,
holes, loose connections or other conditions which could
cause a heat build-up in the floor pan or could let
exhaust fumes into the vehicle. See “Engine Exhaust” in
the Index.
Radiator and Heater Hose Inspection
Inspect the hoses and have them replaced if they are
cracked, swollen or deteriorated. Inspect all pipes,
fittings and clamps; replace as needed.
Throttle Linkage Inspection
Inspect the throttle linkage for interference or binding,
and for damaged or missing parts. Replace parts as
needed. Replace any cables that have high effort or
excessive wear.
Do not lubricate accelerator and cruise
control cables.
Brake System Inspection
Inspect the complete system. Inspect brake lines and
hoses for proper hook-up, binding, leaks, cracks,
chafing, etc. Inspect disc brake pads for wear and rotors
for surface condition. Inspect other brake parts,
including calipers, parking brake, etc. Check parking
brake adjustment. You may need to have your brakes
inspected more often
if your driving habits or conditions
result
in frequent braking.
7-43
ProCarManuals.com