maintenance BUICK REGAL 1998 Owners Manual
[x] Cancel search | Manufacturer: BUICK, Model Year: 1998, Model line: REGAL, Model: BUICK REGAL 1998Pages: 388, PDF Size: 20.19 MB
Page 3 of 388
The 1998 Buick Regal Owner’s Manual
1-1
2-1
3-1
4- 1
5-1
6- 1
7-1
8- 1
9- 1
Seats and Restraint Systems
This section tells you how to use your seats and safety belts\
properly. It also explains the “SRS” system.
Features and Controls
This section explains how to start and operate your vehicle.
Comfort Controls and Audio Systems
This section tells you how to adjust the ventilation and comfo\
rt controls and how to operate your audio system.
Your Driving and the Road
Here you’ll find helpful information and tips about the road\
and how to drive under different conditions.
Problems on the Road
This section tells what to do if you have a problem while driving, such as a flat tire or overheated engine, etc.
Service and Appearance Care
Here the manual tells you how to keep your vehicle running properly and looking good.
Maintenance Schedule
This section tells you when to perform vehicle maintenance and what fluids and lu\
bricants to use.
Customer Assistance Information
This section tells you how to contact Buick for assistance and how to get service and owner publications.
It also gives you information on “Reporting Safety Defects” on page 8-8.
Index
Here’s an alphabetical listing of almost every subject in this manual. You can use it to quickly find
something you want to read.
i
ProCarManuals.com
Page 33 of 388
NOTICE:
If you damage the covering for the driver’s or the
right front passenger’s
air bag, the bag may not
work properly. You may have to replace the
air
bag module in the steering wheel or both the air
bag module and the instrument panel for the
right front passenger’s
air bag. Do not open or
break the air bag coverings.
If your vehicle ever gets into a lot of water -- such as
water up to the carpeting or higher
-- or if water enters
your vehicle and soaks the carpet, the air bag controller
can be soaked and ruined.
If this ever happens, and then
you start your vehicle, the damage could make the air
bags inflate, even
if there’s no crash. You would have to
replace the air
bags as well as the sensors and related
parts.
If your vehicle is ever in a flood, or if it’s exposed
to water that
soaks the carpet, you can avoid needless
repair costs by turning off the vehicle immediately.
Don’t let anyone start the vehicle, even to tow it, unless
the battery cables
are first disconnected.
Servicing Your Air Bag-Equipped Vehicle
Air bags affect how your vehicle should be serviced.
There are parts
of the air bag system in several places
around your vehicle.
You don’t want the system to
inflate while someone is working on your vehicle. Your
dealer and the Regal Service Manual have information
about servicing your vehicle and the air bag system. To
purchase a service manual, see “Service and Owner
Publications” in the Index.
For up to 10 minutes after the ignition key is
turned off and the battery is disconnected, an air
bag can still inflate during improper service. You
can be injured
if you are close to an air bag when
it inflates. Avoid yellow connectors. They are
probably part of the air bag system. Be sure
to
follow proper service procedures, and make sure
the person performing work for you
is qualified
to do
so.
The air bag system does not need regular maintenance.
1-25
ProCarManuals.com
Page 74 of 388
be just for you, and just for the seat in your vehicle that
you choose. Don’t let someone else
use it, and use it
only for the seat
it is made to fit. To wear it, just attach it
to the regular safety belt.
Checking Your Restraint Systems
Now and then, make sure the safety belt reminder light
and all your belts, buckles, latch plates, retractors and
anchorages are working properly.
If your vehicle has a
built-in child restraint, also periodically make sure the
harness straps, latch plates, buckle, clip, retractors and
anchorages are working properly. Look for any other
loose or damaged safety belt and built-in child restraint
system parts. If you see anything that might keep a
safety belt or built-in child restraint system from doing
its job, have it repaired.
Torn or frayed safety belts may not protect you
in a
crash. They can rip apart under impact forces. If a belt is
torn or frayed, get a new one right away.
If
your vehicle has the built-in child restraint, torn or
frayed harness straps can rip apart under impact forces
just like torn or frayed safety belts can.
They may not
protect a child
in a crash. If a harness strap is torn or
frayed, get a new harness right away. Also look
for any opened or broken air bag covers, and
have them repaired or replaced. (The air bag system
does not need regular maintenance.)
Replacing Restraint System Parts
After
a Crash
If you’ve had a crash, do you need new safety belts or
built-in child restraint parts?
After a very minor collision, nothing may be necessary.
But if the safety belts
or built-in child restraint harness
straps were stretched, as
they would be if worn during a
more severe crash, then you need new safety belts or
harness straps.
If safety belts or built-in child restraint harness straps
are cut or damaged, replace them. Collision damage also
may mean you will need to have safety belt, built-in
child restraint or seat parts repaired or replaced. New
parts and repairs may be necessary even if the safety belt
or built-in child restraint wasn’t being used at
the time
of the collision.
If an air bag inflates, you’ll need to replace air bag
system parts. See the part
on the air bag system earlier in
this section.
1-66
ProCarManuals.com
Page 147 of 388
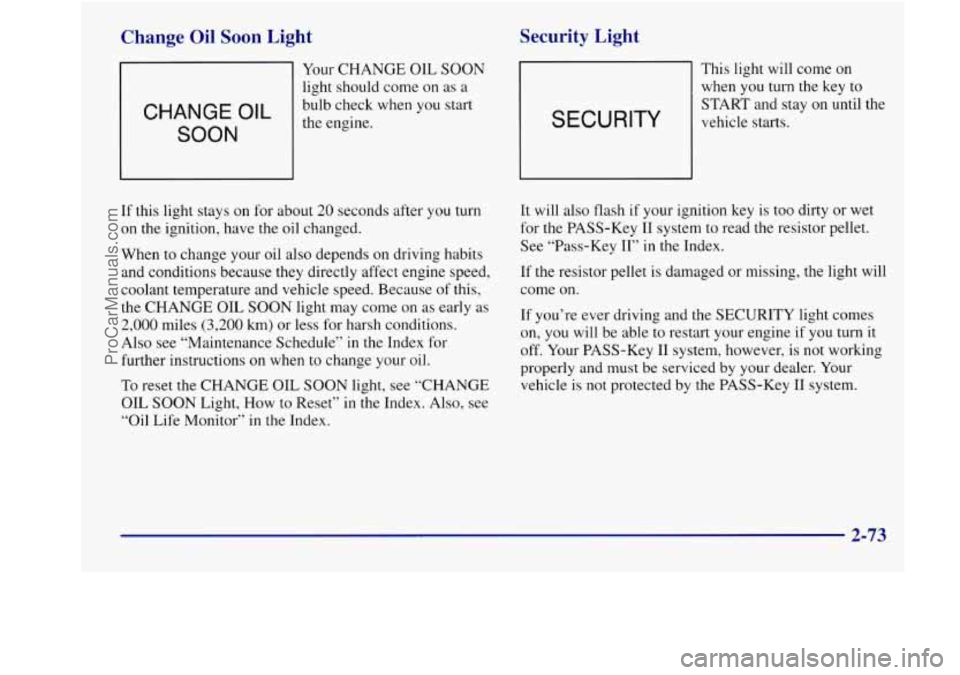
Change Oil Soon Light
Your CHANGE OIL SOON
light should come on as a
CHANGE OIL
SOON
bulb check when you start
the engine.
Security Light
SECURITY
This light will come on
when you turn the key
to
START and stay on until the
vehicle starts.
If this light stays on for about
20 seconds after you turn
on the ignition, have the oil changed.
When to change your oil also depends on driving habits
and conditions because
they directly affect engine speed,
coolant temperature and vehicle speed. Because of this,
the CHANGE OIL
SOON light may come on as early as
2,000 miles (3,200 km) or less for harsh conditions.
Also see “Maintenance Schedule” in the Index for
further instructions on when
to change your oil.
To reset the CHANGE OIL SOON light, see “CHANGE
OIL SOON Light, How to Reset” in the Index. Also, see
“Oil Life Monitor”
in the Index. It
will also flash if your ignition key is too dirty or wet
for the PASS-Key I1 system to read the resistor pellet.
See “Pass-Key
11” in the Index.
If the resistor pellet is damaged or missing, the light will
come
on.
If you’re ever driving and the SECURITY light comes
on, you will be able to restart your engine
if you turn it
off. Your PASS-Key I1 system, however, is not working
properly and must be serviced by your dealer. Your
vehicle is not protected by the PASS-Key I1 system.
2-73
ProCarManuals.com
Page 150 of 388
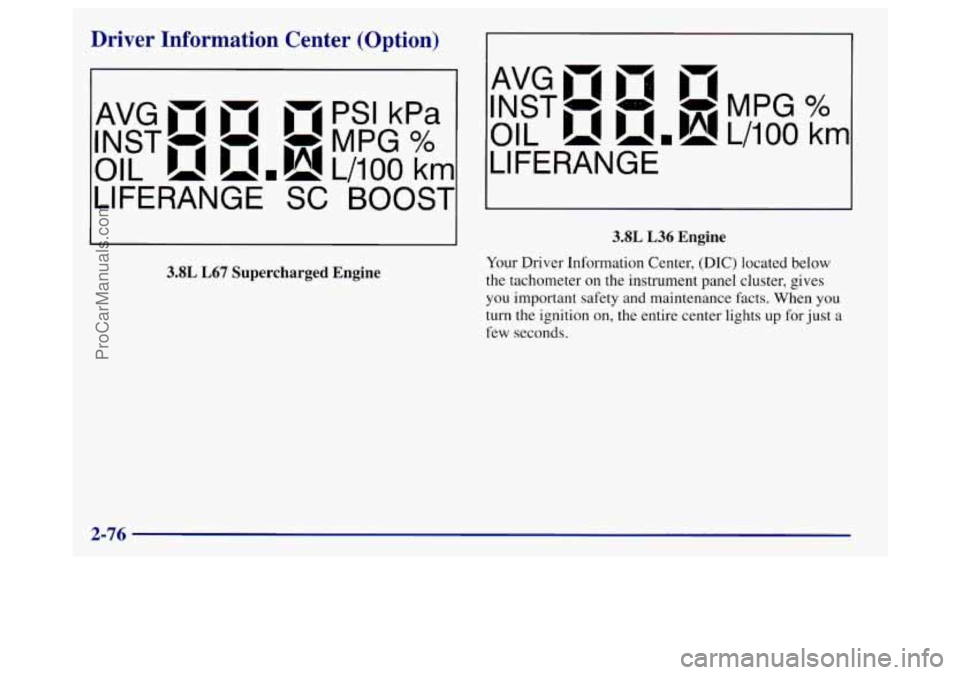
Driver Information Center (Option)
- PSI kPa
INST- - -MPG %
AVGnm D 1
OIL u "b! L/100 km
LIFERANGE SC BOOST
3.8L L67 Supercharged Engine
INST- - -MPG %
OIL ),I umb! L/100 km
AVG in nl )'I(
LIFERANGE
3.8L L36 Engine
Your Driver Information Center, (DIC) located below
the tachometer on the instrument panel cluster, gives
you important safety and maintenance facts. When
you
turn the ignition on, the entire center lights up for just a
few seconds.
2-76
ProCarManuals.com
Page 152 of 388
Modes
AVG ECON: Shows your average fuel economy since
you last reset this mode. Average fuel economy is
viewed as a long term approximation of your overall
driving and driving conditions. To learn the average fuel
economy from a new starting point, press the RESET
button while
the average fuel economy is displayed in
the
DIC.
INSTANTANEOUS FUEL ECONOMY Shows your
current fuel economy. Instantaneous fuel economy
varies with your driving conditions, such as
acceleration, braking and the grade of the road being
traveled. The instantaneous fuel economy display cannot
be reset, therefore the reset button has no effect while in
this mode.
OIL LIFE MONITOR: Shows an estimate of the oil’s
remaining useful life. When
the oil life index is less than
lo%, the CHANGE OIL SOON light will come on.
When you have the oil changed according to the
maintenance schedule (see “Maintenance Schedule” in
the Index), you will have to reset the oil life monitor.
To
do this, press and hold the RESET button for more than
five seconds while the oil life monitor is being displayed
on the DIC. The oil life will change
to 100%.
RANGE: Shows the approximate distance you can
drive without refueling. This
is based on the amount of
fuel in the tank and on the fuel economy of the most
recent
25 miles (40 km). Pressing RESET while in this
mode will have no effect.
BOOST GAGE: If you have the supercharged engine,
this gage will show
the amount of boost your engine is
receiving. Pressing RESET while in this mode will have
no effect.
2-78
ProCarManuals.com
Page 154 of 388
Comfort Controls
Manual Single Zone Climate Control
[OD I COMFORT CONTROL
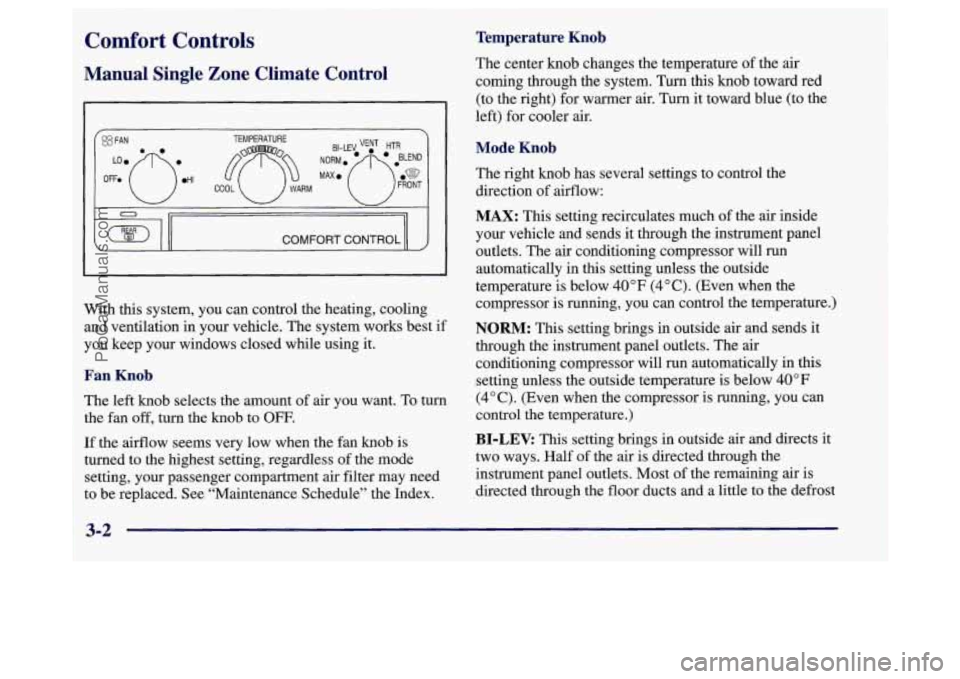
With this system, you can control the heating, cooling
and ventilation in your vehicle. The system works best if
you keep your windows closed while using it.
Fan Knob
The left knob selects the amount of air you want. To turn
the fan off, turn the knob to OFF.
If the airflow seems very low when the fan knob is
turned to the highest setting, regardless
of the mode
setting, your passenger compartment
air filter may need
to be replaced. See “Maintenance Schedule” the Index.
~~~
Temperature Knob
The center knob changes the temperature of the air
coming through the system. Turn this knob toward red
(to the right) for warmer air. Turn it toward blue (to the
left) for cooler air.
Mode Knob
The right knob has several settings to control the
direction of airflow:
MAX: This setting recirculates much of the air inside
your vehicle and sends it through the instrument panel
outlets. The air conditioning compressor will run
automatically in
this setting unless the outside
temperature is below
40°F (4°C). (Even when the
compressor is running, you can control the temperature.)
NORM: This setting brings in outside air and sends it
through the instrument panel outlets. The air conditioning compressor will run automatically in this
setting unless the outside temperature is below
40°F
(4°C). (Even when the compressor is running, you can
control the temperature.)
BI-LEV: This setting brings in outside air and directs it
two ways. Half of the air is directed through the
instrument panel outlets. Most of the remaining air is
directed through the floor ducts and a little to the defrost
3-2
ProCarManuals.com
Page 156 of 388
Heating
On cold days, use HTR with the temperature knob all
the way in the red area. The system will bring in outside
air, heat it and send it to
the floor ducts.
If your vehicle has an engine coolant heater,
you can use
it to help your system provide warm air faster when it’s
cold outside
(0°F (-18°C) or lower). An engine coolant
heater warms the coolant your engine and heating
system use
to provide heat. See “Engine Coolant
Heater” in
the Index.
Ventilation
For mild outside temperatures when little heating or
cooling is needed,
use VENT to direct outside air
through your vehicle. Your vehicle also has the
flow-through ventilation system described later in
this section.
Defogging and Defrosting
Your system has two settings for clearing the front and
side windows.
To defrost the windows quickly, use
FRONT with the temperature knob all the way in the red
area.
To warm passengers while keeping the windows
clear, use
BLEND.
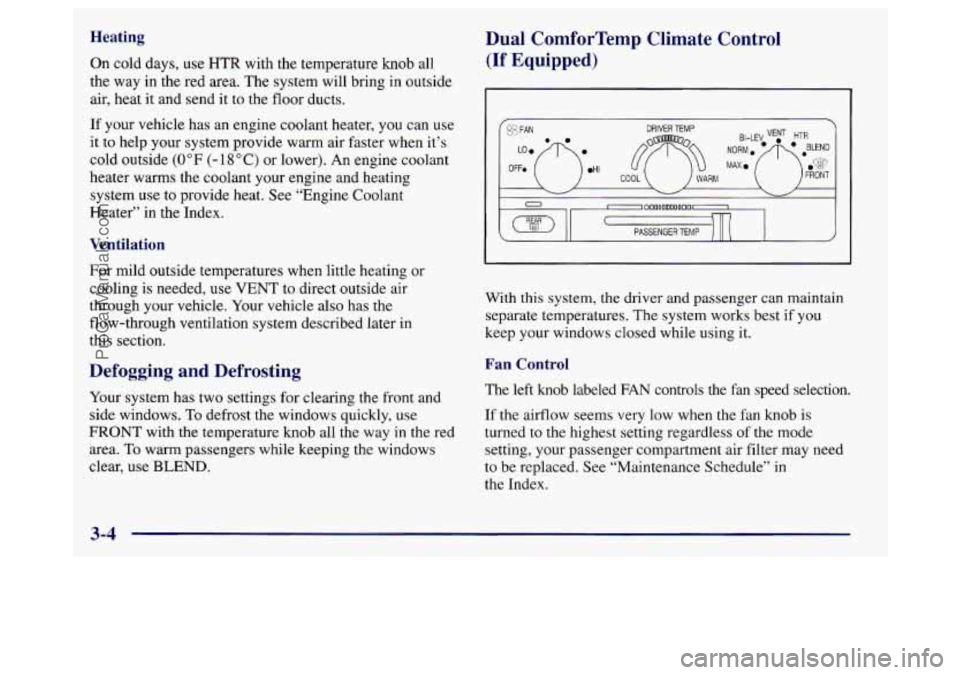
Dual ComforTemp Climate Control
(If Equipped)
~DoooomnoooLr[n~ PASSENGER TEMP
With this system, the driver and passenger can maintain
separate temperatures. The system works best if you
keep your windows closed while using it.
Fan Control
The left knob labeled FAN controls the fan speed selection.
If
the airflow seems very low when the fan knob is
turned to the highest setting regardless
of the mode
setting, your passenger compartment air filter may need
to be replaced. See “Maintenance Schedule” in
the Index.
3-4
ProCarManuals.com
Page 162 of 388
Heating Ventilation System
On cold days, use HTR with the temperature knobs all
the way in the red area. The system will bring in outside
air, heat it and send it to the floor ducts.
If your vehicle has an engine coolant heater, you can use
it
to help your system provide wm air faster when it’s
cold outside
(0°F (-18°C) or lower). An engine coolant
heater wms the coolant your engine and heating
system use to provide heat. See “Engine Coolant
Heater” in the Index.
Defogging and Defrosting
Your system has two settings for clearing the front and
side windows.
To defrost the windows quickly, press the
FRONT button; set the temperature to 90 OF (32”C),
select high fan speed and turn the DUAL button off. To
warm passengers while keeping the windows clear, push
the AIR
FLOW button until WINDSHIELDFLOOR
appears in the display. Select fan speed for comfort and
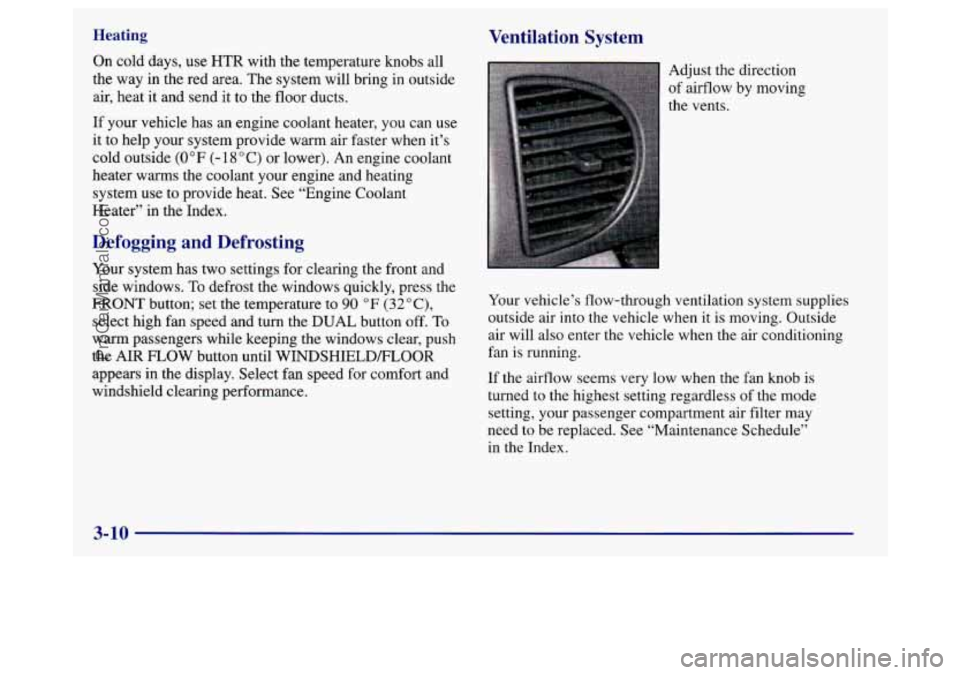
windshield clearing performance. Adjust the direction
of airflow by moving
the vents.
Your vehicle’s flow-through ventilation system supplies
outside air into the vehicle when it
is moving. Outside
air will also enter the vehicle when the air conditioning
fan is running.
If the airflow seems very low when the fan knob is
turned
to the highest setting regardless of the mode
setting, your passenger compartment air filter may
need
to be replaced. See “Maintenance Schedule’’
in the Index.
3-10
ProCarManuals.com
Page 224 of 388
Parking on Hills 0 Shift into a gear; and
0 Release the parking brake.
You really should not park your vehicle, with a trailer
attached, on
a hill. If something goes wrong, your rig
could start to move. People can be injured, and both
your vehicle and the trailer can be damaged.
But if you ever have to park your rig on a hill, here’s
how to do it:
1. Apply your regular brakes, but don’t shift into
PARK (P) yet.
2. Have someone place chocks under the
trailer’s wheels.
3. When the wheel chocks are in place, release the
regular brakes until the chocks absorb the load.
4. Reapply the regular brakes. Then apply your parking
brake, and shift to
PARK (P).
5. Release the regular brakes.
When You Are Ready to Leave After
Parking
on a Hill
1. Apply your regular brakes and hold the pedal down
while you:
Start your engine;
2. Let up on the brake pedal.
3. Drive slowly until the trailer is clear of the chocks.
4. Stop and have someone pick up and store the chocks.
Maintenance When Trailer Towing
Your vehicle will need service more often when you’re
pulling a trailer. See the Maintenance Schedule for more
on this. Things that are especially important in trailer
operation are automatic transaxle fluid (don’t overfill),
engine oil, drive belt, cooling system and brake
adjustment. Each of these
is covered in this manual, and
the Index
will help you find them quickly. If you’re
trailering, it’s a good idea to review this information
before you start your trip.
Check periodically
to see that all hitch nuts and bolts
are tight.
Engine Cooling When Trailer Towing
Your cooling system may temporarily overheat during
severe operating conditions. See “Engine Overheating”
in the Index.
4-40
ProCarManuals.com