spare wheel BUICK REGAL 2003 Owner's Manual
[x] Cancel search | Manufacturer: BUICK, Model Year: 2003, Model line: REGAL, Model: BUICK REGAL 2003Pages: 344, PDF Size: 2.21 MB
Page 202 of 344

Uniform Tire Quality Grading..........................5-62
Wheel Alignment and Tire Balance..................5-63
Wheel Replacement......................................5-63
Tire Chains..................................................5-65
If a Tire Goes Flat........................................5-66
Changing a Flat Tire.....................................5-66
Compact Spare Tire......................................5-77
Appearance Care............................................5-77
Cleaning the Inside of Your Vehicle.................5-78
Care of Safety Belts......................................5-80
Weatherstrips...............................................5-80
Cleaning the Outside of Your Vehicle..............5-80
Sheet Metal Damage.....................................5-83
Finish Damage.............................................5-83
Underbody Maintenance................................5-83Chemical Paint Spotting.................................5-83
GM Vehicle Care/Appearance Materials...........5-84
Vehicle Identification......................................5-85
Vehicle Identification Number (VIN).................5-85
Service Parts Identification Label.....................5-86
Electrical System............................................5-86
Add-On Electrical Equipment..........................5-86
Headlamp Wiring..........................................5-86
Windshield Wiper Fuses................................5-86
Power Windows and Other Power Options.......5-86
Fuses and Circuit Breakers............................5-87
Capacities and Specifications..........................5-92
Capacities and Specifications.........................5-92
Normal Maintenance Replacement Parts..........5-93
Section 5 Service and Appearance Care
5-2
2003 - Regal OM
Page 259 of 344

3. Press and hold the RESET button for aboutfive
seconds.
The LOW TIRE light will come on andflash three
times. Then it will go off. If the light doesn’tgo
off, see your dealer for service.
The system completes the calibration process during
driving.
The system normally takes 15 to 20 minutes of driving
in each of three speed ranges to“learn”tire pressures.
The speed ranges are 15 to 40 mph (25 to 65 km/h),
40 to 65 mph (65 to 105 km/h) and above 65 mph
(105 km/h). When learning is complete, the system will
alert you after two to eight minutes if a tire is 12 psi
(83 kPa) different from the other three tires. Detection
thresholds may be higher and detection times may
be longer on rough roads, curves and at high speeds.
The system is not capable of detection at speeds greater
than 70 mph (110 km/h).Tire Inspection and Rotation
Tires should be rotated every 7,500 miles (12 500 km).
Any time you notice unusual wear, rotate your tires
as soon as possible and check wheel alignment. Also
check for damaged tires or wheels. SeeWhen It Is Time
for New Tires on page 5-60andWheel Replacement
on page 5-63for more information.
The purpose of regular rotation is to achieve more
uniform wear for all tires on the vehicle. Thefirst rotation
is the most important. See“Part A: Scheduled
Maintenance Services,”in Section 6, for scheduled
rotation intervals.
When rotating your tires, always use the correct rotation
pattern shown here.
Don’t include the compact spare tire in your tire rotation.
5-59
2003 - Regal OM
Page 261 of 344
Buying New Tires
Tofind out what kind and size of tires you need, look at
the Tire-Loading Information label.
The tires installed on your vehicle when it was new had
a Tire Performance Criteria Specification (TPC Spec)
number on each tire’s sidewall. When you get new tires,
get ones with that same TPC Spec number. That way
your vehicle will continue to have tires that are designed
to give proper endurance, handling, speed rating,
traction, ride and other things during normal service on
your vehicle. If your tires have an all-season tread
design, the TPC number will be followed by an“MS”(for
mud and snow).
If you ever replace your tires with those not having a
TPC Spec number, make sure they are the same size,
load range, speed rating and construction type (bias,
bias-belted or radial) as your original tires.{CAUTION:
Mixing tires could cause you to lose control
while driving. If you mix tires of different sizes
or types (radial and bias-belted tires), the
vehicle may not handle properly, and you
could have a crash. Using tires of different
sizes may also cause damage to your vehicle.
Be sure to use the same size and type tires on
all wheels. It’s all right to drive with your
compact spare temporarily, it was developed
for use on your vehicle. See“Compact Spare
Tire”in the index.
{CAUTION:
If you use bias-ply tires on your vehicle, the
wheel rim�anges could develop cracks after
many miles of driving. A tire and/or wheel
could fail suddenly, causing a crash. Use only
radial-ply tires with the wheels on your vehicle.
5-61
2003 - Regal OM
Page 270 of 344
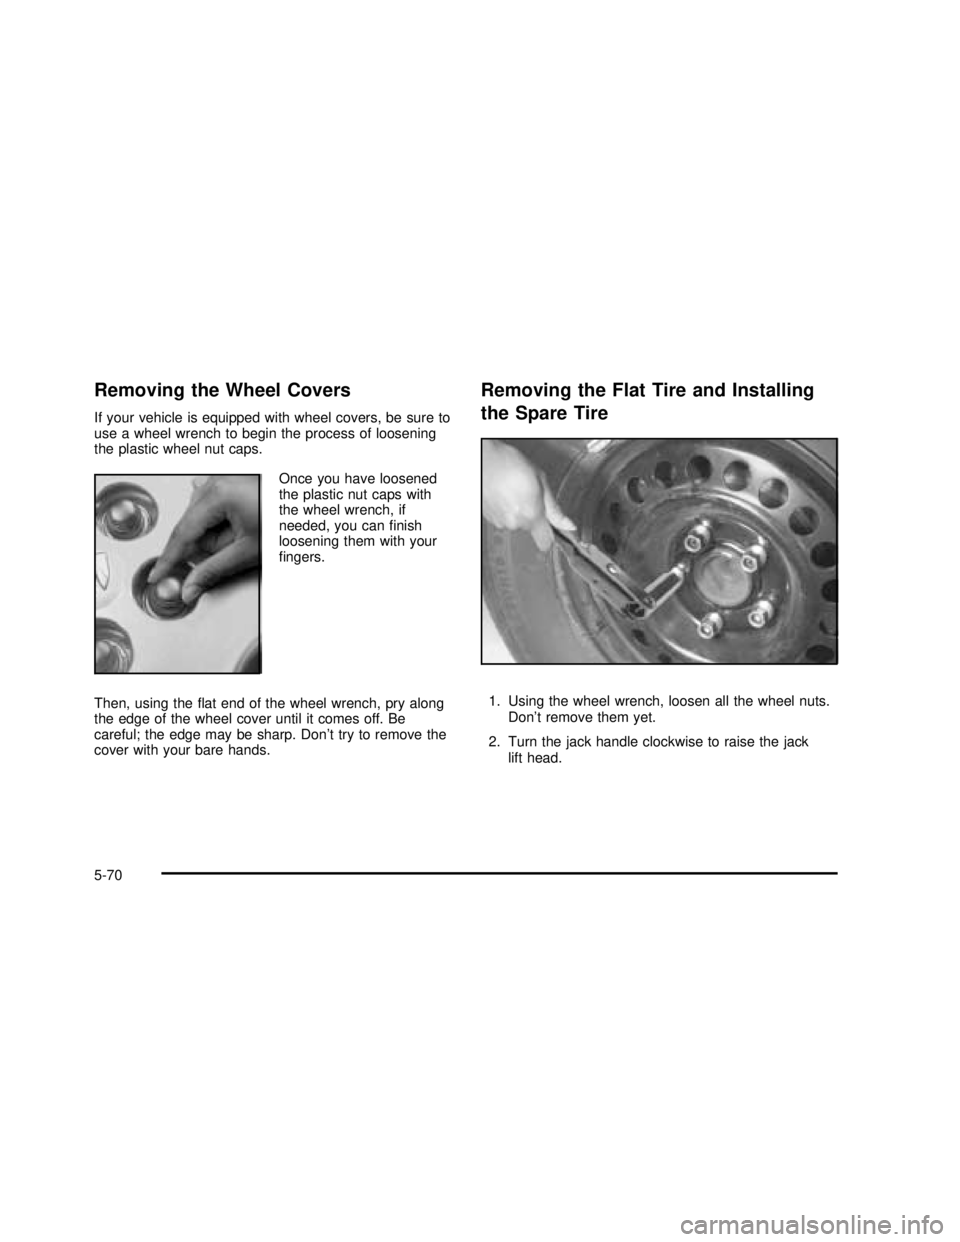
Removing the Wheel Covers
If your vehicle is equipped with wheel covers, be sure to
use a wheel wrench to begin the process of loosening
the plastic wheel nut caps.
Once you have loosened
the plastic nut caps with
the wheel wrench, if
needed, you canfinish
loosening them with your
fingers.
Then, using theflat end of the wheel wrench, pry along
the edge of the wheel cover until it comes off. Be
careful; the edge may be sharp. Don’t try to remove the
cover with your bare hands.
Removing the Flat Tire and Installing
the Spare Tire
1. Using the wheel wrench, loosen all the wheel nuts.
Don’t remove them yet.
2. Turn the jack handle clockwise to raise the jack
lift head.
5-70
2003 - Regal OM
Page 272 of 344
4. Put the compact spare tire near you.
{CAUTION:
Getting under a vehicle when it is jacked up is
dangerous. If the vehicle slips off the jack you
could be badly injured or killed. Never get
under a vehicle when it is supported only by
a jack.
{CAUTION:
Raising your vehicle with the jack improperly
positioned can damage the vehicle and even
make the vehicle fall. To help avoid personal
injury and vehicle damage, be sure to�t the
jack lift head into the proper location before
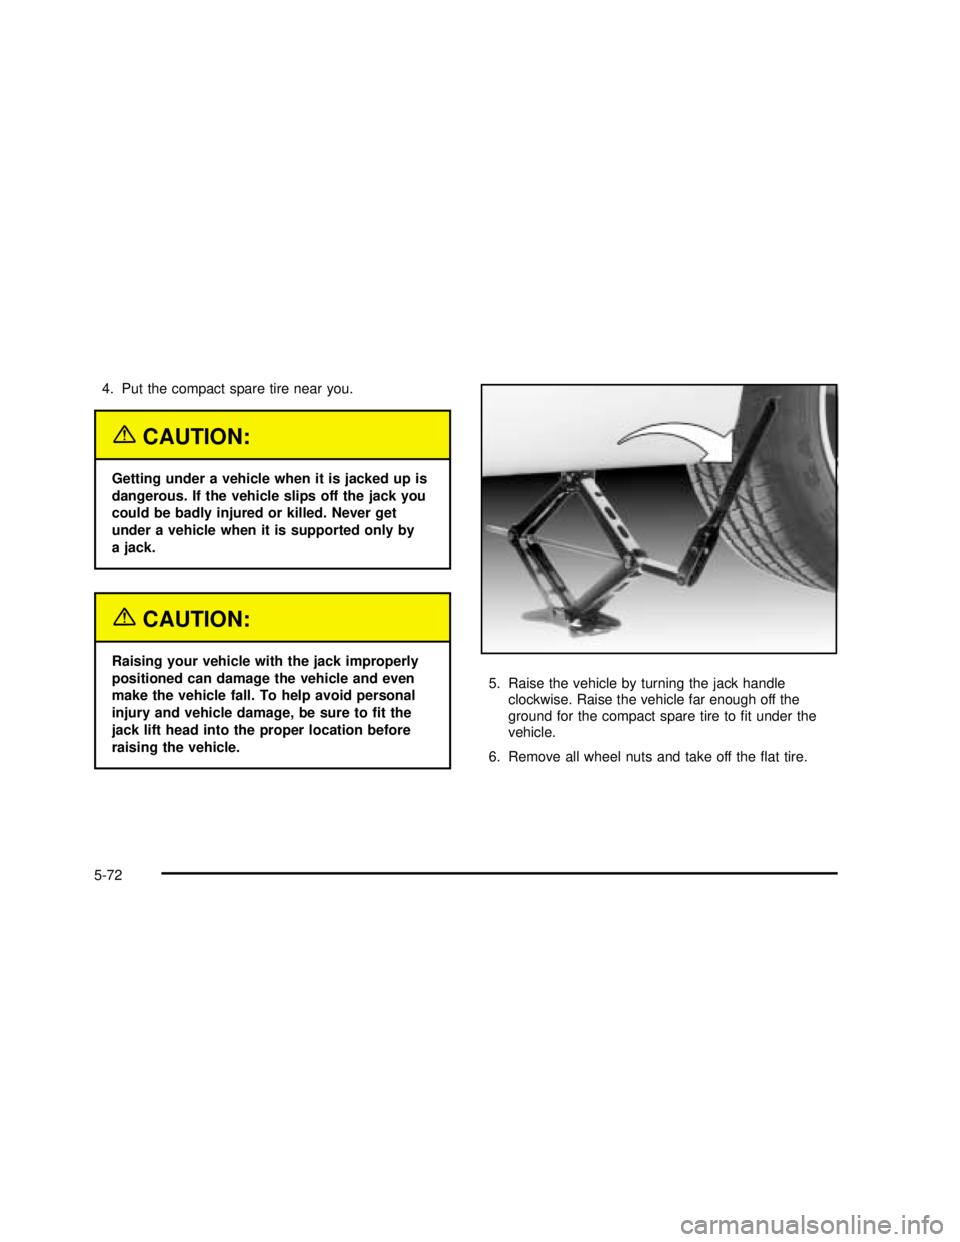
raising the vehicle.5. Raise the vehicle by turning the jack handle
clockwise. Raise the vehicle far enough off the
ground for the compact spare tire tofit under the
vehicle.
6. Remove all wheel nuts and take off theflat tire.
5-72
2003 - Regal OM
Page 273 of 344
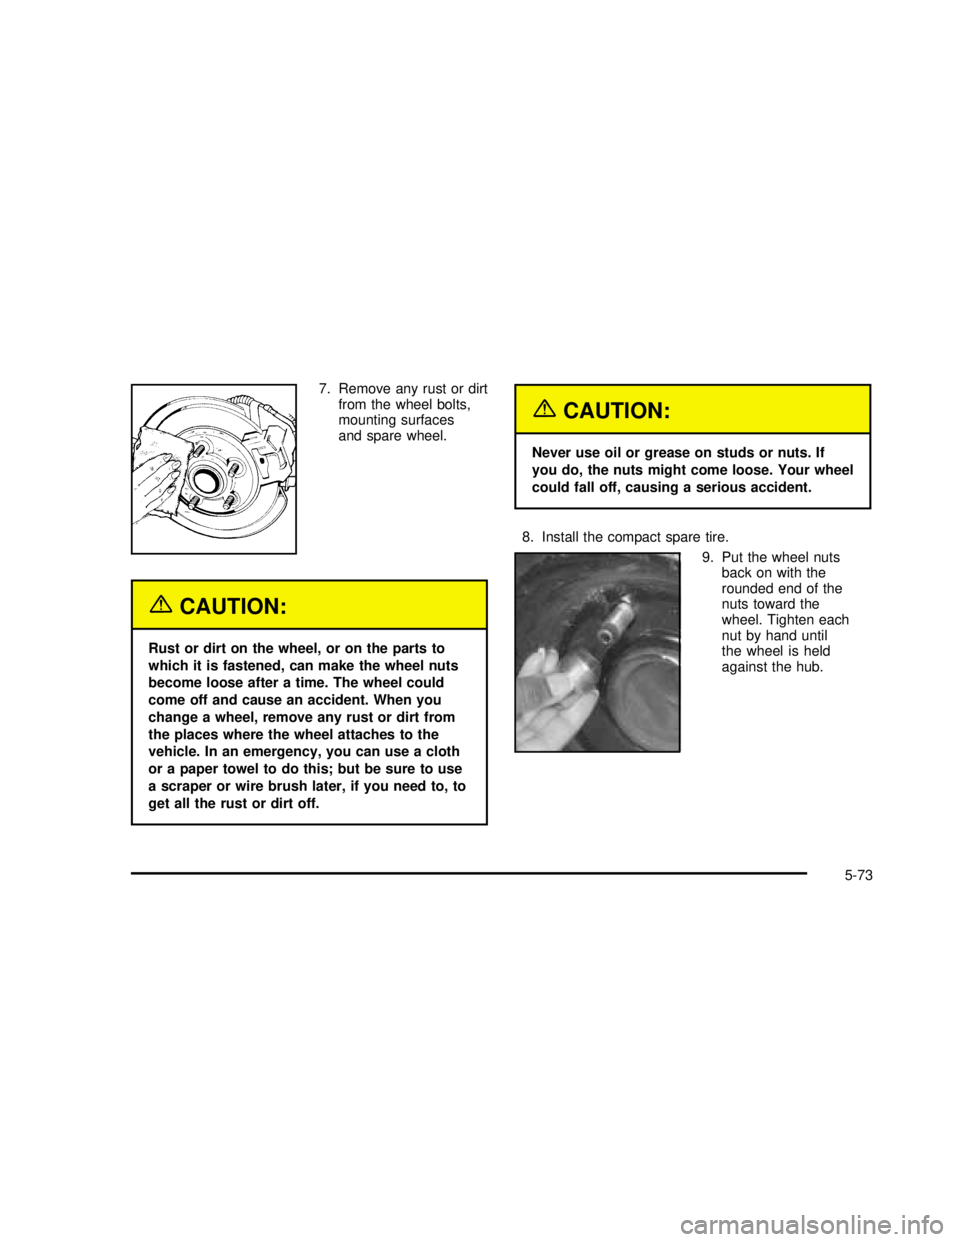
7. Remove any rust or dirt
from the wheel bolts,
mounting surfaces
and spare wheel.
{CAUTION:
Rust or dirt on the wheel, or on the parts to
which it is fastened, can make the wheel nuts
become loose after a time. The wheel could
come off and cause an accident. When you
change a wheel, remove any rust or dirt from
the places where the wheel attaches to the
vehicle. In an emergency, you can use a cloth
or a paper towel to do this; but be sure to use
a scraper or wire brush later, if you need to, to
get all the rust or dirt off.
{CAUTION:
Never use oil or grease on studs or nuts. If
you do, the nuts might come loose. Your wheel
could fall off, causing a serious accident.
8. Install the compact spare tire.
9. Put the wheel nuts
back on with the
rounded end of the
nuts toward the
wheel. Tighten each
nut by hand until
the wheel is held
against the hub.
5-73
2003 - Regal OM
Page 275 of 344
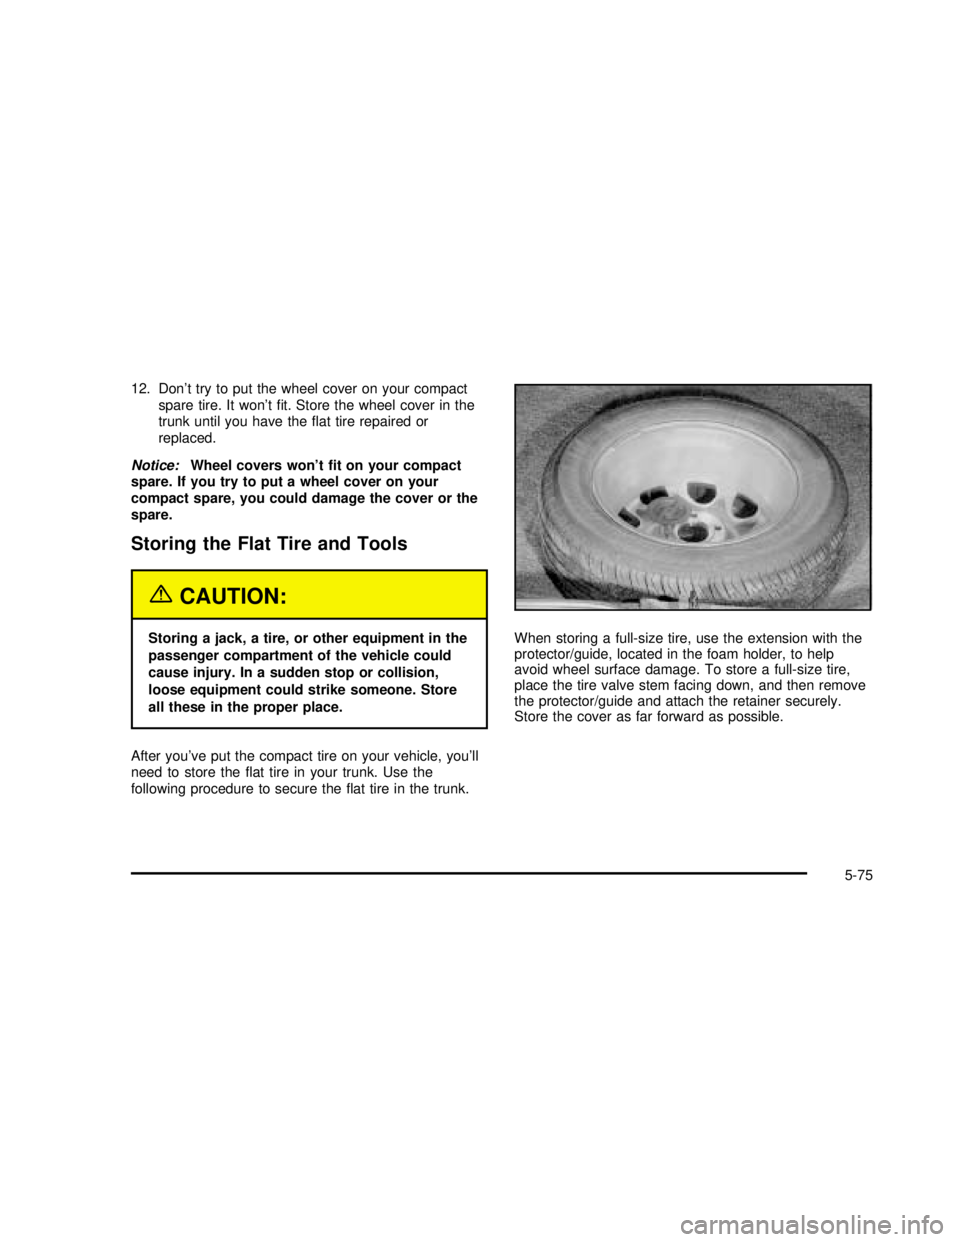
12. Don’t try to put the wheel cover on your compact
spare tire. It won’tfit. Store the wheel cover in the
trunk until you have theflat tire repaired or
replaced.
Notice:Wheel covers won’t�t on your compact
spare. If you try to put a wheel cover on your
compact spare, you could damage the cover or the
spare.
Storing the Flat Tire and Tools
{CAUTION:
Storing a jack, a tire, or other equipment in the
passenger compartment of the vehicle could
cause injury. In a sudden stop or collision,
loose equipment could strike someone. Store
all these in the proper place.
After you’ve put the compact tire on your vehicle, you’ll
need to store theflat tire in your trunk. Use the
following procedure to secure theflat tire in the trunk.When storing a full-size tire, use the extension with the
protector/guide, located in the foam holder, to help
avoid wheel surface damage. To store a full-size tire,
place the tire valve stem facing down, and then remove
the protector/guide and attach the retainer securely.
Store the cover as far forward as possible.
5-75
2003 - Regal OM
Page 276 of 344
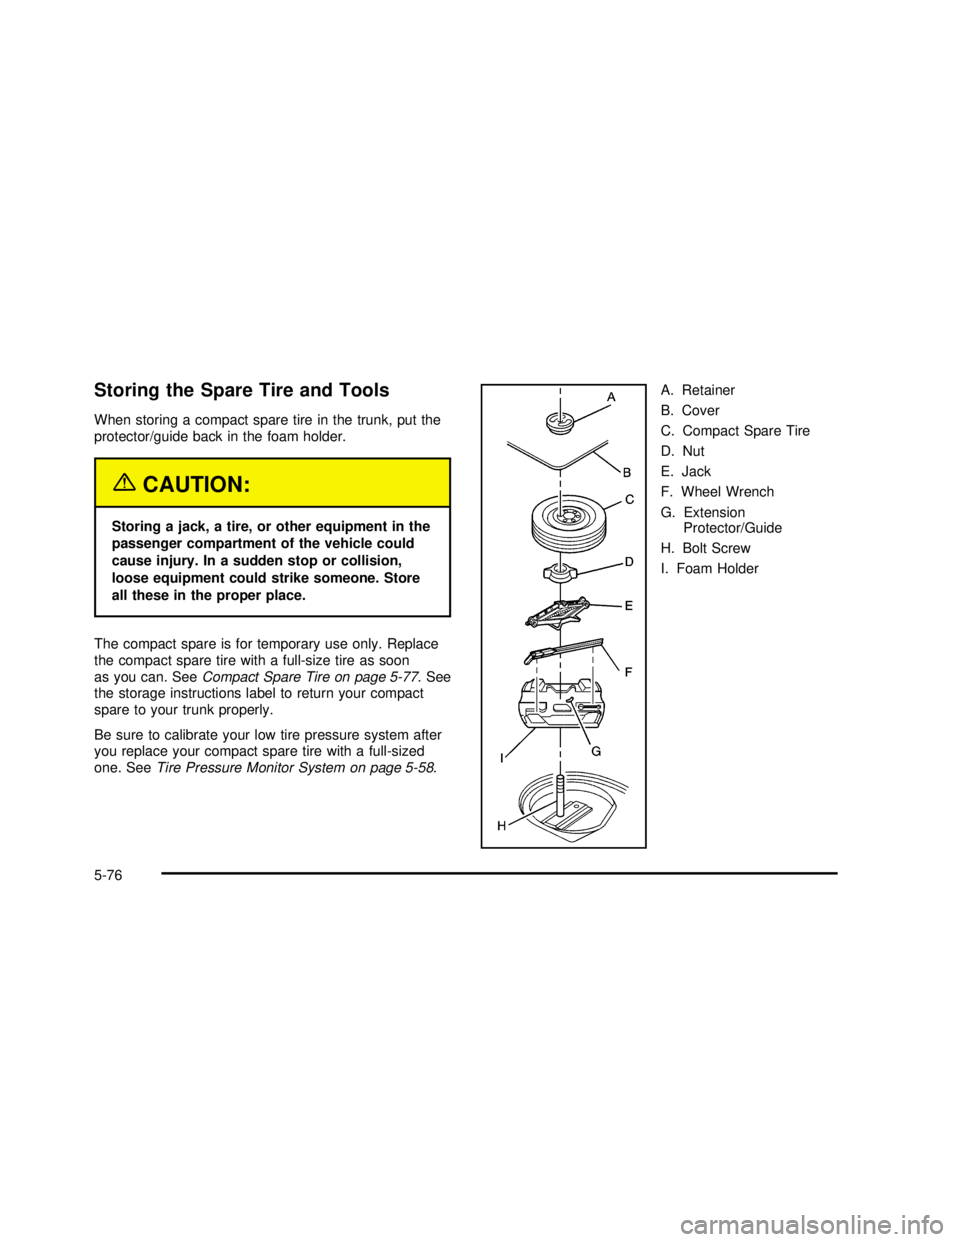
Storing the Spare Tire and Tools
When storing a compact spare tire in the trunk, put the
protector/guide back in the foam holder.
{CAUTION:
Storing a jack, a tire, or other equipment in the
passenger compartment of the vehicle could
cause injury. In a sudden stop or collision,
loose equipment could strike someone. Store
all these in the proper place.
The compact spare is for temporary use only. Replace
the compact spare tire with a full-size tire as soon
as you can. SeeCompact Spare Tire on page 5-77. See
the storage instructions label to return your compact
spare to your trunk properly.
Be sure to calibrate your low tire pressure system after
you replace your compact spare tire with a full-sized
one. SeeTire Pressure Monitor System on page 5-58.A. Retainer
B. Cover
C. Compact Spare Tire
D. Nut
E. Jack
F. Wheel Wrench
G. Extension
Protector/Guide
H. Bolt Screw
I. Foam Holder
5-76
2003 - Regal OM
Page 277 of 344

Compact Spare Tire
Although the compact spare tire was fully inflated when
your vehicle was new, it can lose air after a time.
Check the inflation pressure regularly. It should be
60 psi (420 kPa).
After installing the compact spare on your vehicle, you
should stop as soon as possible and make sure
your spare tire is correctly inflated. The compact spare
is made to perform well at speeds up to 65 mph
(105 km/h) for distances up to 3,000 miles (5 000 km),
so you canfinish your trip and have your full-size
tire repaired or replaced where you want. You must
calibrate the tire inflation monitor system after installing
or removing the compact spare. SeeTire Pressure
Monitor System on page 5-58. The system may not work
correctly when the compact spare is installed on the
vehicle. Of course, it’s best to replace your spare with a
full-size tire as soon as you can. Your spare will last
longer and be in good shape in case you need it again.
Notice:When the compact spare is installed,
don’t take your vehicle through an automatic car
wash with guide rails. The compact spare can
get caught on the rails. That can damage the tire
and wheel, and maybe other parts of your vehicle.Don’t use your compact spare on other vehicles.
And don’t mix your compact spare tire or wheel with
other wheels or tires. They won’tfit. Keep your spare tire
and its wheel together.
Notice:Tire chains won’t�t your compact spare.
Using them can damage your vehicle and can
damage the chains too. Don’t use tire chains on
your compact spare.
Appearance Care
Remember, cleaning products can be hazardous. Some
are toxic. Others can burst intoflames if you strike a
match or get them on a hot part of the vehicle. Some are
dangerous if you breathe their fumes in a closed
space. When you use anything from a container to clean
your vehicle, be sure to follow the manufacturer’s
warnings and instructions. And always open your doors
or windows when you’re cleaning the inside.
5-77
2003 - Regal OM
Page 337 of 344

Power
Accessory Outlets........................................3-15
Auxiliary Connection.....................................3-16
Door Locks.................................................2-10
Drop ..........................................................3-16
Electrical System.........................................5-86
Six-Way Seats.............................................. 1-3
Steering Fluid.............................................5-36
Windows....................................................2-15
Power Steering...............................................4-12
Programmable Automatic Door Locks.................2-10
Programmable Modes......................................2-10
Q
Questions and Answers About Safety Belts.........1-11
R
Radiator Pressure Cap....................................5-25
Radios..........................................................3-44
Care of Your Cassette Tape Player................3-58
Care of Your CD Player...............................3-59
Care of Your CDs ........................................3-59
Radio with Cassette.....................................3-45
Radio with Cassette and CD.........................3-49Radios (cont.)
Setting the Time..........................................3-45
Theft-Deterrent............................................3-55
Understanding Reception..............................3-57
Reading Lamps..............................................3-15
Rear Safety Belt Comfort Guides......................1-24
Rear Seat Outside Passenger Positions.............1-21
Rear Seat Passengers, Safety Belts..................1-21
Rear Window Defogger............................3-19, 3-23
Rearview Mirror, Automatic Dimming..................2-32
Rearview Mirror, Automatic Dimming
with OnStar
®..............................................2-32
Rearview Mirror with OnStar®...........................2-31
Rearview Mirrors.............................................2-31
Reclining Seatbacks.......................................... 1-4
Recreational Vehicle Towing
.............................4-31
Remote Keyless Entry System
............................ 2-3
Remote Keyless Entry System, Operation
............ 2-4
Remote Trunk Release
....................................2-12
Removing the Flat Tire and Installing
the Spare Tire
.............................................5-70
Removing the Spare Tire and Tools
...................5-67
Removing the Wheel Center Caps
....................5-69
Removing the Wheel Covers
............................5-70
Replacement Bulbs
.........................................5-55
Replacing Brake System Parts
..........................5-42
11
2003 - Regal OM