BUICK REGAL 2013 Get To Know Guide
Manufacturer: BUICK, Model Year: 2013, Model line: REGAL, Model: BUICK REGAL 2013Pages: 20, PDF Size: 3.17 MB
Page 11 of 20
11
IntelliLink System
Note: ALWAYS VERIFY THAT YOUR PHONE HAS THE LATEST VERSION OF AN APPLICATION AND THAT THE PHONE
VOLUME IS TURNED UP.
PANDORA® Internet Radio
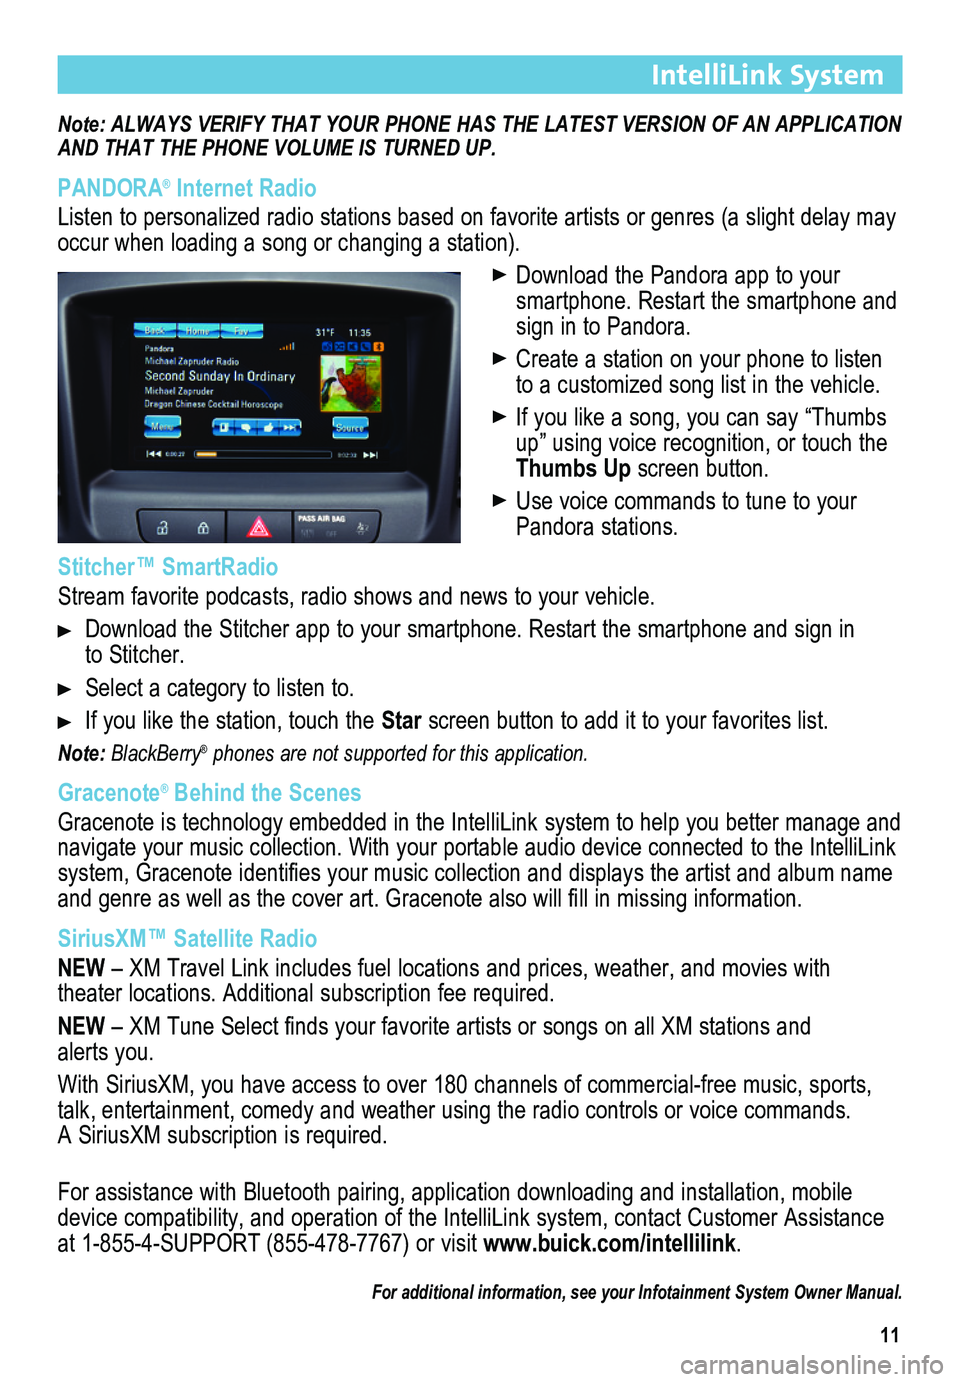
Listen to personalized radio stations based on favorite artists or genres (a slight delay may \
occur when loading a song or changing a station).
Download the Pandora app to your smartphone. Restart the smartphone and sign in to Pandora.
Create a station on your phone to listen to a customized song list in the vehicle.
If you like a song, you can say “Thumbs up” using voice recognition, or touch the Thumbs Up screen button.
Use voice commands to tune to your Pandora stations.
Stitcher™ SmartRadio
Stream favorite podcasts, radio shows and news to your vehicle.
Download the Stitcher app to your smartphone. Restart the smartphone and sign in to Stitcher.
Select a category to listen to.
If you like the station, touch the Star screen button to add it to your favorites list.
Note: BlackBerry® phones are not supported for this application.
Gracenote® Behind the Scenes
Gracenote is technology embedded in the IntelliLink system to help you better manage and navigate your music collection. With your portable audio device connected to the IntelliLink system, Gracenote identifies your music collection and displays the artist and album name and genre as well as the cover art. Gracenote also will fill in missing information.
SiriusXM™ Satellite Radio
NEW – XM Travel Link includes fuel locations and prices, weather, and movies with
theater locations. Additional subscription fee required.
NEW – XM Tune Select finds your favorite artists or songs on all XM stations and alerts you.
With SiriusXM, you have access to over 180 channels of commercial-free music, sports, talk, entertainment, comedy and weather using the radio controls or voice commands. A SiriusXM subscription is required.
For assistance with Bluetooth pairing, application downloading and installation, mobile device compatibility, and operation of the IntelliLink system, contact Customer Assistance at 1-855-4-SUPPORT (855-478-7767) or visit www.buick.com/intellilink.
For additional information, see your Infotainment System Owner Manual.
Page 12 of 20
12
Note: AVOID EXTENDED SEARCHING FOR ITEMS OR CONFIGURING SETTINGS WHILE DRIVING.
Navigation SystemF
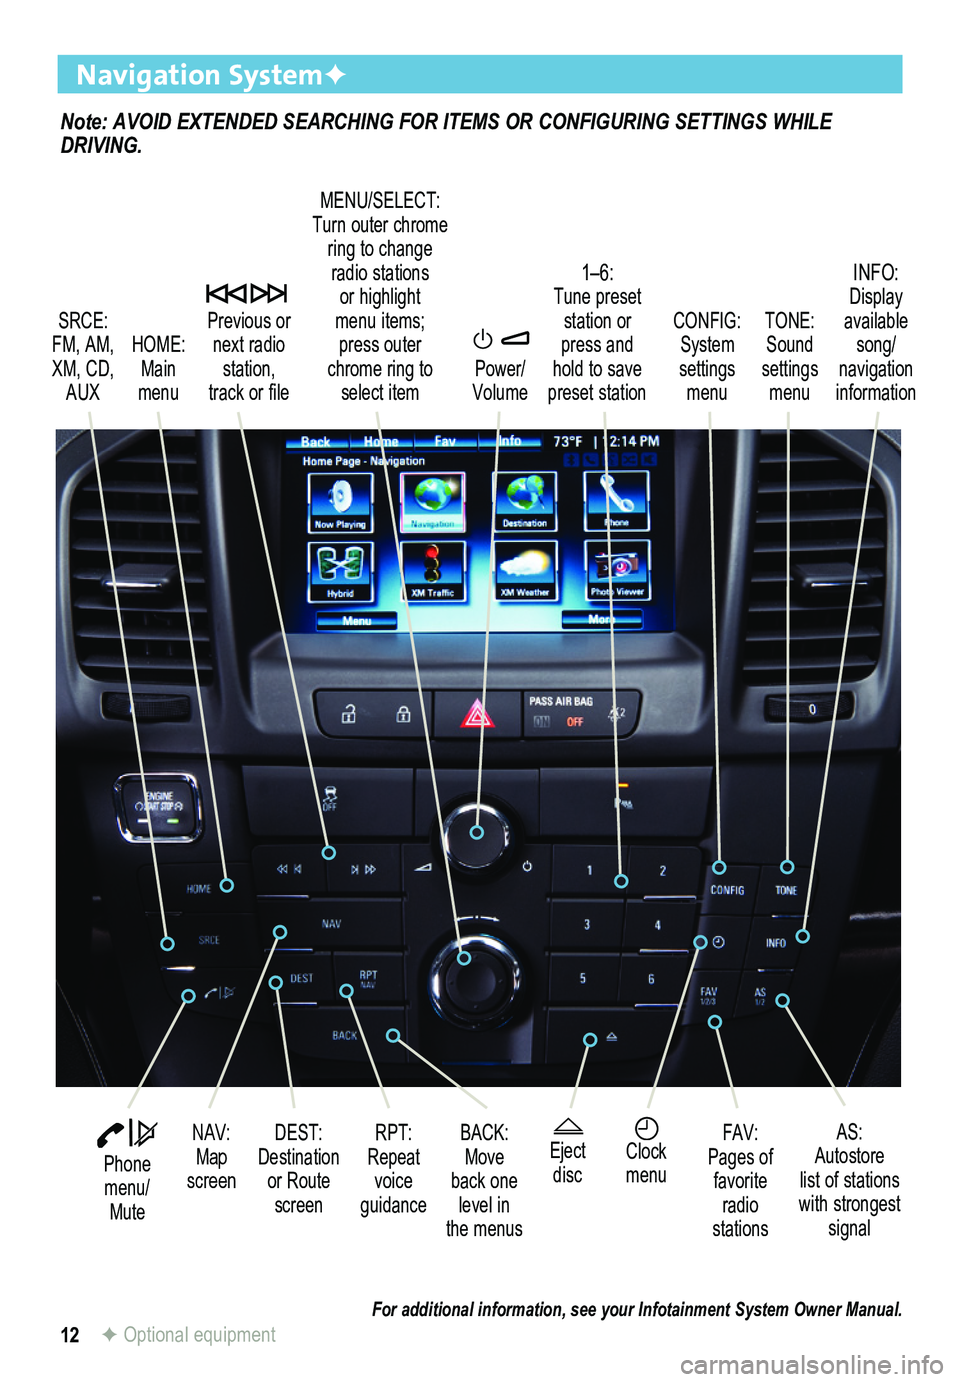
SRCE: FM, AM, XM, CD, AUX
1–6: Tune preset station or press and hold to save preset station
TONE: Sound settings menu
INFO: Display available song/ navigation information
CONFIG: System settings menu
Previous or next radio station, track or file
HOME: Main menu
Power/ Volume
DEST: Destination or Route screen
NAV: Map screen
RPT: Repeat voice guidance
FAV:Pages of favorite radio stations
AS:Autostore list of stations with strongest signal
MENU/SELECT:Turn outer chrome ring to change radio stations or highlight menu items;press outer chrome ring to select item
Eject discClock menu
BACK: Move back one level in the menus
Phone menu/ Mute
For additional information, see your Infotainment System Owner Manual.F Optional equipment
Page 13 of 20
13
Note: WHEN THE VEHICLE IS MOVING, VARIOUS ON-SCREEN FUNCTIONS ARE DISABLED TO REDUCE DRIVER DISTRACTION.
The navigation system includes the features of the IntelliLink system an\
d the touch screen infotainment display.
To select various system functions, touch the highlighted touch screen buttons in the on-screen menus or use the MENU/SELECT knob.
Navigation SystemF
Clock
Setting the Time
1. Turn on the radio.
2. Press the Clock button.
3. Use the screen buttons to adjust the time, date and day settings.
4. The new time settings will be displayed after exiting the screen.
See Instruments and Controls in your Owner Manual.
F Optional equipment
Entering a Destination
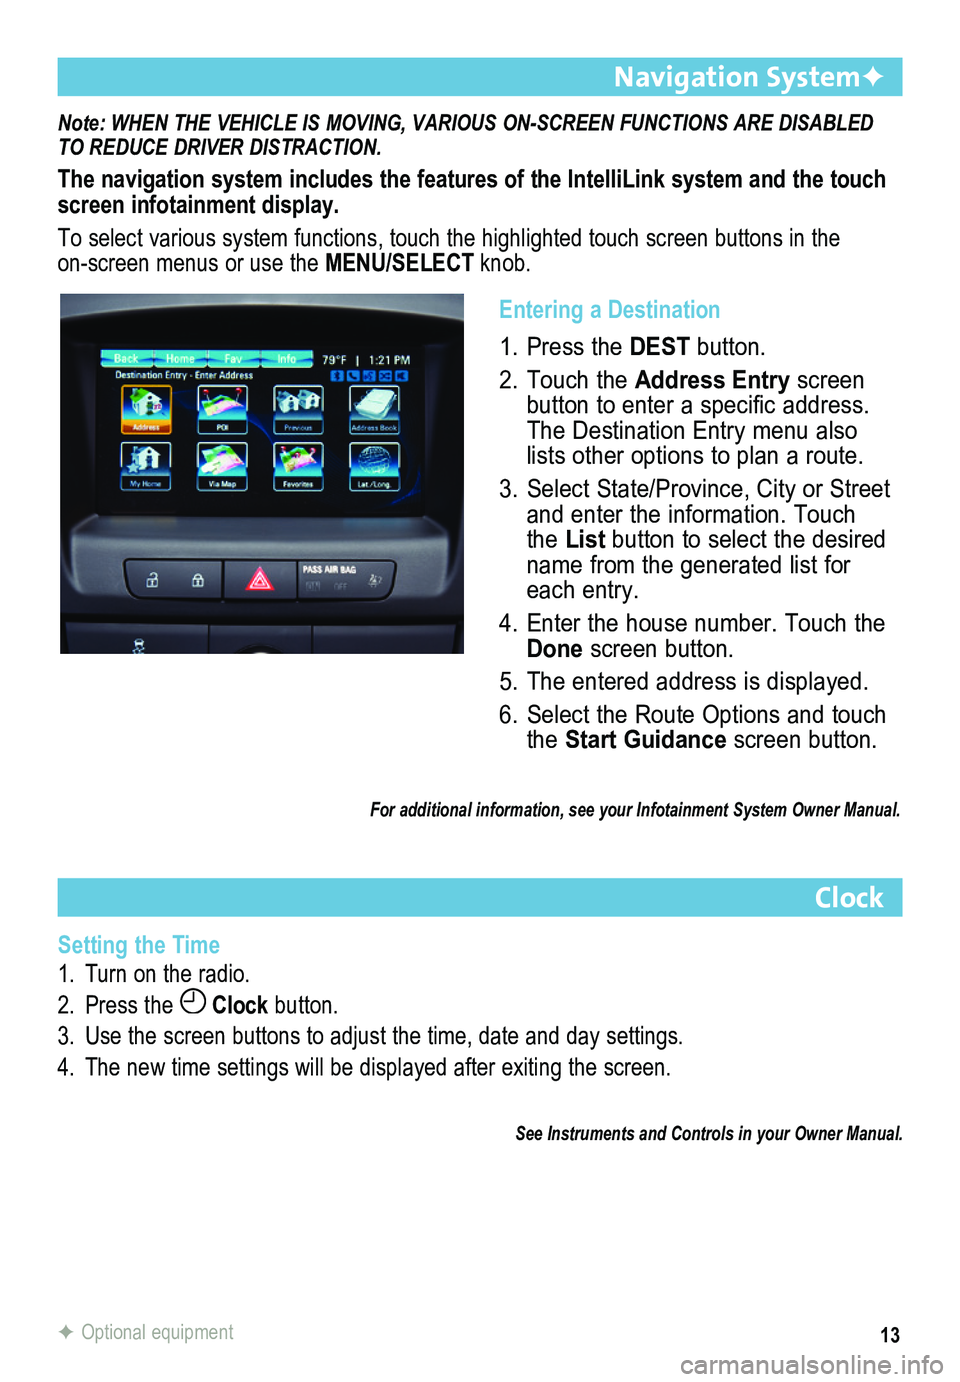
1. Press the DEST button.
2. Touch the Address Entry screen button to enter a specific address. The Destination Entry menu also lists other options to plan a route.
3. Select State/Province, City or Street and enter the information. Touch the List button to select the desired name from the generated list for each entry.
4. Enter the house number. Touch the Done screen button.
5. The entered address is displayed.
6. Select the Route Options and touch the Start Guidance screen button.
For additional information, see your Infotainment System Owner Manual.
Page 14 of 20
14
Audio/Bluetooth® Steering Wheel Controls
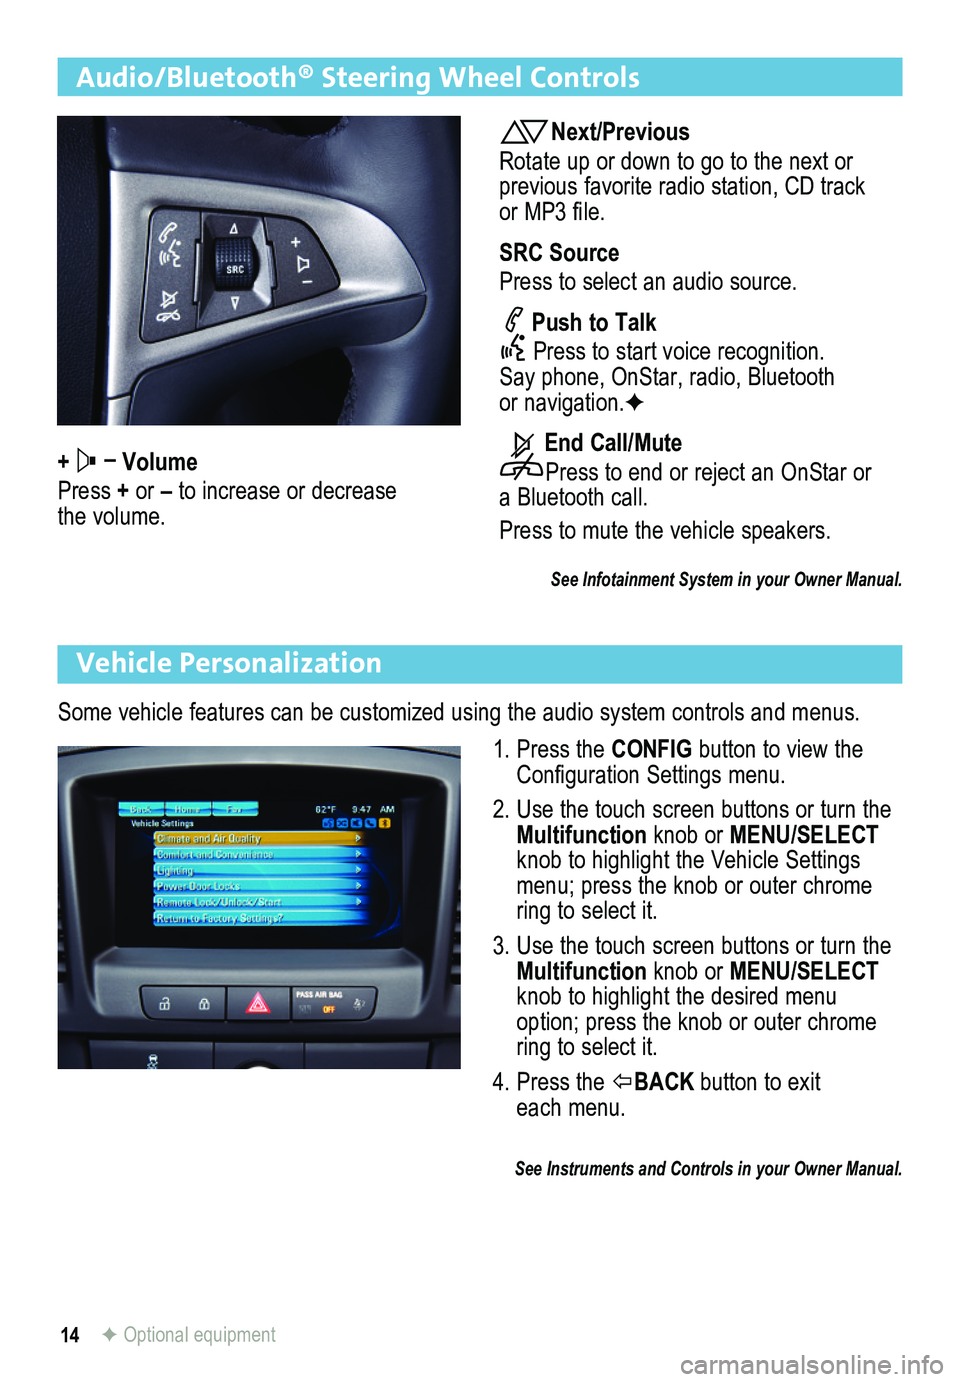
+ – Volume
Press + or – to increase or decrease the volume.
Next/Previous
Rotate up or down to go to the next or previous favorite radio station, CD track or MP3 file.
SRC Source
Press to select an audio source.
Push to Talk
Press to start voice recognition. Say phone, OnStar, radio, Bluetooth or navigation.F
End Call/Mute
Press to end or reject an OnStar or a Bluetooth call.
Press to mute the vehicle speakers.
See Infotainment System in your Owner Manual.
Vehicle Personalization
Some vehicle features can be customized using the audio system controls and menus.
1. Press the CONFIG button to view the Configuration Settings menu.
2. Use the touch screen buttons or turn the Multifunction knob or MENU/SELECT knob to highlight the Vehicle Settings menu; press the knob or outer chrome ring to select it.
3. Use the touch screen buttons or turn the Multifunction knob or MENU/SELECT knob to highlight the desired menu option; press the knob or outer chrome ring to select it.
4. Press the BACK button to exit each menu.
See Instruments and Controls in your Owner Manual.
F Optional equipment
Page 15 of 20
15
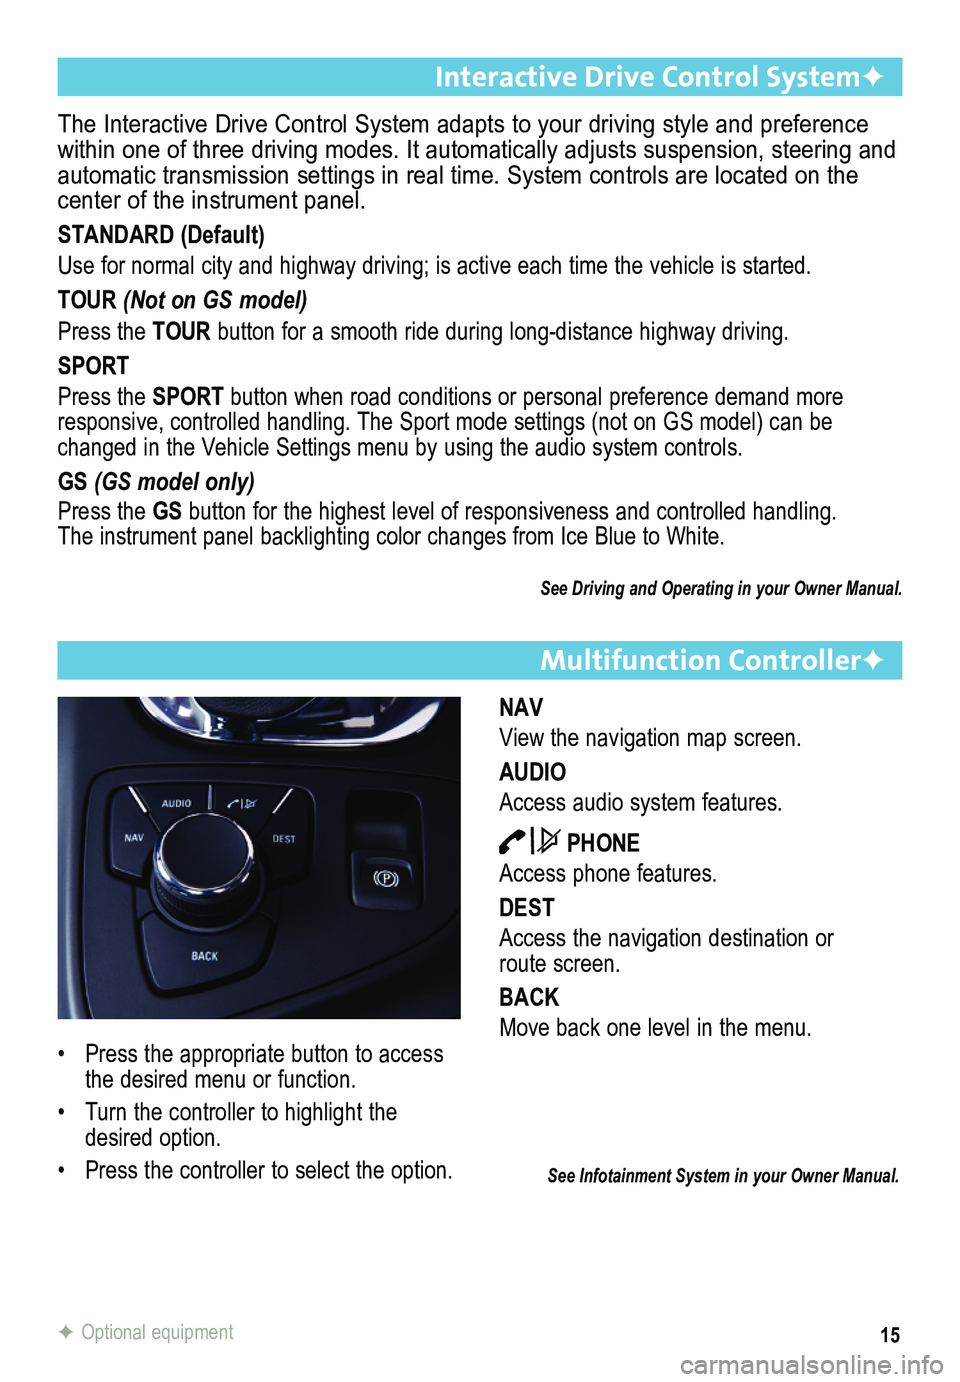
Multifunction ControllerF
NAV
View the navigation map screen.
AUDIO
Access audio system features.
PHONE
Access phone features.
DEST
Access the navigation destination or route screen.
BACK
Move back one level in the menu.
The Interactive Drive Control System adapts to your driving style and pr\
eference within one of three driving modes. It automatically adjusts suspension, \
steering and automatic transmission settings in real time. System controls are locate\
d on the center of the instrument panel.
STANDARD (Default)
Use for normal city and highway driving; is active each time the vehicle\
is started.
TOUR (Not on GS model)
Press the TOUR button for a smooth ride during long-distance highway driving.
SPORT
Press the SPORT button when road conditions or personal preference demand more responsive, controlled handling. The Sport mode settings (not on GS model) can be changed in the Vehicle Settings menu by using the audio system controls.\
GS (GS model only)
Press the GS button for the highest level of responsiveness and controlled handling. The instrument panel backlighting color changes from Ice Blue to White.
See Driving and Operating in your Owner Manual.
Interactive Drive Control SystemF
See Infotainment System in your Owner Manual.
• Press the appropriate button to access the desired menu or function.
• Turn the controller to highlight the desired option.
• Press the controller to select the option.
F Optional equipment
Page 16 of 20
16
Driver Information Center
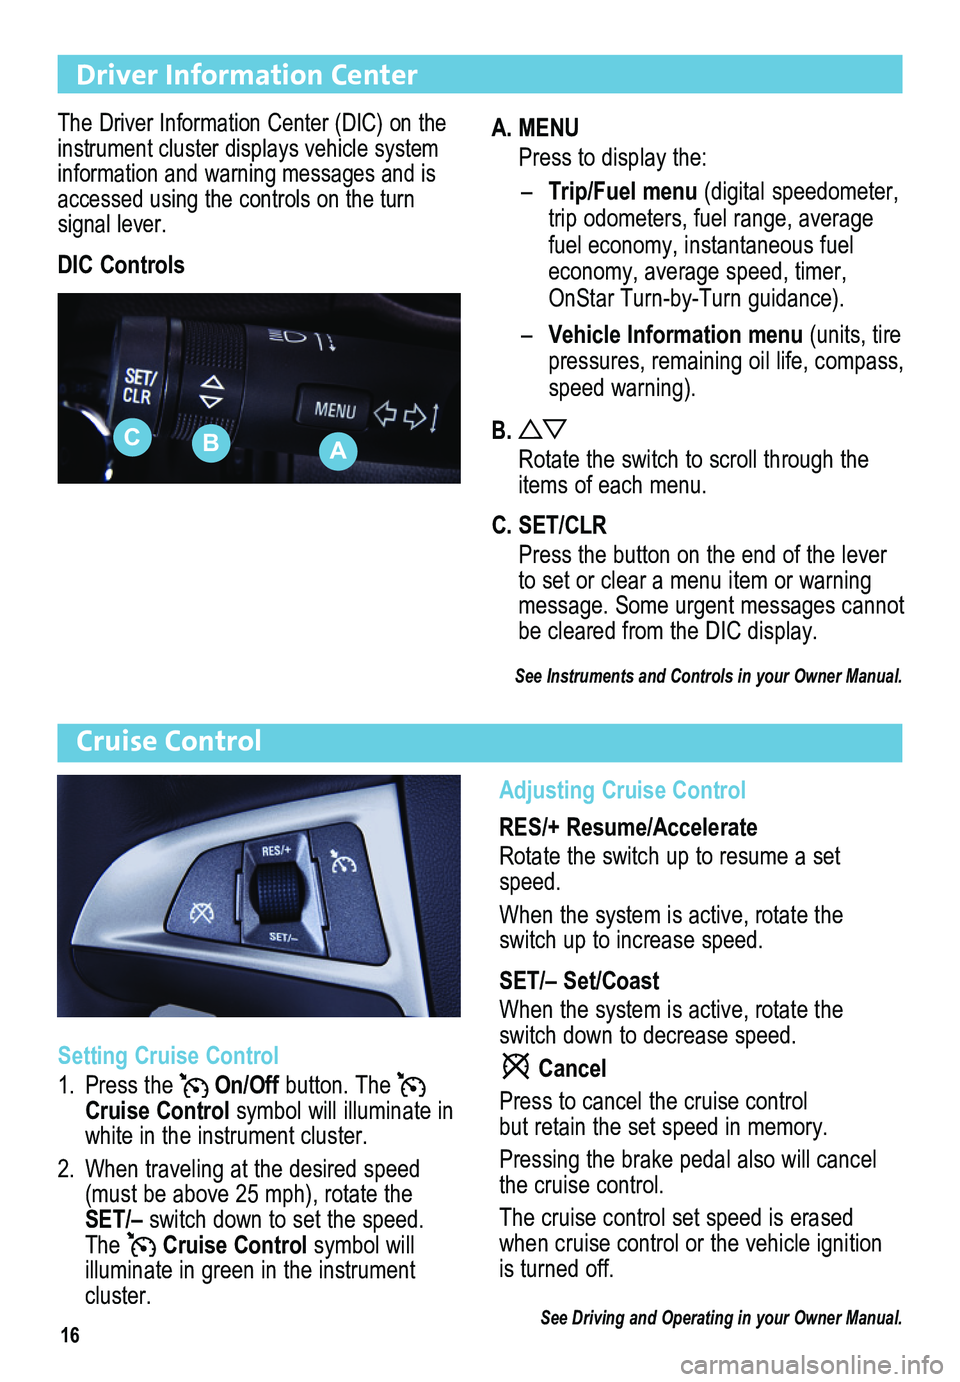
The Driver Information Center (DIC) on the instrument cluster displays vehicle system info r mation and warning messages and is accessed using the controls on the turn signal lever.
DIC Controls
Cruise Control
Adjusting Cruise Control
RES/+ Resume/Accelerate
Rotate the switch up to resume a set speed.
When the system is active, rotate the switch up to increase speed.
SET/– Set/Coast
When the system is active, rotate the switch down to decrease speed.
Cancel
Press to cancel the cruise control but retain the set speed in memory.
Pressing the brake pedal also will cancel the cruise control.
The cruise control set speed is erased when cruise control or the vehicle ignition is turned off.
See Driving and Operating in your Owner Manual.
Setting Cruise Control
1. Press the On/Off button. The Cruise Control symbol will illuminate in white in the instrument cluster.
2. When traveling at the desired speed (must be above 25 mph), rotate the SET/– switch down to set the speed. The Cruise Control symbol will
illuminate in green in the instrument cluster.
A. MENU
Press to display the:
– Trip/Fuel menu (digital speed ometer, trip odometers, fuel range, average fuel economy, instantaneous fuel economy, average speed, timer, OnStar Turn-by-Turn guidance).
– Vehicle Information menu (units, tire pressures, remaining oil life, compass, speed warning).
B.
Rotate the switch to scroll through the items of each menu.
C. SET/CLR
Press the button on the end of the lever to set or clear a menu item or warning message. Some urgent messages
cannot be cleared from the DIC display.
See Instruments and Controls in your Owner Manual.
ABC
Page 17 of 20
17
Automatic Transmission
Detected objects are indicated by audible beeps when the vehicle is in Reverse. The
interval between beeps becomes shorter as the vehicle gets closer to an object. When the distance is less than 12 in. (30cm), the beeps are continuous. The system operates only at speeds less than 5 mph.
• To turn the system on/off, press the Parking Assist button on the center of the instrument panel.
Note: THE SYSTEM MAY BE DISABLED IF DIRT, SNOW OR ICE BUILDS UP ON THE SENSORS. KEEP THE VEHICLE CLEAN FOR PROPER OPERATION.
See Driving and Operating in your Owner Manual.
Electric Parking Brake
• To apply the parking brake, pull up theParking Brake switch by the shift lever.
• To release the parking brake, turn on the ignition, press the brake pedal and press the Parking Brake switch.
See Driving and Operating in your Owner Manual.
Ultrasonic Rear Parking AssistF
The full-time, full-function traction control system limits wheelspin and the StabiliTrak
electronic stability control system assists with directional control of the vehicle in difficult driving conditions. Both systems turn on automatically every time the vehicle is started.
Turning the Systems Off/On
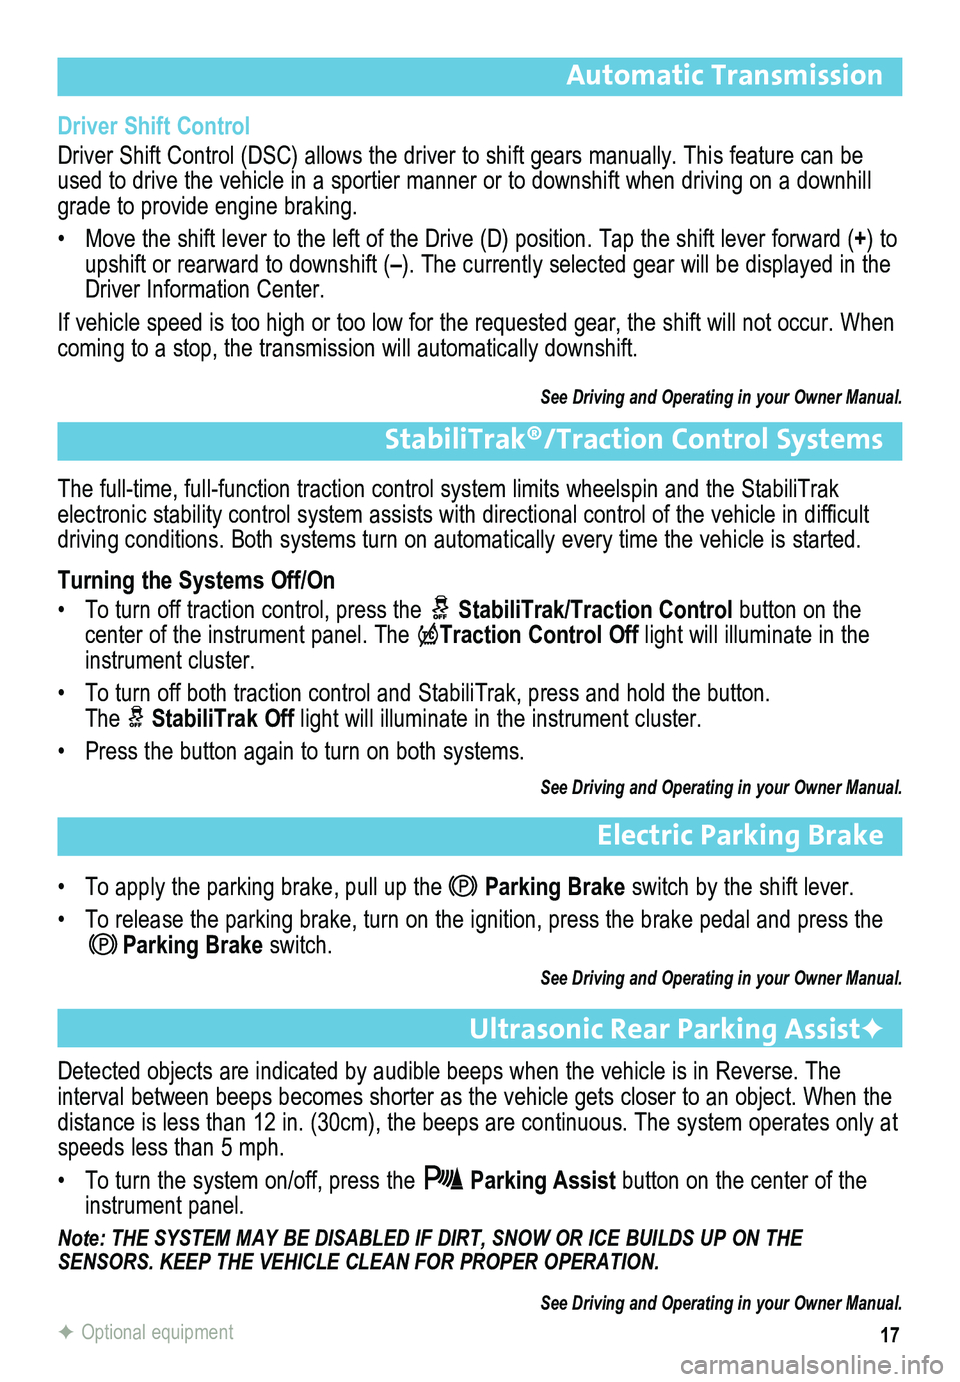
• To turn off traction control, press the StabiliTrak/Traction Control button on the center of the instrument panel. The Traction Control Off light will illuminate in the instrument cluster.
• To turn off both traction control and StabiliTrak, press and hold the button. The StabiliTrak Off light will illuminate in the instrument cluster.
• Press the button again to turn on both systems.
See Driving and Operating in your Owner Manual.
StabiliTrak®/Traction Control Systems
Driver Shift Control
Driver Shift Control (DSC) allows the driver to shift gears manually. This feature can be used to drive the vehicle in a sportier manner or to downshift when driv\
ing on a downhill grade to provide engine braking.
• Move the shift lever to the left of the Drive (D) position. Tap the shift lever forward (+) to upshift or rearward to downshift (–). The currently selected gear will be displayed in the Driver Information Center.
If vehicle speed is too high or too low for the requested gear, the shif\
t will not occur. When coming to a stop, the transmission will automatically downshift.
See Driving and Operating in your Owner Manual.
F Optional equipment
Page 18 of 20
18
eAssist Overview (if equipped)
A compact electric drive system called eAssist has been integrated with the highly efficient 2.4-liter four-cylinder engine and six-speed automatic transmission to provide an electric “boost” to help conserve fuel. eAssist includes a small, but powerful, electric motor rated at 15 kilowatts. It replaces the typical alternator found on most engines. \
eAssist also uses a small, advanced 115-volt lithium-ion battery located in the trunk.
eAssist Features
Your Regal with eAssist has several features that increase vehicle efficiency and maximize fuel economy.
When braking or coasting, the electric motor acts like a generator to ch\
arge the high- voltage battery. This “regenerative braking” process captures kine\
tic energy that would otherwise be lost and stores it in the high-voltage battery. This electrical energy can then be reused.
Note: THE REGENERATIVE BRAKING PROCESS REQUIRES UNIQUE TRANSMISSION SHIFTING AS THE VEHICLE SLOWS DOWN.
When the vehicle comes to a stop, the engine may turn off automatically, saving fuel that would otherwise be used while idling. This is called an Auto Stop. The v\
ehicle is powered by the high-voltage battery.
Note: THE eASSIST FEATURES OF THE VEHICLE ARE ENABLED AFTER THE ENGINE REACHES OPERATING TEMPERATURE.
Auto Start/Stop
While driving, when the brake is applied and the vehicle comes to a complete stop, the automatic engine start/stop system may turn off the engine, referred to \
as an Auto Stop. In Auto Stop mode, the tachometer gauge will read AUTO STOP. The audio syst\
em, climate controls and other accessories will be powered by the high-voltage battery. The engine will restart immediately when the brake pedal is released or the accelerator pedal is applied.
After parking the vehicle and turning off the engine using the key or START/STOP buttonF, the tachometer gauge will read OFF.
Auto Start/Stop Conditions
There are several conditions that may cause the engine to remain running or restart when the vehicle is stopped.
• The engine, transmission or high voltage battery is not warmed up.
• The outside temperature is less than –4°F (–20°C).
• The shift lever is in any gear other than Drive (D).
• The high-voltage battery state of charge is low.
• The climate control system requires the engine to run based on the climate control or defog setting. Using the eco Air Conditioning mode will result in more f\
requent and
longer Auto Stops than the Comfort Air Conditioning mode.
• The Auto Stop time is greater than two minutes.
See Driving and Operating in your Owner Manual.
F Optional equipment
Page 19 of 20
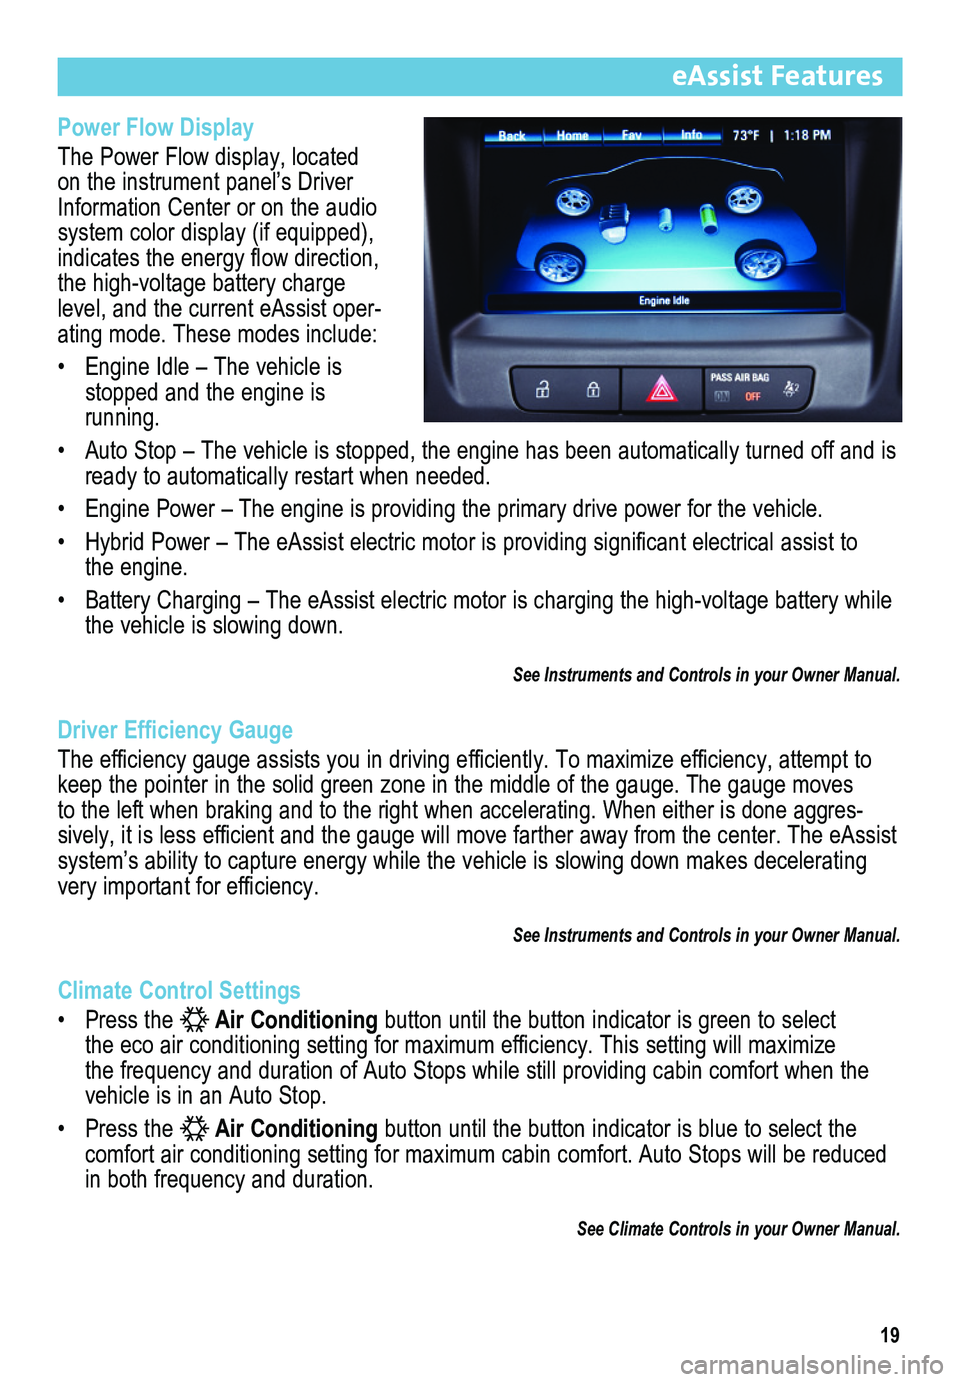
Power Flow Display
The Power Flow display, located on the instrument panel’s Driver Information Center or on the audio system color display (if equipped),
indicates the energy flow direction, the high-voltage battery charge level, and the current eAssist oper-ating mode. These modes include:
• Engine Idle – The vehicle is stopped and the engine is running.
• Auto Stop – The vehicle is stopped, the engine has been automatically turned off and is ready to automatically restart when needed.
• Engine Power – The engine is providing the primary drive power for the vehicle.
• Hybrid Power – The eAssist electric motor is providing significant electrical assist to the engine.
• Battery Charging – The eAssist electric motor is charging the high-voltage battery while the vehicle is slowing down.
See Instruments and Controls in your Owner Manual.
Driver Efficiency Gauge
The efficiency gauge assists you in driving efficiently. To maximize efficiency, attempt to keep the pointer in the solid green zone in the middle of the gauge. The\
gauge moves to the left when braking and to the right when accelerating. When either is\
done aggres-sively, it is less efficient and the gauge will move farther away from the center. The eAssist
system’s ability to capture energy while the vehicle is slowing down makes decelerating very important for efficiency.
See Instruments and Controls in your Owner Manual.
Climate Control Settings
• Press the Air Conditioning button until the button indicator is green to select the eco air conditioning setting for maximum efficiency. This setting will maximize the frequency and duration of Auto Stops while still providing cabin comfort\
when the
vehicle is in an Auto Stop.
• Press the Air Conditioning button until the button indicator is blue to select the comfort air conditioning setting for maximum cabin comfort. Auto Stops will be reduced in both frequency and duration.
See Climate Controls in your Owner Manual.
19
eAssist Features
Page 20 of 20
20
22822966 A
!22822966!
Certain restrictions, precautions and safety procedures apply to your ve\
hicle. Please read your Owner Manual for complete instructions. All information contained herein is based on the \
latest information available at the time of printing and is subject to change without notice. Copyright 2012 General\
Motors. All rights reserved.
Always demand genuine GM Parts
Roadside Assistance
1-800-252-1112 TTY Users: 1-888-889-2438
As the owner of a new Buick, your vehicle is automatically enrolled in the Buick Roadside Assistance program for 6 years/70,000 miles at no expense to you. This value-added \
service is intended to provide you with peace of mind as you drive acros\
s town or travel the open road.
Buick’s Roadside Assistance toll-free number is staffed by a team of trained advisors who are available 24 hours a day, 365 days a year, to contact a service provider for light\
ser vices (fuel delivery, jump-starts, flat tire and lock-outs) or make arrangements to tow your vehicle to the nearest Buick dealer.
Roadside Assistance and OnStar
If you have a current OnStar subscription, press the OnStar button and the vehicle will send your current GPS location to an OnStar Advisor who will speak to yo\
u, assess your problem, contact Roadside Assistance and relay your exact location so you will get the help you need.
Buick Owner Center
The Buick Owner Center, a complimentary service for Buick owners, is a one-stop resource designed to enhance your Buick ownership experience. Exclusive member
benefits include online service reminders, vehicle maintenance tips, online owner manual and special privileges.
Sign up today at my.buick.com.
myBuick and OnStar® Mobile Apps
The myBuick and OnStar RemoteLink mobile apps connect owners to a
variety of vehicle information and services, such as a searchable Owner Manual, real-time fuel information and Roadside Assistance, as well as enabling users to perform Remote Keyless Entry transmitter commands, including locking and unlocking the doors and starting the vehicle.
An active OnStar account is required to use the OnStar mobile app. Downl\
oad the mobile apps from your iPhone® or Android™ device’s app store. To learn more about OnStar
services, press the OnStar button, refer to your Owner Manual, call 1-888-466-7827\
or visit OnStar.com.