brake BUICK REGAL 2017 Get To Know Guide
[x] Cancel search | Manufacturer: BUICK, Model Year: 2017, Model line: REGAL, Model: BUICK REGAL 2017Pages: 20, PDF Size: 4.46 MB
Page 2 of 20
2
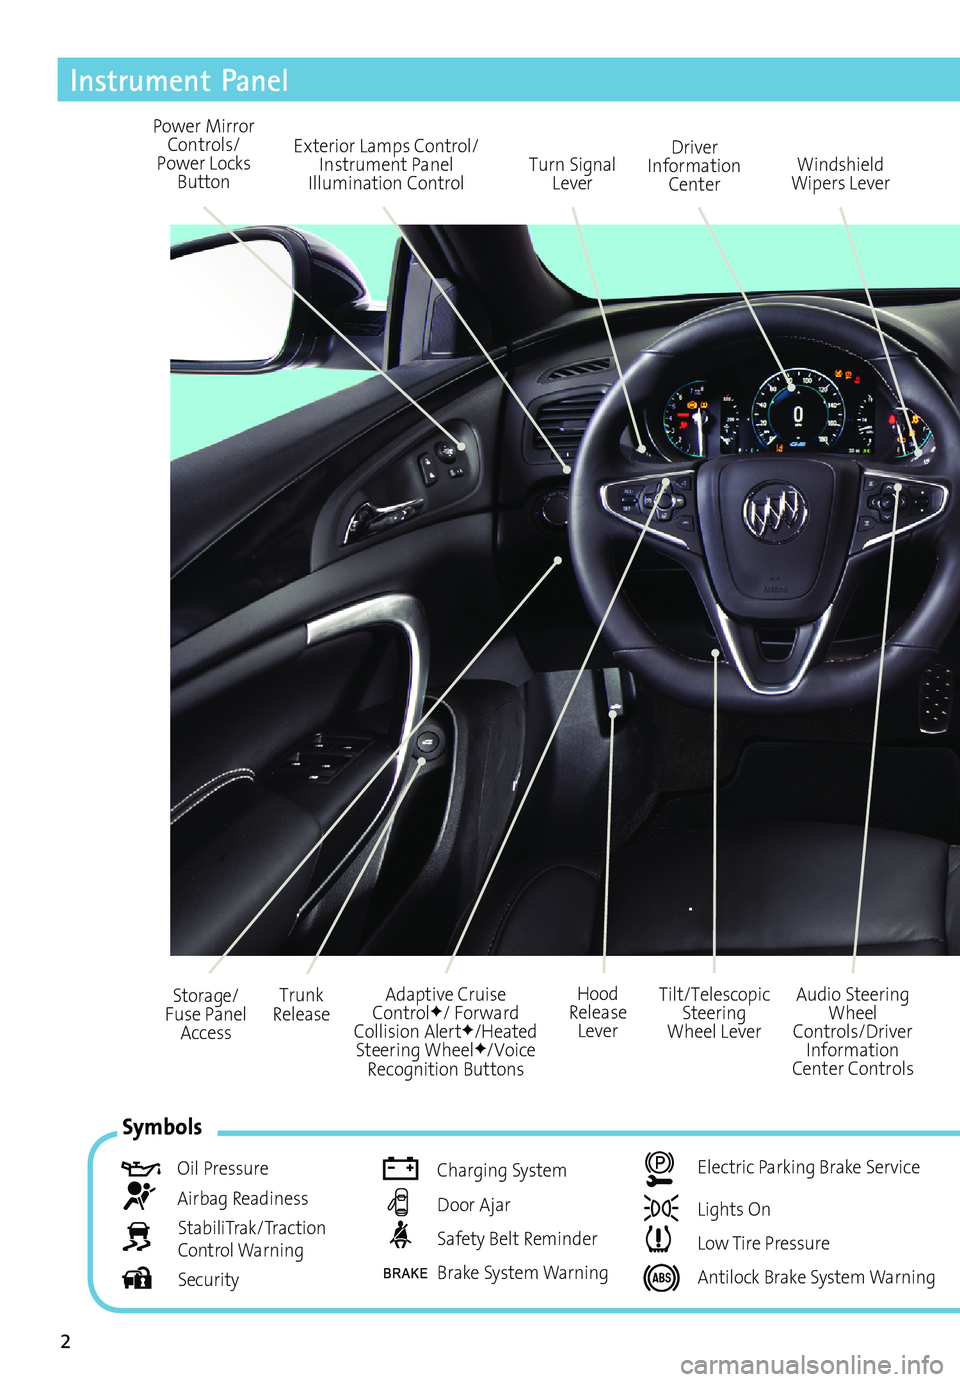
Exterior Lamps Control/Instrument Panel
Illumination Control Turn Signal
Lever
Power Mirror
Controls/
Power Locks Button Driver
Information Center
Tilt/Telescopic Steering
Wheel Lever
Adaptive Cruise
Control
F/ Forward
Collision AlertF/Heated
Steering WheelF/Voice
Recognition Buttons Audio Steering
Wheel
Controls/Driver Information
Center Controls Windshield
Wipers Lever
Hood
Release Lever
Trunk
Release
Storage/
Fuse Panel Access
Instrument Panel
Symbols
Oil Pressure
Airbag Readiness
StabiliTrak/Traction
Control Warning
Security
Charging System
Door Ajar
Safety Belt Reminder
Brake System Warning
Electric Parking Brake Service
Lights On
Low Tire Pressure
Antilock Brake System Warning
Page 3 of 20
3
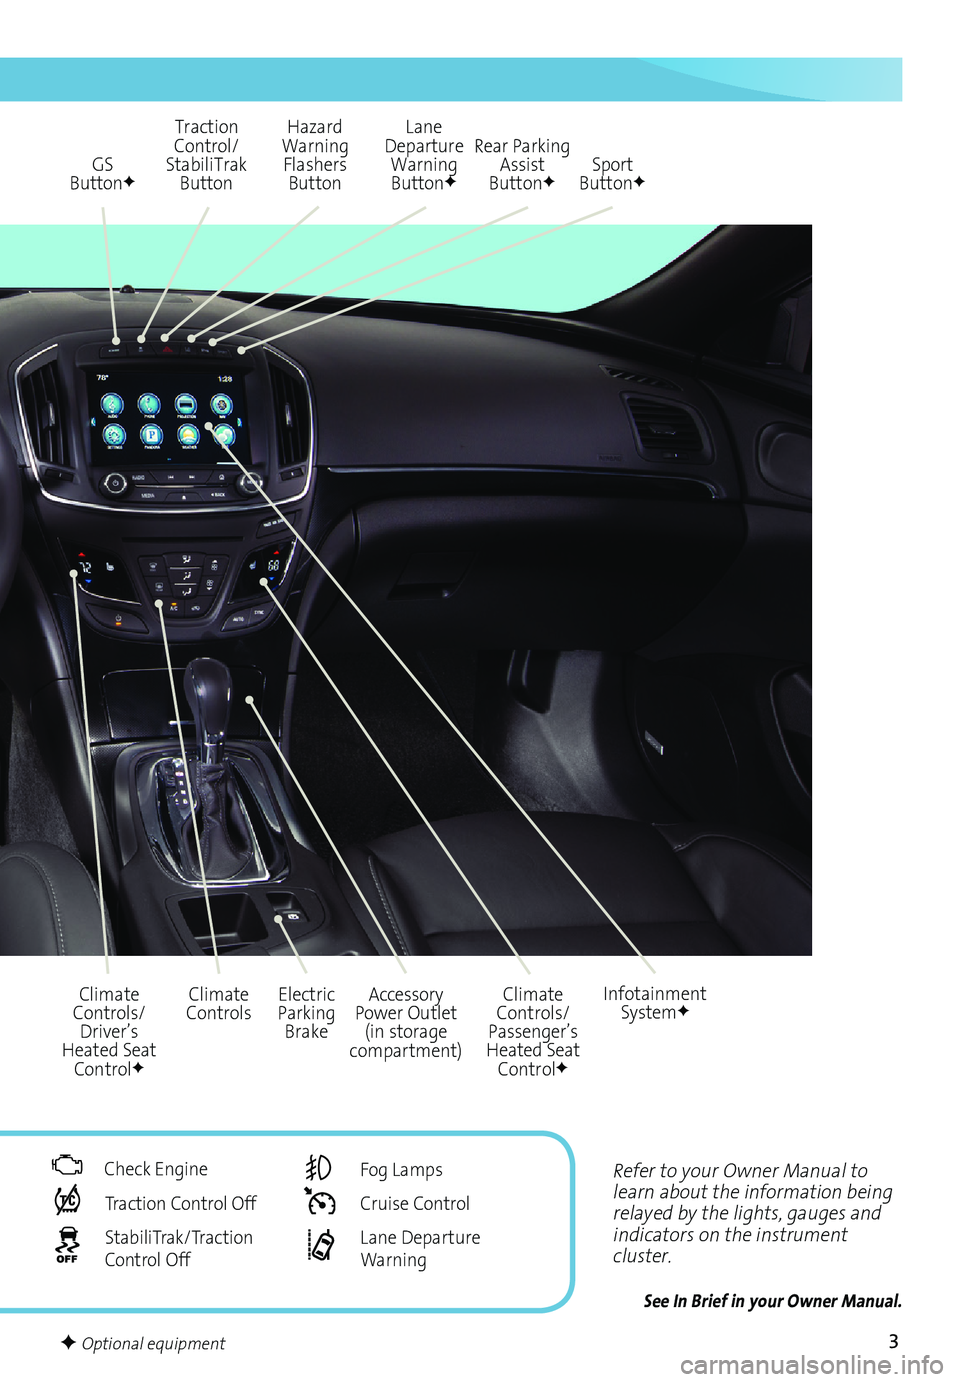
Refer to your Owner Manual to
learn about the information being
relayed by the lights, gauges and
indicators on the instrument
cluster.
See In Brief in your Owner Manual.
GS
ButtonF
Accessory
Power Outlet (in storage
compartment)
Climate
Controls Electric
Parking Brake Climate
Controls/
Passenger’s
Heated Seat Control
F
Infotainment SystemF
Traction
Control/
StabiliTrak Button Hazard
Warning Flashers Button
Climate
Controls/ Driver’s
Heated Seat Control
F
Rear Parking Assist
Button
F
Lane
Departure Warning Button
FSport
ButtonF
Check Engine
Traction Control Off
StabiliTrak/Traction
Control Off
Fog Lamps
Cruise Control
Lane Departure
Warning
F Optional equipment
Page 5 of 20
5F Optional equipment
Keyless Access SystemF
The Keyless Access System enables operation of the doors and ignition without remov-ing the key fob from a pocket or purse. The key fob must be within three feet of the door
being unlocked or the trunk.
Keyless Unlocking
With the key fob within range:
Press the lock button on the driver’s door handle to unlock the driver’s door; press it again within five seconds to unlock all doors.
Press the lock button on a passenger door handle to unlock all doors.
Press the touchpad above the license plate to open the trunk.
Keyless Locking
With the ignition off, the key fob out of the vehicle, and all doors closed:
Press the lock button on any door handle to lock all doors immediately.
If Passive Locking is turned on, all doors will lock automatically after a short delay once
all doors are closed.
Note: To change the door lock and unlock settings, go to Remote Lock, Unlock, Start in the Vehicle
Settings menu.
See Keys, Doors and Windows in your Owner Manual.
Keyless Access StartF
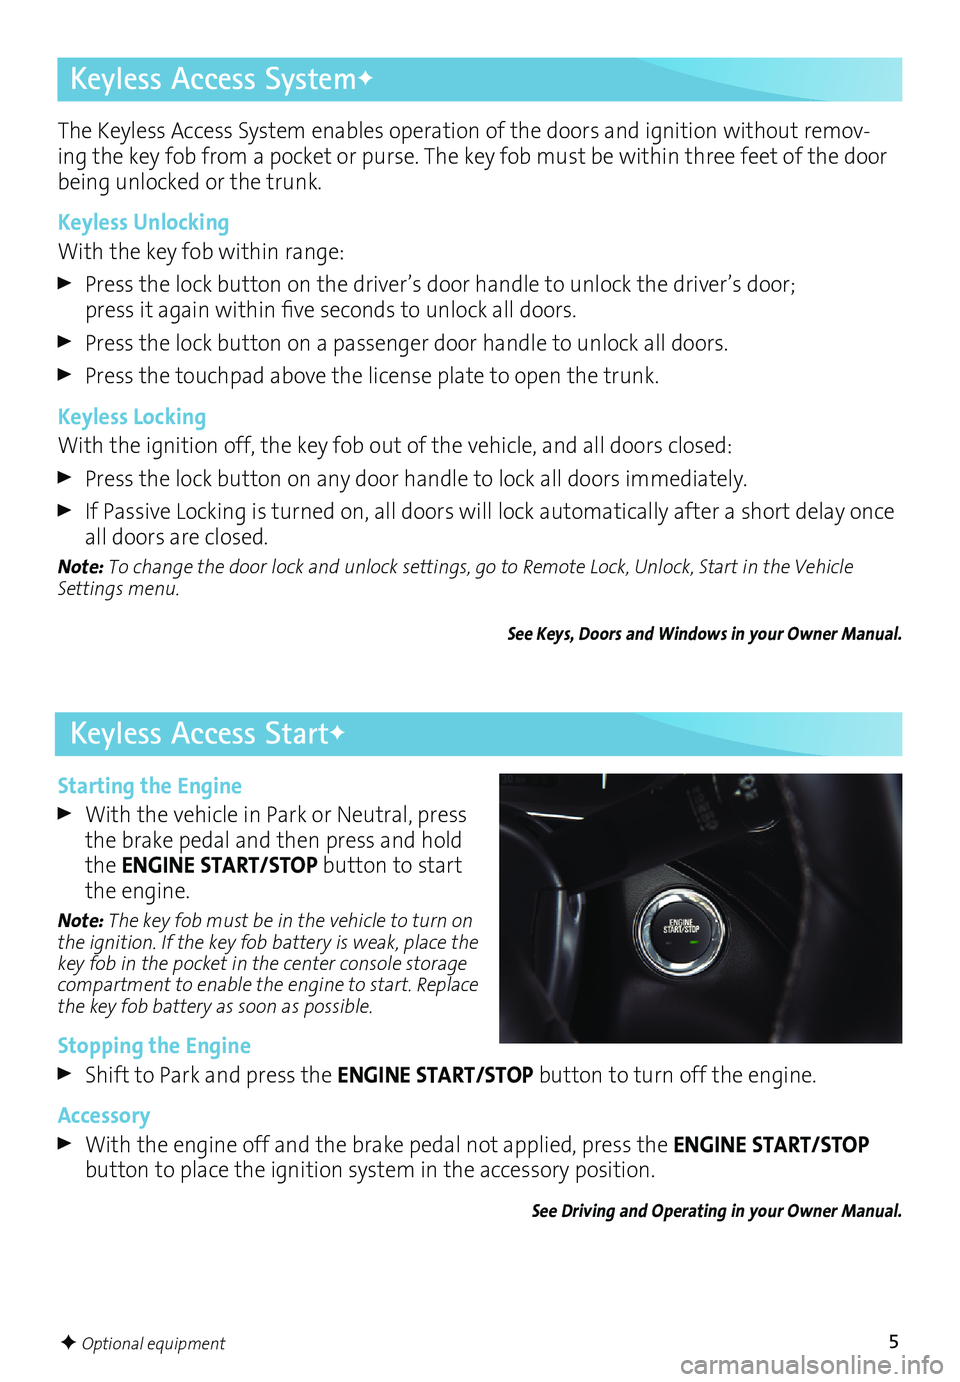
Starting the Engine
With the vehicle in Park or Neutral, press
the brake pedal and then press and hold
the ENGINE START/STOP button to start
the engine.
Note: The key fob must be in the vehicle to turn on
the ignition. If the key fob battery is weak, place the
key fob in the pocket in the center console storage
compartment to enable the engine to start. Replace
the key fob battery as soon as possible.
Stopping the Engine
Shift to Park and press the ENGINE START/STOP button to turn off the engine.
Accessory
With the engine off and the brake pedal not applied, press the ENGINE START/STOP
button to place the ignition system in the accessory position.
See Driving and Operating in your Owner Manual.
Page 16 of 20
16
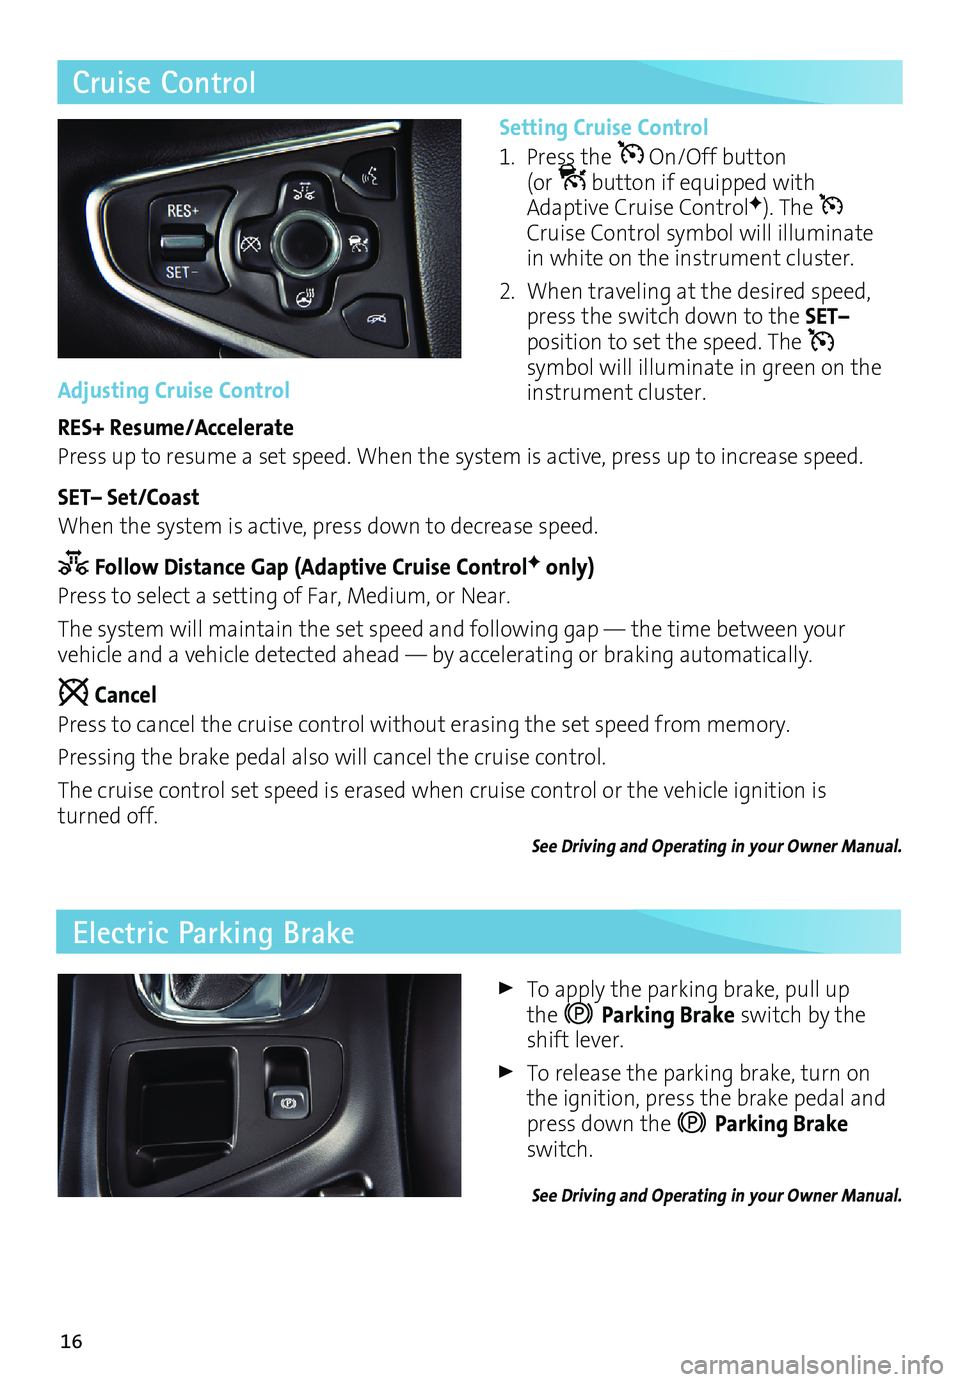
Electric Parking Brake
To apply the parking brake, pull up the Parking Brake switch by the shift lever.
To release the parking brake, turn on
the ignition, press the brake pedal and
press down the
Parking Brake
switch.
See Driving and Operating in your Owner Manual.
Cruise Control
Adjusting Cruise Control
RES+ Resume/Accelerate
Press up to resume a set speed. When the system is active, press up to increase speed.
SET– Set/Coast
When the system is active, press down to decrease speed.
Follow Distance Gap (Adaptive Cruise ControlF only)
Press to select a setting of Far, Medium, or Near.
The system will maintain the set speed and following gap — the time between your
vehicle and a vehicle detected ahead — by accelerating or braking automatically.
Cancel
Press to cancel the cruise control without erasing the set speed from memory.
Pressing the brake pedal also will cancel the cruise control.
The cruise control set speed is erased when cruise control or the vehicle ignition is
turned off.
See Driving and Operating in your Owner Manual.
Setting Cruise Control
1. Press the
On/Off button (or button if equipped with
Adaptive Cruise ControlF). The
Cruise Control symbol will illuminate
in white on the instrument cluster.
2. When traveling at the desired speed,
press the switch down to the SET–
position to set the speed. The
symbol will illuminate in green on the
instrument cluster.
Page 18 of 20
18
The driver assistance systems use advanced technologies to help avoid collisions by
providing visual and audible alerts under some imminent collision conditions.
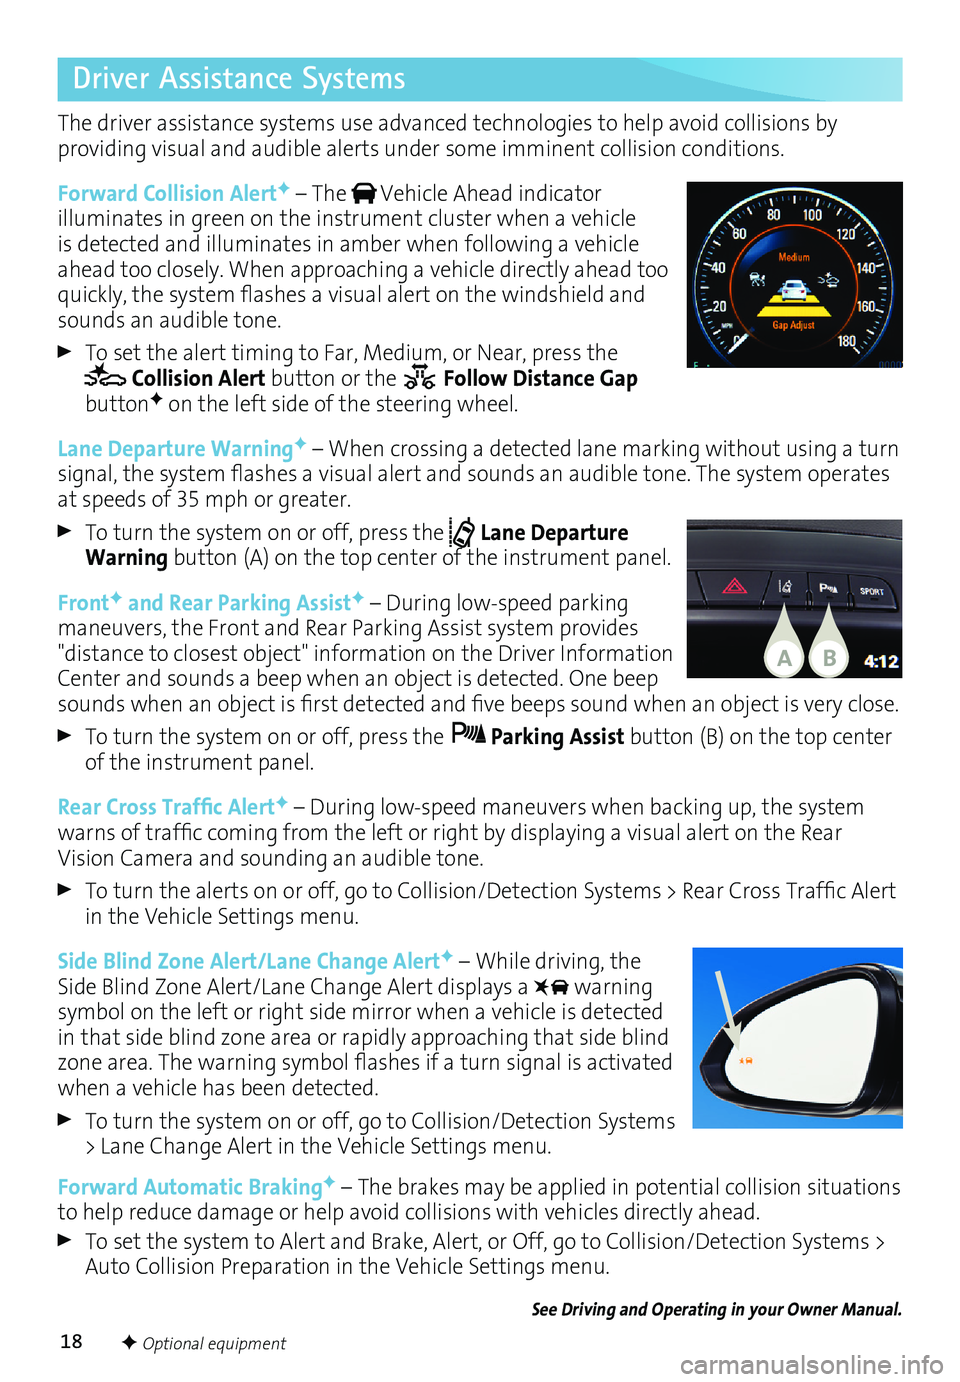
Forward Collision Alert
F – The Vehicle Ahead indicator
illuminates in green on the instrument cluster when a vehicle
is detected and illuminates in amber when following a vehicle
ahead too closely. When approaching a vehicle directly ahead too
quickly, the system flashes a visual alert on the windshield and
sounds an audible tone.
To set the alert timing to Far, Medium, or Near, press the Collision Alert button or the Follow Distance Gap
buttonF on the left side of the steering wheel.
Lane Departure Warning
F – When crossing a detected lane marking without using a turn
signal, the system flashes a visual alert and sounds an audible tone. The system operates
at speeds of 35 mph or greater.
To turn the system on or off, press the Lane Departure
Warning button (A) on the top center of the instrument panel.
Front
F and Rear Parking AssistF – During low-speed parking
maneuvers, the Front and Rear Parking Assist
system provides
"distance to closest object" information on the Driver Information
Center and sounds a beep when an object is detected. One beep
sounds when an object is first detected and five beeps sound when an object is very close.
To turn the system on or off, press the Parking Assist button (B) on the top center
of the instrument panel.
Rear Cross Traffic Alert
F – During low-speed maneuvers when backing up, the system
warns of traffic coming from the left or right by displaying a visual alert on the Rear
Vision Camera and sounding an audible tone.
To turn the alerts on or off, go to Collision/Detection Systems > Rear Cross Traffic Alert
in the Vehicle Settings menu.
Side Blind Zone Alert/Lane Change Alert
F – While driving, the
Side Blind Zone Alert/Lane Change Alert displays a
warning
symbol on the left or right side mirror when a vehicle is detected
in that side blind zone area or rapidly approaching that side blind
zone area. The warning symbol flashes if a turn signal is activated
when a vehicle has been detected.
To turn the system on or off, go to Collision/Detection Systems
> Lane Change Alert in the Vehicle Settings menu.
Forward Automatic Braking
F – The brakes may be applied in potential collision situations
to help reduce damage or help avoid collisions with vehicles directly ahead.
To set the system to Alert and Brake, Alert, or Off, go to Collision/Detection Systems >
Auto Collision Preparation in the Vehicle Settings menu.
See Driving and Operating in your Owner Manual.
BA
F Optional equipment
Driver Assistance Systems
Page 19 of 20
19
After stopping on an incline, the Hill Start Assist feature momentarily holds the vehicle
when the brake pedal is released. The driver-applied brake pressure is used during the
stop to keep the vehicle from rolling during the period between when the brake pedal is
released and the accelerator pedal is applied.
See Driving and Operating in your Owner Manual.
Hill Start Assist
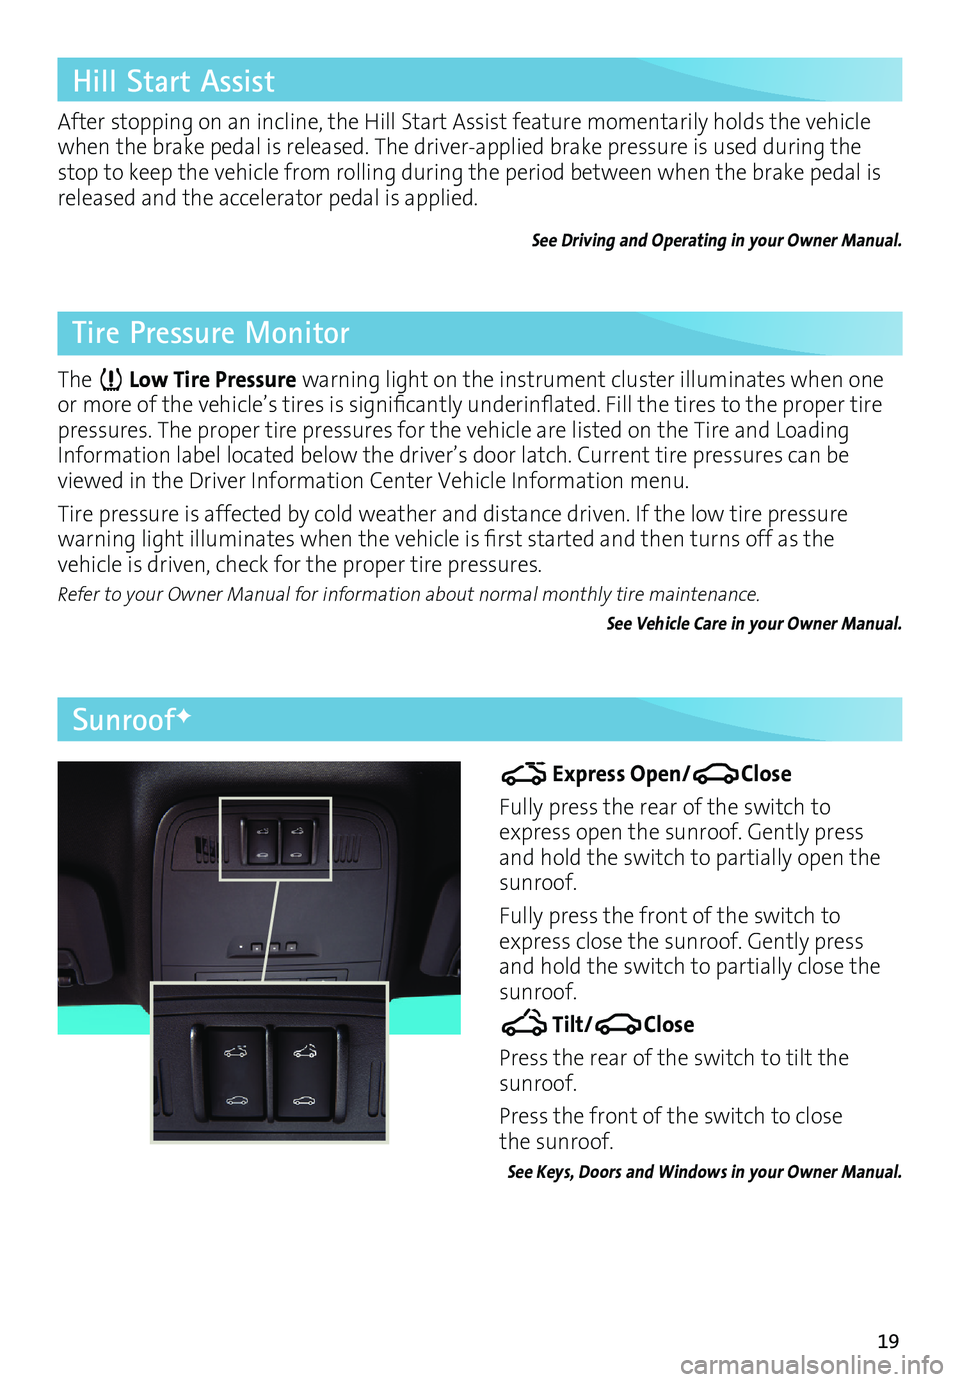
SunroofF
Express Open/Close
Fully press the rear of the switch to
express open the sunroof. Gently press
and hold the switch to partially open the
sunroof.
Fully press the front of the switch to
express close the sunroof. Gently press
and hold the switch to partially close the
sunroof.
Tilt/Close
Press the rear of the switch to tilt the
sunroof.
Press the front of the switch to close
the sunroof.
See Keys, Doors and Windows in your Owner Manual.
Tire Pressure Monitor
The Low Tire Pressure warning light on the instrument cluster illuminates when one
or more of the vehicle’s tires is significantly underinflated. Fill the tires to the proper tire
pressures. The proper tire pressures for the vehicle are listed on the Tire and Loading
Information label located below the driver’s door latch. Current tire pressures can be
viewed in the Driver Information Center Vehicle Information menu.
Tire pressure is affected by cold weather and distance driven. If the low tire pressure
warning light illuminates when the vehicle is first started and then turns off as the
vehicle is driven, check for the proper tire pressures.
Refer to your Owner Manual for information about normal monthly tire
maintenance.
See Vehicle Care in your Owner Manual.