display CADILLAC ATS 2013 1.G Repair Manual
[x] Cancel search | Manufacturer: CADILLAC, Model Year: 2013, Model line: ATS, Model: CADILLAC ATS 2013 1.GPages: 450, PDF Size: 6.98 MB
Page 190 of 450
Black plate (18,1)Cadillac ATS Owner Manual - 2013 - CRC - 10/5/12
7-18 Infotainment System
iPod music information displays on
the radio’s display and begins
playing through the vehicle’s audio
system.
The iPod battery recharges
automatically while the vehicle is on.
When the vehicle is off while an
iPod is connected using the iPod
USB cable, the iPod battery stops
charging and the iPod automatically
turns off.
If the iPod is an unsupported model,
it can still be listened to in the
vehicle by connecting to the
auxiliary input jack using a standard
3.5 mm (1/8 in) stereo cable.
iPod Menu
Press the MENU knob to display the
iPod Menu and the following may
display:
Browse:Select to display the files
or songs on the iPod. See “Browse
iPod Media” later in this section. Tone Settings:
Select to adjust
Bass, Midrange, Treble, Balance,
Fade, and EQ (Equalizer). See
“Tone Settings” under“Playing an
Audio CD.”
Auto Volume: If equipped, see
“Playing an Audio CD.”
Bose
®AudioPilot®: If equipped,
this feature can be turned on or off.
See “Bose
®AudioPilot®”in AM-FM
Radio on page 7‑8.
EQ (Equalizer) Settings:
If equipped, this feature adjusts the
pre-defined EQ modes. See “EQ
(Equalizer) Settings” inAM-FM
Radio on page 7‑8.
DSP Modes: If equipped with a
Bose
®Surround Sound System, this
feature adjusts the DSP modes.
See “DSP Modes” inAM-FM Radio
on page 7‑8. Browse iPod Media
Use the following to browse:
Playlists:
1. Turn the MENU knob to highlight
and press to view the playlists
stored on the iPod.
2. Turn the MENU knob to highlight and press to select a playlist
name to view a list of all songs
in the playlist.
3. Turn the MENU knob to highlight and press to select the song
from the list to begin playback.
Artists:
1. Turn the MENU knob to highlight and press to view the artists
stored on the iPod.
2. Turn the MENU knob to highlight and press to select an artist
name to view a list of all albums
by the artist.
3. Turn the MENU knob to highlight and press to select the album
from the list.
Page 192 of 450
Black plate (20,1)Cadillac ATS Owner Manual - 2013 - CRC - 10/5/12
7-20 Infotainment System
Auxiliary Jack
This vehicle has an AUX port in the
center console under the armrest
and in the center stack storage bin.
Possible auxiliary audio sources
include:
.Laptop computer
.Audio music player
This jack is not an audio output. Do
not plug headphones into the
auxiliary input jack. Auxiliary
devices should be set up while the
vehicle is in P (Park).
Connect a 3.5 mm (1/8 in) cable
from the auxiliary device to the
auxiliary input jack. If an auxiliary device has already
been connected, but a different
source is currently active, press the
MEDIA faceplate button repeatedly
to scroll through all of the available
audio source screens, until the AUX
source screen is selected.
Playing from the AUX Port
An auxiliary device is played
through the audio system and
controlled through the device itself.
AUX Menu
Press the MENU knob to display the
AUX menu and the following may
display:
Tone Settings:
Select to adjust
Bass, Midrange, Treble, Balance,
Fade, and EQ (Equalizer). See
“Tone Settings” under“Playing an
Audio CD.” Auto Volume:
If equipped, see
“Playing an Audio CD.”
Bose
®AudioPilot®: If equipped,
this feature can be turned on or off.
See “Bose
®AudioPilot®”in AM-FM
Radio on page 7‑8.
EQ (Equalizer) Settings:
If equipped, this feature adjusts the
pre-defined EQ modes. See “EQ
(Equalizer) Settings” inAM-FM
Radio on page 7‑8.
DSP Modes: If equipped with a
Bose
®Surround Sound System, this
feature adjusts the DSP modes.
See “DSP Modes” inAM-FM Radio
on page 7‑8.
Page 195 of 450
Black plate (23,1)Cadillac ATS Owner Manual - 2013 - CRC - 10/5/12
Infotainment System 7-23
Bluetooth (Infotainment
Controls)
For information about how to
navigate the menu system using the
infotainment controls, seeOverview
on page 7‑3.
Switching to Handset or
Handsfree Mode
To switch between handset mode,
use the OnStar command,
“transfer call.”
Pairing
A Bluetooth-enabled cell phone
must be paired to the Bluetooth
system and then connected to the
vehicle before it can be used. See
your cell phone manufacturer's user
guide for Bluetooth functions before
pairing the cell phone. If a Bluetooth
phone is not connected, calls can
be made using OnStar Hands-Free
Calling, if available. SeeOnStar
Overview on page 14‑1. Pairing Information
.Up to five cell phones can be
paired to the Bluetooth system.
.The pairing process is disabled
when the vehicle is moving.
.Pairing only needs to be
completed once, unless the
pairing information on the cell
phone changes or the cell phone
is deleted from the system.
.Only one paired cell phone can
be connected to the Bluetooth
system at a time.
.If multiple paired cell phones are
within range of the system, the
system connects to the first
available paired cell phone in the
order that they were newly
paired to the system. To link to a
different paired phone, see
“Connecting to a Different
Phone”
after in this section. Pairing a Phone or Device
1. From the Home Page, turn the
MENU knob to access the
PHONE screen button, then
press the MENU knob to select
the PHONE screen button. If a
device has been previously
paired, the main Phone menu
will be shown. If no devices
have been paired, Step two can
be skipped.
2. Turn the MENU knob and press to select Manage Phones.
3. Press the area just above the chrome bar and below the PAIR
screen button. A four-digit
Personal Identification Number
(PIN) appears on the display.
The PIN is used in Step 5.
4. Start the pairing process on the cell phone to be paired to the
vehicle. See the cell phone
manufacturer's user guide for
information on this process.
Page 196 of 450
Black plate (24,1)Cadillac ATS Owner Manual - 2013 - CRC - 10/5/12
7-24 Infotainment System
5. Locate the device named“Your
Vehicle” in the list on the cell
phone. Follow the instructions
on the cell phone to enter the
PIN provided in Step 3. The
system recognizes the new
connected phone after the
pairing process is complete.
6. If the phone prompts to accept connection or allow phone book
download, select always accept
and allow. The phone book may
not be available if not accepted.
7. Repeat steps 1–6 to pair additional phones or devices.
Listing All Paired and Connected
Phones
1. To list all paired devices, turn the MENU knob, then press to
select the PHONE screen
button.
2. Turn the MENU knob and press to select Manage Phones. Deleting a Paired Phone
1. From the Home Page, turn the
MENU knob, then press to
select the PHONE screen button
or press the PHONE button on
the faceplate.
2. Turn the MENU knob and press to select Manage Phones.
3. Turn the MENU knob to highlight the phone to be deleted.
4. Press the area just above the chrome bar and below the
DELETE screen button to delete
the highlighted device.
5. A confirmation screen is displayed. Press the button just
below the DELETE screen
button to confirm deletion.
Connecting to a Different Phone
1. From the Home Page, turn the MENU knob, then press to
select the PHONE screen button
or press the PHONE button on
the faceplate. 2. Turn the MENU knob and press
to select Manage Phones.
3. Turn the MENU knob to highlight the phone to be connected.
4. Press the button just below the CONNECT screen button to
connect to the highlighted
device.
Phone Menu
Once a phone is connected and
selected, the following may display:
Recent Calls: Turn the MENU
knob to highlight Recent Calls and
press to select.
Contacts: Turn the MENU knob to
highlight Contacts and press to
select.
Keypad: Turn the MENU knob to
highlight Keypad and press to
select.
Active Call: Turn the MENU knob
to highlight Active Call and press to
select and display the active call
screen.
Page 208 of 450
Black plate (2,1)Cadillac ATS Owner Manual - 2013 - CRC - 10/5/12
8-2 Climate Controls
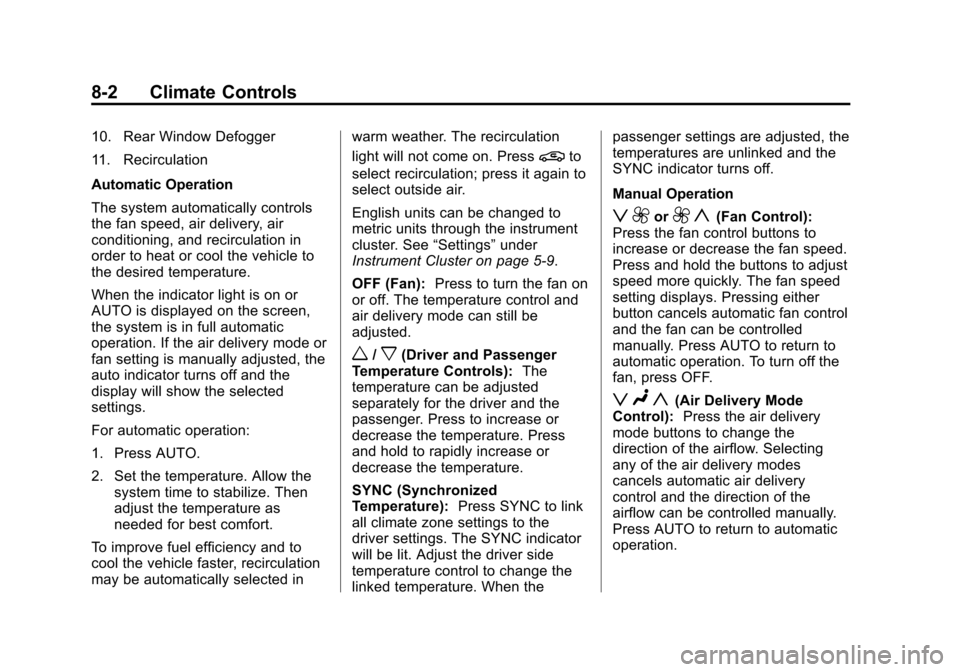
10. Rear Window Defogger
11. Recirculation
Automatic Operation
The system automatically controls
the fan speed, air delivery, air
conditioning, and recirculation in
order to heat or cool the vehicle to
the desired temperature.
When the indicator light is on or
AUTO is displayed on the screen,
the system is in full automatic
operation. If the air delivery mode or
fan setting is manually adjusted, the
auto indicator turns off and the
display will show the selected
settings.
For automatic operation:
1. Press AUTO.
2. Set the temperature. Allow thesystem time to stabilize. Then
adjust the temperature as
needed for best comfort.
To improve fuel efficiency and to
cool the vehicle faster, recirculation
may be automatically selected in warm weather. The recirculation
light will not come on. Press
@to
select recirculation; press it again to
select outside air.
English units can be changed to
metric units through the instrument
cluster. See “Settings”under
Instrument Cluster on page 5‑9.
OFF (Fan): Press to turn the fan on
or off. The temperature control and
air delivery mode can still be
adjusted.
w/x(Driver and Passenger
Temperature Controls): The
temperature can be adjusted
separately for the driver and the
passenger. Press to increase or
decrease the temperature. Press
and hold to rapidly increase or
decrease the temperature.
SYNC (Synchronized
Temperature): Press SYNC to link
all climate zone settings to the
driver settings. The SYNC indicator
will be lit. Adjust the driver side
temperature control to change the
linked temperature. When the passenger settings are adjusted, the
temperatures are unlinked and the
SYNC indicator turns off.
Manual Operation
z 9or9 y(Fan Control):
Press the fan control buttons to
increase or decrease the fan speed.
Press and hold the buttons to adjust
speed more quickly. The fan speed
setting displays. Pressing either
button cancels automatic fan control
and the fan can be controlled
manually. Press AUTO to return to
automatic operation. To turn off the
fan, press OFF.
z N y(Air Delivery Mode
Control): Press the air delivery
mode buttons to change the
direction of the airflow. Selecting
any of the air delivery modes
cancels automatic air delivery
control and the direction of the
airflow can be controlled manually.
Press AUTO to return to automatic
operation.
Page 212 of 450
Black plate (6,1)Cadillac ATS Owner Manual - 2013 - CRC - 10/5/12
8-6 Climate Controls
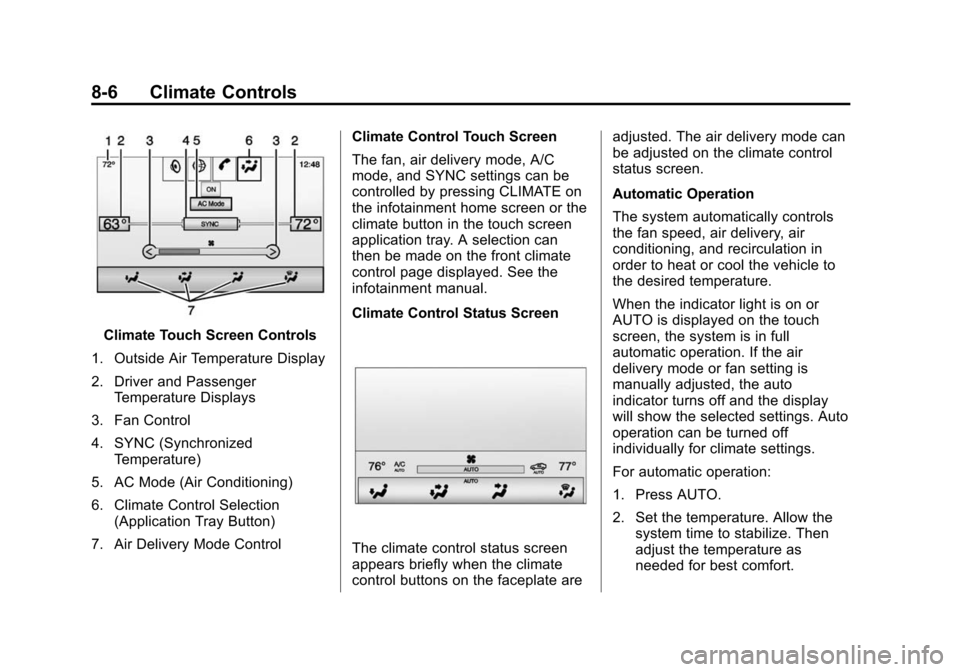
Climate Touch Screen Controls
1. Outside Air Temperature Display
2. Driver and Passenger Temperature Displays
3. Fan Control
4. SYNC (Synchronized Temperature)
5. AC Mode (Air Conditioning)
6. Climate Control Selection (Application Tray Button)
7. Air Delivery Mode Control Climate Control Touch Screen
The fan, air delivery mode, A/C
mode, and SYNC settings can be
controlled by pressing CLIMATE on
the infotainment home screen or the
climate button in the touch screen
application tray. A selection can
then be made on the front climate
control page displayed. See the
infotainment manual.
Climate Control Status Screen
The climate control status screen
appears briefly when the climate
control buttons on the faceplate areadjusted. The air delivery mode can
be adjusted on the climate control
status screen.
Automatic Operation
The system automatically controls
the fan speed, air delivery, air
conditioning, and recirculation in
order to heat or cool the vehicle to
the desired temperature.
When the indicator light is on or
AUTO is displayed on the touch
screen, the system is in full
automatic operation. If the air
delivery mode or fan setting is
manually adjusted, the auto
indicator turns off and the display
will show the selected settings. Auto
operation can be turned off
individually for climate settings.
For automatic operation:
1. Press AUTO.
2. Set the temperature. Allow the
system time to stabilize. Then
adjust the temperature as
needed for best comfort.
Page 213 of 450
Black plate (7,1)Cadillac ATS Owner Manual - 2013 - CRC - 10/5/12
Climate Controls 8-7
To improve fuel efficiency and to
cool the vehicle faster, recirculation
may be automatically selected in
warm weather. The recirculation
light will not come on. Press
@to
select recirculation; press it again to
select outside air.
English units can be changed to
metric units through the instrument
cluster. See “Settings”under
Instrument Cluster on page 5‑9.
OFF (Fan): Press to turn the fan on
or off. The temperature control and
air delivery mode can still be
adjusted.
w/x(Driver and Passenger
Temperature Controls): The
temperature can be adjusted
separately for the driver and the
passenger. Press to increase or
decrease the temperature. Press
and hold to rapidly increase or
decrease the temperature. SYNC (Synchronized
Temperature):
Press SYNC on the
touch screen to link all climate zone
settings to the driver settings. Adjust
the driver side temperature control
to change the linked temperature.
When the passenger settings are
adjusted, the SYNC button is
displayed when the temperatures
are unlinked.
Manual Operation
z 9or9 y(Fan Control):
Press the fan control buttons or the
touch screen fan control, to increase
or decrease the fan speed. Press
and hold the buttons or the touch
screen control to adjust speed more
quickly. The fan speed setting
displays. Pressing either button
cancels automatic fan control and
the fan can be controlled manually.
Press AUTO to return to automatic
operation. To turn off the fan and
climate control system, press and
hold the fan down button or touch
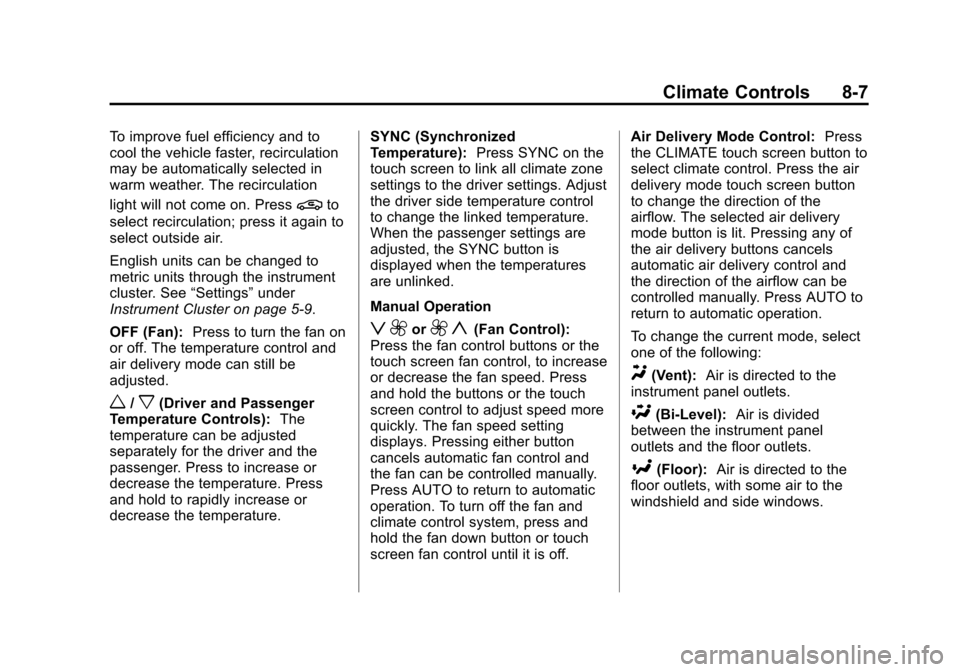
screen fan control until it is off. Air Delivery Mode Control:
Press
the CLIMATE touch screen button to
select climate control. Press the air
delivery mode touch screen button
to change the direction of the
airflow. The selected air delivery
mode button is lit. Pressing any of
the air delivery buttons cancels
automatic air delivery control and
the direction of the airflow can be
controlled manually. Press AUTO to
return to automatic operation.
To change the current mode, select
one of the following:
Y(Vent): Air is directed to the
instrument panel outlets.
\(Bi-Level): Air is divided
between the instrument panel
outlets and the floor outlets.
[(Floor): Air is directed to the
floor outlets, with some air to the
windshield and side windows.
Page 235 of 450
Black plate (17,1)Cadillac ATS Owner Manual - 2013 - CRC - 10/5/12
Driving and Operating 9-17
The Remote Keyless Entry (RKE)
transmitter must be in the vehicle
for the system to operate. If the
pushbutton start is not working, the
vehicle may be near a strong radio
antenna signal causing interference
to the keyless access system. See
Remote Keyless Entry (RKE)
System Operation on page 2‑3.
To shift out of P (Park), the vehicle
must be in ON/RUN and the brake
pedal must be applied.
Stopping the Engine/OFF (No
Indicator Lights):When the
vehicle is stopped, press the
ENGINE START/STOP button once
to turn the engine off.
If the vehicle is in P (Park), the
ignition will turn off, and Retained
Accessory Power (RAP) will remain
active. See Retained Accessory
Power (RAP) on page 9‑21. Automatic Transmission
If the vehicle is not in P (Park),
the ignition will return to ACC/
ACCESSORY and display a
message in the Driver Information
Center (DIC). See
Transmission
Messages on page 5‑42. When the
vehicle is shifted into P (Park), the
ignition system will switch to OFF.
Manual Transmission
If the vehicle is stationary, the
ignition will turn OFF, and Retained
Accessory Power (RAP) will remain
active. See Retained Accessory
Power (RAP) on page 9‑21.
The vehicle may have an electric
steering column lock. The lock is
activated when the vehicle is
switched to OFF and either front
door is opened. A sound may be
heard as the lock actuates or
releases. The steering column lock
may not release with the wheels
turned off center. If this happens,
the vehicle may not start. Move the
steering wheel from left to right while attempting to start the vehicle.
If this does not work, the vehicle
needs service.
Do not turn the engine off when the
vehicle is moving. This will cause a
loss of power assist in the brake
and steering systems and disable
the airbags.
If the vehicle must be shut off in an
emergency:
1. Brake using a firm and steady
pressure. Do not pump the
brakes repeatedly. This may
deplete power assist, requiring
increased brake pedal force.
2. Shift the vehicle to N (Neutral). This can be done while the
vehicle is moving. After shifting
to N (Neutral), firmly apply the
brakes and steer the vehicle to a
safe location.
3. Come to a complete stop. Shift to P (Park) with an automatic
transmission, or Neutral with a
manual transmission. Turn the
ignition to LOCK/OFF.
Page 237 of 450
Black plate (19,1)Cadillac ATS Owner Manual - 2013 - CRC - 10/5/12
Driving and Operating 9-19
Starting the Engine
Place the transmission in the
proper gear.
Automatic Transmission
Move the shift lever to P (Park) or
N (Neutral). The engine will not start
in any other position. To restart the
vehicle when it is already moving,
use N (Neutral) only.
Notice:Do not try to shift to
P (Park) if the vehicle is moving.
If you do, you could damage the
transmission. Shift to P (Park)
only when the vehicle is stopped.
Notice: If you add electrical parts
or accessories, you could change
the way the engine operates. Any
resulting damage would not be
covered by the vehicle warranty.
See Add-On Electrical Equipment
on page 9‑75.
Manual Transmission
The shift lever should be in Neutral
and the parking brake engaged.
Hold the clutch pedal down to the
floor and start the engine. The
vehicle will not start if the clutch
pedal is not all the way down.
Starting Procedure (Keyless
Access)
1. If the vehicle has the keyless
access system, the transmitter
must be in the vehicle. Put your
foot on the brake pedal and
push the ENGINE START/STOP
button. When the engine begins
cranking, let go of the button.
The idle speed will go down as
the engine gets warm. Do not
race the engine immediately
after starting it. Operate the
engine and transmission gently
to allow the oil to warm up and
lubricate all moving parts. If the transmitter is not in the
vehicle or something is
interfering with the transmitter,
the Driver Information Center
(DIC) will display a message.
See
Remote Keyless Entry
(RKE) System Operation on
page 2‑3 andKey and Lock
Messages on page 5‑36.
If the battery in the keyless
access transmitter needs
replacing, a DIC message
displays. The vehicle can
still be driven. See “Starting the
Vehicle with a Low Transmitter
Battery” inRemote Keyless
Entry (RKE) System Operation
on page 2‑3.
Page 249 of 450
Black plate (31,1)Cadillac ATS Owner Manual - 2013 - CRC - 10/5/12
Driving and Operating 9-31
The vehicle may have an Electric
Parking Brake (EPB). The switch
for the EPB is on the center console
for vehicles with a manual
transmission, or on the left side of
the instrument panel for vehicles
with an automatic transmission. The
EPB can always be activated, even
if the ignition is off. To prevent
draining the battery, avoid repeated
cycles of the EPB system when the
engine is not running.
The system has a parking brake
status light and a parking brake
warning light. SeeParking Brake
Light on page 5‑19 andService
Electric Parking Brake Light on
page 5‑19. There are also parking
brake related Driver Information
Center (DIC) messages. See Brake
System Messages on page 5‑33. In
case of insufficient electrical power,
the EPB cannot be applied or
released.
Before leaving the vehicle, check
the parking brake status light to
ensure that the parking brake is
applied.EPB Apply
The EPB can be applied any time
the vehicle is stopped. The EPB is
applied by momentarily lifting up on
the EPB switch. Once fully applied,
the parking brake status light will be
on. While the brake is being applied,
the status light will flash until it is
fully applied. If the light does not
come on, or remains flashing, you
need to have the vehicle serviced.
Do not drive the vehicle if the
parking brake status light is flashing.
See your dealer. See Parking Brake
Light on page 5‑19.
If the EPB is applied while the
vehicle is in motion, a chime will
sound, and a DIC message will be
displayed. The vehicle will
decelerate as long as the switch is
held in the up position. Releasing
the EPB switch during deceleration
will release the parking brake. If the
switch is held in the up position until
the vehicle comes to a stop, the
EPB will remain applied. If the parking brake status light
flashes continuously, then the EPB
is only partially applied or released,
or there is a problem with the EPB.
A DIC message will be displayed.
If this light flashes continuously,
release the EPB, and attempt to
apply it again. If this light continues
to flash, do not drive the vehicle.
See your dealer.
If the parking brake warning light is
on, the EPB has detected an
internal error, or a fault in another
system, and is operating with
reduced functionality. To apply the
EPB when this light is on, lift up on
the EPB switch and hold it in the up
position. Full application of the
parking brake by the EPB system
may take a longer period of time
than normal when this light is on.
Continue to hold the switch until the
parking brake status light remains
on. If the parking brake warning light
is on, see your dealer.