battery CADILLAC ATS 2013 1.G Owners Manual
[x] Cancel search | Manufacturer: CADILLAC, Model Year: 2013, Model line: ATS, Model: CADILLAC ATS 2013 1.GPages: 450, PDF Size: 6.98 MB
Page 33 of 450
Black plate (3,1)Cadillac ATS Owner Manual - 2013 - CRC - 10/5/12
Keys, Doors, and Windows 2-3
Remote Keyless Entry
(RKE) System
SeeRadio Frequency Statement on
page 13‑21 for information
regarding Part 15 of the Federal
Communications Commission (FCC)
rules and Industry Canada
Standards RSS-GEN/210/220/310.
If there is a decrease in the RKE
operating range:
.Check the distance. The
transmitter may be too far from
the vehicle.
.Check the location. Other
vehicles or objects may be
blocking the signal.
.Check the transmitter's battery.
See “Battery Replacement” later
in this section.
.If the transmitter is still not
working correctly, see your
dealer or a qualified technician
for service.
Remote Keyless Entry
(RKE) System Operation
The RKE transmitter functions may
work up to 60 m (195 ft) away from
the vehicle.
Keep in mind that other conditions,
such as those previously stated, can
impact the performance of the
transmitter.
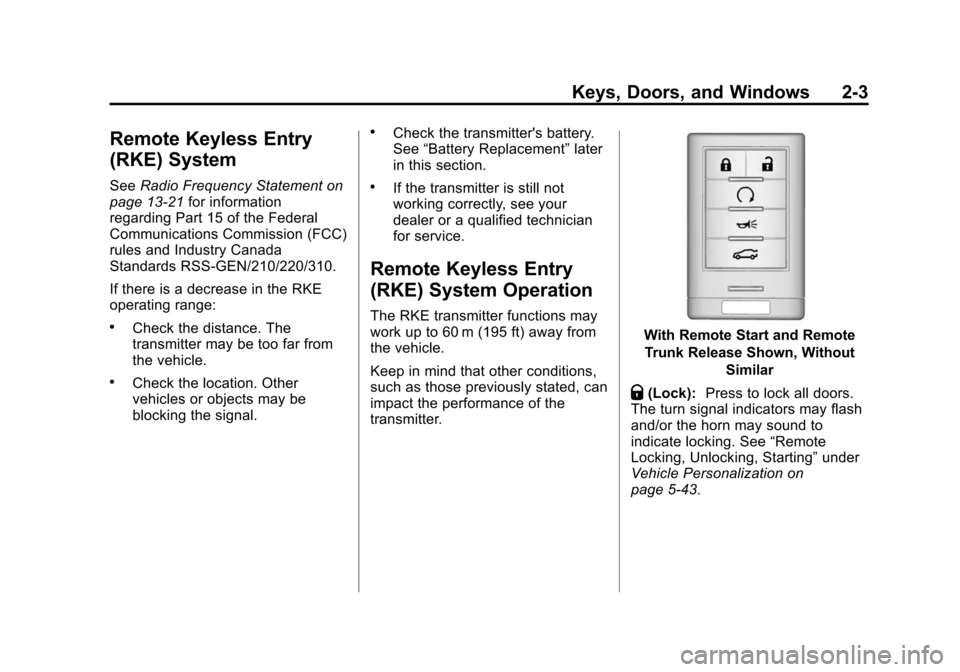
With Remote Start and Remote
Trunk Release Shown, Without Similar
Q(Lock):Press to lock all doors.
The turn signal indicators may flash
and/or the horn may sound to
indicate locking. See “Remote
Locking, Unlocking, Starting” under
Vehicle Personalization on
page 5‑43.
Page 38 of 450
Black plate (8,1)Cadillac ATS Owner Manual - 2013 - CRC - 10/5/12
2-8 Keys, Doors, and Windows
5. Press the START/STOP button.When the transmitter is learned,
the DIC display will show that it
is ready to program the next
transmitter.
6. Remove the transmitter from the transmitter pocket and press
K
orQon the transmitter.
To program additional
transmitters, repeat Steps 4–6.
When all additional transmitters
are programmed, press and hold
the START/STOP button for
approximately 12 seconds to exit
programming mode.
Starting the Vehicle with a Low
Transmitter Battery
If the transmitter battery is weak or if
there is interference with the signal,
the DIC may display a message
when you try to start the vehicle.
See Key and Lock Messages on
page 5‑36. To start the vehicle:
1. Open the center console storage
area and the storage tray.
2. Place the transmitter in thetransmitter pocket.
3. With the vehicle in P (Park), N (Neutral) or, Neutral, press the
brake pedal and the ENGINE
START/STOP button.
Replace the transmitter battery
as soon as possible.
Battery Replacement
Notice: When replacing the
battery, do not touch any of the
circuitry on the transmitter. Static
from your body could damage the
transmitter.
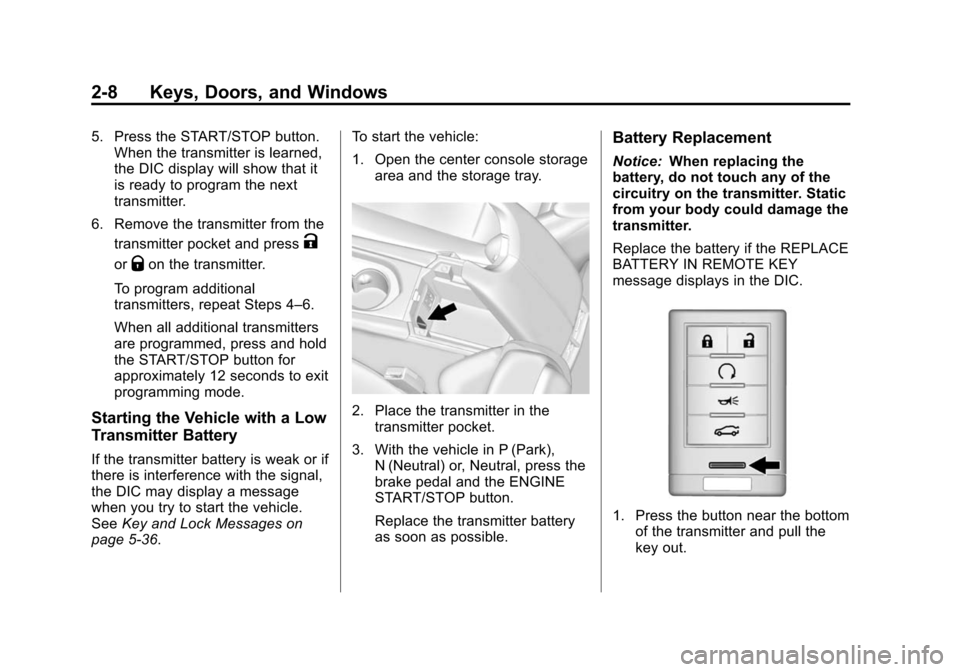
Replace the battery if the REPLACE
BATTERY IN REMOTE KEY
message displays in the DIC.
1. Press the button near the bottom of the transmitter and pull the
key out.
Page 39 of 450
Black plate (9,1)Cadillac ATS Owner Manual - 2013 - CRC - 10/5/12
Keys, Doors, and Windows 2-9
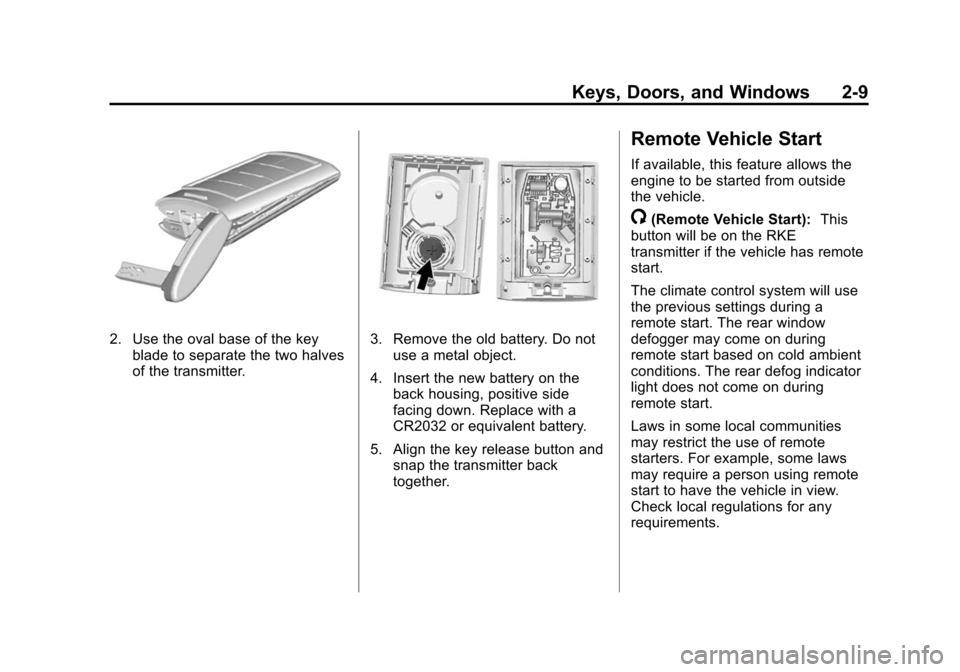
2. Use the oval base of the keyblade to separate the two halves
of the transmitter.3. Remove the old battery. Do notuse a metal object.
4. Insert the new battery on the back housing, positive side
facing down. Replace with a
CR2032 or equivalent battery.
5. Align the key release button and snap the transmitter back
together.
Remote Vehicle Start
If available, this feature allows the
engine to be started from outside
the vehicle.
/(Remote Vehicle Start): This
button will be on the RKE
transmitter if the vehicle has remote
start.
The climate control system will use
the previous settings during a
remote start. The rear window
defogger may come on during
remote start based on cold ambient
conditions. The rear defog indicator
light does not come on during
remote start.
Laws in some local communities
may restrict the use of remote
starters. For example, some laws
may require a person using remote
start to have the vehicle in view.
Check local regulations for any
requirements.
Page 47 of 450
Black plate (17,1)Cadillac ATS Owner Manual - 2013 - CRC - 10/5/12
Keys, Doors, and Windows 2-17
When equipped with the optional
security package, the alarm can
also be triggered by a change in
vehicle position, such as if the
vehicle is lifted, or by an interruption
of the vehicle's power supply. The
power sounder has an internal
battery. If the vehicle loses battery
power when the theft-deterrent
system is armed, the power sounder
will activate automatically.
Arming the System
1. Close all doors, the trunk, andthe hood.
2. Lock the vehicle using the transmitter or the power door
lock switch. The indicator light
on the instrument panel should
come on and stay on for about
30 seconds.
3. After 30 seconds, or after
Qis
pressed again, the alarm system
will arm, and the indicator light
will begin to slowly flash
indicating the alarm is operating. If a door, the hood, or trunk is
opened without first unlocking with
the transmitter, the turn signals will
flash and the horn will sound for
about 30 seconds. The alarm
system will then re-arm to monitor
for the next unauthorized event.
The theft-deterrent alarm system will
not activate if the doors are locked
with the key.
Disarming the System
To disarm the system, either unlock
the doors using the transmitter,
or start the vehicle with a
recognized transmitter in the
vehicle.
To avoid setting off the alarm by
accident:
.Lock the vehicle with the
transmitter after all occupants
have left the vehicle and all
doors are closed.
.Always unlock a door with the
transmitter. Unlocking the driver
door with the key will not disarm
the alarm.If you set off the alarm by accident,
turn off the alarm by pressing
Kon
the transmitter, or start the vehicle
with a recognized transmitter in the
vehicle. The alarm will not stop if
you unlock the driver door with
the key.
How to Detect a Tamper
Condition
IfKis pressed and the horn chirps
three times, the alarm was activated
while the system was armed.
If the alarm has been activated, a
message will appear on the DIC.
See Security Messages on
page 5‑41.
Immobilizer
See Radio Frequency Statement on
page 13‑21 for information
regarding Part 15 of the Federal
Communications Commission (FCC)
rules and Industry Canada
Standards RSS-GEN/210/220/310.
Page 52 of 450
Black plate (22,1)Cadillac ATS Owner Manual - 2013 - CRC - 10/5/12
2-22 Keys, Doors, and Windows
Express Window Anti-Pinch
Override
{WARNING
If express override is activated,
the window will not reverse
automatically. You or others could
be injured and the window could
be damaged. Before you use
express override, make sure that
all people and obstructions are
clear of the window path.
The anti-pinch feature can be
overridden when the ignition is in
ON/RUN/START. Hold the window
switch all the way up to the second
position. The window will rise for as
long as the switch is held. Once the
switch is released, the express
mode is reactivated.
In this mode, the window can close
on an object in its path. Use care
when using the override mode.
Programming the Power
Windows
If the vehicle battery has been
recharged or disconnected, or is not
working, the front power windows
may need to be reprogrammed for
the express-up feature to work.
Before reprogramming, replace or
recharge the vehicle battery.
To program:
1. With the ignition in ON/RUN or ACC/ACCESSORY, or when
RAP is active, close all doors.
2. Press down the power window switch until the window is
fully open.
3. Pull the power window switch up until the window is fully closed.
4. Continue holding the switch up for approximately two seconds
after the window is completely
closed. The window is now reprogrammed.
Repeat the process for the other
windows.
Window Lockout
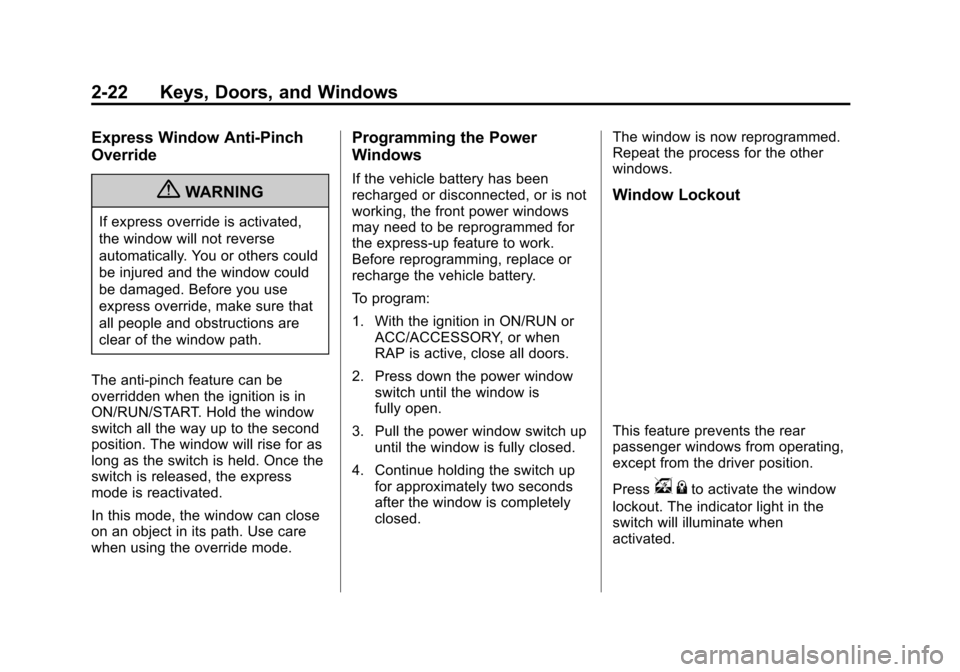
This feature prevents the rear
passenger windows from operating,
except from the driver position.
Press
v
{to activate the window
lockout. The indicator light in the
switch will illuminate when
activated.
Page 85 of 450
Black plate (31,1)Cadillac ATS Owner Manual - 2013 - CRC - 10/5/12
Seats and Restraints 3-31
lit, and the airbag readiness light
on the instrument cluster will
also be lit.
.Liquid pooled on the seat that
has not soaked in may make it
more likely that the passenger
sensing system will turn on the
passenger frontal airbag and
passenger knee airbag while a
child restraint or child occupant
is on the seat. If the passenger
frontal airbag and passenger
knee airbag are turned on, the
on indicator will be lit.
If the passenger seat gets wet, dry
the seat immediately. If the airbag
readiness light is lit, do not install a
child restraint or allow anyone to
occupy the seat. See Airbag
Readiness Light on page 5‑14 for
important safety information.
The on indicator may be lit if an
object, such as a briefcase,
handbag, grocery bag, laptop,
or other electronic device, is put on an unoccupied seat. If this is not
desired, remove the object from
the seat.{WARNING
Stowing of articles under the
passenger seat or between the
passenger seat cushion and
seatback may interfere with the
proper operation of the passenger
sensing system.
Servicing the
Airbag-Equipped Vehicle
Airbags affect how the vehicle
should be serviced. There are parts
of the airbag system in several
places around the vehicle. Your
dealer and the service manual have
information about servicing the
vehicle and the airbag system. To
purchase a service manual, see
Service Publications Ordering
Information on page 13‑17.
{WARNING
For up to 10 seconds after the
vehicle is turned off and the
battery is disconnected, an airbag
can still inflate during improper
service. You can be injured if you
are close to an airbag when it
inflates. Avoid yellow connectors.
They are probably part of the
airbag system. Be sure to follow
proper service procedures, and
make sure the person performing
work for you is qualified to do so.
Adding Equipment to the
Airbag-Equipped Vehicle
Adding accessories that change the
vehicle's frame, bumper system,
height, front end, or side sheet
metal, may keep the airbag
system from working properly.
Page 111 of 450
Black plate (1,1)Cadillac ATS Owner Manual - 2013 - CRC - 10/5/12
Instruments and Controls 5-1
Instruments and
Controls
Controls
Steering Wheel Adjustment . . . 5-2
Steering Wheel Controls . . . . . . 5-2
Heated Steering Wheel . . . . . . . 5-3
Horn . . . . . . . . . . . . . . . . . . . . . . . . . . 5-4
Windshield Wiper/Washer . . . . . 5-4
Compass . . . . . . . . . . . . . . . . . . . . . 5-5
Clock (Base Radio) . . . . . . . . . . . 5-6
Clock (Uplevel Radio) . . . . . . . . . 5-6
Power Outlets . . . . . . . . . . . . . . . . . 5-7
Warning Lights, Gauges, and
Indicators
Warning Lights, Gauges, andIndicators . . . . . . . . . . . . . . . . . . . . 5-8
Instrument Cluster . . . . . . . . . . . . 5-9
Speedometer . . . . . . . . . . . . . . . . 5-10
Odometer . . . . . . . . . . . . . . . . . . . . 5-11
Trip Odometer . . . . . . . . . . . . . . . 5-11
Tachometer . . . . . . . . . . . . . . . . . . 5-11
Fuel Gauge . . . . . . . . . . . . . . . . . . 5-11
Engine Coolant Temperature Gauge . . . . . . . . . . . . . . . . . . . . . . 5-12
Safety Belt Reminders . . . . . . . 5-13 Airbag Readiness Light . . . . . . 5-14
Passenger Airbag Status
Indicator . . . . . . . . . . . . . . . . . . . . 5-14
Charging System Light . . . . . . 5-15
Malfunction Indicator Lamp . . . . . . . . . . . . . 5-16
Brake System Warning Light . . . . . . . . . . . . . . . . . . . . . . . 5-18
Parking Brake Light . . . . . . . . . . 5-19
Service Electric Parking Brake Light . . . . . . . . . . . . . . . . . . . . . . . 5-19
Antilock Brake System (ABS) Warning Light . . . . . . . . . . . . . . 5-20
Lane Departure Warning (LDW) Light . . . . . . . . . . . . . . . . 5-20
Vehicle Ahead Indicator . . . . . . 5-20
Traction Off Light . . . . . . . . . . . . 5-21
StabiliTrak
®OFF Light . . . . . . . 5-21
Traction Control System (TCS)/StabiliTrak
®Light . . . . 5-21
Engine Coolant Temperature Warning Light . . . . . . . . . . . . . . 5-22
Tire Pressure Light . . . . . . . . . . 5-22
Engine Oil Pressure Light . . . . 5-23
Low Fuel Warning Light . . . . . . 5-23
Security Light . . . . . . . . . . . . . . . . 5-24
High-Beam On Light . . . . . . . . . 5-24 Adaptive Forward Lighting
(AFL) Light . . . . . . . . . . . . . . . . . 5-24
Lamps On Reminder . . . . . . . . . 5-25
Cruise Control Light . . . . . . . . . 5-25
Information Displays
Driver Information Center (DIC) . . . . . . . . . . . . . . . 5-26
Head-Up Display (HUD) . . . . . 5-29
Vehicle Messages
Vehicle Messages . . . . . . . . . . . 5-32
Battery Voltage and Charging Messages . . . . . . . . . . . . . . . . . . 5-33
Brake System Messages . . . . 5-33
Compass Messages . . . . . . . . . 5-34
Cruise Control Messages . . . . 5-34
Door Ajar Messages . . . . . . . . . 5-34
Engine Cooling System Messages . . . . . . . . . . . . . . . . . . 5-35
Engine Oil Messages . . . . . . . . 5-35
Engine Power Messages . . . . 5-36
Fuel System Messages . . . . . . 5-36
Key and Lock Messages . . . . . 5-36
Lamp Messages . . . . . . . . . . . . . 5-37
Object Detection System Messages . . . . . . . . . . . . . . . . . . 5-38
Ride Control System Messages . . . . . . . . . . . . . . . . . . 5-40
Page 125 of 450
Black plate (15,1)Cadillac ATS Owner Manual - 2013 - CRC - 10/5/12
Instruments and Controls 5-15
as a system check. Then, after
several more seconds, the status
indicator will light either ON or OFF,
or the on or off symbol to let you
know the status of the front
outboard passenger frontal airbag
and knee airbag.
If the word ON or the on symbol is
lit on the passenger airbag status
indicator, it means that the front
outboard passenger frontal airbag
and knee airbag are allowed to
inflate.
If the word OFF or the off symbol is
lit on the airbag status indicator, it
means that the passenger sensing
system has turned off the front
outboard passenger frontal airbag
and knee airbag.
If, after several seconds, both status
indicator lights remain on, or if there
are no lights at all, there may be a
problem with the lights or the
passenger sensing system. See
your dealer for service.{WARNING
If the airbag readiness light ever
comes on and stays on, it means
that something may be wrong
with the airbag system. To help
avoid injury to yourself or others,
have the vehicle serviced right
away. SeeAirbag Readiness
Light on page 5‑14 for more
information, including important
safety information.
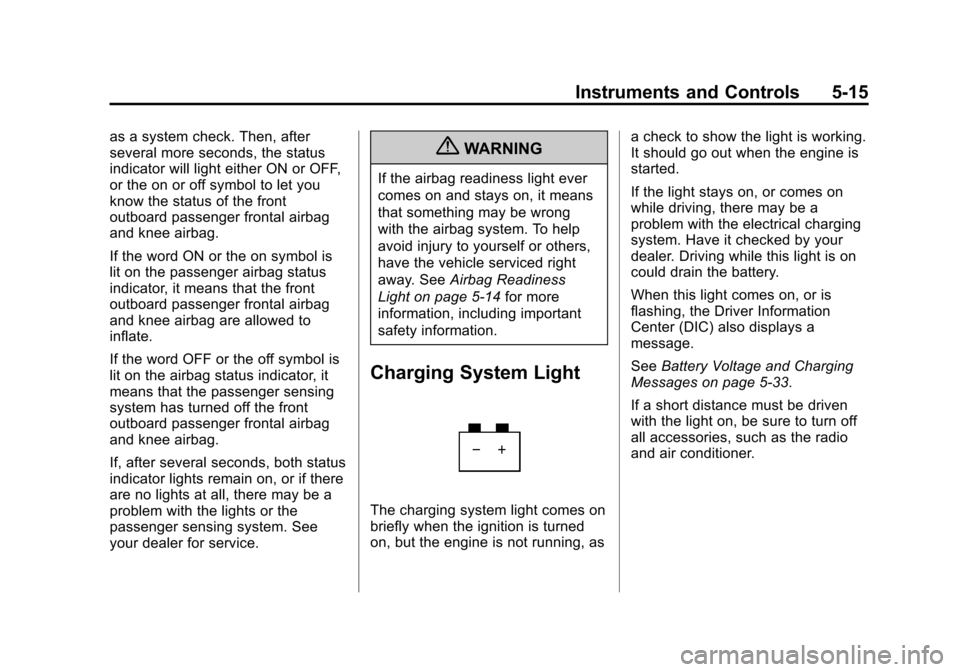
Charging System Light
The charging system light comes on
briefly when the ignition is turned
on, but the engine is not running, as a check to show the light is working.
It should go out when the engine is
started.
If the light stays on, or comes on
while driving, there may be a
problem with the electrical charging
system. Have it checked by your
dealer. Driving while this light is on
could drain the battery.
When this light comes on, or is
flashing, the Driver Information
Center (DIC) also displays a
message.
See
Battery Voltage and Charging
Messages on page 5‑33.
If a short distance must be driven
with the light on, be sure to turn off
all accessories, such as the radio
and air conditioner.
Page 128 of 450
Black plate (18,1)Cadillac ATS Owner Manual - 2013 - CRC - 10/5/12
5-18 Instruments and Controls
The vehicle may not pass
inspection if:
.The malfunction indicator lamp is
on with the engine running, or if
the vehicle is placed in Service
Only Mode and the malfunction
indicator lamp does not come
on. See your dealer for
assistance in verifying proper
operation of the malfunction
indicator lamp.
.The OBD II (On-Board
Diagnostics) system determines
that critical emission control
systems have not been
completely diagnosed. The
vehicle would be considered not
ready for inspection. This can
happen if the 12-volt battery has
recently been replaced or run
down. The diagnostic system is
designed to evaluate critical
emission control systems during
normal driving. This can take
several days of routine driving.
If this has been done and the
vehicle still does not pass the
inspection for lack of OBD IIsystem readiness, your dealer
can prepare the vehicle for
inspection.
Brake System Warning
Light
The vehicle brake system consists
of two hydraulic circuits. If one
circuit is not working, the remaining
circuit can still work to stop the
vehicle. For normal braking
performance, both circuits need to
be working.
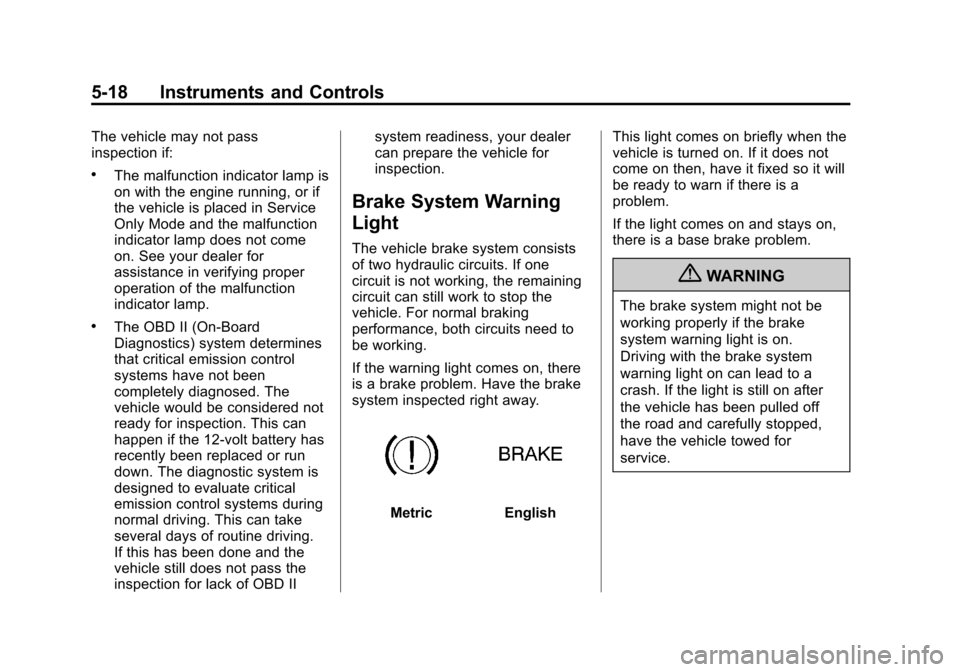
If the warning light comes on, there
is a brake problem. Have the brake
system inspected right away.
MetricEnglish
This light comes on briefly when the
vehicle is turned on. If it does not
come on then, have it fixed so it will
be ready to warn if there is a
problem.
If the light comes on and stays on,
there is a base brake problem.
{WARNING
The brake system might not be
working properly if the brake
system warning light is on.
Driving with the brake system
warning light on can lead to a
crash. If the light is still on after
the vehicle has been pulled off
the road and carefully stopped,
have the vehicle towed for
service.
Page 138 of 450

Black plate (28,1)Cadillac ATS Owner Manual - 2013 - CRC - 10/5/12
5-28 Instruments and Controls
Speed Limit:The Speed Limit
display shows the current speed
limit. The information for this page
comes from a roadway database.
Speed Warning: The Speed
Warning display allows the driver to
set a speed that they do not want to
exceed. To set the Speed Warning,
press SEL when Speed Warning is
displayed. Press
yorzto adjust
the value. This feature can be
turned off by pressing and holding
SEL while viewing this page. If the
selected speed limit is exceeded, a
pop-up warning is displayed and a
chime may sound.
Cruise Set Speed: The Cruise Set
Speed display shows the speed the
cruise control or Adaptive Cruise
Control is set to.
Battery Voltage: The Battery
Voltage display shows the current
battery voltage. Oil Life:
The Oil Life display shows
an estimate of the oil's remaining
useful life. If REMAINING OIL LIFE
99% is displayed, that means 99%
of the current oil life remains.
When the remaining oil life is low,
the CHANGE ENGINE OIL SOON
message will appear on the display.
See Engine Oil Messages on
page 5‑35. The oil should be
changed as soon as possible. See
Engine Oil on page 10‑11. In
addition to the engine oil life system
monitoring the oil life, additional
maintenance is recommended in the
Maintenance Schedule. See
Maintenance Schedule on
page 11‑3.
Remember, the Oil Life display must
be reset after each oil change. It will
not reset itself. Also, be careful not
to reset the Oil Life display
accidentally at any time other than
when the oil has just been changed. It cannot be reset accurately until
the next oil change. To reset the
engine oil life system, press and
hold SEL for several seconds while
the Oil Life display is active. See
Engine Oil Life System on
page 10‑13.
Tire Pressure:
The Tire Pressure
display shows the approximate
pressures of all four tires. Tire
pressure is displayed in either
kilopascal (kPa) or in pounds per
square inch (psi). If the pressure is
low, the value for that tire is shown
in amber. See Tire Pressure Monitor
System on page 10‑52 andTire
Pressure Monitor Operation on
page 10‑53.
Blank Page: The Blank Page
display allows for no information to
be displayed in the DIC display
zone(s).