climate control CADILLAC ATS 2014 User Guide
[x] Cancel search | Manufacturer: CADILLAC, Model Year: 2014, Model line: ATS, Model: CADILLAC ATS 2014Pages: 434, PDF Size: 5.61 MB
Page 50 of 434
Black plate (20,1)Cadillac ATS Owner Manual (GMNA-Localizing-U.S./Canada/Mexico-
6014430) - 2014 - 2nd Edition - 8/23/13
2-20 Keys, Doors, and Windows
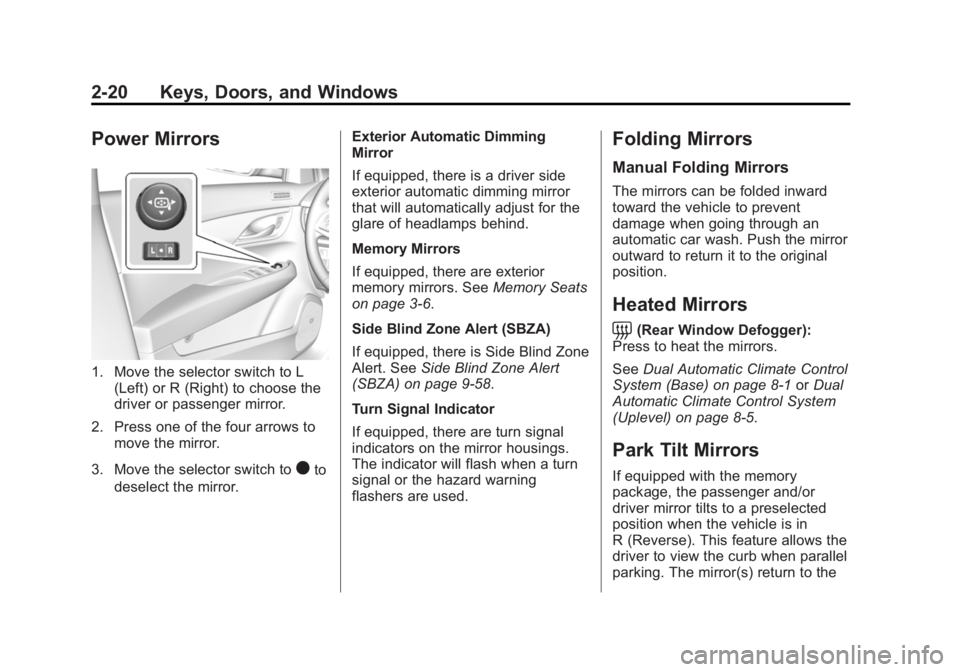
Power Mirrors
1. Move the selector switch to L(Left) or R (Right) to choose the
driver or passenger mirror.
2. Press one of the four arrows to move the mirror.
3. Move the selector switch to
)to
deselect the mirror. Exterior Automatic Dimming
Mirror
If equipped, there is a driver side
exterior automatic dimming mirror
that will automatically adjust for the
glare of headlamps behind.
Memory Mirrors
If equipped, there are exterior
memory mirrors. See
Memory Seats
on page 3-6.
Side Blind Zone Alert (SBZA)
If equipped, there is Side Blind Zone
Alert. See Side Blind Zone Alert
(SBZA) on page 9-58.
Turn Signal Indicator
If equipped, there are turn signal
indicators on the mirror housings.
The indicator will flash when a turn
signal or the hazard warning
flashers are used.
Folding Mirrors
Manual Folding Mirrors
The mirrors can be folded inward
toward the vehicle to prevent
damage when going through an
automatic car wash. Push the mirror
outward to return it to the original
position.
Heated Mirrors
=
(Rear Window Defogger):
Press to heat the mirrors.
See Dual Automatic Climate Control
System (Base) on page 8-1 orDual
Automatic Climate Control System
(Uplevel) on page 8-5.
Park Tilt Mirrors
If equipped with the memory
package, the passenger and/or
driver mirror tilts to a preselected
position when the vehicle is in
R (Reverse). This feature allows the
driver to view the curb when parallel
parking. The mirror(s) return to the
Page 64 of 434
Black plate (8,1)Cadillac ATS Owner Manual (GMNA-Localizing-U.S./Canada/Mexico-
6014430) - 2014 - 2nd Edition - 8/23/13
3-8 Seats and Restraints
exit feature not recalling for
two seconds. Try recalling the exit
position again. If the exit position is
still not recalling, see your dealer for
service.
Heated Front Seats
{Warning
If you cannot feel temperature
change or pain to the skin, the
seat heater may cause burns. To
reduce the risk of burns, people
with such a condition should use
care when using the seat heater,
especially for long periods of
time. Do not place anything on
the seat that insulates against
heat, such as a blanket, cushion,
cover, or similar item. This may
cause the seat heater to
overheat. An overheated seat
heater may cause a burn or may
damage the seat.
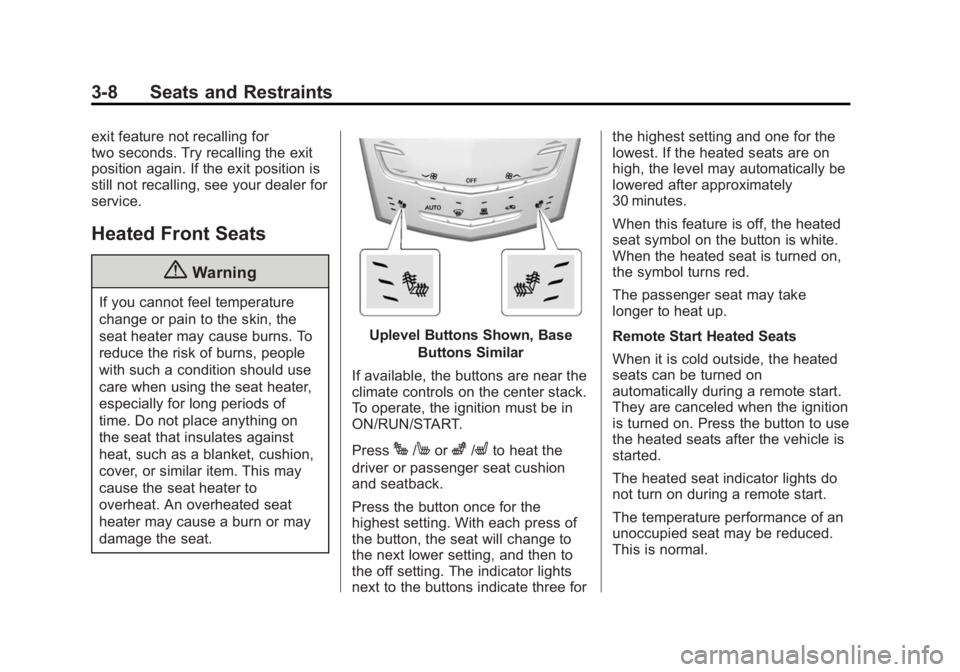
Uplevel Buttons Shown, BaseButtons Similar
If available, the buttons are near the
climate controls on the center stack.
To operate, the ignition must be in
ON/RUN/START.
Press
J/Morz/Lto heat the
driver or passenger seat cushion
and seatback.
Press the button once for the
highest setting. With each press of
the button, the seat will change to
the next lower setting, and then to
the off setting. The indicator lights
next to the buttons indicate three for the highest setting and one for the
lowest. If the heated seats are on
high, the level may automatically be
lowered after approximately
30 minutes.
When this feature is off, the heated
seat symbol on the button is white.
When the heated seat is turned on,
the symbol turns red.
The passenger seat may take
longer to heat up.
Remote Start Heated Seats
When it is cold outside, the heated
seats can be turned on
automatically during a remote start.
They are canceled when the ignition
is turned on. Press the button to use
the heated seats after the vehicle is
started.
The heated seat indicator lights do
not turn on during a remote start.
The temperature performance of an
unoccupied seat may be reduced.
This is normal.
Page 107 of 434

Black plate (1,1)Cadillac ATS Owner Manual (GMNA-Localizing-U.S./Canada/Mexico-
6014430) - 2014 - 2nd Edition - 8/23/13
Storage 4-1
Storage
Storage Compartments
Storage Compartments . . . . . . . 4-1
Instrument Panel Storage . . . . . 4-1
Glove Box . . . . . . . . . . . . . . . . . . . . 4-2
Armrest Storage . . . . . . . . . . . . . . 4-2
Additional Storage Features
Cargo Tie-Downs . . . . . . . . . . . . . 4-2
Storage
Compartments
{Warning
Do not store heavy or sharp
objects in storage compartments.
In a crash, these objects may
cause the cover to open and
could result in injury.
Instrument Panel Storage
To access, press on the cover and
release. There is an accessory
power outlet inside. SeePower
Outlets on page 5-7.
If equipped, there may be storage
behind the climate control system.
Touch the bottom of the climate
control system panel until the door
automatically starts to open. There
is a USB port inside. See USB Port
on page 7-15.
Keep the storage area closed when
not in use.
Page 108 of 434
Black plate (2,1)Cadillac ATS Owner Manual (GMNA-Localizing-U.S./Canada/Mexico-
6014430) - 2014 - 2nd Edition - 8/23/13
4-2 Storage
Touch the bottom of the climate
control system panel again until the
door automatically starts to close.
Glove Box
To open the glove box, lift up on the
lever. Use the key to lock and
unlock it. The glove box may have a
compact disc player inside.
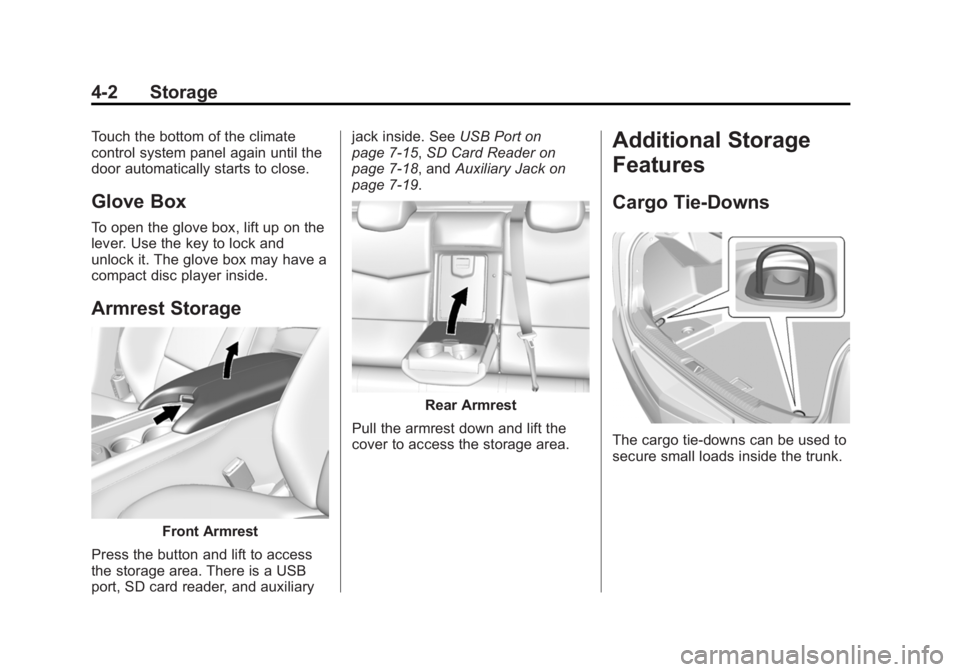
Armrest Storage
Front Armrest
Press the button and lift to access
the storage area. There is a USB
port, SD card reader, and auxiliary jack inside. See
USB Port on
page 7-15, SD Card Reader on
page 7-18, and Auxiliary Jack on
page 7-19.
Rear Armrest
Pull the armrest down and lift the
cover to access the storage area.
Additional Storage
Features
Cargo Tie-Downs
The cargo tie-downs can be used to
secure small loads inside the trunk.
Page 115 of 434
Black plate (7,1)Cadillac ATS Owner Manual (GMNA-Localizing-U.S./Canada/Mexico-
6014430) - 2014 - 2nd Edition - 8/23/13
Instruments and Controls 5-7
If auto timing is set, the time
displayed on the clock may not
update immediately when driving
into a new time zone.
Clock Display
When on, the digital clock will
display on the infotainment screen.
To set the clock display:
1. Press the SETTINGS screenbutton and press Time and Date.
2. Press Clock Display, then select Off or On.
3. Press
[to go back to the
previous menu.
Power Outlets
The accessory power outlets can be
used to plug in electrical equipment,
such as a cell phone or MP3 player.
The vehicle has two accessory
power outlets:
.Inside the front storage bin
below the climate control
system.
.On the rear of the center floor
console.
Lift the cover to access the
accessory power outlet.
Certain electrical accessories may
not be compatible with the
accessory power outlet and could
overload a vehicle circuit breaker or
adapter fuse. If overloaded, the
circuit breaker will reset after all
devices are disconnected or if
Retained Accessory Power (RAP) is
turned off and then back on. See
Retained Accessory Power (RAP)
on page 9-21. Wait one minute to
allow the circuit breaker to reset
before reconnecting devices or
turning RAP back on. If the problem
continues, the issue could be within
your device. Try another known
good device to make sure the circuit
breaker is operating properly. If this
does not resolve your problem, see
your dealer.
It is possible to replace the factory
power outlet with a cigar lighter
receptacle, if desired. This requires
the factory installed circuit breaker to be replaced with a standard
minifuse by the dealer. A minifuse
will not reset and will have to be
replace if blown.
{Caution
Failure to replace the circuit
breaker with the minifuse could
overheat the cigar lighter and
damage the vehicle.
When adding electrical equipment,
be sure to follow the proper
installation instructions included with
the equipment. See Add-On
Electrical Equipment on page 9-72.
{Caution
Hanging heavy equipment from
the power outlet can cause
damage not covered by the
vehicle warranty. The power
outlets are designed for
accessory power plugs only, such
as cell phone charge cords.
Page 152 of 434

Black plate (44,1)Cadillac ATS Owner Manual (GMNA-Localizing-U.S./Canada/Mexico-
6014430) - 2014 - 2nd Edition - 8/23/13
5-44 Instruments and Controls
Valet Mode
This will lock the infotainment
system, the infotainment controls,
and screen storage location.
To turn Valet Mode on and off, enter
a four-digit code on the keypad.
Press Enter to go to the
confirmation screen. Re-enter the
four-digit code. Press LOCK to lock
the system. Enter the four-digit code
to unlock the system. Press the
Back screen button to go back to
the previous menu.
Radio
Press to display the Radio Menu
and the following may display:
.Manage Favorites
.Number of Favorites Pages
.Audible Touch Feedback
.Auto Volume
.Bose Audio Pilot
.Maximum Start Up Volume
.Audio Cue VolumeManage Favorites
This allows favorites to be edited.
Select a displayed Favorite to select
that favorite to edit. Select Rename
to rename the favorite or Delete to
delete it.
Number of Favorites Pages
Select to set the number of favorites
to display.
Select the desired number or select
Auto and the infotainment system
will automatically adjust the number
of favorite shown.
Audible Touch Feedback
This allows Audible Touch
Feedback to be turned on or off.
Select Off or On.
Auto Volume
If equipped, this feature adjusts the
volume based on the vehicle speed.
Bose Audio Pilot
This feature adjusts the volume
based on the noise in the vehicle.
See
“Bose AudioPilot Noise
Compensation Technology” under
“Infotainment System Settings” in
the infotainment manual.
Maximum Startup Volume
This feature sets the maximum
startup volume. If the vehicle is
started and the volume is greater
than this level, the volume is
adjusted to this level. To set the
maximum startup volume, select +
or −to increase or decrease.
Audio Cue Volume
If equipped, this feature adjusts the
startup and shutdown sounds. To
adjust the volume, select + or −to
increase or decrease.
Vehicle
Select and the following may
display:
.Climate and Air Quality
Page 153 of 434
Black plate (45,1)Cadillac ATS Owner Manual (GMNA-Localizing-U.S./Canada/Mexico-
6014430) - 2014 - 2nd Edition - 8/23/13
Instruments and Controls 5-45
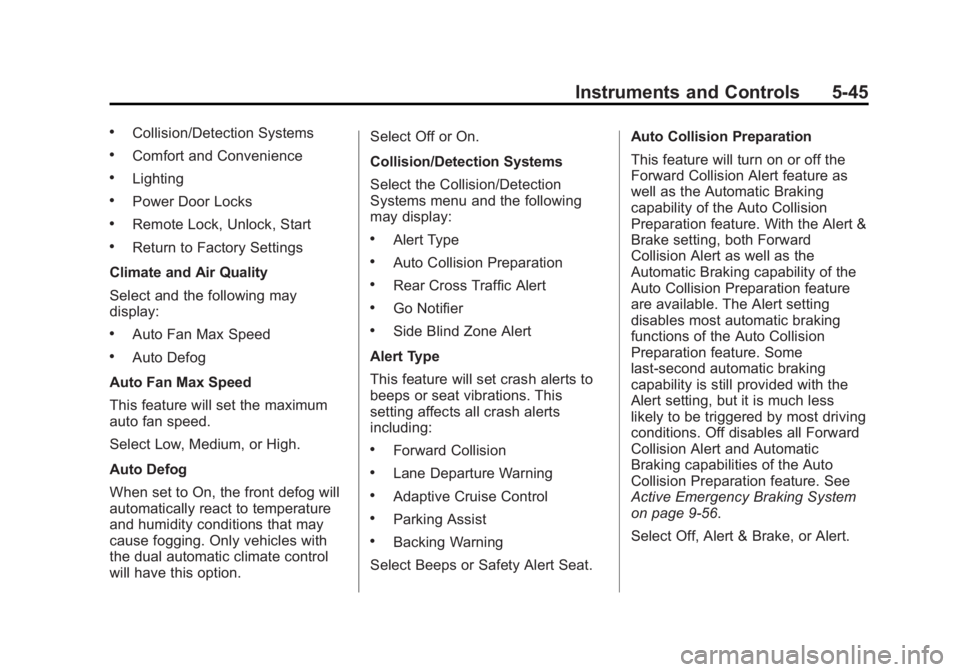
.Collision/Detection Systems
.Comfort and Convenience
.Lighting
.Power Door Locks
.Remote Lock, Unlock, Start
.Return to Factory Settings
Climate and Air Quality
Select and the following may
display:
.Auto Fan Max Speed
.Auto Defog
Auto Fan Max Speed
This feature will set the maximum
auto fan speed.
Select Low, Medium, or High.
Auto Defog
When set to On, the front defog will
automatically react to temperature
and humidity conditions that may
cause fogging. Only vehicles with
the dual automatic climate control
will have this option. Select Off or On.
Collision/Detection Systems
Select the Collision/Detection
Systems menu and the following
may display:
.Alert Type
.Auto Collision Preparation
.Rear Cross Traffic Alert
.Go Notifier
.Side Blind Zone Alert
Alert Type
This feature will set crash alerts to
beeps or seat vibrations. This
setting affects all crash alerts
including:
.Forward Collision
.Lane Departure Warning
.Adaptive Cruise Control
.Parking Assist
.Backing Warning
Select Beeps or Safety Alert Seat. Auto Collision Preparation
This feature will turn on or off the
Forward Collision Alert feature as
well as the Automatic Braking
capability of the Auto Collision
Preparation feature. With the Alert &
Brake setting, both Forward
Collision Alert as well as the
Automatic Braking capability of the
Auto Collision Preparation feature
are available. The Alert setting
disables most automatic braking
functions of the Auto Collision
Preparation feature. Some
last-second automatic braking
capability is still provided with the
Alert setting, but it is much less
likely to be triggered by most driving
conditions. Off disables all Forward
Collision Alert and Automatic
Braking capabilities of the Auto
Collision Preparation feature. See
Active Emergency Braking System
on page 9-56.
Select Off, Alert & Brake, or Alert.
Page 185 of 434

Black plate (15,1)Cadillac ATS Owner Manual (GMNA-Localizing-U.S./Canada/Mexico-
6014430) - 2014 - 2nd Edition - 8/23/13
Infotainment System 7-15
Playing an MP3 CD
To play an MP3 CD, follow the same
instructions as“Playing an
Audio CD.”
The following guidelines must be
met when creating an MP3 disc,
otherwise the CD might not play:
.Sampling rate: 16 kHz,
22.05 kHz, 24 kHz, 32 kHz,
44.1 kHz, and 48 kHz.
.Bit rates supported: 8, 16, 24,
32, 40, 48, 56, 64, 80, 96, 112,
128, 144, 160, 192, 224, 256,
and 320 kbps.
.Maximum number of folders:
eight folders with 255 files per
folder.
.Maximum of 1,000 files on
a disc.
.Recorded on a CD-R or CD-RW. Root Directory
The root directory is treated as a
folder. All files contained directly
under the root directory are
accessed prior to any root directory
folders.
Empty Folders
If a root directory or folder is empty
or contains only folders, the player
advances to the next folder in the
file structure that contains a
compressed audio file. The empty
folder(s) are not displayed or
numbered.
No Folder
When the CD only contains
compressed audio files without any
folders or playlists, all files are
under the root folder.
USB Port
Playing from a USB
A USB mass storage device or
Media Transfer Protocol (MTP)
device can be connected to the
USB port.
The USB port is in the center
console under the armrest and if
equipped, in the storage behind the
climate control system, see
Instrument Panel Storage on
page 4-1.
When connecting a non-Apple
device to the USB port in the center
console the message
“This USB
port only supports Apple Devices”
will appear. Connect the device to
the other port to initiate playback.
Both ports are capable of charging
devices.
USB MP3 Player and USB Drives
.The USB MP3 players and USB
drives connected must comply
with the USB Mass Storage
Class specification (USB MSC).
Page 203 of 434
Black plate (1,1)Cadillac ATS Owner Manual (GMNA-Localizing-U.S./Canada/Mexico-
6014430) - 2014 - 2nd Edition - 8/23/13
Climate Controls 8-1
Climate Controls
Climate Control Systems
Dual Automatic Climate ControlSystem (Base) . . . . . . . . . . . . . . . 8-1
Dual Automatic Climate Control System (Uplevel) . . . . . . . . . . . . 8-5
Air Vents
Air Vents . . . . . . . . . . . . . . . . . . . . . . 8-9
Maintenance
Passenger Compartment AirFilter . . . . . . . . . . . . . . . . . . . . . . . 8-10
Service . . . . . . . . . . . . . . . . . . . . . . 8-10
Climate Control Systems
Dual Automatic Climate Control System (Base)
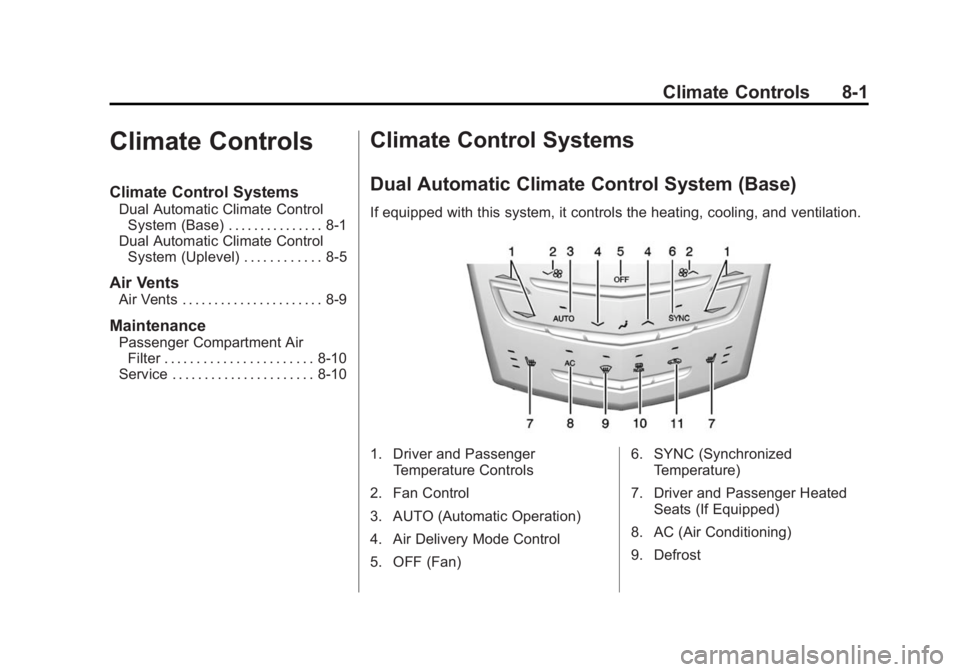
If equipped with this system, it controls the heating, cooling, and ventilation.
1. Driver and Passenger
Temperature Controls
2. Fan Control
3. AUTO (Automatic Operation)
4. Air Delivery Mode Control
5. OFF (Fan) 6. SYNC (Synchronized
Temperature)
7. Driver and Passenger Heated Seats (If Equipped)
8. AC (Air Conditioning)
9. Defrost
Page 204 of 434

Black plate (2,1)Cadillac ATS Owner Manual (GMNA-Localizing-U.S./Canada/Mexico-
6014430) - 2014 - 2nd Edition - 8/23/13
8-2 Climate Controls
10. Rear Window Defogger
11. Recirculation
Automatic Operation
The system automatically controls
the fan speed, air delivery, air
conditioning, and recirculation in
order to heat or cool the vehicle to
the desired temperature.
When the indicator light is on or
AUTO is displayed on the screen,
the system is in full automatic
operation. If the air delivery mode or
fan setting is manually adjusted, the
auto indicator turns off and the
display will show the selected
settings.
For automatic operation:
1. Press AUTO.
2. Set the temperature. Allow thesystem time to stabilize. Then
adjust the temperature as
needed for best comfort.
To improve fuel efficiency and to
cool the vehicle faster, recirculation
may be automatically selected in warm weather. The recirculation
light will not come on. Press
@to
select recirculation; press it again to
select outside air.
English units can be changed to
metric units through the instrument
cluster. See “Settings”under
Instrument Cluster on page 5-10.
OFF (Fan): Press to turn the fan on
or off. The temperature control and
air delivery mode can still be
adjusted.
worx(Driver and Passenger
Temperature Controls): The
temperature can be adjusted
separately for the driver and the
passenger. Press to increase or
decrease the temperature. Press
and hold to rapidly increase or
decrease the temperature.
SYNC (Synchronized
Temperature): Press SYNC to link
all climate zone settings to the
driver settings. The SYNC indicator
will be lit. Adjust the driver side
temperature control to change the
linked temperature. When the passenger settings are adjusted, the
temperatures are unlinked and the
SYNC indicator turns off.
Manual Operation
z 9or9 y(Fan Control):
Press the fan control buttons to
increase or decrease the fan speed.
Press and hold the buttons to adjust
speed more quickly. The fan speed
setting displays. Pressing either
button cancels automatic fan control
and the fan can be controlled
manually. Press AUTO to return to
automatic operation. To turn off the
fan, press OFF.
z N y(Air Delivery Mode
Control): Press the air delivery
mode buttons to change the
direction of the airflow. Selecting
any of the air delivery modes
cancels automatic air delivery
control and the direction of the
airflow can be controlled manually.
Press AUTO to return to automatic
operation.